5 Creative DIY Wine Cork Projects for Your Home
Are you a wine enthusiast with a stash of corks piling up in your kitchen? Instead of tossing them away, why not turn those little treasures into beautiful home decor? Repurposing wine corks is not only eco-friendly but also a fantastic way to express your creativity. In this article, we'll explore five unique DIY projects that will transform your wine corks into charming additions to your living space. From coasters to wall art, these projects are simple, fun, and perfect for anyone looking to add a personal touch to their home. So grab those corks and let’s dive into the world of DIY creativity!
First up, we have the wine cork coasters. This project is incredibly simple and a great starting point for beginners. Not only do these coasters protect your surfaces from unsightly water rings, but they also add a rustic touch to your decor. To create your own, gather about 10-15 corks per coaster, and start by cutting them in half lengthwise. This will give you a flat surface to work with. Next, arrange the cork halves in a circular or square pattern, depending on your preference. Once you're satisfied with the arrangement, use a hot glue gun to secure them together. Finally, finish it off with a coat of sealant to protect your coasters from moisture. Voila! You now have stylish coasters that are sure to impress your guests.
Next, let’s transform those corks into a bulletin board that’s both practical and decorative. This project is perfect for displaying notes, photos, and cherished memories in a unique way. Start by selecting a frame that complements your decor. You can use an old picture frame or create one yourself using wood or cardboard. The key here is to ensure the frame is sturdy enough to hold the corks. Once your frame is ready, it’s time to arrange the corks. You can create a uniform pattern or mix and match for a more eclectic look. Secure the corks with glue, and don’t forget to add decorative touches like paint or fabric to reflect your personal style.
Selecting the right frame is crucial for your bulletin board project. Consider styles such as vintage wood, sleek modern metal, or even a colorful painted frame to match your home’s aesthetic. The frame will set the tone for your entire project, so choose one that resonates with you.
If you’re feeling adventurous, why not create your own frame? You can use materials like reclaimed wood for a rustic vibe or cardboard for a budget-friendly option. Just cut the materials to size, assemble them, and you have a customized frame that’s uniquely yours!
Enhance your bulletin board with decorative elements such as fabric, paint, or embellishments. These touches not only add personality but also make the board a beautiful focal point in your home. Consider using patterned fabric or bright paint that complements your existing decor.
When it comes to arranging your corks, think about balance and symmetry. You can create a visually pleasing layout by alternating colors or sizes of corks. This not only makes for an attractive display but also keeps your bulletin board functional.
Get ready to unleash your green thumb with wine cork planters. These charming mini planters are perfect for small plants or succulents, adding a touch of greenery to your home. To create these adorable planters, simply hollow out the center of a cork. You can use a small knife or a cork drill for this task. Once hollowed, fill the cork with potting soil and plant your choice of greenery. Succulents are a fantastic option as they require minimal care and thrive in small spaces.
When selecting plants for your cork planters, consider options like small succulents, air plants, or even herbs. These plants not only add beauty but also purify the air, making your space feel fresh and vibrant.
To ensure your mini planters thrive, remember to water them sparingly and provide them with adequate sunlight. Succulents, for instance, prefer bright light and should be watered only when the soil is completely dry. With a little care, your cork planters will flourish!
Looking for a fun and functional project? Why not craft personalized keychains using wine corks? This project is a great way to showcase your creativity and make something truly unique. Start by gathering the necessary tools and materials, including key rings, scissors, and decorative items like paint or beads.
For this project, you’ll need:
- Wine corks
- Key rings
- Scissors
- Paint or decorative embellishments
When it comes to designing your keychains, the possibilities are endless! You can paint the corks in vibrant colors, carve initials into them, or even attach small charms. The key is to let your personality shine through your designs!
Last but not least, let’s dive into creating stunning wall art pieces using wine corks. This project allows for endless creativity, and you can transform your corks into beautiful designs that enhance your home decor. Start by brainstorming themes or shapes you want to create—think geometric patterns, animals, or even abstract art.
Find inspiration for your wall art project by browsing online or visiting local art galleries. Look for themes, shapes, and patterns that resonate with you. Once you have an idea, sketch it out to visualize the final product.
When it comes to mounting your cork creations on walls, ensure they are securely attached. You can use strong adhesive or small nails to keep them in place. Consider arranging your artwork in a gallery style for a stunning visual impact.
For those looking to make a bold statement, incorporating wine corks into furniture projects is a fantastic way to add unique accents to tables, chairs, or shelves. This approach brings a personalized touch to your home that guests will admire.
Explore the process of crafting table legs from wine corks. This project not only provides a sturdy base for your furniture but also adds an artistic flair that’s sure to impress.
Learn how to make drawer pulls from wine corks. This whimsical element adds charm to cabinets and drawers while enhancing functionality—perfect for a kitchen or bathroom makeover.
Craft elegant candle holders using wine corks to create a cozy ambiance in your home. This project is perfect for adding warmth and charm to any space. Start by cutting the corks to the desired height and arranging them in a circle. Secure them with glue, and place a small candle in the center for a stunning centerpiece.
When selecting candles for your cork holders, opt for small votive candles or tea lights. These types of candles are safe to use and will fit perfectly in your cork creations.
Explore ways to decorate your cork candle holders by incorporating paint, twine, or other materials that match your home decor. Personalizing your candle holders will make them even more special.
Finally, let’s create a unique bath mat using wine corks! This eco-friendly project repurposes corks into a functional item that adds style to your bathroom. To assemble your bath mat, cut corks in half and arrange them in a rectangular shape. Secure them together with a strong adhesive, and you’ll have a soft and stylish addition to your bathroom.
For durability and comfort, ensure that your corks are securely attached. You might want to use a non-slip backing to keep the mat in place while you step out of the shower.
To keep your cork bath mat in excellent condition, avoid soaking it in water. Instead, wipe it down with a damp cloth as needed. This simple maintenance will ensure your mat remains a beautiful addition to your bathroom decor.
Q: How do I clean my wine cork projects?
A: Most wine cork projects can be cleaned with a damp cloth. Avoid soaking them in water to prevent damage.
Q: Where can I find wine corks?
A: You can collect wine corks from friends, family, or local restaurants. Many wine shops also sell corks in bulk.
Q: Can I use synthetic corks for these projects?
A: While natural corks are preferred for aesthetics, synthetic corks can also be used for most projects, though they may not have the same charm.
Q: Are these projects suitable for kids?
A: Many of these projects can be adapted for kids with adult supervision, especially those that involve tools or hot glue.

Wine Cork Coasters
Are you looking for a fun and creative way to protect your surfaces while adding a rustic touch to your home decor? are the perfect DIY project for you! Not only are they simple to make, but they also allow you to showcase your personality and creativity. Imagine sipping your favorite drink while resting it on a coaster that you crafted with your own hands. Sounds delightful, right?
Creating wine cork coasters is an enjoyable activity that anyone can try, regardless of their crafting skills. All you need are a few wine corks, a hot glue gun, and some scissors. You can even personalize them by arranging the corks in different patterns or colors. Here’s a quick breakdown of how you can get started:
- Gather Your Materials: Collect a sufficient number of wine corks. Depending on the size of the coasters you want to create, you might need anywhere from 8 to 12 corks per coaster.
- Decide on a Design: You can arrange the corks in various patterns—circular, square, or even a fun mosaic style. The choice is yours!
- Glue the Corks Together: Using a hot glue gun, start gluing the corks in your chosen design. Make sure to apply enough glue to ensure they stick together well.
- Let Them Dry: Allow the coasters to dry completely before using them. This ensures they hold up well when you place your drinks on them.
Not only do these coasters serve a practical purpose, but they also add a charming, rustic element to your home. They make excellent conversation starters when guests come over. Plus, you can even create a set of coasters as a thoughtful gift for your friends or family who enjoy wine. Just imagine their surprise when they receive a unique, handmade gift!
Additionally, if you're feeling extra crafty, consider painting or staining the corks before assembling them. This can add a pop of color or a more polished look to your coasters. You could even use stencils to create designs or initials on the corks for a personalized touch. The possibilities are endless!
In summary, wine cork coasters are not just a practical solution for protecting your surfaces; they are a fun way to express your creativity and style. So, grab those corks, unleash your inner artist, and start crafting!
Q: How many wine corks do I need for a set of coasters?
A: Typically, you'll need about 8 to 12 corks per coaster, depending on the size you're aiming for. For a full set of four coasters, gather around 32 to 48 corks.
Q: Can I use synthetic corks instead of natural corks?
A: Yes, you can use synthetic corks, but keep in mind that they may not have the same aesthetic appeal as natural corks. However, they are often more durable and can still make great coasters!
Q: How do I clean my wine cork coasters?
A: To clean your coasters, simply wipe them down with a damp cloth. Avoid soaking them in water as this can damage the glue and the cork material.
Wine Cork Bulletin Board
Transforming your wine corks into a bullentin board is not only a fun project but also a fantastic way to showcase your cherished memories and important notes. Imagine walking into a room and being greeted by a vibrant display of photos, reminders, and mementos, all framed beautifully with corks that tell a story of your favorite wines. This project is simple yet incredibly rewarding, allowing you to blend functionality with creativity. Not only does it serve a practical purpose, but it also adds a unique touch to your home decor.
To kick off your wine cork bulletin board, you'll first want to gather your materials. You'll need a substantial collection of wine corks, a frame to hold them, and some adhesive to secure the corks in place. The beauty of this project lies in its versatility; you can use a variety of corks, whether they are all from the same vineyard or a mix of different styles. The choice is yours! The more eclectic the corks, the more character your bulletin board will have.
Selecting an appropriate frame is crucial for your bulletin board project. A well-chosen frame can enhance the overall aesthetic of your cork display. Consider frames that complement your existing decor; for instance, if your home has a rustic vibe, a wooden frame might be the perfect fit. Alternatively, a sleek metal frame could add a modern touch. Here are a few frame styles to consider:
- Wooden Frames: Perfect for a cozy, rustic feel.
- Metal Frames: Great for a contemporary look.
- Colorful Frames: Add a pop of color to your space.
If you’re feeling particularly crafty, why not create your own frame? You can use materials like wood or cardboard to design a frame that fits your style perfectly. This allows for complete customization and ensures that your bulletin board is truly one-of-a-kind. To make a wooden frame, simply cut the wood to size and assemble it using nails or glue. For a cardboard frame, you can easily cut and fold the cardboard to create a sturdy base. Don’t forget to paint or decorate your frame to match your decor!
Once you have your frame ready, it’s time to enhance your bulletin board with some decorative touches. Consider adding elements like paint, fabric, or embellishments that reflect your personal style and taste. You might want to paint the frame in a color that matches your room or use fabric to back the corks for a softer look. Adding small decorative items, such as stickers or washi tape, can also bring a unique flair to your board.
Arranging your wine corks is where the real fun begins! You want to create an aesthetically pleasing and functional display. Start by laying out your corks on a flat surface to experiment with different arrangements before securing them to the board. You might choose to arrange them in a pattern, such as a checkerboard or a spiral, or simply cluster them in groups. The key is to balance the visual weight of the corks, ensuring that no area looks too crowded or sparse. Once you’re happy with the arrangement, use your adhesive to secure each cork in place.
And there you have it! Your wine cork bulletin board is not just a functional piece; it’s a conversation starter, a piece of art, and a personal touch to your home decor. Every time you glance at it, you’ll be reminded of the good times shared over a glass of wine. Plus, it’s a fantastic way to keep your important notes and cherished memories organized and on display!
Q: How many wine corks do I need for a bulletin board?
A: The number of corks you need will depend on the size of your frame and the arrangement you choose. Typically, a standard bulletin board can require anywhere from 30 to 100 corks.
Q: Can I use synthetic corks for this project?
A: Yes, synthetic corks can be used, but they may not adhere as well as natural corks. Natural corks are more flexible and easier to work with.
Q: How do I clean my wine corks before using them?
A: Simply wipe them down with a damp cloth to remove any dust or residue. If they have a strong wine smell, you can soak them in warm, soapy water for a few minutes and then rinse them well.

Choosing the Right Frame
When it comes to creating a stunning wine cork bulletin board, one of the most important decisions you'll make is . The frame not only holds your corks in place but also serves as a decorative element that can enhance your overall design. Think of the frame as the icing on the cake; it should complement the corks and fit seamlessly into your existing decor. So, how do you go about selecting the perfect frame?
First, consider the style of your home. Are you leaning towards a rustic, farmhouse vibe, or do you prefer something more modern and sleek? For a rustic look, wooden frames with a weathered finish can add that charming touch. On the other hand, if you’re aiming for a contemporary feel, a clean-lined metal frame might be just what you need. The key is to ensure that the frame resonates with the overall aesthetic of your living space.
Next, think about the size of your bulletin board. You want a frame that not only fits the corks but also the wall space where it will hang. Measure the area where you plan to display your bulletin board and choose a frame that will make a statement without overwhelming the space. A larger frame can serve as a focal point, while a smaller one can be part of a gallery wall.
Another factor to consider is the color of the frame. If your corks are predominantly natural shades, a darker or painted frame can create a beautiful contrast. Alternatively, if your corks are stained or painted in vibrant colors, a neutral or light-colored frame can help them stand out. Don’t be afraid to experiment with different colors—sometimes a pop of color in the frame can add that unexpected twist to your decor.
Lastly, think about the material of the frame. Wood, metal, and even acrylic can all work beautifully, but they each bring a different feel to the table. For instance, a wooden frame can add warmth and texture, while a sleek metal frame can lend a modern touch. If you’re feeling particularly crafty, consider making your own frame from reclaimed materials. This not only adds a personal touch but also allows you to customize the frame to fit your vision perfectly.
In summary, choosing the right frame for your wine cork bulletin board is all about aligning your personal style with the functionality of the piece. Take your time, explore different options, and don’t hesitate to mix and match until you find the perfect combination that reflects your unique taste. After all, this is your chance to showcase your creativity while keeping those cherished memories and notes beautifully displayed!
- What type of frame works best for a wine cork bulletin board? A wooden frame is often preferred for a rustic look, while metal frames suit modern decor.
- How do I ensure my bulletin board fits my wall space? Measure the area where you plan to hang the board before purchasing a frame to ensure a good fit.
- Can I use a colored frame with natural corks? Yes! A colored frame can create a beautiful contrast and highlight the corks.
- Is it possible to make my own frame? Absolutely! Using reclaimed materials can add a unique, personalized touch to your project.

DIY Frame Options
When it comes to creating a bulletin board from wine corks, choosing the right frame is essential. The frame not only holds the corks in place but also enhances the overall aesthetic of your project. You can opt for various materials and styles, depending on your personal taste and the decor of your home. For instance, a rustic wooden frame can bring a cozy, farmhouse vibe, while a sleek metal frame can lend a modern touch.
One popular option is to use a reclaimed wood frame. This not only adds a unique character to your bulletin board but also promotes sustainability by repurposing materials. You can find reclaimed wood at local craft stores or even salvage yards. If you're feeling particularly crafty, consider making your own frame from scratch. All you need are some wooden planks, nails, and a bit of wood glue.
Another fantastic choice is to use a cardboard frame. This is an excellent option for those on a budget or looking for a lightweight solution. Simply cut out a rectangle from sturdy cardboard, then cover it with decorative paper or fabric to match your home decor. This DIY approach allows for endless customization, so feel free to get creative with colors and patterns!
If you prefer a more polished look, consider purchasing a store-bought frame. Many frames come in various sizes and finishes, making it easy to find one that complements your cork design. When selecting a frame, think about the color scheme of your room. Do you want the frame to blend in or stand out? A contrasting color can create a striking focal point, while similar tones can provide a more subtle look.
To help you visualize your options, here's a simple table summarizing the different DIY frame options:
| Frame Type | Material | Pros | Cons |
|---|---|---|---|
| Reclaimed Wood Frame | Wood | Unique character, eco-friendly | Can be expensive, may require more effort |
| Cardboard Frame | Cardboard | Budget-friendly, lightweight | Less durable, may look less polished |
| Store-Bought Frame | Various | Wide selection, easy to find | Can be costly, may lack uniqueness |
Once you've chosen your frame, don't forget to personalize it! Adding decorative touches such as paint, fabric, or even embellishments like ribbons or buttons can really make your bulletin board stand out. These elements allow you to express your style and make the project feel uniquely yours.
In summary, the frame you choose for your wine cork bulletin board can significantly impact its overall look and feel. Whether you go for a rustic wood frame, a simple cardboard option, or a sleek store-bought frame, the key is to ensure it complements your cork arrangement and fits seamlessly into your home decor.
Q: What types of corks are best for crafting?
A: Natural corks are ideal for crafting due to their durability and aesthetic appeal. Avoid synthetic corks as they may not adhere well to certain projects.
Q: How can I clean wine corks before using them?
A: Soak the corks in warm soapy water for a few minutes, then scrub them gently with a brush to remove any residue. Rinse thoroughly and let them dry completely before use.
Q: Can I paint wine corks?
A: Yes! Painting wine corks can add a pop of color to your projects. Just make sure to use acrylic paint for the best results.

Decorative Touches
When it comes to personalizing your DIY wine cork bulletin board, can truly make a difference. Think of this project as a blank canvas waiting for your unique flair. You can enhance the visual appeal of your cork board by incorporating various materials and techniques that reflect your personal style. For instance, consider using paint to add a splash of color. A simple coat of acrylic paint can transform the natural look of cork into something vibrant and eye-catching. You might choose colors that complement your room's palette or even go for a bold contrast to make the board a statement piece.
Another fantastic way to add character is through the use of fabric. Covering the frame or even the back of the cork board with a patterned or textured fabric can create a warm, inviting feel. Imagine a beautiful floral print or a chic geometric design peeking out from behind your notes and pictures. This not only adds a decorative element but also softens the overall look of the board.
Embellishments can also play a significant role in personalizing your cork board. You can use items like ribbons, buttons, or even stickers to create a more playful or sophisticated vibe. For example, wrapping a ribbon around the frame can give it a polished finish, while buttons can be used as quirky pushpins to hold your notes in place.
To ensure that your decorative touches are cohesive, consider creating a theme for your board. Whether it’s a rustic farmhouse style, a modern minimalist look, or a whimsical fairy tale vibe, sticking to a theme will help you choose the right colors and materials.
Lastly, don't forget about the placement of your corks. Arranging them in a pattern or using different sizes can create a dynamic visual effect. You might even want to leave some space for future additions, allowing your bulletin board to evolve over time as you collect new memories and inspirations.
In summary, the decorative touches you choose can elevate your wine cork bulletin board from a simple DIY project to a stunning piece of art that reflects your personality and creativity. So, gather your materials, unleash your imagination, and let your cork board become a true representation of you!
1. Can I use any type of wine cork for my bulletin board?
Yes, you can use any type of wine cork, but natural corks tend to be more aesthetically pleasing and easier to work with compared to synthetic ones.
2. How do I attach the corks to the bulletin board?
You can use hot glue or a strong adhesive to attach the corks to the board. Make sure to apply enough glue to ensure they stay in place.
3. What is the best way to clean my cork bulletin board?
To clean your cork bulletin board, simply wipe it down with a damp cloth. Avoid using harsh chemicals, as they can damage the cork.
4. Can I paint the corks?
Absolutely! Painting the corks can add a fun and colorful element to your bulletin board. Just make sure to use non-toxic paint if you plan to handle them frequently.
5. How can I make my cork bulletin board more functional?
Consider adding hooks for keys or small items, or integrate a calendar or planner into your design for added functionality.
Arranging the Corks
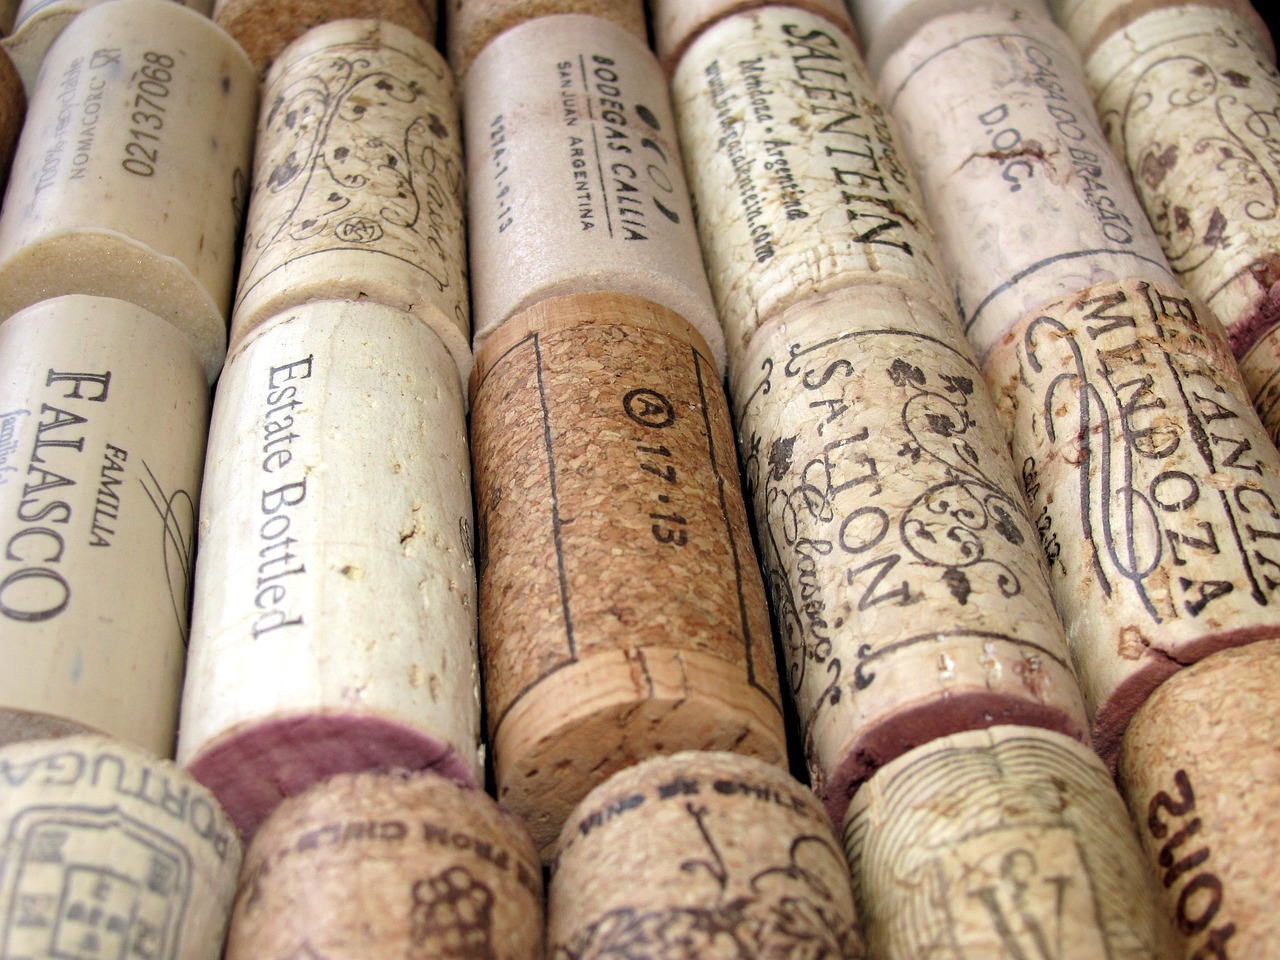
Arranging wine corks on your bulletin board is not just about sticking them on; it's an art form that can transform your project from ordinary to extraordinary. Think of it as creating a mosaic where each cork contributes to a larger picture. The first step is to gather your corks and lay them out on a flat surface. This will allow you to visualize different patterns and arrangements before committing to the board. You might want to consider a few different styles:
- Random Arrangement: This style is perfect for a more casual look. Simply place the corks in a haphazard fashion, allowing their natural shapes and colors to shine.
- Color Gradient: For those who appreciate a bit of organization, try arranging the corks by color. This can create a stunning visual effect, transitioning from light to dark shades.
- Geometric Patterns: If you’re feeling particularly creative, consider arranging the corks in geometric shapes or patterns. This can add a modern twist to your bulletin board.
Once you’ve decided on a layout, it’s time to consider the spacing between the corks. The distance can greatly affect the overall appearance. A tighter arrangement can give a fuller look, while spacing them out can create a more airy and open feel. Additionally, think about incorporating different sizes of corks if you have them. Mixing sizes can add depth and interest to your design.
Furthermore, don’t hesitate to experiment with the orientation of the corks. Some can be placed upright, while others can be laid flat. This variation can create visual texture, making your bulletin board even more engaging. As you arrange the corks, step back occasionally to assess your work from a distance. This will help you see the overall effect and make adjustments as needed.
Finally, once you're satisfied with the arrangement, it’s time to secure the corks onto the bulletin board. Use a strong adhesive that can hold the corks in place, ensuring your hard work lasts. Whether you choose to glue them down or use pins for a more flexible approach, make sure they are firmly attached to avoid any mishaps later.
In conclusion, arranging wine corks can be a fun and fulfilling process. It allows you to express your creativity while creating a functional piece of art. Remember, there are no strict rules—just let your imagination flow and enjoy the journey!
Q: How many wine corks do I need for a bulletin board?
A: The number of corks needed depends on the size of your board and the arrangement style you choose. A standard bulletin board may require anywhere from 50 to 100 corks for a full coverage look.
Q: Can I use synthetic corks for this project?
A: Yes, synthetic corks can be used, but they may not have the same aesthetic appeal as natural corks. Consider mixing them for variety.
Q: What type of adhesive works best for securing the corks?
A: A strong craft glue or hot glue gun is recommended for securing corks. Ensure it dries clear for a neat finish.
Q: How can I clean the corks before using them?
A: Simply wipe them down with a damp cloth to remove any dust or residue. If they are particularly dirty, a gentle soap solution can be used.

Wine Cork Planters
If you've ever sipped a glass of wine and found yourself staring at the cork, wondering what to do with it, you're not alone! are a delightful and eco-friendly way to breathe new life into those little pieces of wine history. These charming mini planters not only serve as a creative outlet but also add a touch of greenery to your home. Imagine a row of tiny succulents or herbs sitting on your windowsill, each nestled in a unique cork planter, bringing a bit of nature indoors!
Creating wine cork planters is a straightforward project that even beginners can tackle. All you need are some wine corks, a small drill or knife, potting soil, and your favorite small plants. The beauty of this project lies in its simplicity and the ability to customize it according to your style. You can leave the corks natural for a rustic look or paint them to match your decor. The choice is yours!
To get started, first, gather your materials. You’ll need:
- Wine corks (the more, the merrier!)
- A drill or a sharp knife
- Potting soil
- Small plants or seeds (succulents and herbs are great choices)
Once you have everything ready, the first step is to prepare your corks. Use the drill or knife to create a small hole in the top of each cork. This is where you’ll add the soil and your plant. Be careful not to drill all the way through; you want to create a pocket that can hold the soil without leaking out. After you've made the holes, fill each cork with potting soil, leaving a little space at the top for your plant.
Now comes the fun part! Choose your plants wisely. Small succulents, like Haworthia or Echeveria, are perfect for this project because they thrive in small spaces and require minimal care. If you prefer herbs, consider tiny varieties of basil or thyme, which can add a lovely aroma to your kitchen.
After planting, give your cork planters a little drink of water and place them in a spot where they can get adequate sunlight. Remember, these little guys don’t need much water—overwatering can lead to rot, especially since corks don’t have drainage holes. A quick misting or a few drops of water every week will keep them happy!
As you enjoy your new planters, you might find yourself wanting to create more. The versatility of wine corks means you can experiment with different plants, colors, and arrangements. You could even create a vertical garden by attaching several cork planters to a wooden board and hanging it on your wall. The possibilities are endless!
When selecting plants for your wine cork planters, consider the following factors:
| Plant Type | Light Requirements | Watering Needs |
|---|---|---|
| Succulents | Bright, indirect light | Low; allow soil to dry out |
| Herbs | Full sun | Moderate; keep soil slightly moist |
| Air Plants | Indirect light | Very low; mist weekly |
With these tips and ideas, you’re all set to create beautiful wine cork planters that will not only beautify your home but also serve as a conversation starter. So, grab those corks, get your hands dirty, and enjoy the satisfaction of crafting something truly unique!
To ensure your wine cork planters thrive, remember these essential care tips:
- Place them in a well-lit area but avoid direct sunlight to prevent scorching.
- Water sparingly; it's better to underwater than overwater.
- Rotate your planters occasionally for even growth.
In conclusion, wine cork planters are a fun, easy, and creative way to repurpose those leftover corks from your favorite bottles. They add a bit of charm to any space, all while being a sustainable choice for your home. So, why not give it a try? Your corks are waiting!
Q: Can I use any type of plant in wine cork planters?
A: While you can use many types of plants, it's best to choose small varieties that thrive in limited soil space, such as succulents or herbs.
Q: Do I need to drill holes in the bottom of the corks for drainage?
A: No, it's not necessary. The cork itself is porous and allows for some moisture to escape. Just make sure not to overwater your plants.
Q: How long will the cork planters last?
A: With proper care, your cork planters can last for several months, but they may eventually break down due to moisture and time.
Choosing the Right Plants
When it comes to creating charming mini planters using wine corks, selecting the right plants is crucial for ensuring they thrive in their unique homes. Not all plants are suited for the confined space of a cork planter, so it's essential to consider size, growth habits, and care requirements. A few excellent options include succulents, cacti, and small herbs. These plants are not only visually appealing but also relatively low-maintenance, making them perfect for beginners.
Succulents, for instance, come in a variety of shapes and colors, allowing you to mix and match to create a stunning display. They store water in their leaves, which means they can survive with minimal watering—a perfect trait for a small planter. Cacti also require little water and can add a unique texture to your collection. On the other hand, small herbs like basil or mint can provide a delightful aroma and can be used in your cooking, making them both beautiful and functional.
When choosing your plants, consider the following factors:
- Light Requirements: Ensure your selected plants receive the right amount of sunlight. Most succulents and cacti prefer bright, indirect light.
- Watering Needs: Remember that corks retain some moisture, so overwatering can lead to root rot. Choose plants that can thrive in drier conditions.
- Growth Rate: Opt for slow-growing varieties to keep your mini planters looking neat and tidy.
Ultimately, the key to success lies in understanding the specific needs of your chosen plants. By doing a bit of research and selecting plants that are well-suited for the limited space of wine corks, you’ll create a delightful and thriving mini garden. Plus, the process of nurturing these plants can be incredibly rewarding, allowing you to enjoy the beauty of nature indoors.
Q: Can I use any type of plant in my wine cork planters?
A: It's best to choose plants that thrive in small spaces and have low watering needs, such as succulents, cacti, or small herbs.
Q: How often should I water my cork planters?
A: Water your cork planters sparingly, allowing the soil to dry out between waterings to prevent root rot.
Q: Can I use larger plants in wine cork planters?
A: Larger plants may not thrive in cork planters due to limited space. Stick to small varieties for the best results.

Plant Care Tips
Caring for your mini planters made from wine corks is essential to ensure that your plants thrive in their unique homes. First and foremost, it's crucial to choose the right type of soil. A good quality potting mix is ideal as it provides the necessary nutrients and drainage that your plants need. Make sure to fill your cork planters with soil, leaving a little space at the top to prevent overflow when watering.
Watering is another vital aspect of plant care. Since wine corks are porous, they can absorb moisture, which means you need to be cautious not to overwater your plants. A general rule of thumb is to water when the top inch of soil feels dry to the touch. This will help prevent root rot, which is a common issue in small planters. Additionally, consider using a spray bottle for light misting, especially for plants that thrive in humid conditions.
Light conditions play a significant role in the health of your plants as well. Most small plants and succulents prefer bright, indirect sunlight. Position your cork planters near a window where they can receive adequate light without being scorched by direct rays. If you notice your plants stretching towards the light, it might be a sign that they need more exposure, so feel free to adjust their location.
Furthermore, fertilizing your plants is essential for their growth. Since the corks provide limited nutrients, using a diluted liquid fertilizer every few weeks during the growing season can give your plants the boost they need. Look for a balanced fertilizer that includes essential nutrients like nitrogen, phosphorus, and potassium, which are vital for healthy plant development.
Lastly, keep an eye out for any pests that may invade your mini garden. Common pests like aphids or spider mites can affect your plants' health. If you notice any signs of infestation, such as webbing or discolored leaves, act quickly. You can use a mixture of water and mild soap to gently wash the affected areas or introduce beneficial insects that prey on these pests.
By following these simple plant care tips, you can ensure that your wine cork planters not only look beautiful but also provide a thriving environment for your plants. Remember, each plant has its unique needs, so always research specific care instructions for the varieties you choose to cultivate.
- How often should I water my plants in cork planters? Aim to water when the top inch of soil is dry to the touch.
- What type of plants are best for wine cork planters? Succulents and small houseplants that thrive in well-drained soil are ideal.
- Can I use regular garden soil in my cork planters? It's best to use a good quality potting mix for optimal growth.
- How can I prevent pests in my mini planters? Regularly check your plants and use a mild soap solution if you notice any pests.

Wine Cork Keychains
If you’re looking for a fun, functional project that showcases your creativity, then crafting is a fantastic choice. Not only do these keychains serve a practical purpose, but they also add a personal touch to your everyday accessories. Imagine pulling out your keys and having a unique piece of art dangling from your keyring! Plus, it’s a great way to repurpose those leftover corks from your favorite bottles of wine.
Creating wine cork keychains is simple and requires minimal materials. To get started, you’ll need a few essential tools and supplies:
- Wine corks: Gather a selection of corks. You can use different types for varied textures and colors.
- Keychain rings: These are available at craft stores or online and come in various sizes.
- Drill or sharp knife: To create holes in the corks for the keychain rings.
- Decorative elements: Consider adding beads, charms, or even paint to personalize your keychains further.
Once you have your materials ready, the fun begins! Start by deciding how many corks you want to use for each keychain. You can use a single cork for a minimalist design or stack several for a more playful look. If you're feeling adventurous, try mixing and matching different corks to create a visually appealing piece.
Next, carefully drill a hole through the center of the cork. If you don’t have a drill, you can use a sharp knife to make a hole, but be cautious to avoid injury. Once the hole is made, thread the keychain ring through the cork. This step is where your creativity can shine! You might want to add some decorative beads or charms to enhance the look. This can be done by threading them onto the keychain ring before securing it.
As you work on your keychains, think about how you can incorporate your personality into each piece. You could paint the corks with vibrant colors, use washi tape to wrap them, or even carve designs into the cork for a more intricate look. The possibilities are endless! This project not only allows you to express your style but also makes for a great gift for friends and family.
Now that you've crafted your unique wine cork keychains, it’s time to show them off! Attach them to your keys, bags, or even give them as personalized gifts. They’re perfect for any occasion, and each one tells a story of your creativity and love for wine.
1. Can I use synthetic corks for my keychains?
Yes, synthetic corks can be used as well. They may have different textures and colors, allowing for even more creativity in your designs.
2. How can I clean the corks before using them?
You can wipe them down with a damp cloth. If they have any stains, a gentle scrub with soap and water should do the trick. Just make sure they are fully dry before crafting.
3. What if I don’t have a drill?
If you don’t have a drill, you can use a sharp knife to carefully make a hole. Just be cautious and take your time to avoid accidents.
4. Can I add other materials to my keychains?
Absolutely! Feel free to incorporate materials like twine, ribbon, or fabric to enhance your keychains. This will add a unique flair to each piece.
In conclusion, wine cork keychains are a delightful way to repurpose corks while adding a touch of personality to your everyday items. So gather those corks and start crafting!
Tools and Materials Needed
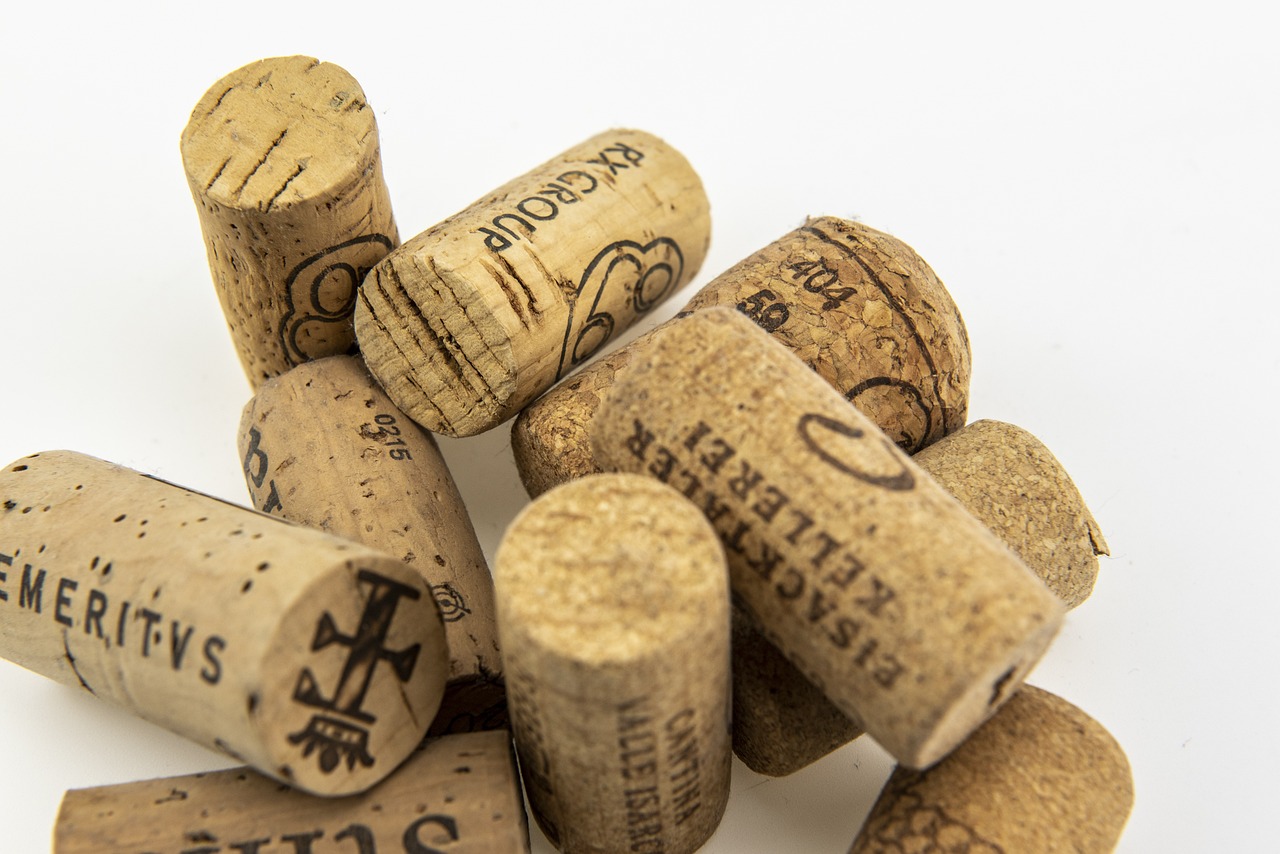
Creating personalized wine cork keychains is not only a fun and engaging activity, but it also allows you to express your creativity. To get started on this delightful DIY project, you’ll need a few essential tools and materials. First and foremost, gather a collection of wine corks. These can be sourced from your own wine bottles or obtained from friends and family who enjoy a good glass of vino. The more varied your corks, the more unique your keychains will be!
Next, you'll need a sharp knife or a craft knife to slice the corks if you want to create different shapes or designs. Be sure to handle this tool with care to avoid any accidents. Additionally, a drill with a small drill bit is necessary for making holes in the corks, which will allow you to attach them to key rings. If you don’t have a drill, a sturdy needle can work in a pinch, though it may take a bit more effort.
Don’t forget to grab some key rings! These are essential for transforming your corks into functional keychains. You can find key rings in various sizes and styles at craft stores or online. For added flair, consider including decorative elements such as beads, charms, or ribbons. These embellishments can enhance the visual appeal of your keychains, making them even more special.
Here’s a quick overview of the tools and materials you’ll need:
- Wine corks (variety is key!)
- Sharp knife or craft knife
- Drill with a small drill bit (or sturdy needle)
- Key rings
- Decorative elements (beads, charms, ribbons)
Finally, a cutting mat or a sturdy surface is recommended to protect your work area while cutting and drilling. With these tools and materials at your disposal, you’re all set to embark on your creative journey of making one-of-a-kind wine cork keychains that are not only practical but also tell a story. So, roll up your sleeves, unleash your creativity, and let’s get crafting!
Q: Can I use any type of wine cork for this project?
A: Yes, you can use any type of wine cork, but natural corks tend to hold up better than synthetic ones. They also provide a more rustic look!
Q: How many keychains can I make from a single cork?
A: It depends on the size of the cork and the design you choose. Typically, you can make one or two keychains per cork, especially if you cut them into smaller pieces.
Q: Are there any safety tips I should keep in mind?
A: Always be cautious when using sharp tools. Make sure to cut away from your body and work on a stable surface. If you're using a drill, wear safety goggles to protect your eyes from debris.
Q: Can I personalize the keychains further?
A: Absolutely! You can paint the corks, add initials, or even use stamps to give your keychains a personal touch. The possibilities are endless!
Design Ideas
When it comes to creating stunning wall art with wine corks, the possibilities are as vast as your imagination! One of the most exciting aspects of this project is the ability to customize your designs to reflect your personal style. Think about the themes that resonate with you—do you love nature, geometric shapes, or perhaps abstract art? Each theme can guide your choice of colors and arrangements.
For a rustic look, consider using corks in their natural state, showcasing their unique textures and colors. You can arrange them in a circular pattern to create a beautiful sunburst design or line them up in a grid for a modern, minimalist feel. If you’re feeling adventurous, why not paint some of the corks in vibrant hues? This can add a playful touch to your artwork while allowing you to coordinate with your existing decor.
Another fun idea is to create a cork mosaic. Start by sketching out a design on a canvas or a piece of wood, then glue the corks in place according to your pattern. This technique allows for a lot of creativity; you can even incorporate other materials like fabric or paper to enhance your artwork. The contrast between the corks and other textures can create a visually striking piece that draws attention.
If you want to add a personal touch, consider incorporating photos or quotes into your design. You could use corks to form a frame around a cherished photograph or spell out a meaningful word or phrase. This not only adds a unique element to your wall art but also makes it a conversation starter for guests.
To help you visualize your ideas, here’s a simple table outlining different design concepts you can explore:
| Design Concept | Description |
|---|---|
| Sunburst | A circular arrangement of corks radiating from a center point, creating an eye-catching focal piece. |
| Geometric Shapes | Using corks to create triangles, squares, or other geometric patterns for a modern look. |
| Mosaic | A collage of corks arranged to form a larger image or pattern, offering endless creative possibilities. |
| Framed Photos | Using corks to create a frame around personal photos or inspirational quotes, adding a personal touch to your decor. |
Ultimately, the key to designing with wine corks is to have fun and let your creativity shine. Experiment with different arrangements and colors until you find a design that truly speaks to you. Remember, there are no strict rules in art—what matters most is that your creation brings you joy and adds a unique flair to your wall!
- What type of glue should I use for cork projects? A strong adhesive like hot glue or craft glue works best for securing corks together.
- Can I paint wine corks? Yes! Acrylic paint adheres well to corks and allows you to customize them in any color you desire.
- How do I clean wine corks before using them? Simply wipe them down with a damp cloth to remove any dust or residue. Make sure to let them dry completely before starting your project.
- Are there any safety concerns when using corks? Generally, cork is safe to use, but be cautious with sharp tools when cutting or shaping corks.

Wine Cork Wall Art
Creating stunning is not just a fun project but also a fantastic way to bring a personal touch to your home decor. Imagine transforming those leftover corks into beautiful pieces that tell a story or evoke a feeling. Whether you want to showcase your love for wine, nature, or abstract art, the possibilities are endless. Plus, this project is a great conversation starter when guests come over!
To get started, gather your materials. You’ll need a collection of wine corks, a sturdy base (like a canvas or a wooden board), and some crafting supplies such as glue, scissors, and possibly paint. You can also incorporate other materials like twine, fabric, or even small decorative items that resonate with your chosen theme. The beauty of this project lies in its versatility; you can create everything from geometric shapes to intricate designs that mimic landscapes or animals.
Here are some design inspirations to spark your creativity:
- Abstract Patterns: Arrange the corks in unique patterns or shapes, allowing the natural colors and textures to shine.
- Nature Scenes: Create a landscape using corks to represent hills, trees, and the sun. This can be a beautiful homage to the outdoors.
- Word Art: Spell out a meaningful word or phrase using corks, which can serve as a daily reminder or inspiration.
Once you’ve settled on a design, it’s time to start arranging the corks on your base. Take your time during this process; play around with different layouts until you find one that feels just right. Remember, it’s all about creating something that resonates with you personally. Once you’re satisfied with the arrangement, use a strong adhesive to secure each cork in place. Allow it to dry completely before moving on to the next step.
After your corks are securely attached, consider adding a finishing touch. You could paint the background to match your decor or apply a coat of sealant to protect your artwork. Additionally, think about how you’ll mount your art piece. You might want to frame it or simply hang it directly on the wall. Either way, your wine cork wall art will surely become a cherished focal point in your home.
Q: How many wine corks will I need for a project?
A: The number of corks needed depends on the size and complexity of your design. For a small canvas, around 30-50 corks may suffice, while larger projects could require 100 or more.
Q: Can I use synthetic corks?
A: Absolutely! While natural corks provide a classic look, synthetic corks can also be used for durability and a modern touch.
Q: How do I clean the corks before using them?
A: Simply soak the corks in warm, soapy water for a few minutes, then scrub gently with a brush to remove any residue. Rinse and let them dry completely before crafting.
Q: What if I don’t have enough corks?
A: You can always ask friends and family to save their corks for you or check local wine shops. Some stores even sell corks in bulk!
Creating wine cork wall art is not just a project; it's an opportunity to express your creativity and love for wine in a way that enhances your living space. So gather those corks and let your imagination run wild!

Design Inspiration
When it comes to creating stunning wall art with wine corks, the only limit is your imagination. Think of your corks as a blank canvas, ready to be transformed into something extraordinary. The beauty of using wine corks lies in their unique textures and natural colors, which can evoke a rustic charm that complements any decor style. You might want to consider various themes that resonate with your personal taste. For instance, a nature-inspired design can incorporate corks arranged in the shape of trees or flowers, bringing a touch of the outdoors inside your home.
Another exciting idea is to create a geometric pattern. By cutting some corks in half or using them whole, you can arrange them in shapes like triangles or hexagons, which are visually striking and modern. Don't forget the option of crafting a color gradient. If you have corks from different wines, you can arrange them by color, transitioning from light to dark hues, creating a stunning ombre effect. This not only makes for a beautiful display but also tells a story of the wines enjoyed over time.
For those who love a bit of whimsy, consider incorporating other materials into your design. For example, you can mix corks with fabric swatches or painted canvases to add depth and interest to your wall art. Using a combination of textures can elevate your piece and make it a true conversation starter. Here are a few design inspirations to spark your creativity:
- Abstract Art: Create a collage of corks in various sizes and shapes for a modern abstract look.
- Word Art: Spell out a meaningful word or phrase using corks, which can serve as a motivational piece.
- Seasonal Themes: Change your artwork with the seasons by incorporating seasonal colors and designs, like leaves in fall or flowers in spring.
As you embark on this creative journey, remember that the process should be as enjoyable as the final product. Gather your corks, some glue, and your favorite frame, and let your creativity flow. The end result will not only be a unique piece of art but also a reflection of your personality and experiences. So, roll up your sleeves and start crafting your own wine cork masterpiece!
Q: How do I prepare wine corks for crafting?
A: Start by cleaning your corks with warm soapy water to remove any residue. Let them dry completely before using them in your projects.
Q: Can I use synthetic corks for these projects?
A: Absolutely! Synthetic corks can be used in place of natural corks, although they may not have the same texture and look.
Q: What type of adhesive works best for cork projects?
A: A strong craft glue or hot glue gun is recommended for sticking corks together or to other surfaces, ensuring a durable hold.
Q: How can I hang my cork wall art?
A: Depending on the weight of your project, you can use picture hangers, adhesive strips, or even wire to mount your cork art on the wall securely.
Q: Are there any special care instructions for cork art?
A: Keep your cork art out of direct sunlight to prevent fading, and dust it regularly with a soft cloth to maintain its appearance.

Mounting Techniques
When it comes to displaying your stunning wine cork wall art, the mounting techniques you choose can make all the difference. You want to ensure that your creations not only look fantastic but also stay securely in place. The first step is to select the appropriate mounting method based on the weight and size of your artwork. For lighter pieces, adhesive strips or double-sided tape can work wonders. These options are easy to apply and remove, making them perfect for renters or anyone who loves to change their decor frequently.
For heavier designs, such as those that incorporate multiple corks or larger shapes, you might want to opt for more robust mounting solutions. Here are a few effective techniques:
- Picture Hangers: These are ideal for cork art that you want to hang on walls. Simply attach a picture hanger to the back of your cork creation and secure it to the wall.
- Wall Brackets: If your piece is particularly large or heavy, consider using wall brackets. These provide extra support and help distribute the weight evenly.
- Framing: Another elegant solution is to frame your cork art. This not only adds a polished look but also protects your creation from dust and damage.
Before you start mounting, always take a moment to plan the layout of your cork art on the wall. Lay your pieces out on the floor first to visualize how they will look together. This will help you identify the best mounting spots and ensure a balanced, aesthetically pleasing arrangement.
Once you've decided on the layout, it’s time to get your tools ready. You might need a level to ensure everything is straight, a measuring tape for precise placement, and a pencil to mark where your mounts will go. Taking these extra steps will save you from the frustration of crooked art and multiple holes in your wall!
Lastly, don’t forget to consider the height at which you mount your cork art. A general rule of thumb is to hang art at eye level, which is typically around 57 to 60 inches from the floor. This height allows for easy viewing and creates a harmonious flow in your space.
Q1: Can I use regular glue to mount my wine cork art?
A1: While regular glue can work for lighter pieces, it’s best to use mounting putty or adhesive strips for a cleaner look and easier removal.
Q2: How do I ensure my cork art stays straight on the wall?
A2: Using a level during installation will help you achieve a straight alignment. Additionally, measuring from the floor to the bottom of the piece can ensure consistency across multiple artworks.
Q3: What if I want to change the arrangement later?
A3: Using removable adhesive strips allows you to easily reposition your artwork without damaging your walls.
Q4: Are there specific types of walls that require special mounting techniques?
A4: Yes, for drywall, picture hangers or adhesive strips work well. For brick or concrete walls, you may need to use wall anchors or masonry screws.

Wine Cork Furniture Accents
Are you looking to add a dash of personality to your furniture? are a fantastic and eco-friendly way to do just that! Imagine transforming ordinary tables or chairs into stunning conversation pieces that not only look great but also tell a story. Using wine corks in furniture projects can bring a rustic charm to your home while showcasing your creativity. Whether you're crafting table legs or whimsical drawer pulls, these DIY projects are sure to impress.
One of the most exciting aspects of using wine corks in furniture design is the versatility they offer. You can create unique accents that match your style, from elegant to quirky. For instance, if you're crafting table legs, you can glue multiple corks together to form a sturdy base. This not only adds a distinctive touch but also provides a comfortable grip for your furniture. Just picture a dining table with legs made entirely of wine corks—it's bound to be a hit during dinner parties!
Moreover, cork drawer pulls can breathe new life into your cabinets. Instead of conventional hardware, why not use wine corks? They can be easily attached to drawers, creating a playful yet functional element in your kitchen or bathroom. You can even customize them by painting or decorating the corks to match your existing decor. It's a small change that can make a big impact!
To give you a clearer idea of how to incorporate wine corks into your furniture projects, here's a simple table outlining the materials you might need:
| Project | Materials Needed |
|---|---|
| Table Legs | Wine corks, strong adhesive, wooden base |
| Drawer Pulls | Wine corks, screws, drill |
When working on these projects, it's essential to ensure that the corks are clean and dry. A little bit of preparation goes a long way. Start by collecting enough corks for your project—this might take some time, but it’s part of the fun! You can ask friends and family to save their corks for you, or check local wine shops. Once you have a good collection, you can begin your crafting adventure!
As you embark on these DIY projects, remember that the goal is not just to create functional items but to express your personal style. Don’t hesitate to experiment with different arrangements and combinations of corks. After all, every piece you create will be unique, just like the memories associated with each cork. So, roll up your sleeves and get crafting—your furniture will thank you!
Q: How do I clean wine corks before using them?
A: You can rinse them under warm water and let them air dry completely before starting your project.
Q: Can I use synthetic corks for these projects?
A: Yes, synthetic corks can also be used, but they may not have the same aesthetic appeal as natural corks.
Q: What type of adhesive works best for cork projects?
A: A strong craft glue or hot glue works well for adhering corks together.
Creating Cork Table Legs
Have you ever thought about how ordinary wine corks can transform into something extraordinary? is a fantastic way to add a unique flair to your furniture while also giving those discarded corks a new lease on life. Imagine walking into your living room and seeing a table that not only serves its purpose but also tells a story of creativity and sustainability. This project is not only fun but also practical, allowing you to showcase your DIY skills to family and friends.
To start this project, you'll need to gather a few materials. Here’s what you’ll require:
- Wine corks: Collect a sufficient number of corks—around 50 to 100, depending on the size of your table.
- Wooden board: This will serve as the top of your table.
- Strong adhesive: A high-quality wood glue or epoxy will work best to ensure the corks stay in place.
- Table legs: You can use pre-made legs or create your own using wood.
- Sealant: To protect your corks from wear and tear, a sealant will be necessary.
Once you have your materials ready, the real fun begins! Start by cutting your wooden board to the desired size for your table. Next, you’ll want to decide on the design for your cork legs. You can arrange the corks in a cylindrical shape or stack them in a more traditional leg structure. The beauty of this project is that you can let your creativity flow! After deciding on the design, apply a generous amount of adhesive to the corks and start attaching them to your chosen leg structure. Make sure to press firmly and allow them to dry completely.
After the corks are securely attached, it’s time to connect the legs to the wooden board. If you’re using pre-made legs, simply attach them using screws or brackets. If you’re crafting your own legs, ensure they are sturdy enough to support the weight of the table. Once everything is assembled, apply a sealant over the corks to enhance durability and protect against spills.
Now, you have a stunning table that not only serves a functional purpose but also adds a touch of charm to your living space. This DIY project is perfect for those who love to mix style with sustainability. Plus, every time you look at your table, you’ll be reminded of the fun you had creating it!
Q: How many corks do I need to make a cork table leg?
A: The number of corks you'll need depends on the height and thickness of your table legs. Generally, around 50 to 100 corks should suffice for a standard-sized table leg.
Q: Can I use any type of adhesive for this project?
A: While you can use various adhesives, it's best to opt for a strong wood glue or epoxy to ensure the corks stay securely attached.
Q: How do I clean and maintain my cork table?
A: To clean your cork table, use a damp cloth and mild soap. Avoid soaking the corks in water, as this can damage them. Regularly applying a sealant can help maintain their appearance.
Q: Is this project suitable for beginners?
A: Absolutely! This project is beginner-friendly and allows for a lot of creativity, making it perfect for anyone looking to try their hand at DIY.

Cork Drawer Pulls
If you're looking to add a touch of whimsy and uniqueness to your cabinets or drawers, are an excellent choice! Not only do they provide functionality, but they also serve as a conversation starter. Imagine opening a drawer and being greeted by the charming texture of wine corks—it's a delightful surprise that can elevate the aesthetic of any furniture piece. Plus, crafting your own cork drawer pulls is a fun DIY project that allows you to express your creativity!
To get started, you'll need a few basic materials. Gather some wine corks, a drill with a suitable drill bit, screws, and a screwdriver. You might also want to have sandpaper on hand to smooth out any rough edges on the corks. The process is straightforward: first, drill a hole through the center of each cork. Ensure the hole is wide enough to accommodate the screws you'll be using. Once your corks are prepped, simply attach them to your drawer fronts using screws. This simple technique can instantly transform plain drawers into eye-catching features.
But wait, there's more! You can customize your cork drawer pulls in various ways to match your decor style. Consider the following ideas:
- Painting: A splash of color can breathe new life into your corks. Use non-toxic acrylic paint to match your furniture or add a pop of color.
- Staining: If you prefer a more natural look, try staining your corks with wood stain to enhance their texture and grain.
- Embellishing: Add embellishments like twine, beads, or even small decorative knobs to elevate their appearance further.
As you can see, cork drawer pulls offer endless possibilities for personalization. Not only are they eco-friendly, given that you're repurposing wine corks, but they also add a unique flair to your home. Whether you choose to keep them simple or jazz them up with decorations, these drawer pulls are sure to impress your guests and provide a delightful touch to your living space.
Q: Can I use corks from any type of wine bottle?
A: Yes, you can use corks from any wine bottle. However, ensure that they are in good condition and not too dried out.
Q: How do I ensure the corks stay securely attached to the drawers?
A: Make sure to drill a hole that fits snugly for the screws. Additionally, using longer screws can provide more stability.
Q: Can I use corks for other furniture projects?
A: Absolutely! Corks can be used for various projects, including coat hooks, cabinet knobs, or even decorative accents on furniture.

Wine Cork Candle Holders
Crafting elegant candle holders from wine corks is a delightful way to add a cozy ambiance to your home. Not only are these holders a fantastic conversation starter, but they also showcase your creativity and love for repurposing materials. Imagine the soft glow of candles illuminating your space, casting beautiful shadows while you enjoy a quiet evening or entertain friends. The best part? This project is simple and can be tailored to fit any decor style!
To get started, you'll need a few essential materials. Gather your wine corks, a sharp knife or scissors, a hot glue gun, and candle bases or tealight candles. If you want to take your candle holders to the next level, consider incorporating decorative elements such as paint, twine, or even glitter. The possibilities are endless!
When choosing the right candles for your cork holders, safety is paramount. It's advisable to use tealight candles or LED candles, as they are less likely to cause any fire hazards compared to traditional candles. Tealights fit perfectly into the openings created in the corks and provide a lovely, warm light. If you decide to use larger candles, ensure that your cork holder is sturdy enough to support them and that there’s enough space around the flames.
Here’s a quick overview of how to create your very own wine cork candle holders:
- Step 1: Cut the wine corks in half or into smaller pieces, depending on your desired design.
- Step 2: Arrange the corks in a circular or square shape based on the size of your candle.
- Step 3: Use your hot glue gun to secure the corks together, ensuring a stable base for your candle.
- Step 4: Once the glue has dried, carefully place your candle in the center.
- Step 5: Add decorative touches as desired, such as painting or wrapping twine around the holder.
By following these steps, you'll create a charming piece that not only serves a functional purpose but also highlights your unique style. Whether you place them on your dining table, coffee table, or even in the bathroom, these wine cork candle holders are sure to enhance the atmosphere of any room.
As you embark on this creative journey, remember that experimenting is key. Feel free to mix and match different cork shapes, sizes, and colors to create a truly one-of-a-kind piece. Each holder you make will reflect your personal touch, making them perfect gifts for friends and family or delightful additions to your own home.
Q: Can I use regular candles instead of tealights?
A: While you can use larger candles, it's important to ensure that the cork holder is stable enough to support them. Always monitor the candles while they are lit to prevent any fire hazards.
Q: How do I clean my wine cork candle holders?
A: To clean your candle holders, simply wipe them down with a damp cloth. Avoid soaking them in water, as this can damage the cork.
Q: Can I paint my wine cork candle holders?
A: Absolutely! Painting your cork holders can add a personal touch and match your home decor. Just make sure to use non-toxic paint if you plan to use them with real candles.

Choosing the Right Candles
When it comes to creating stunning candle holders from wine corks, selecting the right candles is crucial for both visual appeal and safety. You want your candles to fit snugly within the cork holders while also providing a beautiful glow that enhances the ambiance of your space. First, consider the size of your cork holders. Most wine corks can accommodate tea lights or small votive candles, which are perfect for creating a cozy atmosphere. However, if you're feeling adventurous, you could also use pillar candles, but make sure they are not too tall for the corks to handle.
Another important factor to consider is the type of wax used in the candles. Paraffin wax is the most common and affordable option, but it can produce soot when burned, which might not be ideal for your cork creations. Instead, you might want to opt for soy wax or beeswax, which burn cleaner and longer, making them a better choice for your DIY candle holders. Plus, soy wax is often easier to work with if you decide to make your own candles to fit your cork holders.
Don't forget about fragrance! If you enjoy scented candles, choose those that complement your home’s atmosphere. For a relaxing bath, consider soothing scents like lavender or eucalyptus. For a festive gathering, opt for warm and inviting fragrances like cinnamon or vanilla. Just remember, the scent should not overpower the space but rather enhance the overall experience.
Lastly, safety is paramount. Ensure that the candles are placed on a stable surface and never leave them unattended while lit. If you’re using larger candles, consider placing them on a heat-resistant base to protect your furniture. By choosing the right candles, you can create a beautiful and safe environment that showcases your creative wine cork projects!
- Can I use any type of candle with wine cork holders? It's best to use small candles like tea lights or votives for safety and aesthetics. Larger candles may not fit securely.
- Are there any specific brands of candles you recommend? Look for brands that use natural waxes like soy or beeswax for a cleaner burn and better quality.
- How can I make my own candles for the cork holders? You can melt soy wax or beeswax and pour it into molds that fit your cork holders, adding fragrance oils as desired.
Decorative Ideas
When it comes to crafting your own wine cork candle holders, the possibilities for decorative flair are as endless as your imagination! One of the most exciting aspects of this project is that you can tailor your candle holders to fit your personal style and home decor. For instance, consider painting the corks in colors that complement your living space. A splash of vibrant paint can turn a simple cork into a stunning centerpiece. You might choose to go with a rustic look by leaving the corks in their natural state, or you could opt for a more modern aesthetic by using metallic paints like gold or silver.
Another creative approach is to incorporate various materials alongside the corks. Twine, for example, can be wrapped around the base of the candle holder for a charming, farmhouse feel. You can even add embellishments such as beads, ribbons, or small flowers to create a more intricate design. Imagine a candle holder that tells a story—perhaps adorned with little mementos from your travels or special occasions. This not only adds a personal touch but also makes for great conversation starters!
For those who love a bit of texture, consider mixing different types of corks—some smooth, some with unique patterns. This variety will create a visually interesting piece that captures attention. You could also experiment with layering corks in different orientations, which can give your candle holder an artistic vibe. The arrangement can be geometric for a modern look or more organic for a natural feel.
Furthermore, think about the size and shape of the candles you plan to use. Tall, slender candles can create an elegant atmosphere, while shorter, wider candles may provide a cozy, intimate glow. Ensure that the design of your cork candle holder complements the candles perfectly, enhancing both their beauty and functionality. Here’s a quick table summarizing some to consider:
| Decorative Element | Description |
|---|---|
| Paint | Use vibrant or metallic colors to match your decor. |
| Twine | Wrap around the base for a rustic look. |
| Embellishments | Add beads, ribbons, or flowers for extra flair. |
| Texture | Mix different types of corks for a unique visual effect. |
| Candle Size | Choose candles that complement the holder’s design. |
In conclusion, the decorative ideas for your wine cork candle holders are limited only by your creativity. So gather your supplies, unleash your artistic side, and let your imagination run wild! Whether you prefer a minimalist design or something more elaborate, these candle holders will surely add a touch of warmth and charm to any space.
Q: Can I use any type of candle with my cork holders?
A: It's best to use candles that fit securely within the cork holder and are safe for use. Consider using LED candles for added safety.
Q: How do I clean my cork candle holders?
A: You can gently wipe them with a damp cloth. Avoid soaking them in water, as this may damage the cork.
Q: Can I use other materials along with corks?
A: Absolutely! Feel free to mix in wood, glass, or metal elements to enhance your design.
Q: How long will the corks last?
A: With proper care, corks can last for many years, but they may eventually wear down due to exposure to heat and moisture.

Wine Cork Bath Mat
Creating a unique bath mat using wine corks is not only a fun DIY project but also an eco-friendly way to repurpose those leftover corks from your favorite bottles. Imagine stepping out of the shower onto a soft, cushioned surface that not only feels great underfoot but also adds a touch of rustic charm to your bathroom decor. This project allows you to express your creativity while contributing to sustainability. Plus, it’s a conversation starter for guests!
To start, gather your materials. You will need a sufficient number of wine corks (typically around 50-100, depending on the size you want), a sturdy backing material such as a rubber mat or a piece of canvas, and a hot glue gun. The great thing about this project is that you can customize the size and shape of your bath mat to fit your space perfectly. Whether you want a long runner style or a compact square, the choice is yours!
Once you have your materials ready, the first step is to prepare the corks. Make sure they are clean and dry. You can soak them in warm soapy water to remove any residue, then let them dry completely. After that, arrange the corks on your backing material in your desired pattern. This is where you can get creative! You can choose to create a symmetrical design or a more random, organic look. Take your time to find a layout that you love.
After you are satisfied with the arrangement, it’s time to start gluing. Apply a generous amount of hot glue to the bottom of each cork and press it firmly onto the backing material. Make sure to leave some space between the corks for drainage, as this will help keep your bath mat dry and prevent mold. Once all the corks are glued down, let the mat dry completely before using it.
Now, you might be wondering about the care and maintenance of your new cork bath mat. To keep it looking fresh and clean, simply wipe it down with a damp cloth regularly. If you notice any stains or odors, you can sprinkle baking soda on the mat, let it sit for a few hours, and then vacuum it up. This will help absorb any unwanted smells and keep your bath mat in top condition.
In addition to being functional, your wine cork bath mat can also serve as a beautiful decorative piece. You can experiment with different cork colors, or even paint some of them for a pop of color. The possibilities are endless! So, why not give this creative project a try? Not only will it enhance your bathroom’s aesthetic, but it will also showcase your unique style and love for wine.
- How many corks do I need for a bath mat? The number of corks needed varies based on the size of the mat you want to create. Generally, you'll need between 50 to 100 corks.
- Can I use synthetic corks? While traditional wine corks are preferred for their aesthetic appeal, synthetic corks can also be used. Just ensure they are durable enough for foot traffic.
- How do I clean my cork bath mat? Wipe it down with a damp cloth regularly. For deeper cleaning, sprinkle baking soda, let it sit, and then vacuum.
- Will my cork bath mat get moldy? If you ensure proper drainage and clean it regularly, your cork bath mat should remain mold-free.
Mat Construction Techniques
Creating a wine cork bath mat is not only a fun DIY project but also a fantastic way to add a touch of rustic charm to your bathroom. The construction process involves a few key techniques that ensure your mat is both durable and visually appealing. First, you’ll need to gather a sufficient number of wine corks, ideally around 80 to 100, depending on the size of the mat you wish to create. It's best to use corks that are similar in size for a uniform look, but a mix can also add character.
Once you have your corks, the first step is to cut them in half lengthwise. This will allow for a flatter surface that’s easier to adhere to a base. You can use a sharp knife or a cork cutter for this task, but be cautious to avoid any injuries. After cutting, arrange the cork halves on a flat surface in your desired design. You might choose a simple grid pattern or get creative with shapes and colors. Experiment with different arrangements until you're satisfied with the layout.
Next, you’ll need a sturdy base for your mat. A piece of plywood or a thick cardboard sheet works well for this purpose. Cut the base to your preferred size, keeping in mind that it should be slightly larger than the corks to allow for a border. Once your base is ready, start attaching the corks using a strong adhesive, such as hot glue or wood glue. Apply glue to the flat side of each cork half and press it firmly onto the base. Make sure to leave small gaps between the corks for drainage and to prevent mold buildup.
As you glue down the corks, it’s helpful to work in sections. This way, you can ensure that the corks are aligned properly and that the glue sets evenly. After all the corks are attached, let the mat dry completely. This might take a few hours, depending on the adhesive used. Once dry, consider applying a sealant to protect the cork from moisture and wear. A clear acrylic spray can provide a waterproof finish while maintaining the natural look of the cork.
Finally, if you want to add extra grip to the bottom of your mat, you can attach a non-slip matting or rubber backing. This will help prevent slipping when the mat is wet, ensuring safety in your bathroom. With these construction techniques, your wine cork bath mat will not only be a unique addition to your home but also a practical one!
- How do I clean my wine cork bath mat? It's best to wipe it down with a damp cloth and mild soap. Avoid soaking it in water.
- Can I use any type of cork? While wine corks are ideal, you can also use other types of cork, but ensure they are durable and water-resistant.
- Will the cork absorb water? Cork is naturally water-resistant, but prolonged exposure to water can cause it to degrade. Make sure to let it dry properly after use.
- How long will my cork mat last? With proper care, your cork bath mat can last for several years, but it may need occasional repairs or replacements of individual corks.
Care and Maintenance
Maintaining your wine cork bath mat is essential for ensuring its longevity and keeping it looking fresh and stylish. Since cork is a natural material, it requires a bit of special care to prevent damage and wear over time. First and foremost, avoid exposing your bath mat to excessive moisture, as this can lead to mold and deterioration. After each use, it's a good idea to hang the mat up or place it in a well-ventilated area to allow it to dry thoroughly. This simple step can significantly extend the life of your cork mat.
When it comes to cleaning, a gentle approach is best. Use a damp cloth or sponge with mild soap to wipe down the surface of the mat. Avoid harsh chemicals or abrasive scrubbers, as they can damage the cork. If you notice any stubborn stains, you can sprinkle a little baking soda on the affected area and let it sit for a few minutes before gently scrubbing with a soft cloth.
To keep your bath mat looking its best, consider applying a protective sealant specifically designed for cork every few months. This will help to maintain its natural beauty and provide an extra layer of protection against moisture. Additionally, if you notice any signs of wear or damage, such as cracks or peeling, it's essential to address these issues promptly. You can use a cork glue to repair small cracks, ensuring that your bath mat remains functional and visually appealing.
Lastly, if you ever decide to refresh your bathroom decor, your wine cork bath mat can easily be repurposed or upcycled into other creative projects, making it a versatile addition to your home.
- How often should I clean my wine cork bath mat? It's recommended to clean it every couple of weeks or as needed, especially if you notice dirt or stains.
- Can I machine wash my cork bath mat? No, machine washing is not advisable as it can damage the cork. Stick to hand cleaning with mild soap.
- What should I do if my cork bath mat starts to smell? If you notice any unpleasant odors, clean it thoroughly with a mixture of water and vinegar, then allow it to dry completely.
- Is it safe to use in a bathroom with high humidity? Yes, but ensure proper ventilation and regular drying to prevent mold growth.
- Can I use essential oils on my cork bath mat? While some essential oils can be safe, it's best to use them sparingly and ensure they don't saturate the cork.
Frequently Asked Questions
- What materials do I need for the wine cork projects?
For most wine cork projects, you'll need wine corks, a hot glue gun, scissors, and possibly a frame or additional decorative materials like paint or twine. Depending on the specific project, you may also need plants, candles, or furniture pieces to enhance your creations.
- Can I use any type of wine cork for these projects?
Yes, you can use any type of wine cork! Natural corks work best due to their durability and aesthetic appeal, but synthetic corks can also be used. Just ensure they are clean and free from any wine residue before starting your projects.
- Are these projects suitable for beginners?
Absolutely! Most of these DIY projects are beginner-friendly and require minimal crafting skills. They are designed to be fun and easy, making them perfect for anyone looking to get creative with wine corks.
- How do I care for my wine cork creations?
To maintain your wine cork projects, keep them in a dry place away from direct sunlight to prevent fading. For items like coasters and bath mats, you can clean them with a damp cloth. Avoid soaking them in water, as this can damage the cork.
- Can I customize my wine cork projects?
Definitely! Customization is part of the fun. You can paint your corks, add embellishments, or choose specific plants for your planters to reflect your personal style. The possibilities are endless!
- Where can I find wine corks for my projects?
You can collect wine corks from friends and family, purchase them at craft stores, or check online marketplaces. Many wineries also sell corks or might give them away for free, so don’t hesitate to ask!


