How To Create DIY Nail Polish Marbled Decor
Are you ready to dive into the world of DIY and unleash your creativity? Creating stunning marbled decor using nail polish is not only a fun project but also a fantastic way to add a personal touch to your home. Imagine transforming ordinary items into eye-catching pieces of art that reflect your unique style! In this article, we'll guide you through the exciting process of marbling with nail polish, sharing tips and techniques that will help you achieve breathtaking results. Whether you're looking to spruce up your living space or searching for a fun craft project, this guide will provide you with all the information you need to get started.
Before you jump into the marbling fun, it’s crucial to gather and understand the materials you'll need for this project. The right tools and supplies can make all the difference in achieving that perfect marbled effect. Here’s a quick rundown of what you’ll need:
- Nail Polish: Choose a variety of colors that complement each other.
- Surface: This could be anything from a ceramic plate to a wooden box.
- Additional Tools: You might need a toothpick for swirling, a bowl of water, and gloves to keep your hands clean.
Understanding these materials will set you up for success, ensuring that your marbling experience is both enjoyable and rewarding.
When it comes to marbling, not all nail polishes are created equal. Selecting the appropriate nail polish is crucial for achieving a successful design. You’ll want to explore various brands and finishes to find the perfect fit for your decor project. Some brands are known for their vibrant colors and smooth application, while others might offer unique finishes that can elevate your marbled pieces.
Different finishes can dramatically affect the final look of your marbled decor. Here’s a breakdown of the most popular finishes:
| Finish Type | Description |
|---|---|
| Matte | Provides a non-reflective surface, giving a more understated look. |
| Glossy | Offers a shiny finish that can make colors pop and appear more vibrant. |
| Metallic | Contains metallic flakes for a shimmering effect that adds depth. |
So, which finish should you choose? If you’re going for a more subtle and sophisticated look, matte might be your best bet. On the other hand, if you want your decor to shine and grab attention, glossy finishes are the way to go. Think of it like choosing between a classic painting and a vibrant, eye-catching mural—each has its own appeal!
Don’t overlook metallic nail polishes! They can add a striking element to your marbled decor. Imagine incorporating gold or silver swirls into your design—talk about a statement piece! Metallics can enhance the overall aesthetic, making your creations not just beautiful but also luxurious.
Choosing the right color combinations is vital for creating visually appealing marbled decor. Think about popular color pairings that resonate with your style. For instance, soft pastels can create a calm and serene look, while bold primary colors can energize a space. The right colors can influence the overall vibe of your decor, so take your time to experiment with different combinations until you find the perfect match.
Now that you have your materials and colors sorted, it’s time to prepare for the marbling process. Proper preparation is key to ensuring a smooth and enjoyable experience. This section covers the necessary steps to set up your workspace and protect your surfaces.
Creating an organized and protected workspace will enhance your DIY experience. Ensure you have a clean, flat surface to work on, and gather all your materials within reach. This will help you stay focused and avoid unnecessary messes. Consider using a plastic tablecloth or old newspapers to protect your work area.
Using protective coverings is essential to avoid messes. Discover the best materials to safeguard your surfaces while you work. Old newspapers, plastic sheets, or even a disposable tablecloth can do wonders in keeping your space clean. Trust me, your future self will thank you!
Now comes the fun part—the actual marbling process! This is where the magic happens, and you’ll see your vision come to life. Let’s dive into the step-by-step procedure to achieve those stunning marbled effects with nail polish.
To create stunning marble patterns, you can use techniques such as swirling and dipping. Start by pouring a small amount of nail polish into a bowl of water, then use a toothpick to swirl the colors together. Dip your chosen surface into the water, and watch as the polish clings to it, creating a mesmerizing marble effect!
Layering different colors can enhance the depth and complexity of your marbled designs. Don’t be afraid to experiment with multiple layers. Each layer adds a new dimension, making your decor even more captivating. It’s like adding brushstrokes to a canvas—each stroke tells a story!
Once your marbled decor is complete, it’s time to add the finishing touches. This is where you can truly make your creations shine! Sealing your marbled pieces is crucial for durability. Learn about the best sealants to use and how to apply them effectively to ensure your designs last.
Sealing your marbled pieces is essential for protecting them from wear and tear. A good sealant will keep your colors vibrant and prevent chipping. Look for sealants that are specifically designed for crafts, and follow the application instructions carefully to achieve the best results.
Finally, let’s talk about how to showcase your beautiful creations! Explore creative ideas for displaying your marbled decor in your home. Whether it’s on a shelf, as a centerpiece, or even as wall art, make sure your pieces are highlighted to their fullest potential. After all, you want everyone to admire your amazing handiwork!
Q: Can I use any type of nail polish for marbling?
A: While most nail polishes can work, it's best to use ones that are not too thick or fast-drying to achieve better results.
Q: How long does the marbling process take?
A: The actual marbling process can take anywhere from 30 minutes to a few hours, depending on the complexity of your design.
Q: How do I clean up after marbling?
A: Use nail polish remover and cotton balls to clean up any spills or excess polish from your workspace.
Understanding the Materials
Before diving into the exciting world of DIY nail polish marbling, it’s essential to gather all the necessary materials. This not only ensures that you have everything at your fingertips but also helps in achieving the best possible results. The key components you’ll need include a variety of nail polish colors, a suitable surface to marble on, and some additional tools to assist in the marbling process.
First and foremost, let’s talk about nail polish. You’ll want to select several colors that complement each other. Think about the overall aesthetic you’re aiming for in your decor. For example, if you want a calming look, consider using soft pastels or monochromatic shades. On the other hand, if you’re looking for something more vibrant and eye-catching, bold hues can create a stunning effect. Remember, the color combinations you choose can dramatically influence the final appearance of your marbled pieces.
Next, you’ll need a surface to work on. This could be anything from ceramic tiles to glass, plastic, or even wooden items. The choice of surface will affect how well the nail polish adheres and how the marbling turns out. It’s crucial to pick a non-porous material for the best results, as this will allow the polish to float and swirl effectively without being absorbed.
In addition to nail polish and a surface, you’ll also need some tools to make the marbling process easier. Here’s a quick rundown of what you might find useful:
- Toothpicks or skewers: Perfect for swirling and creating intricate patterns.
- Small cups: For holding water during the marbling process.
- Protective gloves: To keep your hands clean while working.
- Paper towels: Handy for cleaning up any spills or excess polish.
Lastly, don’t forget about the importance of protective coverings for your workspace. Using newspapers, plastic sheets, or an old tablecloth can save you from a significant mess. Nail polish can be tricky to clean, so it’s wise to prepare your area beforehand.
With these materials in hand, you’re well on your way to creating stunning DIY nail polish marbled decor. The next step is to choose the right nail polish, which we’ll explore further in the following section.

Choosing the Right Nail Polish
When it comes to creating stunning marbled decor, the choice of nail polish is absolutely crucial. You might be wondering, what makes one nail polish better than another for this creative endeavor? Well, it all boils down to a few key factors: brand quality, finish type, and color selection. Each of these elements plays a significant role in how your marbling will turn out, so let’s dive into the details!
First off, let’s talk about brand quality. Not all nail polishes are created equal. Some brands offer better consistency and pigmentation than others, which can dramatically affect the marbling process. For instance, high-quality polishes tend to spread more evenly on the surface, allowing for smoother blending of colors. Brands like OPI, Essie, and China Glaze are often recommended for their reliable formulas. However, don’t shy away from experimenting with drugstore brands as well; you might find a hidden gem!
Next, consider the finish type. The finish of your nail polish can change the entire vibe of your marbled decor. Here’s a quick rundown:
| Finish Type | Description | Best Use |
|---|---|---|
| Matte | Flat, non-shiny finish | Modern, understated looks |
| Glossy | Shiny, reflective finish | Bright and bold designs |
| Metallic | Shimmering, reflective finish | Eye-catching accents |
As you can see, each finish offers a unique aesthetic. If you're aiming for a vibrant and eye-catching design, glossy or metallic polishes are your best bet. On the other hand, if you're looking for something more subtle and chic, matte finishes can provide that sophisticated touch.
Now, let’s not forget about color selection. The colors you choose will significantly influence the overall look of your marbled decor. Popular combinations include:
- Blues and greens for a calming oceanic effect
- Pinks and purples for a romantic vibe
- Bold reds and blacks for a dramatic statement
Remember, the key to a successful marbled design is to choose colors that complement each other. Experimenting with contrasting colors can also yield stunning results, so don’t hesitate to play around until you find the perfect palette!
In summary, choosing the right nail polish involves a thoughtful approach to brand quality, finish type, and color selection. By paying attention to these factors, you'll set yourself up for a successful marbling experience that will leave your decor looking absolutely fabulous!

Types of Nail Polish Finishes
When it comes to creating stunning marbled decor with nail polish, the finish of the polish plays a pivotal role in determining the overall aesthetic of your project. Each type of finish brings its unique charm and character, making it essential to understand the differences before diving into your DIY adventure. The three most common finishes you'll encounter are matte, glossy, and metallic. Each finish can dramatically alter the look of your marbled pieces, so let’s explore them further.
Matte finishes provide a soft, muted appearance that can give your decor a contemporary and understated elegance. This finish absorbs light rather than reflecting it, which can create a striking contrast against glossy or metallic elements in your design. Imagine a serene, matte marbled bowl sitting next to a shiny, reflective piece; the juxtaposition can be visually captivating.
On the flip side, glossy finishes are all about shine and vibrancy. These polishes reflect light beautifully, making colors appear more vivid and lively. If you want your marbled decor to pop, opting for glossy nail polish can be the way to go. Think of it as the difference between a flat painting and a high-gloss photograph; the latter draws the eye and creates a sense of excitement.
Lastly, we have metallic finishes, which can add an extra layer of drama to your marbled designs. These polishes contain fine metallic particles that catch the light in unique ways, creating a shimmering effect that can elevate any decor piece. Incorporating metallic nail polish into your marbling project can be likened to adding a touch of glitter to a cake—suddenly, it’s not just a cake; it’s a showstopper!
To help you visualize the differences, here’s a quick comparison table:
| Finish Type | Characteristics | Best For |
|---|---|---|
| Matte | Soft, non-reflective | Modern, understated decor |
| Glossy | Shiny, reflective | Vibrant, eye-catching pieces |
| Metallic | Shimmering, light-catching | Bold, dramatic accents |
In conclusion, the type of nail polish finish you choose can significantly impact the final look of your marbled decor. Whether you prefer the subtlety of matte, the vibrancy of glossy, or the drama of metallic, understanding these finishes will help you make informed decisions that lead to stunning results. So, as you prepare your materials, consider how each finish aligns with your vision for your decor project!
Q: Can I mix different finishes in one project?
A: Absolutely! Mixing finishes can create a unique and dynamic look. Just be sure to plan your design so that the finishes complement each other.
Q: How do I know which finish to choose?
A: Consider the overall theme of your decor. For a modern look, matte might be best, while glossy finishes are perfect for a lively atmosphere. Metallics are great for adding a touch of glamour!
Q: Will the finish affect the durability of my decor?
A: Yes, some finishes may be more durable than others. Glossy finishes often provide a tougher surface, while matte finishes can be more prone to scratches. Always seal your decor for added protection!
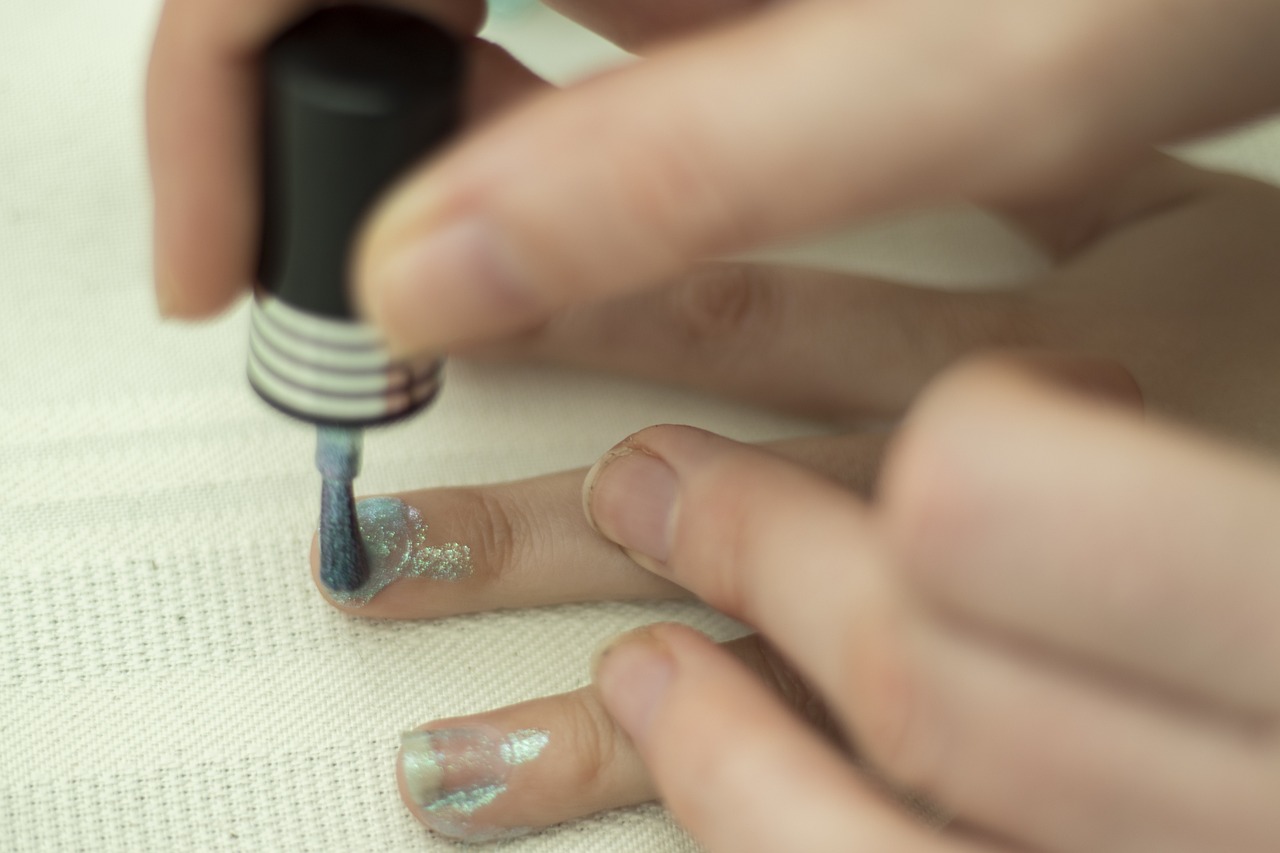
Matte vs. Glossy
When it comes to choosing between matte and glossy finishes for your DIY nail polish marbled decor, understanding the nuances of each option can significantly impact the overall aesthetic of your project. Matte finishes have a soft, non-reflective quality that can lend a sophisticated and understated elegance to your creations. They absorb light rather than reflecting it, which can create a more subdued and earthy vibe. This makes matte finishes particularly appealing for those looking to achieve a minimalist or rustic look.
On the other hand, glossy finishes are all about shine and vibrancy. They catch the light beautifully, making colors appear more vivid and dynamic. If you want your marbled decor to pop and draw attention, glossy nail polishes are the way to go. The reflective surface can also give your pieces a polished and professional look, making them stand out in any setting. However, glossy finishes can sometimes show imperfections more easily, so ensure your marbling technique is on point!
To help you decide which finish might be best for your project, consider the following factors:
- Desired Aesthetic: Do you prefer a soft, muted look or a vibrant, eye-catching design?
- Lighting Conditions: How will your decor be displayed? Glossy finishes may shine too brightly in direct light, while matte finishes can provide a calming effect.
- Durability: Glossy polishes may be more resistant to chipping and wear, while matte finishes can be more susceptible to scratches.
Ultimately, the choice between matte and glossy finishes boils down to personal preference and the specific vibe you want to create. You might even consider experimenting with both finishes in your marbled designs to see how they interact with the colors and patterns you choose. Mixing and matching can lead to unique and unexpected results, adding even more character to your decor!

Metallic Options
When it comes to creating stunning marbled decor, the choice of nail polish is paramount, and can truly elevate your project to a whole new level. Imagine the way light dances off the shimmering surfaces, creating a mesmerizing effect that draws the eye. Metallic nail polishes come in a variety of hues, each offering a unique flair that can transform your decor into a statement piece. So, how do you choose the right metallic shades for your marbling project?
First, consider the overall theme and color scheme of your decor. Are you aiming for a bold and vibrant look, or something more subtle and elegant? Metallics like gold and silver can add a touch of luxury, while colors like teal and copper can introduce a playful yet chic vibe. Here’s a quick breakdown of some popular metallic shades and their potential uses:
| Metallic Color | Best For |
|---|---|
| Gold | Classic elegance, festive themes |
| Silver | Modern aesthetics, minimalistic designs |
| Copper | Warm, rustic decor |
| Teal | Vibrant accents, bohemian styles |
Incorporating metallics into your marbling technique can be done in several ways. You might choose to use a metallic polish as a base coat, allowing the marbling colors to pop against its reflective surface. Alternatively, consider adding metallic polishes as accents during the marbling process, swirling them in with other colors to create depth and complexity. The result? A captivating blend of hues that can turn any ordinary item into a work of art.
Moreover, don’t forget about the application technique. When applying metallic polishes, a steady hand is essential to ensure even coverage. You might find that using a dotting tool or a fine brush can help you achieve the precise effects you desire. As you experiment, remember that layering is key; applying multiple thin layers rather than one thick coat will yield a more professional finish. So, are you ready to dive into the world of metallic marbling? With the right choices, your decor will shine like never before!
- Can I mix different brands of nail polish? Yes, you can mix different brands as long as they have similar formulations. However, be cautious as some may not blend well together.
- How do I clean up nail polish spills? Use acetone or nail polish remover on a cotton ball or cloth to carefully clean up any spills.
- What surfaces can I use for marbling? You can marble on various surfaces such as wood, glass, and ceramic. Just ensure they are clean and dry before starting.
- How do I ensure my marbled decor lasts? Sealing your finished pieces with a clear, protective sealant will help preserve their beauty and durability.

Color Combinations
Choosing the right color combinations is vital for creating visually appealing marbled decor. The colors you select can dramatically influence the overall aesthetic of your project, transforming a simple piece into a stunning focal point. Think of color combinations as the spices in a recipe; the right mix can elevate your design from bland to beautiful. When considering colors, it’s essential to strike a balance between harmony and contrast. Harmonious colors create a soothing effect, while contrasting colors can add excitement and energy to your decor.
One popular approach is to use a monochromatic scheme, where you choose different shades of a single color. This can create a sophisticated look that is both cohesive and elegant. For example, using various shades of blue can evoke feelings of tranquility and calmness, perfect for a relaxing space. Alternatively, a complementary color scheme pairs colors that are opposite each other on the color wheel, like blue and orange or purple and yellow. This can create a vibrant and dynamic effect, drawing the eye and making your decor pop.
Another trend is to explore analogous color schemes, which involve selecting colors that are next to each other on the color wheel. For instance, combining green, blue, and teal can create a harmonious and serene look, ideal for a nature-inspired theme. On the other hand, if you're looking for something bold and dramatic, consider using a triadic color scheme, which consists of three colors that are evenly spaced around the color wheel. This can result in a lively and energetic design that captures attention.
To help you visualize these combinations, here’s a simple table that showcases some effective color pairings:
| Color Scheme | Example Colors | Effect |
|---|---|---|
| Monochromatic | Light Blue, Blue, Dark Blue | Calm and Elegant |
| Complementary | Blue and Orange | Vibrant and Dynamic |
| Analogous | Green, Blue, Teal | Harmonious and Serene |
| Triadic | Red, Yellow, Blue | Lively and Energetic |
Ultimately, the key to successful marbled decor lies in experimentation. Don't be afraid to mix and match colors to discover what resonates with you. Grab some nail polish, play with different combinations, and remember that the process is just as important as the final product. After all, creating art should be fun and liberating!

Preparation Steps
Before diving into the exciting world of DIY nail polish marbling, it’s crucial to take a moment to prepare your workspace and gather everything you need. Think of this preparation as the foundation of a house; without it, your beautiful marbled decor may crumble before it even begins. Start by selecting a clean, well-lit area where you can comfortably work without interruptions. This will not only enhance your focus but also make the entire process more enjoyable. Make sure to lay down some newspaper or a plastic sheet to protect your surfaces from any accidental spills or splatters.
Next, gather your materials. You’ll need a variety of nail polish colors, a suitable surface to marble on (like ceramic tiles, glass, or plastic), and some essential tools. These tools can include a toothpick or a skewer for swirling, a small bowl of water, and possibly a pair of gloves to keep your hands clean. Having everything at hand will save you from the hassle of searching for items midway through your project. Remember, a well-prepared workspace is half the battle won!
To ensure a smooth marbling process, consider the following steps:
- Choose Your Colors: Select a palette that speaks to you. Think about the mood you want to create; vibrant colors can energize a space, while softer hues can bring tranquility.
- Test Your Nail Polishes: Not all nail polishes will behave the same way in water. It’s a good idea to do a quick test with a few colors to see how they spread and mix.
- Prepare Your Tools: Make sure your tools are clean and ready to use. A quick rinse of your bowl and a wipe down of your skewer will ensure that there’s no residue from previous projects.
Finally, take a moment to mentally visualize your design. Picture the swirls, the colors blending together, and how the final piece will look. This mental preparation can be just as important as the physical setup. Once you feel ready and everything is in place, you’ll be set to embark on your marbling adventure, transforming ordinary surfaces into stunning works of art!
Setting Up Your Workspace
Creating an organized and efficient workspace is essential for a successful DIY nail polish marbled decor project. Imagine stepping into a space that feels inviting and inspires creativity; that’s exactly what you want to achieve. Start by selecting a flat, stable surface where you can comfortably work. A large table or a clean countertop is ideal. Make sure this area is well-lit, as good lighting will help you see the true colors and details of your marbling work.
Next, it’s crucial to gather all your materials before diving into the marbling process. This includes your nail polish, a bowl of water, toothpicks or skewers for swirling, and any items you plan to marble. Having everything within reach will minimize disruptions and keep your creative flow intact. Additionally, consider laying down a protective covering, such as plastic sheeting or newspaper, to safeguard your workspace from spills and splatters. Trust me, a little preparation goes a long way in avoiding a messy aftermath!
Here are some key items to have on hand for your workspace setup:
- Nail Polish: Choose a variety of colors and finishes.
- Water Bowl: A shallow bowl works best for marbling.
- Swirling Tools: Toothpicks or skewers to create your designs.
- Protective Covering: Plastic sheeting or old newspapers.
- Paper Towels: For quick clean-ups and drying your pieces.
Once your workspace is set up, take a moment to breathe and visualize the beautiful creations you’re about to make. This is your time to unleash your inner artist! Remember, a clutter-free and well-prepared environment not only enhances your focus but also makes the entire DIY experience more enjoyable. So roll up your sleeves, put on an apron if you like, and get ready to create some stunning marbled decor!
Protecting Surfaces
When diving into the world of DIY nail polish marbling, one of the most critical aspects to consider is protecting your surfaces. You don’t want to ruin your favorite table or floor with accidental spills or splatters of vibrant nail polish. Think of your workspace as a canvas; if it’s not protected, you risk ruining the masterpiece you’re trying to create. So, let’s get into the nitty-gritty of how to safeguard your area effectively.
First and foremost, it’s essential to choose the right protective coverings. You can use a variety of materials, and the choice often depends on the size of your workspace and the materials you have on hand. Here are some popular options:
- Plastic Tablecloths: These are inexpensive and can cover large areas. Simply lay them down over your work surface for easy cleanup.
- Old Newspapers or Magazines: If you have some lying around, they can serve as a great makeshift surface protector. Just be sure to layer them for extra protection!
- Drop Cloths: If you’re feeling fancy, a painter's drop cloth can provide excellent coverage and is reusable.
Once you’ve selected your protective covering, secure it in place to prevent any movement while you work. You can use tape to hold down the edges, ensuring it doesn’t shift around. This will not only keep your workspace tidy but also allow you to focus on creating those stunning marbled designs without the distraction of worrying about spills.
Additionally, don’t forget to protect your hands and clothes. Wearing an old shirt or apron can save your favorite outfit from splashes. Disposable gloves are also a fantastic idea to keep your hands clean and avoid any unwanted nail polish stains. It’s like putting on your armor before entering the battlefield of creativity!
Lastly, remember to have a cleanup plan in place. Keep some paper towels and nail polish remover nearby for quick touch-ups. This way, if you do make a mess, you can tackle it immediately, preventing any lasting damage.
In summary, protecting your surfaces is a vital step in the marbling process. By taking these precautions, you can ensure a fun and stress-free DIY experience, allowing your creativity to shine without the fear of making a mess. So gear up, protect your space, and let the marbling magic begin!
Q: What surfaces can I use for marbling with nail polish?
A: You can marble on various surfaces, including glass, plastic, wood, and ceramics. Just ensure the surface is clean and dry before you start.
Q: How do I clean up nail polish spills?
A: Use nail polish remover and a cotton ball or paper towel. It's best to clean spills immediately before they dry.
Q: Can I use any nail polish for marbling?
A: While most nail polishes work, it's best to use ones that are not too thick. Experiment with different brands to see which gives the best results.
The Marbling Process
The marbling process is where the real fun begins, and trust me, it’s a delightful experience that transforms your ordinary surfaces into stunning works of art. Imagine dipping a plain ceramic bowl into a swirling pool of vibrant colors, and watching as it emerges with a unique pattern that no one else in the world has. This is not just a craft; it’s a way to express your creativity and bring a touch of magic into your home. To start, you’ll want to gather your nail polish and prepare to get a little messy—after all, that’s part of the fun!
First, let’s talk about the techniques that will help you create those mesmerizing marble effects. The two most popular methods are swirling and dipping. In the swirling technique, you’ll apply drops of nail polish onto a bowl of water, then use a stick or a toothpick to gently swirl the colors together. This creates beautiful, intricate designs that resemble natural marble. On the other hand, the dipping method involves submerging your object directly into the water where the nail polish has floated. This technique is not only easier but also provides a more uniform coverage, making it perfect for beginners.
Another important aspect of the marbling process is layering. Layering different colors can add depth and complexity to your designs. For instance, start with a base color and let it dry completely. Then, apply additional colors on top, swirling them in for that marbled effect. The key here is patience; allow each layer to dry before adding the next. This not only enhances the visual appeal but also ensures that your marbled decor stands out with a richness that draws the eye.
As you embark on this creative journey, don’t forget to have some fun with color combinations. You can choose contrasting colors for a bold statement or opt for softer shades for a more delicate look. The beauty of marbling is that it’s entirely up to you—your imagination is the limit! Just remember to keep your workspace organized and your surfaces protected, as things can get a bit messy during the process.
Finally, once you've created your masterpiece, it’s essential to let your pieces dry thoroughly. Depending on the thickness of the nail polish, this could take anywhere from a few hours to a full day. Once dry, you can apply a sealant to protect your design from scratches and fading. This step is crucial if you want your marbled decor to last and maintain its stunning appearance over time.
- Can I use any type of nail polish for marbling? - While you can use various brands, it's best to choose polishes that are known for their fluidity and quick-drying properties.
- What surfaces can I marble on? - You can marble on a variety of surfaces, including ceramics, glass, wood, and plastic. Just ensure the surface is clean and dry before starting.
- How do I clean up after marbling? - Nail polish can be tricky to clean. Use acetone or nail polish remover on any spills, but be cautious as it may damage some surfaces.

Creating the Marble Effect
Creating the marble effect with nail polish is like painting a masterpiece, but with a twist of fun and creativity. It’s an exciting process that allows you to unleash your inner artist while crafting unique decor pieces. To begin, you’ll want to gather your materials, which include nail polish in various colors, a shallow container filled with water, and something to dip or swirl your item into the mixture. The beauty of this technique lies in its unpredictability; every swirl and dip can yield a different result, making each piece one-of-a-kind.
First, let’s talk about the swirling method. This technique involves dropping different colors of nail polish onto the surface of the water. You can use a toothpick or a skewer to swirl the colors together gently. The key is to be light-handed; too much stirring can create a muddy effect instead of the desired marbled look. As you swirl, you’ll see the colors blend beautifully, creating a mesmerizing pattern. Once you’re satisfied with the design, it’s time to dip your chosen item into the water. Make sure to do this slowly and steadily to allow the polish to adhere to the surface.
Alternatively, you can use the dipping method. For this, you’ll follow a similar process but instead of swirling the colors, you’ll simply drop them onto the water’s surface in random spots. Then, you can quickly dip your item straight down into the water. This method can yield more abstract designs, which can be just as stunning! Remember, the angle and speed of your dip can significantly impact the final look, so don’t hesitate to experiment.
Once you’ve dipped your item, allow it to dry completely before handling it again. This is crucial because the nail polish needs time to set and adhere properly. You might also want to do a test run with a small item before diving into larger pieces. This way, you can practice your technique without the pressure of ruining a bigger project. The more you practice, the more adept you’ll become at creating those gorgeous marble effects!
Lastly, don’t forget about cleanup! Nail polish can be tricky to remove from surfaces, so be sure to have some acetone or nail polish remover handy. Using a drop cloth or newspaper can also help contain any mess. With these tips and techniques in mind, you’re well on your way to creating stunning marbled decor that will impress anyone who sees it.
- Can I use any type of nail polish for marbling? Yes, but it's best to stick with regular nail polish rather than gel or quick-dry formulas, as they don’t spread as well on water.
- What items can I marble? You can marble a variety of items, including ceramic, plastic, glass, and even wood. Just ensure the surface is clean and dry before starting.
- How long does the marbling process take? The entire process, including drying time, can take a few hours. However, the actual marbling part only takes a few minutes.
- Will the colors fade over time? If properly sealed, your marbled decor should maintain its vibrancy. Make sure to use a good quality sealant for durability.
Layering Techniques
When it comes to creating stunning marbled decor, can truly elevate your project to the next level. Think of layering as the secret ingredient in your favorite recipe—it adds depth and complexity that can transform something ordinary into something extraordinary. The key is to use different colors and finishes strategically to achieve that captivating marble effect that catches the eye and sparks conversation.
Start by selecting a few nail polish colors that complement each other. Consider using a mix of dark and light shades to create contrast, or opt for colors that are analogous on the color wheel for a more harmonious look. For instance, if you're working with a base of deep blue, a lighter sky blue and a touch of shimmering silver can create a beautiful layered effect. As you layer, remember that the order of application matters. Begin with a base coat of your lightest color, allowing it to dry completely before adding the next layer.
One effective technique is to use a swirling method after applying your base layer. Once your base layer is dry, apply a few drops of your second color on top. Using a toothpick or a small brush, gently swirl the colors together, but be careful not to overdo it! You want to create a marbled effect without completely blending the colors into one solid hue. This technique can give your decor a more organic and fluid appearance, mimicking the natural patterns found in marble.
Another tip is to work with translucent layers. After your initial layers have dried, you can apply a semi-transparent polish over the top. This adds a unique depth to your design, as the colors beneath will subtly show through, creating a more intricate look. Think of it like adding a sheer veil to a beautiful dress—it enhances the overall design without overpowering it.
Finally, don't forget about the finishing touches. Once you’ve achieved your desired marbled effect, consider adding a top coat. This not only seals your design but also enhances the shine and durability of your decor. A glossy top coat can make the colors pop, while a matte finish can give your piece a more understated elegance. The choice is yours!
In summary, layering techniques in marbling are all about experimenting and finding what works best for your vision. Whether you're swirling colors, playing with translucency, or adding that perfect top coat, the possibilities are endless. So, grab your nail polish and get creative—your stunning marbled decor awaits!
- What types of surfaces can I use for marbling with nail polish?
Most non-porous surfaces work well, such as glass, plastic, or ceramic. Just ensure they are clean and dry before you start. - How do I clean up nail polish spills?
Act quickly! Use nail polish remover on a cotton ball or cloth to gently wipe up any spills. - Can I mix different brands of nail polish?
Yes, you can mix different brands, but be cautious as not all polishes have the same consistency, which can affect the final result. - How long does the marbled decor last?
With proper sealing and care, your marbled decor can last for a long time. Just avoid exposing it to harsh chemicals or extreme temperatures.
Finishing Touches
Once your marbled decor is complete, it's time to add the that will elevate your project from good to spectacular. This stage is not just about aesthetics; it's also about ensuring that your beautiful creations are protected and displayed to their fullest potential. First and foremost, sealing your marbled pieces is crucial. A good sealant will not only enhance the colors but also provide a protective layer that guards against scratches and fading. You want your decor to last, right? So, let's dive into the best practices for sealing and displaying your marbled masterpieces.
When it comes to sealing your marbled decor, the choice of sealant can make a significant difference in the longevity and appearance of your pieces. There are several options available, each with its unique benefits. Here’s a quick rundown:
| Sealant Type | Benefits | Application Method |
|---|---|---|
| Acrylic Spray Sealer | Quick-drying, clear finish | Spray evenly from a distance |
| Mod Podge | Multi-purpose, dries clear | Apply with a brush |
| Polyurethane | Durable, waterproof | Brush on thin layers |
Each of these sealants can provide a protective layer, but your choice may depend on the surface you're working with and the final look you desire. For instance, if you want a glossy finish, an acrylic spray might be your best bet. On the other hand, if you're looking for something more durable, especially for items that will be handled frequently, a polyurethane sealant would be ideal.
Now that your pieces are sealed and ready, it’s time to think about how to display them. After all, what’s the point of creating stunning decor if it’s hidden away? Here are some creative ideas for showcasing your marbled creations:
- Wall Art: Frame your marbled pieces and hang them on the wall. They can serve as vibrant focal points in any room.
- Table Centerpieces: Use your marbled decor as centerpieces for tables. They can add a splash of color and creativity to your dining experience.
- Shelves and Mantels: Arrange your marbled items on shelves or mantels, mixing them with other decor items for a curated look.
- Gift Ideas: Consider gifting your marbled decor to friends and family. Personal, handmade gifts are always cherished.
By thoughtfully arranging your marbled decor, you’ll not only enhance your space but also share your creativity with others. Remember, the beauty of DIY projects lies in their uniqueness, so don’t shy away from experimenting with different display ideas!
Q: Can I use any type of nail polish for marbling?
A: While you can technically use any nail polish, it's best to choose brands that are known for their quality and consistency to achieve the best results.
Q: How long does the marbling process take?
A: The marbling process can take anywhere from 30 minutes to a few hours, depending on the complexity of your design and drying times.
Q: Will the marbled decor fade over time?
A: If properly sealed and displayed away from direct sunlight, your marbled decor should maintain its vibrancy for a long time.
Q: Can I marble on different surfaces?
A: Absolutely! You can marble on various surfaces like wood, glass, or even ceramics, just ensure they are clean and dry before starting.
Sealing Your Decor
Once you've created your stunning marbled decor, the next crucial step is to seal your pieces. Sealing not only enhances the beauty of your project but also provides essential protection against wear and tear. This ensures your artwork remains vibrant and intact over time. But how do you choose the right sealant? Let's dive into the details!
First, you'll want to select a sealant that is compatible with nail polish. A clear acrylic spray or a brush-on sealant designed for crafts works wonders. Each option has its benefits:
- Acrylic Spray Sealant: This is a quick and easy option for sealing your decor. It dries fast and provides a durable finish. Make sure to spray it from a distance to avoid drips.
- Brush-On Sealant: If you prefer more control over the application, a brush-on sealant can be ideal. It allows you to apply a thicker coat, which can be beneficial for intricate designs.
Before applying your chosen sealant, ensure that your marbled decor is completely dry. Applying sealant on wet nail polish can lead to smudging and ruin your hard work. Once dry, follow these steps for sealing:
- Prepare Your Workspace: Just like when you started your marbling project, set up a clean, well-ventilated area to apply your sealant.
- Apply the Sealant: If using a spray, hold it about 12 inches away from the surface and spray in light, even coats. For a brush-on sealant, use a clean brush and apply a thin layer evenly over the surface.
- Let it Dry: Allow the first coat to dry completely before deciding if you need a second coat. More layers can enhance protection but be cautious not to overdo it.
After sealing, your marbled decor will be ready to shine! However, remember that while sealing provides a layer of protection, it’s still wise to handle your pieces with care. Avoid placing them in high-traffic areas where they might get knocked over or scratched.
Now that you’ve sealed your creations, it's time to think about how to display them. A well-sealed piece deserves a prominent place in your home, showcasing your creativity and effort. From elegant shelves to eye-catching centerpieces, the options are endless!
Q: How long does the sealant take to dry?
A: Drying times can vary based on the type of sealant used. Generally, spray sealants dry within 15-30 minutes, while brush-on types may take longer, around 1-2 hours.
Q: Can I use any sealant for my marbled decor?
A: It's best to use sealants specifically designed for crafts or acrylics. Avoid oil-based sealants as they can react negatively with nail polish.
Q: Will sealing change the appearance of my marbled decor?
A: While sealants are clear, some may slightly alter the finish (e.g., making it glossier). Always test on a small area first if you're concerned about changes.
Displaying Your Marbled Decor
Once you've created your stunning marbled decor, the next exciting step is figuring out how to display it in a way that truly highlights its beauty. Think of your marbled pieces as unique art forms that deserve to be showcased, much like a gallery exhibit in your own home! The way you present your decor can significantly enhance its visual appeal and create a cohesive atmosphere in your space.
Start by considering the location of your marbled decor. Are you thinking of placing it on a shelf, a coffee table, or perhaps hanging it on the wall? Each location offers different opportunities. For instance, a vibrant marbled vase can become a stunning centerpiece on your dining table, while a series of marbled coasters can add a pop of color to your coffee table, inviting conversation among guests.
When displaying your marbled decor, consider using grouping techniques. Grouping items of varying heights and sizes can create visual interest. For example, you might place a tall marbled vase alongside smaller marbled candle holders. This not only adds dimension but also creates a dynamic arrangement that draws the eye. Don't forget to incorporate other decorative elements, such as books or natural elements like plants, to create a more inviting and layered look.
Another fantastic way to display your marbled decor is by using floating shelves. These shelves provide a modern and clean backdrop that allows your creations to stand out. Arrange your marbled pieces with complementary items, such as framed photos or small sculptures, to create a personalized vignette that reflects your style.
If you're feeling adventurous, consider incorporating your marbled decor into seasonal displays. For example, during the fall, you can add small pumpkins alongside your marbled items, or in the winter, incorporate some festive decorations. This not only keeps your decor fresh but also allows you to express your creativity throughout the year.
Lastly, don't underestimate the power of lighting. Proper lighting can dramatically change how your marbled decor looks. Use spotlights or accent lighting to draw attention to specific pieces, or place them near windows where natural light can enhance their colors. Experimenting with different lighting setups can reveal new aspects of your decor that you might not have noticed before.
In summary, displaying your marbled decor is all about creativity and personalization. By considering location, grouping techniques, using floating shelves, incorporating seasonal elements, and playing with lighting, you can create a showcase that not only highlights your unique creations but also enhances the overall ambiance of your home.
- How do I clean my marbled decor? - Use a soft, damp cloth to gently wipe down your marbled items. Avoid harsh chemicals that could damage the finish.
- Can I use my marbled decor outdoors? - It’s best to keep marbled decor indoors unless specifically sealed for outdoor use, as weather elements can affect the finish.
- What types of surfaces are best for displaying marbled decor? - Smooth, stable surfaces like wood or glass tables work well. Make sure the surface complements the colors of your decor.
Frequently Asked Questions
- What materials do I need for DIY nail polish marbled decor?
To get started with your DIY nail polish marbled decor, you'll need a variety of nail polish colors, a suitable surface like a ceramic plate or a piece of wood, and some additional tools like a toothpick or a skewer for swirling the colors. Don't forget to have some protective coverings for your workspace!
- How do I choose the right nail polish for marbling?
Selecting the right nail polish is crucial for achieving the best marbled effect. Look for polishes that are not too thick, as they should spread easily on the surface. Brands that offer a variety of finishes, such as glossy, matte, or metallic, can also enhance the final look of your decor.
- What are the best color combinations for marbled decor?
When it comes to color combinations, consider pairing contrasting colors for a bold look or complementary colors for a more harmonious effect. Popular combinations include blues and greens, pinks and golds, or classic black and white. Experimenting with different shades can lead to unique and stunning results!
- How can I protect my surfaces while marbling?
Protecting your surfaces is essential to avoid messes. Use newspaper, plastic sheets, or painter's tape to cover the areas you want to keep clean. This way, you can focus on creating your beautiful marbled designs without worrying about spills.
- What techniques can I use to create marble effects?
There are several techniques to create marble effects, such as swirling the colors with a toothpick or dipping your surface directly into the marbled polish. Layering different colors can also add depth and complexity to your designs, making them truly eye-catching!
- How do I seal my marbled decor for durability?
Sealing your marbled decor is important to ensure its longevity. Use a clear acrylic sealer or a spray sealant to protect the surface from scratches and fading. Make sure to apply it in a well-ventilated area and follow the manufacturer's instructions for the best results.
- What are some creative ways to display my marbled decor?
Once your marbled decor is complete, get creative with how you display it! You can use decorative stands, hang them on walls, or create a centerpiece for your dining table. The key is to showcase your beautiful creations in a way that draws attention and complements your home decor.


