Creating Beautiful Wooden Ornaments: Christmas DIY Ideas
As the holiday season approaches, the excitement of decorating your home with festive ornaments is palpable. There's something truly magical about the warm glow of Christmas lights reflecting off handcrafted decorations. Creating beautiful wooden ornaments not only adds a personal touch to your holiday decor but also provides a fun and fulfilling DIY project for you and your family. Imagine the joy of hanging unique, handmade ornaments on your tree, each one telling a story or representing a cherished memory. Whether you're a seasoned crafter or a beginner, this article will guide you through various creative ideas and techniques to make your own stunning wooden ornaments.
Wooden ornaments can range from simple shapes to intricate designs, allowing for endless possibilities. The beauty of working with wood lies in its natural textures and colors, which can be enhanced through various finishing techniques. Plus, crafting your own ornaments is a fantastic way to express your creativity while making lasting memories with loved ones. So, grab your tools and let’s dive into the world of DIY wooden ornaments!
Before you start crafting, it’s essential to select the right type of wood. Different woods have unique characteristics that will influence the final look and durability of your ornaments. For instance, softwoods like pine and cedar are easy to work with and carve, making them ideal for beginners. On the other hand, hardwoods such as oak and maple offer durability and a beautiful grain pattern, perfect for more intricate designs.
Here’s a quick comparison of popular wood types:
| Wood Type | Characteristics | Best For |
|---|---|---|
| Pine | Soft, easy to carve | Beginners, simple designs |
| Cedar | Aromatic, lightweight | Rustic ornaments |
| Oak | Strong, beautiful grain | Durable, intricate designs |
| Maple | Hard, smooth finish | Detailed ornaments |
Choosing the right wood is crucial for ensuring your ornaments not only look great but also last for many Christmases to come. So take your time, explore your options, and pick the wood that resonates with your vision!
Now that you've selected your wood, it's time to gather the essential tools that will make the crafting process a breeze. Having the right tools can significantly enhance your experience and the quality of your finished ornaments.
First and foremost, cutting tools are fundamental for shaping your wooden pieces. Depending on the complexity of your designs, you may need a variety of cutting tools. Here are a few options:
- Hand Saw: Great for simple cuts and shapes.
- Jigsaw: Ideal for intricate designs and curves.
- Scroll Saw: Perfect for detailed patterns and fine cuts.
Each tool serves a unique purpose, so consider your design's requirements when selecting the best one for your project.
When it comes to saws, understanding the differences between hand saws and power saws can help you choose the right one for your ornament crafting. Hand saws are excellent for smaller, more controlled cuts, while power saws can handle larger pieces with ease. If you're just starting, a simple hand saw might be your best bet!
After cutting, sanding is essential for achieving a smooth finish. A good finish not only enhances the appearance of your ornaments but also helps to prevent splinters. Different types of sanders, such as orbital sanders and hand sanders, can be used depending on the size and detail of your ornaments. Remember to start with a coarser grit and gradually move to a finer grit for the best results.
Finishing techniques are what truly elevate your wooden ornaments. Whether you choose to paint, stain, or seal your creations, these methods will give your ornaments a professional touch. Painting can add vibrant colors, while staining enhances the natural beauty of the wood grain. Sealing your ornaments with a protective coat will ensure they withstand the test of time, making them cherished holiday decorations for years to come.
Now that you have the basics down, let’s explore some inspiring design ideas for your wooden ornaments. Whether you prefer traditional styles or modern aesthetics, there's something for everyone!
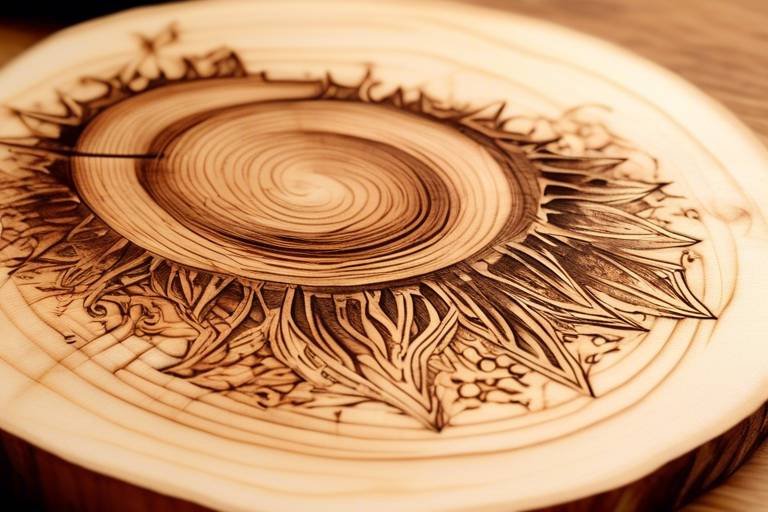
Personalized ornaments make for thoughtful gifts and cherished keepsakes. Think about incorporating names, dates, or special messages into your wooden designs. You can use wood burning tools to engrave names or simply paint them on for a colorful touch. These ornaments can become family heirlooms that are passed down through generations!
For those who appreciate the beauty of the outdoors, nature-inspired ornaments can bring a rustic charm to your Christmas tree. Consider incorporating elements like leaves, animals, and natural textures into your designs. You could create ornaments shaped like pine cones, or use twigs and dried flowers to embellish your creations.
Once your ornaments are crafted, it’s time to unleash your creativity with decorating! From painting to adding embellishments, the sky's the limit when it comes to making your wooden ornaments truly unique.
Painting is a versatile way to add color and personality to your ornaments. Explore different techniques, such as brushwork for detailed designs, sponging for a textured effect, or stenciling for clean lines. Don’t be afraid to experiment with colors and patterns!
Adding embellishments can elevate your wooden ornaments to the next level. Think about incorporating ribbons, beads, or even glitter to enhance your designs. These little touches can make a big difference in the overall look of your ornaments.
After all your hard work, it’s time to showcase your beautiful wooden ornaments! Consider how to display them in a way that maximizes their beauty and charm.
Strategically placing your ornaments on the Christmas tree can create a stunning visual impact. Try grouping similar colors together or alternating between larger and smaller ornaments for balance. Don’t forget to step back and admire your handiwork!
Beyond the tree, there are many creative ways to display your ornaments. You can use hooks to hang them on walls, create garlands to drape across mantels, or place them in decorative bowls as table centerpieces. The possibilities are endless!
Q: What type of wood is best for beginners?
A: Softwoods like pine are great for beginners due to their ease of use and availability.
Q: Can I use acrylic paint on wooden ornaments?
A: Yes, acrylic paint works well on wood and can be sealed for durability.
Q: How do I hang my wooden ornaments?
A: You can drill a small hole at the top and thread a ribbon or string through it for hanging.
Q: Are there any special finishing techniques I should know about?
A: Consider sealing your ornaments with a clear varnish or polyurethane to protect them from wear and tear.
Choosing the Right Wood
When it comes to crafting beautiful wooden ornaments, choosing the right type of wood is absolutely crucial. Not only does the type of wood affect the overall appearance of your ornaments, but it also plays a significant role in their durability and ease of crafting. So, what should you look for when selecting wood for your festive projects? Let’s dive into the various wood options available and their unique characteristics.
First off, you’ll want to consider the hardness of the wood. Hardwoods like oak, maple, and cherry are often favored for their durability and fine grain, making them perfect for intricate designs. On the other hand, softwoods like pine and cedar are easier to work with, especially for beginners, but they may not hold up as well over time. If you’re aiming for a rustic aesthetic, softwoods can provide that charming, natural look that many people love.
Next, think about the color and grain patterns. Different woods offer a variety of hues and textures, which can significantly impact the visual appeal of your ornaments. For example, walnut has a rich, dark color and beautiful grain, while birch is lighter and has a more uniform appearance. If you’re planning to paint or stain your ornaments, softer woods like poplar can be an excellent choice since they take paint well.
Another factor to consider is the availability and cost. Some exotic woods can be stunning but may also be quite expensive and hard to find. If you’re just starting out, it might be wise to stick with more readily available options like pine or plywood. These materials are not only cost-effective but also provide a solid base for your creative endeavors.
Here’s a quick comparison of some popular wood options:
| Wood Type | Hardness | Grain Pattern | Best For |
|---|---|---|---|
| Oak | Hard | Prominent | Durable ornaments |
| Pine | Soft | Varied | Beginner projects |
| Maple | Hard | Fine | Intricate designs |
| Basswood | Soft | Uniform | Carving and painting |
| Walnut | Hard | Rich | Elegant ornaments |
In summary, choosing the right wood for your Christmas ornaments can make all the difference in your crafting experience and the final product. By considering factors such as hardness, color, grain, availability, and cost, you can select a wood that not only suits your style but also enhances the beauty of your handmade decorations. So, grab your tools and get ready to create some stunning wooden ornaments!
Essential Tools for Crafting
When it comes to creating stunning wooden ornaments, having the right tools is not just a luxury; it's a necessity. Imagine trying to bake a cake without the proper utensils—frustrating, right? The same goes for woodworking. The right tools can make your crafting experience smoother, more enjoyable, and ultimately more successful. You'll want to have a well-rounded toolkit to tackle various aspects of your projects, ensuring that you're prepared for anything from cutting to finishing. So, what tools do you need to get started?
First and foremost, let's talk about cutting tools. These are the backbone of any woodworking project. Whether you're working with intricate designs or simple shapes, you'll need tools that can handle the job. Saws are essential, and you have a couple of options here:
| Type of Saw | Best For |
|---|---|
| Hand Saw | Simple cuts and small projects |
| Power Saw | More complex cuts and larger pieces |
Now, you might be wondering which saw is right for you. If you’re just starting out, a hand saw can be a fantastic choice for smaller projects. They’re easy to control and allow for precision. On the other hand, if you're looking to tackle larger pieces or more intricate designs, investing in a power saw could save you time and effort.
Next up are sandpaper and sanders. After cutting your wooden pieces, you'll want to ensure they have a smooth finish. Rough edges can ruin the aesthetic of your ornaments and make them feel unfinished. Hand sanding is great for small areas, but for larger projects, a power sander can be a game-changer. There are various types of sanders available, including:
- Belt Sanders: Perfect for quickly removing material.
- Orbital Sanders: Ideal for achieving a smooth finish.
- Detail Sanders: Great for intricate areas and corners.
Once your pieces are cut and sanded, you'll want to focus on finishing techniques. This is where tools like brushes, sponges, and spray applicators come into play. These tools help you apply paint, stain, or sealant evenly, ensuring that your ornaments not only look beautiful but also stand the test of time. A good quality paintbrush can make a world of difference in the final appearance of your ornaments.
Lastly, don’t forget about safety equipment! Crafting can be fun, but safety should always come first. Make sure to have protective eyewear and a dust mask on hand to keep yourself safe while working with wood and tools. After all, no one wants to cut their crafting session short due to an injury!
In summary, having the right tools can significantly enhance your crafting experience. From cutting and sanding to finishing, each tool plays a unique role in the creation of your wooden ornaments. So gather your tools, roll up your sleeves, and let your creativity flow!
Q: Do I need to invest in expensive tools to make wooden ornaments?
A: Not necessarily! While high-quality tools can make a difference, there are plenty of affordable options that work just as well for beginners. Start with the basics and upgrade as you gain experience.
Q: How do I choose the right type of wood for my ornaments?
A: Consider the look and feel you want for your ornaments. Softwoods like pine are easier to work with, while hardwoods like oak offer durability and a beautiful finish. Experiment to see what you prefer!
Q: Can I use leftover wood from other projects?
A: Absolutely! Repurposing leftover wood is a great way to save money and reduce waste. Just make sure the wood is in good condition and suitable for your ornament designs.
Cutting Tools
When it comes to crafting beautiful wooden ornaments, play a pivotal role in shaping your pieces with precision and creativity. The right tools not only enhance your crafting experience but also ensure that your final products are both durable and visually appealing. Among the various cutting tools available, you’ll find that each type serves a unique purpose, making it essential to choose wisely based on your project needs.
One of the most common tools you'll encounter in woodworking is the saw. There are numerous types of saws, each designed for specific tasks. For instance, if you’re working on intricate designs, a scroll saw is perfect for making detailed cuts. On the other hand, a jigsaw is fantastic for cutting curves and more complex shapes. If you prefer a more traditional approach, a hand saw can be just as effective, especially for smaller projects. Understanding the differences between these saws can help you select the best option for your ornament crafting.
Another essential tool in your arsenal is the router. This tool is invaluable for adding decorative edges and grooves to your wood, allowing for a more refined finish. Additionally, a miter saw is great for making precise angled cuts, which can be especially useful when creating multi-dimensional ornaments or frames. Each of these tools brings its own set of advantages, so consider your design requirements carefully before making a purchase.
To give you a clearer picture, here's a quick comparison of some common cutting tools:
| Tool | Best For | Notes |
|---|---|---|
| Scroll Saw | Intricate designs | Ideal for curves and fine details |
| Jigsaw | Curved cuts | Versatile and easy to handle |
| Hand Saw | Small projects | Great for beginners and simple cuts |
| Router | Decorative edges | Adds flair to your designs |
| Miter Saw | Angled cuts | Perfect for frame-making |
When using these tools, safety should always be your top priority. Make sure to wear protective gear such as goggles and gloves to prevent any injuries. Additionally, familiarize yourself with the operational guidelines of each tool to maximize efficiency and minimize risks.
In conclusion, investing in the right cutting tools is crucial for any DIY enthusiast looking to create stunning wooden ornaments. By understanding the functions and benefits of each tool, you can elevate your crafting game and produce beautiful pieces that will be cherished for years to come.
Q: What is the best saw for beginners?
A: A hand saw is often recommended for beginners due to its simplicity and ease of use.
Q: How do I maintain my cutting tools?
A: Regular cleaning, sharpening blades, and proper storage will help maintain your tools in good condition.
Q: Can I use power tools for small projects?
A: Yes, power tools can speed up the process, but ensure you practice safety and control.

Saws
When it comes to crafting beautiful wooden ornaments, choosing the right saw can make all the difference in the world. Each type of saw has its own unique strengths, allowing you to tackle various projects with precision and ease. Whether you're a seasoned woodworker or a DIY novice, understanding the differences between hand saws and power saws is essential for achieving the best results.
Hand saws, for instance, are perfect for those who appreciate the traditional approach to woodworking. They offer a level of control and finesse that can be hard to replicate with power tools. For smaller, intricate designs, a coping saw is an excellent choice. It allows you to make delicate cuts and navigate curves with ease. On the other hand, if you're looking to cut through thicker pieces of wood quickly, a panel saw or a miter saw can save you time while delivering clean, straight cuts.
Power saws, while perhaps a bit intimidating for beginners, can significantly speed up the crafting process. A jigsaw, for example, is a versatile tool that can handle both straight and curved cuts, making it ideal for creating unique ornament shapes. Meanwhile, a band saw is fantastic for more complex designs and can handle a variety of materials, not just wood. When choosing between hand and power saws, consider the scope of your project and your comfort level with each tool.
To help you decide which saw might be best for your ornament crafting, here’s a quick comparison:
| Type of Saw | Best For | Pros | Cons |
|---|---|---|---|
| Hand Saw | Intricate cuts | Control, no power needed | Time-consuming |
| Coping Saw | Curved designs | Precision | Limited to thinner wood |
| Jigsaw | Versatile cuts | Speed and ease | Less control than hand saws |
| Band Saw | Complex designs | Handles various materials | Requires more setup |
Ultimately, the choice of saw depends on your specific needs and the complexity of your ornament designs. Remember, the right tool can not only enhance your crafting experience but also elevate the quality of your finished product. So, take your time, explore your options, and enjoy the process of creating stunning wooden ornaments that will bring joy to your holiday season!
Sanders
When it comes to crafting beautiful wooden ornaments, achieving a smooth and polished finish is essential, and that's where sandpaper and come into play. Using the right sanding tools not only enhances the appearance of your ornaments but also ensures they are comfortable to handle and visually appealing. There are several types of sanders available, each designed for specific tasks, and understanding their functions can significantly improve your crafting experience.
One of the most common types of sanders is the orbital sander. This handy tool moves in a circular motion, allowing for even sanding across surfaces. It's perfect for larger pieces or when you want to remove material quickly. If you're working on intricate designs or smaller ornaments, a detail sander is your best friend. With its pointed tip, it can reach tight corners and delicate areas that larger sanders might miss.
Another option is the belt sander, which is excellent for heavy material removal. However, due to its aggressive nature, it's best used for initial shaping rather than finishing touches. For those who prefer a more manual approach, traditional hand sanding with sandpaper can be just as effective, allowing for greater control over the sanding process.
Regardless of the type of sander you choose, remember these tips to ensure a flawless finish:
- Start with a coarse grit: Begin with a lower grit sandpaper (like 80 or 120) to remove rough spots and shape your ornament.
- Progress to finer grits: Gradually move to higher grits (like 220 or 320) for a smooth finish.
- Sand with the grain: Always sand in the direction of the wood grain to avoid scratches and achieve a polished look.
- Keep it clean: Regularly clean your sandpaper and the surface to remove dust and debris for optimal results.
Investing time in sanding your wooden ornaments will undoubtedly elevate their overall quality and appearance, making them a joy to display during the festive season. Whether you opt for power tools or manual sanding, the key is to be patient and meticulous. After all, the effort you put into the finishing touches will reflect in the beauty of your handmade creations.
Q: What type of sander is best for beginners?
A: For beginners, an orbital sander is often the most user-friendly option. It's versatile and easy to handle, making it ideal for various projects.
Q: How do I know which grit sandpaper to use?
A: Start with a lower grit (80-120) for heavy material removal and progress to higher grits (220-320) for finishing. The finer the grit, the smoother the finish.
Q: Can I use sandpaper instead of a sander?
A: Absolutely! Hand sanding can be effective, especially for small or intricate pieces. Just ensure you have a variety of grit options for the best results.
Q: How can I prevent sanding marks on my ornaments?
A: Always sand in the direction of the wood grain and use progressively finer grits to minimize the appearance of sanding marks.
Finishing Techniques
When it comes to crafting beautiful wooden ornaments, play a pivotal role in enhancing both the appearance and durability of your creations. Just like an artist adds the final strokes to a masterpiece, the right finishing touches can transform your wooden pieces from ordinary to extraordinary. Whether you're aiming for a rustic charm or a sleek, modern look, understanding various finishing techniques is essential.
One of the most popular methods is painting. This technique allows for endless creativity, enabling you to choose colors that match your holiday decor or personal style. You can go for a classic red and green palette, or perhaps something more contemporary like metallics or pastels. The beauty of painting is that you can experiment with different techniques such as brushwork, sponging, or even stenciling to achieve unique effects. For instance, sponging can create a textured look that adds depth, while stenciling can introduce intricate patterns to your ornaments.
Another effective technique is staining, which enhances the natural grain of the wood while adding a touch of color. Staining can give your ornaments a rich, warm tone that highlights the beauty of the wood. It’s a fantastic option if you want to maintain the natural look of the wood while still incorporating some color. Remember to apply a wood conditioner before staining to ensure even absorption and a smooth finish.
Once you've painted or stained your ornaments, it's crucial to seal them properly. Sealing not only protects your ornaments from scratches and moisture but also gives them a polished, professional appearance. You can choose between spray sealers or brush-on finishes, depending on your preference. Make sure to apply multiple thin coats for the best results, allowing each coat to dry completely before adding the next. This will ensure that your ornaments withstand the test of time and remain vibrant year after year.
For those looking to add a touch of elegance, consider using glitter or metallic finishes. These can be applied over paint or stain to create a shimmering effect that catches the light beautifully. Just a sprinkle of glitter can turn a simple ornament into a dazzling decoration that stands out on your Christmas tree. However, be cautious with the amount you use; sometimes less is more when it comes to embellishments.
In summary, mastering finishing techniques is essential for creating stunning wooden ornaments. By experimenting with painting, staining, and sealing, you can achieve a variety of looks that will impress your friends and family. So, roll up your sleeves and get creative—your beautifully finished ornaments await!
- What type of paint is best for wooden ornaments? Acrylic paint is highly recommended due to its quick drying time and vibrant colors.
- Can I use regular wood stain on my ornaments? Yes, regular wood stain works well, but make sure to test it on a scrap piece first to see how it looks.
- How do I seal my finished ornaments? Use a clear spray sealer or a brush-on polyurethane, applying multiple thin coats for best results.
- Is it necessary to sand the wood before finishing? Yes, sanding helps to create a smooth surface, allowing for better paint adhesion and a polished finish.
Design Ideas for Ornaments
When it comes to creating beautiful wooden ornaments, the sky's the limit with design possibilities! You can truly let your creativity shine as you explore various themes and styles that resonate with your personal taste and holiday spirit. Whether you're aiming for a classic look or something more contemporary, there are countless ways to make your ornaments stand out. Imagine your Christmas tree adorned with unique pieces that not only reflect your personality but also tell a story. Here are some inspiring ideas to get your creative juices flowing!
One of the most heartfelt ways to design your wooden ornaments is by incorporating personalized touches. Think about adding names, dates, or special messages that hold significance to you and your loved ones. For instance, you could create an ornament for each family member, inscribing their name along with the year. This not only makes for a lovely decoration but also serves as a cherished keepsake that can be passed down through generations. You could even consider making a family tree ornament that highlights your family lineage, adding a touch of nostalgia to your holiday decor.
Another exciting avenue to explore is nature-inspired designs. These ornaments can bring a rustic charm to your Christmas tree, making it feel like a cozy cabin in the woods. Think about using shapes like leaves, pinecones, or even animals that symbolize the winter season. You could create a series of ornaments featuring different woodland creatures, each one representing a member of your family. Imagine a cute little owl for your wise aunt or a playful squirrel for your energetic cousin! The possibilities are endless, and using natural textures can enhance the overall aesthetic of your decorations.
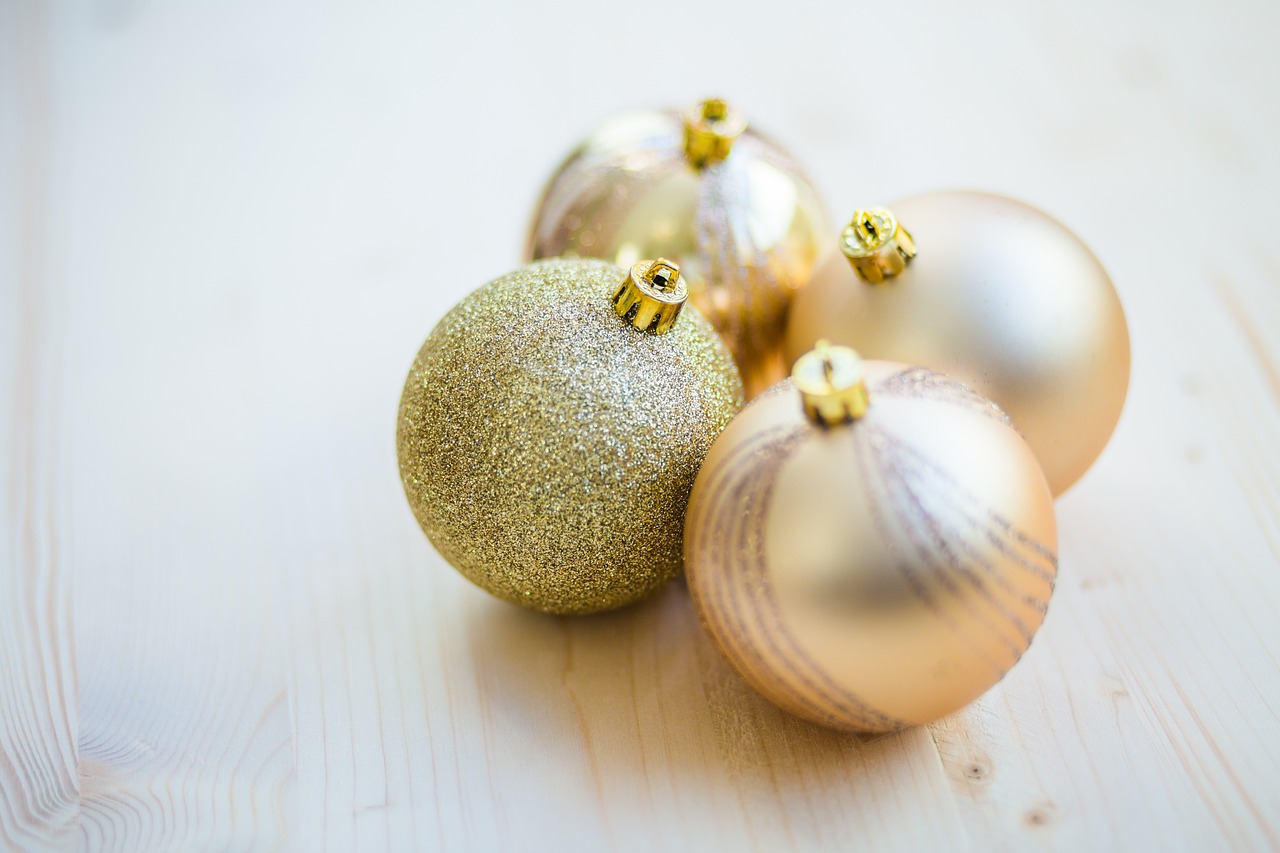
For those who love a bit of sparkle, consider incorporating elements like glitter, metallic paints, or even gemstones into your designs. A simple wooden star can transform into a dazzling ornament with the right embellishments. You can create a charming winter scene by painting a snowy landscape on a wooden disc and adding tiny glittery snowflakes for a magical touch. The contrast of natural wood with bright colors and shimmering details can create a stunning visual effect that captures the essence of the holiday season.
As you brainstorm your designs, don't forget about the shapes and sizes of your ornaments. Mixing different shapes—like hearts, circles, and stars—can add visual interest to your tree. You could even experiment with layering by creating multi-dimensional ornaments that stand out from the rest. Consider using a larger base piece and attaching smaller shapes to it, giving the illusion of depth and creativity. This layered approach not only adds dimension but also allows you to play with colors and textures in a unique way.
Lastly, think about how you can bring in cultural elements into your designs. If you have a particular heritage or tradition that you cherish, why not celebrate it through your ornaments? You could create ornaments that reflect traditional patterns, symbols, or colors associated with your culture. This not only adds a personal touch but also serves as a conversation starter when friends and family gather around your tree. Imagine the joy of sharing stories about each ornament and what it represents!
In conclusion, designing your wooden ornaments is a delightful journey that allows you to express your creativity and celebrate the season in your own unique way. Whether you choose to personalize them, draw inspiration from nature, or incorporate cultural elements, the key is to have fun and let your imagination run wild. Your Christmas tree will not only be beautifully decorated but will also be filled with memories and stories that make the holiday season even more special.
Q: What type of wood is best for making ornaments?
A: Softwoods like pine or cedar are great for beginners due to their ease of cutting and sanding. Hardwoods like oak or maple offer durability and a beautiful finish but may require more effort to work with.
Q: Can I use paint on my wooden ornaments?
A: Absolutely! Acrylic paints work well for wooden surfaces. You can also use wood stains for a more natural look or even metallic paints for a festive touch.
Q: How can I hang my wooden ornaments?
A: You can drill a small hole at the top of each ornament and thread a piece of twine or ribbon through it for hanging. Alternatively, you can use small hooks or clips for easy attachment to your tree.
Q: Are there any tips for sealing my ornaments?
A: Yes! After painting or staining, it’s a good idea to seal your ornaments with a clear varnish or polyurethane. This will protect your designs and enhance their longevity.
Personalized Ornaments
Personalized ornaments are not just decorations; they are cherished keepsakes that carry memories and stories. Imagine hanging a beautifully crafted wooden ornament on your tree, engraved with your child's name or a special date. It’s like having a little piece of history right there among the twinkling lights and festive garlands. Not only do these ornaments add a unique touch to your holiday decor, but they also make for thoughtful gifts that friends and family will treasure for years to come.
Creating personalized ornaments can be a fun and rewarding process. You can incorporate names, dates, or even special messages that resonate with the recipient. Here are a few creative ideas to inspire your designs:
- Engraved Names: Use a wood burner or engraving tool to carve names into the wood. This adds a personal touch that’s hard to beat.
- Special Dates: Consider adding important dates, like anniversaries or birth dates, to commemorate those special moments.
- Meaningful Quotes: A short, sweet quote that captures the spirit of the season can make your ornament even more special.
To make the process even more engaging, why not involve your family? Gather around the crafting table and let everyone contribute their ideas. Each person can design their own ornament, making it a fun family activity that results in a collection of unique pieces. Plus, seeing the kids’ creativity shine through can be a delightful experience!
When it comes to materials, consider using different types of wood for various effects. For instance, maple offers a light, clean finish, while walnut provides a rich, dark hue. You can also experiment with different shapes and sizes. Think outside the box! Instead of the traditional round ornament, try stars, hearts, or even custom shapes that reflect your family's interests.
Once you’ve crafted your personalized ornaments, don’t forget to add a finishing touch! A layer of sealant can protect your designs and enhance their durability, ensuring that they remain beautiful for many holiday seasons to come. And remember, the best part about personalized ornaments is that they can be made to reflect your unique style and story. So, unleash your creativity and let your imagination run wild!
Q: What materials do I need to create personalized wooden ornaments?
A: You will need wooden pieces, an engraving tool or wood burner, sandpaper, paint or stain, and a sealant for finishing.
Q: Can I use any type of wood for my ornaments?
A: While you can use many types of wood, softer woods like pine are easier to work with for beginners, while hardwoods like oak or maple provide a more polished look.
Q: How can I ensure my designs are unique?
A: Think about incorporating personal elements such as family traditions, hobbies, or inside jokes. You can also mix different painting techniques or embellishments to create a one-of-a-kind piece.

Nature-Inspired Designs
When it comes to creating wooden ornaments, nothing adds a touch of warmth and charm quite like . Imagine your Christmas tree adorned with beautiful pieces that echo the beauty of the great outdoors. These designs not only reflect the tranquility of nature but also bring a rustic elegance that can elevate your holiday decor. From intricate carvings of woodland creatures to simple shapes inspired by leaves and pinecones, the possibilities are endless.
One of the most delightful aspects of nature-inspired ornaments is how they can be customized to reflect your personal style and the natural elements around you. For instance, you might consider using shapes like stars, snowflakes, or even acorns. Each of these can be crafted from wood and then adorned with natural finishes or paints that mimic the colors found in nature. Think about incorporating colors like earthy greens, deep browns, and soft whites to evoke a sense of calm and connection to the environment.
Moreover, you can enhance your wooden ornaments by adding elements such as dried flowers, twigs, or small pinecones. These additions not only make your ornaments more visually appealing but also create a tactile experience that draws people in. For example, a wooden circle ornament can be decorated with a small cluster of pinecones and a sprig of evergreen, creating a delightful focal point that celebrates the season.
Another fantastic idea is to use woodburning techniques to create intricate designs that resemble tree bark or leaf patterns. This method allows for a level of detail that can truly make your ornaments stand out. You can even personalize each piece by adding initials or meaningful dates, transforming a simple ornament into a cherished keepsake.
As you embark on your crafting journey, remember that nature-inspired designs can also tell a story. Consider creating a series of ornaments that represent different aspects of nature, such as birds, flowers, and trees. Not only will this add variety to your tree, but it will also spark conversations about the beauty of the natural world and your love for it.
In conclusion, nature-inspired wooden ornaments are a beautiful way to celebrate the holiday season while honoring the environment. By incorporating natural elements, personal touches, and creative techniques, you can craft ornaments that are not only stunning but also meaningful. So grab your tools, let your imagination run wild, and create pieces that will bring joy and warmth to your home for years to come!
- What types of wood are best for nature-inspired ornaments?
Softwoods like pine and cedar are great choices due to their workability and natural beauty. - Can I use natural finishes on my ornaments?
Absolutely! Natural oils or water-based finishes can enhance the wood's appearance while keeping it eco-friendly. - How can I personalize my nature-inspired ornaments?
You can use woodburning tools to add names or dates, or even paint meaningful symbols that resonate with you. - Are there specific tools needed for crafting these designs?
Basic tools like saws, sanders, and woodburning pens will help you create beautiful nature-inspired ornaments.
Decorating Your Ornaments
Once your wooden ornaments are crafted, it’s time to unleash your creativity and decorate them to reflect your personal style. Decorating is where the magic truly happens, transforming a simple piece of wood into a stunning holiday decoration. You can think of it as dressing up for a party; just like you wouldn’t wear the same outfit every time, your ornaments deserve unique touches that make them stand out on your Christmas tree.
There are countless ways to embellish your wooden ornaments, and the options can be as varied as your imagination. One of the most popular methods is painting. You can opt for traditional holiday colors like red, green, and gold, or go for something more contemporary with cool blues and silvers. Painting techniques can range from simple brushwork to more intricate methods like sponging or stenciling. Each technique can create a different effect, so don’t hesitate to experiment! For instance, sponging can give your ornaments a soft, textured look, while stenciling allows for precise designs that can include snowflakes, stars, or even words that express your holiday spirit.
Another exciting way to enhance your ornaments is by adding embellishments. Think of ribbons, beads, glitter, and even small charms that can bring your designs to life. A simple wooden star can be transformed into a dazzling decoration with just a few carefully placed embellishments. For example, wrapping a shiny ribbon around the ornament can add a touch of elegance, while sprinkling some glitter can give it a festive sparkle. If you’re feeling particularly adventurous, consider using a combination of materials to create a mixed-media effect. This could involve layering paint, adding fabric, or even incorporating natural elements like dried flowers or leaves.
Don’t forget about the importance of sealing your decorated ornaments. Once you’ve achieved the perfect look, applying a clear sealant can protect your designs from wear and tear, especially if they’ll be displayed outdoors or in high-traffic areas. A good sealant not only preserves your artwork but also enhances the colors, making them pop even more. You can choose from various sealants, including spray finishes or brush-on options, depending on your preference.
Finally, remember that the process of decorating your ornaments should be enjoyable. Gather your family or friends, put on some holiday music, and turn this activity into a cherished tradition. As you create together, you’ll not only make beautiful decorations but also lasting memories. And who knows? You might even inspire your loved ones to start their own ornament-making traditions!
- What type of paint is best for wooden ornaments? Acrylic paint is a great choice because it adheres well to wood and comes in a wide range of colors. Make sure to use a sealant afterward for durability.
- Can I use hot glue for embellishments? Yes! Hot glue is perfect for attaching ribbons, beads, and other lightweight decorations to your ornaments.
- How do I hang my ornaments? You can drill a small hole at the top of the ornament and thread a piece of twine or ribbon through it, or attach a hook for easy hanging.

Painting Techniques
When it comes to adding a splash of color to your wooden ornaments, can truly transform your creations from simple to spectacular. Whether you're aiming for a classic, elegant look or a fun, whimsical vibe, the right painting method can help you achieve your desired style. Let's dive into some of the most effective painting techniques that can elevate your wooden ornaments and make them stand out on your Christmas tree.
One of the most popular methods is the traditional brushwork technique. This involves using a variety of brushes to apply paint directly onto the wood. You can choose from fine-tipped brushes for detailed designs or broader brushes for larger areas. The beauty of brushwork lies in its versatility; you can create everything from delicate patterns to bold strokes. For a more textured look, consider using a dry brush technique, where you lightly drag a nearly dry brush across the surface, allowing the wood grain to show through.
Another exciting technique is sponging. This method uses a sponge to apply paint, resulting in a soft, mottled effect that can add depth and dimension to your ornaments. You can layer different colors to create a unique blend that captures the essence of the season. Just dab the sponge in the paint and gently press it onto the wood, letting the colors mix naturally. It’s a fun way to experiment, and the results can be stunning!
If you're looking for something more precise, stenciling is an excellent option. This technique involves using a stencil to create intricate designs on your ornaments. Simply place the stencil on the wood, secure it, and apply paint over it with a brush or sponge. Once you remove the stencil, you'll reveal a beautifully defined pattern. This is a fantastic way to add personalized touches, such as holiday greetings or festive symbols, to your ornaments.
To ensure your painted ornaments last, you might want to consider sealing them after the paint has dried. A clear sealant can protect your artwork from scratches and fading, allowing your ornaments to be cherished for years to come. Just make sure to choose a sealant that is compatible with the type of paint you've used.
In summary, the world of painting techniques for wooden ornaments is vast and exciting. Whether you choose brushwork, sponging, or stenciling, each technique offers a unique way to express your creativity. So, grab your paints and brushes, and let your imagination run wild as you create stunning wooden ornaments that will bring joy to your holiday season!
- What type of paint is best for wooden ornaments? Acrylic paint is highly recommended for wooden ornaments due to its quick drying time, vibrant colors, and durability.
- Can I use spray paint on wooden ornaments? Yes, spray paint can be used, but it’s important to apply it in thin layers to avoid drips and ensure an even coat.
- Should I sand the wood before painting? Absolutely! Sanding the wood will create a smooth surface and help the paint adhere better, resulting in a more polished finish.
- How can I achieve a distressed look on my ornaments? You can achieve a distressed look by painting your ornament a base color, then lightly sanding the edges once it’s dry to reveal the wood underneath.

Embellishments and Accessories
Once you've crafted your beautiful wooden ornaments, the fun really begins with decorating them! can transform a simple ornament into a stunning piece of art that captures the spirit of the season. Think of your ornaments as a blank canvas; the right accessories can add layers of personality and charm. So, what can you use to elevate your creations?
One of the most popular choices for embellishing wooden ornaments is ribbons. Ribbons come in various colors, patterns, and textures, allowing you to customize your ornaments to match your holiday decor. You can use them to create bows, hang your ornaments, or even wrap them around the ornament itself for a more finished look. Consider using a mix of velvet, satin, and burlap ribbons for a delightful contrast.
Another exciting option is to incorporate beads into your designs. Beads can be strung together to create unique garlands or used individually to accentuate certain features of your ornaments. They can be made from wood, glass, or even acrylic, giving you a range of styles to choose from. For instance, using natural wooden beads can enhance a rustic theme, while shiny glass beads can add a touch of elegance.
Don't forget about the power of paint as an embellishment! Whether you choose to hand-paint intricate designs or use stencils for a more uniform look, paint can add depth and color to your ornaments. You might even consider using metallic paints to give your ornaments a shimmering effect that catches the light beautifully. Just imagine how stunning a gold or silver star ornament would look hanging on your tree!
For those who want to add a touch of nature, consider using natural elements such as pinecones, dried flowers, or twigs. These can be glued onto your ornaments for a rustic, earthy feel. You could create a woodland-themed ornament by attaching small pinecones and moss, giving your decor a cozy, cabin-like vibe. The beauty of using natural elements is that they not only look great but also connect your ornaments to the beauty of the outdoors.
Lastly, don't underestimate the impact of personal touches. Adding names, dates, or special messages can turn an ornament into a cherished keepsake. You can use wood burning tools to engrave messages or simply write them with permanent markers. This personal touch not only makes the ornament unique but also creates lasting memories for your family.
In summary, embellishing your wooden ornaments is an opportunity to express your creativity and style. With a variety of options like ribbons, beads, paint, natural elements, and personal touches, the sky's the limit! So gather your materials and let your imagination run wild as you create ornaments that will be treasured for years to come.
- What type of wood is best for crafting ornaments? - Basswood and pine are popular choices due to their softness and ease of carving.
- Can I use regular paint on wooden ornaments? - Yes, acrylic paints work well and dry quickly, making them ideal for ornament decoration.
- How can I hang my wooden ornaments? - You can use ribbons, twine, or even wire to create a loop for hanging.
- Is it safe to use natural elements on ornaments? - Yes, as long as they are properly dried and treated to prevent mold.

Displaying Your Ornaments
After all the hard work you've put into crafting and decorating your beautiful wooden ornaments, it’s time to showcase them! Displaying your ornaments not only highlights your creativity but also adds a personal touch to your holiday decor. Think of your ornaments as the stars of your Christmas show; they deserve a stage that enhances their beauty. So, how can you effectively display these charming creations? Let’s dive into some creative ideas that will make your ornaments shine.
First and foremost, consider your Christmas tree as the primary canvas for your ornaments. Strategically placing them on the tree can create a stunning visual impact. To achieve a balanced look, try to distribute your ornaments evenly throughout the tree. You can create a sense of depth by placing larger ornaments deeper into the branches while hanging smaller ones closer to the tips. This layering technique not only adds dimension but also draws the eye in, making your tree a focal point of your holiday decor.
But why stop at just the tree? There are numerous alternative display options that can add flair to your home. Here are a few creative ideas:
- Hooks and Hangers: Use decorative hooks to hang your ornaments in doorways or on walls. This method can create a festive atmosphere throughout your home.
- Garlands: String your ornaments along garlands or ribbons and drape them across mantels, staircases, or even windows. This adds a whimsical touch to your decor.
- Decorative Bowls: Place smaller ornaments in decorative bowls or glass cloches on tables or shelves. This not only showcases your craftsmanship but also adds an elegant touch to your interior design.
When it comes to displaying your ornaments, lighting plays a crucial role. Consider using fairy lights or spotlights to illuminate your ornaments, making them sparkle and shine. The right lighting can transform your display into a magical scene, captivating anyone who enters your home. You could even create a dedicated display area—perhaps a small table or a shelf—where your ornaments can be the center of attention.
Lastly, don’t forget to change things up from year to year. Rotating your ornaments or incorporating new designs can keep your holiday decor fresh and exciting. It’s like a surprise for your family and friends each Christmas! Remember, the goal is to create an inviting atmosphere that reflects your personality and the joy of the season. So, get creative and enjoy the process of displaying your beautiful wooden ornaments!
Q: How can I ensure my ornaments are safe while displayed?
A: To keep your ornaments safe, especially if you have pets or young children, consider placing delicate ornaments higher up on the tree or in less accessible areas. Using unbreakable materials for certain pieces can also help prevent accidents.
Q: What are some unique ways to personalize my ornament displays?
A: You can personalize your displays by incorporating family photos or handwritten notes alongside your ornaments. This adds a sentimental touch and makes your decorations even more special.
Q: Can I use my ornaments in non-holiday decor?
A: Absolutely! Many wooden ornaments can transition beautifully into year-round decor. Consider using them as part of a rustic centerpiece or hanging them in a child’s room for a whimsical touch.
Tree Placement Ideas
When it comes to showcasing your beautifully crafted wooden ornaments, placement on the Christmas tree can make all the difference. Imagine standing back, hot cocoa in hand, and admiring a tree where every ornament tells a story and shines with its own unique charm. The art of ornament placement is not just about aesthetics; it’s about creating a visual narrative that draws the eye and sparks joy. Here are some thoughtful strategies to help you maximize the beauty of your creations:
1. Balance is Key: Just like in a well-composed painting, balance plays an essential role in your tree's overall appearance. Distribute your ornaments evenly across the tree, ensuring that no particular section feels too heavy or sparse. For instance, if you have a cluster of larger ornaments on one side, consider placing a few smaller ones on the opposite side to create harmony. This balance can be achieved by stepping back and viewing the tree from different angles as you go.
2. Create Focal Points: Identify a few standout ornaments—perhaps a stunning hand-carved piece or a personalized ornament that holds sentimental value. Position these at eye level or in prominent spots to draw attention. You can use a tiered approach, placing larger ornaments lower on the tree and smaller ones higher up, which creates depth and visual interest. Think of your tree as a gallery where each ornament is a featured exhibit!
3. Layering and Depth: To add dimension, consider layering your ornaments. Hang some closer to the trunk of the tree and others toward the tips of the branches. This not only creates a sense of depth but also allows your wooden ornaments to catch the light in different ways, enhancing their natural beauty. For instance, if you have a beautiful wooden star, place it at the top, and let smaller ornaments cascade down like a waterfall, creating a stunning visual flow.
4. Use the Rule of Threes: A classic principle in design, the rule of threes suggests that groupings of three create a more visually appealing arrangement. Try clustering three ornaments of varying sizes or colors together in one area. This technique can be particularly effective with your nature-inspired designs, where you might group a wooden leaf, an animal figure, and a textured piece together to evoke a cohesive theme.
5. Incorporate Lights: Don’t forget about the magic of lights! Incorporating string lights can elevate your wooden ornaments even further. As you drape lights around the branches, pay attention to how they illuminate your ornaments. Consider using warm white lights for a cozy feel or colorful ones for a more festive vibe. The interplay of light and wood can create a mesmerizing effect, making your ornaments pop and shimmer.
Lastly, remember that your tree is a canvas for creativity and expression. Don’t hesitate to experiment with different placements until you find what feels right to you. After all, the holiday season is about joy, family, and the memories we create together. So, let your personality shine through your ornament arrangements, and most importantly, have fun!
Q: How can I prevent my ornaments from falling off the tree?
A: To ensure your ornaments stay securely in place, use sturdy hooks or ties. For heavier ornaments, consider using a wire or a stronger hook that can support their weight without bending.
Q: Can I mix different styles of ornaments?
A: Absolutely! Mixing styles can add character and charm to your tree. Just try to maintain a cohesive color palette or theme to keep the overall look harmonious.
Q: What’s the best way to store my wooden ornaments after the holidays?
A: Store your ornaments in a cool, dry place. Use tissue paper or bubble wrap to cushion them and prevent scratches. Consider using a dedicated ornament box to keep them organized and safe for next year!

Alternative Display Options
Once you've poured your heart and soul into crafting beautiful wooden ornaments, the next exciting step is showcasing them in a way that truly highlights their charm. While the Christmas tree is the traditional go-to, there are plenty of creative alternatives to consider that can add a unique touch to your holiday decor. Imagine transforming your living space into a winter wonderland, where every corner tells a story of craftsmanship and creativity!
One fantastic option is to use decorative bowls or trays. These can serve as eye-catching centerpieces on your dining table or coffee table. Simply arrange your ornaments within the bowl, mixing in some pinecones or faux snow for added texture. This not only brings a festive vibe to your home but also allows you to enjoy your creations up close!
Another innovative idea is to create a garland. Stringing your ornaments along a ribbon or twine can create a stunning display that can be hung over doorways, mantles, or even across windows. You can use a variety of materials to enhance the look, such as:
- Twinkling fairy lights to add a magical glow.
- Natural elements like dried orange slices or cinnamon sticks for a rustic feel.
- Seasonal greenery to create a fresh, vibrant look.
For those who love a bit of whimsy, consider using hooks or clips to hang your ornaments in unexpected places. Think about hanging them from the ceiling or attaching them to a decorative ladder. This not only saves space but also creates a playful atmosphere that invites curiosity.
Don't forget about the walls! You can create a gallery-style display by hanging your wooden ornaments in shadow boxes or frames. This allows you to treat your ornaments as works of art, showcasing their beauty while adding depth and interest to your walls. Additionally, using a variety of frame sizes can create a dynamic visual impact.
Lastly, if you're hosting a festive gathering, why not incorporate your ornaments into your table settings? Place them at each guest's seat as a charming favor, or use them as part of your table decor. This personal touch will surely impress your guests and make your holiday celebrations even more memorable.
In conclusion, the possibilities for displaying your handmade wooden ornaments are as limitless as your creativity. Whether you opt for a simple bowl arrangement or a whimsical garland, each choice allows you to express your unique style and spread holiday cheer throughout your home.
Q: How can I ensure my wooden ornaments last for years to come?
A: Proper sealing and storage are key. Use a clear sealant to protect them from moisture and dust, and store them in a cool, dry place when not in use.
Q: What types of wood are best for crafting ornaments?
A: Softwoods like pine or cedar are great for beginners due to their ease of cutting and shaping, while hardwoods like oak or maple provide durability and a beautiful finish.
Q: Can I use regular paint for decorating my ornaments?
A: Absolutely! Just make sure to use acrylic or water-based paints, as they adhere well to wood and dry quickly. For a more polished look, consider applying a clear coat after painting.
Q: How do I hang my ornaments if I don’t want to use hooks?
A: You can use ribbon or twine to create loops on top of your ornaments. This allows you to easily hang them from any surface without needing additional hardware.
Frequently Asked Questions
- What type of wood is best for crafting ornaments?
Choosing the right wood is essential for creating durable and beautiful ornaments. Softwoods like pine and cedar are popular due to their ease of cutting and sanding. However, hardwoods like oak or maple offer a more polished finish and durability. Ultimately, it depends on your design and the look you want to achieve!
- Do I need special tools to make wooden ornaments?
While you can get started with basic tools, having specific crafting tools can make your life easier and your ornaments more professional. Essential tools include saws for cutting, sanders for smoothing, and brushes for painting. Investing in quality tools can elevate your crafting experience!
- How can I personalize my wooden ornaments?
Personalizing your ornaments can add a special touch. You can engrave names or dates using a wood burner, paint them on, or even use decals. Think of it as adding a unique signature to your work that makes it even more meaningful!
- What are some decorating techniques for wooden ornaments?
You can unleash your creativity with various decorating techniques! Painting is a classic choice, but you can also try sponging for texture or stenciling for intricate designs. Adding embellishments like ribbons, beads, or glitter can really make your ornaments pop!
- How should I display my finished wooden ornaments?
Displaying your ornaments can be as creative as making them! You can hang them on your Christmas tree, use hooks on walls, or arrange them in decorative bowls. Think of your ornaments as art pieces that deserve a spotlight in your home!
- Can I use leftover wood pieces for crafting?
Absolutely! Using leftover wood pieces is a fantastic way to be resourceful and eco-friendly. Smaller scraps can be transformed into mini ornaments or used for embellishments. It’s a win-win for your creativity and the environment!
- What finishing techniques should I consider?
Finishing techniques are crucial for enhancing the look and longevity of your ornaments. You can opt for staining to bring out the wood's natural grain or sealing to protect your work. Experimenting with different finishes can lead to stunning results!


