Woodworking Basics: Building Your First Birdhouse
Are you ready to dive into the wonderful world of woodworking? If you’ve ever looked at a birdhouse and thought, “I could make that,” then you’re in the right place! Building your first birdhouse is not just a fun project; it’s a chance to connect with nature and unleash your creativity. Imagine watching birds flit in and out of a cozy home that you crafted with your own hands. How satisfying is that?
In this article, we’ll cover essential woodworking techniques, the tools you’ll need, and step-by-step instructions for crafting your own birdhouse. Whether you’re a complete novice or someone who has dabbled in DIY projects, this guide is designed to make your experience smooth and enjoyable. So, grab your tools, roll up your sleeves, and let’s get started on this exciting woodworking adventure!
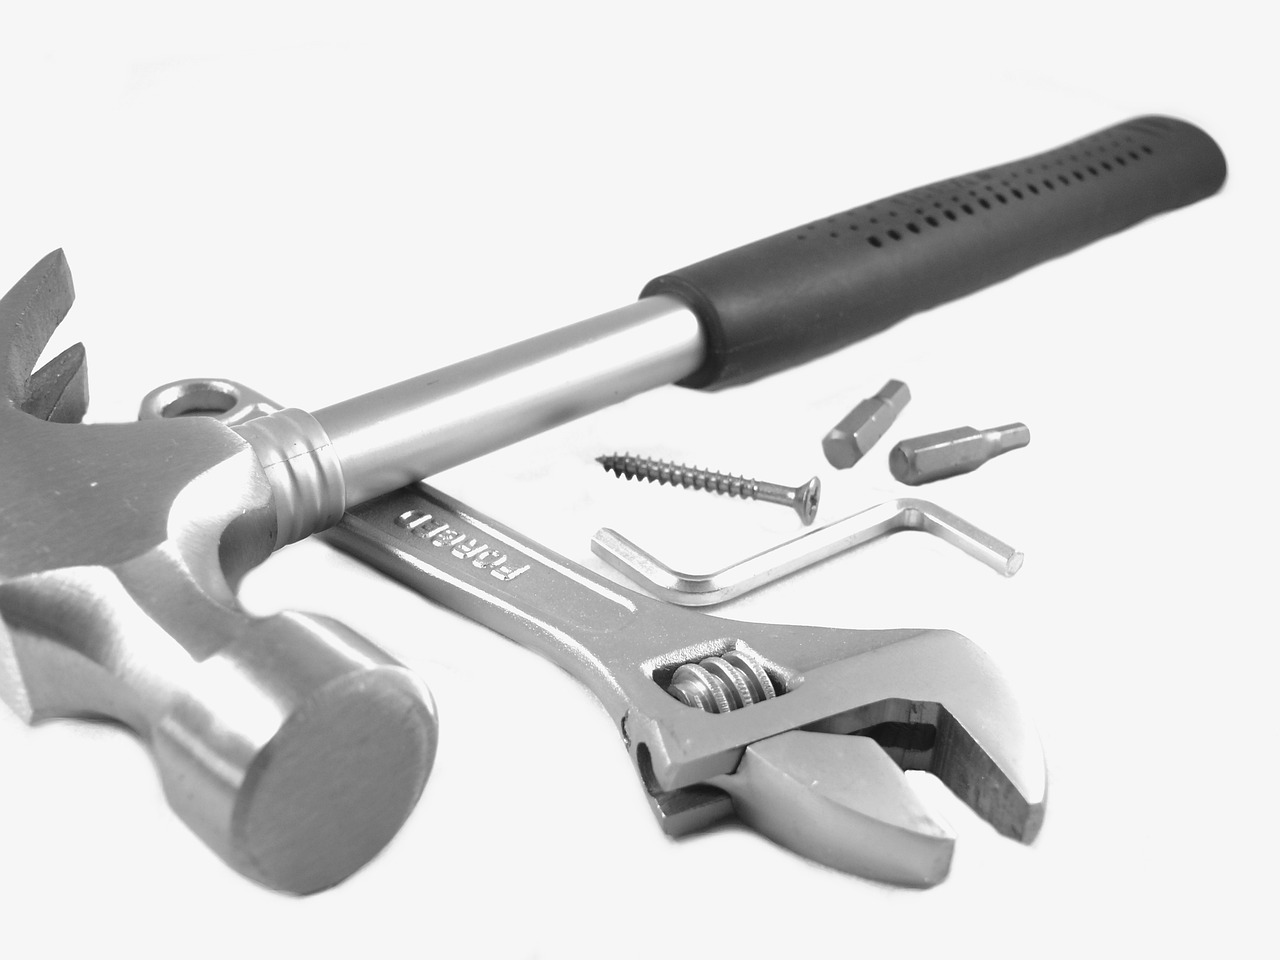
Before you start hammering away, it’s crucial to understand the basic tools required for woodworking. Having the right tools can make your birdhouse-building experience much smoother and more enjoyable. Here’s a quick rundown of the must-have tools:
- Measuring Tape: Accurate measurements are the backbone of any woodworking project.
- Saw: A handsaw or power saw will help you cut wood to the desired dimensions.
- Drill: Essential for creating holes for nails and screws, as well as ventilation for the birds.
- Hammer: A trusty hammer is necessary for joining pieces together.
- Screwdriver: Useful for securing components with screws instead of nails.
- Sandpaper: To smooth out rough edges and give your birdhouse a polished finish.
With these tools at your disposal, you’ll be well-equipped to tackle your birdhouse project. Remember, investing in quality tools can make a significant difference in the outcome of your work.
Now that you have your tools ready, let’s talk about the wood! Selecting the appropriate type of wood is vital for both durability and aesthetics. Not all wood is created equal, and different types have unique qualities that can affect your birdhouse’s performance and appearance. Here, we explore the best wood options for birdhouses, considering factors like weather resistance and ease of work.
When it comes to woodworking, you’ll often hear the terms softwoods and hardwoods. But what do they really mean? Softwoods come from coniferous trees (think pine, spruce, and cedar), while hardwoods come from deciduous trees (like oak and maple). Softwoods are generally easier to work with, making them ideal for beginners. They’re also lighter and more affordable, which is a huge plus when starting your first project.
Let’s take a closer look at some popular softwood options:
- Pine: Affordable and easy to find, pine is a great choice for beginners. It’s lightweight and can be painted or stained easily.
- Cedar: Known for its natural resistance to rot and insects, cedar is perfect for outdoor projects. Plus, it has a beautiful grain that adds character to your birdhouse.
While hardwoods like oak and maple are known for their durability and strength, they can be more challenging to work with. If you’re looking for a long-lasting birdhouse and have some woodworking experience, hardwoods might be worth considering. However, keep in mind that they are often heavier and more expensive than softwoods.
Finishing your birdhouse is essential for protection against the elements and to enhance its visual appeal. There are several finishing techniques you can use:
- Staining: This adds color while allowing the natural wood grain to show through.
- Sealing: A clear sealer protects the wood from moisture and UV rays.
- Painting: If you want to add a splash of color, painting is a fun option!
Choosing the right finish will help ensure your birdhouse stands the test of time, allowing you to enjoy watching the birds for years to come.
Ready to build? In the next section, we’ll provide detailed, easy-to-follow plans for constructing your birdhouse. We’ll cover everything from measurements and materials needed to a comprehensive guide for each construction phase.
Proper measurement and cutting techniques are fundamental to successful woodworking. Here’s how to accurately measure and cut your wood pieces for the birdhouse:
First, gather your materials and tools. Measure each piece carefully, marking the dimensions clearly on the wood. Use a straight edge to guide your saw for clean cuts. Remember, measure twice, cut once!
Once your pieces are cut, it’s time to assemble the birdhouse. Start by joining the base to the sides, ensuring everything is level. Use screws or nails for a secure fit, and don’t forget to add ventilation holes if your design requires them. With patience and attention to detail, you’ll have a sturdy birdhouse ready for its feathered inhabitants!
Q: Can I use treated wood for my birdhouse?
A: It’s best to avoid treated wood as the chemicals can be harmful to birds. Stick to untreated softwoods like cedar or pine.
Q: What size should the entrance hole be?
A: The size of the entrance hole depends on the type of birds you want to attract. Generally, a 1.5-inch diameter hole is suitable for small birds like chickadees.
Q: How can I clean my birdhouse?
A: It’s important to clean your birdhouse at the end of each nesting season. Simply remove old nesting materials and scrub the interior with a mild soap solution.
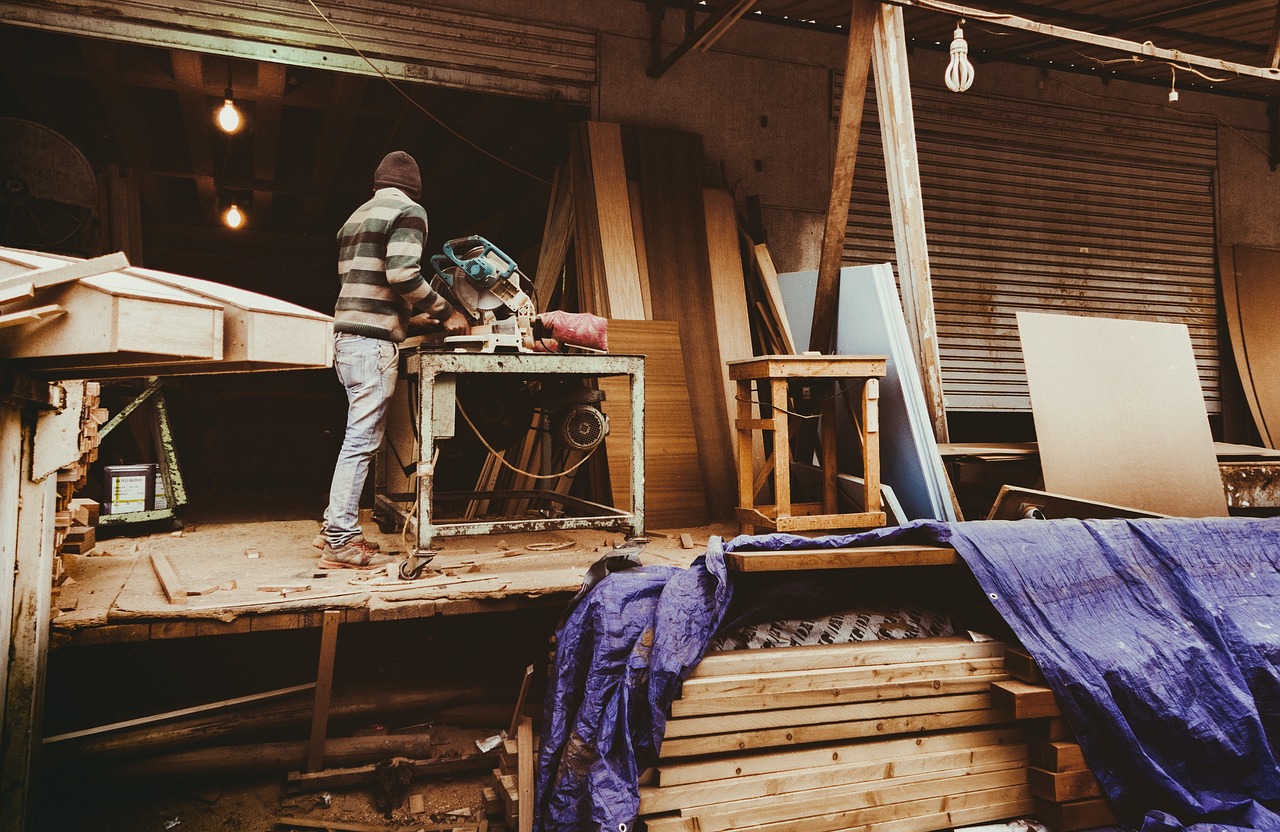
Essential Tools for Woodworking
This article covers essential woodworking techniques, tools needed, and step-by-step instructions for crafting your first birdhouse, making it a perfect project for beginners and nature enthusiasts alike.
When it comes to woodworking, having the right tools is like having a good toolbox of magic wands at your disposal. Each tool plays a crucial role in transforming your vision into reality, especially when you're building something as delightful as a birdhouse. Imagine trying to bake a cake without a mixer or a pan; the same principle applies to woodworking. So, let’s dive into the must-have tools that will make your birdhouse-building experience smoother and more enjoyable.
First and foremost, you'll need a measuring tape. Precision is key in woodworking, and a measuring tape helps ensure that your cuts are accurate. Pair this with a square to check the angles and make sure your pieces fit together perfectly. Think of it as your trusty sidekick, always helping you keep things in line.
Next up is the saw. A good handsaw or a power saw will work wonders for cutting your wood pieces. If you're new to woodworking, a handsaw can be a great choice to start with, as it gives you more control. However, if you want to speed things up, consider investing in a power saw. Just remember, safety first! Always wear protective gear when using saws.
Another essential tool is the drill. This handy device allows you to make holes for screws, which will hold your birdhouse together. A cordless drill can be particularly useful, giving you the freedom to move around without being tethered to a power outlet.
Don’t forget about the screwdriver. While a drill is fantastic for making holes, a screwdriver will help you tighten screws securely. It's like the finishing touch that holds everything together, ensuring your birdhouse withstands the test of time and weather.
Lastly, a reliable sandpaper or a sanding block is essential for smoothing the edges of your wood pieces. Nobody wants a birdhouse with sharp edges! Sanding not only makes the wood safer for the little birds but also enhances the overall appearance of your project. Think of it as giving your birdhouse a spa day, preparing it for its new feathered residents.
To summarize, here’s a quick look at the essential tools you'll need:
| Tool | Purpose |
|---|---|
| Measuring Tape | For accurate measurements |
| Square | To check angles |
| Saw | For cutting wood |
| Drill | To make holes for screws |
| Screwdriver | To tighten screws |
| Sandpaper | For smoothing edges |
With these tools in hand, you're well on your way to crafting a beautiful birdhouse that will attract feathered friends to your yard. Remember, the right tools can make all the difference, turning a challenging task into a rewarding experience. So gather your tools, roll up your sleeves, and let's get started on this exciting woodworking adventure!
- What is the best wood for building a birdhouse? Softwoods like cedar and pine are excellent choices due to their weather resistance and ease of work.
- Do I need to treat the wood before building? Yes, using a sealant can help protect the wood from the elements.
- How long does it take to build a birdhouse? Depending on your skill level, it can take anywhere from a few hours to a couple of days.
- What types of birds will use my birdhouse? It depends on the design, but common visitors include bluebirds, wrens, and chickadees.
Choosing the Right Wood
When it comes to building your first birdhouse, one of the most critical decisions you'll make is . The wood you select not only affects the birdhouse's durability and aesthetic appeal but also influences how well it withstands the elements. Imagine your birdhouse as a cozy little home for feathered friends; you wouldn't want it to fall apart after a few rainy days, right? So, let’s dive into the world of wood selection, exploring the best options that balance weather resistance and ease of work.
First off, consider the environment where your birdhouse will reside. If it's going to be exposed to harsh weather conditions, you'll want to choose a wood that can endure moisture, sun, and temperature fluctuations. For many beginners, softwoods like pine and cedar are excellent choices due to their availability and workability. These woods are lightweight, making them easier to cut and shape, which is a huge plus when you're just starting out.
However, if you're looking for something that can stand the test of time, you might want to consider hardwoods. While they can be more challenging to work with, the durability they offer can be worth the extra effort. Hardwoods like oak and maple are incredibly sturdy, but they can be heavier and may require more advanced tools to cut and shape. It's like choosing between a comfy sofa and a solid oak chair; both have their merits, but your needs and skills dictate the best choice.
Here’s a quick comparison of the two types of wood:
| Type of Wood | Durability | Workability | Cost |
|---|---|---|---|
| Softwoods (e.g., Pine, Cedar) | Moderate | Easy | Affordable |
| Hardwoods (e.g., Oak, Maple) | High | More difficult | Expensive |
In summary, the choice between softwood and hardwood boils down to your specific needs and skill level. If you're eager to get started and want something that’s easy to work with, softwoods are your best bet. But if you’re committed to creating a birdhouse that will last for years, investing in hardwoods might be a wise decision.
Ultimately, the wood you choose is just one piece of the puzzle. Remember to consider factors like finishing techniques and the overall design of your birdhouse. By putting thought into your wood selection, you're already on your way to crafting a beautiful and functional home for your avian visitors.
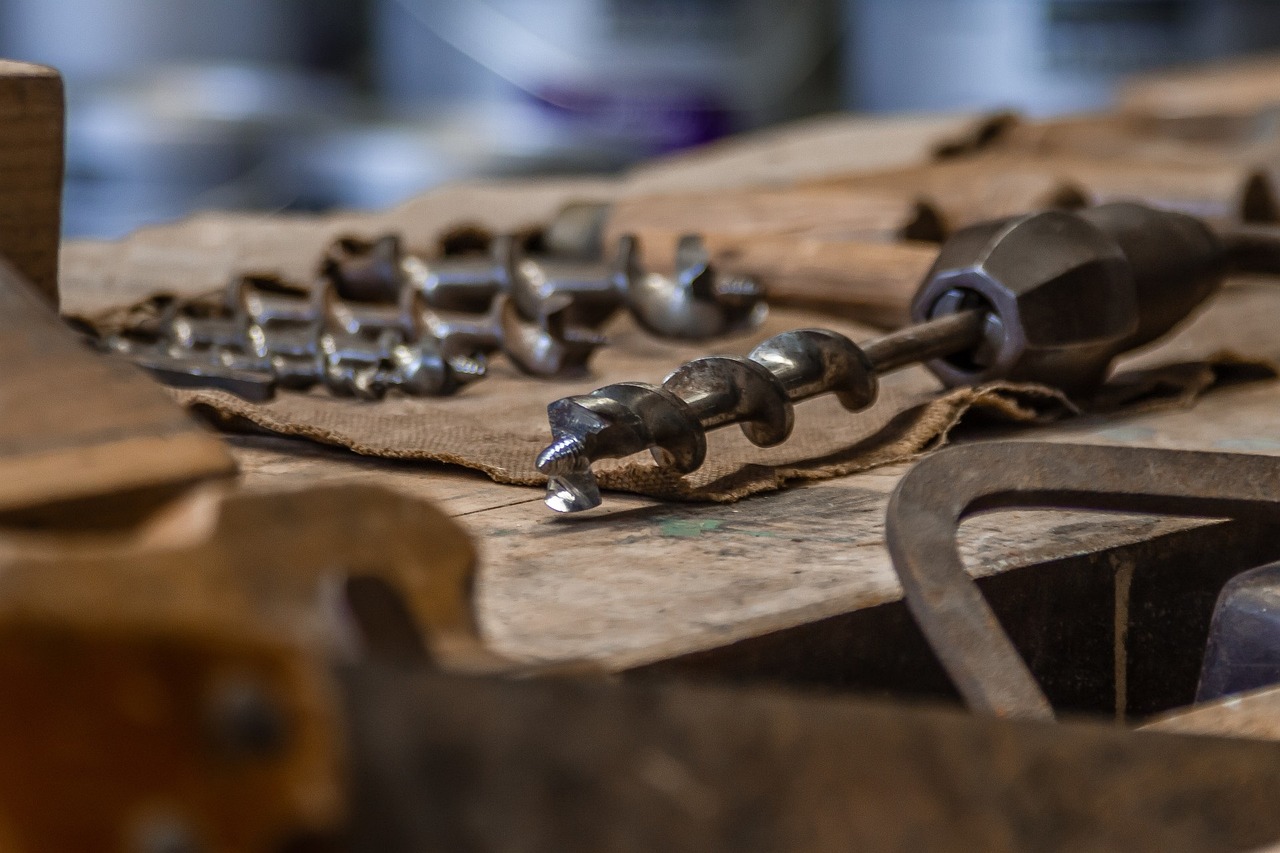
Softwoods vs. Hardwoods
When it comes to woodworking, particularly for projects like birdhouses, understanding the differences between softwoods and hardwoods is essential. You might be wondering, what’s the big deal? Well, it’s all about the characteristics of the wood and how they affect your project. Softwoods, which come from coniferous trees like pine and cedar, are generally easier to work with. They’re lightweight, cut easily, and are often more affordable. This makes them a fantastic choice for beginners who are just getting their feet wet in woodworking.
On the other hand, hardwoods come from deciduous trees such as oak and maple. They are typically denser and more durable, which can be beneficial for long-lasting projects. However, this density can also make them more challenging to work with, requiring sharper tools and more effort during cutting and shaping. If you’re looking for a birdhouse that will withstand the elements for years to come, hardwoods might seem appealing. But keep in mind that they can be pricier and may require more skill to handle properly.
To give you a clearer picture, here’s a quick comparison:
| Feature | Softwoods | Hardwoods |
|---|---|---|
| Weight | Lightweight | Heavy |
| Cost | Generally cheaper | Typically more expensive |
| Workability | Easy to cut and shape | Requires more skill and effort |
| Durability | Less durable | More durable |
Ultimately, the choice between softwoods and hardwoods comes down to what you’re aiming to achieve with your birdhouse. If you’re a beginner looking for a fun and simple project, softwoods are your best bet. They’re forgiving and allow for a smoother learning curve. But if you’re feeling adventurous and want to create a birdhouse that will last for generations, consider using hardwoods, keeping in mind the extra effort and cost involved.
- Can I use treated wood for my birdhouse? - While treated wood is durable, the chemicals used in treatment can be harmful to birds, so it’s best to avoid it.
- What is the best wood for outdoor use? - Cedar and redwood are excellent choices due to their natural resistance to decay and insects.
- How can I finish my birdhouse? - Consider using non-toxic stains or paints to protect your birdhouse without harming the birds.
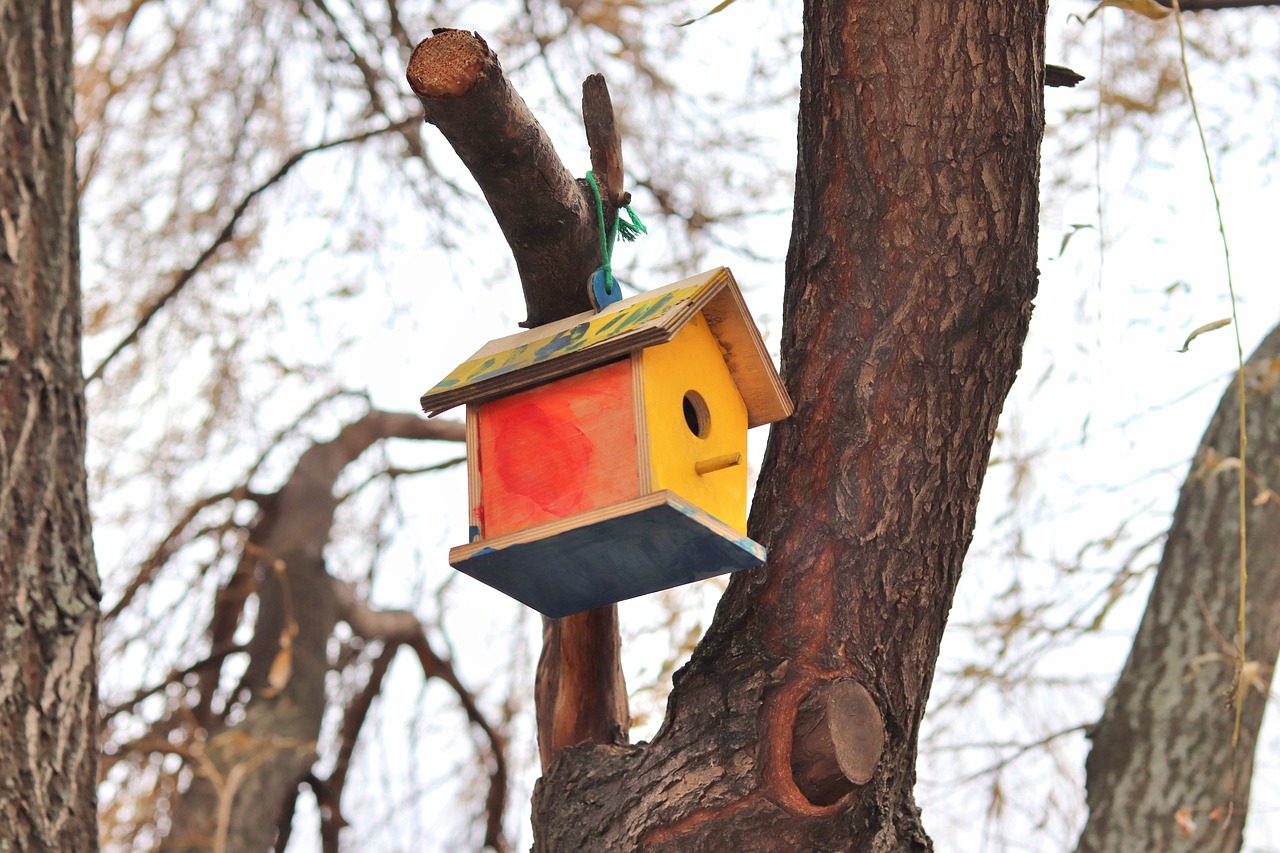
Popular Softwood Choices
When it comes to building a birdhouse, choosing the right type of wood is crucial for both durability and aesthetics. Softwoods are often the go-to choice for many beginners, and for good reason! They are generally easier to work with and more affordable than hardwoods. Two of the most popular softwood choices for birdhouses are pine and cedar. Let’s dive deeper into why these woods are favored by many DIY enthusiasts.
Pine is widely available and known for its light weight, making it a breeze to cut and assemble. It’s also quite affordable, which is a big plus for beginners who are just getting started in woodworking. One of the best things about pine is its versatility; you can easily paint or stain it to match your garden decor. However, it's important to note that pine is less resistant to the elements compared to other woods, so applying a good sealant is essential to prolong its life outdoors.
On the other hand, cedar is often considered the gold standard for outdoor projects. Its natural oils make it highly resistant to rot and insect damage, which is a significant advantage for a birdhouse that will be exposed to various weather conditions. Cedar also has a beautiful, natural aroma and a rich color that many people find appealing. While it may be a bit pricier than pine, the durability and aesthetic appeal it provides can make it worth the investment. Plus, who wouldn’t want a charming birdhouse that complements their backyard?
In summary, both pine and cedar have their unique benefits. If you're looking for something budget-friendly and easy to work with, pine is your best bet. However, if you're aiming for longevity and natural beauty, cedar is the way to go. Either choice can lead to a stunning birdhouse that not only attracts feathered friends but also enhances your outdoor space.
- What type of wood is best for a birdhouse? While both pine and cedar are excellent choices, cedar is generally preferred for its durability and resistance to rot.
- How can I protect my birdhouse from the elements? Applying a high-quality sealant or paint can help protect the wood from moisture and UV damage.
- Can I use treated wood for my birdhouse? It’s best to avoid treated wood as it may contain chemicals that are harmful to birds.
Hardwood Considerations
When it comes to building your first birdhouse, hardwoods can be both a blessing and a challenge. Unlike softwoods, hardwoods are denser and often more durable, making them an attractive choice for projects that require longevity. However, they can also be more difficult to work with, especially for beginners. It's essential to weigh the pros and cons before diving into your woodworking adventure.
One of the most significant advantages of using hardwoods like oak and maple is their resistance to weathering. These woods can endure the elements better than many softwoods, which may rot or warp over time. This durability means that a birdhouse made from hardwood can provide a safe haven for feathered friends for many seasons to come. However, the trade-off is that hardwoods tend to be heavier and more challenging to cut and shape, requiring more specialized tools and techniques.
Another consideration is the cost. Hardwoods are generally more expensive than their softwood counterparts. If you're just starting out, you might want to consider whether the investment is worth it for your first birdhouse. While the aesthetic appeal of hardwoods is undeniable, with beautiful grains and rich colors, it’s essential to ask yourself: Are you ready to commit to the extra effort and expense?
For those who are keen on using hardwoods, here are a few things to keep in mind:
- Workability: Hardwoods can require sharper tools and more effort to cut. Make sure you have the right saws and drills to handle the task.
- Finishing: Hardwoods often take stain and finish differently than softwoods. Be prepared to experiment a little to achieve the look you want.
- Weight: The density of hardwoods means they can add significant weight to your birdhouse. Ensure that your design accounts for this, especially if you plan to hang it.
Ultimately, choosing hardwoods for your birdhouse can yield stunning results, but it requires careful consideration and preparation. If you’re up for the challenge, the reward of a beautifully crafted birdhouse that stands the test of time is well worth the effort. Just remember, patience and practice are key when working with these resilient materials!
Q: Can I use any type of wood for my birdhouse?
A: While you can technically use any type of wood, it's best to choose weather-resistant options. Softwoods like cedar and pine are popular for beginners, while hardwoods offer durability.
Q: How do I know if my birdhouse is suitable for birds?
A: Ensure that the dimensions and entrance hole size are appropriate for the species you want to attract. Research the specific needs of local birds to create a welcoming environment.
Q: What finishes are safe for birdhouses?
A: Use non-toxic stains and paints. Avoid chemicals that can be harmful to birds. Natural oils or water-based products are often safer choices.
Wood Finishing Techniques
Finishing your birdhouse is not just about making it look good; it's also about protecting it from the elements. Imagine spending hours crafting a beautiful birdhouse only to have it succumb to rain, sun, or pests. That’s where finishing techniques come into play. These techniques enhance the visual appeal of your birdhouse while providing a protective barrier against moisture and UV rays.
There are several methods to finish your birdhouse, each offering unique benefits. Here are the most popular techniques:
- Staining: This technique allows the natural grain of the wood to shine through while adding color. Stains come in various shades, so you can choose one that complements your garden or backyard. Remember to select a stain that is specifically designed for outdoor use to ensure longevity.
- Sealing: After staining, applying a sealant is crucial. Sealants create a waterproof layer that protects the wood from moisture. Look for a sealant that is non-toxic and safe for birds, ensuring that your feathered friends are not harmed.
- Painting: If you want to add a splash of color to your birdhouse, painting is a great option. Use exterior-grade paint for durability. However, avoid dark colors as they can heat up excessively in the sun, which might be uncomfortable for the birds.
When choosing a finishing technique, consider the type of wood you are using and the climate in your area. For instance, if you live in a region with heavy rainfall, sealing your birdhouse is non-negotiable. On the other hand, if you prefer a more natural look, staining might be the way to go.
It’s also worth mentioning that proper preparation is key to a successful finish. Before applying any product, ensure that the wood surface is clean and sanded. This not only helps the finish adhere better but also provides a smoother appearance. You can use fine-grit sandpaper to achieve that perfect surface.
After applying your chosen finishing technique, allow sufficient drying time. Rushing this process can lead to unsightly drips and uneven coverage. Patience is essential here; after all, you want your birdhouse to be a beautiful addition to your garden, not an eyesore!
Lastly, remember that maintenance is part of the finishing process. Regularly check your birdhouse for any signs of wear and tear. A quick touch-up every season can keep your birdhouse looking fresh and inviting for your avian visitors.
Q: How often should I refinish my birdhouse?
A: It depends on your local weather conditions, but generally, refinishing every 1-2 years is a good practice.
Q: Can I use indoor paint for my birdhouse?
A: No, indoor paints are not designed to withstand outdoor elements. Always use exterior-grade products for outdoor projects.
Q: Is there a specific type of stain that is best for birdhouses?
A: Look for water-based, non-toxic stains that are safe for wildlife. Avoid stains with harmful chemicals.
Step-by-Step Birdhouse Plans
Building your first birdhouse can be a delightful experience, especially when you follow a structured plan. Not only does it provide a cozy home for our feathered friends, but it also allows you to flex your creative muscles. Let's break down the process into manageable steps, ensuring you create a birdhouse that is both functional and aesthetically pleasing.
Before diving into construction, gather all your materials and tools. Here’s a quick checklist of what you’ll need:
- Wood (preferably cedar or pine)
- Wood screws or nails
- Wood glue
- Sandpaper
- Paint or wood stain (optional)
- Measuring tape
- Saw (hand saw or power saw)
- Drill
- Safety goggles
Now, let’s get into the nitty-gritty of the birdhouse plans. The basic dimensions for a simple birdhouse are as follows:
| Part | Dimensions (inches) |
|---|---|
| Base | 6 x 6 |
| Sides (2 pieces) | 6 x 8 |
| Front | 6 x 8 |
| Back | 6 x 10 |
| Roof (2 pieces) | 7 x 7 |
With your materials ready and dimensions set, it’s time to start measuring and cutting. Measure each piece carefully, ensuring accuracy, as this will affect the overall look and stability of your birdhouse. Use a saw to cut the wood according to the dimensions listed above. After cutting, sand the edges to prevent any splinters that could harm the birds.
Once you have all your pieces cut and smoothed out, it’s time to assemble them. Start by attaching the sides to the base using wood screws or nails, ensuring they are flush with the edges. Next, attach the front piece, followed by the back. The back piece should be taller than the front to create a sloped roof, which is essential for rain runoff.
After the walls are up, it’s time to add the roof. Position the two roof pieces so they meet at the top, forming a peak. Secure them in place using screws or nails. Once the assembly is complete, double-check for any loose joints and reinforce them if necessary. Your birdhouse should now resemble a quaint little cottage, ready for its new inhabitants!
Before placing your birdhouse outdoors, consider applying a protective finish. This can be a coat of sealant, paint, or stain, which not only enhances the beauty of your birdhouse but also protects it from the elements. Remember to choose non-toxic finishes, as birds are sensitive to chemicals.
Finally, find a suitable location to hang or mount your birdhouse. Look for a spot that is sheltered from harsh weather and predators, ideally facing away from the wind. By following these steps, you’ll not only create a beautiful birdhouse but also contribute to the local wildlife, providing a safe haven for birds.
Q: What type of wood is best for birdhouses?
A: Softwoods like cedar and pine are excellent choices due to their durability and ease of work. They also resist decay, making them ideal for outdoor projects.
Q: How can I ensure my birdhouse is safe for birds?
A: Use non-toxic materials and finishes, and ensure there are no sharp edges. Ventilation holes and drainage holes are also important for the health of the birds.
Q: What is the best location to place my birdhouse?
A: Look for a spot that is sheltered from strong winds and direct sunlight. Ideally, it should be mounted at least 5-10 feet off the ground.
Measuring and Cutting Wood
When it comes to woodworking, are the cornerstones of a successful project. Think of it as the foundation of a house; if it's not solid, everything built on top will be shaky. To kick things off, grab your measuring tape, a pencil, and a square. These tools will be your best friends in ensuring your measurements are accurate. Remember, "measure twice, cut once" is not just a catchy phrase; it's a golden rule in woodworking!
First things first, you'll want to gather your materials. Start by laying out your wood pieces. It’s essential to have a clear workspace where you can see everything you’re working with. This helps avoid any mix-ups and keeps your mind focused on the task at hand. Now, let’s talk about the actual measuring. Use your measuring tape to determine the lengths needed for each section of your birdhouse, such as the base, walls, and roof. Mark these measurements clearly with a pencil—don’t be shy about making bold lines, as they’ll guide your cuts later.
Once you’ve got your measurements down, it’s time to cut! Here’s where the fun begins. Depending on the tools you have available, you might use a handsaw, jigsaw, or even a circular saw. Each tool has its strengths; for instance, a jigsaw is great for making curved cuts, while a circular saw excels at straight cuts. Make sure to wear safety goggles to protect your eyes from wood shavings and dust.
Before you dive into cutting, double-check your measurements once more. It’s all about precision! When cutting, keep your hands clear of the blade and let the saw do the work. As you cut, maintain a steady hand and a firm grip on the wood. After you’ve cut your pieces, take a moment to sand the edges. This step not only smooths out any rough spots but also prevents splinters, making your birdhouse safe for its feathered inhabitants.
Here’s a quick reference table to help you understand the common wood dimensions you might need for your birdhouse:
| Part of Birdhouse | Recommended Dimensions |
|---|---|
| Base | 6” x 6” |
| Side Walls | 6” x 8” (cut two) |
| Front Wall | 6” x 10” (with a hole for the entrance) |
| Back Wall | 6” x 10” |
| Roof | 7” x 7” (cut two) |
Following these steps will set you up for success in building your birdhouse. Remember, practice makes perfect! So, don’t be discouraged if your first cuts aren’t flawless. Each project is a learning experience, and soon enough, you’ll be measuring and cutting like a pro.
Q: What tools do I need for measuring and cutting wood?
A: Essential tools include a measuring tape, a square, a pencil for marking, and a saw (handsaw, jigsaw, or circular saw) for cutting.
Q: How do I ensure my measurements are accurate?
A: Always measure twice before cutting. Use a square to ensure your lines are straight and your cuts are accurate.
Q: What should I do if I make a mistake while cutting?
A: Don’t panic! You can always adjust your cuts or use wood filler for minor mistakes. Each error is a chance to learn!

Assembling the Birdhouse
Now that you have all your pieces cut and ready, it’s time to dive into the exciting part of the project: assembling your birdhouse. This is where your vision starts to take shape, and it’s incredibly satisfying to see all your hard work come together. Before you start, make sure you have a clean workspace and all your tools within reach. You’ll need wood glue, screws, and a screwdriver for this part. Having everything handy will save you time and keep the momentum going.
First, let’s talk about the base. Start by laying the bottom piece of the birdhouse flat on your work surface. This will be the foundation for the entire structure. Apply a generous amount of wood glue to the edges of the side panels, then position them upright against the base. It’s important to ensure that they are aligned properly. You can use clamps to hold them in place while you secure them with screws. This step is crucial because a sturdy base will provide the stability your birdhouse needs.
Next, attach the back panel. Apply glue along the edges where the back meets the base and the side panels. Again, use screws to fasten it securely. This is where you might start to see your birdhouse taking on a real shape! Once the back is in place, it’s time to add the front panel. Don’t forget to drill a hole for the entrance if you haven’t done so already. The size of the entrance will depend on the type of birds you want to attract. A diameter of about 1.5 inches is usually sufficient for small birds like bluebirds or chickadees.
After the front panel is secured, it’s time to attach the roof. Depending on your design, you might have two sloping panels or a single flat piece. If you’re using two panels, position them at an angle to create a peak. Apply glue and secure them with screws, ensuring they sit snugly against the top edges of the side and back panels. This part of the assembly is essential for keeping your birdhouse dry and protected from the elements.
Once the roof is on, take a moment to admire your work! But don’t get too comfortable just yet. We still need to add a few finishing touches. Consider adding drainage holes at the bottom of the birdhouse to prevent any water from pooling inside. Additionally, you might want to drill a few ventilation holes near the top to ensure your feathered friends have a comfortable living environment.
Finally, once everything is assembled and the glue has dried, you can sand down any rough edges to make it safe for birds. A smooth surface will help prevent any injuries to the birds when they enter and exit the house. After sanding, you can proceed to finish your birdhouse with your choice of paint or stain, which will not only improve its appearance but also provide extra protection against the weather.
In summary, assembling your birdhouse is a rewarding experience that combines creativity and craftsmanship. With a little patience and careful attention to detail, you’ll have a beautiful birdhouse ready to welcome new feathered friends into your garden. Remember, the joy of woodworking lies not just in the final product but in the process of creating it!
- What type of wood is best for a birdhouse? Softwoods like cedar and pine are excellent choices due to their durability and resistance to the elements.
- How do I attract birds to my birdhouse? Place the birdhouse in a quiet location, preferably near trees or shrubs, and ensure it’s clean and well-maintained.
- Can I paint my birdhouse? Yes, but use non-toxic paints and avoid bright colors that may deter birds. Natural wood finishes are often preferred.
- How often should I clean my birdhouse? It's best to clean it out at the end of each nesting season to prepare for new inhabitants.
Frequently Asked Questions
- What tools do I need to build a birdhouse?
To build a birdhouse, you'll need some essential tools such as a saw, hammer, drill, measuring tape, and sandpaper. These tools will help you cut, assemble, and finish your birdhouse efficiently. If you're just starting out, don't worry—most of these tools are beginner-friendly and can be found at your local hardware store.
- What type of wood is best for a birdhouse?
When choosing wood for your birdhouse, softwoods like pine and cedar are excellent choices due to their weather resistance and ease of work. They’re not only durable but also provide a natural look that blends well with outdoor environments. Hardwoods like oak and maple can also be used, but they tend to be heavier and more challenging to work with for beginners.
- How do I finish my birdhouse?
Finishing your birdhouse is important for both protection and aesthetics. You can choose to stain, seal, or paint your birdhouse depending on the look you want. A good sealant will protect the wood from moisture, while stains can enhance the natural grain. Just make sure to use non-toxic products, especially if you want to attract birds!
- What are some common mistakes to avoid when building a birdhouse?
Some common mistakes include not measuring accurately, using untreated wood, and forgetting to add drainage holes. Always double-check your measurements before cutting, and opt for weather-resistant wood to ensure longevity. Additionally, make sure to include small holes at the bottom for drainage to keep the interior dry.
- Can I customize my birdhouse design?
Absolutely! One of the fun aspects of building a birdhouse is the ability to customize it to your liking. You can alter the size, shape, and even add decorative elements like paint or carvings. Just keep in mind the specific needs of the birds you want to attract, such as entry hole size and ventilation.
- How long does it take to build a birdhouse?
The time it takes to build a birdhouse can vary depending on your skill level and the design complexity. For beginners, it might take a few hours to a day to complete a simple birdhouse. As you gain experience, you'll find that you can finish projects more quickly!


