Creative Ideas for Woodworking: Mailbox Projects
Are you tired of the same old boring mailbox that everyone else in your neighborhood has? It’s time to unleash your creativity and transform that ordinary mailbox into a stunning piece of art! Woodworking projects offer a fantastic opportunity to showcase your craftsmanship while adding a personal touch to your home’s curb appeal. Imagine a mailbox that not only serves its purpose but also reflects your personality and style. Whether you're a seasoned woodworker or just starting out, there are countless innovative ideas waiting to be explored. In this article, we’ll dive into unique designs, the materials and tools you’ll need, and even tips for personalizing your masterpiece. So, grab your tools and let’s get started!
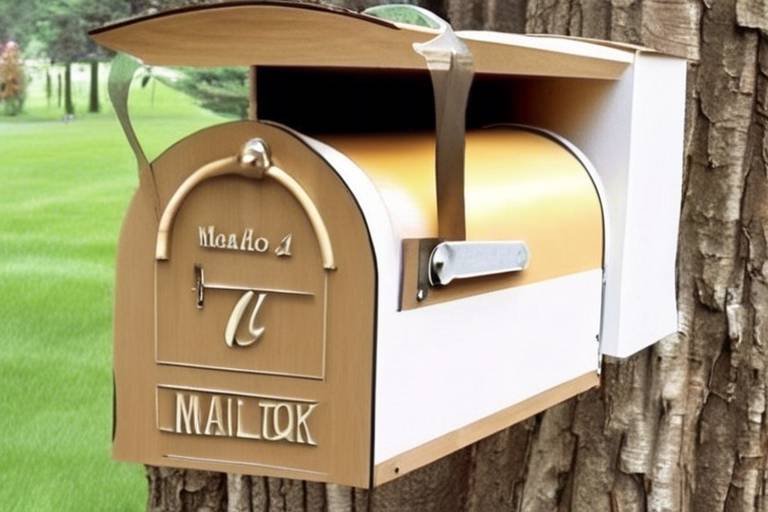
When it comes to mailbox designs, the possibilities are endless! You can go for a whimsical theme that brings a smile to anyone passing by or opt for a more elegant style that complements your home’s architecture. For instance, consider creating a mailbox that resembles a cozy cottage or a charming birdhouse. These designs not only stand out but also tell a story. If you’re feeling adventurous, why not try a themed mailbox based on your favorite hobbies? A fishing-themed mailbox with a little wooden fish on top could be a hit for anglers, while a floral design could attract nature lovers. Whatever your choice, the key is to let your imagination run wild!
Before diving into your mailbox project, it’s essential to gather the right materials and tools. Here’s a quick rundown of what you’ll need:
- Wood: Choose durable wood such as cedar or redwood, which can withstand the elements.
- Paint or Stain: Select weather-resistant paint or stain to protect your mailbox and enhance its aesthetics.
- Hardware: Don’t forget screws, hinges, and a mailbox flag!
- Tools: A saw, drill, sandpaper, and a paintbrush are essential for construction and finishing touches.
Having these materials on hand will not only streamline your process but also ensure that your mailbox stands the test of time!
Constructing your mailbox can be a rewarding experience, especially when you see your vision come to life. Here’s a simplified step-by-step guide to help you through the process:
- Design Your Mailbox: Sketch out your design and dimensions. This will serve as your blueprint.
- Cut the Wood: Use your saw to cut the wood according to your design. Make sure to wear safety gear!
- Assemble the Pieces: Use screws and nails to assemble the mailbox structure.
- Sand and Finish: Smooth the surfaces with sandpaper and apply your chosen paint or stain.
- Add Final Touches: Attach the hardware and any decorative elements you desire.
Following these steps will help ensure that your mailbox turns out just as you envisioned!
Now that your mailbox is built, it’s time to add some personal flair! Personalization techniques can take your project from ordinary to extraordinary. Consider painting your family name or house number in bold letters for visibility. You might even want to try engraving a meaningful quote or a fun design that resonates with you. Adding decorative elements like small sculptures, flowers, or even seasonal decorations can also make your mailbox a standout piece. Remember, this is your chance to showcase your unique style!
To keep your wooden mailbox looking fresh and inviting, regular maintenance is key. Here are some tips to ensure its longevity:
- Inspect Regularly: Check for any signs of wear and tear, especially after harsh weather.
- Repaint or Restain: Refresh the paint or stain every few years to protect the wood and maintain its appearance.
- Keep it Clean: Wipe off dirt and debris to prevent mold and mildew buildup.
By following these simple maintenance steps, your mailbox will continue to be a source of pride for years to come!
As you embark on your mailbox project, consider incorporating eco-friendly practices. Using reclaimed wood not only gives your mailbox character but also helps reduce waste. Additionally, opt for non-toxic, water-based finishes that are better for the environment. By making these choices, you can create a beautiful mailbox while being kind to our planet!
Once you’ve completed your mailbox project, it’s time to show it off! Sharing your work can inspire others and foster community connections. Consider posting photos on social media platforms like Instagram or Facebook, or even participating in local art fairs. You might also want to create a blog or join woodworking forums to share your experiences and tips. The more you showcase your creativity, the more you’ll inspire others to embark on their own woodworking journeys!
Engaging with your community can add another layer of enjoyment to your mailbox projects. Why not organize a workshop where you teach others how to build and customize their own mailboxes? This not only fosters creativity but also builds relationships among fellow woodworkers. Participating in local art fairs or community events can also be a great way to showcase your work and connect with like-minded individuals. Remember, the joy of woodworking is often amplified when shared with others!
Q: What type of wood is best for outdoor mailboxes?
A: Durable woods like cedar and redwood are excellent choices because they withstand weather conditions well.
Q: How can I make my mailbox more visible?
A: Consider using bright colors and bold lettering for your house number or family name to enhance visibility.
Q: How often should I maintain my mailbox?
A: Regular inspections and maintenance every few months are recommended, especially after harsh weather.

Unique Mailbox Designs
When it comes to making your mailbox a true reflection of your personality and style, the sky's the limit! Gone are the days of bland, cookie-cutter mailboxes that blend into the background. Today, we’re diving into a world of that can transform your front yard into a showcase of creativity. Whether you want something whimsical that brings a smile to your neighbors’ faces or an elegant piece that adds a touch of sophistication, there’s a design out there that’s perfect for you.
One popular trend is the themed mailbox. Imagine a mailbox shaped like a classic red barn, complete with tiny animals peeking out from the sides, or perhaps a mailbox that resembles a vintage car, complete with a shiny chrome finish. These designs not only serve their functional purpose but also become a talking point in the neighborhood. They can evoke nostalgia or simply bring joy, making the mundane act of checking the mail a delightful experience.
For those who lean toward a more modern aesthetic, sleek and minimalist designs are all the rage. Think of a mailbox crafted from stainless steel or painted in bold, vibrant colors with geometric patterns. These contemporary designs can make a striking statement against a backdrop of traditional homes, showcasing your unique taste and flair. Pairing a modern mailbox with clean landscaping can elevate your curb appeal significantly.
If you’re feeling particularly crafty, consider a DIY mailbox project where you can use reclaimed wood to create a rustic masterpiece. This not only gives your mailbox character but also tells a story of sustainability. You might even want to incorporate elements like a small planter box for flowers or herbs, giving your mailbox a functional twist that enhances the beauty of your home.
Moreover, don’t underestimate the power of personalization! Adding your house number in a creative font, or even a fun quote that resonates with you, can make your mailbox truly one-of-a-kind. Consider using stencils or vinyl decals for a clean finish, or hand-painting designs for a more artisanal feel. The beauty of crafting your mailbox is that you can tailor it to fit your style, making it a true reflection of who you are.
Inspiration can also come from the seasons. For instance, a mailbox adorned with seasonal decorations—like autumn leaves or winter snowflakes—can keep your mailbox fresh and engaging throughout the year. This not only showcases your creativity but also invites neighbors to join in the seasonal spirit.
To sum it up, your mailbox can be so much more than a simple receptacle for your letters. With a bit of imagination and some woodworking skills, you can create a stunning piece that enhances your home’s curb appeal while reflecting your personal style. So why settle for ordinary when you can have extraordinary? Get those creative juices flowing and start planning your unique mailbox design today!
- What materials are best for building a unique mailbox? - Common materials include wood, metal, and recycled materials. Choose based on your design preference and local climate.
- How can I personalize my mailbox? - You can personalize your mailbox with paint, decals, or by engraving your house number or a favorite quote.
- Are there any regulations regarding mailbox designs? - Yes, check with your local postal service or homeowners' association for guidelines on mailbox height, size, and placement.
- How can I maintain my wooden mailbox? - Regularly check for weather damage, repaint or reseal as needed, and keep it clean to ensure longevity.

Materials and Tools Needed
When diving into your mailbox woodworking project, it's essential to gather the right materials and tools. Having everything ready will not only streamline your process but also enhance your overall experience. First, let's discuss the basic materials you'll need. You will primarily require wood, and while you can choose from various types, cedar and pine are popular choices due to their durability and ease of handling. In addition to wood, you might want to consider a weatherproof finish to protect your mailbox from the elements. This could be a high-quality exterior paint or a natural wood sealant that preserves the beauty of the wood while providing a barrier against moisture.
Next, let's talk about the tools. A well-equipped workshop can make all the difference. Here’s a quick rundown of the essential tools you might need:
- Table Saw: Perfect for making precise cuts.
- Drill: Essential for creating holes for screws and decorative elements.
- Sander: To smooth out any rough edges and prepare the surface for finishing.
- Paintbrushes or Sprayers: For applying your chosen finish.
- Measuring Tape: Accurate measurements are crucial for a well-constructed mailbox.
Additionally, don't forget about the hardware! You’ll need screws, hinges (if you're adding a door), and perhaps some decorative accents, like house numbers or a flag. The right hardware can elevate your project from ordinary to extraordinary! To give you a clearer picture, here’s a simple table summarizing the materials and tools:
| Materials | Tools |
|---|---|
| Wood (Cedar or Pine) | Table Saw |
| Weatherproof Finish | Drill |
| Screws and Hinges | Sander |
| Decorative Elements (e.g., House Numbers) | Measuring Tape |
With these materials and tools in hand, you'll be well-equipped to embark on your mailbox project. Remember, preparation is key! So, take your time to gather everything you need, and get ready to unleash your creativity. You’ll find that having the right items not only makes your job easier but also allows you to focus on the fun part: crafting something unique that will welcome your guests with style!
Step-by-Step Construction Guide
Building your own mailbox can be a rewarding project that not only enhances your home's curb appeal but also showcases your woodworking skills. Whether you're a seasoned woodworker or a curious beginner, following a structured approach will make the process smoother and more enjoyable. Let’s dive into a comprehensive step-by-step guide that will help you construct a stunning mailbox from scratch!
First and foremost, you’ll want to gather all the necessary materials and tools. Here’s a quick overview of what you’ll need:
| Materials | Tools |
|---|---|
| Wood (Cedar, Pine, or Redwood) | Measuring Tape |
| Wood Glue | Power Drill |
| Wood Screws | Saw (Circular or Hand Saw) |
| Sandpaper | Paintbrush |
| Outdoor Paint or Stain | Level |
Once you have everything ready, it’s time to sketch out your design. Think about the style that resonates with you—do you want something traditional, modern, or perhaps a whimsical design? A clear plan will guide you through the building process and help you visualize the final product.
Now, let’s get down to the nitty-gritty of construction. Here’s a streamlined approach:
1. Cut the Wood: Using your saw, cut the wood into the necessary pieces according to your design. Typically, you’ll need a base, sides, a top, and a door. Make sure to measure twice and cut once to avoid any mistakes!
2. Assemble the Base: Start by attaching the base to the sides using wood glue and screws. Ensure everything is level and square. This step is crucial as it forms the foundation of your mailbox.
3. Attach the Top: Once the base is secure, attach the top piece. Depending on your design, this could be a flat piece or a pitched roof. Again, make sure it’s securely fastened and level.
4. Create the Door: Cut out a door from one of the side panels, ensuring it’s appropriately sized for easy access to your mail. You can use hinges to attach the door, allowing it to swing open smoothly.
5. Sand and Finish: After assembly, use sandpaper to smooth out any rough edges. This step not only improves the aesthetics but also ensures safety when handling the mailbox. Once sanded, apply your chosen paint or stain to protect the wood from the elements.
6. Install the Mailbox: Finally, choose a location to install your mailbox. Dig a hole for the post, ensuring it’s deep enough for stability. Use a level to ensure it’s straight and fill the hole with concrete for added durability.
And voila! You now have a beautiful, handcrafted mailbox that’s sure to impress your neighbors. Remember, the beauty of woodworking lies in the details, so don’t rush through the finishing touches. Embrace the process, and let your creativity shine!
Q: What type of wood is best for outdoor mailboxes?
A: Cedar and redwood are excellent choices due to their natural resistance to rot and insects. Pine is more affordable but should be treated for outdoor use.
Q: How can I ensure my mailbox withstands harsh weather?
A: Use high-quality outdoor paint or stain to protect the wood. Additionally, consider sealing joints with waterproof glue to prevent moisture from entering.
Q: Can I customize my mailbox after construction?
A: Absolutely! You can paint, engrave, or add decorative elements at any time. Personalization is what makes your mailbox unique!
Q: What tools do I need as a beginner?
A: A measuring tape, saw, power drill, and basic hand tools will suffice. As you gain experience, you can invest in more advanced tools.
With this guide, you’re well on your way to crafting a mailbox that reflects your style and skills. Happy woodworking!
Personalization Techniques
When it comes to woodworking, personalization is where the magic truly happens! Imagine transforming a simple mailbox into a vibrant expression of your personality or a reflection of your home’s character. Personalization techniques can range from the **subtle** to the **bold**, allowing you to create a mailbox that not only serves a functional purpose but also stands as a **unique work of art**. So, how can you make your mailbox stand out? Let’s dive into some creative ideas!
One of the most popular methods is **painting**. A fresh coat of paint can breathe new life into your mailbox. You can choose colors that complement your home or go for something eye-catching and vibrant. If you’re feeling adventurous, consider using **stencils** to add patterns or designs. Think of swirls, florals, or even geometric shapes that can turn your mailbox into a canvas. Remember, the key is to choose weather-resistant paint to ensure your masterpiece withstands the elements.
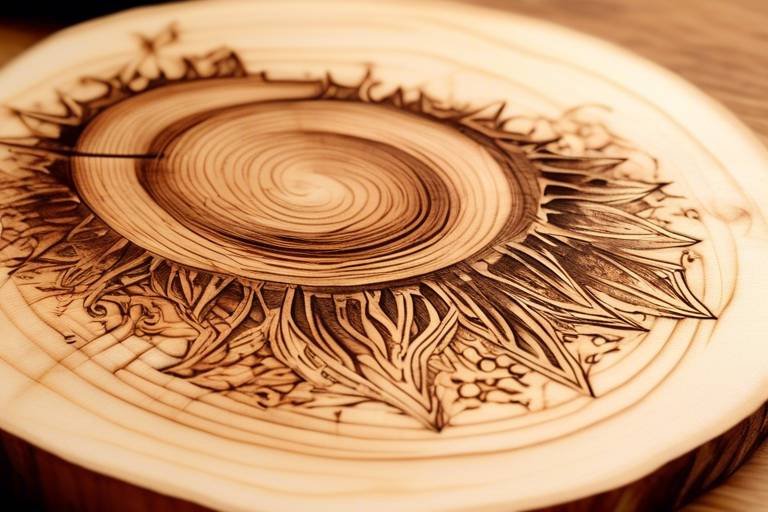
Another fantastic way to personalize your mailbox is through **engraving**. This technique adds a touch of elegance and permanence. You can engrave your family name, house number, or even a favorite quote. Using a rotary tool or a laser engraver can help you achieve precise designs. Not only does engraving provide a polished look, but it also makes your mailbox easily identifiable, which is a practical bonus!
Don’t forget about adding **decorative elements**! This could include anything from wooden accents to metal embellishments. For instance, you could attach a small wooden birdhouse or a decorative flag that flutters in the wind. These little touches can make a big difference. You might even consider incorporating **seasonal decorations**—think pumpkins for fall or snowflakes for winter. This way, your mailbox can change with the seasons, keeping it fresh and engaging for passersby.
For those who love a more rustic look, consider using **natural materials**. Adding elements like twigs, stones, or even dried flowers can create a charming, organic feel. You could create a mosaic design on the mailbox using small stones or tiles, which not only enhances its appearance but also adds texture. The beauty of natural materials lies in their unique imperfections, making each mailbox truly one-of-a-kind.
Lastly, don’t underestimate the power of **lighting**! Incorporating small solar lights or LED strips can illuminate your mailbox beautifully at night, making it a focal point in your yard. Imagine your personalized mailbox glowing softly as the sun sets—what a welcoming sight for visitors and delivery personnel alike!
Incorporating these personalization techniques into your mailbox project can transform it from a mundane object into a **statement piece**. Whether you choose to paint, engrave, or add decorative elements, the possibilities are endless. So grab your tools and let your creativity flow—your mailbox is waiting to become a reflection of you!
Q: What type of paint should I use for my mailbox?
A: It's best to use weather-resistant exterior paint to ensure durability against the elements.
Q: Can I use any wood for my mailbox project?
A: While you can use various types of wood, opt for those that are naturally resistant to decay, such as cedar or redwood, for longevity.
Q: How can I protect my personalized mailbox from the weather?
A: Applying a clear sealant after painting or engraving can help protect your mailbox from moisture and UV damage.
Q: Is engraving difficult to do?
A: Engraving can be challenging, but with practice and the right tools, it can be a rewarding way to personalize your mailbox.
Maintenance Tips for Longevity
When you've poured your heart and soul into crafting a beautiful wooden mailbox, the last thing you want is for it to succumb to the elements. Just like a well-tended garden, a wooden mailbox thrives with a little love and care. Here are some essential maintenance tips that will help preserve your mailbox's beauty and functionality for years to come.
First and foremost, regular inspections are crucial. Take a moment every few months to check for any signs of wear and tear. Look for cracks, warping, or peeling paint. Catching these issues early can save you from more extensive repairs down the line. If you notice any damage, don't panic! A little wood filler or a quick sanding can work wonders.
Next, consider the environment where your mailbox resides. If it's exposed to harsh weather conditions—like blazing sun or heavy rain—you might want to apply a protective finish. A good quality outdoor varnish or sealant can create a barrier against moisture and UV rays. This not only enhances the look of your mailbox but also extends its lifespan significantly. Remember, a little prevention goes a long way!
Cleaning your mailbox is another vital aspect of maintenance. Dust, dirt, and grime can accumulate over time, diminishing its charm. A simple solution of warm water and mild soap is usually all you need. Grab a soft cloth or sponge, and gently wipe down the surfaces. Avoid using abrasive materials, as they can scratch the wood and ruin that pristine finish.
Additionally, if your mailbox has any metal components, such as hinges or flags, make sure to keep an eye on them too. A little rust can develop if they’re not adequately maintained. A quick wipe with some oil can keep them functioning smoothly and looking sharp.
Lastly, don’t forget about seasonal care. In colder months, ensure that snow and ice don’t accumulate around your mailbox. Heavy snow can put undue stress on the structure, leading to potential damage. If you live in an area with extreme weather, consider bringing your mailbox inside during the worst of it. Think of it like tucking in a beloved pet during a storm—keeping it safe and sound!
By following these simple maintenance tips, you can ensure that your handcrafted mailbox remains a stunning focal point of your home for years to come. Just like a fine wine, with the right care, your mailbox will only get better with age!
- How often should I inspect my mailbox? It's a good idea to check your mailbox every few months for any signs of damage or wear.
- What type of finish should I use for outdoor protection? A high-quality outdoor varnish or sealant works best to protect against moisture and UV rays.
- Can I use regular soap to clean my mailbox? Yes, a mild soap mixed with warm water is perfect for cleaning without damaging the wood.
- What should I do if I find rust on metal parts? A quick wipe with some oil can help remove rust and keep metal components functioning well.

Incorporating Eco-Friendly Practices
When it comes to woodworking, embracing eco-friendly practices not only benefits the planet but also adds a unique charm to your projects. Imagine crafting a mailbox that not only showcases your skills but also tells a story of sustainability. By using reclaimed wood, for example, you can breathe new life into materials that would otherwise end up in a landfill. This not only reduces waste but also gives your mailbox a character that new wood simply can’t replicate.
Another excellent practice is to opt for non-toxic finishes. Many traditional wood finishes contain harmful chemicals that can leach into the environment. Instead, consider using eco-friendly stains and sealants made from natural ingredients. These products are not only safer for you and your family but also provide a beautiful finish that enhances the wood's natural beauty. Plus, they often come in a variety of shades, allowing you to customize your mailbox to fit your personal style.
In addition, think about incorporating local materials into your projects. Sourcing wood from local suppliers not only supports your community but also reduces the carbon footprint associated with transportation. You might be surprised at the variety of woods available in your area, each with its own unique properties and aesthetics. By choosing local, you can create a mailbox that reflects the beauty of your surroundings.
Don’t forget about the power of upcycling. You can enhance your mailbox with decorative elements made from old materials. For instance, old house numbers, vintage signs, or even reclaimed metal can add a distinctive touch to your creation. This not only makes your mailbox stand out but also tells a story of creativity and resourcefulness.
Finally, consider sharing your eco-friendly practices with your community. Organizing workshops or demonstrations on sustainable woodworking techniques can inspire others to follow suit. This not only fosters a sense of community but also raises awareness about the importance of sustainability in craftsmanship. After all, when we come together to share knowledge, we can create a ripple effect that encourages more people to adopt eco-friendly practices.
In summary, incorporating eco-friendly practices into your woodworking projects—like using reclaimed wood, opting for non-toxic finishes, sourcing local materials, and embracing upcycling—can transform your mailbox into a stunning piece that is both beautiful and sustainable. So, roll up your sleeves, grab those tools, and let’s make something amazing that Mother Nature would be proud of!
- What types of wood are best for eco-friendly woodworking? Reclaimed wood, bamboo, and locally sourced hardwoods are excellent choices.
- Are there any eco-friendly finishes available? Yes, look for natural oil finishes, water-based stains, and non-toxic sealants.
- How can I upcycle materials for my mailbox project? Consider using old hardware, scrap wood, or vintage decorations to add a personal touch.
- What are the benefits of using local materials? It supports local businesses, reduces transportation emissions, and often results in unique, regional aesthetics.

Showcasing Your Work
After pouring your heart and soul into crafting a stunning mailbox, it’s time to show it off! Sharing your woodworking creations not only allows you to take pride in your work but also inspires others to explore their creative sides. So, how can you effectively showcase your mailbox projects? Let's dive into some exciting ideas that can help you shine a spotlight on your craftsmanship.
First off, consider leveraging the power of social media. Platforms like Instagram, Pinterest, and Facebook are fantastic for sharing images of your completed projects. Create a dedicated account or page where you can post high-quality photos of your mailboxes, capturing them from different angles and in various settings. Don’t forget to use relevant hashtags like #Woodworking, #DIYMailbox, and #Craftsmanship to reach a broader audience. Engaging with fellow woodworkers and enthusiasts through comments and shares can also create a community around your work.
Another effective way to showcase your work is by participating in local exhibitions or craft fairs. These events provide a platform to display your mailboxes and interact with potential customers and fellow artisans. Setting up a booth allows you to not only showcase your pieces but also demonstrate your woodworking skills live. Imagine the joy of seeing someone admire your work up close and perhaps even purchasing it! Plus, these events are excellent for networking with other creatives who share your passion.
Consider creating a portfolio website to display your projects professionally. A well-designed website can serve as your online gallery, showcasing high-resolution images, project descriptions, and even a blog where you can share your woodworking journey. This not only enhances your credibility as a craftsman but also provides a space for potential clients to contact you for custom projects. You can include testimonials from satisfied customers, adding an extra layer of trust to your offerings.
Don't underestimate the power of community engagement. Organizing workshops or classes in your area can help you connect with other woodworking enthusiasts. By teaching others how to create their own mailboxes, you not only share your skills but also foster a sense of community. Plus, participants are likely to share their experiences and results on social media, further spreading the word about your work.
Lastly, consider collaborating with local businesses or charities. For instance, you could create a unique mailbox to be auctioned off for a good cause. This not only showcases your talent but also gives back to the community, enhancing your reputation as a responsible and creative craftsman. Collaborations can lead to exciting opportunities and even more exposure for your work.
In summary, showcasing your mailbox projects can be as fulfilling as creating them. Whether through social media, local events, or community engagement, there are countless ways to share your craftsmanship with the world. So, grab your camera, connect with your community, and let your creativity shine!
- How can I take better photos of my mailbox projects? - Ensure good lighting, use a neutral background, and capture multiple angles to highlight your work.
- What social media platforms are best for showcasing woodworking projects? - Instagram and Pinterest are particularly effective due to their visual nature.
- Should I charge for workshops I conduct? - It depends on your goals; you can charge a fee or offer free workshops to build community engagement.
Community Engagement Through Mailbox Projects
Engaging with your community through mailbox projects is not just about building a beautiful piece of craftsmanship; it's about creating connections and fostering a sense of belonging. Imagine walking through your neighborhood and spotting a series of uniquely designed mailboxes, each telling a story of creativity and collaboration. Wouldn’t that spark a conversation? By organizing workshops or participating in local art fairs, you can turn a simple mailbox project into a community event that brings people together.
One effective way to engage your community is by hosting mailbox design workshops. These workshops can cater to various skill levels, from beginners eager to learn the basics to seasoned woodworkers looking to refine their techniques. You can provide all the necessary materials, such as wood, paint, and tools, while participants bring their creativity. This not only allows individuals to express themselves but also encourages teamwork and sharing of ideas. Plus, it’s a fantastic way to make new friends who share your passion for woodworking!
Additionally, consider participating in local art fairs or community festivals. Setting up a booth to showcase your mailbox projects can attract attention and inspire others. You can even offer live demonstrations on how to build a mailbox, which can be both educational and entertaining. This kind of visibility not only promotes your work but also highlights the importance of craftsmanship in your community.
Another exciting idea is to collaborate with local schools or community centers. You could initiate a project where students design and build their own mailboxes, allowing them to express their creativity while learning valuable skills. This initiative can be incredibly rewarding, as it nurtures the next generation of woodworkers and instills a sense of pride in their creations. Plus, seeing a row of colorful, student-designed mailboxes can brighten up any street!
To make the most of your community engagement efforts, consider creating a social media group or a community bulletin board dedicated to woodworking projects. This platform can serve as a space for sharing ideas, seeking advice, and showcasing completed projects. By fostering an online community, you can keep the momentum going even after workshops or events have ended. It’s a great way to stay connected and inspire one another!
In conclusion, community engagement through mailbox projects is a wonderful way to blend creativity with connection. Whether through workshops, fairs, or school collaborations, these initiatives can bring people together, fostering a vibrant community spirit. So, grab your tools and start building not just mailboxes, but also lasting relationships!
- How can I start a woodworking workshop in my community? Consider reaching out to local community centers or libraries to see if they would host your event. You can also use social media to promote your workshop.
- What materials do I need for a basic mailbox project? Basic materials include wood (such as cedar or pine), screws, wood glue, paint or stain, and tools like a saw, drill, and sandpaper.
- Can I involve children in mailbox projects? Absolutely! Just ensure that adult supervision is present, and choose age-appropriate tasks for them.
- How can I promote my mailbox project at local events? Create eye-catching displays and consider offering a small demonstration to draw in attendees. Hand out business cards or flyers with your contact information.
Frequently Asked Questions
- What materials do I need to build a unique mailbox?
To create a standout mailbox, you'll need basic materials like wood (cedar or pine works great), screws, wood glue, and paint or varnish for finishing. Don't forget tools like a saw, drill, and sandpaper to shape and smooth your project!
- How can I personalize my mailbox?
Personalization is key! You can paint your mailbox in vibrant colors, engrave your house number, or add decorative elements like stencils or carvings. Think of it as giving your mailbox a personality that reflects you!
- Are there eco-friendly options for mailbox construction?
Absolutely! Using reclaimed wood not only helps the environment but also adds a unique touch to your mailbox. Plus, choosing eco-friendly finishes can protect the wood while being kinder to our planet.
- How do I maintain my wooden mailbox?
To keep your mailbox looking fresh, regularly check for any signs of wear and tear. A coat of exterior wood sealant every couple of years can help protect it from the elements, ensuring it stays beautiful for years to come.
- Can I use power tools if I'm a beginner?
Yes! While power tools can seem intimidating, they can actually make your woodworking projects easier. Just make sure to read the manuals, follow safety guidelines, and maybe start with simpler tools before moving on to more complex ones.
- What are some creative designs for mailboxes?
Get inspired by themes! You could create a whimsical fairy-tale mailbox, a rustic farmhouse style, or even a sleek modern design. The possibilities are endless, so let your imagination run wild!
- How can I showcase my mailbox project?
Once your masterpiece is complete, consider sharing it on social media platforms, participating in local craft fairs, or even hosting a small exhibition in your community. It’s a great way to connect with fellow woodworkers and inspire others!
- Is woodworking a good hobby for everyone?
Definitely! Woodworking can be a fulfilling hobby for anyone, regardless of skill level. It’s not just about making things; it’s about expressing creativity and enjoying the process. Plus, you get to create something tangible that you can be proud of!

