DIY Calendars: Fun Craft Project for Kids
Are you looking for a fun and engaging way to spend time with your kids while also teaching them valuable skills? Well, look no further! Creating DIY calendars is not only a fantastic craft project but also a wonderful opportunity to enhance your child's organizational skills. Imagine the joy on their faces as they design their very own calendar, filled with their favorite colors, themes, and memories. This project is perfect for bonding time, allowing parents and children to work together, share ideas, and unleash their creativity.
But why stop at just making a calendar? This activity can be a springboard for discussions about time management, planning, and even sustainability if you choose to incorporate recycled materials. As kids engage in this crafting adventure, they’ll learn to appreciate the importance of keeping track of important dates and events while expressing their individuality through art. So, grab your supplies and let’s dive into the world of DIY calendars!
Creating DIY calendars is more than just a fun craft; it’s a multifaceted learning experience. Here are some of the benefits:
- Developing Time Management Skills: By marking important dates and events, kids learn to manage their time effectively.
- Fostering Creativity: The design process allows children to explore their artistic side, whether through drawing, painting, or using decorative elements.
- Encouraging Planning: Kids will understand the importance of planning ahead, which is a crucial skill for their future.
- Building Bonds: Working together on a calendar project can strengthen family ties and create lasting memories.
So, not only are you engaging in a fun activity, but you are also setting the stage for valuable life skills that your children will carry with them as they grow.
Before you embark on this exciting crafting journey, it’s essential to gather the right materials. Here’s a quick list of common supplies you might need:
- Paper (cardstock, construction paper, or recycled materials)
- Markers and crayons
- Stickers and embellishments
- Glue and scissors
- Washi tape, stamps, and glitter for decoration
Having these materials on hand will ensure that your crafting session goes smoothly and that the final product is both beautiful and functional.
The type of paper you choose can significantly impact your calendar's durability and appearance. Here are some options:
- Cardstock: Thick and sturdy, perfect for a long-lasting calendar.
- Construction Paper: Colorful and fun, ideal for creative designs.
- Recycled Materials: Eco-friendly and a great way to teach kids about sustainability.
Each type of paper offers unique textures and colors, so feel free to mix and match to create a visually appealing calendar!
Incorporating recycled materials into your DIY calendar project is a fantastic way to save money and teach kids about sustainability. Items like old magazines, cardboard boxes, and scrap paper can be transformed into beautiful designs. Imagine turning a cereal box into a sturdy calendar base or using cut-out pictures from magazines to decorate each month. Not only does this practice promote creativity, but it also instills a sense of responsibility towards our planet.
To make the calendar visually engaging, consider adding decorative supplies such as washi tape, stamps, and glitter. These embellishments allow children to express their artistic flair and personalize their creations. The more they can add their touch, the more they will cherish the final piece. Think of it like seasoning a dish—just the right amount can elevate the entire experience!
Choosing a theme for the calendar can make the project even more exciting. Themes can be based on:
- Seasons (Spring, Summer, Fall, Winter)
- Holidays (Christmas, Halloween, Birthdays)
- Favorite characters (Superheroes, Disney characters, etc.)
Letting kids choose a theme allows them to explore their interests and make the calendar truly their own. It’s like giving them the canvas to paint their world!
Now that you have your materials and theme, it’s time to get crafting! Here’s a simple step-by-step guide to help you and your kids create a fabulous DIY calendar:
Before diving in, it’s essential to plan the calendar's layout. Encourage kids to sketch their ideas, deciding where to place dates, images, and decorations for a balanced design. This planning stage is crucial as it helps them visualize the final product and makes the assembly process smoother.
Assembling the calendar involves cutting, gluing, and organizing elements according to the planned layout. This hands-on activity encourages children to follow instructions and develop fine motor skills. Plus, watching their ideas come to life is incredibly rewarding!
To spark inspiration, here are some creative calendar concepts that incorporate different artistic techniques and themes:
Creating a photo calendar allows kids to showcase their favorite memories. They can use family pictures, drawings, or nature photos, making each month special and personal. Imagine flipping through the months and seeing a snapshot of a fun family vacation or a beloved pet!
Interactive calendars engage children in fun ways, such as adding flaps or movable parts. These features encourage play while teaching kids about dates and events in an enjoyable manner. It’s like turning a regular calendar into a fun adventure!
Personalization makes each calendar unique. Here are some tips on how kids can add their touch:
Encouraging children to mark special dates, such as birthdays and holidays, helps them connect with the calendar. This practice fosters anticipation and excitement for upcoming events throughout the year. It’s a beautiful way to celebrate the moments that matter!
Incorporating handwritten notes or drawings adds a personal touch to the calendar. Kids can express their thoughts, reminders, or goals, making the calendar a cherished keepsake. It’s like capturing a piece of their personality in every month!
Q: What age is appropriate for kids to start making DIY calendars?
A: Kids as young as 5 can start with simple designs, while older children can handle more complex projects.
Q: How can I make this project educational?
A: Incorporate lessons on time management, sustainability, or even art techniques to enhance the learning experience.
Q: What if we don’t have specific crafting supplies?
A: Get creative with what you have at home! Old magazines, wrapping paper, and even fabric scraps can be used.
Q: Can we use digital tools for creating calendars?
A: Absolutely! There are many online tools and apps that allow kids to design digital calendars, which can then be printed out.

Benefits of Making DIY Calendars
Creating DIY calendars is more than just a fun craft project; it's an enriching experience that offers a multitude of benefits for children. First and foremost, it helps develop time management skills. By engaging in the process of planning and organizing their calendar, kids learn to allocate time for various activities, which is a crucial life skill. Imagine your child learning to prioritize their homework, playdates, and family events all while having a blast decorating their own calendar!
Moreover, making DIY calendars fosters creativity. Children can express themselves through various artistic mediums, whether it's drawing, painting, or using stickers. This freedom to create not only boosts their self-esteem but also encourages them to think outside the box. For instance, when they choose a theme—be it their favorite cartoon character or a season—they're not just following instructions; they're diving deep into their imagination.
Additionally, these crafting sessions offer an excellent opportunity for family bonding. Working together to create a calendar can strengthen relationships and enhance communication. Parents can share stories about past events while kids pick out colors and designs, creating a delightful atmosphere filled with laughter and learning. It’s like building a time capsule of memories that they can look forward to every month!
On top of that, DIY calendars can serve as a practical tool for goal setting. As kids fill in important dates—like school projects, sports events, and family outings—they learn to anticipate and prepare for future activities. This practice not only keeps them organized but also instills a sense of responsibility. They might even surprise you by reminding you of upcoming events!
In summary, the benefits of making DIY calendars extend far beyond mere decoration. They help children develop essential life skills, express their creativity, foster family connections, and learn the importance of planning and organization. So, why not gather some materials and start this exciting project with your little ones? The joy and skills they’ll gain will be worth every minute spent crafting!

Materials Needed for DIY Calendars
When embarking on the exciting journey of creating DIY calendars with your kids, gathering the right materials is key to unlocking their creativity and ensuring a smooth crafting experience. Think of it like preparing for a fun adventure; you wouldn’t want to set off without the essentials! The materials you choose can significantly impact the final product, transforming a simple calendar into a vibrant masterpiece that reflects your child’s personality.
First and foremost, you'll need a sturdy base for your calendar. Cardstock is an excellent choice as it provides durability and a smooth surface for decorating. Alternatively, construction paper offers a variety of colors that can make each month pop. If you're feeling eco-conscious, consider using recycled materials like old cereal boxes or scrap paper, which can add unique textures and colors while teaching kids about sustainability.
Next, gather some decorative supplies to make the calendar visually appealing. This could include:
- Markers for drawing and coloring
- Stickers to add fun elements
- Washi tape for borders and accents
- Glitter for a touch of sparkle
- Stamps for unique designs
These embellishments not only enhance the calendar's look but also allow children to express their artistic flair. Imagine your child’s face lighting up as they add their favorite stickers or draw colorful illustrations for each month! It’s these little touches that make the project truly special.
In addition to the basic supplies, consider incorporating some functional items as well. For instance, having a ruler and scissors on hand will help with precise cutting and measuring, while glue sticks or double-sided tape are essential for assembling the different components of the calendar. A pencil is also handy for sketching out designs before committing to them, ensuring that the layout is just right.
Lastly, don’t forget about the personal touches. Encourage your kids to gather photos, drawings, or even quotes that inspire them. Incorporating these elements into the calendar will make it a cherished keepsake that they can look back on with fond memories. Remember, the goal here is to make the calendar not just a tool for organization, but a canvas for creativity and self-expression!
So, gather your materials, roll up your sleeves, and get ready to dive into a world of creativity and fun. Making DIY calendars is more than just a craft; it’s an opportunity for bonding, learning, and unleashing your child’s imagination!
Q: What age group is suitable for making DIY calendars?
A: DIY calendars can be enjoyed by children of all ages, but younger kids may need more assistance with cutting and gluing. Tailor the complexity of the project to suit their age and skill level.
Q: How can I make the calendar more educational?
A: You can incorporate educational elements by having kids research historical events for each month or include important dates related to their studies, such as science experiments or book reports.
Q: What if I don't have all the materials listed?
A: No worries! Get creative with what you have at home. Old magazines, wrapping paper, and even fabric scraps can be used to make a beautiful calendar.
Q: Can we make a calendar for a specific purpose?
A: Absolutely! You can create themed calendars for birthdays, holidays, or even a countdown to a family vacation. The possibilities are endless!

Choosing the Right Paper
When embarking on the exciting journey of creating a DIY calendar, one of the first and most crucial decisions you'll face is selecting the right paper. The type of paper you choose can significantly affect the durability and overall aesthetic of the calendar, making it a vital consideration in your crafting process. Imagine your calendar as a canvas; the paper is the foundation that will hold all your creative ideas together. So, what types of paper should you consider? Let's explore some popular options!
First up, we have cardstock. This heavyweight paper is perfect for calendars because it can withstand wear and tear throughout the year. If you envision your calendar being flipped through frequently, cardstock is an excellent choice. It offers a sturdy feel and allows for vibrant colors and intricate designs without worrying about tearing. Plus, it comes in various colors and textures, so you can easily find one that suits your theme.
Next, we have construction paper. This versatile option is often a favorite among kids due to its vibrant hues and ease of use. Construction paper is great for younger children who might be experimenting with different techniques, such as cutting and gluing. However, keep in mind that it’s not as durable as cardstock, so if you’re aiming for longevity, you might want to use it in combination with sturdier materials.
Another fantastic choice is recycled materials. Utilizing recycled paper not only helps the environment but also adds a unique touch to your calendar. Think about using old magazines, newspapers, or even scraps from previous craft projects. These materials can provide interesting textures and patterns that make your calendar stand out. Plus, embracing sustainability teaches children the importance of recycling and being eco-friendly.
Lastly, if you’re feeling adventurous, consider using specialty papers like metallic or textured papers. These can add a touch of elegance and flair to your calendar, making it truly one-of-a-kind. Imagine how stunning a calendar would look with a shimmering background or a soft, tactile finish! Just remember to balance these with more practical choices so that your calendar remains functional.
In summary, choosing the right paper for your DIY calendar is all about balancing durability, aesthetics, and personal preference. Whether you opt for sturdy cardstock, colorful construction paper, eco-friendly recycled materials, or luxurious specialty papers, each option brings something unique to the table. So gather your materials, unleash your creativity, and get ready to craft a calendar that not only keeps you organized but also reflects your artistic flair!

Using Recycled Materials
In today's world, embracing sustainability is not just a trend; it's a responsibility we all share. When it comes to crafting DIY calendars with kids, incorporating recycled materials is a fantastic way to teach them about the importance of reusing and recycling. Not only does this approach save money, but it also sparks creativity by transforming everyday items into beautiful works of art. Imagine turning an old cereal box into a vibrant calendar base or using colorful magazine pages to create unique backgrounds for each month. The possibilities are endless!
One of the best aspects of using recycled materials is that they often come with their own stories and textures. For example, using old greeting cards can add a personal touch, as they might remind the kids of special occasions. Similarly, cardboard can be cut into different shapes, while scrap paper can be used for notes or decorations. This not only enhances the visual appeal of the calendar but also encourages children to think outside the box about what can be reused.
Here are some common recycled materials you might consider using:
- Old Magazines: Perfect for colorful cutouts and collages.
- Cardboard: Great for sturdy backing or creating 3D elements.
- Scrap Paper: Ideal for notes, drawings, or decorative accents.
- Wrapping Paper: Can add a festive touch to the calendar.
- Fabric Scraps: Use these for texture and unique designs.
By involving children in the process of collecting and choosing these materials, you not only make the crafting experience more engaging but also instill a sense of responsibility towards the environment. They will learn that beauty can be found in what others might consider waste. So, the next time you’re about to toss something out, pause for a moment and ask, “Can this be part of our next creative project?” This simple question can lead to exciting discoveries and wonderful bonding moments.
Q: What types of recycled materials are best for DIY calendars?
A: Some great options include old magazines, cardboard, scrap paper, wrapping paper, and fabric scraps. Each material can add a unique touch to your calendar.
Q: How can I encourage my kids to be creative with recycled materials?
A: Allow them to explore and experiment! Let them choose the materials and guide them in thinking about how to repurpose them into their calendar. Encourage brainstorming sessions to spark ideas.
Q: Can we use any other materials besides recycled ones?
A: Absolutely! While recycled materials are fantastic, you can also use craft supplies like markers, stickers, and washi tape to enhance the calendar's design.
Q: What age group is suitable for making DIY calendars?
A: DIY calendars can be a fun project for kids of all ages. Younger children might need more guidance, while older kids can take the lead in the creative process.
Decorative Supplies
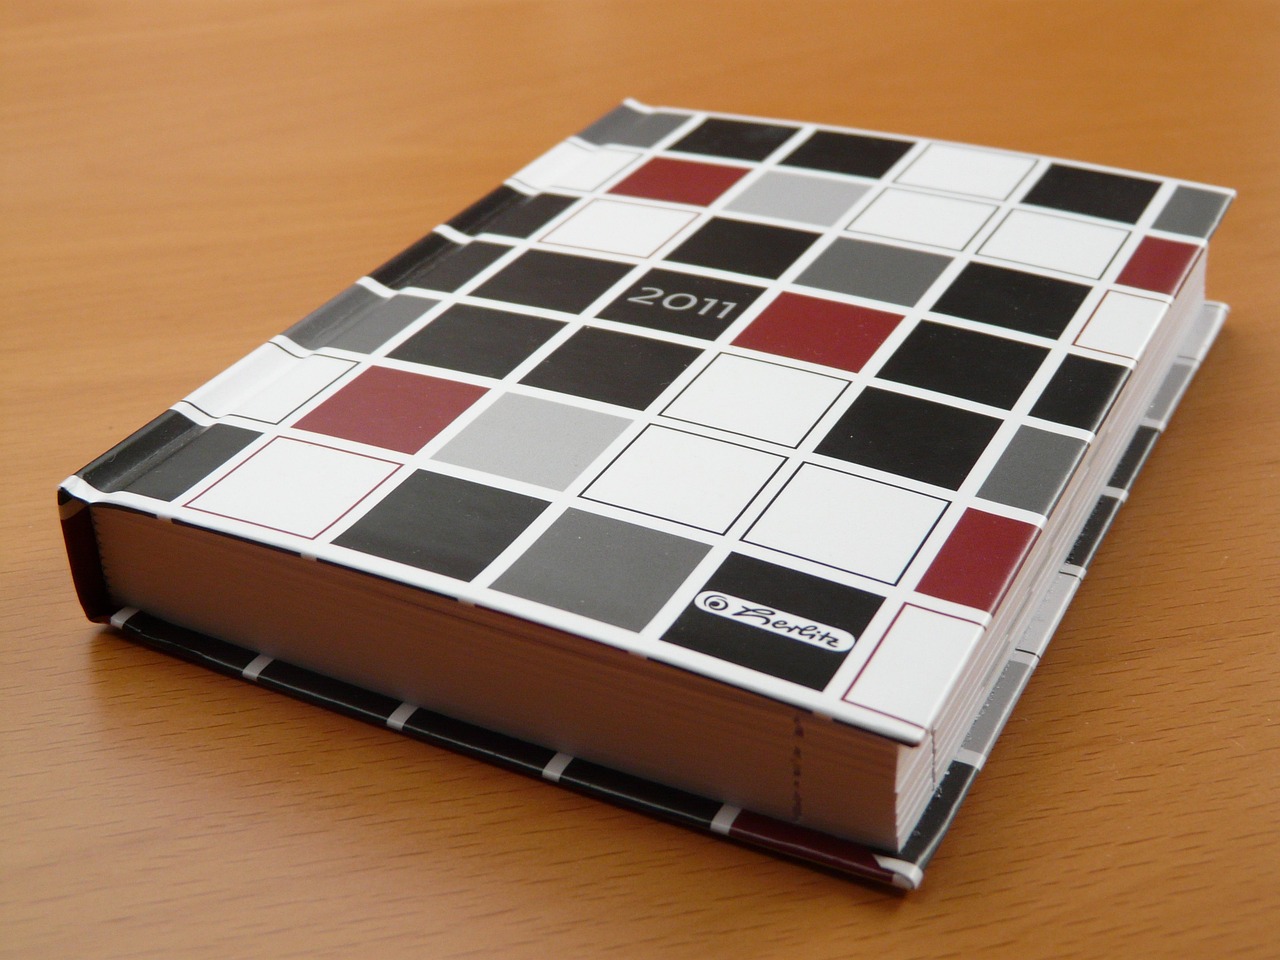
When it comes to making your DIY calendar truly shine, are your best friends! These materials not only add flair but also allow kids to unleash their creativity. Think of decorative supplies as the icing on the cake; they transform a simple project into a vibrant masterpiece. The options are endless, and the only limit is your imagination!
One of the most popular choices is washi tape. This decorative tape comes in a variety of colors and patterns, making it perfect for adding borders or highlighting special dates. Kids can use washi tape to create fun designs or even to separate different months visually. It’s easy to work with and can be repositioned, which is a huge plus for young crafters who are still honing their skills.
Stickers are another fantastic option. From cute animals to motivational quotes, stickers can help personalize each month. Kids can choose stickers that resonate with their interests or the theme of the calendar. They can even create a sticker chart for special achievements or milestones, making the calendar not just a planner but a celebration of their accomplishments!
Don’t forget about glitter! A sprinkle of glitter can turn a mundane calendar into a sparkling spectacle. Just a little bit can add a touch of magic, especially for themed months like December or birthdays. However, a word of caution: glitter can be messy, so it’s best to work in a designated area or use glitter glue to minimize the mess.
For those who enjoy a more artistic approach, stamps and ink pads can be a game-changer. Kids can create unique designs by stamping images or patterns onto their calendar pages. This method allows for greater customization, and children can experiment with different colors and shapes to find what they love. It’s like having a mini art studio right at their fingertips!
In addition to these, consider using fabric scraps or buttons for a three-dimensional effect. These materials can add texture and depth, making the calendar not only visually appealing but also tactile. Kids can glue fabric pieces to represent different seasons or events, such as a little green patch for spring or a red piece for holiday festivities.
To summarize, the right decorative supplies can transform your DIY calendar from a simple organizational tool into a vibrant, personalized piece of art. With items like washi tape, stickers, glitter, stamps, and even fabric scraps, the possibilities are endless. So gather those materials, let the creativity flow, and watch as your calendar becomes a true reflection of your child's personality!
- What age is suitable for kids to start making DIY calendars? Kids as young as 5 can start with simple designs, while older children can take on more complex projects.
- Can we use digital tools for creating a DIY calendar? Absolutely! Digital tools can help in planning layouts, but the hands-on crafting experience is what makes it special.
- How can we make the calendar more educational? Incorporate learning elements like months, days of the week, or even fun facts about each month to make it both fun and educational.

Incorporating Themes
Choosing a theme for your DIY calendar can truly elevate the crafting experience, turning a simple project into an exciting adventure! Imagine your child’s face lighting up as they bring their favorite interests to life on a calendar that reflects their personality. Themes can be based on a variety of inspirations, such as seasons, holidays, or even favorite characters from books and movies. This not only makes the calendar visually appealing but also engages children on a deeper level, allowing them to explore their creativity.
For instance, a seasonal theme can include vibrant colors and images that represent each time of year. Think about using bright flowers and sunshine for spring, beach scenes for summer, fall leaves for autumn, and snowflakes for winter. This approach not only teaches children about the changing seasons but also helps them associate specific months with particular feelings and activities. The calendar then becomes a living reflection of nature’s beauty, and each month is a new opportunity to celebrate!
On the other hand, holiday-themed calendars can be a fantastic way to build excitement around annual celebrations. Kids can incorporate elements like pumpkins for Halloween, snowmen for Christmas, or hearts for Valentine’s Day. By doing this, they can look forward to each holiday while learning about its significance. Plus, it’s a great way to bond with family as you all discuss and decorate for each upcoming festivity.
Furthermore, if your child has a favorite character from a movie or a book, why not let that inspire the calendar? Whether it’s superheroes, princesses, or even animals, using these characters can make the calendar feel personal and special. Kids can draw or print out images of their favorite characters and incorporate them into the design. This not only sparks their imagination but also encourages them to take ownership of the project, making it truly their own.
Ultimately, the key to incorporating themes is to let your child’s interests guide the design process. By doing so, you’re not just creating a calendar; you’re also fostering a sense of identity and individuality in your child. So, gather those materials, let their creativity flow, and watch as they transform a blank calendar into a masterpiece that they’ll cherish throughout the year!
- What materials do I need to create a DIY calendar? You will need paper, markers, stickers, and decorative supplies like washi tape and glitter.
- Can we use recycled materials for the calendar? Absolutely! Using recycled materials not only saves money but also teaches kids about sustainability.
- How can we make the calendar more interactive? Consider adding flaps or movable parts to engage children in a fun way.
- What themes can we choose for our DIY calendar? You can choose from seasonal themes, holiday themes, or even themes based on favorite characters or interests.

Steps to Create a DIY Calendar
Creating a DIY calendar is not just a craft project; it’s an adventure that sparks creativity and enhances organizational skills in children. To embark on this fun journey, it’s essential to follow a structured approach that guides kids from initial planning to the final touches. Let's break down the steps to ensure a smooth crafting experience!
First and foremost, planning the layout is a crucial step. Before diving into the hands-on work, encourage your kids to sketch out their ideas. This is where their imagination can run wild! They can decide where to place the dates, images, and decorations. A well-thought-out layout not only makes the calendar visually appealing but also ensures that everything fits harmoniously. Think of it like drawing a treasure map; every detail counts!
Once the layout is planned, it’s time to get down to the nitty-gritty of assembling the calendar. This stage involves cutting, gluing, and organizing all the elements according to the planned layout. Kids can start by cutting out the calendar grid and then glue it onto a sturdy base. This hands-on activity is not only fun but also helps develop fine motor skills as they manipulate scissors and glue. Watching their vision come to life is incredibly rewarding!
As they assemble, remind them to stay flexible—sometimes, the best ideas come from spontaneity! If they feel inspired to add an extra doodle or switch the placement of a sticker, encourage that creativity. After all, the goal is to make a calendar that reflects their personality and interests.
To help children stay organized during the assembly process, you might want to create a simple checklist to ensure they have everything they need. Here’s a quick example:
| Item | Status |
|---|---|
| Paper | ✔️ |
| Markers | ✔️ |
| Stickers | ✔️ |
| Glue | ✔️ |
| Scissors | ✔️ |
After the assembly is complete, it’s time for the final touches. This is where the calendar can truly shine! Encourage kids to add embellishments like washi tape, glitter, or even drawings that represent their favorite things. These little details not only enhance the visual appeal but also make the calendar a cherished keepsake. It’s like adding sprinkles on top of a cupcake—deliciously fun!
Finally, remind them to hang up their calendar in a special spot where everyone can see it. This not only makes it a part of the home decor but also serves as a constant reminder of their hard work and creativity. Plus, it’s a great conversation starter!
In summary, creating a DIY calendar is a delightful process that combines planning, creativity, and hands-on activities. By following these steps, children will not only craft a beautiful calendar but also gain valuable skills that will benefit them throughout their lives. So gather those materials and let the crafting begin!
Q: What age is suitable for kids to start making DIY calendars?
A: Kids as young as 5 can start with simple designs, while older children can take on more complex projects.
Q: Can we use digital tools to create a calendar?
A: Absolutely! Digital tools can be a great way to design and print a calendar, but the hands-on craft experience is invaluable for kids.
Q: How can we make the calendar more educational?
A: Incorporate lessons about months, seasons, or even math by having them count down days until special events!

Planning the Layout
Before diving into the exciting world of crafting your DIY calendar, it's crucial to take a moment to plan the layout. This step is like sketching a blueprint before building a house; it sets the foundation for your creative project. Encourage your kids to grab some paper and pencils to brainstorm their ideas. They can sketch out how they envision the calendar, deciding where to place important elements such as the days of the week, images, and decorative touches.
When planning the layout, consider the following aspects to ensure a balanced and visually appealing design:
- Size of the Calendar: Will it be a wall calendar or a desk calendar? The size will influence how much space you have for each day and decoration.
- Grid Structure: Think about whether you want a traditional grid format or something more creative, like a circular or themed layout. A grid format is straightforward, while a creative layout can add a fun twist.
- Color Scheme: Choosing a color scheme can help unify the calendar. Kids can select colors that reflect their favorite season or theme, creating a cohesive look.
As they sketch, remind them to think about the balance of the elements. For instance, placing images or decorations too close to the edge can make the calendar look cluttered, while leaving too much empty space can make it feel incomplete. Encourage them to visualize how the calendar will look once all the pieces come together. This exercise not only sparks creativity but also helps them develop important organizational skills.
Once they have a clear idea, they can transfer their layout to the actual calendar paper. This is where the real fun begins! They can start marking out boxes for each day, drawing images, and adding any embellishments they’ve gathered. By planning ahead, kids can create a calendar that is not only functional but also a true reflection of their personality and interests. It's like creating a piece of art that serves a practical purpose!

Assembling the Calendar
Assembling the calendar is where the magic truly happens! It's the stage where all the planning and creativity come together to form a tangible piece of art that your kids can use throughout the year. Start by gathering all the materials you’ve prepared, including the paper, scissors, glue, and any decorative supplies you’ve chosen. This hands-on activity not only enhances their fine motor skills but also teaches them the importance of following instructions and being organized.
First things first, cutting the paper to the desired size is essential. Depending on the type of calendar you’re making, you might want to create a grid layout for the days of the week. For example, if you’re making a monthly calendar, each month could be represented by a large square. Once you have your squares cut out, it's time to get creative! You can use a ruler to draw lines for each day, ensuring that everything is neat and tidy. This step might sound simple, but it’s a great opportunity for kids to practice their measuring and cutting skills.
Next, gluing the pieces together is where your child can really express themselves. Encourage them to arrange their cut-out squares in a way that feels visually appealing. They might want to alternate colors or create a pattern. Once they’re happy with the layout, it’s time to stick everything down. Remind them to apply glue evenly to avoid any messy situations! This part can be a bit sticky, but that’s all part of the fun.
As they assemble the calendar, it's also a great idea to incorporate some of those decorative supplies we talked about earlier. Adding washi tape around the edges can give it a polished look, while stickers can be placed on significant dates such as holidays or family birthdays. This not only makes the calendar more engaging but also allows kids to personalize their creation further. If they’re feeling adventurous, they can even experiment with layering different materials to create a 3D effect!
Finally, don’t forget the finishing touches. Encourage your child to go back and add any additional decorations or embellishments that speak to them. Maybe they want to sprinkle some glitter on special dates or draw little doodles in the corners. The goal here is to make the calendar not just functional but a true reflection of their personality. Once everything is assembled, step back and admire the handiwork together. It’s a fantastic way to celebrate their effort and creativity!
- What age is appropriate for kids to start making DIY calendars?
Kids as young as 5 can start with simple designs, while older children can take on more complex projects.
- How can I encourage my child to stay organized with their calendar?
Regularly reviewing the calendar together and marking important dates can help instill organizational skills.
- What should I do if my child loses interest in the project?
Try to incorporate their favorite themes or characters to reignite their enthusiasm for the calendar-making process.

Creative Calendar Ideas
When it comes to crafting calendars, the sky's the limit! Getting creative with calendar design can turn a simple project into a memorable masterpiece. One fantastic idea is to create a photo calendar. Imagine the joy on your child's face as they flip through the months, each adorned with their favorite family pictures, drawings, or nature snapshots. This not only makes the calendar visually appealing but also serves as a beautiful way to reminisce about cherished memories. Kids can select images that represent special moments or even create themed months, such as a month dedicated to their favorite vacation or pet.
Another exciting concept is the interactive calendar. This type of calendar can include flaps, movable parts, or even pockets for storing little notes or surprises. Picture a calendar where each day has a flap that reveals a fun fact, a joke, or a mini-challenge for the day. This not only keeps the kids engaged but also turns the calendar into a playful learning tool. They can look forward to opening a new flap each day, making the experience of tracking time more enjoyable and interactive.
In addition to these ideas, consider incorporating thematic designs into your calendars. Themes can range from seasonal changes to favorite TV shows or characters. For instance, a winter calendar could feature snowflakes and holiday decorations, while a summer calendar might burst with bright colors and beach motifs. This not only allows children to express their interests but also makes the crafting process more exciting. You can even set up a theme week where each day of the week is dedicated to a different theme, encouraging kids to brainstorm and explore various ideas.
To make the calendar even more personalized, kids can add special dates that are meaningful to them. Marking birthdays, anniversaries, or family events can create a sense of connection and anticipation. This practice teaches children the importance of remembering and celebrating milestones, fostering a sense of belonging and joy. Moreover, incorporating handwritten notes or drawings on certain dates allows for a personal touch. Kids can jot down their thoughts, goals, or even little reminders for themselves, making the calendar not just a tool for organization but a cherished keepsake that reflects their personality.
Ultimately, the key to a successful DIY calendar project is to let creativity flow. Encourage your children to experiment with colors, textures, and layouts. The more they invest their imagination and effort into the calendar, the more they will cherish it. So, gather your supplies, unleash your creativity, and embark on this fun crafting adventure together!
Q: What age is appropriate for kids to start making DIY calendars?
A: Kids as young as 5 can participate in making simple DIY calendars with guidance. As they grow older, they can take on more complex designs and themes.
Q: How can I ensure that the calendar is durable?
A: Using sturdy materials like cardstock or laminated pages can help enhance durability. Additionally, reinforcing edges with washi tape can add both style and strength.
Q: What if my child is not very artistic?
A: That's perfectly fine! The beauty of DIY calendars is that they can be as simple or elaborate as desired. Encourage your child to express themselves in any way they feel comfortable, and remember that creativity comes in many forms.
Q: Can we use digital tools to create a calendar?
A: Absolutely! While this article focuses on physical crafting, there are many digital tools and apps available that allow kids to design and print their own calendars, combining technology with creativity.
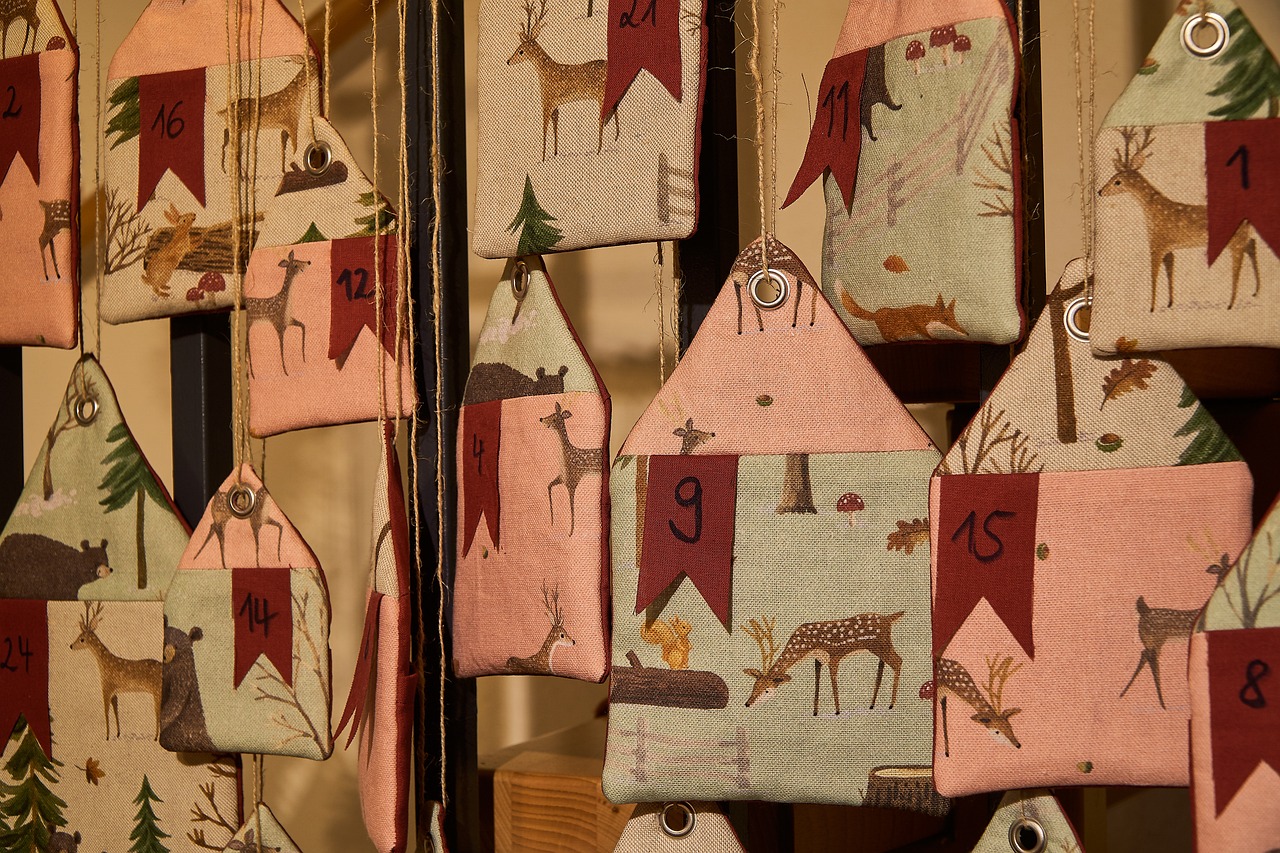
Photo Calendars
Creating a photo calendar is not just a craft project; it's a delightful journey through memories and creativity! Imagine flipping through the months and being greeted by cherished family moments, breathtaking landscapes, or even your child's own artwork. This interactive project allows kids to dive deep into their imagination while also learning the significance of each month through personal memories. By incorporating photos, children can transform a simple calendar into a vibrant storybook that captures their experiences throughout the year.
To kick off the project, gather a selection of photos that resonate with your child. These can range from family vacations, birthday celebrations, or even snapshots of their favorite pets. Encourage them to choose images that evoke feelings of joy or nostalgia. Once the photos are selected, it’s time to decide how they will be used in the calendar. Here are a few creative ideas:
- Monthly Themes: Assign a theme for each month based on the photos chosen. For instance, January could feature snowy landscapes from a winter trip, while July might showcase beach days.
- Highlighting Special Events: Use photos from birthdays, holidays, or milestones to mark those special dates, making each month a celebration.
- Artistic Touch: Kids can add their drawings or doodles around the photos, creating a blend of photography and art that reflects their personality.
The assembly process is equally exciting! Kids can cut their photos into fun shapes or use decorative scissors to add flair. They can also mix in colorful backgrounds or stickers that complement the pictures. This is where the magic happens—each photo becomes a piece of art, and the calendar evolves into a unique masterpiece.
As the calendar takes shape, encourage your child to write little captions or stories about each photo. This not only enhances their writing skills but also deepens their connection to the images. It’s like a mini autobiography captured in a calendar format! Plus, when they look back at the calendar at the end of the year, they’ll have a delightful reminder of the moments that mattered most.
Finally, once the calendar is complete, consider displaying it prominently in your home. This not only serves as a functional tool for tracking dates but also as a beautiful piece of art that sparks conversations and reminiscing. Each month becomes a new opportunity to celebrate and reflect on the past, making the photo calendar a cherished item for the entire family.
Q1: What materials do I need to create a photo calendar?
A1: You will need cardstock or heavy paper for the base, printed photos, scissors, glue, markers, and decorative items like stickers or washi tape.
Q2: Can I create a photo calendar digitally?
A2: Absolutely! There are several online platforms that allow you to design and print photo calendars. This can be a great option if you prefer a polished look.
Q3: How can I make my photo calendar more interactive?
A3: Consider adding flaps that reveal hidden messages or mini photo pockets where kids can swap out pictures throughout the year.
Q4: What age is appropriate for kids to create their own photo calendars?
A4: Children as young as 5 can participate with guidance, while older kids can take on more responsibility in the design and assembly process.

Interactive Calendars
Interactive calendars are not just a feast for the eyes; they are a playground for the imagination! Imagine a calendar that doesn't just sit on the wall but invites kids to engage with it daily. These calendars can be designed with fun features like flaps that lift to reveal surprises, movable parts that slide to mark days, or even scratch-off sections for special events. The idea is to create a calendar that transforms the mundane task of checking dates into an exciting adventure.
One of the best aspects of interactive calendars is that they can be tailored to fit any child's interests. For instance, a child who loves animals might create a calendar where each month features a different animal that pops up when you lift a flap. Alternatively, a calendar themed around a favorite movie or book can incorporate characters that kids can move around to mark different days. This kind of personalization not only makes the calendar visually appealing but also connects with the child's passions.
To get started, gather some basic materials: colored paper, scissors, glue, and markers. You can also include craft supplies like googly eyes, stickers, and washi tape to make the calendar even more engaging. Begin by sketching out a design that includes the interactive elements. For example, you might want to create a month where kids can flip a section to reveal a fun fact or a quote related to the month’s theme.
Here’s a simple example of how to structure an interactive calendar:
| Month | Interactive Feature | Purpose |
|---|---|---|
| January | Flap with a New Year’s resolution | Encourages goal-setting |
| February | Scratch-off hearts for Valentine’s Day | Builds excitement for the holiday |
| March | Sliding parts to mark spring activities | Promotes outdoor engagement |
As you and your child create the calendar, encourage them to think about what makes each month special. This could include holidays, birthdays, or even personal milestones. By incorporating these elements, you not only create a functional calendar but also a treasured keepsake that reflects the child's life and interests. Plus, the act of creating something interactive fosters a sense of ownership and responsibility, as they will want to keep it updated and engaging throughout the year.
In conclusion, interactive calendars are a wonderful way to blend creativity with practicality. They transform the simple act of marking a date into a fun, hands-on activity that can be enjoyed all year long. So, grab those craft supplies and let the fun begin!
- What age is suitable for kids to start making their own interactive calendars? Kids as young as 5 can start with simple designs, while older children can handle more complex projects.
- Do I need special materials for interactive calendars? No, basic craft supplies like paper, scissors, and glue will work just fine. You can always add more decorative items as you go!
- How can I ensure my child stays engaged with the calendar? Make it a routine to check and update the calendar together, and encourage them to add personal touches or new interactive elements throughout the year.
Tips for Personalizing Calendars
Personalizing your DIY calendar is not just about making it look good; it's about making it meaningful! When kids add their unique touches, it transforms a simple calendar into a treasured keepsake. One of the first steps is to encourage children to mark special dates. This could include birthdays, holidays, or even family anniversaries. By highlighting these important days, children learn to anticipate and celebrate events, which adds a layer of excitement to their calendar. They can use different colors or stickers to signify various events, making it visually appealing and easy to read.
Another fantastic way to personalize the calendar is by incorporating handwritten notes or drawings. Imagine how special it would be for a child to see their own doodles or little reminders scattered throughout the months! This not only makes the calendar feel more personal but also allows kids to express their thoughts and feelings. For instance, they might write down a goal they want to achieve or a fun memory associated with a particular date. This practice encourages kids to engage with their calendar more deeply, turning it into a canvas for their creativity.
Additionally, consider adding a section for monthly reflections. At the end of each month, children can write a few sentences about what they enjoyed the most, what they learned, or even what they are looking forward to in the next month. This not only enhances their writing skills but also promotes a sense of mindfulness and gratitude.
To further enhance the personalization process, you might want to create a family events section within the calendar. This could be a small area where kids can jot down family outings, movie nights, or game days. By doing this, they will have a dedicated space to remember and look forward to family bonding time, making the calendar not just a tool for organization but also a celebration of family life.
Lastly, don't forget to involve the entire family in this process! Each member can contribute ideas, decorations, and even themes for the months. This collaboration not only strengthens family bonds but also makes the calendar a true reflection of your family's personality and interests. Whether it's a quirky theme for March or a vibrant color scheme for summer, every detail can be a fun discussion point, making the crafting process even more enjoyable.
Here are some common questions that parents might have about creating DIY calendars with their children:
- What age is appropriate for kids to start making DIY calendars? Generally, children aged 5 and up can begin creating their own calendars with some guidance. Younger kids may need more assistance, but they can still participate in decorating.
- How can I make the calendar last the entire year? Using durable materials like cardstock or laminating the final product can help ensure that the calendar withstands wear and tear throughout the year.
- Can we create a digital version of a DIY calendar? Absolutely! There are many online tools and apps that allow kids to design and print their own calendars digitally, which can be a fun alternative.
- What if my child has trouble coming up with themes? Encourage them to think about their favorite hobbies, seasons, or even movies. You can also brainstorm together for inspiration!
Adding Special Dates
One of the most exciting parts of creating a DIY calendar is marking special dates. This simple act can transform a plain calendar into a vibrant celebration of family milestones, holidays, and personal achievements. Imagine your child’s face lighting up as they circle their birthday or a loved one’s anniversary! It's not just about tracking time; it's about making memories. By encouraging children to highlight these special occasions, you instill a sense of anticipation and joy for the events that matter most in their lives.
To make this process even more engaging, consider creating a special dates legend. You can use different colors or symbols to represent various types of events. For example, use a star for birthdays, a heart for anniversaries, and a cake for holidays. This not only adds a fun visual element but also helps children learn to categorize and organize their calendar in a way that makes sense to them. Here’s a simple table to illustrate how this could look:
| Event Type | Symbol | Color |
|---|---|---|
| Birthday | ★ | Blue |
| Anniversary | ♥ | Red |
| Holiday | 🎂 | Green |
Moreover, children can also jot down personal goals or reminders next to these dates. For instance, if they have a school project due or a friend’s birthday party to attend, writing it down helps them build a sense of responsibility. This practice not only makes the calendar a functional tool but also a cherished keepsake filled with their thoughts and aspirations.
As they fill in these dates, encourage them to decorate the corresponding days with stickers, drawings, or even little notes. This adds a layer of personalization and creativity, making each month a unique reflection of their interests and experiences. Plus, it’s a great way for them to express themselves artistically while learning the importance of planning and remembering significant moments in their lives.
So, grab those markers, stickers, and some glitter, and let your child’s imagination run wild as they add their special dates to their DIY calendar. This simple act can create lasting memories and instill valuable organizational skills that will serve them well in the future!
- What materials do I need to start making a DIY calendar? You will need paper, markers, stickers, and other decorative supplies. Recycled materials can also be a great addition!
- Can I incorporate themes into my DIY calendar? Absolutely! Themes based on seasons, holidays, or favorite characters can make the project more exciting and personalized.
- How can I encourage my child to stay organized with their calendar? Encourage them to mark special dates and write down reminders, which helps them connect with the calendar and develop time management skills.
Using Handwritten Notes
This article explores creative ways to make DIY calendars with children, enhancing their organizational skills while promoting creativity and bonding through crafting activities.
Creating DIY calendars helps children develop time management skills, fosters creativity, and encourages planning. It also provides a fun way to engage with family and friends through collaborative projects.
Gathering the right materials is essential for a successful DIY calendar project. Common supplies include paper, markers, stickers, and embellishments to make the calendar visually appealing and personalized.
Selecting the appropriate type of paper can enhance the calendar's durability and aesthetic. Options include cardstock, construction paper, or recycled materials, each offering unique textures and colors.
Incorporating recycled materials not only saves money but also teaches kids about sustainability. Items like old magazines, cardboard, and scrap paper can be transformed into beautiful calendar designs.
Adding decorative supplies such as washi tape, stamps, and glitter can make the calendar more engaging. These embellishments allow children to express their artistic flair and personalize their creations.
Choosing a theme for the calendar can make the project more exciting. Themes can be based on seasons, holidays, or favorite characters, allowing kids to explore their interests.
Following a structured approach makes creating a DIY calendar easier. This section outlines simple steps to guide kids through the crafting process, from planning to final touches.
Before starting, it's important to plan the calendar's layout. Kids can sketch their ideas, deciding where to place dates, images, and decorations for a balanced design.
Assembling the calendar involves cutting, gluing, and organizing elements according to the planned layout. This hands-on activity encourages children to follow instructions and develop fine motor skills.
Exploring various creative ideas can inspire children to think outside the box. This section presents unique calendar concepts that incorporate different artistic techniques and themes.
Creating a photo calendar allows kids to showcase their favorite memories. They can use family pictures, drawings, or nature photos, making each month special and personal.
Interactive calendars engage children in fun ways, such as adding flaps or movable parts. These features encourage play while teaching kids about dates and events in an enjoyable manner.
Personalization makes each calendar unique. This section provides tips on how kids can add their touch, ensuring their calendars reflect their personality and interests.
Encouraging children to mark special dates, such as birthdays and holidays, helps them connect with the calendar. This practice fosters anticipation and excitement for upcoming events throughout the year.
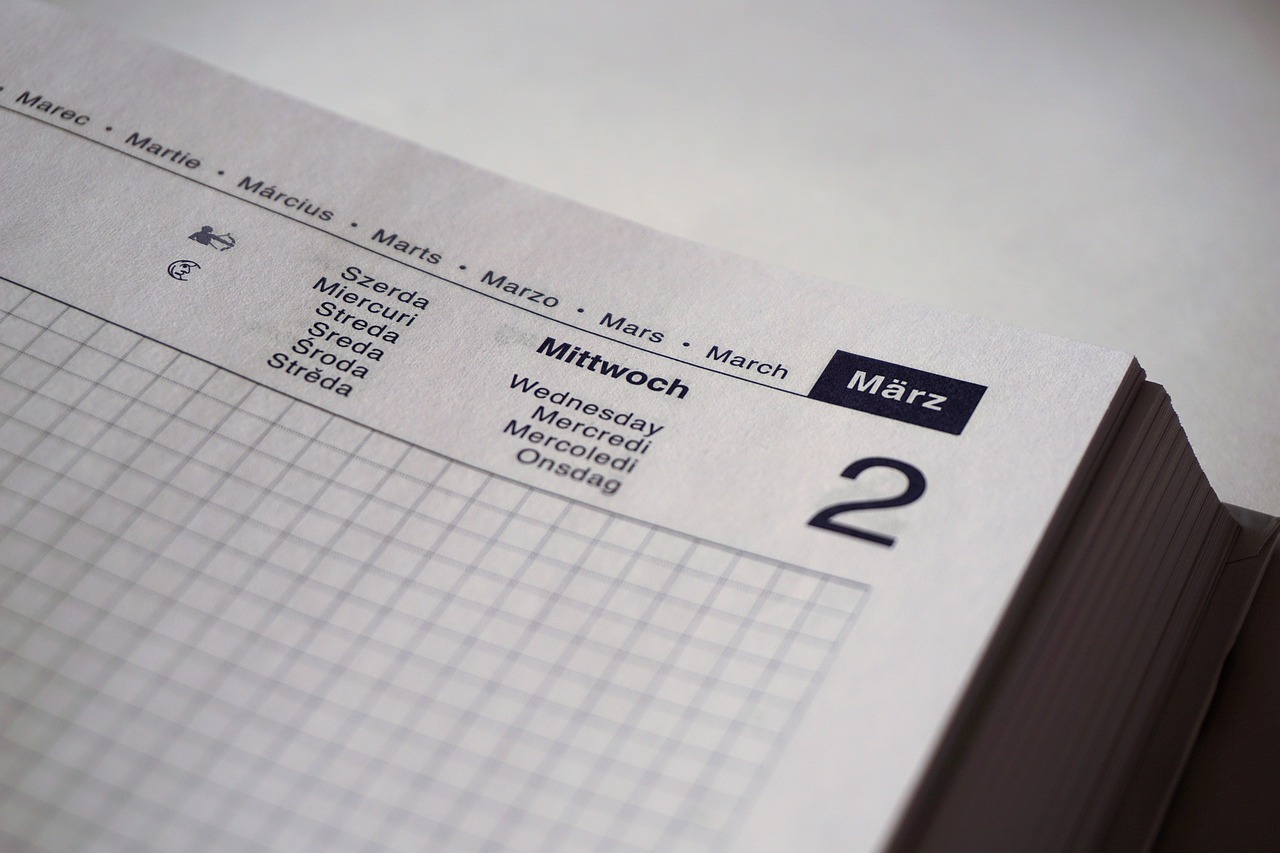
Incorporating handwritten notes into DIY calendars is a fantastic way to add a personal touch that truly reflects each child's personality. Imagine flipping through the pages of a calendar and seeing not just dates, but also little reminders, doodles, or motivational quotes penned in their own handwriting. This practice not only enhances the visual appeal of the calendar but also instills a sense of ownership and pride in their creation.
Kids can dedicate sections of each month to jot down their thoughts, goals, or even silly jokes that make them smile. Here are a few ideas to inspire them:
- Daily Reminders: Encourage them to write down important tasks or events, like school projects or family outings.
- Inspirational Quotes: They can include quotes that motivate them or words of wisdom from their favorite characters.
- Creative Doodles: Adding small drawings or doodles can make each page lively and fun.
By integrating handwritten notes, children not only practice their writing skills but also create a keepsake that they can cherish for years to come. It transforms a simple calendar into a treasure trove of memories, capturing their thoughts and feelings throughout the year.
Q: What age is appropriate for kids to start making DIY calendars?
A: Kids as young as 5 years old can participate with guidance, while older children (8+) can take on more complex tasks independently.
Q: How can I encourage my child to stay organized with their calendar?
A: Regularly reviewing the calendar together and setting reminders for important dates can help instill good organizational habits.
Q: Can we use digital tools to create a calendar?
A: Absolutely! Digital tools can complement the DIY process, allowing for printing of designs or even creating interactive calendars online.
Q: What if we run out of ideas for decorating the calendar?
A: Explore nature for inspiration! Leaves, flowers, and even rocks can be used as stamps or decorations, making the process fun and eco-friendly.
Frequently Asked Questions
- What age group is suitable for DIY calendar projects?
DIY calendar projects are perfect for kids aged 5 and up! Younger children might need a little help from an adult, but the hands-on activities can be a fun way for parents to bond with their kids while fostering creativity.
- What materials do I need to create a DIY calendar?
You'll need some basic supplies like paper (cardstock or construction paper works great), markers, stickers, glue, and scissors. Don't forget to add some decorative items like washi tape or glitter to really jazz it up!
- Can we use recycled materials for our calendars?
Absolutely! Using recycled materials not only helps the environment but also sparks creativity. Old magazines, cardboard boxes, and scrap paper can all be transformed into beautiful calendar designs.
- How can we make our calendars more interactive?
To make calendars interactive, consider adding flaps, movable parts, or even pockets for notes! This adds a playful element and can help kids engage more with the calendar.
- What are some fun themes we can choose for our DIY calendar?
The possibilities are endless! You can base your calendar on seasons, holidays, or even your child's favorite characters. Let their imagination run wild and choose a theme that excites them!
- How can we personalize our calendars?
Personalizing calendars is all about adding that special touch. Encourage kids to mark important dates, write handwritten notes, or include their drawings. This makes the calendar not just a tool but a cherished keepsake!
- What are some tips for planning the layout of the calendar?
Before diving in, it’s helpful to sketch out ideas. Decide where to place the dates, images, and decorations for a balanced look. Planning ahead can make the crafting process smoother and more enjoyable.


