DIY Gift Ideas: Handmade Crafts from Kids to Grandparents
There's something truly magical about a gift made by little hands, especially when it’s crafted with love and imagination. DIY gift ideas for grandparents are not just about the final product; they’re about the thought and effort put into creating something unique and meaningful. From personalized photo frames to colorful hand-painted kitchen towels, these gifts are perfect for any occasion and are sure to bring a smile to grandparents' faces. In this guide, we'll explore a variety of handmade crafts that children can create, showcasing their creativity while strengthening the bond with their grandparents. So, grab your crafting supplies and let’s dive into the wonderful world of handmade gifts!
Creating personalized photo frames is an enjoyable and straightforward craft that kids can easily tackle. These frames can hold cherished family photos, making them a delightful gift for grandparents to display in their homes. Imagine the joy on a grandparent's face when they receive a frame decorated with their grandchild's artwork! Kids can use materials like popsicle sticks, cardboard, or even natural elements such as twigs and leaves to design their frames. The best part? Each frame can be tailored to reflect the personality of both the child and the grandparent, making it even more special.
Handmade greeting cards offer a wonderful opportunity for kids to express their feelings and creativity. They can design unique cards for various occasions, adding a personal touch that grandparents will treasure forever. Whether it’s a birthday, holiday, or just a simple “I love you,” a handmade card speaks volumes. Kids can use different techniques, such as drawing, painting, or even incorporating natural materials like leaves and flowers to enhance their designs. The possibilities are endless!
Kids can create beautiful cards using natural materials like leaves and flowers. This eco-friendly approach not only enhances creativity but also connects children to nature while crafting. For instance, collecting vibrant autumn leaves or delicate flowers from the garden can turn a simple card into a work of art, making it even more meaningful for grandparents who appreciate the beauty of nature.
Pressed flower cards are a charming option, where kids can collect flowers, press them, and incorporate them into their card designs for a lovely, rustic look. This method not only preserves the beauty of the flowers but also adds a touch of elegance to the cards. Grandparents will love receiving a card adorned with beautiful blooms, reminding them of special moments spent with their grandchildren.
Painting cards with vibrant colors and patterns allows kids to showcase their artistic skills, creating one-of-a-kind cards that grandparents will love to receive. Imagine a card bursting with color, featuring hand-painted designs that reflect the child's personality! This not only makes the card special but also serves as a keepsake that grandparents can proudly display.
Collage cards enable kids to cut and paste various materials, such as magazine clippings or colored paper, resulting in imaginative designs that reflect their personalities and thoughts. This method encourages creativity and allows children to express themselves in a fun and engaging way. Each collage card becomes a unique piece of art, showcasing the child's individuality and love for their grandparents.
Decorative plant pots are a wonderful gift idea that combines creativity and nature. Kids can paint or decorate pots, allowing grandparents to showcase their favorite plants in style. Imagine a bright, hand-painted pot filled with vibrant flowers or herbs, bringing life and color to any space! This gift not only beautifies the home but also encourages a love for gardening and nature.
Kids can use different painting techniques, such as sponge painting or finger painting, to create vibrant designs on plant pots, adding a personalized touch to their gifts. The tactile experience of painting allows children to explore their creativity while producing a functional piece of art that grandparents will cherish.
Decoupage is a fun way for kids to decorate plant pots using paper cutouts and glue, creating unique and artistic designs that will brighten any space. This technique allows for endless creativity, as kids can choose themes or colors that resonate with their grandparents, ensuring that each pot is a reflection of their relationship.
Memory jars are a heartfelt gift where kids can fill jars with notes, drawings, or small tokens that represent special memories shared with their grandparents, fostering connection and nostalgia. Each jar becomes a treasure trove of memories, allowing grandparents to revisit cherished moments whenever they wish. Kids can decorate the jar with paint or stickers, making it visually appealing while enhancing the sentimental value of the gift.
Kids can personalize the memory jar by painting or decorating it with stickers and embellishments, making it visually appealing while enhancing the sentimental value of the gift. A beautifully decorated jar filled with memories is not just a gift; it’s a heartfelt expression of love and appreciation.
Filling the jar with meaningful notes or drawings allows kids to express their love and appreciation, creating a cherished keepsake that grandparents can revisit whenever they wish. Each note can represent a special moment, a favorite memory, or simply a reason why the grandchild loves their grandparent, making this gift incredibly personal and touching.
Q: What are some easy DIY gift ideas for kids to make for grandparents?
A: Some easy DIY gift ideas include personalized photo frames, handmade greeting cards, decorative plant pots, and memory jars. These crafts are simple and allow kids to express their creativity.
Q: How can kids personalize their gifts?
A: Kids can personalize their gifts by adding their artwork, using favorite colors, or incorporating special materials that have meaning to their grandparents, such as family photos or sentimental items.
Q: What materials do I need for these crafts?
A: Basic materials include paper, paints, markers, natural elements (like leaves and flowers), pots for painting, yarn for knitting, and jars for memory crafts. Most of these items can be found around the house or at local craft stores.
Personalized Photo Frames
Creating is not just a fun and simple craft; it's a heartfelt way for kids to express their love for their grandparents. These frames can hold cherished family photos, making them a delightful gift that grandparents will proudly display in their homes. Imagine the joy on a grandparent's face when they receive a beautiful frame adorned with their grandchild's artwork, holding a treasured memory! The process of making these frames can be as enjoyable as the final product itself, allowing kids to unleash their creativity while crafting something special.
To get started, you'll need a few basic materials which can be easily found around the house or at your local craft store. Here's a quick list of what you'll need:
- Plain wooden or cardboard frames
- Paints (acrylic or watercolor)
- Glue
- Decorative items (stickers, glitter, buttons, etc.)
- Photos to fill the frames
Once you have your materials, the fun begins! Kids can paint the frames in their favorite colors, add their names, or even write sweet messages directly on the frame. For an added touch, they can glue on decorative items to create a unique design that reflects their personality. This not only makes the gift visually appealing but also adds a layer of sentimental value that is sure to warm any grandparent's heart.
After the frames are decorated and dried, it's time to add a photo. Choosing a special picture, like a family portrait or a candid shot of a fun day spent together, will make the gift even more meaningful. The act of selecting the photo can be a beautiful bonding moment for kids, as they reflect on the memories they've shared with their grandparents.
In the end, personalized photo frames are more than just a craft project; they are a way for kids to create lasting memories and showcase their love. When grandparents receive these thoughtful gifts, they not only appreciate the effort that went into making them but also feel a deeper connection with their grandchildren. So, gather your supplies, unleash your creativity, and start crafting a gift that will be cherished for years to come!
Q: What materials do I need to make a personalized photo frame?
A: You will need plain frames (wooden or cardboard), paints, glue, and decorative items like stickers or buttons. Don't forget the photos!
Q: Can kids decorate the frames in any way they like?
A: Absolutely! Encourage kids to express their creativity. They can paint, draw, or use various embellishments to personalize their frames.
Q: What types of photos should I use in the frames?
A: Choose photos that hold special memories, such as family gatherings, holidays, or candid moments that reflect the bond between grandparents and grandchildren.
Handmade Greeting Cards
Handmade greeting cards are not just pieces of paper; they are heartfelt expressions of love, creativity, and thoughtfulness. When kids take the time to craft their own cards, they infuse each creation with a personal touch that store-bought cards simply can't replicate. Imagine the joy on a grandparent's face when they receive a card adorned with colorful drawings, heartfelt messages, and perhaps even a sprinkle of glitter! These cards can be tailored for any occasion—birthdays, holidays, or just because—and they serve as a beautiful reminder of the bond shared between generations.
One of the most exciting aspects of making handmade greeting cards is the opportunity for kids to explore their artistic side. They can use a variety of materials and techniques to create something truly unique. For instance, they might choose to use natural materials like leaves, flowers, or even pebbles, which can add an earthy and organic feel to their designs. By incorporating these elements, kids not only enhance their creativity but also learn to appreciate the beauty of nature.
Another fun approach is to create pressed flower cards. This method involves collecting flowers, pressing them between the pages of a heavy book, and then incorporating them into the card design. The result is a charming, rustic look that can evoke memories of sunny days spent outdoors. On the other hand, kids can unleash their inner artists by painting vibrant cards with bold colors and patterns. This not only showcases their artistic skills but also allows them to express their feelings visually, creating one-of-a-kind cards that grandparents will cherish forever.
For those who enjoy a bit of collage work, collage greeting cards offer a fantastic outlet for creativity. Kids can cut out images from magazines, use colorful paper, or even include fabric scraps to make visually stunning designs. This technique allows them to experiment with layering and textures, resulting in imaginative cards that reflect their personalities and thoughts. The possibilities are endless, and each card becomes a unique masterpiece that tells a story.
In conclusion, handmade greeting cards are a delightful way for kids to connect with their grandparents. They provide an opportunity for self-expression, creativity, and heartfelt communication. The joy of receiving a card crafted with love is immeasurable, making these cards a treasured keepsake that grandparents will hold dear for years to come. So, gather your art supplies and let the creativity flow—it's time to make some magic with handmade greeting cards!
- What materials do I need to make handmade greeting cards?
You can use cardstock, colored paper, markers, paints, stickers, and natural materials like leaves or flowers. - How can kids personalize their cards?
Kids can add their drawings, handwritten messages, or even photographs to make the cards special. - Are there any age restrictions for making these cards?
No, kids of all ages can participate! Just ensure that younger children have supervision, especially when using scissors or glue. - What occasions are suitable for handmade greeting cards?
Handmade cards are perfect for birthdays, holidays, thank you notes, or simply to say 'I love you.'
Using Natural Materials
When it comes to crafting, there’s something truly magical about incorporating natural materials. Imagine the joy on a grandparent's face when they receive a card adorned with elements that come straight from nature! Kids can gather leaves, flowers, and even twigs to create stunning, one-of-a-kind greeting cards that not only showcase their creativity but also connect them with the world around them. This approach not only enhances their artistic skills but also teaches them the importance of nature and sustainability.
Using natural materials allows children to explore various textures, colors, and shapes. For instance, they can collect vibrant autumn leaves, delicate petals, or even tiny pebbles. Each item can tell a story, making the card even more special. When crafting, kids can consider the following options:
- Leaves: Different shapes and colors provide a fantastic backdrop for any card.
- Flowers: Pressed flowers can add a lovely, rustic touch to their designs.
- Twigs: Small twigs can be used to create frames or decorative borders.
One of the most popular methods is making pressed flower cards. Kids can gather flowers from their gardens or local parks, then press them between the pages of a heavy book for a few days. Once dried, these flowers can be glued onto cards, creating a beautiful, natural design. This not only enhances the visual appeal but also adds a personal touch that grandparents will cherish.
Another exciting technique is using leaf prints. Children can paint one side of a leaf and press it onto paper, leaving a stunning imprint that captures the leaf's intricate details. This method is simple yet incredibly effective, resulting in unique designs that are sure to impress. The beauty of using natural materials is that no two cards will ever look the same, making each gift truly special.
Incorporating natural elements into crafts also opens up conversations about the environment. Kids can learn about different species of plants and the importance of preserving nature while having fun. So, next time you're looking for a creative project, consider heading outdoors to collect materials. It’s a wonderful way to bond, create, and show love through handmade gifts that carry the essence of nature.
Q: What types of natural materials can I use for crafting?
A: You can use a variety of natural materials such as leaves, flowers, twigs, stones, and even seeds. The key is to choose items that inspire creativity and can be easily incorporated into your designs.
Q: How do I preserve flowers for crafting?
A: To preserve flowers, you can press them between the pages of a heavy book for several days. Alternatively, you can use a flower press or microwave flower press for quicker results.
Q: Are there any safety concerns when using natural materials?
A: Always ensure that the materials you collect are safe and non-toxic. Avoid using items that may be poisonous or harmful. Supervision is recommended for younger children during crafting activities.
Q: Can I use dried leaves and flowers for other crafts?
A: Absolutely! Dried leaves and flowers can be used in a variety of crafts, including scrapbooking, home decor, and even jewelry making. Their versatility makes them a fantastic addition to any crafting project.

Pressed Flower Cards
Pressed flower cards are a charming and creative way for kids to express their love and appreciation for their grandparents. The process of creating these cards not only allows children to engage in a hands-on craft but also teaches them about nature and the beauty of flowers. Imagine the delight on a grandparent's face when they receive a card adorned with delicate, colorful flowers that their grandchild has lovingly pressed and arranged!
To create pressed flower cards, kids can start by gathering a variety of flowers from their garden or local park. It's a wonderful opportunity for a nature walk, where they can pick flowers like daisies, violets, or even ferns. Once they have their selection, they can begin the pressing process. Here’s a simple method:
- Place the flowers between two pieces of parchment paper.
- Put the parchment paper inside a heavy book.
- Leave the flowers to press for about a week, ensuring they are completely flat and dry.
After the flowers are pressed, the real fun begins! Kids can take blank cards or cardstock and start designing their creations. They can use glue to affix the pressed flowers onto the front of the card, arranging them in beautiful patterns or simply placing them haphazardly for a more whimsical look. Adding a personal touch, like a heartfelt message or a drawing, can make the card even more special.
Not only do pressed flower cards make unique gifts, but they also serve as a lovely way to celebrate different seasons. For instance, spring flowers can bring a fresh vibe, while autumn leaves can offer a warm, nostalgic feel. This variety allows kids to create cards for any occasion, be it birthdays, anniversaries, or just a simple "thinking of you" note. The recipients, especially grandparents, will cherish these keepsakes, as they encapsulate the essence of nature and the creativity of their grandchildren.
In addition to being a delightful gift, pressed flower cards can also be a great learning experience. Kids can explore different types of flowers, their colors, and even their meanings. This can lead to discussions about gardening, ecosystems, and the importance of preserving nature. In this way, crafting pressed flower cards becomes not just a fun activity but also an educational journey.
Ultimately, pressed flower cards are a fantastic way for kids to connect with their grandparents, fostering a bond that is strengthened through creativity and shared experiences. So, gather those flowers, get pressing, and let the crafting begin!
- What types of flowers are best for pressing? Flowers like pansies, daisies, and violets work well due to their flat shapes. Avoid thick or fleshy flowers as they may not press well.
- How long should I press the flowers? Generally, pressing flowers for about a week will yield the best results. Ensure they are completely dry before using them on cards.
- Can I use other materials besides flowers? Yes! Leaves, ferns, and even small herbs can be pressed and used to create beautiful designs.
- What kind of glue should I use? A craft glue or a glue stick is recommended for adhering pressed flowers to cards, as they provide a strong bond without damaging the flowers.
Painted Cards
Creating is a fantastic way for kids to unleash their inner artists while crafting something truly special for their grandparents. Imagine the joy on a grandparent's face when they receive a card adorned with vibrant colors and imaginative designs, all made by their beloved grandchild. This craft not only encourages creativity but also allows children to express their feelings in a unique way, making each card a personal treasure.
To get started, all you need are some basic supplies: blank cards or cardstock, a variety of paints (watercolors, acrylics, or even finger paints), brushes, and a splash of imagination. The beauty of painted cards lies in their versatility; kids can create everything from simple patterns to elaborate scenes. For instance, they could paint a serene landscape, a colorful bouquet of flowers, or even a whimsical animal that reflects their grandparent's personality.
One of the best parts about this craft is that there are no strict rules. Kids can experiment with different techniques, such as:
- Sponge Painting: Using a sponge to dab paint onto the card creates a textured effect that can be both fun and visually appealing.
- Watercolor Blending: Mixing colors with water allows for beautiful gradients and soft edges, giving the card a dreamy quality.
- Finger Painting: Embracing the messiness of finger painting can lead to delightful surprises, as kids explore their tactile creativity.
Once the painting is complete, kids can add their personal touch by writing heartfelt messages inside the card. This could be a simple "I love you" or a cherished memory that they share with their grandparents. The combination of art and words transforms a simple card into a meaningful keepsake.
In terms of presentation, consider using envelopes that match the card's theme. Kids can even decorate the envelopes with matching designs or stickers, creating a cohesive and delightful package. This thoughtful attention to detail not only enhances the gift but also shows the effort and love that went into making it.
Ultimately, painted cards are not just about the final product; they are about the experience of creating something beautiful from scratch. This activity fosters a sense of accomplishment in kids and strengthens their bond with their grandparents, making every painted card a cherished reminder of their love.
Q: What materials do I need to make painted cards?
A: You will need blank cards or cardstock, various types of paints (like watercolors or acrylics), brushes, and possibly sponges or other tools for different painting techniques.
Q: Can younger kids participate in making painted cards?
A: Absolutely! Younger kids can use finger paints or sponge painting techniques, which are easier and more fun for them. Always supervise them to ensure safety.
Q: How can I make the card more personal?
A: Encourage kids to write a heartfelt message inside, share a favorite memory, or even include a small drawing that represents their relationship with their grandparents.
Q: What if I don't have traditional paints?
A: You can be creative! Try using food coloring, natural dyes from fruits and vegetables, or even markers as alternatives for painting.
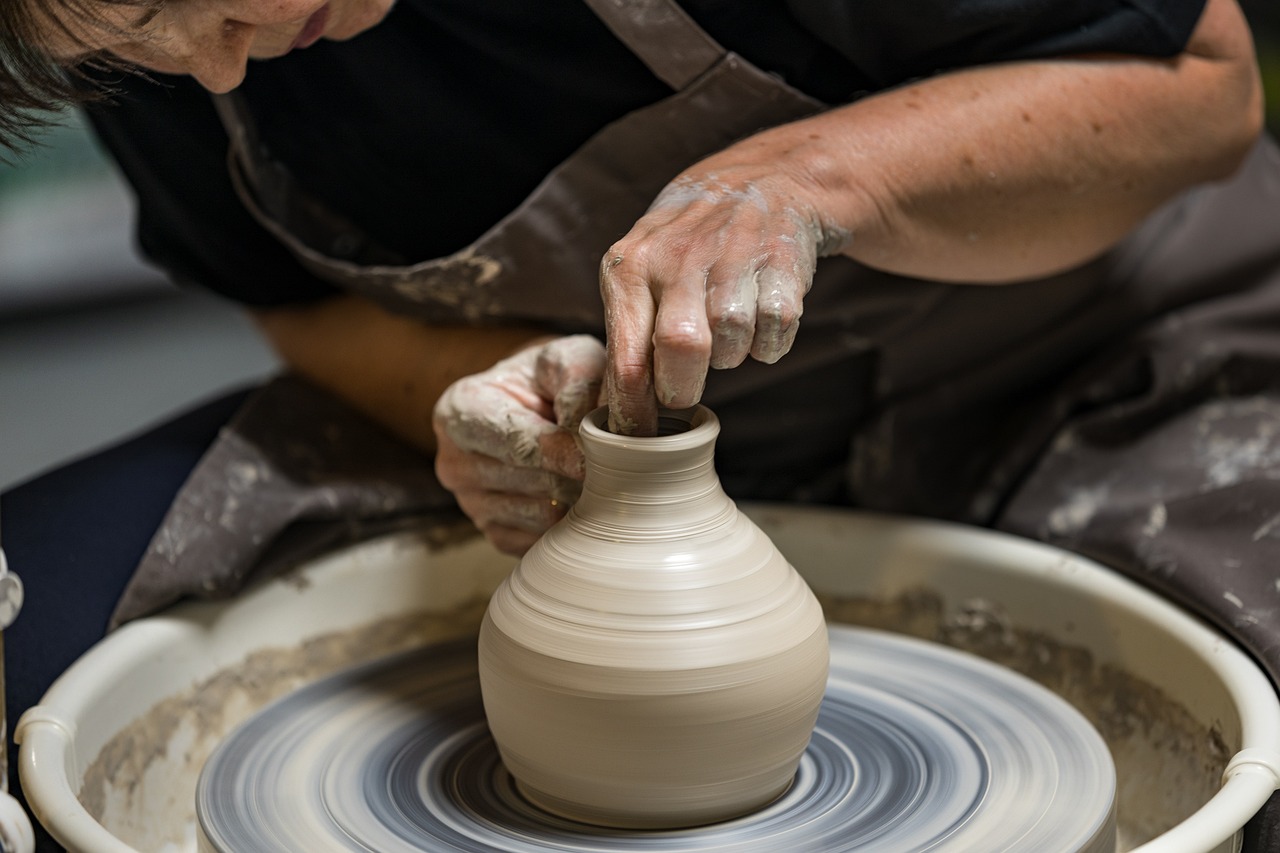
Collage Greeting Cards
Creating is a fantastic way for kids to unleash their creativity while crafting heartfelt messages for their grandparents. This project not only allows them to express their emotions but also encourages them to think outside the box. Imagine the joy on a grandparent's face when they receive a card that reflects their grandchild's personality and artistic flair! By using various materials, kids can create a card that is truly one-of-a-kind.
To start this delightful craft, kids can gather a variety of materials that resonate with them. Consider using:
- Old magazines for vibrant images
- Colored paper in different textures and shades
- Stickers and embellishments for added flair
- Glue sticks and scissors for assembling
Once the materials are collected, the real fun begins! Kids can cut out pictures or shapes from magazines and arrange them on a blank card. This process is similar to piecing together a puzzle, where each element contributes to the overall picture. They can layer different materials, creating depth and interest, and even add personal touches like handwritten messages or drawings to make the card even more special.
One of the most beautiful aspects of collage greeting cards is that they can tell a story. For instance, a child might create a card featuring images of flowers and sunshine to symbolize the warmth of their relationship with their grandparents. This storytelling aspect adds a layer of meaning that can be cherished for years to come.
Moreover, collage cards are versatile and can be tailored for any occasion—be it birthdays, holidays, or just a simple "thinking of you." The possibilities are endless, and the process of creating these cards can be a wonderful bonding activity between kids and their grandparents. As they craft together, they share stories, laughter, and love, making the experience even more memorable.
In conclusion, collage greeting cards are not just a craft; they are a heartfelt expression of love and creativity. By engaging in this activity, kids learn valuable skills while creating something that their grandparents will treasure forever. So gather those materials, unleash your imagination, and let the collage-making begin!
Q: What materials do I need to create collage greeting cards?
A: You will need old magazines, colored paper, scissors, glue sticks, and any additional embellishments like stickers or ribbons.
Q: Can collage greeting cards be made for any occasion?
A: Absolutely! Collage greeting cards can be customized for birthdays, holidays, or just to say "I love you."
Q: Is this craft suitable for all ages?
A: Yes! Kids of all ages can participate. Younger children may need assistance with scissors, but they can still contribute by choosing materials and gluing.
Q: How can I make my collage greeting card more personal?
A: Incorporate handwritten messages, drawings, or photos to add a personal touch that reflects your relationship with the recipient.
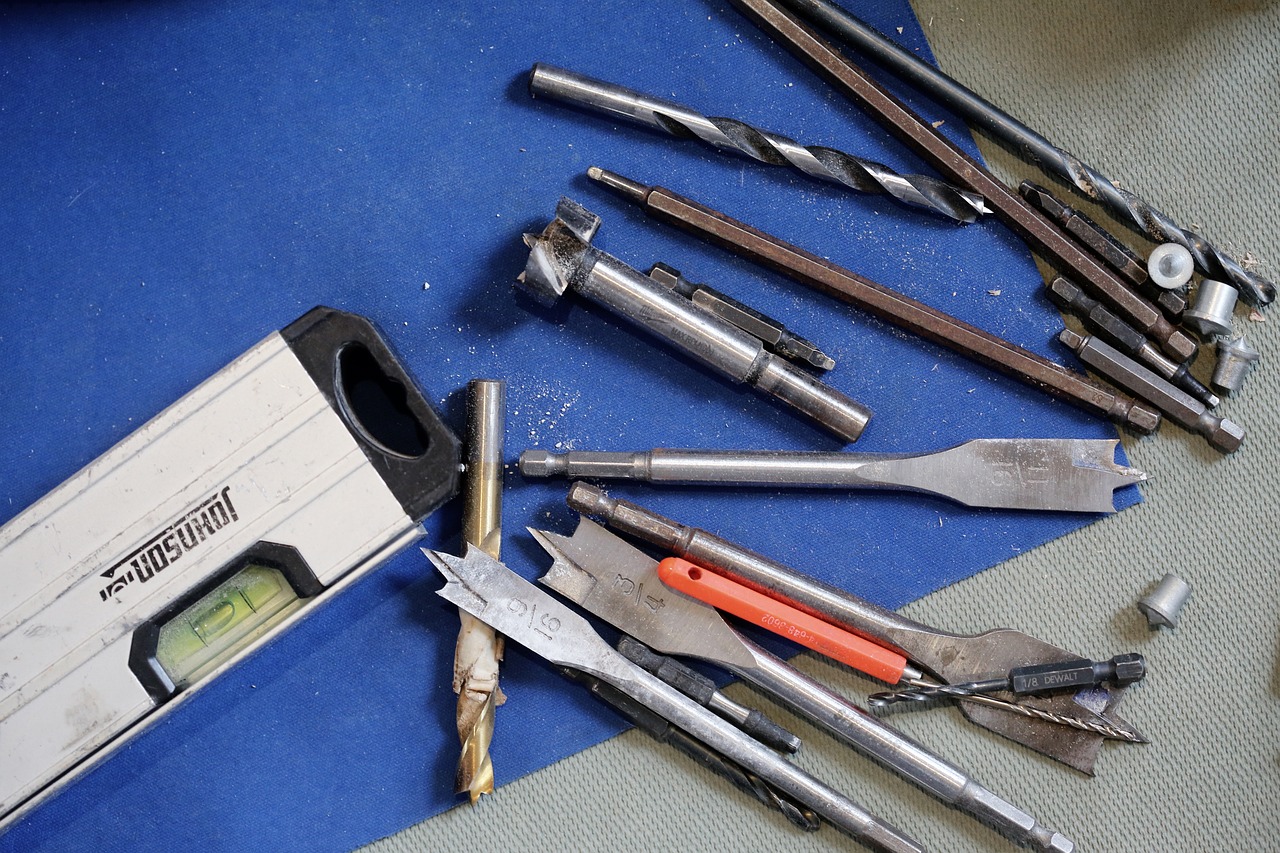
Decorative Plant Pots
Decorative plant pots are not just containers for plants; they are a canvas for creativity and a way to bring a touch of nature indoors. Kids can unleash their imagination by painting or decorating pots, transforming ordinary clay pots into vibrant pieces of art that grandparents will adore. Imagine a colorful pot adorned with hand-painted flowers or a whimsical design that brightens up a kitchen window! These pots serve a dual purpose: they are functional and a delightful expression of love and effort from the little ones.
When embarking on this crafty adventure, kids can choose from various painting techniques to make their pots stand out. For instance, they might opt for sponge painting, where they use sponges dipped in paint to create textured patterns. Alternatively, finger painting allows them to get hands-on and messy, resulting in unique designs that showcase their personal touch. The beauty of decorative plant pots lies in their versatility; they can be customized to suit any style, whether it's a rustic look or a modern flair.
To add an extra layer of creativity, kids can explore the art of decoupage. This technique involves gluing paper cutouts onto the pot, which can include anything from colorful magazine clippings to beautiful wrapping paper. It's a fun way for children to express their ideas and emotions through art. The result is a pot that not only holds a plant but also tells a story, making it a cherished gift for grandparents who will appreciate the thought and effort behind it.
Here are some tips to help kids create stunning decorative plant pots:
- Choose the Right Pot: Start with a clean, dry terracotta or ceramic pot. These materials are easy to paint and decorate.
- Gather Supplies: Kids will need acrylic paints, brushes, sponges, and any additional decorations like stickers or ribbons.
- Plan the Design: Encourage kids to sketch their ideas on paper before applying them to the pot. This will help them visualize the final product.
- Seal the Art: After the paint dries, applying a clear sealant can protect the artwork and ensure it lasts for years to come.
In conclusion, decorative plant pots are a wonderful way for kids to express their creativity while creating a thoughtful gift for their grandparents. Each pot, uniquely designed, becomes a cherished home for plants and a symbol of the love shared between generations. So, gather those paints and let the crafting begin!
Q1: What materials do I need to create decorative plant pots?
A1: You'll need terracotta or ceramic pots, acrylic paints, brushes, sponges, and optional decorations like stickers and ribbons.
Q2: Can kids use any type of paint on the pots?
A2: It's best to use acrylic paint as it adheres well to the pot surface and is available in a wide range of colors.
Q3: How can I protect the painted design on the pot?
A3: After the paint is completely dry, you can apply a clear sealant to protect the design from moisture and wear.
Q4: What kind of plants can I put in my decorated pots?
A4: You can use any type of plant that fits the size of the pot, such as succulents, herbs, or flowering plants.
Q5: Is decoupage suitable for kids?
A5: Yes, decoupage is a fun and easy technique for kids, allowing them to create beautiful designs with minimal mess.
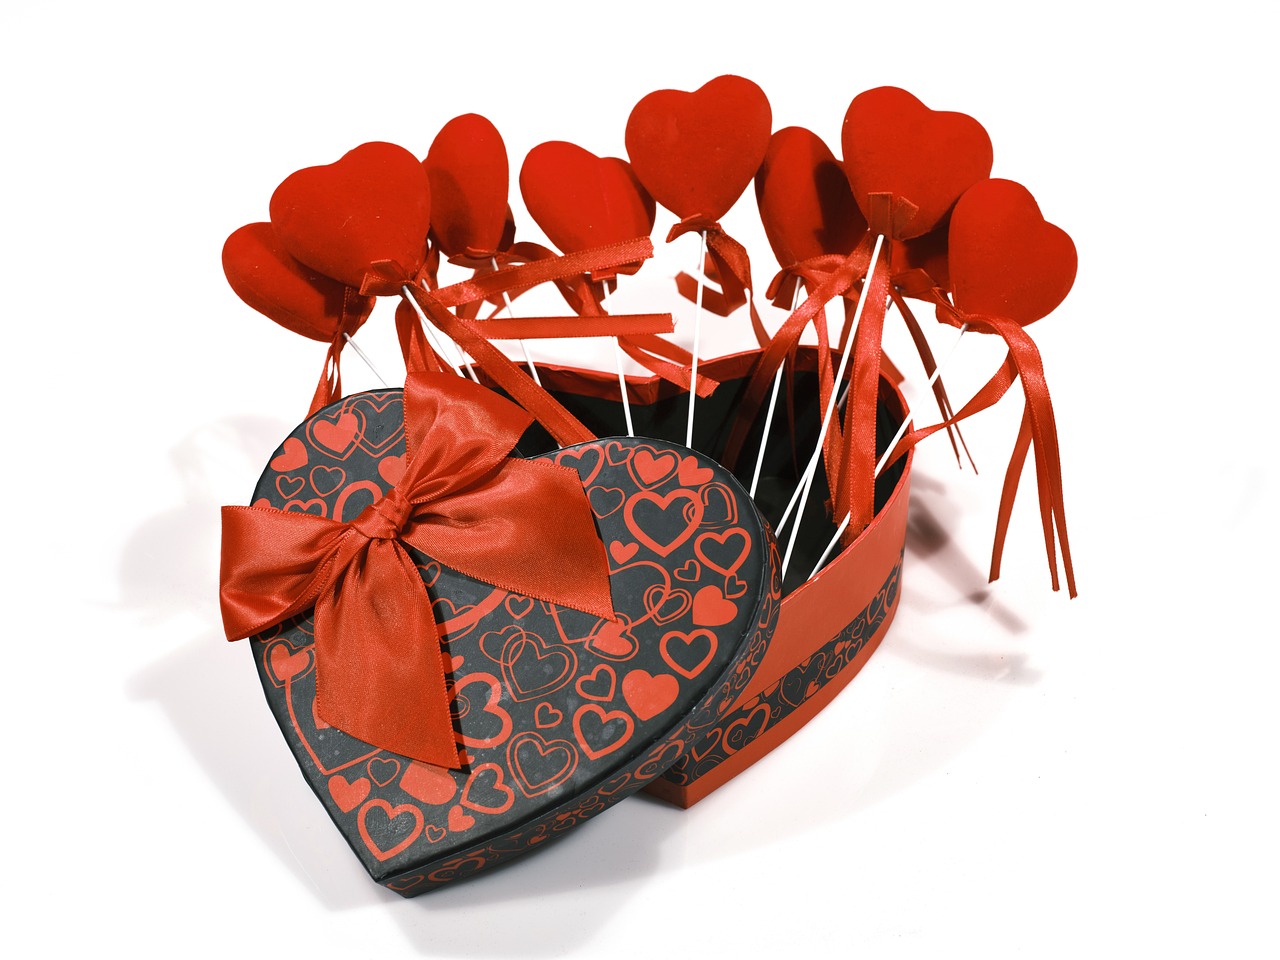
Painting Techniques
When it comes to creating decorative plant pots, can make all the difference. Kids can unleash their creativity and transform plain pots into vibrant pieces of art that grandparents will cherish. One of the simplest yet most effective methods is sponge painting. This technique involves using a sponge to apply paint, creating a textured effect that is visually appealing and easy for little hands to manage. Kids can choose their favorite colors and dab the sponge onto the pot, mixing and matching shades to create a unique masterpiece.
Another fun technique is finger painting. This method is not only enjoyable but also allows for a more personal touch. Children can use their fingers to create swirls, dots, and patterns, making each pot a true reflection of their personality. It's a great way to encourage kids to explore color combinations and develop their artistic skills. Just imagine the joy on a grandparent's face when they receive a pot adorned with their grandchild's fingerprints, each one telling a story of love and creativity!
For those who want to take it a step further, stencil painting is a fantastic option. By using stencils, kids can create precise designs such as flowers, animals, or even letters. This technique not only enhances their fine motor skills but also allows them to experiment with different colors and patterns. Once the stenciled design is complete, a clear sealant can be applied to protect the artwork from the elements, ensuring that the pot remains beautiful for years to come.
Lastly, watercolor painting can add a delicate touch to plant pots. Kids can use watercolor paints to create soft, flowing designs, blending colors in a way that mimics nature's beauty. This technique encourages children to think outside the box and embrace the unpredictability of art. The result is a stunning pot that not only serves as a home for a beloved plant but also as a cherished piece of decor.
In summary, the world of painting techniques offers endless possibilities for kids to express their creativity while crafting unique gifts for their grandparents. Whether through sponge painting, finger painting, stenciling, or watercolor techniques, each method allows children to connect with their artistic side and create something truly special. So, gather those paintbrushes, set up a crafting station, and watch as kids transform ordinary plant pots into extraordinary gifts that will surely warm the hearts of their grandparents!
Q: What type of paint should kids use for plant pots?
A: It's best to use acrylic paint, as it adheres well to ceramic and clay surfaces. Make sure to choose non-toxic options for safety.
Q: How can I protect the painted pots from weather damage?
A: Applying a clear sealant or outdoor varnish after the paint has dried can help protect the design from rain and sunlight.
Q: Can kids paint on plastic pots?
A: Yes, kids can paint on plastic pots, but it's advisable to use a primer first to help the paint adhere better.
Q: Are there any eco-friendly paint options available?
A: Yes, there are eco-friendly paints made from natural ingredients that are safe for kids and the environment.
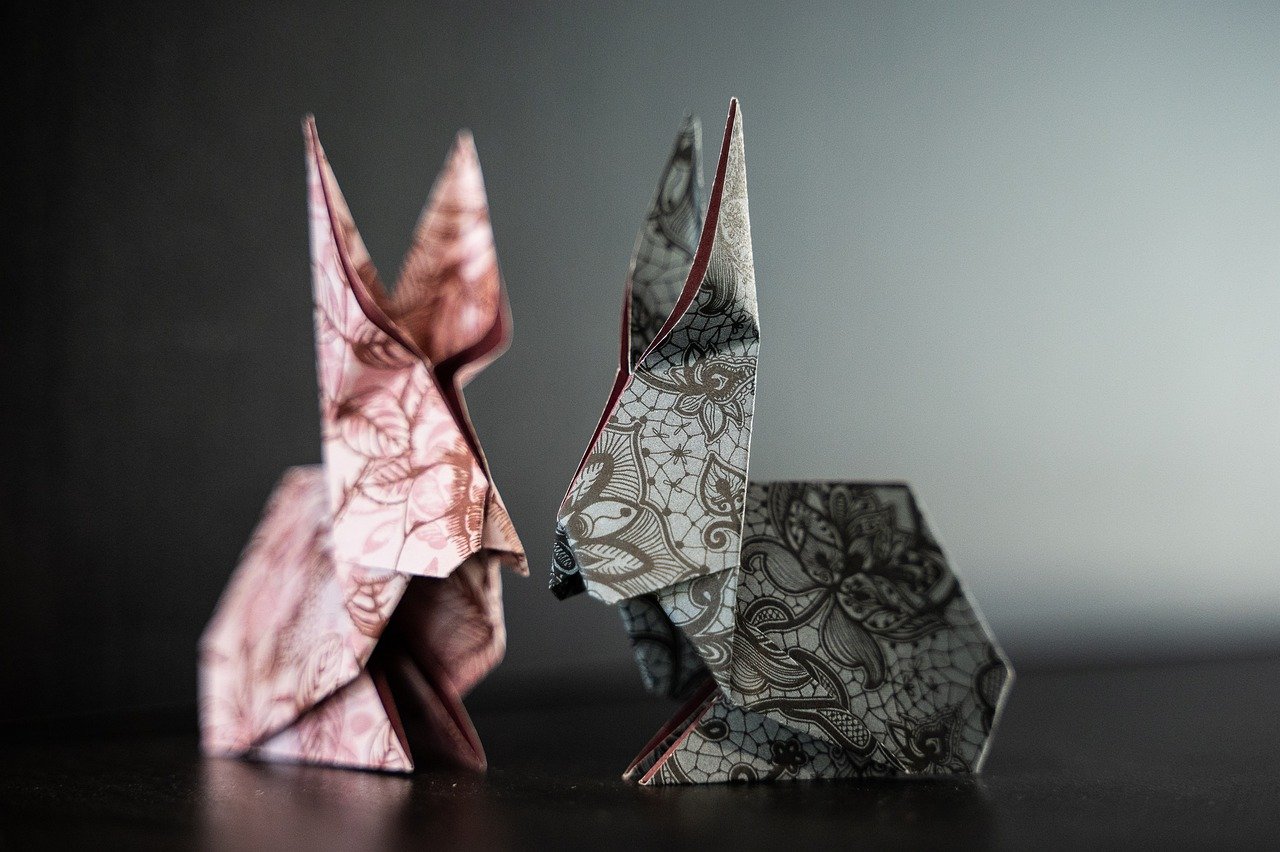
Decoupage Plant Pots
Decoupage is a delightful and creative way for kids to transform ordinary plant pots into stunning pieces of art. This craft not only allows children to express their imagination but also gives them a chance to create a personalized gift that grandparents will cherish. The process involves layering decorative paper cutouts onto the surface of the pot and sealing them with glue, resulting in a unique design that can brighten up any space.
To get started with decoupage plant pots, kids will need a few essential materials. These include:
- Plain terracotta or ceramic pots
- Decoupage glue or Mod Podge
- Paintbrushes for applying glue
- Decorative papers (old magazines, wrapping paper, or craft paper)
- Scissors for cutting out designs
- Acrylic sealant (optional, for added protection)
The beauty of decoupage lies in its versatility. Kids can choose any theme they like, whether it's floral patterns, geometric designs, or even their favorite cartoon characters. This allows them to tailor the pot to their grandparent's tastes. Once the pot is prepared, the fun really begins! Children can cut out their chosen designs and arrange them on the pot, experimenting with placement until they find the perfect layout.
After arranging the cutouts, kids can use a paintbrush to apply a layer of decoupage glue over the paper, ensuring it adheres well to the pot. It's essential to apply the glue evenly and cover the entire surface of the paper to prevent any lifting or peeling. Once the first layer is dry, they can add additional layers for a more polished look. For an extra touch, a final coat of sealant can be applied to protect the design from moisture and wear.
Not only does this craft foster creativity, but it also provides a fantastic opportunity for kids to bond with their grandparents. Imagine the joy on a grandparent's face as they receive a beautifully decorated plant pot, filled with their favorite flowers or herbs. It’s a gift that embodies love, effort, and thoughtfulness, making it a treasured addition to their home.
Q: What type of paper is best for decoupage?
A: You can use a variety of papers, including wrapping paper, scrapbook paper, or even old magazines. The key is to choose papers that are thin and easy to cut.
Q: Can kids use any kind of paint for this project?
A: While acrylic paint works well, it’s best to use decoupage glue or Mod Podge for sealing the paper. This will ensure a smooth finish and durability.
Q: How can I make the decoupage pot waterproof?
A: Applying a clear acrylic sealant after the decoupage glue dries will help protect the pot from moisture and make it suitable for outdoor use.
Q: Is decoupage safe for kids?
A: Yes, as long as non-toxic materials are used, decoupage is a safe and fun activity for kids. Always supervise younger children when using scissors and glue.

Memory Jars
Memory jars are not just simple gifts; they are heartfelt treasures that encapsulate the special moments shared between kids and their grandparents. Imagine a glass jar filled with notes, drawings, or small tokens that represent cherished memories. Each time a grandparent opens the jar, they are greeted with a wave of nostalgia and love, reminding them of the beautiful bond they share with their grandchildren. This craft is a wonderful way for kids to express their feelings and creativity, resulting in a gift that is both personal and meaningful.
To create a memory jar, kids can start by selecting a jar that resonates with them—perhaps an old mason jar or a decorative glass container. The next step involves decorating the outside of the jar. Kids can use paint, stickers, or even ribbons to give the jar a unique look. This personalization adds to the sentimental value, making it a beautiful piece that grandparents would love to display.
Once the jar is decorated, it’s time to fill it with memories. Kids can write down their favorite moments with their grandparents on small pieces of paper. These could be anything from a fun day at the park, a special family dinner, or even a simple moment of laughter shared over a game. Here are some ideas for what to include:
- Notes: Short messages expressing love and gratitude.
- Drawings: Simple sketches that capture a favorite memory.
- Photos: Small pictures of fun times spent together.
- Tokens: Little items like ticket stubs or pressed flowers that hold significance.
Each note or token added to the jar serves as a reminder of the special relationship they share. This gift becomes a living scrapbook, where every item tells a story. Moreover, the process of creating a memory jar can be a bonding experience in itself, as kids reflect on their favorite moments with their grandparents while crafting.
As the jar fills up, it transforms into a beautiful keepsake that grandparents can revisit whenever they wish. It’s a gift that keeps on giving, allowing them to relive those precious memories time and again. In a world where material gifts often overshadow emotional connections, a memory jar stands out as a unique and thoughtful present that truly embodies love and creativity.
Q: What materials do I need to create a memory jar?
A: You will need a jar (like a mason jar), decorative items (such as paint, stickers, and ribbons), and paper or small tokens to fill the jar with memories.
Q: How can kids personalize the memory jar?
A: Kids can decorate the jar with their artwork, stickers, or paint. They can also choose colors and designs that reflect their personality or their grandparent's favorite things.
Q: What kind of memories should be included?
A: Kids can include notes about fun times spent together, drawings, photos, or small tokens that represent special moments, like ticket stubs from events they've attended together.
Q: Can multiple kids contribute to one memory jar?
A: Absolutely! Siblings can work together to create a shared memory jar, each adding their own notes and tokens, making the gift even more special.
Q: How can grandparents use the memory jar?
A: Grandparents can keep the memory jar on display in their homes, opening it whenever they want to reminisce about the beautiful moments shared with their grandchildren.
Decorating the Jar
When it comes to creating a memory jar, the decoration is just as important as the contents inside. Kids can unleash their creativity by transforming a simple glass jar into a stunning keepsake that reflects their personality and the special bond they share with their grandparents. Imagine a jar that not only holds precious memories but also serves as a beautiful piece of decor in the living room or kitchen!
To start, kids can use a variety of materials to decorate the jar. Here are some popular options:
- Paint: Non-toxic acrylic paints can be used to create colorful designs or patterns. Kids can even paint their grandparents' names or special dates on the jar for a personalized touch.
- Stickers: Fun stickers are an easy way to add flair. Whether it’s flowers, animals, or even favorite cartoon characters, stickers can make the jar visually appealing.
- Ribbons and Twine: Wrapping the neck of the jar with colorful ribbons or twine adds a rustic charm. Kids can tie bows or create intricate designs that enhance the overall look.
- Craft Paper: Using decorative craft paper, kids can cut out shapes or designs and glue them to the jar. This technique allows for endless creativity, from hearts to stars!
Additionally, kids can explore different techniques for decorating the jar:
- Decoupage: This technique involves gluing paper cutouts onto the jar and sealing them with a clear finish. It’s an excellent way to create a collage of memories.
- Glitter: For a touch of sparkle, kids can apply glue and sprinkle glitter over the jar. This can be particularly enchanting when the jar catches the light!
Ultimately, decorating the jar should be a fun and engaging activity. It’s a chance for kids to express their feelings and creativity while making something truly special for their grandparents. Each jar, adorned with love and care, transforms into a treasure chest of memories, ready to be filled with notes, drawings, and tokens that celebrate their cherished moments together.
Q: What materials are safe to use for decorating a memory jar?
A: It’s best to use non-toxic paints, stickers, and other materials that are safe for children. Always check labels to ensure they are child-friendly.
Q: How can I help my child come up with ideas for decorating the jar?
A: Encourage them to think about their favorite colors, patterns, and themes that represent their relationship with their grandparents. Browsing through craft books or online resources can also spark inspiration.
Q: Can we use recycled materials for decorating the jar?
A: Absolutely! Using recycled materials not only promotes sustainability but also adds a unique touch to the jar. Items like old wrapping paper, fabric scraps, or even buttons can be creatively repurposed.
Filling the Jar
Filling the memory jar is where the true magic happens! This is the moment when kids can pour their hearts into something tangible, creating a beautiful treasure trove of memories that their grandparents will cherish forever. Imagine the joy on a grandparent's face when they open a jar filled with handwritten notes, drawings, and little tokens that capture the essence of their relationship with their grandchild. It's not just a jar; it's a container of love.
To make the process even more special, kids can include a variety of items in the jar. Here are some creative ideas to inspire them:
- Handwritten Notes: Encourage kids to write down their favorite memories or things they love about their grandparents. Simple phrases like "I love our ice cream dates" or "You tell the best stories" can mean the world.
- Drawings: Kids can create small drawings that represent special moments, like a family picnic or a birthday celebration. These drawings add a personal touch that photographs simply can't capture.
- Small Tokens: Items like dried flowers from a family outing, a ticket stub from a movie they watched together, or even a small seashell collected from the beach can evoke wonderful memories.
As kids fill the jar, they should think about the stories behind each item. Each note or token can spark a conversation, allowing grandparents to reminisce about shared experiences. This connection fosters a sense of belonging and love that transcends generations.
To make the jar even more visually appealing, kids can decorate each note or drawing with colorful markers or stickers. They can also use decorative paper for the notes, making them pop with creativity. The key is to ensure that every item is infused with thoughtfulness and care. The process of filling the jar becomes a delightful journey of reflection, creativity, and bonding.
Ultimately, the memory jar serves as a heartfelt reminder of the special bond between grandparents and grandchildren. It's a gift that keeps on giving, allowing them to revisit those cherished moments whenever they wish. So, gather those memories, fill that jar, and watch as it transforms into a cherished keepsake that encapsulates love, laughter, and the beauty of family connections.
Q: What should I include in the memory jar?
A: You can include handwritten notes, drawings, small tokens, or anything that represents your special moments together.
Q: How can I decorate the memory jar?
A: You can paint the jar, add stickers, or wrap it with colorful ribbons to make it visually appealing.
Q: Is there a specific size for the memory jar?
A: No, the size of the jar can vary based on how many items you plan to include. Just ensure it’s large enough to hold all your special memories!
Q: Can I use the memory jar for other occasions?
A: Absolutely! Memory jars can be used for birthdays, anniversaries, or any special occasion to celebrate cherished relationships.
Knitted or Crocheted Gifts
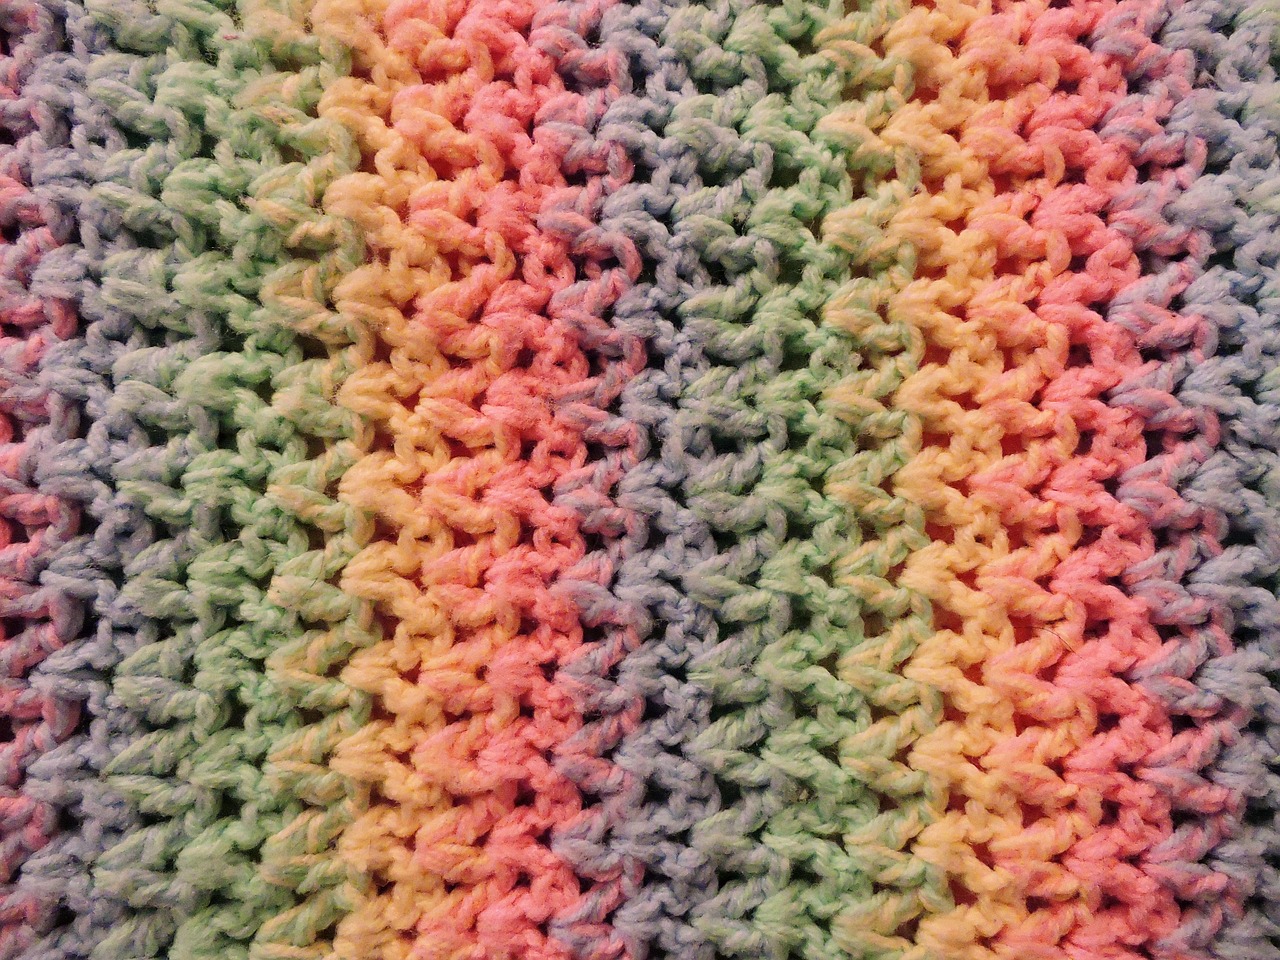
Knitting or crocheting small items like scarves or coasters can be a truly rewarding project for kids. Not only does it engage their creativity, but it also allows them to produce something tangible that conveys warmth and comfort. Imagine a grandparent's delight when they receive a cozy scarf or a set of colorful coasters, all crafted with love by their grandchild. Each stitch tells a story, and these handmade gifts serve as a heartfelt reminder of the bond shared between generations.
When kids embark on their knitting or crocheting journey, they can start with simple patterns that are easy to follow. This way, they won't feel overwhelmed and can enjoy the satisfaction of completing a project. For instance, a basic scarf can be made using just a few stitches, making it an ideal starting point. As they gain confidence, they can explore more intricate designs and patterns, transforming their creations into personalized treasures.
Choosing the right yarn is essential when crafting knitted or crocheted gifts. Kids should look for colorful and soft yarn that not only enhances the visual appeal of their creations but also ensures comfort for the recipients. Imagine wrapping up in a beautifully knitted scarf made from soft, cozy yarn—it's like a warm hug! Additionally, selecting yarn in their grandparents' favorite colors can make the gift even more special, showing that thought and consideration went into the crafting process.
To help kids get started, here are a few simple patterns they might consider:
- Basic Scarf: A straightforward pattern requiring minimal stitches, perfect for beginners.
- Simple Coasters: Quick to make and ideal for practicing knitting or crocheting techniques.
- Fingerless Gloves: A fun way to add a bit of flair while keeping hands warm.
As they create these knitted or crocheted gifts, kids not only learn a valuable skill but also develop a sense of pride in their work. Each piece they craft can be infused with love and creativity, making the final product a cherished keepsake for their grandparents. So, why not encourage your little ones to pick up some yarn and needles? They might just discover a passion that lasts a lifetime!
Q: What is the best age for kids to start knitting or crocheting?
A: Kids as young as 6-8 years old can start learning basic knitting or crocheting techniques, especially with the help of adult supervision. Simple projects can help them build confidence and skills.
Q: What materials do I need to get started?
A: To begin knitting or crocheting, you'll need yarn, knitting needles or a crochet hook, and a pattern to follow. It's also helpful to have scissors and a yarn needle for finishing touches.
Q: How can I encourage my child to continue crafting?
A: Providing them with new patterns, fun yarns, or even setting up a crafting space can inspire them to keep creating. Celebrating their finished projects with family can also motivate them to continue.
Simple Patterns for Beginners
When it comes to knitting or crocheting, starting with simple patterns can be incredibly rewarding for kids. These patterns not only build confidence but also help them develop essential skills without feeling overwhelmed. One of the best things about simple patterns is that they provide a strong foundation for more complex projects in the future. Plus, the sense of accomplishment that comes from completing a project is unmatched!
To kick things off, kids can try their hands at creating basic items like scarves, coasters, or even small blankets. These projects typically involve repetitive stitches, making them easier to follow. Here’s a quick breakdown of a couple of simple patterns:
| Project | Skill Level | Materials Needed |
|---|---|---|
| Scarf | Beginner | Yarn, Knitting Needles or Crochet Hook |
| Coaster | Beginner | Yarn, Knitting Needles or Crochet Hook |
| Small Blanket | Beginner | Yarn, Knitting Needles or Crochet Hook |
Starting with a scarf is a classic choice. Kids can use a simple knit or single crochet stitch to create a long, warm accessory. The repetitive motion helps them get comfortable with their tools and yarn. As they progress, they can experiment with different colors or stripes to make their scarves uniquely theirs.
Another great project is a coaster. This small item is perfect for practicing stitches without the commitment of a larger project. Kids can play around with various colors and designs, allowing them to express their creativity while honing their skills. Plus, who wouldn’t love to see their handmade coasters on display at Grandma’s house?
For those feeling a bit more adventurous, a small blanket can be an exciting project. Using a simple stitch pattern, children can create a cozy lap blanket that grandparents will surely cherish. This project may take a bit longer, but the end result will be a beautiful and functional piece that showcases their hard work and dedication.
As kids work through these simple patterns, it’s important to encourage them to take their time and enjoy the process. Crafting is not just about the end result; it’s about the journey of learning and creating something special. So, gather those yarns and needles, and let the crafting adventures begin!
- What materials do I need to start knitting or crocheting?
You'll need yarn, knitting needles or a crochet hook, and a pair of scissors. Some kids also like to have a yarn needle for weaving in ends. - How long does it take to learn knitting or crocheting?
It varies from child to child, but with practice, many can grasp the basics within a few sessions. Patience is key! - Can I use any type of yarn for beginners?
It's best to start with a medium-weight yarn, as it's easier to handle. Avoid very thin or very thick yarns until they gain more experience.

Choosing the Right Yarn
When it comes to knitting or crocheting a heartfelt gift for grandparents, selecting the right yarn is crucial. The yarn you choose can significantly impact both the appearance and the feel of the finished product. Imagine wrapping your loved ones in a cozy scarf or a warm blanket made from soft, vibrant yarn. The right choice can turn a simple gift into a treasured keepsake. Here are some important factors to consider when choosing yarn:
1. Yarn Weight: Yarn comes in various weights, ranging from lace to super bulky. For beginners, it’s often best to start with a medium weight yarn (like worsted weight) as it’s easier to handle and works up quickly. This means that kids can see their progress faster, which is incredibly motivating!
2. Fiber Content: The fiber content of the yarn affects its texture, warmth, and durability. Here’s a quick breakdown of common yarn fibers:
| Fiber Type | Characteristics |
|---|---|
| Wool | Warm, elastic, and great for colder climates. |
| Acrylic | Affordable, easy to care for, and available in many colors. |
| Cotton | Soft, breathable, and perfect for summer projects. |
| Blends | Combines the best of different fibers for unique textures. |
Choosing a fiber that suits the intended use of the gift is essential. For instance, if you’re making a cozy scarf, wool or acrylic could be ideal choices due to their warmth. However, if you’re crafting something for warmer months, cotton might be the way to go.
3. Color and Texture: Kids should also consider the color and texture of the yarn. Bright, cheerful colors can uplift the mood and make the gift more visually appealing. Encourage kids to think about their grandparents' favorite colors or patterns. Textured yarns, like boucle or chenille, can add a fun twist to their projects, making them stand out even more.
In conclusion, choosing the right yarn is not just about aesthetics; it’s about creating a gift that feels special and thoughtful. By considering yarn weight, fiber content, color, and texture, kids can craft beautiful and meaningful gifts that their grandparents will cherish forever. So, let’s get those creative juices flowing and pick out some yarn that’s just right!
- What type of yarn is best for beginners? Medium weight yarn, such as worsted weight, is often recommended for beginners because it is easier to work with.
- Can kids use any type of yarn for their projects? While kids can technically use any yarn, it’s best to choose softer and more forgiving fibers like acrylic or cotton to make the crafting process enjoyable.
- How do I know what color to choose? Consider the recipient's favorite colors or opt for soft, neutral tones that are generally appealing.
Customized Mugs
Customizing mugs is not just a fun craft; it’s a delightful way for kids to express their creativity while creating a practical gift that grandparents will cherish. Imagine the joy on a grandparent's face as they sip their morning coffee from a mug adorned with their grandchild's artwork or a heartfelt message. This simple yet meaningful project allows children to showcase their artistic flair, turning an ordinary kitchen item into a treasured keepsake.
To get started, kids can gather a few essential supplies. All they need are plain ceramic mugs, non-toxic ceramic paints, and brushes. The process is straightforward and can be a great bonding experience between kids and their grandparents, as they can brainstorm ideas together. Here are some tips to ensure the mugs turn out beautifully:
- Use Non-Toxic Paints: Safety is paramount, especially when kids are involved. Choosing non-toxic paints ensures that the mugs are safe for everyday use, allowing grandparents to enjoy their personalized gifts without any health concerns.
- Design Ideas: Kids can unleash their imagination by brainstorming various design ideas. They might want to include favorite family quotes, drawings of family pets, or even handprints that symbolize their love. The possibilities are endless!
- Personal Touch: Encourage kids to add a personal touch, like their name or a special date, making the mug even more memorable. This small detail can evoke fond memories every time the grandparent uses the mug.
Once the designs are completed, the mugs need to be cured according to the paint's instructions, usually by baking in the oven. This step ensures that the artwork is durable and can withstand daily use. After the mugs cool down, they are ready to be gifted, bringing smiles and warmth to the grandparents’ hearts.
In addition to being a fun project, creating customized mugs teaches kids valuable lessons. They learn about planning, creativity, and the joy of giving. It’s an opportunity for them to reflect on their relationship with their grandparents, making the act of crafting even more meaningful. So, why not gather some supplies and start this wonderful DIY project? It’s a simple way to create lasting memories and show love through a personalized gift!
What type of paint should I use for customizing mugs? It’s best to use non-toxic ceramic paints specifically designed for use on dishes. These paints are safe and will adhere well to ceramic surfaces.
How do I ensure the paint is durable? After painting the mug, follow the manufacturer's instructions for curing. This usually involves baking the mug in the oven for a specified time, which helps set the paint.
Can kids use regular markers to decorate mugs? Regular markers may not be suitable as they can wash off easily. It's recommended to use permanent markers or ceramic paints for a long-lasting design.
Are there any safety precautions I should take? Always supervise kids during the crafting process. Ensure they are using non-toxic materials, and remind them to handle the oven safely when curing the mugs.
Using Non-Toxic Paints
When it comes to crafting with kids, safety should always be a top priority. That's why using non-toxic paints is essential, especially for projects like customizing mugs. Non-toxic paints are formulated without harmful chemicals, making them safe for children to use while allowing them to express their creativity freely. Imagine the joy of seeing a child paint a vibrant flower or a silly face on a mug, knowing that they are using materials that won’t pose any risk to their health!
There are several benefits to choosing non-toxic paints for your DIY projects:
- Safety First: Non-toxic paints are made from natural ingredients that are safe for children, ensuring peace of mind for parents and caregivers.
- Vibrant Colors: Many non-toxic paints come in a wide range of colors, allowing kids to create eye-catching and beautiful designs.
- Easy Clean-Up: Most non-toxic paints are water-based, making them easy to clean up with soap and water, which is a huge plus when crafting with kids!
Before starting the project, it's a good idea to gather all your materials and set up a designated crafting area. Here’s a simple checklist to ensure you have everything you need for a successful mug customization session:
| Materials | Purpose |
|---|---|
| Non-toxic paints | For decorating the mugs |
| Paintbrushes | For applying the paint |
| Plain ceramic mugs | The canvas for your creativity |
| Water and paper towels | For cleaning brushes and hands |
| Aprons or old shirts | To protect clothing from paint splatters |
Once you have all your materials ready, encourage the kids to let their imaginations run wild! They can paint their favorite animals, family quotes, or even abstract designs. The key is to have fun and enjoy the process, knowing that the end result will be a beautiful, personalized gift that grandparents will cherish forever. So, gather those non-toxic paints and let the creativity flow!
- What are non-toxic paints made of? Non-toxic paints are generally made from natural materials and pigments, avoiding harmful chemicals commonly found in traditional paints.
- Are non-toxic paints washable? Most non-toxic paints are water-based and can be easily washed off surfaces and skin with soap and water.
- Can non-toxic paints be used on all types of surfaces? While non-toxic paints work well on ceramics, they may not adhere properly to all surfaces, so it's best to check the manufacturer's recommendations.

Design Ideas
When it comes to customizing mugs, the possibilities are as endless as your imagination! Kids can let their creativity run wild by brainstorming various that resonate with their grandparents. One fantastic approach is to think about what makes their grandparents smile or what they cherish the most. For instance, a favorite family quote can be a delightful reminder of shared laughter and love. Imagine a mug that says, 'Grandma's Coffee, Grandkids' Love'—it’s simple yet heartfelt!
Another engaging idea is to incorporate family drawings. Kids can sketch their grandparents, pets, or even their favorite family moments. These illustrations not only showcase the child's artistic side but also create a personal connection with the gift. Additionally, kids can use vibrant colors to paint seasonal themes, such as flowers for spring or snowflakes for winter, making the mugs suitable for any time of the year.
To further enhance the creativity, kids can explore the use of stencils or stickers to add intricate designs or patterns. This method is especially great for younger children who may feel more comfortable using stencils to create shapes like hearts, stars, or even their grandparents' initials. By combining various techniques, such as painting and stenciling, kids can produce a truly unique mug that reflects their personality and love.
Moreover, incorporating handwritten messages adds a special touch. Kids can write little notes or phrases that express their feelings, like, 'You are my sunshine' or 'Best Grandma Ever'. This not only makes the gift more personal but also gives grandparents something to cherish every time they enjoy their favorite beverage.
In summary, customizing mugs is not just about the final product; it's a delightful journey of creativity and love. By exploring different design ideas, kids can create thoughtful gifts that their grandparents will treasure for years to come. So, grab those paints and markers, and let the crafting begin!
Q: What materials do I need to customize a mug?
A: You will need a plain ceramic mug, non-toxic ceramic paints or markers, and possibly stencils or stickers for added designs. Make sure to have brushes or sponges if you're planning to paint.
Q: How do I ensure the design lasts after painting?
A: After painting, allow the mug to dry completely. Most ceramic paints require baking in the oven to set the design—follow the instructions on the paint packaging for the best results.
Q: Can kids of all ages participate in this craft?
A: Absolutely! Younger kids can use non-toxic markers and stickers, while older kids can explore painting techniques. Just supervise to ensure safety, especially with any sharp tools or hot materials.
Q: What if I make a mistake while decorating?
A: Mistakes can be part of the creative process! If a design doesn’t come out as planned, you can often paint over it once it’s dry or incorporate it into a new design. Embrace the imperfections!
Handmade Jewelry
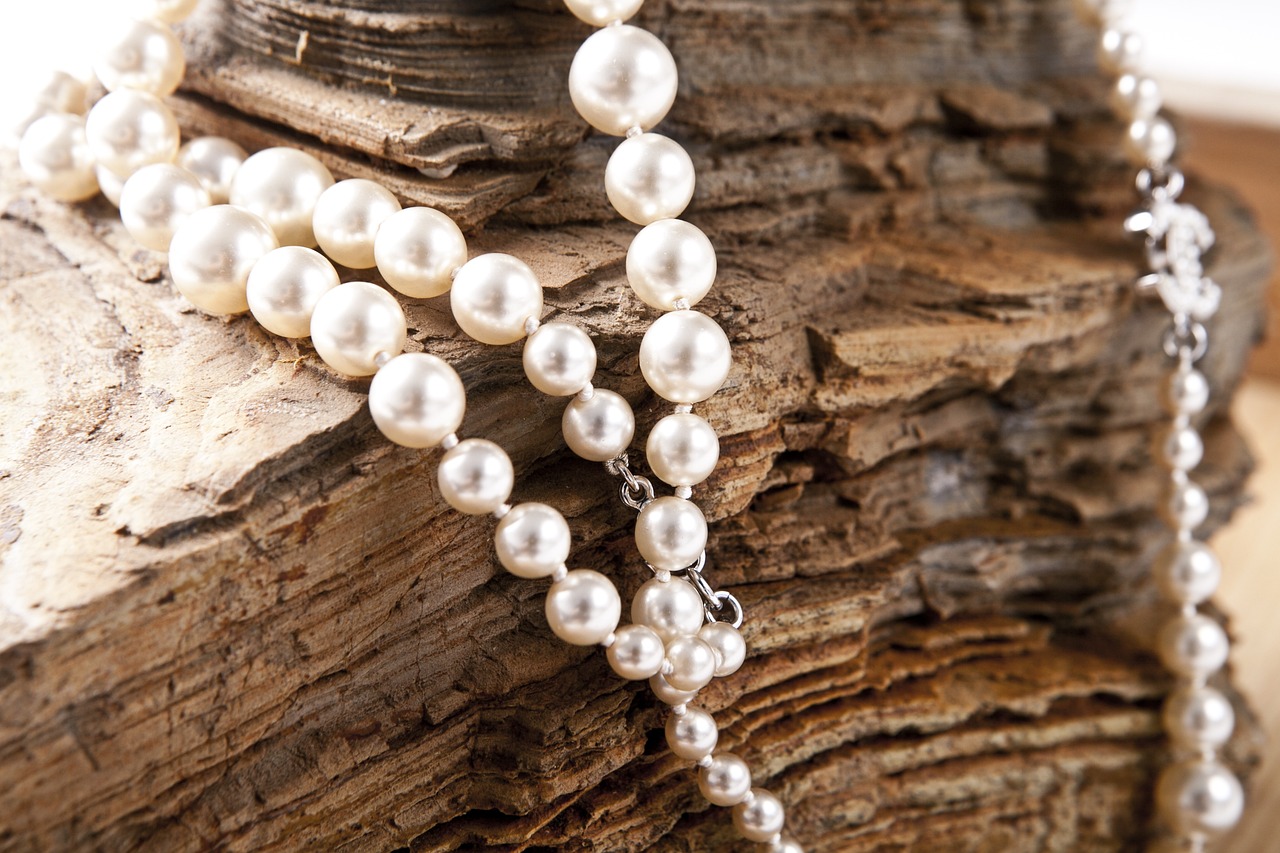
Creating , such as bracelets or necklaces, is a wonderful way for kids to explore their creativity while crafting meaningful gifts for their grandparents. Not only does this activity allow children to express themselves artistically, but it also provides an opportunity to create pieces that hold sentimental value. Imagine the joy on a grandparent's face when they receive a unique piece of jewelry made with love by their grandchild! It’s like wearing a little piece of their heart every day.
To get started, kids can learn some basic beading techniques. This involves stringing beads onto a cord or wire, which is not only fun but also encourages the development of fine motor skills. As they string beads, children can experiment with different colors, shapes, and sizes, creating beautiful combinations that reflect their personal style and the preferences of their grandparents. For example, a colorful bracelet made from brightly colored beads might appeal to a grandparent who loves vibrant patterns, while a necklace featuring natural stones might resonate more with someone who appreciates earthy tones.
Incorporating natural elements into their jewelry designs can add an extra layer of uniqueness. Kids can gather shells, pebbles, or even dried flowers to include in their creations. This not only enhances the aesthetic appeal but also connects the jewelry to special memories, like a day spent at the beach or a family hike in the woods. For instance, a bracelet made with smooth beach stones could remind grandparents of sunny afternoons by the sea, making the gift even more precious.
When it comes to selecting materials, kids should consider using non-toxic and safe supplies. This ensures that the jewelry is not only beautiful but also safe to wear. Parents can assist by helping children choose materials that are durable and suitable for the intended recipient. For example, using elastic cord for bracelets can make them easy to wear and remove, while metal wires might be better for more intricate designs.
To inspire creativity, kids can look at various design ideas. They might think about themes, such as favorite colors, hobbies, or even family memories. For instance, if a grandparent loves gardening, a necklace featuring flower-shaped beads could be a perfect gift. Or if they enjoy reading, a bracelet made with book-themed charms could be a delightful surprise. The possibilities are endless, and the process of creating something unique is just as rewarding as the final product.
Overall, making handmade jewelry is a fantastic way for kids to bond with their grandparents while expressing their love and creativity. Each piece tells a story, and every time a grandparent wears the jewelry, they will be reminded of the special bond they share with their grandchild. It’s not just a gift; it’s a cherished memory, crafted with care and affection.
Q: What materials do I need to start making handmade jewelry?
A: You will need beads, string or wire, clasps, and optionally, tools like pliers for metal work. Non-toxic paints and natural elements can also be used for unique designs.
Q: How can I ensure the jewelry is safe for my grandparents?
A: Use non-toxic materials, avoid small parts that could be a choking hazard, and ensure that any metal components are hypoallergenic if needed.
Q: What are some beginner-friendly jewelry-making techniques?
A: Start with basic beading, knotting, or simple wire wrapping. There are many tutorials available online to guide you through the process.
Q: Can kids personalize their jewelry?
A: Absolutely! Kids can choose colors, shapes, and themes that resonate with their grandparents, making each piece special and unique.

Beading Techniques
When it comes to creating handmade jewelry, are essential for kids to learn. Not only do these techniques enhance creativity, but they also foster fine motor skills and patience. One of the most basic yet effective methods is the stringing technique, where kids can simply thread beads onto a string or elastic cord. This method is perfect for beginners, as it requires minimal tools and allows for immediate gratification. Imagine the joy on a child’s face as they see their colorful creation come to life!
Another technique worth exploring is the knotting technique. This method involves tying knots between beads to create a more secure and unique design. It’s a great way to teach kids about the importance of craftsmanship and the value of making something that will last. Plus, it adds a touch of flair to the jewelry, making each piece truly one-of-a-kind. For those feeling adventurous, the weaving technique can open up a whole new world of possibilities. Using materials like thread or wire, kids can create intricate patterns that showcase their artistic flair.
Here’s a quick overview of some popular beading techniques:
| Technique | Description | Skill Level |
|---|---|---|
| Stringing | Simple threading of beads onto a string or elastic. | Beginner |
| Knotting | Tying knots between beads for security and design. | Intermediate |
| Weaving | Using thread or wire to create intricate patterns. | Advanced |
Incorporating natural elements into beading can also elevate the project. Kids can use shells, stones, or even dried flowers to create jewelry that tells a story. This not only makes the jewelry unique but also connects children to nature, allowing them to appreciate the beauty around them. As they gather these materials, they learn about their environment, fostering a sense of curiosity and responsibility.
Ultimately, the key to mastering these beading techniques is practice and experimentation. Encourage kids to try different combinations of beads, colors, and techniques. The more they play around with their designs, the more confident they will become in their abilities. And remember, the process of creating is just as important as the final product. Each bead strung is a step toward self-expression and creativity!
- What age is appropriate for kids to start beading? Most children can start beading as early as 5 or 6 years old, with supervision. Simple stringing techniques are a great starting point!
- What materials do I need to get started? Basic materials include beads, string or elastic cord, scissors, and optionally, pliers for knotting or weaving techniques.
- Can kids create their own designs? Absolutely! Encourage them to express their creativity by mixing colors and shapes to create unique pieces.
Using Natural Elements
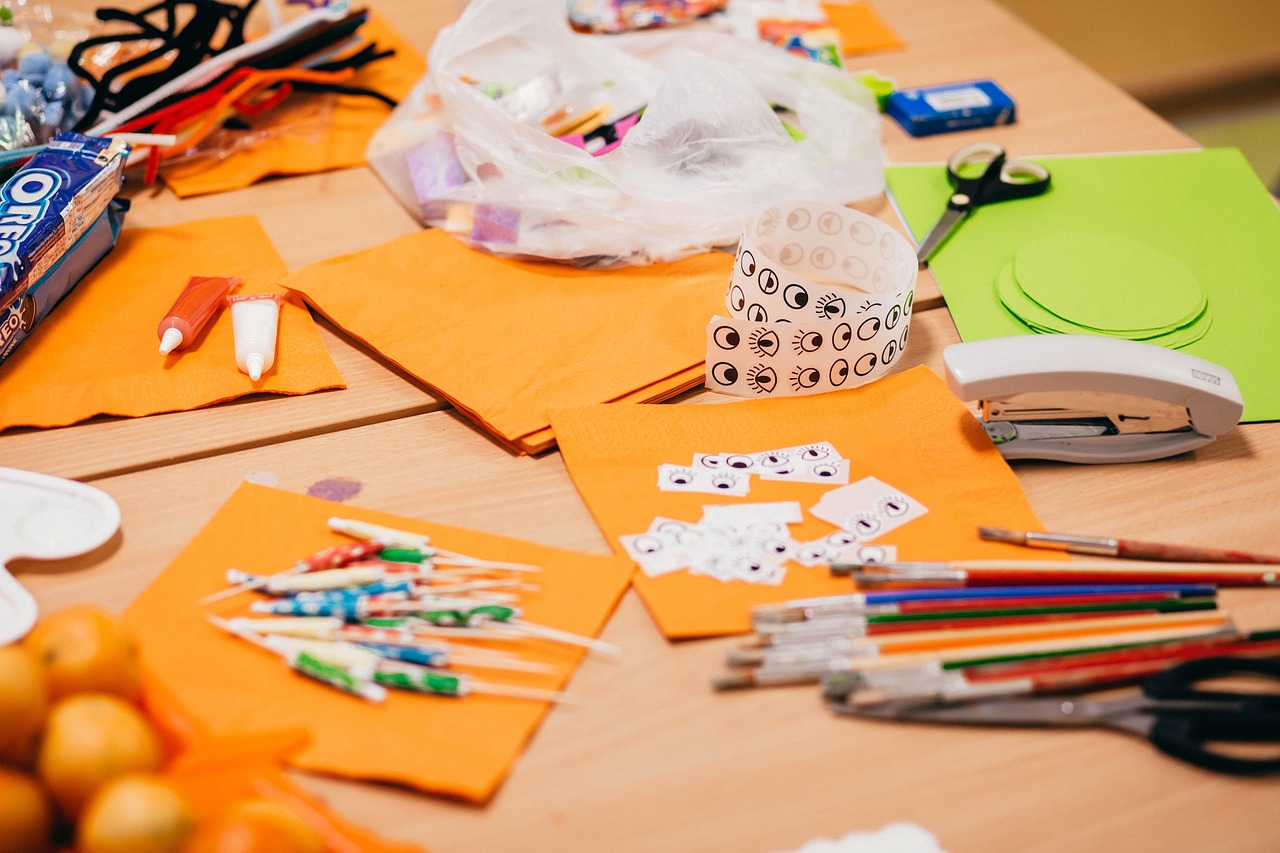
When it comes to crafting greeting cards, incorporating natural elements can elevate the creativity and sentiment behind the gift. Imagine the joy on a grandparent's face when they receive a card adorned with beautiful, real leaves or vibrant flowers. Not only does this eco-friendly approach enhance the artistic flair of the cards, but it also fosters a deeper connection between children and the wonders of nature. Kids can embark on a delightful adventure to collect materials from their surroundings—like fallen leaves, colorful petals, or even small twigs—to create unique designs that reflect the beauty of the outdoors.
One of the most charming ways to utilize natural elements is by making pressed flower cards. This process involves picking fresh flowers, pressing them between heavy books, and allowing them to dry. Once dried, kids can arrange these flowers on their cards, securing them with glue. The result is a stunning, rustic aesthetic that captures the essence of nature, making each card a one-of-a-kind masterpiece. The vibrant colors and delicate textures of the flowers add a personal touch that grandparents will surely cherish.
Additionally, children can explore other creative avenues, such as using leaves to create nature-inspired prints. By painting the leaves and pressing them onto paper, kids can produce intricate patterns that mimic the beauty of nature's designs. This technique not only encourages artistic expression but also teaches children about the different shapes and colors found in the natural world.
Incorporating natural elements into card-making is more than just a crafting technique; it's a way for kids to express their feelings while also showing respect for the environment. By using materials sourced from nature, children learn the value of sustainability and creativity, crafting gifts that are as meaningful as they are beautiful.
- What materials do I need to create pressed flower cards? You will need fresh flowers, heavy books for pressing, cardstock or blank cards, and glue.
- How can I ensure the flowers stay preserved? Make sure to dry the flowers completely before gluing them onto the card. This will help prevent any moisture from ruining the card.
- Can we use other natural elements besides flowers and leaves? Absolutely! Kids can use twigs, seeds, or even small stones to add texture and variety to their cards.
- Is it safe for kids to use natural materials? Yes, as long as they avoid any plants that are known to be toxic. Always supervise children when collecting materials outdoors.

Crafting Memory Quilts
Creating a memory quilt is not just a craft; it’s a heartfelt journey that kids can embark on with their family members. It's a unique way to celebrate special moments, transforming fabric pieces into a cozy, sentimental gift that grandparents will cherish for years. Imagine the joy on a grandparent's face when they receive a quilt made from meaningful fabrics that hold stories and memories! This project encourages children to think deeply about their family history and the moments that matter most.
To start crafting a memory quilt, kids can gather various fabric pieces that symbolize special times in their lives. This could include old t-shirts from family vacations, baby clothes, or even fabric from a beloved blanket. Each piece tells a story, and together they create a tapestry of memories. As kids choose the fabrics, they can discuss with their parents or grandparents what each piece represents, fostering connections and sparking conversations that might have been forgotten.
When it comes to stitching those pieces together, kids can learn basic stitching techniques, which not only enhances their sewing skills but also provides a sense of accomplishment. Simple stitches like the running stitch or whip stitch are perfect for beginners. As they sew, they can reflect on the memories associated with each fabric, making the process even more meaningful. It’s a wonderful opportunity for kids to bond with their grandparents, sharing stories and laughter as they work together.
Once the quilt is assembled, the final product is not just a blanket; it’s a cherished keepsake that encapsulates love, family, and shared experiences. Grandparents can use it to keep warm, but more importantly, they can wrap themselves in the memories it holds. This makes the memory quilt a perfect gift for any occasion, be it a birthday, anniversary, or just a simple gesture of love.
Here are some common questions regarding crafting memory quilts:
- What fabrics are best for a memory quilt? Fabrics that hold sentimental value, like old clothing or items from special events, work best. They add emotional significance to the quilt.
- Can kids sew the quilt by themselves? While kids can certainly help with sewing, it's recommended that an adult supervises or assists, especially with sewing machines or sharp tools.
- How do I care for a memory quilt? Memory quilts can be washed gently in cold water and air-dried to preserve the integrity of the fabrics and the memories they hold.

Choosing Meaningful Fabrics
When it comes to crafting a memory quilt, the choice of fabrics can truly transform the piece from just a blanket into a cherished keepsake. Kids can dive into their family history and pick fabrics that hold special significance. For instance, using pieces from an old favorite shirt of a grandparent or fabric from a baby blanket can evoke nostalgic feelings and create a quilt that tells a story. This process not only makes the quilt more personal but also allows children to connect with their family’s past.
Consider the following tips when selecting fabrics:
- Sentimental Value: Choose fabrics that have a story behind them. This could include clothing items from family members or fabric that represents significant life events, such as a wedding or a family reunion.
- Color and Texture: Think about the colors and textures that your grandparents love. A quilt filled with their favorite hues can brighten their space and bring joy every time they see it.
- Durability: Opt for fabrics that are durable and can withstand the test of time. Quilts are often used and washed, so selecting high-quality materials ensures that the memories they hold will last.
Additionally, kids can involve their grandparents in the fabric selection process. This not only makes the crafting experience more engaging but also allows for an opportunity to share stories about each fabric’s significance. As they sift through old clothes or fabric scraps together, children can learn more about their family's history, fostering a deeper connection. Ultimately, the quilt will not just be a collection of fabric pieces, but a tapestry of love, memories, and shared moments that grandparents will treasure for years to come.
- What types of fabrics are best for a memory quilt? It's best to use cotton or cotton blends, as they are durable and easy to work with. Fabrics with sentimental value, such as old clothing or linens, can also be wonderful choices.
- How can I ensure the quilt lasts a long time? Use high-quality materials and consider pre-washing fabrics to prevent shrinkage. Additionally, following proper washing instructions will help maintain the quilt's appearance.
- Can kids help in the quilting process? Absolutely! Kids can assist in choosing fabrics, cutting pieces, and even sewing if they are old enough. It’s a great way to bond and create lasting memories.

Stitching Techniques
When it comes to creating a beautiful and heartfelt memory quilt, mastering some basic is essential. Kids can start with simple stitches, allowing them to feel accomplished while crafting a sentimental gift for their grandparents. One of the most popular and easy techniques is the running stitch, which involves passing the needle in and out of the fabric in a straight line. This stitch is not only easy to learn but also adds a lovely decorative element to the quilt.
Another technique to consider is the whip stitch, which is perfect for sewing two pieces of fabric together. This stitch is great for securing the edges of the quilt layers, ensuring that everything stays in place. Kids can also experiment with the backstitch, which creates a strong seam by sewing backwards and forwards, making it ideal for areas that might need extra durability.
To help kids visualize these techniques, it can be beneficial to set up a small stitching demonstration. Here’s a quick overview of some basic stitching techniques they can practice:
| Stitch Type | Description | Use |
|---|---|---|
| Running Stitch | A simple stitch that creates a dashed line on the fabric. | Decorative stitching and attaching layers. |
| Whip Stitch | A stitch that secures the edges of two fabrics together. | Finishing edges and securing layers. |
| Backstitch | A strong stitch that provides durability and strength. | Areas needing extra strength and seams. |
Encouraging kids to practice these stitching techniques not only enhances their crafting skills but also instills a sense of pride and accomplishment. As they see their quilt come together, they will feel a profound connection to the memories they are encapsulating in each stitch. Plus, it’s a fantastic way to bond with family members, as they can share tips and tricks while working together on this creative project.
Q: What materials do I need to start a memory quilt?
A: You'll need fabric pieces, a sewing machine or needle and thread, scissors, and any embellishments you want to add, like buttons or patches.
Q: Can beginners really make a memory quilt?
A: Absolutely! With simple stitching techniques and some guidance, beginners can create beautiful quilts that hold special memories.
Q: How do I choose meaningful fabrics for the quilt?
A: Look for fabrics that have sentimental value, such as old clothing, baby blankets, or fabric swatches from memorable events.
Q: How long does it take to make a memory quilt?
A: The time it takes can vary greatly depending on the size of the quilt and the complexity of the design, but with dedication, it can usually be completed in a few days to a week.
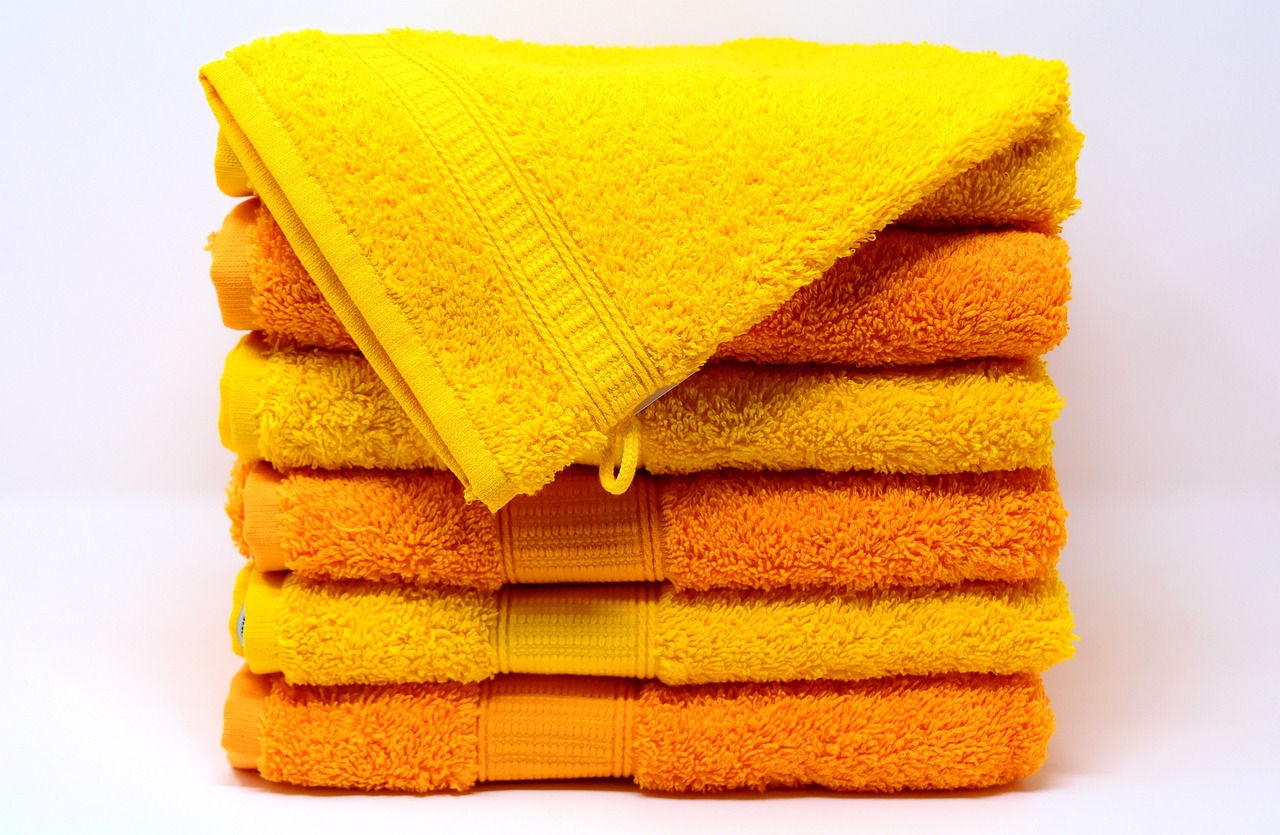
Hand-Painted Kitchen Towels
Hand-painted kitchen towels are not just practical gifts; they are a canvas for creativity that kids can use to express their artistic flair. Imagine the joy on a grandparent's face when they receive a towel adorned with vibrant colors and unique designs, all crafted by their beloved grandchildren. These towels can brighten up any kitchen, adding a splash of color and a personal touch that store-bought items simply can't match.
When it comes to painting kitchen towels, kids can explore various fabric paint techniques that allow them to unleash their imagination. Techniques such as stenciling, sponge painting, or even freehand painting can transform a plain towel into a masterpiece. By using non-toxic fabric paints, kids can ensure that their creations are safe for everyday use. This not only encourages creativity but also teaches them the importance of safety in crafting.
Choosing the right towels is crucial for this project. High-quality, absorbent towels not only enhance the visual appeal of the gift but also ensure practicality in the kitchen. A well-chosen towel can serve as a functional item while also being a cherished keepsake. Kids can select towels in various colors—perhaps matching the kitchen decor of their grandparents or even using their favorite colors to make the gift more personal.
Once the towels are painted, kids can add a special touch by packaging them creatively. Wrapping the towels in a beautifully decorated box or tying them with a ribbon can elevate the presentation, making the gift even more special. This thoughtful gesture shows that the gift is not just about the item itself but also about the love and effort put into creating it.
In conclusion, hand-painted kitchen towels are a delightful and meaningful gift idea that allows kids to showcase their creativity while providing grandparents with a functional item they can use daily. These personalized towels serve as a reminder of the bond shared between generations, making every meal prep a little more special.
- What type of paint should I use for hand-painted kitchen towels? It's best to use non-toxic fabric paints specifically designed for textiles to ensure safety and durability.
- Can kids use any type of towel for this project? High-quality, absorbent cotton towels are recommended as they provide a good surface for painting and are practical for everyday use.
- How can I make the painted design last longer? Allow the paint to dry completely and follow the manufacturer's instructions for heat-setting the paint, usually by ironing on the reverse side.
- Are there any specific techniques that are easier for kids? Yes! Techniques like sponge painting and stenciling are generally easier and more forgiving, allowing kids to create beautiful designs with less pressure.
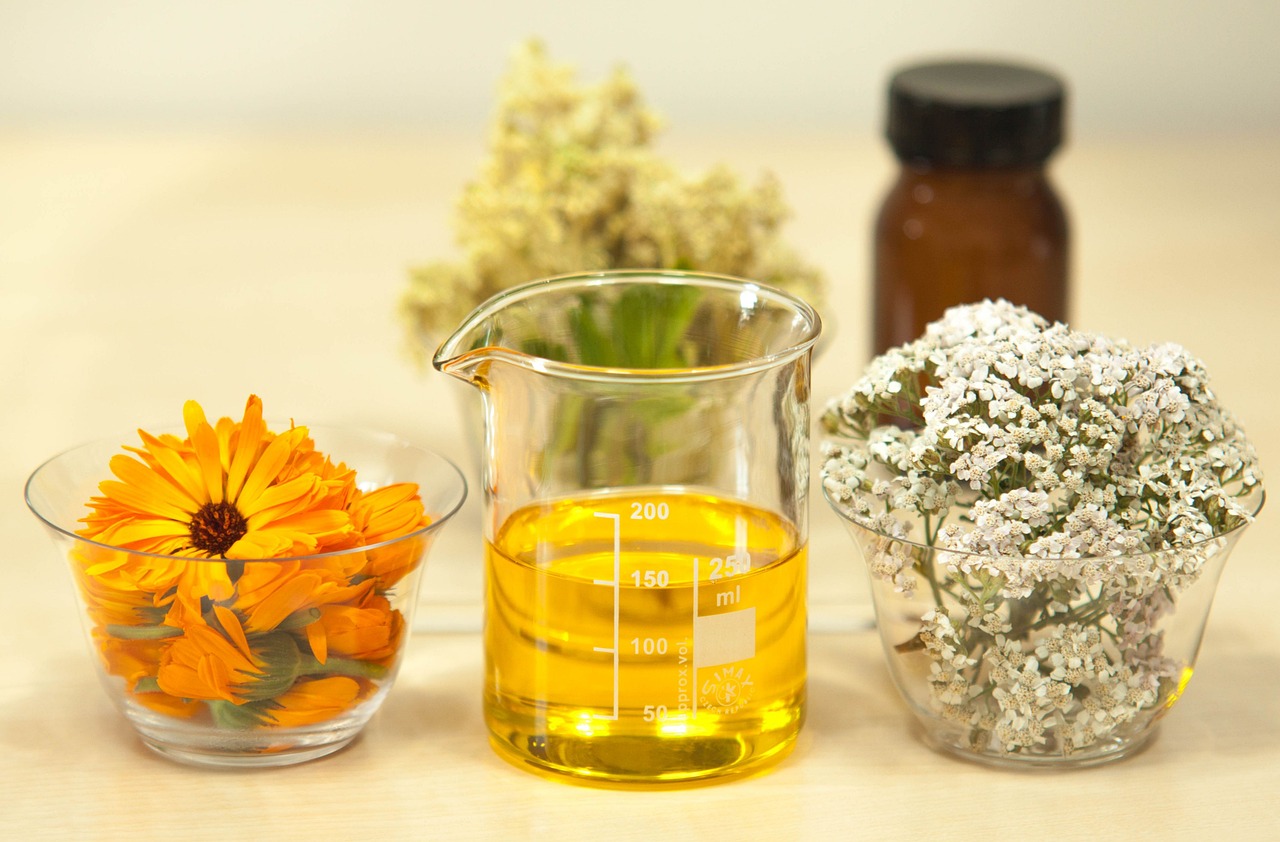
Fabric Paint Techniques
When it comes to crafting hand-painted kitchen towels, exploring various can transform a simple project into a vibrant masterpiece. Kids can unleash their creativity and express themselves in ways that are not only fun but also practical. One of the most exciting aspects of using fabric paint is the variety of techniques available, allowing for endless possibilities. For instance, stenciling is a popular method where kids can use pre-made shapes or designs to create crisp outlines on their towels. This technique is particularly great for those who may feel less confident in their freehand painting skills, as it provides a guide to follow, ensuring a neat and professional-looking finish.
Another technique worth exploring is sponge painting. This involves using a sponge to dab paint onto the fabric, creating a textured and artistic effect. Kids can experiment with different colors and patterns, layering them for a unique appearance. It’s a fantastic way to introduce them to the concept of color blending, where they can mix shades to achieve a desired look. Moreover, using a sponge allows for a more forgiving approach, as any mistakes can often be adjusted with additional layers of paint.
For those looking to add a little sparkle, glitter paint can be mixed with fabric paint to create eye-catching designs that shimmer in the light. This technique is particularly appealing for special occasions or festive seasons, making the kitchen towels not just functional but also decorative. Kids can create simple patterns, like polka dots or stripes, and then sprinkle glitter over the wet paint to achieve a dazzling effect.
Finally, freehand painting is the ultimate way for kids to express their artistic flair. They can draw their favorite characters, flowers, or even abstract designs directly onto the fabric. This technique encourages creativity and imagination, allowing children to turn their kitchen towels into personal canvases. To ensure the longevity of their artwork, it’s essential to use high-quality, non-toxic fabric paints that are designed to withstand washing.
By exploring these various fabric paint techniques, kids not only learn valuable artistic skills but also create thoughtful and personalized gifts for their grandparents. Each towel becomes a unique piece of art that carries a story, making it a cherished addition to any kitchen.
- What type of fabric paint is safe for kids to use?
It’s best to choose non-toxic fabric paints that are specifically labeled as kid-friendly. Look for paints that are washable and easy to clean up.
- How can I set the paint after my child has finished painting?
To set the paint, allow it to dry completely and then heat-set it by placing a cloth over the painted area and pressing it with an iron on a low setting for a few seconds.
- Can I use regular acrylic paint on fabric?
While regular acrylic paint can be used, it may not be as flexible as fabric paint, which is designed to adhere better to fabric and withstand washing.
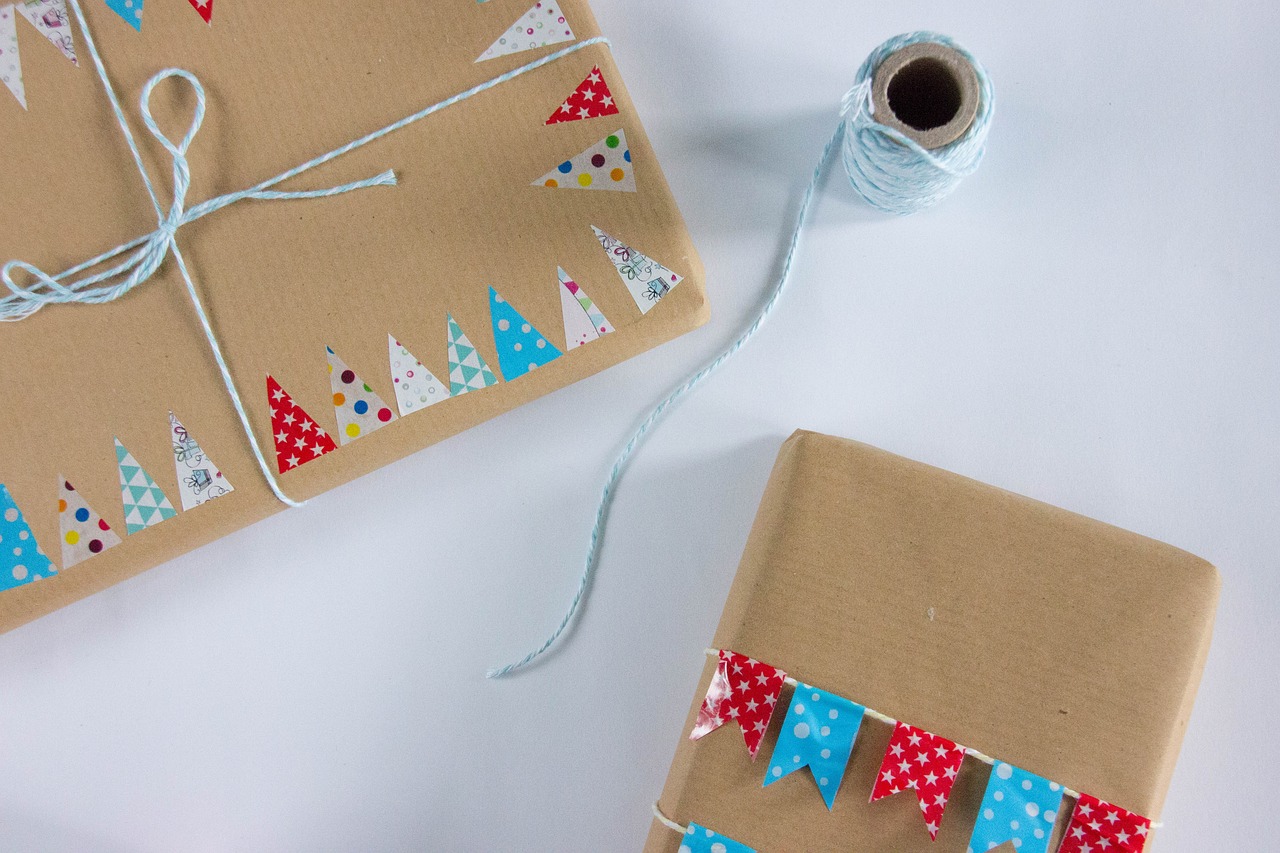
Choosing the Right Towels
When it comes to hand-painted kitchen towels, selecting the right fabric is crucial to ensure that your gift is not only beautiful but also practical. Imagine your grandparents unrolling a towel that not only showcases your creativity but also performs its job effectively. It’s like giving them a piece of art that is also a functional tool in their kitchen! To achieve this, consider the following factors:
First and foremost, the material of the towel plays a significant role in its absorbency and durability. Cotton is often the best choice because it is highly absorbent and soft, making it perfect for drying dishes or wiping hands. You might also want to look for towels made from a cotton-linen blend, which can add a touch of elegance while still being functional. The weight of the fabric is another important aspect; heavier towels tend to be more absorbent and can withstand frequent washing.
Next, think about the size of the towels. Standard kitchen towels typically measure around 15 inches by 25 inches, but you can find larger options that provide more coverage. A larger towel can serve multiple purposes, from drying dishes to covering food. However, make sure that the size is manageable for your grandparents, especially if they have limited storage space in their kitchen.
Another consideration is the color and design. Choosing a color scheme that complements your grandparents' kitchen decor can make your gift even more special. You might opt for classic colors like white or beige, which are versatile, or vibrant hues that add a pop of color. Patterns can also enhance the visual appeal; think about floral designs, geometric shapes, or even hand-painted motifs that reflect your grandparents' personalities. This attention to detail can transform a simple kitchen towel into a cherished keepsake.
Lastly, don’t forget to check for care instructions. It’s essential to choose towels that can withstand regular washing without fading or losing their shape. Look for fabrics that are machine washable and resistant to shrinking. This way, your grandparents can enjoy your thoughtful gift without the worry of complicated maintenance.
In summary, the right towels should be made from absorbent materials, come in suitable sizes, feature appealing designs, and have easy care instructions. By considering these factors, you can create a hand-painted kitchen towel that is both a functional gift and a beautiful piece of art, ensuring that your grandparents think of you every time they reach for it in their kitchen.
- What materials are best for hand-painted kitchen towels? Cotton and cotton-linen blends are ideal for their absorbency and durability.
- How do I ensure the paint stays on the towels? Use fabric paints and follow the manufacturer's instructions for heat setting to make the designs permanent.
- Can I machine wash hand-painted towels? Yes, but it's best to wash them in cold water and avoid bleach to preserve the colors.
- What size should I choose for kitchen towels? Standard sizes are around 15 inches by 25 inches, but larger options are available for more coverage.

Creative Scrapbooks
Creating scrapbooks is one of the most delightful ways for kids to express their love for their grandparents. These personalized books can be filled with photos, drawings, and memories that celebrate their unique relationship. Imagine flipping through the pages and seeing moments captured in time, each telling a story that brings a smile to the face of a grandparent. The beauty of scrapbooking lies not just in the materials used, but in the heartfelt effort that goes into making each page special.
To start, kids can gather materials that resonate with their memories. This can include old photographs, ticket stubs from family outings, or even pressed leaves from a memorable day at the park. The key is to choose items that hold sentimental value. They can also use colorful paper, stickers, and markers to add a splash of creativity to their pages. Crafting a scrapbook is not just about putting things together; it’s about weaving a narrative that reflects love, joy, and shared experiences.
When it comes to organizing the scrapbook, kids can explore different layout ideas. For instance, they might want to dedicate a page to a specific event, such as a family vacation or a birthday celebration. Each page can be designed with a theme, utilizing various colors and textures to make it visually appealing. Here are some layout ideas to consider:
- Chronological Order: Arrange photos and memorabilia in the order they happened to tell a story over time.
- Thematic Pages: Create pages based on themes like holidays, family traditions, or special milestones.
- Collage Style: Use a mix of photos and decorations to create a vibrant, artistic look.
Adding personal touches can elevate the scrapbook from a simple collection of memories to a cherished keepsake. Kids can include handwritten notes, favorite quotes, or even short stories about the memories behind each photo. This allows them to express their feelings and thoughts, making the scrapbook even more meaningful. It's like giving grandparents a window into the heart of their grandchild, showcasing not just the moments captured, but the love that binds them together.
Finally, the presentation of the scrapbook can also be a part of the gift. Kids can decorate the cover with their artwork or photos, giving it a unique touch that sets the tone for what’s inside. Wrapping it in colorful paper or placing it in a decorative box can add an element of surprise. After all, the joy of giving is enhanced by the excitement of unwrapping!
Here are some common questions that parents and kids might have when creating scrapbooks:
| Question | Answer |
|---|---|
| What materials do I need to start a scrapbook? | Basic materials include a scrapbook album, scissors, glue, colored paper, markers, and decorative items like stickers. |
| How can I preserve the photos in my scrapbook? | Use acid-free paper and photo-safe adhesives to prevent photos from fading or deteriorating over time. |
| Can I include digital photos in my scrapbook? | Absolutely! You can print digital photos and include them just like traditional photographs. |
| How do I come up with themes for my scrapbook pages? | Think about special events, seasons, or family traditions that resonate with you; these can inspire your themes. |
Layout Ideas
When it comes to creating a scrapbook that truly reflects the special bond between kids and their grandparents, the layout is crucial. A well-thought-out layout not only organizes the memories but also enhances the storytelling aspect of the scrapbook. Imagine flipping through pages that flow seamlessly, each telling a different chapter of their shared adventures. One effective approach is to use a thematic layout, where each page or section revolves around a specific theme, such as family vacations, holidays, or even daily life moments. This method allows for a cohesive look while highlighting the essence of each memory.
Another popular technique is the chronological layout, where kids can arrange photos and mementos in the order they were created. This timeline approach can be particularly touching, as it illustrates the journey of their relationship over time. For instance, the first page might feature a picture of the grandchild's first visit to the grandparents' house, followed by snapshots from birthday celebrations, family outings, and quiet afternoons spent together. The beauty of this layout is that it not only serves as a visual reminder of their history but also evokes emotions as they reminisce about those cherished moments.
To keep things visually interesting, kids can experiment with mixed media layouts. This involves combining various materials such as photographs, drawings, stickers, and even fabric swatches. For example, a page could feature a photo of a family picnic alongside a hand-drawn sun and some pressed flowers collected from the day. This combination of textures and elements adds depth and dimension to the scrapbook, making each page an artistic expression of love and creativity.
Additionally, incorporating interactive elements can make the scrapbook even more engaging. Kids might consider adding pockets for keepsakes, envelopes for letters, or fold-out pages that reveal additional photos or notes. These surprises can delight grandparents as they explore the scrapbook, turning it into a treasure trove of memories. To help visualize these ideas, here’s a simple table summarizing different layout styles:
| Layout Style | Description | Benefits |
|---|---|---|
| Thematic Layout | Organizes pages by specific themes. | Creates a cohesive narrative. |
| Chronological Layout | Arranges elements in the order they occurred. | Illustrates the timeline of memories. |
| Mixed Media Layout | Combines various materials and textures. | Adds depth and artistic flair. |
| Interactive Elements | Includes pockets, envelopes, or fold-outs. | Enhances engagement and surprise. |
Ultimately, the layout of the scrapbook should reflect the child's personality and their relationship with their grandparents. Encouraging kids to express their creativity through these layouts not only makes the scrapbook a unique gift but also fosters a deeper connection as they reflect on their shared experiences. So grab those photos, gather some art supplies, and let the storytelling begin!
Q: How can kids choose the best photos for their scrapbook?
A: Encourage kids to select photos that evoke strong memories or emotions. They can think about significant events, funny moments, or simple everyday joys that represent their relationship with their grandparents.
Q: What materials are best for decorating a scrapbook?
A: Kids can use a variety of materials such as colored paper, stickers, washi tape, markers, and even fabric scraps. The key is to choose items that resonate with the theme and add visual interest to the pages.
Q: How can kids ensure their scrapbook lasts over time?
A: Using acid-free materials and protective sleeves can help preserve the scrapbook. Additionally, keeping it in a cool, dry place will maintain its quality for years to come.
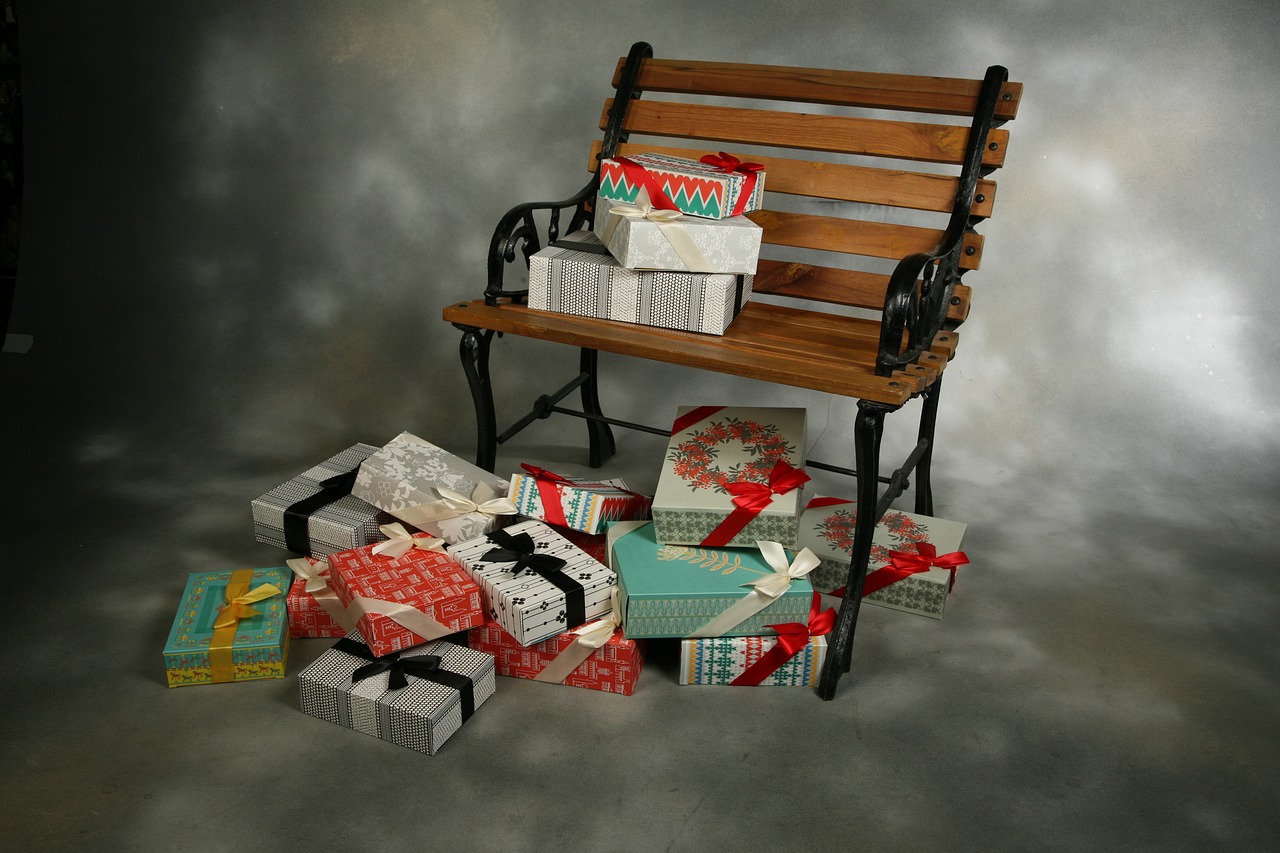
Adding Personal Touches
When it comes to creating a scrapbook, is what truly transforms it from a simple collection of memories into a heartfelt treasure. Think about the little things that make your relationship with your grandparents unique; this is where the magic happens! For instance, you might include handwritten notes throughout the scrapbook. These notes could be funny anecdotes from family gatherings or touching messages expressing your love and appreciation. Imagine flipping through the pages and coming across a note that says, "I will always remember the time you taught me how to bake cookies! Those moments are priceless!"
Another way to enhance the scrapbook is by incorporating favorite quotes that resonate with your family values or shared experiences. You could even create a dedicated page for quotes, where each quote is accompanied by a small drawing or a photo that relates to that particular saying. This not only adds depth but also makes the scrapbook feel more personal and reflective of your family's journey together.
Moreover, consider using decorative elements such as stickers, washi tape, or even small embellishments that represent hobbies or interests shared with your grandparents. For example, if your grandparent loves gardening, you might add floral stickers or pressed flowers to the pages. These little details can evoke memories and emotions, making the scrapbook not just a collection of images, but a journey through time that celebrates your bond.
Lastly, don't forget about the power of photos. While it's essential to include snapshots of memorable moments, think about how you can creatively present them. You could use photo corners to attach pictures or create a collage-style layout that tells a story. Each photograph can be accompanied by a caption that describes the moment, making it easier for your grandparents to reminisce about those special times.
In essence, the key to adding personal touches lies in the details. Make your scrapbook a reflection of your relationship with your grandparents, filled with love, laughter, and memories. This approach not only shows your creativity but also conveys a deeper message: that you truly value and cherish the time spent together. So grab your supplies, unleash your imagination, and let each page tell a story that will warm their hearts for years to come!
- What materials do I need to create a scrapbook? You will need a scrapbook album, decorative papers, scissors, glue, markers, stickers, and photos.
- How can I make my scrapbook more creative? Use various layouts, incorporate different textures, and personalize each page with drawings or embellishments.
- Can I include digital photos? Absolutely! You can print digital photos or even create a digital scrapbook if preferred.
- What age is appropriate for kids to start scrapbooking? Kids as young as 5 can start scrapbooking with adult supervision, while older children can take on more complex designs.
Frequently Asked Questions
- What are some easy DIY gift ideas for kids to make for their grandparents?
Kids can create a variety of heartfelt gifts, such as personalized photo frames, handmade greeting cards, decorative plant pots, memory jars, knitted or crocheted items, customized mugs, handmade jewelry, memory quilts, hand-painted kitchen towels, and creative scrapbooks. Each of these crafts allows kids to express their love and creativity in unique ways.
- How can kids personalize their gifts for grandparents?
Kids can personalize their gifts by incorporating family photos, using favorite colors, adding special messages or quotes, and selecting materials that hold sentimental value. For example, they can use pressed flowers in cards or choose fabrics that represent cherished memories for quilts.
- Are there eco-friendly options for DIY gifts?
Absolutely! Kids can use natural materials like leaves and flowers for greeting cards or select biodegradable paints for decorating items. Crafting with recycled materials, such as old fabric for quilts or jars for memory jars, also promotes sustainability while creating beautiful gifts.
- What materials do kids need to start crafting?
The materials will vary depending on the project, but some basic supplies include paper, paints, yarn, fabric, glue, scissors, and embellishments like stickers or beads. It's also helpful to have items like jars or pots available for specific crafts like memory jars or decorative plant pots.
- Can kids of all ages participate in these crafts?
Yes! Many of these DIY projects can be adapted for different age groups. Younger children may need more guidance and simpler tasks, while older kids can take on more complex projects, allowing them to express their creativity at their own skill level.
- How can parents help their kids with these DIY projects?
Parents can assist by providing supervision, gathering materials, and offering encouragement. They can also participate in the crafting process, making it a fun family activity that fosters creativity and strengthens bonds while creating meaningful gifts.


