
Bring the Beach Home: Seashell Crafts for Kids
Discovering the beauty of the beach doesn't have to end when you leave the shore. With seashell crafts, you can bring a piece of that coastal magic into your home. These creative projects not only ignite the imagination of children but also help develop their fine motor skills. Imagine your little ones sifting through a treasure trove of shells, each one holding the promise of a unique craft. From creating stunning jewelry to designing beautiful displays, the possibilities are endless. So, grab your beach bucket and let’s dive into the wonderful world of seashell crafting!
Seashell crafts are more than just a fun activity; they are an engaging way for kids to explore their creativity while learning about marine life. Crafting with seashells provides an opportunity to discuss the ocean, its inhabitants, and the importance of preserving our beaches. Not only do these projects foster creativity, but they also encourage children to use their hands and minds in a productive way. Whether it's making a colorful seashell necklace or a decorative piece for the living room, each project becomes a cherished keepsake that captures a moment of joy and creativity.
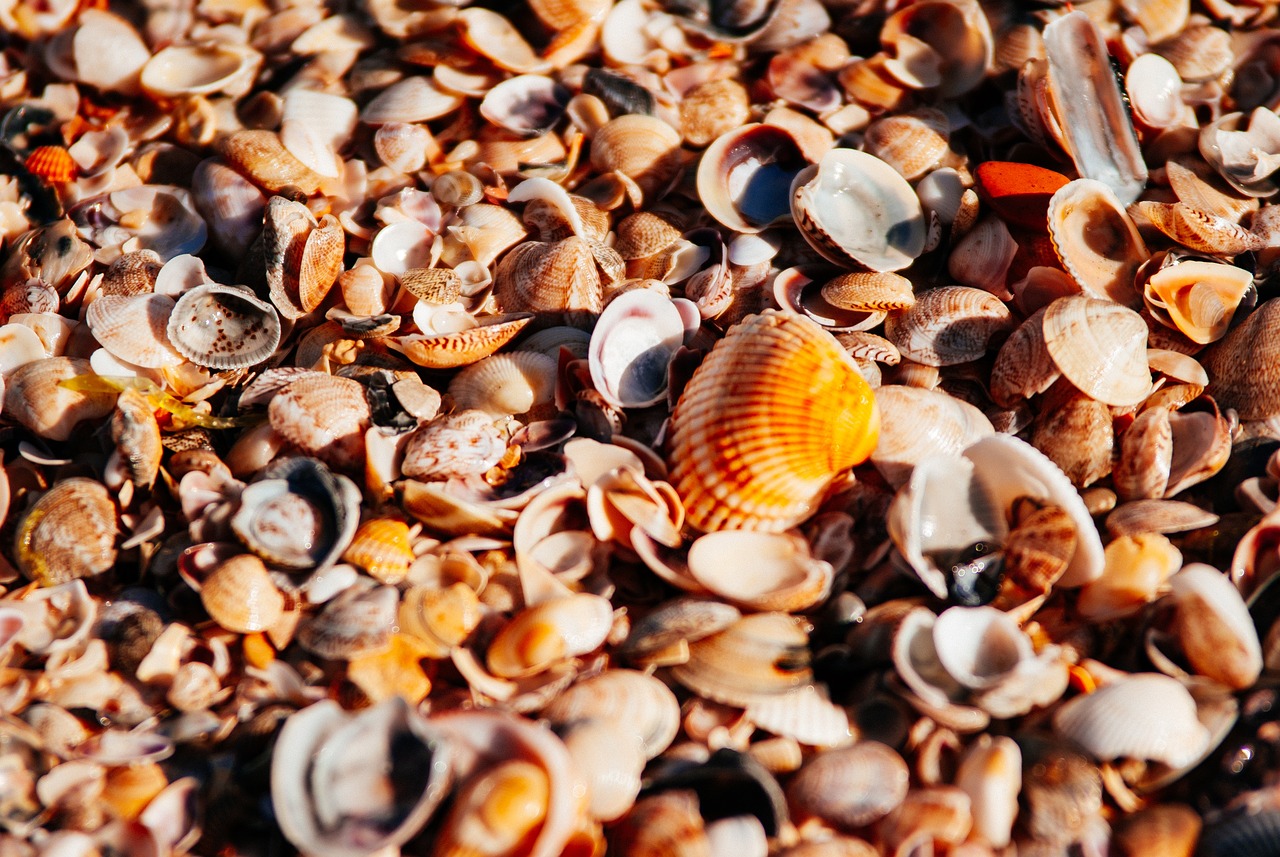
Finding the perfect seashells is an adventure in itself! It’s like a treasure hunt where every shell tells a story. But where do you start? The beach is the obvious choice, but you can also explore local parks, lakes, and riverbanks for unique finds. When searching for seashells, look for smooth, unbroken shells that have vibrant colors or interesting shapes. Remember, not all shells are created equal, and some are better suited for crafting than others. So, get ready to embark on a beachcombing adventure that will leave you with a collection of beautiful shells!
To maximize your seashell collection, consider these effective beachcombing techniques:
- Visit during low tide when more shells are exposed.
- Look in tide pools and along rocky shorelines for hidden gems.
- Search after a storm, as the waves often wash up new shells.
By following these tips, kids can identify ideal locations and times for finding unique shells that will inspire their crafting projects.
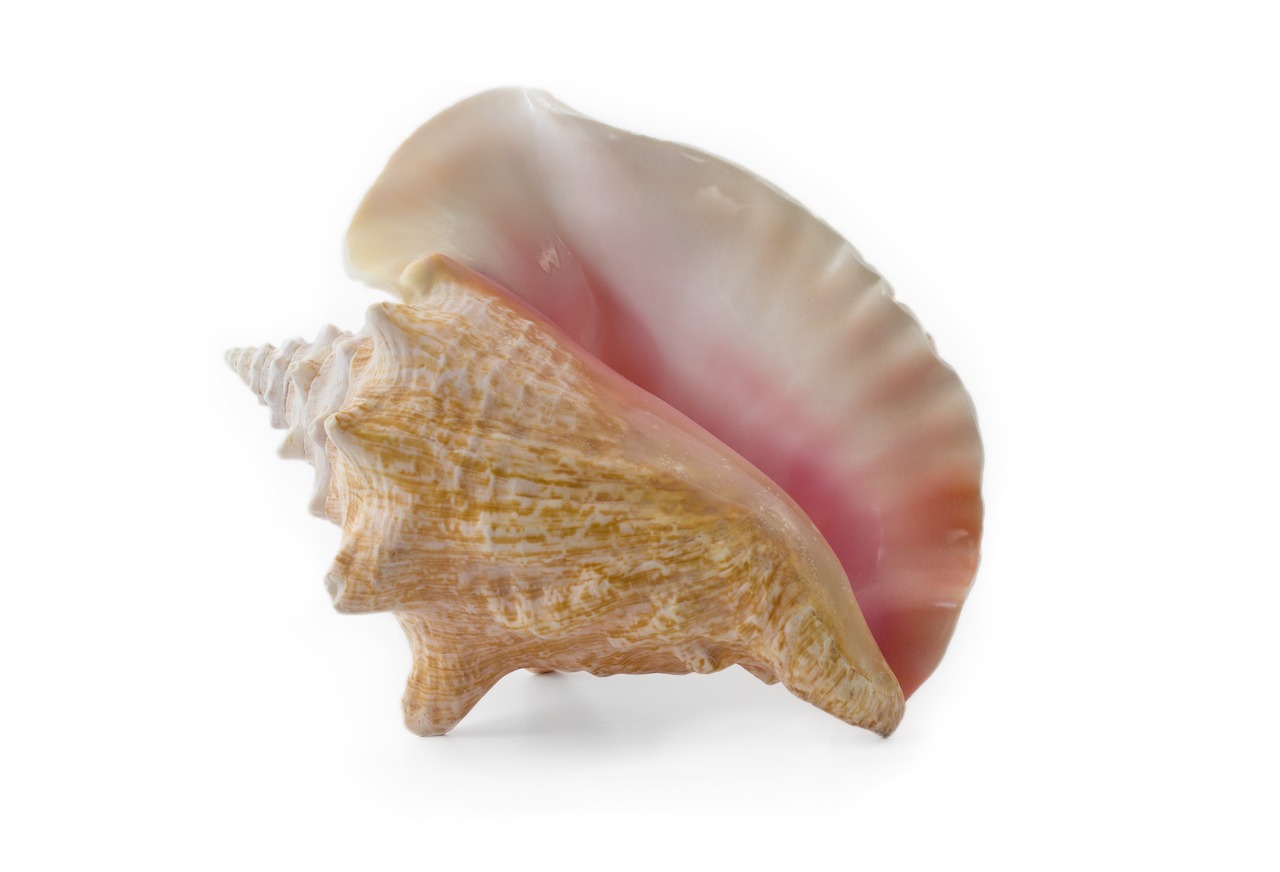
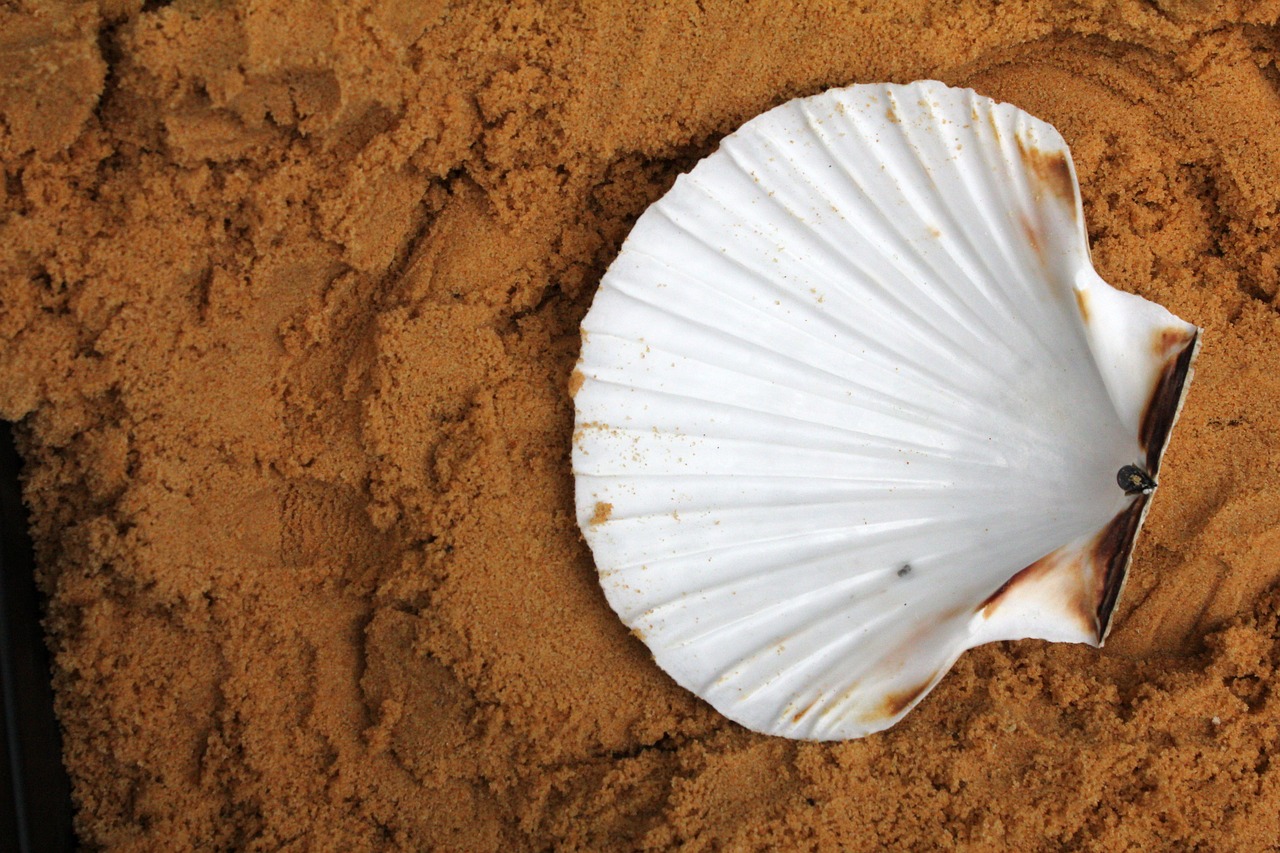
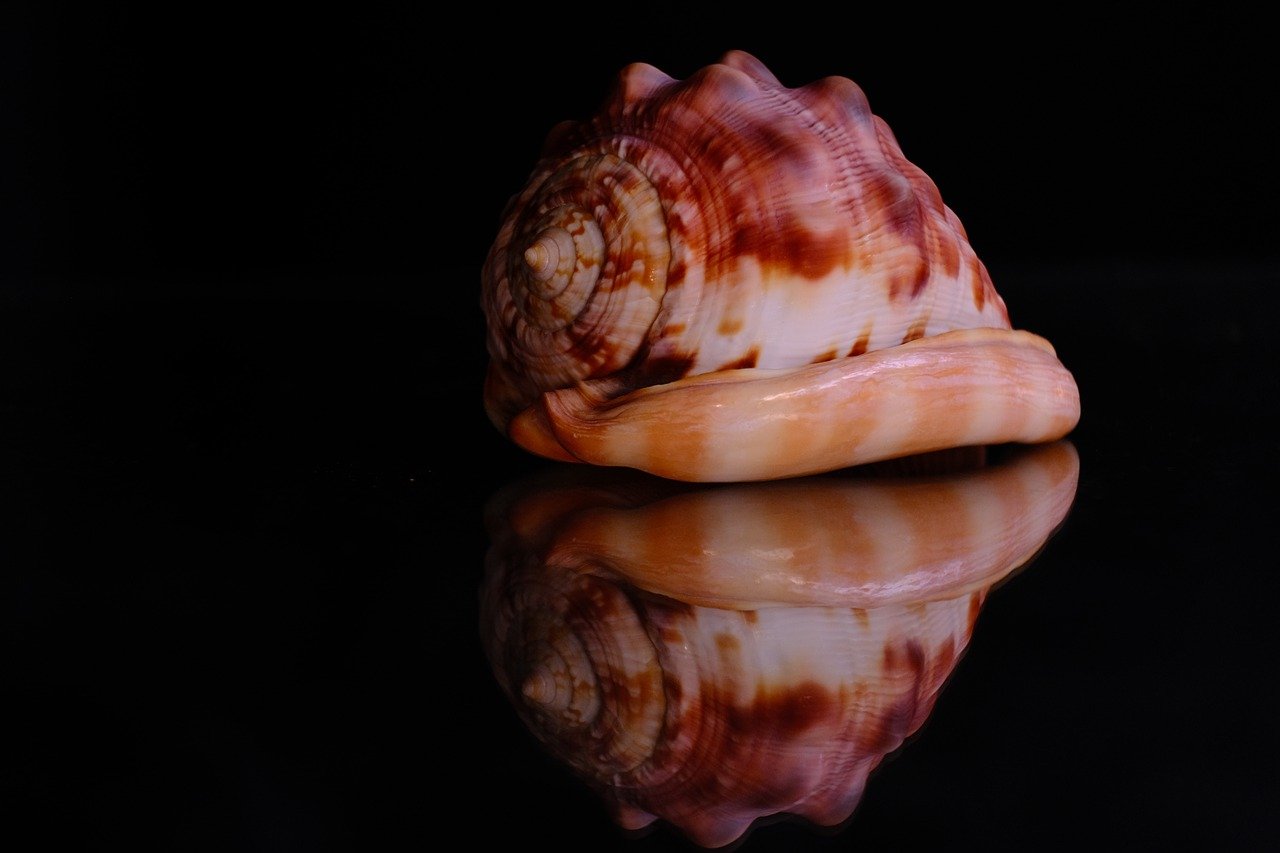
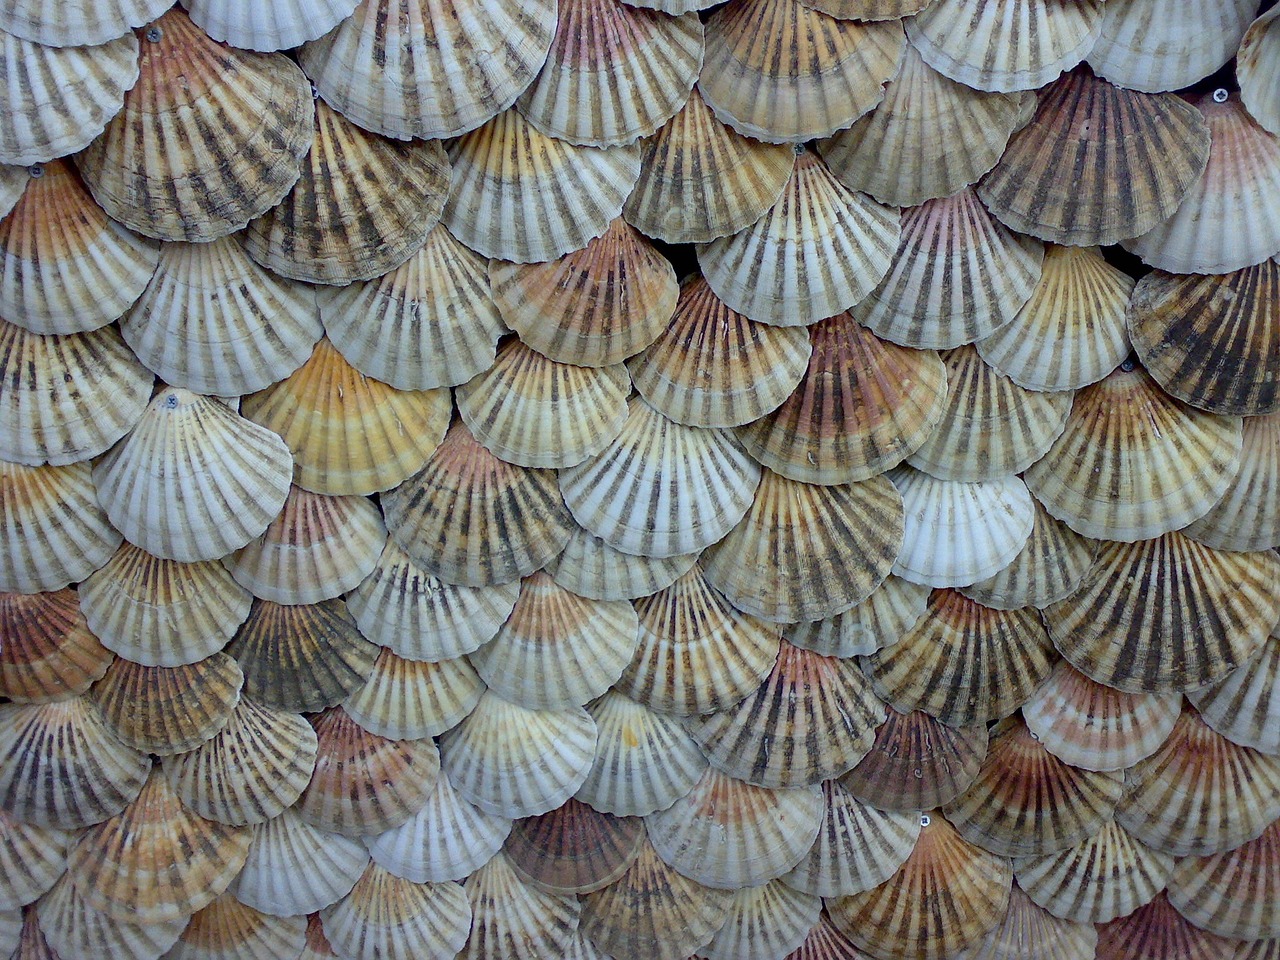
Understanding different types of seashells can enhance the crafting experience. Kids can learn to identify various shells by their unique characteristics. For instance, conch shells are spiral-shaped and often have a pink interior, while scallop shells are fan-shaped and come in a variety of colors. Knowing what types of shells they have will help kids decide how to use them in their crafts. A simple guide can be created to help them recognize some common shells:
| Shell Type | Characteristics |
|---|---|
| Conch | Spiral shape, often pink inside |
| Scallop | Fan shape, colorful |
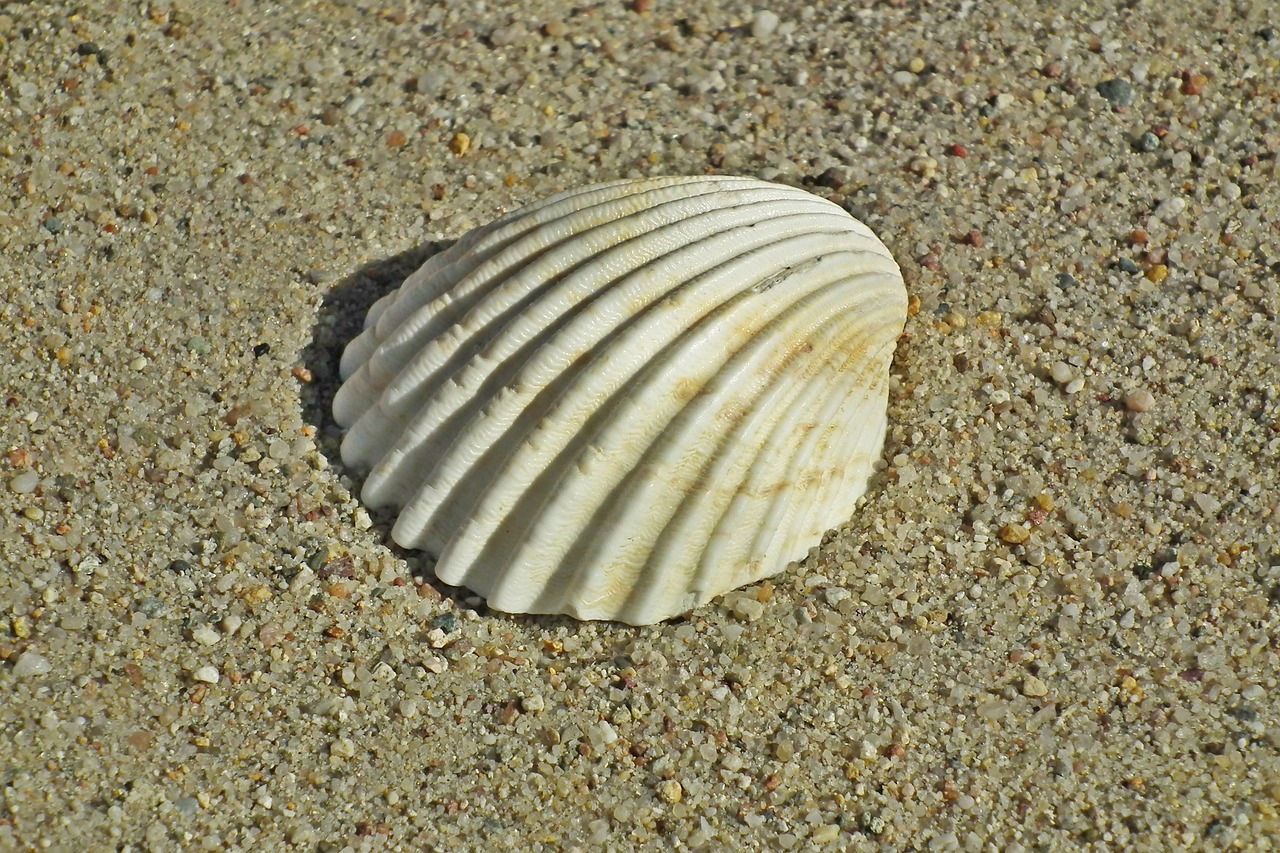
| Clam | Rounded, smooth edges |
Cleaning seashells is essential for successful crafting. After collecting, it's important to remove any sand, dirt, or organic matter. A simple method involves soaking the shells in a mixture of water and vinegar for a few hours, which helps to loosen debris. After soaking, gently scrub with a toothbrush, rinse thoroughly, and let them dry. This process not only prepares the shells for decoration but also brings out their natural beauty, making them perfect for your crafting projects.
Now that you have your seashells, it’s time to get creative! This section showcases a variety of fun and easy seashell craft projects for kids. Each project encourages creativity and can be adapted for different skill levels. Whether your child is a crafting novice or a seasoned pro, there’s something here for everyone. Let the crafting begin!
Creating seashell jewelry is a delightful way for kids to express their style. Imagine wearing a necklace that reminds you of a fun day at the beach! This section outlines simple techniques for making bracelets, necklaces, and earrings using seashells. Kids will love the idea of wearing their creations, and it’s a fantastic way to share their beach memories with friends and family.
Explore various designs for pendants made from seashells. Kids can paint, decorate, or even add beads to create unique jewelry pieces that reflect their personal touch. The process of designing and crafting their own pendants is not only fulfilling but also an excellent way for kids to express themselves.
Learn how to craft stylish bracelets and earrings using seashells. With just a few simple materials like elastic string and earring hooks, kids can create beautiful accessories that showcase their creativity. Step-by-step instructions can guide them through the process, ensuring each piece is a work of art.
Seashells can be transformed into stunning decorative pieces for the home. This section discusses creative ways to display seashells, making them a focal point in any room. Imagine a beautiful seashell centerpiece or framed shell art adorning your walls!
Creating framed art with seashells is a wonderful way to showcase beach memories. Kids can arrange their shells in a shadow box or frame, creating a beautiful piece of art that tells a story. This guide provides tips for arranging and framing shells to create stunning wall art that will be admired by all.
Designing seashell centerpieces adds a coastal vibe to any gathering. Whether it’s a family dinner or a party, incorporating seashells into table decor can elevate the atmosphere. Kids can use their creativity to arrange shells in bowls or on trays, making every occasion feel special and beachy.
Q: What types of seashells are best for crafting?
A: Look for smooth, unbroken shells in various shapes and colors. Common types include conch, scallop, and clam shells.
Q: How do I clean seashells for crafting?
A: Soak them in a mixture of water and vinegar, scrub gently, rinse, and let them dry.
Q: Can kids do these crafts independently?
A: Many projects can be adapted for different skill levels, but adult supervision is recommended for younger children, especially when using tools.
Introduction to Seashell Crafts
Seashell crafts are an engaging way for kids to explore their creativity while learning about marine life. Imagine the joy of transforming simple shells into beautiful art pieces or unique jewelry! Not only do these projects inspire imagination, but they also enhance fine motor skills as children manipulate and decorate their shells. By diving into the world of seashell crafting, kids can connect with nature, develop their artistic abilities, and create keepsakes that remind them of sunny days at the beach.
One of the best parts about seashell crafts is their versatility. Whether you're making a stunning piece of jewelry, a decorative display, or even a functional item, the possibilities are endless. Plus, the materials are often readily available, especially if you live near a beach or coastal area. Think about it: every shell tells a story, and each project can be a new adventure waiting to unfold.
Moreover, crafting with seashells can serve as an educational experience. Kids can learn about different types of shells, their habitats, and the creatures that once inhabited them. This knowledge adds depth to the crafting process, making it not just about creating something beautiful, but also about understanding the natural world around them. For those who are curious, here are some benefits of engaging in seashell crafts:
- Enhanced Creativity: Kids can express their artistic side while developing unique designs.
- Improved Fine Motor Skills: Handling small shells and tools helps refine hand-eye coordination.
- Environmental Awareness: Learning about marine life fosters a sense of responsibility towards nature.
- Bonding Experience: Crafting together can strengthen family relationships and create lasting memories.
So, whether you’re a parent looking for a fun activity or an educator seeking creative projects for your classroom, seashell crafts offer a fantastic opportunity to blend learning and fun. Get ready to gather those shells and let your imagination run wild!
Gathering Seashells
Gathering seashells is not just a fun activity; it's an adventure that allows kids to connect with nature and the ocean. Imagine walking along the shoreline, the gentle waves lapping at your feet, and the warm sun kissing your skin. Each step brings the thrill of discovery as your eyes scan the sand for hidden treasures. The excitement of finding that perfect seashell can ignite a passion for marine life and creativity in children. But where do you start? Here are some tips to make your seashell collection as fruitful as possible.
First, it's essential to choose the right location. Not all beaches are created equal when it comes to seashell hunting. Look for beaches that are known for their diverse marine life and have a reputation for good shelling. Some of the best places to gather seashells include:
- Coastal areas with rocky shorelines
- Beaches after a storm, when the waves have washed up new shells
- Shallow tidal pools where shells may be exposed
Timing is also crucial in your seashell gathering quest. Early morning or late afternoon are often the best times to hunt for shells, as the tide is low and the beach is less crowded. Plus, the lighting during these times can make the shells shine beautifully, making it easier to spot them. Encourage your kids to keep an eye out for different shapes, sizes, and colors. Each shell tells a story, and discovering these unique pieces can be a great conversation starter.
To maximize your seashell collection, it's important to employ effective beachcombing techniques. Here are some tips to guide your little explorers:
- Look closely: Sometimes the best shells are hidden among the sand and debris. Teach kids to be patient and thorough in their search.
- Check the tide schedule: Knowing when the tides come in and out can help you plan your beach visit for the best shelling opportunities.
- Bring the right tools: A small bucket or bag can be handy for collecting shells, while a shovel or scoop can help dig up shells buried in the sand.
Understanding the different types of seashells can enhance the experience of gathering them. Kids can learn to identify various shells by their shapes, colors, and textures. For instance, some common types of seashells include:
| Shell Type | Characteristics |
|---|---|
| Conch Shell | Spiral shape, often large and colorful |
| Clam Shell | Rounded and smooth, often found in pairs |
| Scallop Shell | Fan-shaped with ridges, vibrant colors |
Teaching kids to recognize these shells not only makes the hunt more engaging but also instills a sense of respect for marine life. Each shell has its own unique story and contributes to the ecosystem.
Once you've gathered your seashells, the next step is cleaning them. This is an important process to ensure your crafting projects turn out beautifully. Here's how to clean seashells safely:
- Rinse the shells under warm water to remove sand and debris.
- Soak them in a mixture of water and vinegar for about 10-15 minutes to help dissolve any remaining organic matter.
- Use a soft brush to gently scrub the shells, being careful not to damage them.
- Rinse again and let them dry completely before using them in your crafts.
With clean shells in hand, your kids are ready to dive into a world of creativity! Gathering seashells is not just about collecting; it’s about creating lasting memories and beautiful crafts that will remind you of those sunny beach days.
Q: Can we collect seashells from any beach?
A: Not all beaches allow shell collecting, so it's important to check local regulations. Some beaches are protected areas where shell collecting is prohibited to preserve marine life.
Q: What should we do if we find a live shell?
A: If you encounter a live shell, it's best to leave it where you found it. Live shells are part of the ecosystem and should be returned to the water.
Q: How can we store our seashells safely?
A: Store seashells in a cool, dry place, away from direct sunlight. You can use a decorative box or a glass jar to showcase your collection while keeping them safe.
Beachcombing Tips
Beachcombing is not just a fun activity; it's an adventure that can lead to the discovery of unique and beautiful seashells. To make the most out of your beachcombing experience, consider these essential tips. First, timing is everything! Early mornings or late afternoons are ideal as the tides will have receded, revealing a treasure trove of shells. Plus, the soft light during these hours makes for perfect photographs of your finds.
Next, think about the location. Some beaches are more shell-rich than others. Look for spots where the waves crash against the shore, as these areas often bring in new shells. Rocky shorelines can also be a goldmine for unique finds, so don’t shy away from exploring these terrains. If you want to maximize your shell collection, consider visiting different beaches. Each one has its own unique offerings, so exploring a variety of locations can lead to some surprising discoveries!
While you're out there, keep an eye on the weather. Sunny days are great for beach outings, but overcast days can also be beneficial. The lack of sun can make shells easier to spot against the sand. And remember, the best finds often come after a storm, as rough seas can wash up a bounty of shells. Just be cautious and stay safe.
When it comes to the actual process of collecting, here are a few tips to keep in mind:
- Look for different textures and colors: Seashells come in a variety of shapes and hues. Don’t just grab the first one you see; take your time to examine your options.
- Be respectful of nature: Avoid taking shells that are home to living creatures. Always check for any signs of life before you pick up a shell.
- Use a small bag: Bring along a mesh bag or bucket to store your finds. This will keep them safe and prevent them from getting damaged.
Lastly, don’t forget to enjoy the process! Beachcombing is as much about the experience as it is about the shells. Take in the sounds of the waves, the feel of sand between your toes, and the beauty of the ocean. Each shell you collect tells a story, and the memories you create during your search will last a lifetime. So grab your family or friends, and make a day of it!
Q: What should I do if I find a shell with a living creature inside?
A: It’s best to leave the shell where you found it. Living creatures rely on their shells for protection, so it’s important to respect their habitat.
Q: Are there any specific types of shells that are more valuable?
A: While beauty is subjective, some shells, like conch or cowrie shells, are often considered more valuable due to their rarity and unique characteristics.
Q: How can I clean the seashells I collect?
A: Soak your shells in a mixture of water and vinegar for a few hours to help remove dirt and debris. After soaking, gently scrub them with a soft brush and rinse thoroughly.
Shell Identification
Understanding the different types of seashells is a crucial part of the crafting process. Not only does it enhance the overall experience, but it also adds an educational element to your beachcombing adventures. When kids learn to identify seashells, they not only develop an appreciation for marine life but also gain valuable knowledge about the environment and biodiversity. Imagine strolling along the beach, and with each shell picked up, a child can share interesting facts about its origin and characteristics. Isn't that a fantastic way to combine fun and learning?
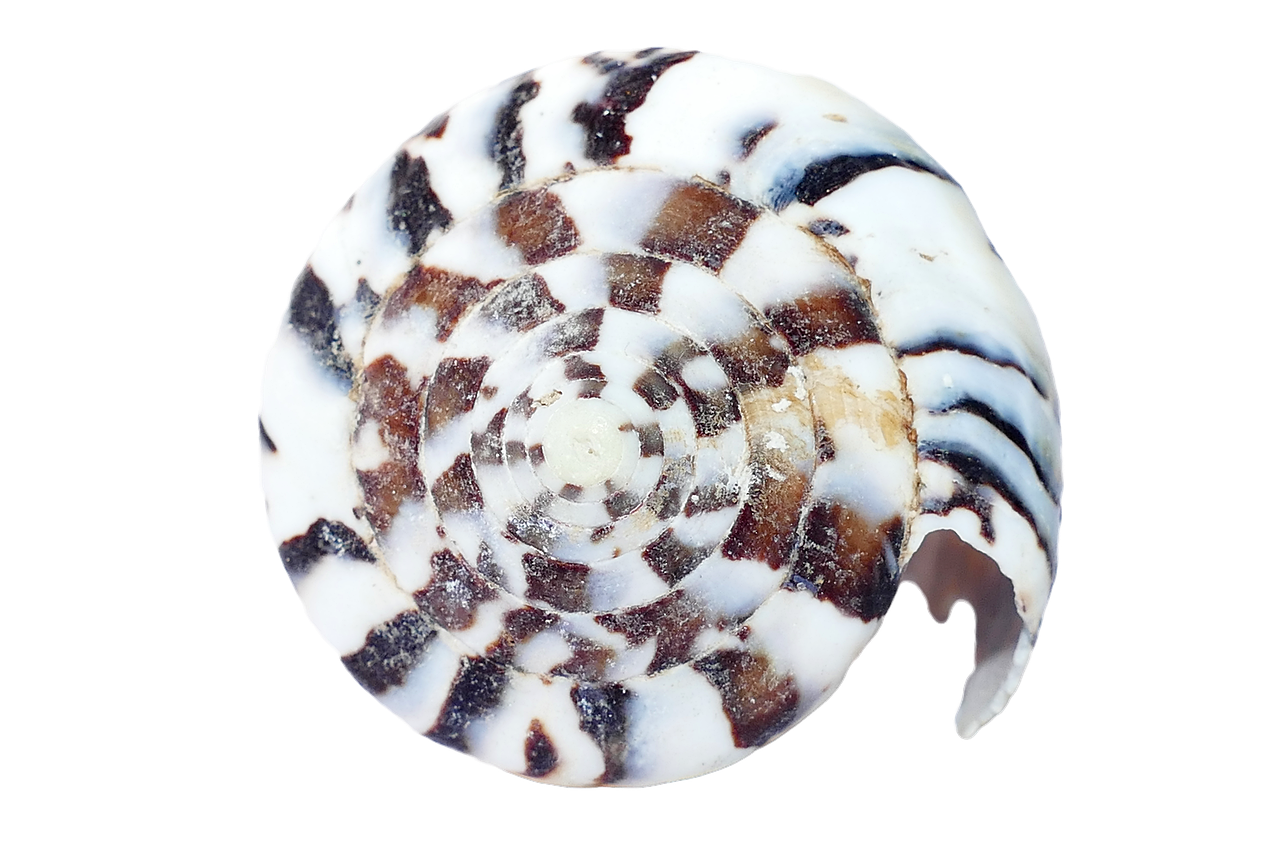
To get started with shell identification, it's important to know that seashells come from various types of mollusks, including snails, clams, and oysters. Each type of shell has its own unique shape, texture, and color, making them fascinating to collect. Below are some common types of seashells that kids might encounter:
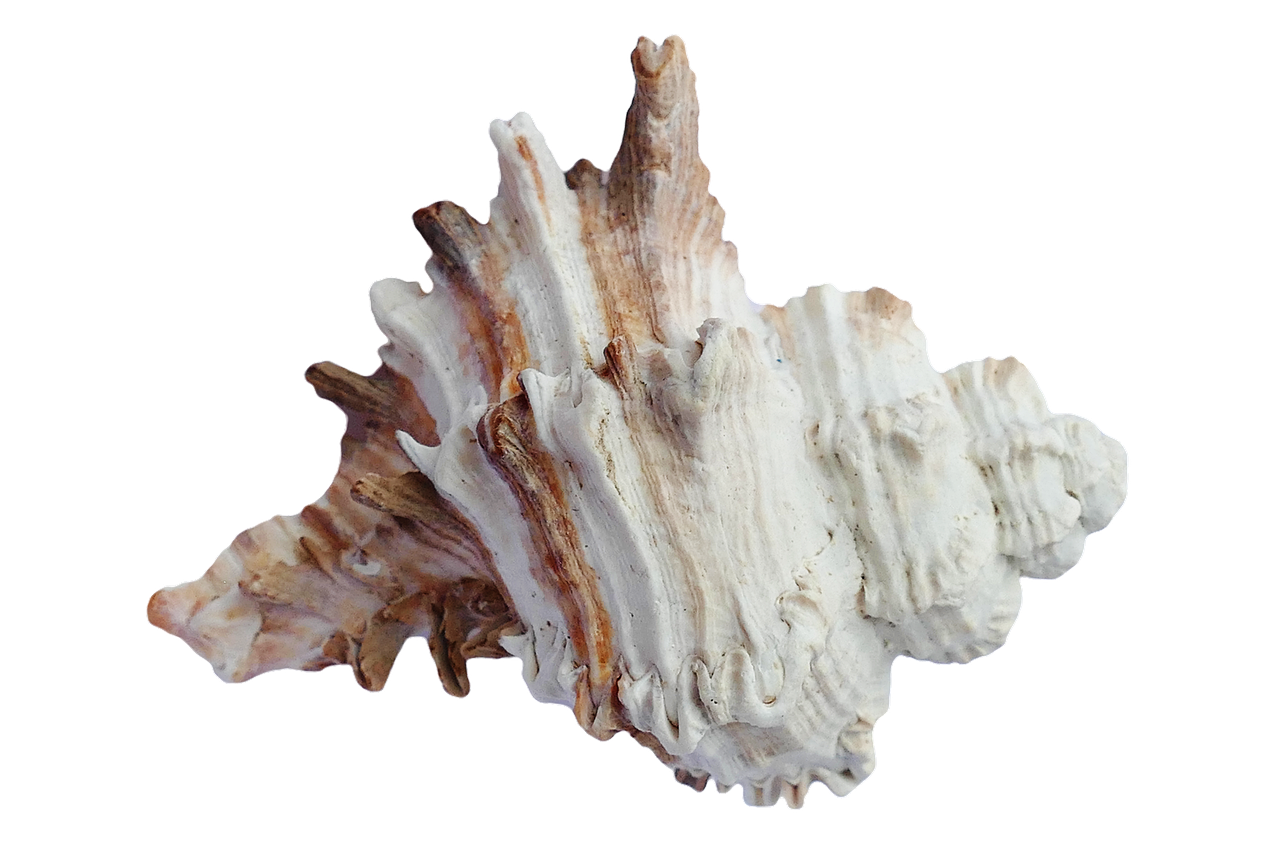
- Conch Shells: These are typically large, spiral-shaped shells that are often found in tropical waters. Their vibrant colors make them a favorite among collectors.
- Clam Shells: Usually found in pairs, clam shells are smooth and symmetrical. They can vary in color from white to various shades of brown.
- Whelk Shells: Recognized by their elongated spiral shape, whelk shells can often be found along the shoreline and are known for their beautiful patterns.
- Scallop Shells: These shells have a distinctive fan shape and are often brightly colored. They are easily recognizable due to their ridged texture.
When kids learn to identify these shells, they can appreciate the beauty and diversity of marine life. A great way to assist in this learning process is through a simple shell identification chart. Here’s a quick reference table that can be printed out and taken along during beachcombing:
| Shell Type | Characteristics | Common Colors |
|---|---|---|
| Conch | Spiral shape, large | Pink, orange, cream |
| Clam | Symmetrical, smooth | White, brown, gray |
| Whelk | Elongated spiral | Brown, tan, white |
| Scallop | Fan shape, ridged | Red, orange, yellow |
As you embark on your seashell crafting journey, encourage kids to take notes or even sketch the shells they find. This not only makes the experience more interactive but also fosters a deeper connection to the craft. By understanding the unique characteristics of each shell, children will be able to choose the best ones for their projects, ensuring that their crafts are as beautiful and unique as the shells themselves.
In conclusion, shell identification is not just about recognizing different types of shells; it's about building a love for nature and creativity. So, the next time you're at the beach, take a moment to explore the wonders of seashells with your kids. Who knows what treasures you might find together?
Q: How can I clean seashells before using them in crafts?
A: Cleaning seashells is simple! Rinse them in fresh water to remove sand, then soak them in a mixture of water and vinegar for about 30 minutes to remove any remaining debris. Rinse again and let them dry completely.
Q: Are all seashells safe for kids to handle?
A: Most seashells are safe for kids, but it’s essential to avoid sharp or jagged shells that could cause cuts. Always supervise young children during beachcombing and crafting activities.
Q: Can seashell crafts be made year-round?
A: Absolutely! While collecting seashells is best done during beach trips, you can also purchase seashells from craft stores to create beautiful projects at home anytime.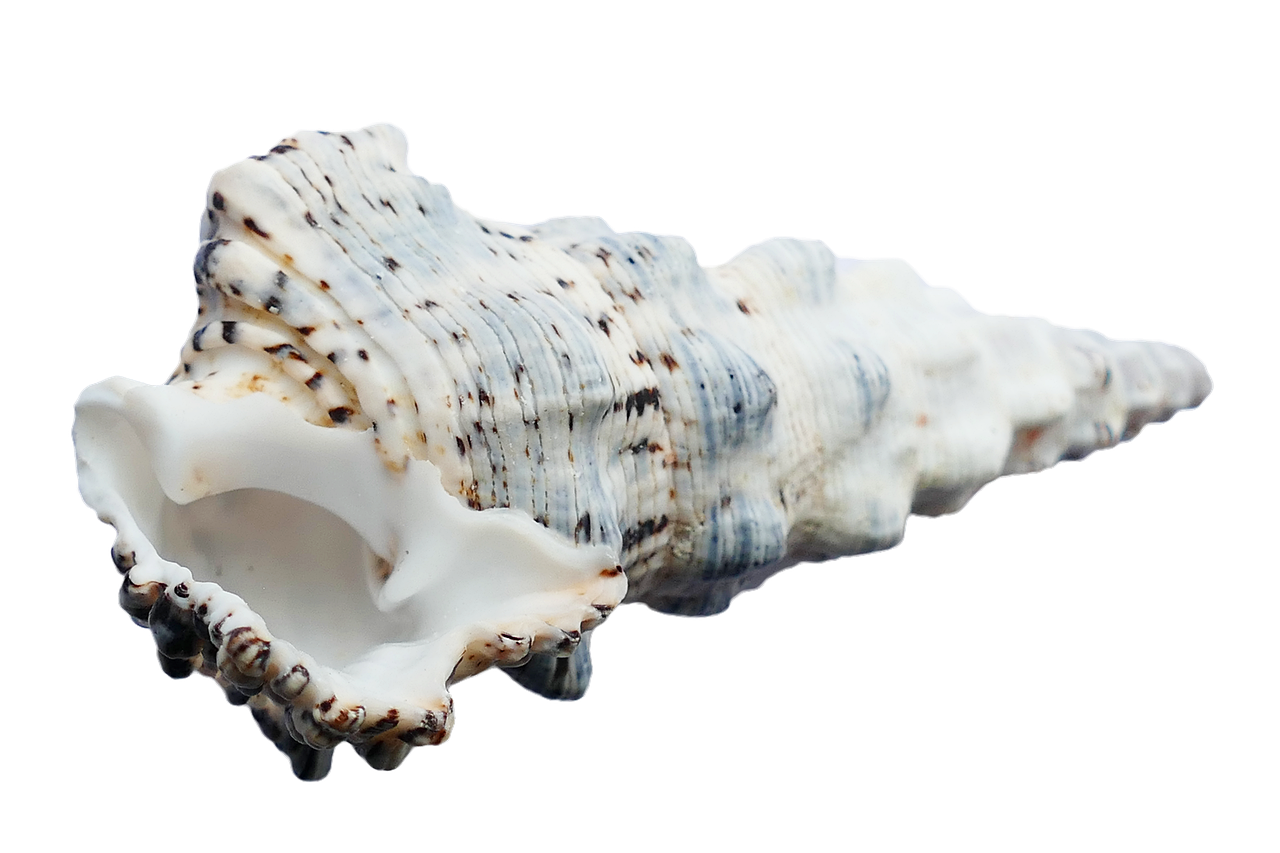
Cleaning Seashells
Cleaning seashells is an essential step in the crafting process, ensuring that your beautiful finds are both safe and ready for decoration. After the excitement of beachcombing, you might be wondering how to transform those sandy treasures into stunning art pieces. The good news is that cleaning seashells is a straightforward process that can be done with a few simple materials you probably already have at home. First and foremost, it's important to handle each shell gently, as they can be fragile and easily damaged.
To start, rinse your seashells under warm water to remove any surface sand or debris. This initial rinse will help you get rid of the bulk of the grime. Next, you may want to soak the shells in a solution of water and vinegar. Vinegar is a natural cleaner that helps to dissolve any remaining organic matter, such as barnacles or algae, that may be clinging to your shells. A good ratio is one part vinegar to three parts water. Let them soak for about 10 to 15 minutes, but keep an eye on them to ensure the vinegar doesn’t cause any discoloration.
After soaking, use a soft brush, like an old toothbrush, to gently scrub the shells. This will help remove any stubborn residues without scratching the surface. Be sure to rinse the shells again with clean water to wash away any vinegar and debris. Once cleaned, lay the shells out on a towel to dry completely. It's crucial to ensure they are fully dry before using them in any craft projects, as moisture can lead to mold or unpleasant odors later on.
For those particularly stubborn shells that need extra attention, consider using a stronger cleaning solution. A mixture of water and bleach can be effective, but it should be used sparingly and with caution. When using bleach, always wear gloves and work in a well-ventilated area. Dilute the bleach in a ratio of one part bleach to ten parts water, and soak the shells for only a few minutes before rinsing thoroughly. Remember, safety first!
In summary, cleaning seashells is a fun and rewarding part of the crafting process that prepares your finds for transformation into beautiful art. With just a few simple steps, you can ensure your seashells are pristine and ready for the next creative project. So, roll up those sleeves, grab your cleaning supplies, and let’s get those shells shining!
- How do I know if a seashell is clean enough? A seashell is clean enough when it no longer has any visible dirt, grime, or organic matter on its surface. It should look shiny and vibrant.
- Can I use any type of shell for crafts? While most shells can be used, some might be too fragile for certain projects. Always choose shells that are intact and sturdy.
- What should I do if a shell has an unpleasant odor? If a shell smells bad, it likely still has organic material inside. Soaking it in a vinegar solution and scrubbing it thoroughly should help eliminate the odor.
Creative Seashell Projects
When it comes to unleashing creativity, seashells are like nature's little canvases, just waiting for kids to transform them into something extraordinary. These are not only fun but also a fantastic way for children to express themselves while honing their fine motor skills. Imagine the joy on their faces as they craft unique pieces that they can proudly display or gift to someone special. From decorative items to wearable art, the possibilities are endless!
One of the simplest yet most delightful projects is creating seashell picture frames. By gluing various seashells around the border of a plain frame, kids can customize their frames to reflect their beach adventures. This project not only allows them to practice their gluing and arranging skills but also gives them a beautiful way to showcase their favorite beach memories. To make it even more special, they can paint the frame in bright colors or add some glitter to give it that extra sparkle.
Another exciting project is crafting seashell wind chimes. This project combines creativity with the soothing sounds of the ocean. Kids can gather a variety of shells, along with some beads and twine, to create a beautiful wind chime that dances in the breeze. The process of threading the shells and beads onto the twine can be a wonderful exercise in patience and precision, and the end result is a charming decoration that can hang in their room or outside on the porch.
For those looking to add a touch of elegance to their home decor, seashell candle holders can be a beautiful project. By using larger shells, kids can create unique holders for small tealight candles. A simple DIY method involves filling the shell with wax and placing a wick in the center. Not only do these candle holders look stunning, but they also provide a warm and cozy atmosphere when lit. Plus, it’s a great opportunity to teach kids about safety when dealing with candles!
Lastly, let’s not forget about the joy of making seashell art collages. This project encourages kids to let their imagination run wild. They can arrange their collected shells on a canvas or sturdy piece of cardboard, creating a stunning piece of art that reflects their personality and experiences. By incorporating other materials like sand, pebbles, or even dried flowers, they can create a mixed-media masterpiece that tells a story of their beach adventures. The tactile experience of arranging and gluing will keep their hands busy and their minds engaged.
These creative seashell projects are not just about crafting; they are about making memories. Each shell tells a story and every project is an opportunity for kids to explore their creativity while learning valuable skills. So, gather those seashells, roll up your sleeves, and let the crafting begin!
Q: What types of seashells are best for crafting?
A: Look for larger, sturdy shells like conchs, clams, and scallops. These provide a good base for various projects.
Q: How do I clean seashells before using them?
A: Rinse them in warm, soapy water and scrub gently with a brush. Avoid using harsh chemicals that could damage the shells.
Q: Are seashell crafts suitable for all ages?
A: Yes! While younger kids may need assistance, many projects can be adapted for different skill levels.
Q: What materials do I need for seashell crafts?
A: Basic materials include glue, paint, twine, and any additional decorative items like beads or glitter.
Q: Can seashell crafts be made indoors?
A: Absolutely! While they are often associated with beach days, many projects can be done at home, especially with adult supervision for younger kids.
Seashell Jewelry Making
Creating seashell jewelry is not just a fun activity; it's a delightful way for kids to express their personal style and creativity. Imagine transforming a simple shell, found on a beach, into a stunning necklace or a pair of earrings that tells a story of adventure and exploration! This craft is perfect for kids of all ages and can be adapted to suit different skill levels. Not only do they get to enjoy the process, but they also end up with unique, handmade accessories that they can wear with pride or gift to family and friends.
To kick off the seashell jewelry-making journey, gather a variety of shells. Look for shells that are not only beautiful but also have interesting shapes and textures. The more unique the shell, the more eye-catching the final piece will be. Once you have your shells, it's time to get creative!
Here are some simple techniques for making seashell jewelry:
- Bracelets: Use a strong cord or elastic string to thread smaller seashells together. Kids can mix and match shells of different colors and shapes to create a bracelet that reflects their personality.
- Necklaces: Larger shells can be used as pendants. Simply drill a small hole in the top of the shell and thread it onto a chain or cord. Add beads or other decorative elements for extra flair!
- Earrings: For a fun pair of earrings, attach small shells to earring hooks. Kids can paint the shells or leave them natural for a beachy vibe.
Now, let's dive deeper into some specific designs that can inspire kids to create their own unique jewelry pieces:
When it comes to pendant designs, the possibilities are endless! Kids can create pendants that resemble sea creatures, such as starfish or seahorses, by using shells with a similar shape. They can also paint shells in their favorite colors or add glitter for a touch of sparkle! The key is to encourage them to let their imagination run wild. A simple yet effective way to make a pendant stand out is by adding a small charm or bead that complements the shell, creating a layered look that is both stylish and fun.
For bracelets, consider incorporating different types of materials. Kids can mix shells with colorful beads, fabric, or even leather to create a more textured look. Encourage them to experiment with various arrangements of shells and beads until they find a design they love. As for earrings, using shells of different sizes can create an interesting asymmetrical design. They can also try using small shells as charms dangling from larger ones, giving a playful twist to their creations.
Overall, seashell jewelry making is a fantastic way for kids to engage with their creativity while developing fine motor skills. Plus, they get to wear their creations, making it a rewarding experience. So gather those shells, unleash the creativity, and let the crafting begin!
Q: What types of shells are best for jewelry making?
A: Look for shells that are not too fragile and have interesting shapes. Larger shells work well for pendants, while smaller shells can be used for bracelets and earrings.
Q: How can we clean seashells before using them?
A: Clean seashells by rinsing them in water and scrubbing gently with a soft brush. For stubborn dirt, soak them in a mixture of water and vinegar for a few hours, then rinse thoroughly.
Q: Can we paint seashells?
A: Absolutely! Acrylic paints work well on seashells. Just make sure to let the paint dry completely before using them in jewelry making.
Q: What tools do we need for making seashell jewelry?
A: Basic tools include a drill for making holes, pliers for bending wires, and scissors for cutting cords. Kids should always be supervised when using tools.
Shell Pendant Designs
Creating shell pendants is not just a craft; it's a way to carry a piece of the beach with you wherever you go! Imagine wearing a little reminder of sunshine, waves, and sandy shores right around your neck. The beauty of seashells lies in their unique shapes and colors, making each pendant a one-of-a-kind treasure. So, how can you transform these natural wonders into beautiful jewelry? Let’s dive into some exciting ideas!
First off, consider the type of seashell you want to use. Large, flat shells like scallops or clam shells are perfect for creating pendants. Their broad surfaces provide ample space for decoration. On the other hand, smaller shells can be combined to create a cluster pendant, which adds texture and visual interest. You could even use a combination of different shells to create a layered effect, giving your pendant depth and character. The possibilities are as vast as the ocean itself!
When it comes to design, think about incorporating elements that reflect your personality or the memories associated with your beach trips. For instance, you can paint the shells with vibrant colors or use nail polish to create a glossy finish. Adding embellishments like beads, glitter, or even tiny charms can elevate the aesthetic, making your pendant truly unique. Remember, the goal is to express your creativity!
To make your shell pendant, follow these simple steps:
- Select your shell: Choose a shell that speaks to you.
- Clean the shell: Ensure it’s free from sand and debris.
- Add a hole: Use a small drill or a hot nail to create a hole for the necklace cord.
- Decorate: Paint, glue on beads, or add any embellishments you like.
- Attach the cord: Use a sturdy string or chain to complete your pendant.
As you work on your pendants, don’t forget to involve your kids in the process. Not only will they learn valuable crafting skills, but they will also enjoy the satisfaction of creating something beautiful with their own hands. Plus, wearing their handmade jewelry can boost their confidence and sense of accomplishment!
To inspire even more creativity, consider hosting a shell pendant-making party with friends or family. Gather a variety of shells, paints, and crafting supplies, and let everyone unleash their imagination. This can be a fantastic way to bond and create lasting memories together, all while celebrating the beauty of the beach.
Q: What types of shells are best for making pendants?
A: Larger, flat shells like scallops or clam shells work well, but you can also use smaller shells for cluster designs.
Q: How do I clean the shells before crafting?
A: Rinse them in fresh water to remove sand and debris, and soak them in a vinegar-water solution if needed to remove any remaining grime.
Q: Can I use other materials with the shells?
A: Absolutely! Beads, glitter, and even small charms can be added to enhance the design of your shell pendant.
Q: What type of cord should I use for the necklace?
A: You can use a sturdy string, leather cord, or even a metal chain, depending on the look you want to achieve.
Bracelet and Earring Ideas
Creating seashell jewelry is not only a fun activity but also a fantastic way for kids to express their creativity and personal style. Bracelets and earrings made from seashells can be as unique as the shells themselves, and they allow children to craft beautiful accessories that they can wear proudly. Imagine walking down the street with a bracelet that you designed yourself, each shell telling a story of its own! Let's dive into some creative ideas for making these lovely pieces.
When it comes to making bracelets, the possibilities are endless! Start by selecting a variety of seashells in different shapes and sizes. This variety will add texture and interest to your bracelet. You can use elastic cord or jewelry wire as your base. For an easy project, simply string the shells onto the cord, alternating between larger and smaller shells to create a balanced look. Don’t forget to tie a secure knot at the end, ensuring that your masterpiece stays intact!
For a more intricate design, consider making a charm bracelet. Kids can create small charms using tiny seashells, beads, or even sea glass. Each charm can represent a special memory from a beach trip, making the bracelet a cherished keepsake. To make the charms, simply drill a small hole in the shell (with adult supervision, of course) and attach them to the bracelet with jump rings. This method not only enhances fine motor skills but also encourages creativity as kids decide which shells to include.
Now, let’s talk about earrings! Seashell earrings are a delightful way to showcase the beauty of the ocean. A simple way to create earrings is to use smaller seashells or even pieces of larger shells. You can use earring hooks and jump rings to attach the shells. For added flair, consider painting the shells or adding a touch of glitter before assembling them. This little extra step makes the earrings pop and gives them a personal touch.
Here’s a quick idea for a seashell earring design that’s sure to impress: choose two matching seashells, perhaps small conch shells. After cleaning and drying them, paint them in complementary colors. Once the paint dries, attach them to earring hooks using jump rings. The result? A stunning pair of earrings that not only looks great but also serves as a reminder of your creative beach day!
To inspire even more creativity, here’s a simple table outlining some ideas for materials and techniques:
| Jewelry Type | Materials Needed | Techniques |
|---|---|---|
| Bracelet | Elastic cord, various seashells, beads | Stringing shells, knotting ends |
| Charm Bracelet | Jewelry wire, small seashells, jump rings | Drilling holes, attaching charms |
| Earrings | Earring hooks, small shells, jump rings | Painting, attaching shells |
With these ideas, kids can unleash their inner artists and create beautiful seashell jewelry that they can wear or gift to friends and family. Remember, the key is to have fun and let your imagination run wild!
Q: What type of seashells are best for jewelry making?
A: Smaller, lighter seashells are ideal for earrings and bracelets. Look for shells that are not too thick or heavy to ensure comfortable wear.
Q: Can I use other materials with seashells?
A: Absolutely! Incorporating beads, stones, or even pieces of driftwood can add a unique touch to your creations.
Q: How do I clean seashells before using them?
A: Rinse the shells in warm soapy water, scrub gently with a toothbrush to remove sand and debris, and let them dry completely before crafting.
Decorative Seashell Displays
Transforming seashells into stunning decorative displays is not just an art; it's a way to bring a piece of the beach into your home. Imagine walking into a room and being greeted by the sight of beautifully arranged seashells that remind you of sun-soaked days at the shore. These displays can serve as conversation starters, evoke fond memories, and even bring a sense of tranquility to your space. Whether you have a few shells collected from your last beach trip or a whole box full of treasures, there are countless ways to showcase them creatively.
One popular method is to create framed shell art. This involves selecting a shadow box or a simple frame and arranging your seashells in an eye-catching pattern. You can use a variety of shells—different shapes, sizes, and colors—to create a visually appealing piece. For instance, a frame filled with white sand and adorned with colorful shells can evoke the essence of a beach day. When arranging the shells, consider the following tips:
- Color Coordination: Choose shells that complement each other in color for a harmonious look.
- Layering: Use smaller shells to fill gaps between larger ones, adding depth to your display.
- Theme: Consider a theme such as "tropical" or "nautical" to guide your selection and arrangement.
Another fantastic idea is to create seashell centerpieces for your dining table or coffee table. These centerpieces can be as simple or elaborate as you desire. You could fill a glass bowl with a mixture of seashells, sand, and perhaps some dried flowers or candles for a stunning effect. Alternatively, you could use a larger shell as a base and arrange smaller shells around it, creating a natural and organic look. This not only adds a coastal vibe to your decor but also brings a touch of nature indoors.
For those who enjoy a bit of DIY, consider crafting a seashell wreath. This project involves gluing shells to a foam wreath form, resulting in a beautiful decorative piece that can hang on your front door or be displayed inside. You can personalize it by adding ribbons, starfish, or even small pieces of driftwood for an extra touch. The beauty of seashell displays is that they can be tailored to fit any space or occasion, whether it’s a summer party or a cozy winter evening.
In addition to these ideas, don't forget the power of lighting. Incorporating fairy lights or LED candles into your seashell displays can create a magical ambiance. Imagine a glass jar filled with seashells and twinkling lights, casting a warm glow in the evening. It's a simple yet effective way to enhance the beauty of your seashell crafts.
As you embark on your journey of creating decorative seashell displays, remember that the most important aspect is to let your creativity shine. There are no strict rules—just let your imagination lead the way. So gather those seashells, unleash your inner artist, and bring the beach home in a way that reflects your unique style!
Q: How do I clean seashells before using them in crafts?
A: Cleaning seashells is essential for removing sand and debris. Soak them in a mixture of water and vinegar for about 30 minutes, then scrub gently with a soft brush. Rinse thoroughly and let them dry completely.
Q: Can I use artificial seashells for crafts?
A: Absolutely! Artificial seashells can be a great alternative, especially if you're looking for specific colors or shapes that may be hard to find in nature.
Q: What type of glue should I use for seashell crafts?
A: A strong adhesive like hot glue or E6000 is recommended for attaching seashells to various surfaces. They provide a durable hold for your projects.
Framed Shell Art
Creating is not just a project; it's an opportunity to capture the essence of the beach and bring it into your home. Imagine walking into a room and being greeted by a stunning piece of art that instantly transports you to sun-soaked shores. This craft allows kids to express their creativity while also preserving memories from a family trip to the beach. Not only is it a fun activity, but it also enhances fine motor skills as children arrange and adhere shells to their chosen canvas.
To get started, you'll need a few essential materials. First, gather your collection of seashells—each one with its own unique shape and color. Next, choose a frame that complements the shells. You can opt for a simple wooden frame, a colorful plastic one, or even a shadow box for a more three-dimensional effect. The choice of frame can greatly influence the overall look of your art piece.
Once you have your materials ready, it’s time to design! Start by laying out the shells on a piece of cardboard or a canvas before securing them. This step allows for experimentation with different arrangements. Encourage the kids to think of themes—perhaps a nautical scene with shells mimicking waves or a colorful explosion of shells that represent a vibrant beach day. The beauty of this craft is that there are no strict rules; it’s all about personal expression.
After deciding on a layout, use a hot glue gun or strong craft glue to secure the shells in place. For added flair, consider incorporating other natural elements like sand, small pebbles, or even pieces of driftwood. These additions can create a more dynamic and textured piece of art. Once everything is glued down, carefully place the frame over your creation and secure it. Voila! You now have a stunning piece of framed shell art that not only brightens up your home but also serves as a cherished reminder of beach days gone by.
To inspire creativity, here are a few ideas for themes and arrangements:
- Beach Sunset: Use shells in warm colors to mimic the hues of a sunset.
- Under the Sea: Incorporate blue and green shells to create an underwater scene.
- Family Memories: Arrange shells in a way that represents family members or special moments.
This project is perfect for family bonding time, allowing everyone to share their ideas and contribute to the final piece. Plus, it’s a fantastic way to teach kids about the different types of shells and their origins. As they work on their framed shell art, you can discuss the importance of marine life and conservation, turning a fun craft into an educational experience.
Q: What types of seashells are best for framed art?
A: Look for shells that have interesting shapes and colors. Common choices include scallops, conchs, and clams. Avoid fragile shells that may break easily.
Q: How do I clean the seashells before using them?
A: Rinse the shells in warm, soapy water to remove sand and debris. For stubborn dirt, a toothbrush can help. Make sure to let them dry completely before crafting.
Q: Can I use artificial shells for this project?
A: Absolutely! Artificial shells can be a great alternative, especially if you want to create a specific design or color scheme.
Q: How can I hang my framed shell art?
A: Use picture hanging strips for easy mounting, or simply use a nail or hook depending on the weight of the frame.
Framed shell art is a beautiful way to celebrate your love for the beach while also creating lasting memories with your children. So gather those seashells, unleash your creativity, and let the beach vibes flow into your home!
Seashell Centerpieces
Transforming seashells into stunning centerpieces can add a touch of coastal charm to any gathering, whether it's a casual family dinner or a sophisticated beach-themed party. Imagine walking into a room and being greeted by the sight of beautifully arranged seashells, evoking memories of sun-soaked days by the shore. Not only do these centerpieces serve as eye-catching decor, but they also spark conversations and transport your guests to the beach, even if they are miles away from the ocean. The beauty of seashell centerpieces lies in their versatility; you can customize them to match your event's theme and color palette.
To create a captivating seashell centerpiece, start by gathering a variety of seashells. Look for different shapes, sizes, and colors to create visual interest. You might want to include some starfish or coral pieces to enhance the beachy vibe. Once you have your collection, consider the base for your centerpiece. A simple glass bowl filled with sand can serve as a beautiful foundation, allowing the shells to shine. Alternatively, you can use a wooden tray or a decorative platter to arrange your shells. The key is to create layers and depth, so your centerpiece feels dynamic and inviting.
Here are some creative ideas to inspire your seashell centerpiece design:
- Layered Shells: Arrange seashells in varying heights to create a three-dimensional effect. Use small, medium, and large shells, placing the largest at the base and layering smaller ones on top.
- Incorporate Candles: Add tealight candles among the shells for a warm, inviting glow. This works especially well for evening gatherings, creating a magical atmosphere.
- Seasonal Touches: For summer events, consider adding bright flowers or greenery among the shells. In the fall, you can mix in small pumpkins or autumn leaves for a seasonal twist.
Don't forget to personalize your seashell centerpieces! You can add name cards for guests or small trinkets that represent special memories. This not only enhances the aesthetic but also makes your guests feel cherished and appreciated. Additionally, if you're hosting a larger event, consider creating smaller seashell arrangements for each table, ensuring that every guest enjoys a piece of the beach.
As you set up your seashell centerpieces, remember that the goal is to evoke the beauty and serenity of the ocean. With a little creativity and thoughtfulness, your seashell centerpieces can become the highlight of your event, leaving a lasting impression on everyone who attends.
Q: How do I clean seashells before using them in centerpieces?
A: Cleaning seashells is essential to remove sand and debris. Soak them in a mixture of water and vinegar for about 30 minutes, then scrub gently with a soft brush. Rinse them thoroughly and let them dry completely before using them in your centerpieces.
Q: Can I use artificial seashells for centerpieces?
A: Absolutely! Artificial seashells can be a great alternative, especially if you're concerned about durability or if you're planning a long-term display. They come in various colors and sizes, allowing for endless creativity.
Q: What other materials can I incorporate into my seashell centerpieces?
A: You can enhance your seashell centerpieces with materials like sand, pebbles, driftwood, or even fairy lights. These elements can help create a more dynamic and visually appealing arrangement.
Frequently Asked Questions
- What types of seashells are best for crafting?
When it comes to crafting, look for larger, sturdy shells that can withstand handling. Some popular choices include conch shells, scallops, and cowrie shells. These shells not only have unique shapes but also come in various colors, making them perfect for creative projects!
- How can I clean seashells before using them in crafts?
Cleaning seashells is crucial for a successful crafting experience. Start by soaking them in a mixture of water and vinegar for about 30 minutes to loosen any debris. After soaking, gently scrub them with a soft brush, rinse thoroughly, and let them dry completely. This will help reveal their natural beauty!
- Are there any safety tips for kids while crafting with seashells?
Absolutely! Always supervise young children during crafting sessions. Make sure they use child-safe tools and avoid any sharp edges on the shells. It's also a good idea to have a first aid kit nearby just in case of minor accidents. Safety first, fun second!
- What materials do I need for making seashell jewelry?
To create seashell jewelry, gather supplies like string, beads, and jewelry findings. You’ll also need some basic tools such as scissors and pliers. With these materials, kids can create stunning necklaces, bracelets, and earrings that showcase their unique style!
- Can seashell crafts be a learning experience for kids?
Definitely! Crafting with seashells can teach kids about marine biology, ecosystems, and creativity. As they collect and identify different shells, they learn about the ocean and its inhabitants. Plus, it enhances their fine motor skills and boosts their confidence as they create beautiful art!
- What are some easy seashell craft projects for beginners?
If you’re just starting, try simple projects like seashell picture frames or shell collages. These projects require minimal supplies and allow for lots of creativity. As kids gain confidence, they can explore more complex crafts like jewelry making or decorative displays!
- How can I display seashell crafts in my home?
Displaying seashell crafts can add a coastal charm to your home! Consider creating framed shell art or using seashells in centerpieces for your dining table. You can also place them in glass jars or shadow boxes for a beautiful, beachy vibe in any room!


