Kickstart Halloween with Gruesome Crafts for Kids
As the leaves turn and the air gets crisp, it's time to embrace the magic of Halloween! This season is not just about spooky stories and trick-or-treating; it's also a fantastic opportunity for kids to unleash their creativity through a variety of fun and spooky craft ideas. Imagine your little ghouls and goblins diving into a world of crafts that not only engage their imagination but also enhance their artistic skills. Whether they're crafting eerie decorations or whipping up some wicked treats, these activities will keep them entertained and excited about the Halloween spirit.
Crafting is more than just a pastime; it's a way for children to express themselves and develop fine motor skills. Plus, what could be more thrilling than creating decorations that will transform your home into a haunted haven? From ghostly garlands to creepy centerpieces, the possibilities are endless! So, gather your supplies, roll up your sleeves, and get ready for a Halloween crafting adventure that promises to be both spooky and spectacular!
Throughout this article, we will explore a variety of gruesome crafts that cater to kids of all ages. Each project is designed to be simple yet engaging, ensuring that children can participate actively while having a blast. So, are you ready to dive into the world of Halloween crafts? Let’s get started!
- What age group are these crafts suitable for? Most of the crafts mentioned are suitable for children aged 5 and up, with some requiring adult supervision.
- Can these crafts be done indoors? Absolutely! Many of these crafts can be done indoors, making them perfect for rainy days or chilly evenings.
- What materials do I need to get started? Basic materials include paper, glue, scissors, paint, and various crafting supplies like felt, googly eyes, and more!
- Are these crafts safe for younger children? Yes, with adult supervision and using child-safe materials, these crafts can be safely enjoyed by younger kids.
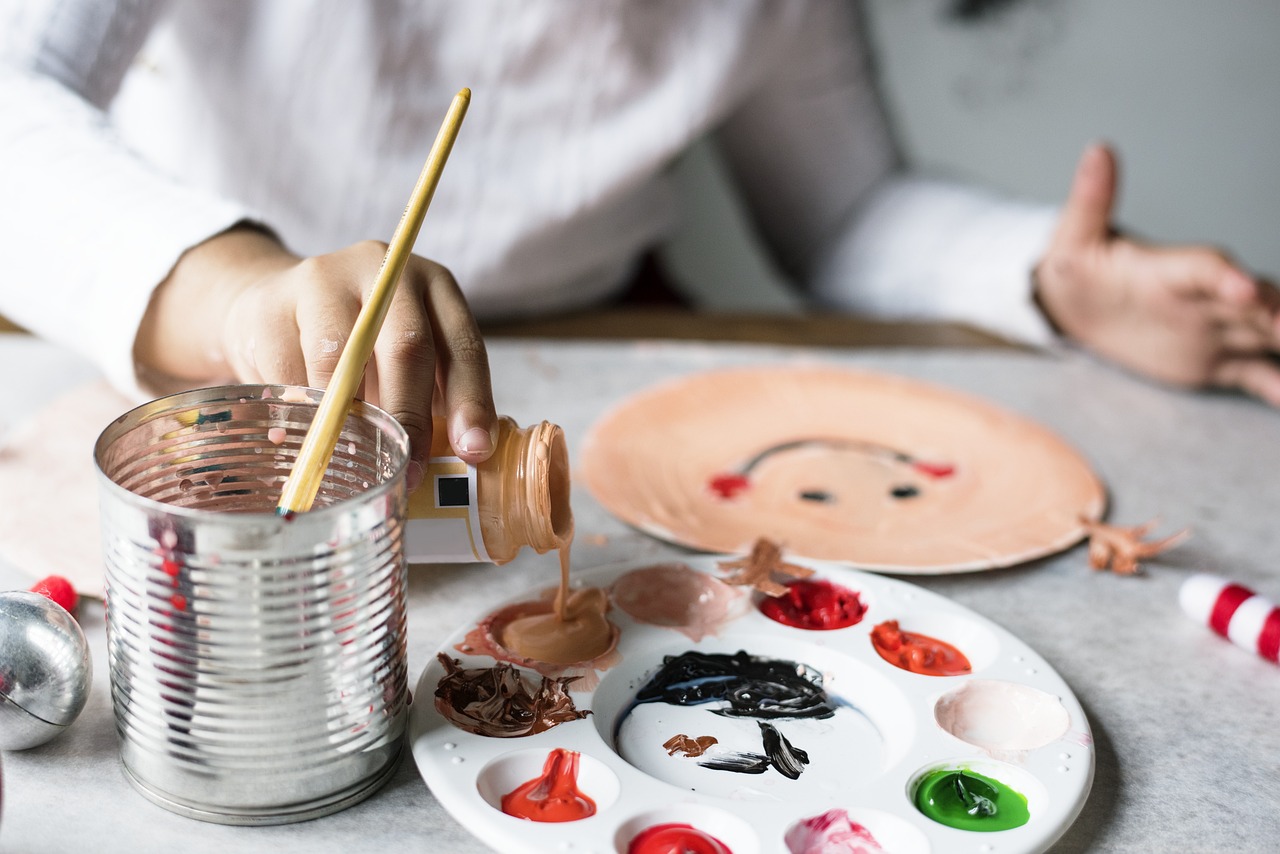
Spooky Decorations
Halloween is the perfect time to unleash your creativity and transform your home into a haunted haven. With just a few supplies and a sprinkle of imagination, you can create eerie decorations that will thrill both kids and adults alike. Imagine walking into a room adorned with ghostly garlands, flickering candlelight, and creepy centerpieces that set the perfect mood for this spooky season. It's not just about the scares; it's about creating an atmosphere that invites fun and excitement!
One of the easiest and most fun ways to get started is by crafting ghostly garlands. All you need are some white balloons, black markers, and string. Inflate the balloons and draw spooky faces on them. Then, simply tie them to a long piece of string to create a garland that can hang across your living room or porch. This simple yet effective decoration is sure to bring smiles and a few playful shrieks!
Next up, let's talk about creepy centerpieces. You can easily repurpose old jars into spooky candle holders. Fill them with fake spider webs, plastic spiders, or even some glow-in-the-dark paint to create an eerie effect. Place a tealight candle inside, and watch as it flickers, casting shadows that dance across the walls. This not only adds a spooky touch but also makes for a great conversation starter during Halloween gatherings.
For those who want to dive deeper into the Halloween spirit, consider creating a haunted house display. Using cardboard boxes, paint, and some crafty touches, kids can design their own miniature haunted houses. Add some battery-operated lights to give it that extra eerie glow. You can even host a little contest to see whose haunted house can be the spookiest!
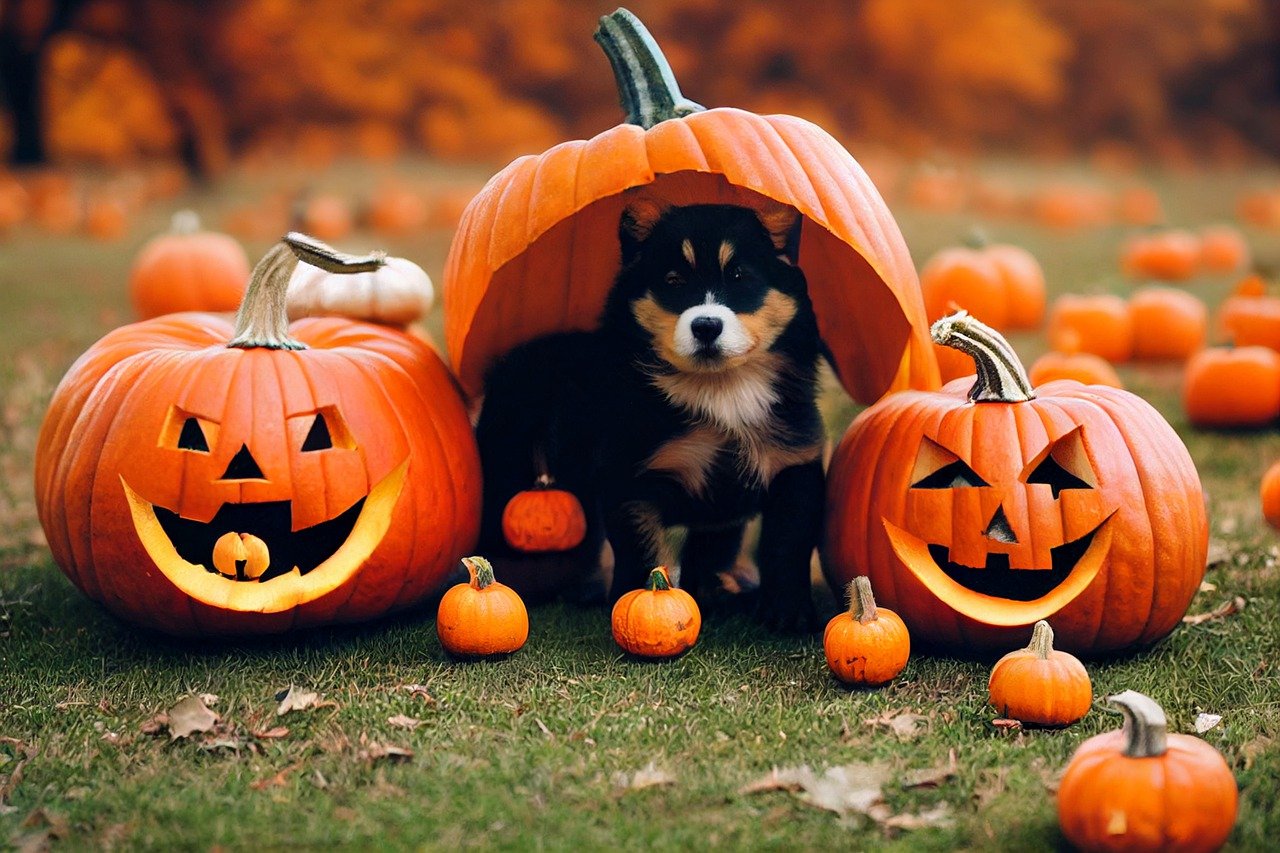
Don’t forget about the classic pumpkin decorations. While carving pumpkins is always a favorite, you can also paint them for a mess-free alternative. Use vibrant colors and fun designs to create a pumpkin patch that reflects your family's personality. These painted pumpkins can be displayed on your porch, adding a cheerful yet spooky vibe to your Halloween decor.
In conclusion, the world of spooky decorations is vast and full of possibilities. Whether you choose to create ghostly garlands, creepy centerpieces, or haunted house displays, the key is to have fun and let your creativity shine. So gather your supplies, invite the kids to join in, and let the crafting begin!
Ghoulish Costumes
Halloween is the perfect time for kids to let their imaginations run wild, and what better way to do that than by crafting their own ? These DIY projects not only encourage creativity but also allow children to express their unique personalities. Imagine your little ones strutting their stuff in costumes that they designed and made themselves! It’s like being the star of their own spooky show.
One of the most exciting aspects of creating ghoulish costumes is the variety of materials that can be used. From recycled clothing to fabric scraps, the possibilities are endless. Kids can either go for a classic Halloween look, like a witch or a ghost, or they can create something entirely new, like a monster or a whimsical creature. The thrill of the unknown can be compared to opening a surprise gift – you never know what amazing creation will come out of it!
Crafting monster masks is an exhilarating way for kids to unleash their imaginations. Using simple materials like cardboard, paint, and elastic bands, children can create masks that reflect their unique personalities. Whether they want to be a ferocious beast or a silly creature, the choice is theirs! Plus, wearing their handmade masks adds an extra layer of excitement to their Halloween adventures.
To make the process even more fun, consider organizing a mask-making party. Invite friends over, set up a crafting station, and let the creativity flow. Kids can swap ideas and materials, leading to a delightful array of monster masks. Just imagine a room full of laughter and creativity, where each child’s personality shines through their creations!
Using paper plates, children can create colorful and imaginative monster faces. This craft is not only easy and affordable but also perfect for groups or individual projects. All you need are some paper plates, paints, googly eyes, and a few craft supplies. Kids can let their creativity run wild, decorating their plates with vibrant colors, funny expressions, and unique features. The result? A gallery of hilarious monster faces ready to greet trick-or-treaters!
Felt masks offer a tactile crafting experience that kids will love. They can cut, glue, and decorate their masks, resulting in one-of-a-kind creations that are comfortable to wear. The softness of felt makes it easy to work with, and the variety of colors available allows for endless creativity. Kids can add embellishments like sequins or feathers to really make their masks pop!
Creating these masks can be a fantastic bonding experience for parents and children. Imagine sitting together, sharing ideas, and watching the transformation of simple materials into fantastic costumes. It’s not just about the final product; it’s about the memories created along the way.
Making Halloween wreaths is another delightful way to celebrate the season. Kids can use various materials, such as leaves, fake spiders, and ribbons, to design their own spooky wreaths to hang on the door. This craft not only beautifies your home but also gets kids involved in the spirit of Halloween. They can experiment with different colors and textures, creating wreaths that reflect their personal style.
Imagine the pride they’ll feel when they hang their handmade wreaths for everyone to see! It's a simple yet effective way to engage children in crafting while adding a festive touch to your home.
Q: What materials do I need for the monster masks?
A: You will need paper plates, paints, googly eyes, scissors, glue, and elastic bands. Feel free to add any other craft supplies you have on hand!
Q: Can we use old clothes for costumes?
A: Absolutely! Old clothes are perfect for creating unique costumes. You can cut, sew, or embellish them to fit your child's vision.
Q: How can I ensure safety while crafting?
A: Always supervise young children when using scissors or glue. Make sure to choose age-appropriate materials and tools for each project.
Q: What if my child is not interested in crafting?
A: Encourage them by showing examples of fun costumes and crafts. Sometimes, a little inspiration is all they need to get started!
Monster Masks
Crafting is an exciting way for kids to unleash their imaginations and dive headfirst into the Halloween spirit. Imagine a world where your little ones can transform into their favorite creatures, be it a fierce dragon, a silly monster, or even a spooky ghost! The best part? These masks can be made from simple materials that you probably already have at home. It’s a fantastic opportunity for children to express their creativity while also engaging in a fun, hands-on activity.
To get started, gather some basic supplies. Here’s a quick list of what you might need:
- Colorful construction paper or cardstock
- Scissors
- Glue or tape
- Markers, crayons, or paint
- Elastic string or ribbon for wearing the masks
- Any additional decorations like googly eyes, feathers, or sequins
Once you have your materials ready, it’s time to let the fun begin! Kids can design their masks by drawing out their monster faces on the construction paper. Encourage them to think outside the box—what would a monster with three eyes look like? Or how about a creature with rainbow-colored fur? The possibilities are endless!
After they’ve sketched their designs, they can cut out the shapes and start assembling their masks. This is where the real magic happens! Kids can glue on googly eyes for a silly effect, add glitter for sparkle, or even use feathers to create a unique look. As they work, they’ll not only be creating something special but also developing fine motor skills and boosting their confidence.
Don’t forget to create a mask-wearing party at the end of your crafting session! Have the kids model their creations and show off their spooky styles. You can even organize a mini photo shoot to capture the fun and creativity. This way, they’ll have a memorable keepsake to look back on, reminding them of the joy of crafting and the excitement of Halloween.
In addition to traditional paper masks, you can also explore other materials. For instance, felt creature masks provide a tactile crafting experience. The soft texture of felt makes it easy for kids to cut, glue, and decorate their masks, resulting in one-of-a-kind creations that are not only fun to make but also comfortable to wear. Felt is forgiving; if a mistake happens, it can be easily corrected, which is perfect for little hands learning the craft.
Overall, making monster masks is not just about crafting; it’s about sparking creativity, fostering imagination, and creating lasting memories. So gather those supplies, roll up your sleeves, and prepare for a howling good time!
Q: What age group is suitable for making monster masks?
A: Monster masks can be made by children of various ages. Younger kids may need adult supervision for cutting materials, while older kids can take on more complex designs independently.
Q: Can we use other materials besides paper?
A: Absolutely! You can use felt, cardboard, or even fabric scraps to create unique masks. Each material offers a different texture and look, so feel free to experiment!
Q: How can we store the masks after Halloween?
A: To keep the masks in good condition, store them in a cool, dry place. You can use a plastic container or hang them up in a craft area to display your little one's creativity!
Paper Plate Monsters
Creating is not just a craft; it’s an adventure that allows kids to dive into their wildest imaginations! With just a few simple materials, children can transform ordinary paper plates into vibrant, eye-catching monsters that are sure to bring a smile to anyone's face. This activity is not only easy and affordable, but it also encourages creativity and self-expression.
To get started, gather some basic supplies: paper plates, colored markers, glue, scissors, and any additional decorations like googly eyes, feathers, or glitter. The beauty of this craft lies in its simplicity and versatility. Kids can create monsters that are silly, scary, or downright whimsical! They can choose to paint their plates with bright colors or use markers to draw unique features such as horns, fangs, and wacky hairstyles.
Here’s a quick breakdown of the process to make these delightful creations:
- Step 1: Start by flipping the paper plate over. This will be the base for your monster's face.
- Step 2: Use markers or paint to add color. Encourage kids to think outside the box—what colors do monsters really come in?
- Step 3: Once the base is dry, it’s time to add features! Glue on googly eyes, cut out shapes from colored paper for ears or mouths, and let their creativity run wild.
- Step 4: Finally, display the monsters proudly! Kids can hang them up as decorations or even use them as puppets for a fun storytelling session.
This craft can be done individually or in groups, making it perfect for Halloween parties or classroom activities. Plus, it's a fantastic way to engage children in discussions about colors, shapes, and even storytelling. Each monster can have its own backstory, and kids can take turns presenting their creations to others. It’s like a mini monster parade!
Not only do these provide a fun crafting experience, but they also serve as a wonderful opportunity for children to develop their fine motor skills and boost their confidence as they see their ideas come to life. So, gather those supplies and let the monster-making begin!
Q: What age group is this craft suitable for?
A: This craft is perfect for children aged 4 and up, as it allows for varying levels of creativity and complexity based on the child's age.
Q: Can this craft be adapted for larger groups?
A: Absolutely! Set up different crafting stations with various materials and let kids rotate through them to create a variety of monsters.
Q: How long does this activity typically take?
A: Depending on the complexity and the number of monsters being made, it can take anywhere from 30 minutes to an hour.
Felt Creature Masks
Creating is a fantastic way for kids to dive into the world of crafting while expressing their wild imaginations. These masks not only spark creativity but also provide a tactile experience that kids absolutely love. Imagine your little ones transforming into their favorite creatures, all while having fun with colorful felt! The best part? Making these masks is incredibly simple and requires just a few materials.
To get started, you'll need some basic supplies:
- Felt sheets: Choose a variety of colors to bring your creatures to life.
- Scissors: Safety scissors are perfect for younger children.
- Glue: Fabric glue works best, but a hot glue gun can be used with adult supervision.
- Elastic bands or strings: To secure the masks on little faces.
- Markers or googly eyes: These add the finishing touches to your creature creations!
Once you have your materials ready, the fun begins! Start by drawing a mask shape on a piece of paper. This could be anything from a friendly monster to a spooky ghost. After deciding on the design, cut out the shape from the felt. Kids can then glue on additional pieces of felt for eyes, mouths, and other features, allowing them to customize their masks to reflect their personalities.
What makes these felt masks especially delightful is the opportunity for imagination. For instance, a child could create a vibrant green monster with big, fluffy purple ears, or a cute pink bunny with floppy ears and a cheeky smile. The only limit is their creativity! Plus, since felt is soft and lightweight, the masks are comfortable to wear, making them perfect for Halloween parties or dress-up play any time of the year.
After finishing the masks, host a little fashion show at home! Kids can parade around in their creations, showcasing their unique designs to family members. This not only boosts their confidence but also encourages them to appreciate the art of crafting.
In conclusion, are an excellent way to engage children in a fun, creative activity that results in a tangible product they can be proud of. So gather your materials, unleash your creativity, and let the crafting begin!
Q: What age group is suitable for making felt creature masks?
A: Felt creature masks are suitable for children aged 5 and up. Younger children may need adult supervision, especially when using scissors or glue.
Q: Can we use other materials besides felt?
A: Absolutely! You can use paper, fabric scraps, or even old clothing to create unique masks. The key is to let your imagination run wild!
Q: How do we secure the masks on children’s faces?
A: You can use elastic bands or strings to secure the masks. Measure the length needed to fit comfortably around the child’s head and attach it to the sides of the mask with glue.
Q: Can these masks be reused?
A: Yes! Felt is durable, so if stored properly, these masks can be reused for different occasions or playtime.
Wicked Wreaths
Making Halloween wreaths is not just a craft; it’s a delightful way to celebrate the season and bring a touch of spooky charm to your home. Imagine your front door adorned with a creation that screams Halloween spirit! Kids can dive into their imaginations and use various materials to design their own unique wreaths, making each one a personal masterpiece. The best part? It’s a fantastic activity that allows children to express their creativity while also enhancing their fine motor skills.
To get started, gather some basic supplies. You’ll need a wreath base, which can be made from foam, wire, or even twigs. Then, let your little ghouls pick from an assortment of craft materials. Think about using:
- Colorful ribbons
- Plastic spiders and bats
- Artificial leaves and flowers
- Halloween-themed stickers
- Craft paint or markers
Encourage the kids to think outside the box! They can create a traditional spooky wreath using black and orange colors, or they can go for a more whimsical approach with bright colors and silly creatures. For instance, they can glue googly eyes on plastic pumpkins, or use feathers to add a fun texture. The possibilities are endless!
Once the wreath is assembled, it’s time to hang it up and admire the handiwork. This craft not only beautifies your home but also gives children a sense of accomplishment. Plus, it’s a perfect conversation starter when guests come to visit. Imagine the pride on their faces when they can say, “I made that!” as they point to their spooky creation.
To help inspire even more creativity, here’s a simple table outlining some fun ideas for your wicked wreaths:
| Wreath Theme | Materials Needed | Instructions |
|---|---|---|
| Classic Spooky | Black mesh, orange ribbon, plastic spiders | Wrap the mesh around the base, add ribbon bows, and glue on spiders. |
| Whimsical Monsters | Bright felt, googly eyes, foam shapes | Cut out monster shapes from felt, attach eyes, and glue onto the wreath. |
| Nature-Inspired | Twigs, leaves, mini pumpkins | Arrange twigs in a circle, glue on leaves and mini pumpkins. |
So gather those supplies and let the crafting begin! Not only will you create a festive atmosphere, but you’ll also make lasting memories with your little ones. Who knows? You might even start a new Halloween tradition that your family will cherish for years to come!
Q: What age group is suitable for making Halloween wreaths?
A: Children of all ages can participate! Younger kids may need more supervision and help with cutting or gluing, while older kids can take the lead in creating their designs.
Q: Can we use recycled materials for wreaths?
A: Absolutely! Using recycled materials is not only eco-friendly but also encourages creativity. Old fabric, paper, and even plastic bottles can be transformed into spooky decorations.
Q: How long will the wreath last?
A: If made with durable materials, your wreath can last for many Halloween seasons! Just be sure to store it properly after the holiday to keep it looking great.
Haunting Treats
As Halloween approaches, the excitement in the air is palpable. What better way to celebrate than by diving into some spooky culinary adventures? Kids love to get their hands dirty in the kitchen, and these are not only fun to make but also a delight to eat! Imagine the joy on their faces as they whip up some deliciously creepy goodies that will make any Halloween gathering a hit.
Let’s start with monster cookies. This delightful activity allows children to unleash their creativity while also indulging their sweet tooth. You can bake a batch of cookies and set up a decorating station with various toppings like colorful icing, candy eyes, and sprinkles. Encourage the kids to create their own unique monster designs. This not only sparks their imagination but also teaches them about colors and textures. Plus, who can resist a cookie that looks like a friendly monster?
Next up, we have ghostly cupcakes. These treats are the perfect canvas for little artists. Begin by baking a batch of cupcakes and then let the kids decorate them to resemble spooky ghosts. Using white frosting, they can pipe on ghostly shapes and add chocolate chips or candy corn for eyes. This simple project helps children learn basic baking skills while allowing them to express their creativity. And the best part? They get to enjoy their spooky creations afterward!
To make things even more exciting, why not combine these treats into a Halloween treat table? You can set it up with a variety of goodies, including:
- Monster cookies
- Ghostly cupcakes
- Witch's brew punch
- Spider web brownies
This treat table will not only look festive but will also provide a range of flavors and textures that will appeal to both kids and adults. It’s a great way to get everyone involved in the Halloween spirit!
Lastly, don’t forget about the presentation. Encourage the kids to help decorate the table with spooky decorations like cobwebs, plastic spiders, and mini pumpkins. The more creative and eerie the setup, the more fun everyone will have. After all, Halloween is all about embracing the spooky vibes and sharing delicious treats with family and friends!
Q: Are these treats easy to make with kids?
A: Absolutely! Both monster cookies and ghostly cupcakes require simple ingredients and straightforward steps, making them perfect for kids to help out with.
Q: What if my child has food allergies?
A: You can easily modify the recipes to accommodate allergies. For instance, use gluten-free flour for cookies or dairy-free frosting for cupcakes.
Q: How can I make the treats healthier?
A: Consider using whole grain flour, reducing sugar, or adding in fruits like mashed bananas or pureed pumpkin for added nutrition.
Monster Cookies
Kids absolutely love a little bit of chaos in the kitchen, especially when it comes to crafting delicious treats like . This fun activity combines baking with creativity, allowing children to unleash their inner pastry chefs while creating cookies that are as spooky as they are scrumptious! Imagine a batch of cookies that looks like a vibrant monster, complete with googly eyes and colorful sprinkles; it’s a treat that’s sure to be the highlight of any Halloween party.
To get started, gather some simple ingredients that you probably already have in your pantry. You’ll need flour, sugar, butter, eggs, and a few other essentials. But the real fun begins when you add the monster twist! Here’s a quick overview of what you can include:
| Ingredient | Purpose |
|---|---|
| Chocolate Chips | For eyes and flavor |
| Colored Sprinkles | Adds a festive touch |
| Mini Marshmallows | For a fluffy monster look |
| Food Coloring | To create vibrant cookie dough |
Once your ingredients are ready, the real magic happens! Kids can mix and match ingredients, and they’ll love the freedom of creating their own unique monster designs. For instance, they can roll the dough into balls, flatten them slightly, and then use chocolate chips and sprinkles to create eyes, mouths, and other features. The result? A platter of cookies that’s not just delicious, but also a feast for the eyes!
After baking, let the cookies cool down before decorating. This is where the fun continues! Encourage your little ones to let their imaginations run wild. They can use icing to draw silly faces, add more sprinkles, or even create a whole monster family. The best part? These cookies are perfect for sharing with friends and family, making them a delightful addition to any Halloween gathering.
So, are you ready to dive into the world of monster cookies? Not only will your kids have a blast making these treats, but they’ll also be able to taste the fruits of their labor. Just be prepared for some sticky fingers and lots of laughter along the way!
- Can I use gluten-free flour for monster cookies?
Absolutely! You can substitute regular flour with gluten-free flour to accommodate dietary needs. - How long do monster cookies stay fresh?
When stored in an airtight container, these cookies can last up to a week, but they’re usually gone much faster! - Can I freeze monster cookies?
Yes, you can freeze the dough or the baked cookies! Just make sure to wrap them tightly to prevent freezer burn.
Ghostly Cupcakes
Creating ghost-themed cupcakes is not just a fun baking project; it's an opportunity for kids to unleash their creativity and get into the Halloween spirit! Imagine fluffy, white frosting shaped like spooky little ghosts, complete with chocolate chip eyes peering out from the sugary surface. This delightful crafting activity combines the joy of baking with the excitement of Halloween, making it perfect for family gatherings or classroom parties.
To start this ghoulish adventure, gather your ingredients and supplies. You'll need basic cupcake ingredients such as flour, sugar, eggs, and butter, along with some fun decorations to bring your ghostly creations to life. Here’s a simple recipe to get you started:
| Ingredients | Amount |
|---|---|
| All-purpose flour | 1 ½ cups |
| Sugar | 1 cup |
| Baking powder | 1 ½ tsp |
| Salt | ½ tsp |
| Butter | ½ cup (softened) |
| Eggs | 2 large |
| Milk | ½ cup |
| Vanilla extract | 1 tsp |
Once you've baked your cupcakes and they have cooled, it's time for the fun part—decorating! Use a piping bag fitted with a round tip to swirl on the white frosting, creating a ghostly shape. For the eyes, simply place two chocolate chips on each cupcake, and voilà! You have adorable ghost cupcakes that are sure to delight everyone.
Additionally, you can encourage kids to personalize their cupcakes. They can use edible markers to draw spooky faces or sprinkle edible glitter for a magical touch. The possibilities are endless! This not only enhances their creativity but also gives them a sense of ownership over their delicious creations.
As a bonus, why not turn this into a friendly competition? Set up a mini cupcake decorating contest where each child can showcase their ghostly designs. This adds an element of excitement and encourages teamwork among kids, making it a memorable Halloween experience. Plus, at the end of the day, everyone gets to enjoy their hard work—what could be better?
In conclusion, ghostly cupcakes are a fantastic way to merge baking with Halloween fun. They are easy to make, delicious to eat, and allow for plenty of creativity. So, gather your little ghouls and goblins, roll up your sleeves, and get ready to whip up some spooky treats that will be the highlight of any Halloween celebration!
- Can I use store-bought cupcakes? Absolutely! If you're short on time, using pre-made cupcakes can make the decorating process even easier.
- What other decorations can I use? Consider using gummy worms, candy corn, or edible eyes for extra spooky effects!
- How can I make the cupcakes healthier? You can substitute ingredients like sugar with applesauce or use whole wheat flour for a healthier twist.
Creative Pumpkin Projects
When it comes to Halloween, pumpkins are the ultimate canvas for creativity! They’re not just for carving anymore; there are a plethora of ways to express your artistic side using these vibrant gourds. Whether you’re looking to paint, plant, or even create something entirely out of the ordinary, these will surely inspire your little ones to get their hands dirty and have some fun!
One of the most exciting alternatives to traditional pumpkin carving is painting. Instead of wielding a knife, kids can unleash their imaginations with brushes and vibrant colors. Imagine a pumpkin splashed with neon pinks, deep blues, or even glittery golds! The best part? There’s no mess from carving, and the designs can be as simple or intricate as your child desires. You can set up a mini pumpkin painting station with a variety of paints, brushes, and even some sponges for texture. Just be sure to cover the table with newspaper to catch any drips!
Another fantastic project is transforming pumpkins into planters. This idea not only allows kids to decorate their pumpkins but also teaches them about nature and gardening. Start by cutting the top off a small pumpkin and scooping out the insides (which you can save for a delicious pumpkin pie!). Then, let your kids fill the hollowed-out pumpkin with soil and plant some colorful flowers or herbs. Not only will they have a unique decoration for Halloween, but they’ll also have a living piece of art that can brighten up their space long after the holiday has passed.
For those looking for something a bit more adventurous, consider creating pumpkin-themed decorations that can be used year after year. Kids can use old pumpkins to make a fun pumpkin family. This project involves painting or decorating pumpkins to resemble family members—think a pumpkin mom with a flower crown, a pumpkin dad with a silly hat, and even little pumpkin siblings with cute faces! You can set up a pumpkin family photo booth and let the kids take pictures with their creations. It’s a great way to commemorate their hard work and creativity!
To help you get started, here’s a quick comparison of some popular pumpkin projects:
| Project | Materials Needed | Time Required | Age Suitability |
|---|---|---|---|
| Painted Pumpkins | Paints, brushes, pumpkins | 1-2 hours | All ages |
| Pumpkin Planters | Small pumpkins, soil, seeds/plants | 1 hour | 5 and up |
| Pumpkin Family | Various pumpkins, paint, accessories | 2-3 hours | All ages |
As you dive into these creative pumpkin projects, remember that the goal is to have fun and embrace the Halloween spirit. Encourage your kids to experiment with their designs and let their personalities shine through. After all, the best part of crafting is the joy of creating something unique and special! So gather your supplies, invite some friends over, and let the pumpkin festivities begin!
Q: What type of paint is best for painting pumpkins?
A: Acrylic paint works great for pumpkins as it adheres well and comes in a variety of colors. Just make sure to apply a sealant afterward if you want the design to last longer.
Q: Can I use the pumpkin insides for anything?
A: Absolutely! The seeds can be roasted for a tasty snack, and the flesh can be used in soups, pies, or even smoothies!
Q: How long do painted pumpkins last?
A: Painted pumpkins can last several weeks if kept in a cool, dry place. Just be aware that they may start to decay faster than carved pumpkins since there’s no hollowing out involved.
Q: Are there any safety tips for kids when crafting with pumpkins?
A: Yes! Always supervise younger children, especially when using sharp tools or paints. Use non-toxic materials and ensure that the crafting area is safe and clean.
Painted Pumpkins
When it comes to Halloween, pumpkins are the ultimate symbol of the season. However, instead of the usual carving that can be messy and requires adult supervision, why not try painting pumpkins? This approach is not only safe for kids of all ages, but it also opens up a world of creativity that carving simply can't match. Imagine a vibrant pumpkin adorned with a rainbow of colors, sparkling glitter, and imaginative designs! The best part? It’s a fun activity that can be enjoyed indoors or outdoors, making it perfect for chilly October days.
To kick off your painted pumpkin project, gather some basic supplies. You’ll need:
- Small to medium-sized pumpkins
- Acrylic paints in various colors
- Paintbrushes (various sizes)
- Palettes or paper plates for mixing colors
- Optional: Glitter, stickers, or other embellishments
Before the kids dive into painting, it's a good idea to set up a designated crafting area. Cover the table with newspaper or a plastic tablecloth to catch any spills. Encourage the little ones to brainstorm ideas for their pumpkin designs. They can create anything from traditional Halloween motifs like ghosts and witches to their favorite cartoon characters or even abstract art! The sky's the limit!
Once they’ve decided on their designs, it’s time to start painting. Here are a few tips to keep in mind:
- Base Coat: If you want a solid color background, start with a base coat and let it dry before adding more details.
- Layering: Encourage kids to layer colors for depth and dimension. This can make their pumpkins pop!
- Details Matter: Use smaller brushes for intricate designs, and don't forget to let their imaginations run wild with patterns or even funny faces.
After the pumpkins are painted and decorated, allow them to dry completely. This could take a few hours, so it’s a good time to enjoy some hot cider or pumpkin-flavored treats. Once dry, these painted pumpkins can be displayed proudly on porches, windowsills, or even as centerpieces for Halloween parties. They not only add a splash of color to your decor but also serve as a fantastic conversation starter!
So, why not make painted pumpkins a part of your Halloween tradition? It’s a delightful way for kids to express their creativity while celebrating the spooky season. Plus, you’ll end up with a beautiful array of pumpkins that can last well into Thanksgiving, bringing joy and color to your home!
Q: Can we use any type of paint for the pumpkins?
A: It's best to use acrylic paint as it adheres well to the pumpkin surface and dries quickly. Avoid using watercolors as they may not provide the desired effect.
Q: Do we need to seal the painted pumpkins?
A: Sealing is optional, but if you want to protect your artwork from the elements, consider using a clear acrylic spray sealer.
Q: How long will painted pumpkins last?
A: Painted pumpkins can last several weeks, especially if they are kept in a cool, dry place. However, they may eventually start to decay, so it's best to enjoy them while they look fresh!
Pumpkin Planters
Transforming pumpkins into planters is not just a creative way to celebrate the Halloween season; it also adds a splash of nature to your decor. Imagine a vibrant orange pumpkin, its top cut off, filled to the brim with colorful flowers or herbs. This craft is perfect for kids, as it allows them to engage in gardening while expressing their artistic flair. Plus, it’s a fantastic way to recycle those pumpkins after Halloween!
To get started on this delightful project, you’ll need a few simple materials. Gather some medium-sized pumpkins, potting soil, and your choice of plants or seeds. Flowers like marigolds, pansies, or even herbs like basil and parsley work wonderfully. The first step is to carefully cut the top off the pumpkin, creating a lid. Kids can use a serrated knife (with supervision) to make this process safe and fun. Once the top is off, scoop out the insides of the pumpkin, just like you would for carving, but this time, save the seeds for planting later!
Next, fill the hollowed-out pumpkin with potting soil, leaving enough space for your plants. Kids can then plant their chosen flowers or herbs, making sure to water them adequately. As the plants grow, they’ll not only beautify the pumpkin but also create a lovely centerpiece for your Halloween festivities. Imagine the delight on your child’s face as they watch their pumpkin planter flourish!
Here’s a quick visual guide to help you with the process:
| Step | Description |
|---|---|
| 1. Choose Your Pumpkin | Pick a medium-sized pumpkin that is firm and has a flat bottom for stability. |
| 2. Cut the Top Off | Using a serrated knife, carefully cut a circle around the stem to create a lid. |
| 3. Scoop Out the Insides | Remove the seeds and stringy insides, saving seeds if desired. |
| 4. Fill with Soil | Fill the pumpkin with potting soil, leaving room for your plants. |
| 5. Plant Your Seeds | Plant flowers or herbs, and water them well. |
This project not only teaches kids about gardening and responsibility but also allows them to enjoy the fruits of their labor as they watch their plants grow. Plus, it’s a great conversation starter when guests arrive for Halloween parties! So, gather your supplies, unleash your creativity, and create some spooky yet delightful pumpkin planters that will surely impress everyone.
- What types of plants can I use in my pumpkin planter? You can use a variety of flowers and herbs, like marigolds, pansies, basil, or parsley.
- How long will the pumpkin last as a planter? Depending on the weather and care, a pumpkin can last several weeks to a couple of months as a planter.
- Can I use a carved pumpkin as a planter? Yes, as long as you remove the insides and keep it well-watered, it can work beautifully!
Spooky Science Experiments
Halloween isn't just about spooky costumes and creepy decorations; it's also an excellent opportunity to dive into the world of science with some thrilling experiments! Imagine combining the **excitement of Halloween** with the **curiosity of science**—what could be more fun? These spooky science experiments are not only entertaining but also educational, allowing kids to learn while they create. With a dash of creativity and a sprinkle of science, your little ghouls and goblins will be engaged and amazed!
One of the most popular experiments during this time of year is slime making. Kids can unleash their inner mad scientists by mixing various ingredients to create Halloween-themed slime. This gooey concoction can be made in a variety of colors, from ghostly whites to vibrant greens, and can even incorporate glitter for that extra sparkle! Not only does slime making offer a sensory experience, but it also teaches children about the properties of polymers. As they mix, stretch, and squish their slime, they'll be learning about viscosity and chemical reactions in a fun and engaging way. Here’s a quick recipe to get started:
| Ingredients | Measurements |
|---|---|
| White school glue | 1 cup |
| Baking soda | 1 teaspoon |
| Contact lens solution | 1 tablespoon |
| Food coloring | Optional |
To make the slime, simply mix the glue and baking soda in a bowl. Add a few drops of food coloring if you want to give it a spooky hue. Finally, stir in the contact lens solution and watch the magic happen as the slime forms! This is a fantastic way to get kids involved in science while also letting them express their creativity.
Another thrilling experiment is creating a spooky volcano eruption. This classic science project is always a hit during Halloween. Using simple household ingredients, kids can create their very own "lava" that bubbles and flows. All you need is some baking soda, vinegar, and food coloring to create a colorful eruption. Here’s how you can do it:
Start by building a small volcano shape using playdough or clay around a plastic bottle. Fill the bottle with baking soda and add a few drops of food coloring. When you're ready for the eruption, pour in some vinegar and watch as the mixture fizzes and bubbles over the top of the volcano. It's a fantastic way to demonstrate chemical reactions and the power of gases!
These experiments not only add an element of fun to Halloween but also encourage kids to ask questions and explore scientific concepts. By engaging in these spooky science activities, children can learn about chemistry, physics, and even environmental science in a way that feels like play. So, gather your ingredients, put on your lab coats, and get ready for a Halloween full of scientific surprises!
- What age group are these experiments suitable for? Most of these experiments are suitable for children aged 5 and up, with adult supervision recommended for younger kids.
- Can I modify the experiments for younger children? Absolutely! You can simplify the steps or pre-measure the ingredients for younger kids to make it easier for them to participate.
- Are these experiments safe to do at home? Yes, all the ingredients used in these experiments are common household items and are safe when used as directed.
Slime Making
Slime making is one of the most exciting and interactive Halloween activities that kids can engage in! Not only does it allow for endless creativity, but it also incorporates a bit of science, making it a fantastic educational experience. Imagine your little ones mixing colors, textures, and ingredients to create their very own gooey concoctions. It’s like a mini science lab right in your kitchen!
To get started, you’ll need a few simple ingredients. Here’s a quick list to make the perfect Halloween-themed slime:
- 1 cup of white school glue
- 1 cup of water
- 1 teaspoon of baking soda
- 1 tablespoon of contact lens solution (contains boric acid)
- Food coloring (green, orange, or purple for that spooky vibe)
- Optional: Glitter, foam balls, or googly eyes for extra fun!
Once you have all your ingredients, the process is a breeze. Start by mixing the glue and water in a bowl until well combined. Then, add in the baking soda and stir until it dissolves. Now comes the fun part—add a few drops of food coloring to give your slime a spooky hue! For that extra Halloween flair, consider using black or glowing colors. Finally, slowly mix in the contact lens solution. You’ll notice the slime starting to form almost immediately!
Encourage your kids to get their hands in there and knead the slime until it reaches the desired consistency. It should be stretchy and not too sticky. If it’s too sticky, just add a bit more contact lens solution. This is where the real magic happens! Watching them play with their handmade slime will surely bring smiles and laughter, making it a perfect Halloween activity.
But wait, there’s more! You can turn this slime-making session into a full-blown Halloween science experiment. Here are a couple of fun ideas:
- Glow-in-the-Dark Slime: Add glow-in-the-dark paint to your slime mixture for a spooky twist that will shine in the dark!
- Textured Slime: Incorporate foam balls or glitter to give the slime a unique texture that kids will love to explore.
As you create these fun slimes, don’t forget to remind the kids about the science behind the slime. Explain how the glue and the boric acid in the contact lens solution react to form a polymer, which is what gives slime its gooey consistency. This will not only make the activity more engaging but will also spark their interest in science!
Q: Is slime safe for kids?
A: Yes, slime made with safe ingredients like school glue and baking soda is generally safe for kids. However, always supervise young children during the activity, especially when using small items like googly eyes.
Q: How do I store leftover slime?
A: To keep your slime fresh, store it in an airtight container. This will prevent it from drying out and keep it ready for playtime!
Q: Can we make slime without glue?
A: Absolutely! There are several recipes available that use alternative ingredients, such as cornstarch and water or even shampoo and cornstarch, for a glue-free slime option.
Volcano Eruptions
Creating a spooky volcano eruption is not just a science project; it's an exhilarating experience that combines education and entertainment! Imagine the thrill on your child's face as they watch their very own "lava" bubble and flow. This activity is perfect for Halloween, bringing a bit of science into the spooky season. To get started, you'll need a few simple ingredients that are likely already in your kitchen. The basic components include baking soda, vinegar, food coloring, and a container to hold your eruption.
Here’s a quick breakdown of how to set up this thrilling project:
- Materials Needed:
- Baking soda
- Vinegar
- Food coloring (red, orange, or yellow for that molten lava effect)
- A small container or cup
- A tray or a large dish to catch any overflow
To create your volcano, start by placing the small container in the center of the tray. Fill it with a few tablespoons of baking soda. Next, add a few drops of food coloring to the baking soda. This will give your "lava" that fiery appearance! Once you’ve prepared your volcano, it’s time for the fun part. Slowly pour vinegar into the container and watch as the reaction occurs. The baking soda and vinegar will react, creating a fizzy eruption that mimics a real volcano!
This project not only captivates children's attention but also provides an opportunity to explain the science behind the eruption. The reaction between baking soda (a base) and vinegar (an acid) produces carbon dioxide gas, which creates bubbles and causes the eruption. You can even encourage your kids to hypothesize what will happen before they pour the vinegar. Will it bubble over? How high will it go? This kind of questioning stimulates their critical thinking and makes the experience even more engaging.
For an added twist, consider decorating the volcano to make it look even more realistic. Use clay or playdough to form a mountain shape around the container, painting it to resemble a volcanic landscape. You could even add some toy dinosaurs or other figures to create a prehistoric scene, making it a complete sensory experience!
| Question | Answer |
|---|---|
| Can I use other ingredients for the eruption? | Yes! Some people use dish soap to create a thicker lava effect, or you can experiment with different acids and bases. |
| Is this project safe for young children? | Absolutely! The materials used are non-toxic and safe for kids, but adult supervision is always recommended. |
| How can I make the eruption more dramatic? | Try using more baking soda and vinegar, or add glitter to the mixture for a sparkling lava effect! |
Frequently Asked Questions
- What are some easy Halloween crafts for kids?
There are plenty of easy Halloween crafts that kids can enjoy! From making paper plate monsters to creating ghostly garlands, these activities are not only fun but also simple enough for little hands. You can also try felt creature masks or spooky wreaths for a touch of creativity!
- How can I incorporate cooking into Halloween crafts?
Incorporating cooking into Halloween crafts can be a blast! You can have kids decorate monster cookies or create ghostly cupcakes. These edible crafts allow children to express their creativity while also enjoying delicious treats afterward. Just imagine the fun of baking and decorating together!
- Are there any science experiments related to Halloween?
Absolutely! Halloween is a great time to mix fun with education through science experiments. Kids can make Halloween-themed slime for sensory play or conduct a spooky volcano eruption using simple kitchen ingredients. These experiments are exciting and provide a hands-on learning experience!
- What are some creative alternatives to pumpkin carving?
If you're looking for alternatives to traditional pumpkin carving, consider painting pumpkins or turning them into planters. Painting allows for vibrant designs without the mess of carving, and using pumpkins as planters adds a unique twist to your Halloween decor!
- Can these crafts be done in groups?
Yes! Many of these crafts are perfect for group activities. Whether it's making monster masks or decorating ghostly cupcakes, kids can work together, share ideas, and have a blast while celebrating the Halloween spirit!


