Fun Paper Mache Projects for Kids
Are you ready to unleash your child's creativity? Paper mache is not just a fun craft; it's a fantastic way to develop motor skills, encourage imaginative play, and create lasting memories with your family. Imagine your little ones transforming simple materials into amazing works of art! In this article, we'll dive into a world of exciting paper mache projects that are perfect for kids of all ages. From vibrant masks to functional art pieces, these activities will not only foster creativity but also provide a wonderful opportunity for family bonding through the joy of crafting.
So, what exactly is paper mache? It's a crafting technique that involves using paper and a binding agent (usually glue or flour paste) to create sturdy structures. To get started, you'll need a few basic materials:
- Newspaper or any paper you can tear into strips
- Flour and water (for homemade paste) or white glue
- A balloon, cardboard, or any form to shape your project
- Paint and decorations for finishing touches
Once you have your materials ready, the fun begins! Start by tearing the paper into strips and mixing your paste. Dip each strip into the paste, remove the excess, and layer it over your form. The key is to apply multiple layers to ensure your creation is strong enough. After you've built up enough layers, let it dry completely. This process can take anywhere from a few hours to overnight, depending on the size of your project. And voilà, you’re ready to unleash your artistic flair!
Who doesn't love a good mask? Creating vibrant masks and costumes is one of the most enjoyable aspects of paper mache. Whether it's for a birthday party, Halloween, or just a fun afternoon, these projects can spark a child's imagination and provide hours of entertainment. Let's explore some ideas that will have your kids excited to dress up!
Imagine your child transforming into their favorite animal! Making animal masks is a delightful project that allows kids to express themselves. Start with a basic mask shape using a balloon or cardboard. Once the base is ready, kids can choose their favorite animal—be it a lion, bunny, or even a dragon—and start layering on the paper mache. Encourage them to think about unique features like whiskers, ears, or scales. The beauty of this project is that each mask can be as unique as the child creating it!
Now that the masks are dry and sturdy, it's time to add some flair! Painting is where the magic happens. Kids can use bright colors, glitter, and other fun decorations to personalize their masks. Techniques like sponge painting or using brushes can create different textures and effects. Encourage them to be bold and creative! You can even set up a mini art gallery at home to showcase their masterpieces.
While crafting is fun, safety is paramount. When kids wear their paper mache masks, it’s important to ensure they fit comfortably and allow for easy breathing. Here are some quick tips:
- Make sure the mask has holes for eyes and a comfortable fit.
- Use non-toxic paint and decorations.
- Ensure proper ventilation while painting.
By keeping these tips in mind, you can ensure a safe and enjoyable experience for everyone involved!
Want to impress your guests at the next party? Paper mache decorations can elevate any event! From centerpieces to wall hangings, the possibilities are endless. Kids can create themed decorations that reflect the party's vibe. For example, a jungle-themed party could feature paper mache animals, while a space-themed bash might include planets and rockets. This not only enhances the party atmosphere but also gives kids a sense of pride in their creations!
Why stop at just decorations? Paper mache can also be functional! Kids can craft items like bowls and planters that are both beautiful and practical. It's a wonderful way to teach them about creating something useful from their imagination.
Crafting decorative bowls is a fantastic project that combines creativity with utility. Start by choosing a bowl as a mold. Kids can layer paper mache around the outside, creating a unique design. Once dry, they can paint and decorate their bowls for a personal touch. These bowls can be used for storing small items or simply as decorative pieces in their room.
Transforming paper mache into charming planters is another exciting project. After creating the planter shape, it's essential to waterproof the inside to protect plants. This can be done by applying a sealant or using plastic liners. Once ready, kids can decorate their planters and fill them with indoor plants, adding a touch of nature to their space!
Here are some common questions parents might have about paper mache projects:
- What type of glue is best for paper mache? White school glue or a mixture of flour and water works well.
- How long does it take for paper mache to dry? It typically takes several hours to overnight, depending on the thickness and humidity.
- Can we use colored paper instead of newspaper? Yes, colored paper can add vibrant colors, but ensure it’s lightweight.
Getting Started with Paper Mache
Are you ready to dive into the world of paper mache? This fun and versatile crafting technique is perfect for kids and adults alike, sparking creativity while developing fine motor skills. To kickstart your paper mache journey, you'll need to gather some essential materials and familiarize yourself with a few basic techniques. First off, let’s talk about what you need to get started!
For your paper mache projects, you'll primarily require:
- Paper: Old newspapers, magazines, or any paper you have lying around will work perfectly.
- Adhesive: You can use a simple mixture of water and flour, or opt for white glue mixed with water for a more durable finish.
- Tools: Scissors, a bowl for mixing, and a brush for applying the adhesive.
- Base Structure: Balloons, cardboard boxes, or even wire frames can serve as the base for your creations.
Once you have your materials, the next step is to prepare your workspace. Choose a well-ventilated area, as the glue can sometimes emit strong odors. Lay down old newspapers or a plastic sheet to protect your surfaces from any mess. After all, the last thing you want is a sticky situation to clean up!
Now, let’s dive into the technique of paper mache. The process is simple and can be broken down into a few key steps:
- Prepare Your Adhesive: If you're using the flour and water method, mix one part flour with two parts water until you achieve a smooth consistency. If you prefer white glue, mix it with an equal amount of water.
- Rip the Paper: Tear your paper into strips. This is crucial because ripped edges adhere better than cut edges, creating a seamless finish.
- Dip and Apply: Dip each strip into your adhesive mixture, removing excess glue before applying it to your base structure. Overlap the strips to ensure full coverage.
- Layering: Apply at least 3-4 layers for a sturdy finish. Allow each layer to dry thoroughly before adding the next.
- Final Touches: Once your structure is dry, you can paint and decorate it to your heart's content!
With these basic techniques, you're ready to unleash your creativity! Whether it’s crafting a whimsical mask, a decorative bowl, or even an imaginative sculpture, the possibilities are endless. Remember, the most important part is to have fun and let your imagination run wild!
As you embark on your paper mache adventure, don't hesitate to experiment with different materials and techniques. Maybe try adding glitter for some sparkle or using colored tissue paper for a vibrant effect. The beauty of paper mache lies in its adaptability, making it a fantastic project for kids and families to enjoy together.
Q: How long does it take for paper mache to dry?
A: Drying time can vary depending on the thickness of your layers and the humidity in your environment. Generally, it can take anywhere from a few hours to overnight.
Q: Can I use any type of paper?
A: Yes! While newspapers are the most common choice, you can use any paper you have at home, including magazines and colored paper.
Q: How do I store leftover adhesive?
A: Leftover adhesive can be stored in an airtight container in the refrigerator for up to a week. Just give it a good stir before using it again!
Fun Masks and Costumes
When it comes to unleashing creativity, paper mache masks and costumes are a fantastic way for kids to express themselves! Imagine your child transforming into their favorite animal or character, all thanks to a little bit of paper and glue. Not only is this activity engaging, but it also encourages imaginative play and can be a great bonding experience for the whole family. So, roll up your sleeves, gather your supplies, and let’s dive into the colorful world of paper mache!
Creating masks and costumes with paper mache is not just about the end product; it’s about the journey of crafting together. Kids can take ownership of their designs, choose colors, and even add unique features to make their creations stand out. The best part? You don’t need to be a professional artist to make something amazing! With a few simple materials and some guidance, anyone can create stunning masks that are perfect for parties, Halloween, or just for fun.
One of the most popular themes for paper mache masks is animals. Kids love the idea of becoming their favorite furry friends, whether it’s a roaring lion, a playful puppy, or a majestic owl. The process is simple and can be broken down into a few easy steps. Start by creating a basic mask shape using a balloon or a cardboard base. Then, layer strips of paper soaked in a flour-water mixture over the base, allowing each layer to dry completely before adding the next. Once the mask is sturdy, it’s time to get creative!
Here are a few animal mask ideas to spark your imagination:
- Lion Mask: Use yellow and orange paint for a vibrant mane and add whiskers with black string.
- Cat Mask: Incorporate ears made from thick paper, and use pink paint for the nose.
- Owl Mask: Experiment with different shades of brown and add feathers for a textured look.
Once your masks are dry, the fun really begins with painting and decorating! Kids can use a variety of paints, from acrylics to watercolors, to bring their creations to life. Encourage them to think outside the box: maybe they want sparkly glitter, colorful feathers, or even sequins to add some flair. The options are endless! A little bit of creativity can turn a simple mask into a masterpiece that reflects their personality.
Here’s a quick tip: when painting, start with a base coat and allow it to dry before adding details. This method ensures that colors don’t mix unintentionally, giving a cleaner finish. Plus, kids can practice their fine motor skills as they carefully paint around the edges and add intricate designs.
While the excitement of wearing a paper mache mask is undeniable, it’s essential to keep safety in mind. Here are some important considerations:
- Ventilation: Ensure that the mask has enough openings for airflow, especially if it's worn for an extended period.
- Comfort: Check that the mask fits well and isn’t too tight. You can use soft materials for straps to avoid discomfort.
- Non-toxic materials: Always use non-toxic paints and adhesives to ensure that your child is safe while crafting and wearing their masks.
By following these safety tips, kids can enjoy their creations without any worries. After all, the goal is to have fun while exploring their artistic side!
Once you’ve mastered the art of mask-making, why not take it a step further and create themed decorations for parties? Paper mache can be used to craft stunning centerpieces, wall hangings, and even piñatas that will wow your guests. Imagine a birthday party adorned with colorful, whimsical decorations that reflect your child’s interests—whether it’s dinosaurs, fairies, or superheroes. The process is similar to making masks, but you can explore different shapes and sizes to suit your theme.
In conclusion, making paper mache masks and costumes is a delightful way for kids to engage in art and creativity. It not only enhances their motor skills but also allows them to express their individuality. So gather your materials, unleash your imagination, and get ready for a crafting adventure that your family will cherish!
Q: What materials do I need to start paper mache projects?
A: You’ll need newspaper, flour, water, a mixing bowl, and a base like a balloon or cardboard. Optional items include paint, brushes, and decorations like glitter or feathers.
Q: How long does it take for paper mache to dry?
A: Drying time can vary based on humidity and thickness of the layers, but typically it takes 24 hours for each layer to dry completely.
Q: Can I reuse the balloon or cardboard base?
A: Yes, you can reuse the cardboard base for multiple projects. However, it’s best to dispose of the balloon after use, as it won’t hold up for another project.
Animal Masks
Creating delightful is not only a fun activity for kids but also a fantastic way to spark their imagination! Picture this: your child, adorned with a vibrant lion mask, prowling around the living room, or perhaps a whimsical butterfly mask, fluttering from room to room. The beauty of paper mache is that it allows for endless creativity, and with just a few materials, you can transform simple paper into a fantastic piece of art.
To get started, gather your supplies. You will need:
- Newspaper or old magazines
- Flour and water (for the paste)
- A balloon or a cardboard base (for shaping the mask)
- Paints and brushes for decoration
- Decorative items like feathers, glitter, or sequins
Once you have your materials ready, the first step is to create the base of the mask. If you're using a balloon, inflate it to the size you want the mask to be. For cardboard, you can cut out the shape of the animal's face you intend to create, such as a cat or a fox. Next, dip strips of newspaper into the flour-water paste, remove the excess, and layer them over your base. Make sure to cover the entire surface, leaving holes for the eyes and mouth. This process not only strengthens the mask but also allows kids to get their hands a little messy—what’s more fun than that?
After applying several layers (usually 3-4 is ideal), let the mask dry completely. This might take a few hours or even overnight, depending on the humidity. Once dried, it’s time to unleash your creativity! Paint the mask in bright colors, and don’t shy away from adding unique features. For example, if you’re making a bear mask, consider using brown fur fabric or adding ears made from cardboard. You can even add a little nose made from a pom-pom or a small ball of paper mache!
Another exciting aspect of making animal masks is the storytelling that can accompany them. Encourage your kids to come up with a story about their animal. Is their mask a fierce lion protecting the jungle, or a playful dolphin splashing in the ocean? This not only enhances their creativity but also adds a layer of educational value, as they learn about different animals and their habitats.
Remember, the goal here is to have fun and let your kids express themselves. Each mask will be unique, reflecting the personality and creativity of its creator. So, whether it’s a roaring tiger or a fluttering owl, the possibilities are endless!
Q: What age is appropriate for kids to start making paper mache masks?
A: Generally, children aged 5 and up can enjoy making paper mache masks with some supervision. Younger kids may need help with the paste and handling the materials.
Q: How can I make the masks more durable?
A: To enhance durability, consider using a mixture of glue and water instead of flour paste. This will create a stronger bond and help the mask withstand more wear and tear.
Q: Can I reuse the balloon or base for other masks?
A: Yes! Once you’ve finished with one mask, you can deflate the balloon or clean the cardboard base and start a new project. Just remember to cover any previous paint or paste to ensure a clean surface.
Using Paint and Decorations
Once you've crafted your paper mache masks, it’s time to bring them to life with vibrant colors and unique decorations! The beauty of paper mache lies not just in its form, but also in how you choose to express your creativity through paint and embellishments. Imagine transforming a plain mask into a dazzling work of art that reflects your child's personality or the theme of the event. So, grab your brushes and let’s dive into the exciting world of colors!
When it comes to painting your paper mache creations, the first step is to choose the right type of paint. Acrylic paint is often the best choice because it adheres well to the surface and dries quickly. You might also consider using non-toxic paints to ensure safety, especially for younger kids. Here’s a quick overview of some popular paint options:
| Type of Paint | Benefits | Best For |
|---|---|---|
| Acrylic Paint | Fast-drying, vibrant colors | General use |
| Watercolor Paint | Easy to blend, soft finishes | Delicate designs |
| Spray Paint | Even coverage, quick application | Large projects |
After selecting your paint, consider the techniques you want to use. Here are a few ideas to get you started:
- Dry Brushing: This technique involves using a dry brush to apply a small amount of paint, creating a textured effect that adds depth.
- Sponging: Use a sponge to dab paint onto the surface for a fun, speckled look.
- Layering: Apply multiple layers of different colors to create a rich, dimensional appearance.
Now that your mask is painted, it’s time to add some decorations! This is where the fun really begins. You can use a variety of materials to personalize each creation. Consider incorporating:
- Glitter: A sprinkle of glitter can make your mask sparkle and shine, perfect for festive occasions.
- Feathers: Add texture and movement by gluing on colorful feathers.
- Stickers and Gems: These can be used to create patterns or highlight features on the mask.
Don’t forget about the finishing touches. Once everything is dry, applying a clear sealant can help protect your masterpiece and give it a polished look. This is especially important if the masks will be worn or displayed outside. Choose a non-toxic sealant that is safe for kids and suitable for the materials used.
In conclusion, the process of painting and decorating paper mache masks is all about imagination and expression. Encourage your kids to experiment with colors and materials, as this not only enhances their creativity but also boosts their confidence in their artistic abilities. So, unleash your inner artist and let those masks shine!

Safety Tips for Wearing Masks
When it comes to wearing paper mache masks, safety should always be a top priority. After all, while these creations are meant to be fun and imaginative, they should also be comfortable and safe for kids to wear. Here are some essential tips to ensure that the mask-wearing experience is enjoyable and secure:
First and foremost, ventilation is key. Ensure that the mask has adequate openings for airflow. This not only prevents discomfort but also minimizes the risk of overheating. If possible, create a few small holes in the mask that won’t compromise its design but will allow for better air circulation. Remember, kids can get easily distracted, so it's important that they remain comfortable while they play!
Next, consider the fit of the mask. A mask that is too tight can cause discomfort, while one that is too loose may fall off during play. To achieve the perfect fit, measure the child’s face before crafting the mask. You can adjust the size by adding or removing layers of paper mache or by using adjustable straps. This way, the mask remains securely in place without causing any irritation.
Additionally, materials matter. When crafting your mask, use non-toxic paints and finishes. Children often touch their faces, and you want to ensure that the materials they are in contact with are safe. Look for water-based paints and glues that are labeled as non-toxic. This simple step can prevent potential allergic reactions or skin irritations.
Another vital aspect is the comfort level. Make sure the edges of the mask are smooth and free from sharp points. You can achieve this by sanding down any rough areas or using soft fabric to line the edges. A comfortable mask encourages kids to wear it longer, enhancing their enjoyment during playtime.
Lastly, always supervise children while they are wearing their masks, especially if they are engaging in active play. It’s crucial to keep an eye on them to ensure they’re safe and not experiencing any issues with their masks. This is also a great opportunity for parents to join in on the fun, making it a bonding experience!
By following these safety tips, you can ensure that your kids will have a fantastic time wearing their creative paper mache masks while staying safe and comfortable. Remember, the goal is to let their imaginations run wild, all while keeping their well-being in mind!
Here are some common questions parents might have regarding paper mache masks and their safety:
- Can paper mache masks be worn for long periods? Yes, but it's important to ensure they are comfortable and well-fitted to avoid discomfort.
- What materials are safe for making masks? Use non-toxic paints, glues, and finishes to ensure safety for children.
- How do I clean the masks? Gently wipe the masks with a damp cloth. Avoid soaking them in water as this can damage the paper mache.
- Are there age restrictions for wearing paper mache masks? While there's no strict age limit, ensure that the mask is appropriate for the child's age and size.
Themed Decorations for Parties
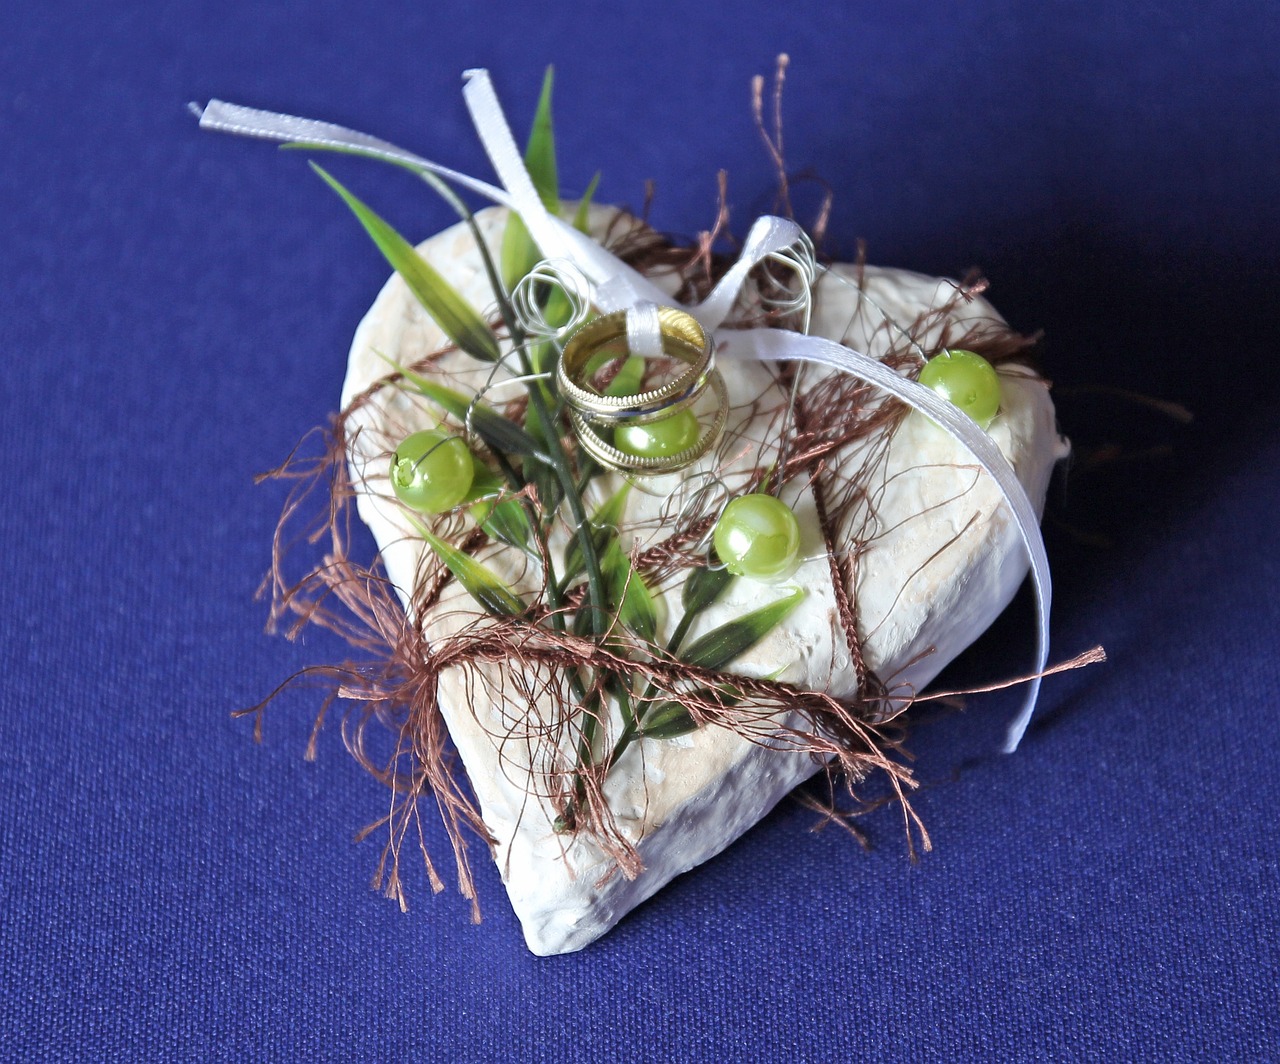
Throwing a party is an exciting way to celebrate special occasions, and what better way to elevate the atmosphere than with themed decorations made from paper mache? These decorations not only add a personal touch but also spark creativity and fun for kids and adults alike. Imagine walking into a room filled with vibrant, handmade decorations that reflect the theme of your event. Whether it's a birthday bash, a festive holiday gathering, or a whimsical costume party, paper mache can help you create stunning centerpieces and wall hangings that will leave your guests in awe.
To kick things off, think about the theme of your party. Are you envisioning a magical fairy tale setting, a spooky Halloween vibe, or maybe a colorful circus atmosphere? Once you have your theme in mind, you can start brainstorming decoration ideas. For instance, if you're going for a fairy tale theme, you could create enchanting castles, whimsical toadstools, or even friendly dragons. On the other hand, a Halloween theme might inspire spooky ghosts, creepy spiders, or jack-o'-lanterns.
Here are some fun ideas for themed decorations:
- Castles and Forts: Create miniature castles that can serve as table centerpieces. Use cardboard bases to form the structure and layer with paper mache for a sturdy finish.
- Floating Ghosts: Craft spooky ghost figures that can hang from the ceiling. Use lightweight materials to ensure they sway gently with the breeze.
- Colorful Balloons: Make oversized paper mache balloons that can be placed around the party area. Paint them in bright colors to match your theme.
Once you’ve created your decorations, it’s time to think about how to present them. Positioning is key! For example, placing a large castle centerpiece on the dining table can instantly draw attention and set the tone for the celebration. You can also hang your paper mache creations from the ceiling or walls to create a 3D effect that will amaze your guests. The beauty of paper mache is that it can be painted and decorated to fit any color scheme or theme, allowing for endless possibilities.
Moreover, involving kids in the decoration process can be a fantastic bonding experience. They can help with painting, gluing, and even brainstorming new decoration ideas. This not only enhances their creativity but also makes them feel like they are an integral part of the celebration. Just imagine the pride on their faces when they see their creations displayed prominently at the party!
Lastly, don’t forget to capture the moment! Take plenty of photos of your themed decorations and the joy they bring to your event. These pictures will serve as cherished memories, reminding you of the fun times spent crafting and celebrating together. So gather your materials, unleash your imagination, and get ready to impress your guests with stunning themed decorations made from paper mache!
Q: What materials do I need to start paper mache projects?
A: To start, you'll need newspaper or paper strips, flour or glue for the paste, and a base structure (like balloons or cardboard) to shape your creations.
Q: How long does it take for paper mache to dry?
A: Drying time can vary depending on the thickness of your layers and humidity, but typically it takes 24 hours for a complete drying process.
Q: Can I paint my paper mache creations?
A: Absolutely! Once your paper mache is completely dry, you can paint it with acrylic paints to personalize your decorations.
Q: Are there any safety tips for using paper mache with kids?
A: Yes! Always supervise young children while crafting, use non-toxic materials, and ensure proper ventilation when working with paste or paint.

Creating Functional Art
When it comes to unleashing creativity, paper mache is not just about crafting whimsical masks or vibrant decorations; it can also lead to the creation of functional art that serves a purpose in our everyday lives. Imagine transforming a simple pile of newspaper and glue into a stunning bowl or a charming planter that can brighten up your home. This section dives into exciting projects that blend creativity with functionality, allowing kids to make something they can actually use.
One of the most popular projects is making paper mache bowls. Not only are these bowls visually appealing, but they also serve a practical purpose. Kids can use them to hold their treasures, snacks, or even as a decorative piece on a shelf. To start, gather some basic materials: newspaper, a balloon or a bowl for shaping, flour, water, and paint for decorating. The process is simple: tear the newspaper into strips, mix the flour and water to create a paste, and start layering the strips over your chosen form. Once dried, the bowl can be painted in bright colors or adorned with fun designs, turning it into a masterpiece!
Another fantastic project is creating planters for indoor plants. This is a great way to teach kids about responsibility and caring for living things. To make a planter, follow the same initial steps as for the bowls, but consider adding some drainage holes at the bottom before the final layer dries. After shaping and drying, it's essential to waterproof the inside to protect it from moisture. You can do this by applying a layer of varnish or a sealant. Once waterproofed, these planters can be painted and decorated to match any room's decor, making them not just functional, but also a stylish addition to your home.
Creating functional art with paper mache not only sparks creativity but also teaches kids valuable skills. They learn about planning, execution, and even a bit of science when it comes to drying and waterproofing their projects. Plus, it opens up discussions about sustainability and the importance of recycling materials. What better way to bond with your kids than by crafting something beautiful and practical together? So, gather those supplies and let the creativity flow!
- What materials do I need for paper mache projects?
Basic materials include newspaper, flour, water, and a surface for shaping (like a balloon or bowl). - How long does it take for paper mache to dry?
Drying time can vary, but it typically takes 24 hours for the layers to dry completely. - Can I use paint on my paper mache projects?
Absolutely! Acrylic paints work well and can add vibrant colors to your creations. - Is paper mache safe for kids?
Yes, as long as you supervise the use of materials and ensure proper ventilation during the drying process.
Paper Mache Bowls
Creating is not just a fun activity; it’s a fantastic way for kids to express their creativity while also developing essential skills. The process is simple, but the results can be stunning! Imagine transforming ordinary materials like newspaper and glue into beautiful, functional art pieces that can hold snacks, trinkets, or even serve as decorative items in your home. It’s like turning trash into treasure!
To get started, you’ll need a few basic materials. Gather some old newspapers, a balloon or a bowl to use as a mold, flour, water, and a mixing bowl. The beauty of paper mache is that it’s inexpensive and eco-friendly. Plus, it’s a great opportunity to teach kids about recycling while having fun!
Here’s a quick breakdown of how to make your own paper mache bowls:
- Prepare the Paper: Tear the newspaper into strips. Aim for pieces that are about 1 inch wide and 6 inches long. The more irregular, the better, as this helps create texture.
- Make the Paste: In a mixing bowl, combine 1 part flour with 2 parts water. Stir until you achieve a smooth consistency. You can also use a glue mixture if you prefer a stronger hold.
- Start Layering: Inflate a balloon or use a bowl as a base. Dip your newspaper strips into the paste, remove the excess, and start layering them over your mold. Aim for at least three layers for sturdiness.
- Drying Time: Allow the bowl to dry completely, which may take up to 24 hours. Once dry, pop the balloon (if used) or carefully remove the bowl from the mold.
- Finishing Touches: Once your bowl is fully dry, you can paint it with vibrant colors or add decorative elements like glitter, stickers, or even beads. The possibilities are endless!
These bowls can be used for a variety of purposes, from holding candy to serving as a catch-all for keys and small items. They also make great gifts, especially when personalized with the recipient's favorite colors or designs. By engaging in this project, kids not only learn about crafting but also gain a sense of accomplishment seeing their creations come to life.
Now, let’s address some common questions about making paper mache bowls:
| Question | Answer |
|---|---|
| Can I use different types of paper? | Absolutely! While newspaper is the most common, you can experiment with tissue paper, magazines, or even recycled paper. |
| How can I make my bowls waterproof? | To waterproof your paper mache bowls, apply a clear sealant or mod podge after painting. This will help protect them from moisture. |
| What can I do if my bowl is too flimsy? | If your bowl feels fragile, you can reinforce it by adding more layers of paper mache or using a stronger adhesive. |
In conclusion, making paper mache bowls is a delightful and educational experience that can be enjoyed by kids and adults alike. It's not just about crafting; it's about creating memories and fostering a love for art. So gather your materials, unleash your creativity, and let the fun begin!
Planters for Indoor Plants
Creating using paper mache is not just a fun activity; it's a fantastic way to bring a touch of nature into your home while engaging your kids in a creative project. Imagine the joy on their faces when they see their very own handmade planters housing beautiful plants! To get started, you’ll need a few basic materials: paper, glue, water, and some balloons or molds to shape your planters. The process is simple and allows for plenty of creativity, making it perfect for children of all ages.
First, let’s talk about the shaping process. You can use balloons as a base for your planters, which gives them a fun, rounded shape. Simply inflate a balloon to your desired size and cover it with layers of paper mache. As the layers dry, you can carefully pop the balloon, leaving you with a hollow shell that can be transformed into a planter. Alternatively, you can use plastic containers or even cardboard boxes as molds, which can create different shapes and sizes. This flexibility means your kids can let their imaginations run wild!
Once the basic shape is dry, it’s time to think about waterproofing. Since you’ll be using these planters for real plants, it’s essential to ensure they can hold water without falling apart. One effective method is to apply a layer of waterproof sealant or varnish to the inside of the planter. You can also line the inside with a plastic bag to create a barrier. Just make sure to poke a few drainage holes at the bottom to prevent overwatering, which is a common mistake that can lead to root rot.
Now comes the fun part: decorating your planters! Kids can use paints, glitter, or even natural materials like twigs and leaves to personalize their creations. Encourage them to think about the colors and designs that reflect their personality or the type of plants they plan to grow. For instance, vibrant colors can make a cheerful statement, while earthy tones can create a more natural look. You might even consider a themed approach, such as jungle animals for a kids' room or pastel colors for a serene living space.
To give you an idea of how versatile these planters can be, here’s a quick comparison of different types of plants that work well in homemade planters:
| Plant Type | Care Level | Best for |
|---|---|---|
| Succulents | Low | Small planters |
| Herbs (like basil or mint) | Medium | Kitchen windowsills |
| Spider Plant | Easy | Hanging planters |
| Peace Lily | Medium | Living rooms |
With these tips in mind, your kids can create stunning planters that not only serve a purpose but also spark conversations and admiration from family and friends. Each planter becomes a unique piece of art, showcasing their creativity and hard work. Plus, taking care of the plants can teach them responsibility and the importance of nurturing living things. So, gather your materials, unleash your creativity, and watch your indoor space come alive with color and greenery!
Q: Can I use any type of glue for paper mache?
A: It's best to use a flour and water mixture or white school glue mixed with water for a safe option, especially for kids.
Q: How long does it take for paper mache to dry?
A: Drying time can vary depending on humidity and thickness, but generally, it takes about 24 hours for each layer to dry completely.
Q: Are paper mache planters safe for indoor use?
A: Yes, as long as they are properly waterproofed and sealed, paper mache planters are safe for indoor use.
Q: What types of plants are best for kids to care for?
A: Easy-care plants like succulents, spider plants, and herbs are great choices for kids, as they require minimal maintenance.
Frequently Asked Questions
- What materials do I need to start a paper mache project?
To kick off your paper mache adventure, you'll need a few basic materials. Grab some newspaper, flour, water, and a mixing bowl for your paste. You might also want to have balloons or cardboard as a base for your creations. And don’t forget to have some paint and brushes ready for that final touch!
- How do I make a paper mache mask?
Making a paper mache mask is super fun! Start by inflating a balloon or using a cardboard base to shape your mask. Then, tear newspaper into strips and dip them in your flour-water mixture. Layer the strips over your base, letting each layer dry before adding the next. Once it’s sturdy, pop the balloon and paint your masterpiece!
- Can I waterproof my paper mache projects?
Absolutely! To make your paper mache creations waterproof, you can apply a sealant after painting. Look for a clear acrylic spray or a waterproof varnish. This will help protect your projects, especially if you’re making planters or bowls that might hold water.
- Are there any safety tips for kids using paper mache?
Yes, safety is key! Make sure to work in a well-ventilated area to avoid inhaling any fumes from paints or adhesives. Supervise younger kids, especially when using scissors or sharp objects. Also, ensure that the masks fit comfortably and allow for easy breathing.
- What are some fun themes for paper mache decorations?
The possibilities are endless! You can create decorations based on holidays like Halloween or birthday parties. Think about themes like jungle animals, underwater scenes, or even outer space! Let your imagination run wild and create something that fits your celebration perfectly.
- How long does it take for paper mache to dry?
The drying time can vary depending on humidity and the thickness of your layers. Generally, it takes about 24 hours for each layer to dry completely. If you're in a hurry, you can use a fan to speed up the process, but be careful not to blow it away!
- Can I use different types of paper for paper mache?
Definitely! While newspaper is the most common choice, you can experiment with other types of paper like tissue paper, brown paper bags, or even old book pages. Just keep in mind that different papers may have different drying times and textures!


