Unique Gift Idea: DIY Wooden Coasters
Are you tired of giving the same old gifts that end up collecting dust on a shelf? If so, it’s time to get creative with a unique gift idea that is both functional and heartfelt: DIY wooden coasters! Making your own coasters is not only a fun and rewarding project, but it also allows you to personalize each piece, making it a truly special gift for friends and family. Imagine handing over a beautifully crafted coaster that reflects the recipient’s personality or interests—now that’s a gift that will be cherished! In this article, we will explore the entire process of creating stunning wooden coasters, from selecting the right materials to finishing touches that will make your creations shine.
Whether you're a seasoned crafter or a complete beginner, this project is accessible and can be tailored to fit any skill level. You’ll learn about different types of wood, essential tools, and creative design ideas that will help you transform simple wood into a masterpiece. Plus, with the right techniques, you can ensure your coasters not only look great but also stand the test of time. So, roll up your sleeves, grab your tools, and let’s dive into the world of DIY wooden coasters!
Selecting the appropriate type of wood is crucial for durability and appearance. The wood you choose can dramatically affect the final look and functionality of your coasters. For instance, hardwoods like oak and maple are known for their strength and resistance to wear, making them excellent choices for coasters that will see frequent use. On the other hand, softer woods like pine can be easier to work with for beginners but may not hold up as well over time.
Here’s a quick overview of some popular wood options:
| Type of Wood | Characteristics | Best Use |
|---|---|---|
| Oak | Strong, durable, and water-resistant | Everyday use coasters |
| Maple | Hard, fine grain, and beautiful finish | Decorative coasters |
| Pine | Soft, easy to work with, and inexpensive | Beginner projects |
Ultimately, the choice of wood will depend on your personal preference and the look you want to achieve. Each type of wood brings its own unique charm, and selecting the right one is the first step in your coaster-making journey.
Before you embark on your DIY project, it's essential to gather all necessary tools and materials. Having everything on hand will ensure a smooth crafting experience, and you won’t have to interrupt your flow to hunt down missing items. Here’s a quick rundown of what you’ll need:
The essential tools for creating beautiful wooden coasters include:
- Saw: A jigsaw or circular saw will help you cut the wood into the desired shape.
- Sander: A power sander or sandpaper will smooth out rough edges and surfaces.
- Drill: Useful for creating holes if you plan to add any decorative elements.
When it comes to choosing between power tools and hand tools, it really depends on your comfort level and the complexity of your design. Power tools can make the job quicker and often result in cleaner cuts, while hand tools can offer more control and are typically less intimidating for beginners. Consider starting with hand tools if you're new to woodworking, and gradually incorporate power tools as you gain confidence.
Adhesives play a crucial role in assembling your coasters. Options like wood glue, epoxy, or even hot glue can be effective, but each has its pros and cons. Wood glue is strong and dries clear, making it a popular choice, while epoxy offers excellent durability. Make sure to test your adhesive on scrap wood first to ensure it meets your needs.
Once your coasters are cut and sanded, it’s time to let your creativity shine! You can use a variety of materials to decorate your wooden coasters, including:
- Paints: Acrylic paints work well for vibrant colors.
- Stains: Enhance the natural beauty of the wood while adding color.
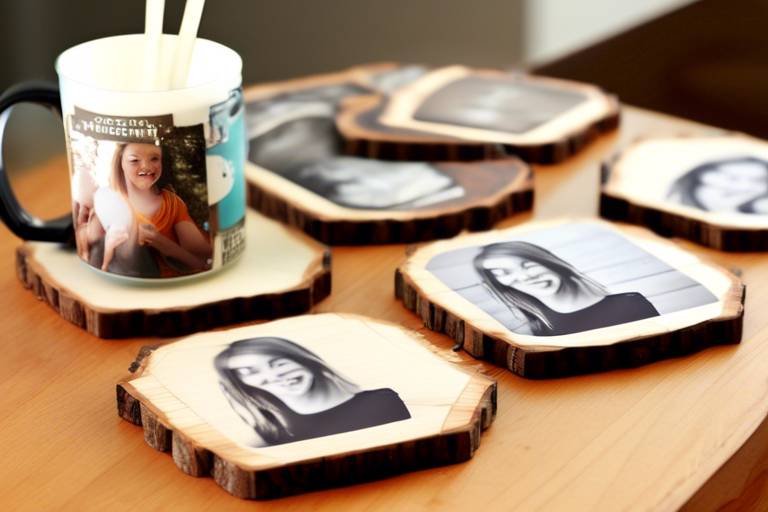
- Embellishments: Consider adding beads, fabric, or even photographs for a personal touch.
Now that you have your materials ready, it’s time to brainstorm some creative design ideas for your wooden coasters. Think about themes, patterns, and color schemes that resonate with the recipient. For example, you could create:
- Floral Patterns: Perfect for nature lovers.
- Geometric Designs: Great for a modern touch.
- Seasonal Themes: Coasters that reflect the time of year can be a hit!
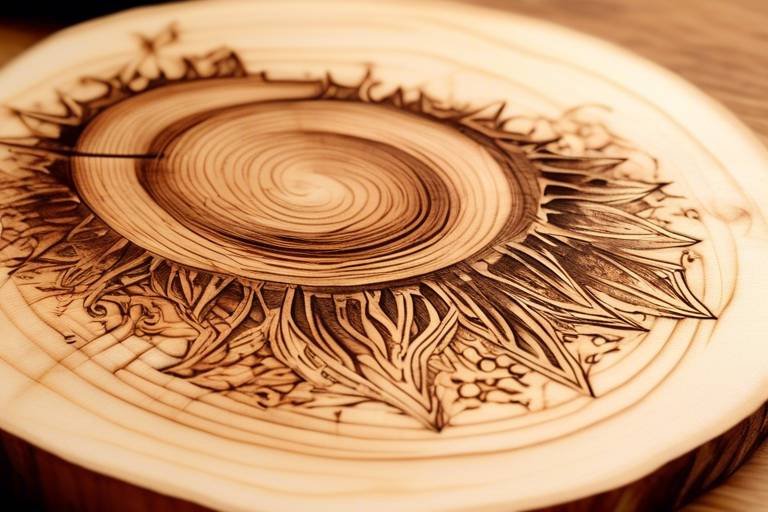
Adding personalized engravings can elevate your coasters to a whole new level. You can use a wood-burning tool or a laser engraver to inscribe names, dates, or special messages. This thoughtful touch not only makes the coasters unique but also adds sentimental value, turning them into cherished keepsakes.
Creating coasters that reflect seasonal themes or special occasions can ensure your gifts are relevant and cherished throughout the year. For example, you can design coasters with autumn leaves for fall, snowflakes for winter, or vibrant flowers for spring. This way, your coasters can be displayed and used year-round, making them a practical yet beautiful gift.
Finishing touches can elevate your wooden coasters to professional quality. Applying stains and sealants not only enhances their appearance but also protects them from moisture and wear. Here’s how to achieve that perfect finish:
When it comes to applying stains, make sure to follow the manufacturer’s instructions. Use a clean cloth or brush to evenly apply the stain, allowing it to soak in before wiping off any excess. Once the stain is dry, a clear sealant will provide an extra layer of protection, ensuring your coasters remain beautiful for years to come.
Finally, polishing your coasters can give them a smooth, glossy finish that is not only visually appealing but also pleasant to touch. Use a fine-grade sandpaper followed by a wood polish to achieve that professional sheen. Your coasters will look so good, you might just want to keep them for yourself!
1. What type of wood is best for coasters?
Hardwoods like oak and maple are excellent choices due to their durability, but softer woods can also work for decorative purposes.
2. Do I need special tools to make wooden coasters?
No, basic tools like a saw, sander, and drill will suffice. You can start with hand tools if you're a beginner.
3. Can I personalize my coasters?
Absolutely! Engravings and unique designs can make your coasters a thoughtful gift.
4. How do I protect my coasters from moisture?
Applying a clear sealant after staining will provide protection against moisture and wear.
5. Are DIY wooden coasters suitable for all occasions?
Yes! You can create coasters for any occasion, from holidays to birthdays, making them versatile gifts.

Choosing the Right Wood
When it comes to crafting your own wooden coasters, choosing the right type of wood is essential for both durability and aesthetics. Imagine sipping your favorite drink while resting it on a beautifully crafted coaster that not only protects your surfaces but also adds a touch of elegance to your home decor. The right wood can transform a simple DIY project into a stunning piece of art. So, what are your options? Let’s delve into some popular wood choices and their unique characteristics.
First off, you might want to consider oak. Known for its strength and durability, oak is a classic choice that can withstand the test of time. Its natural grain patterns add a rustic charm, making it perfect for coasters that want to make a statement. If you’re looking for something a bit softer, pine could be your go-to. Pine is lightweight and easy to work with, making it ideal for beginners. Plus, its light color provides a blank canvas for all sorts of designs.
Another excellent option is maple. This hardwood is not only tough but also has a fine, even grain that looks stunning when stained or painted. Maple coasters can be both functional and decorative, serving as a conversation starter at your next gathering. If you’re feeling adventurous, consider using bamboo. While technically a grass, bamboo is incredibly strong and eco-friendly, making it a fantastic sustainable choice. Its unique texture can add an exotic flair to your coaster collection.
Here’s a quick comparison of these wood types to help you decide:
| Wood Type | Durability | Grain Pattern | Best Uses |
|---|---|---|---|
| Oak | High | Prominent | Rustic coasters |
| Pine | Medium | Light and simple | Beginner projects |
| Maple | High | Fine and even | Decorative coasters |
| Bamboo | High | Unique texture | Sustainable options |
Ultimately, the best wood for your coasters will depend on your personal style and the purpose of the coasters. Are you looking for something that stands out, or do you prefer a more understated elegance? Whatever your choice, remember that the wood you select will not only determine the functionality of your coasters but also their overall visual appeal.
So, before you start cutting and crafting, take a moment to reflect on what you want your coasters to represent. With the right wood, you can create coasters that are not just functional but also a true reflection of your personality and creativity.

Tools and Materials Needed
Before diving into the exciting world of DIY wooden coasters, it’s essential to gather all the necessary tools and materials. Think of this step as laying the foundation for a sturdy house; without it, your crafting experience could crumble. First and foremost, you’ll need some basic tools that will help you cut, shape, and finish your coasters with finesse. Here’s a rundown of what you’ll require:
- Saws: A circular saw or jigsaw will be your best friends when it comes to cutting the wood into the desired shapes and sizes. They allow for precision and can handle various types of wood effortlessly.
- Sanders: A power sander will save you time and give your coasters a smooth finish, while hand sanders can help you reach those tricky corners and edges.
- Drills: If you plan on adding holes for decorative purposes or even for hanging, a drill is crucial. It opens up a world of creative possibilities.
But tools are just part of the equation. You'll also need materials that will bring your coasters to life. The right wood can make all the difference, so consider options like oak, maple, or birch. Each type of wood has its unique characteristics: oak is durable and has a beautiful grain, while maple is known for its smooth texture and light color. Choosing the right wood is akin to selecting the perfect canvas for your masterpiece.
In addition to wood, you’ll want to stock up on adhesives. A strong wood glue is essential for ensuring your coasters stay together, especially if you plan on layering materials or adding decorative elements. Don’t forget to grab some finishing materials, such as stains and sealants, which will protect your coasters and enhance their natural beauty.
To ensure a smooth crafting experience, here’s a detailed look at the essential tools you’ll want to have on hand:
| Tool | Purpose |
|---|---|
| Saw | Cutting wood into desired shapes |
| Sander | Smoothing edges and surfaces |
| Drill | Creating holes for embellishments |
| Clamps | Holding pieces together while glue dries |
With the right tools and materials in your arsenal, you’re all set to embark on your DIY coaster-making journey. Remember, the joy of crafting lies not just in the final product but also in the process. So, take your time, enjoy the experience, and let your creativity flow!
Q: What type of wood is best for making coasters?
A: Hardwoods like oak, maple, or cherry are ideal due to their durability and aesthetic appeal.
Q: Can I use paint on my wooden coasters?
A: Absolutely! Paint can add a fun and personalized touch to your coasters. Just make sure to seal them afterward for protection.
Q: How do I prevent my coasters from sticking to the table?
A: Applying a sealant will help create a protective barrier that prevents moisture from seeping in, which can cause sticking.
Q: Are DIY wooden coasters safe for hot drinks?
A: Yes, as long as you use the right type of wood and apply a proper sealant, they can safely hold hot beverages.

Basic Tools for Coaster Making
When it comes to crafting your own wooden coasters, having the right tools is essential for achieving that perfect finish. Think of these tools as your trusty sidekicks in your DIY adventure; they can make the difference between a mediocre project and a stunning masterpiece. So, what do you need to get started? Let's dive into the essentials!
First up, you’ll need a good quality saw. A circular saw is a fantastic choice for cutting your wood into the desired shape and size. If you're looking for precision, a jigsaw can be your best friend, especially for intricate designs. Remember, safety first! Always wear protective eyewear while cutting.
Next on the list is a sander. After cutting your coasters, sanding them down is crucial to ensure there are no rough edges. A random orbital sander is highly recommended because it provides a smooth finish without leaving swirl marks. If you prefer a more hands-on approach, you can always opt for sandpaper, but be prepared for a workout!
Another tool to consider is a drill. This is particularly useful if you plan on adding holes for embellishments or if you want to attach a cork backing for extra grip. A cordless drill can offer you the freedom to move around without being tethered to an outlet, making it ideal for DIY projects.
Now, let’s not forget about measuring tools. A good old-fashioned tape measure and a square will help you ensure that your cuts are accurate and your coasters are uniform. After all, nobody wants wonky coasters that wobble under a drink!
Lastly, you might want to invest in some clamps. These handy devices will hold your pieces together while the glue dries, ensuring that everything stays in place. It’s like having an extra set of hands when you need them most!
To sum it up, here’s a quick overview of the basic tools you’ll need for making your wooden coasters:
| Tool | Purpose |
|---|---|
| Circular Saw | Cutting wood into desired shapes |
| Jigsaw | Making intricate cuts |
| Sander | Smoothing rough edges |
| Drill | Creating holes for embellishments |
| Measuring Tools | Ensuring accurate cuts and dimensions |
| Clamps | Holding pieces together while drying |
With these tools in your arsenal, you’ll be well-equipped to create beautiful, personalized wooden coasters that will impress your friends and family. So, gather your supplies, roll up your sleeves, and let your creativity flow!

Power Tools vs. Hand Tools
When diving into the world of DIY wooden coasters, one of the first decisions you'll need to make is whether to use power tools or hand tools. Each option has its own set of advantages and disadvantages, and understanding these can help you choose the best approach for your project. For instance, power tools, such as electric saws and drills, can significantly speed up the process and provide more precision, especially when cutting or shaping the wood. Imagine trying to slice through a thick piece of lumber with just a hand saw; it can be a workout and may not yield the cleanest edges!
On the flip side, hand tools offer a level of control and craftsmanship that many DIY enthusiasts cherish. Tools like chisels and hand saws allow for a more intimate connection with the material, giving you the chance to feel the wood and make adjustments as you go. This tactile experience can be incredibly satisfying, especially when you're crafting something unique. Additionally, hand tools are often more affordable and require less maintenance compared to their electric counterparts.
To help you weigh your options, here’s a quick comparison:
| Feature | Power Tools | Hand Tools |
|---|---|---|
| Speed | High | Low |
| Precision | High | Moderate |
| Cost | Higher initial investment | Generally lower |
| Skill Level Required | Moderate | Higher |
| Portability | Less portable | Highly portable |
Ultimately, the choice between power tools and hand tools comes down to your personal preference and the specific demands of your project. If you're looking for speed and efficiency, power tools might be your best bet. However, if you value craftsmanship and a hands-on approach, hand tools could be the way to go. Remember, you can always mix and match! Many woodworkers use a combination of both to achieve the best results.
- Can I make wooden coasters with only hand tools? Yes, you can absolutely create beautiful wooden coasters using just hand tools. It may take more time, but the results can be very rewarding.
- Are power tools safe for beginners? Yes, but it’s essential to follow safety guidelines and practice proper techniques. Start with basic tools and gradually work your way up to more complex machinery.
- What type of wood is best for coasters? Hardwoods like oak, maple, or walnut are excellent choices due to their durability and resistance to moisture.

Choosing the Right Adhesives
When it comes to crafting your own wooden coasters, selecting the right adhesive is just as important as choosing the wood itself. The adhesive you use can significantly affect the durability and overall finish of your coasters. Imagine spending hours creating a beautiful set of coasters only to have them fall apart after a few uses! To avoid this heartache, let’s dive into the various types of adhesives available and their unique characteristics.
First off, consider wood glue. This is a favorite among woodworkers for its strong bond and ease of use. Wood glue is specifically designed to bond wood to wood, making it perfect for your coaster project. It dries clear, which means it won’t detract from the natural beauty of your coasters. However, be mindful that wood glue generally requires clamping while it sets, which can add extra time to your project.
Another option worth exploring is epoxy resin. This adhesive is incredibly versatile and provides a waterproof bond, making it ideal if you plan to use your coasters for drinks that may sweat or spill. Epoxy also allows for some creativity; you can mix in pigments or glitter to enhance your coaster's aesthetic appeal. However, it’s essential to work quickly with epoxy, as it can set relatively fast, especially in warm conditions.
For those looking for a more flexible option, craft glue or PVA glue can be suitable for decorative elements like embellishments or painted designs. While it may not be as strong as wood glue or epoxy, craft glue is easy to use and is perfect for lighter materials. Just keep in mind that it may not hold up as well under heavy use.
Lastly, if you're considering a more advanced approach, hot glue can be a quick and effective solution for temporary fixes or when working with non-porous materials. However, it’s not recommended for the actual wood bonding process, as it may not provide the longevity you desire. Hot glue can be great for adhering decorative elements or for quick assembly but be aware that it can become brittle over time.
To summarize, here’s a quick comparison of the adhesives discussed:
| Adhesive Type | Strength | Water Resistance | Drying Time |
|---|---|---|---|
| Wood Glue | High | Moderate | Slow (requires clamping) |
| Epoxy Resin | Very High | High | Fast |
| Craft Glue | Low to Moderate | Low | Slow |
| Hot Glue | Moderate | Low | Very Fast |
In conclusion, choosing the right adhesive for your DIY wooden coasters is crucial for ensuring they stand the test of time. Whether you opt for wood glue for its strength, epoxy for its versatility, or craft glue for lighter applications, each type has its own set of advantages and disadvantages. Take the time to assess your project requirements, and you’ll find the perfect adhesive to bring your creative vision to life!
Q: Can I use super glue for my wooden coasters?
A: While super glue can bond quickly, it’s not recommended for wood projects as it may not provide a strong enough bond for durability.
Q: How long does wood glue take to dry?
A: Wood glue typically takes about 30 minutes to set and up to 24 hours to cure fully, depending on the brand and conditions.
Q: Is epoxy resin safe for food contact?
A: Yes, many epoxy resins are food-safe once fully cured, but always check the manufacturer's specifications to be sure.
Q: Can I use multiple types of adhesives in one project?
A: Yes, you can use different adhesives for various components of your coasters, but ensure they are compatible to avoid issues.

Materials for Decoration
When it comes to decorating your DIY wooden coasters, the options are as vast as your imagination! The materials you choose can transform a simple piece of wood into a stunning piece of art that reflects your personality or the preferences of the recipient. Whether you’re aiming for a rustic charm or a modern flair, selecting the right materials is key to achieving the desired look.
One of the most popular choices for decorating wooden coasters is paint. Acrylic paints are particularly favored due to their vibrant colors and quick drying time. You can experiment with various techniques, such as sponging, stenciling, or even freehand painting, to create unique designs. For a more subdued look, consider using wood stains, which enhance the natural grain of the wood while adding a touch of color. Stains come in various shades, allowing you to create a warm, inviting feel or a sleek, contemporary finish.
In addition to paint and stains, you might want to explore embellishments. Think about using materials like fabric scraps, twine, or even natural elements like dried flowers or leaves. These can be adhered to the surface of the coaster to add texture and depth. For instance, wrapping twine around the edges of the coaster can give it a rustic feel, while a delicate flower pressed into the wood can create a beautiful, nature-inspired design.
Another great way to personalize your coasters is through decoupage. This technique involves gluing decorative paper or fabric onto the surface of the coaster and sealing it with a protective finish. You can use anything from old postcards to magazine cutouts, allowing for endless creativity. Just remember to apply a clear sealant over the top to ensure durability and protect your artwork from moisture.
To help you visualize the different materials you can use, here’s a quick overview:
| Material | Description | Best For |
|---|---|---|
| Acrylic Paint | Vibrant colors, quick drying | Bold designs and patterns |
| Wood Stain | Enhances natural grain, adds color | Subtle, elegant finishes |
| Twine/Fabric | Adds texture and a rustic feel | Natural, homey designs |
| Decoupage Materials | Personalized images or patterns | Creative and unique designs |
Ultimately, the choice of materials for decorating your wooden coasters boils down to your personal style and the message you want to convey. Don't be afraid to mix and match different materials to create something truly one-of-a-kind. After all, each coaster you craft is not just a functional item but also a canvas for your creativity!

Design Ideas for Coasters
When it comes to creating stunning DIY wooden coasters, the design possibilities are truly endless! Whether you're aiming for a rustic charm or a modern aesthetic, your coasters can be a reflection of your personal style or a thoughtful gift for someone special. Imagine serving drinks on coasters that not only protect your surfaces but also spark conversation. So, let’s dive into some inspiring design ideas that will help you craft coasters that are as unique as you are.
One fantastic approach is to incorporate personalized engravings. This can be anything from initials to meaningful quotes or even a favorite image. By using a wood burner or laser engraver, you can create a lasting impression that adds a personal touch to your coasters. It’s like giving a piece of your heart, wrapped in the warmth of wood! Plus, these coasters make wonderful gifts for weddings, anniversaries, or housewarmings, allowing you to celebrate those special moments in a truly unique way.
Another exciting design idea is to create seasonal themes. Think about how you can reflect the changing seasons or holidays through your coaster designs. For example, during the fall, you might use warm colors like oranges and browns, and incorporate leaf patterns or pumpkin motifs. In winter, snowflakes or holiday ornaments can bring a festive touch to your table. This not only keeps your decor fresh and lively but also allows you to showcase your creativity throughout the year!
For those who love a bit of color, why not explore the world of paints and stains? You can create vibrant, eye-catching designs by painting geometric patterns or abstract art onto your coasters. Alternatively, using different stains can highlight the natural beauty of the wood while adding depth and character. Imagine a set of coasters where each one showcases a different shade of blue, reminiscent of the ocean, or perhaps a gradient that transitions from light to dark, adding a modern flair to your home.
Additionally, consider the use of natural materials as embellishments. You can glue on small stones, shells, or even dried flowers to create a beautiful, textured look. This not only enhances the aesthetic appeal but also gives each coaster a unique feel. Just think of the stories these coasters could tell, each one a little piece of nature brought indoors!
To help you visualize these ideas, here’s a quick table that summarizes some popular design themes for wooden coasters:
| Design Theme | Description | Best For |
|---|---|---|
| Personalized Engravings | Custom designs featuring names, dates, or quotes. | Gifts for special occasions |
| Seasonal Themes | Designs reflecting holidays or seasons. | Year-round decor |
| Colorful Paints | Bright, bold colors and patterns. | Modern, vibrant spaces |
| Natural Embellishments | Incorporating stones, shells, or flowers. | Nature-inspired decor |
By exploring these design ideas, you can transform simple wooden coasters into stunning pieces of art. Remember, the key is to let your creativity flow and have fun with the process. Each coaster you create can tell a story, whether it’s a personal memory or an artistic expression. So grab your tools and materials, and let’s start crafting coasters that will impress your guests and brighten up your home!
Q: What type of wood is best for making coasters?
A: Hardwoods like oak, maple, or walnut are great choices for durability and aesthetic appeal. Softwoods can work too, but they may not hold up as well over time.
Q: How do I seal my coasters to make them water-resistant?
A: Applying a clear sealant or polyurethane will help protect your coasters from moisture. Be sure to allow adequate drying time between coats for the best results.
Q: Can I use my coasters outdoors?
A: Yes, but you’ll need to ensure they are properly sealed to withstand the elements. Consider using outdoor-safe sealants for maximum durability.
Q: How do I clean my wooden coasters?
A: To clean your coasters, simply wipe them down with a damp cloth. Avoid soaking them in water, as this can warp the wood.
By addressing these questions, you can feel more confident in your DIY coaster-making journey. Happy crafting!

Personalized Engravings
When it comes to crafting unique gifts, can transform a simple wooden coaster into a cherished keepsake. Imagine gifting a friend a set of coasters adorned with their initials or a memorable date; it’s a thoughtful touch that shows you’ve put in extra effort. Engraving not only adds a personal flair but also makes the coasters more meaningful. You might be surprised at how a few well-placed words can evoke emotions and memories, turning an everyday item into a treasured memento.
To get started with personalized engravings, you have a few options at your disposal. You can use a laser engraver, which offers precision and is perfect for intricate designs. Alternatively, if you're feeling a bit more hands-on, you could try wood burning tools, which provide a rustic charm and allow for creative freedom. Regardless of the method you choose, the key is to think about the design that best represents the recipient. Here are some ideas to consider:
- Initials: Simple and classic, perfect for a personal touch.
- Quotes: Choose a favorite quote or saying that resonates with the recipient.
- Images: Incorporate small graphics or symbols that have significance.
- Dates: Engrave important dates, like anniversaries or birthdays, to commemorate special occasions.
Once you've settled on a design, the next step is to prepare your coasters for engraving. Make sure the surface is smooth and clean; this will ensure that your engraving is crisp and clear. If you're using a laser engraver, you’ll want to adjust the settings based on the type of wood you’re using. For wood burning, practice on a scrap piece first to get the hang of it. Remember, patience is key!
After engraving, consider applying a finish to protect your artwork. A clear sealant not only enhances the wood's natural beauty but also ensures your engravings last for years to come. The end result will be a stunning set of coasters that not only serve a practical purpose but also tell a story, making them perfect for any occasion. Whether it's for a wedding, a housewarming, or just because, personalized engravings can truly elevate your DIY wooden coasters!
Q: What tools do I need for engraving?
A: Depending on your method, you may need a laser engraver or a wood burning tool. Both have their own learning curves, so choose what you feel most comfortable with!
Q: Can I engrave on any type of wood?
A: Most hardwoods work well for engraving, but softer woods may also be suitable. Just ensure the surface is smooth for the best results.
Q: How do I protect my engravings?
A: Applying a clear sealant after engraving will help protect your artwork from moisture and wear, ensuring it lasts for years.
Q: Are there any design limitations?
A: While there are some limitations based on the size of your coasters and the tools you use, you can generally get quite creative with your designs!

Seasonal Themes
Creating coasters that reflect is a fantastic way to make your DIY projects not only functional but also visually appealing and relevant throughout the year. Imagine sipping your favorite beverage on a coaster that captures the essence of each season! From the vibrant colors of autumn leaves to the soft pastels of spring flowers, the possibilities are endless. By incorporating seasonal elements into your coaster designs, you can transform simple wooden pieces into delightful decor that celebrates the changing times.
For instance, during the fall, consider using warm colors like deep reds, oranges, and yellows. You can paint or stain your coasters in these hues and even add leaf motifs or pumpkin designs. This not only enhances the aesthetic but also evokes the cozy feeling of autumn gatherings. Similarly, in the winter, you might opt for cooler tones like icy blues and whites, perhaps featuring snowflakes or holiday-themed engravings. These designs can serve as perfect gifts for the holiday season, adding a personal touch to your celebrations.
As spring arrives, think about incorporating floral patterns or pastel colors. Light greens, soft pinks, and yellows can breathe life into your coasters, making them perfect for springtime brunches or garden parties. And let’s not forget about summer! Bright colors and tropical designs, such as palm trees or beach scenes, can create a fun and vibrant atmosphere for barbecues and pool parties. The key is to let your creativity flow and choose colors and designs that resonate with the spirit of each season.
Here’s a quick overview of some seasonal themes you might consider:
- Spring: Floral designs, pastel colors
- Summer: Bright colors, tropical motifs
- Fall: Warm colors, leaf patterns
- Winter: Cool colors, snowflakes or holiday themes
By tailoring your coaster designs to the seasons, you not only create beautiful items but also thoughtful gifts that your friends and family will cherish. These seasonal coasters can serve as a reminder of special moments and celebrations, making them a unique addition to any home. So, gather your materials, let the seasons inspire you, and start crafting coasters that are not just functional but also a celebration of the beauty around us!
Q1: Can I use any type of wood for seasonal coasters?
A1: While you can use various types of wood, it's best to choose hardwoods like oak, maple, or walnut for durability and a polished look. Softwoods can work too, but they may not be as long-lasting.
Q2: How can I ensure my painted designs last through the seasons?
A2: To protect your painted designs, apply a clear sealant after the paint dries. This will help prevent chipping and fading, ensuring your seasonal coasters remain beautiful for years to come.
Q3: Are there any specific tools I need for engraving seasonal designs?
A3: A wood burning tool or laser engraver can be ideal for creating intricate designs. However, if you're looking for simpler options, stencils and paint can also achieve great results.
Q4: How do I care for my wooden coasters?
A4: Clean them with a damp cloth and avoid soaking them in water. If they start to look dull, you can reapply a food-safe mineral oil to restore their shine.

Finishing Techniques
When it comes to crafting your own wooden coasters, the you employ can truly make or break your project. Think of these techniques as the final brush strokes on a masterpiece; they not only enhance the aesthetic appeal of your coasters but also provide crucial protection against wear and tear. After all, you want your coasters to look stunning while also standing the test of time, right?
One of the most popular ways to finish wooden coasters is by applying stains and sealants. Stains allow you to highlight the natural grain of the wood, giving your coasters a rich, deep color that can elevate their overall appearance. Sealants, on the other hand, create a protective barrier that guards against moisture and spills, ensuring that your coasters remain functional and beautiful for years to come. To apply these finishes effectively, start by sanding your coasters with fine-grit sandpaper, which will create a smooth surface for the stain to adhere to.
Once you’ve achieved that silky-smooth texture, it’s time for the fun part! Choose a stain that complements the wood type you’ve selected. For instance, if you’re working with a lighter wood like pine, a darker stain can create a striking contrast. Apply the stain with a clean cloth or brush, working it into the wood in the direction of the grain. Remember, less is more—start with a thin layer and build up to your desired color. After allowing the stain to dry according to the manufacturer’s instructions, seal your coasters with a clear sealant. This step is essential, as it provides that extra layer of protection against moisture.
In addition to stains and sealants, polishing your coasters can take them from good to great. Polishing not only adds a glossy finish but also enhances the wood's natural beauty. To achieve a professional-looking polish, use a soft cloth and a wood polish or beeswax. Gently buff the surface in circular motions until you achieve a shine that catches the light just right. This step is particularly important if you plan to use your coasters regularly, as it helps to prevent scratches and keeps them looking fresh.
Lastly, don’t forget about the importance of environmental factors when finishing your coasters. If you’re using oil-based products, ensure you’re working in a well-ventilated area to avoid inhaling fumes. Water-based products are generally safer and easier to clean up, making them a great choice for DIY enthusiasts. Always check the labels for specific instructions and safety precautions.
In summary, the finishing techniques you choose for your DIY wooden coasters can significantly impact their durability and appearance. By carefully applying stains and sealants, polishing for that perfect shine, and considering environmental factors, you can create stunning coasters that are as functional as they are beautiful.
- What type of wood is best for coasters? Hardwoods like oak or maple are ideal for their durability and aesthetic appeal.
- How long should I let the stain dry? It typically takes 24 hours for stains to dry fully, but always check the product instructions.
- Can I use acrylic paint instead of stain? Yes, acrylic paint can be used, but it won't highlight the wood grain like a stain would.
- How often should I reapply sealant? It’s a good idea to reapply sealant every couple of years, depending on usage.

Applying Stains and Sealants
When it comes to finishing your DIY wooden coasters, applying stains and sealants is a crucial step that can transform your project from ordinary to extraordinary. Stains not only enhance the natural beauty of the wood, but they also allow you to introduce a splash of color that reflects your personal style or matches your home décor. Imagine sipping your favorite drink while resting it on a beautifully stained coaster that you've crafted yourself—what a satisfying feeling!
Before diving into the application process, it's essential to prepare your coasters properly. Start by ensuring that the surface of the wood is smooth and clean. Use sandpaper to remove any rough patches or debris, as a smooth surface allows for even stain application. Once sanded, wipe down the coasters with a damp cloth to eliminate any dust particles. This step is vital because even the tiniest speck can mar the finish.
Now, let's talk about the types of stains available. You can choose from water-based, oil-based, or gel stains, each offering unique characteristics:
- Water-Based Stains: Quick-drying and easy to clean up, these stains are great for beginners. They come in a variety of colors and maintain the wood's natural grain.
- Oil-Based Stains: These provide a rich, deep color and are ideal for achieving a more traditional look. However, they take longer to dry and require mineral spirits for cleanup.
- Gel Stains: Perfect for vertical surfaces, gel stains sit on top of the wood rather than soaking in, making them ideal for achieving consistent color on uneven surfaces.
Once you've selected your stain, it's time to apply it. Use a clean brush or cloth to apply the stain evenly across the surface of the coasters. Remember to work in the direction of the wood grain to avoid streaks. If you desire a deeper color, you can apply multiple coats, allowing each coat to dry thoroughly before adding the next. This step is where the magic happens—watch as the wood transforms and comes to life with color!
After staining, it's crucial to protect your coasters with a sealant. Sealants provide a barrier against moisture, heat, and stains, ensuring your coasters remain functional and beautiful for years to come. You can choose from several types of sealants, including polyurethane, varnish, or a simple clear coat. Each option has its benefits:
- Polyurethane: Offers a durable finish and is available in both matte and gloss options.
- Varnish: Provides a warm, natural finish and is ideal for indoor use.
- Clear Coat: A simple option that provides basic protection without altering the wood's appearance.
To apply the sealant, use a clean brush or foam applicator, and again, work in the direction of the wood grain. Apply a thin layer and allow it to dry completely before adding additional coats. Typically, two to three coats are recommended for optimal protection. After the final coat has dried, you can lightly sand the surface with fine-grit sandpaper for an ultra-smooth finish. This little extra effort can make a world of difference in how your coasters feel and look!
In summary, applying stains and sealants is not just about aesthetics; it’s about ensuring your hard work lasts. With the right techniques and materials, your DIY wooden coasters will not only serve their purpose but also become a cherished part of your home. So, gather your materials, let your creativity flow, and enjoy the process of bringing your unique vision to life!
Q: How long should I wait between applying stain and sealant?
A: It's best to wait at least 24 hours after staining before applying sealant to ensure the stain is fully cured.
Q: Can I use food-safe sealants for coasters?
A: Yes, if you plan to use your coasters for food or beverages, look for sealants labeled as food-safe to ensure safety.
Q: How do I remove stains if I make a mistake?
A: You can use mineral spirits or sand the area lightly to remove any excess stain before it dries.

Polishing for a Smooth Finish
Polishing your wooden coasters is the final touch that transforms them from simple crafts into stunning pieces of art. Imagine the satisfaction of holding a coaster that not only showcases your creativity but also feels smooth to the touch. Achieving that perfect finish requires a bit of patience and the right techniques. First off, you’ll want to ensure that your coasters are sanded down to a fine grit before you start polishing. This means using progressively finer sandpaper, starting with something like 80-grit to remove any rough edges, then moving up to 220-grit for a silky-smooth surface.
Once your coasters are sanded to perfection, it’s time to choose your polishing method. You can opt for a variety of products, including polishing compounds, waxes, or even homemade solutions like a mix of olive oil and vinegar. Each of these options has its own unique benefits:
- Polishing Compounds: These are great for achieving a high-gloss finish and are available in various grades.
- Waxes: They provide a protective layer while enhancing the wood’s natural beauty, giving it a warm glow.
- Homemade Solutions: A simple mix of olive oil and vinegar can nourish the wood and add a subtle sheen.
To apply your chosen polish, use a soft, lint-free cloth. This is crucial because the last thing you want is to introduce scratches to your freshly sanded surface. Apply a small amount of your polish to the cloth and rub it onto the coaster in circular motions. This technique not only helps to evenly distribute the polish but also allows it to penetrate the wood, enhancing its appearance. Be sure to pay attention to the edges and corners, as these areas often get overlooked.
After applying the polish, let it sit for a few minutes to allow the wood to absorb the product. Then, take a clean section of your cloth and buff the coaster to a shine. This step is where the magic happens! You’ll start to see the wood grain pop, and the colors will become more vibrant. If you’re aiming for a glossy finish, you might want to repeat the polishing process one or two more times, allowing for adequate drying time in between applications.
Finally, don’t forget about maintenance! To keep your coasters looking their best, consider reapplying the polish every few months, especially if they’re being used frequently. A little care goes a long way in preserving the beauty of your handcrafted coasters, ensuring they remain a centerpiece in your home or a cherished gift for friends and family.
Q: How often should I polish my wooden coasters?
A: It’s recommended to polish your coasters every few months, especially if they see regular use, to maintain their shine and protection.
Q: Can I use any type of polish on my wooden coasters?
A: While many products can work, it’s best to choose polishes specifically designed for wood to avoid damaging the finish.
Q: What if my coasters get stained or damaged?
A: Minor stains can often be removed with a gentle cleaning solution, but deeper scratches may require sanding and refinishing.
Q: Is it necessary to seal my coasters after polishing?
A: Yes, sealing your coasters with a protective finish after polishing can help enhance durability and resistance to moisture.
Frequently Asked Questions
- What type of wood is best for making coasters?
When choosing wood for your DIY coasters, consider options like oak, maple, or birch. These woods are not only durable but also have beautiful grain patterns that enhance the aesthetic appeal of your coasters. Each type of wood has its unique characteristics, so think about what look and feel you want for your finished product.
- What tools do I need to make wooden coasters?
To get started on your coaster-making journey, you'll need some basic tools. Essential items include a saw for cutting the wood, sandpaper or a sander for smoothing the edges, and a drill if you plan to add holes for hanging or embellishments. Having the right tools will make your crafting experience much smoother and more enjoyable!
- Can I use power tools for making coasters?
Absolutely! Power tools can make the process quicker and easier, especially for cutting and sanding. However, if you're more comfortable with hand tools or are a beginner, they can also be a great option. The choice really depends on your skill level and the tools you have available.
- How can I personalize my wooden coasters?
Personalizing your coasters can be as simple as adding a name or a special date through engraving. You can also use paints or stains to create unique designs that reflect the personality of the recipient. Don't be afraid to get creative and let your imagination run wild!
- What finishing techniques should I use?
Finishing techniques are crucial for enhancing the durability and appearance of your coasters. Applying stains and sealants can protect the wood while highlighting its natural beauty. Additionally, polishing your coasters will give them a smooth, glossy finish that makes them stand out.
- How do I clean and maintain my wooden coasters?
To keep your coasters looking great, simply wipe them down with a damp cloth after use. Avoid soaking them in water, as this can warp the wood. If you notice any wear over time, you can lightly sand and reapply a sealant to refresh their appearance.