5 Easy Steps to Create DIY Rope Baskets
Are you looking to add a touch of creativity and functionality to your home decor? Well, look no further! Creating your own rope baskets is not only a fun and engaging project, but it also allows you to personalize your space with unique, handmade items. This article provides a straightforward guide to making beautiful and functional rope baskets. Follow these easy steps to enhance your home decor with personalized, handmade items that are both stylish and practical.
Before diving into your DIY rope basket project, it's essential to gather all the necessary materials. This will set the tone for a smooth crafting experience. Here’s a quick list of what you’ll need:
- Rope: Choose a type that fits your style.
- Scissors: For cutting the rope to the desired length.
- Glue: A strong adhesive to hold everything together.
- Bowl or Shape Mold: To shape your basket as you go.
Having everything ready will streamline the process and make crafting more enjoyable. Imagine the satisfaction of having your workspace organized and all your tools at hand as you embark on this creative journey!
Selecting the appropriate type of rope is crucial for your basket's durability and look. You have a variety of materials to explore, such as cotton, jute, or synthetic options. Each type brings its own flavor to the project, so it’s important to understand their characteristics.
Each type of rope has unique properties that can influence your basket's final appearance and functionality. For instance, cotton is soft and flexible, making it easy to work with, while jute offers a rustic feel that can add a warm touch to your decor. Think about the vibe you want to create when deciding which rope to use for your basket.
When it comes to choosing between natural and synthetic ropes, consider the following:
| Type | Advantages | Disadvantages |
|---|---|---|
| Natural Ropes | Eco-friendly, biodegradable | Less durable, may degrade over time |
| Synthetic Ropes | More durable, moisture-resistant | Not biodegradable, can be less aesthetic |
Evaluate your needs to determine which type best suits your project. If you're looking for something that lasts, synthetic might be the way to go. However, if you want to stick with eco-friendly materials, natural ropes are a great choice.
Rope comes in various colors and textures, allowing for creative expression. Whether you want a bold pop of color or a subtle, earthy tone, consider how these elements will complement your home decor before making a final choice. The right color and texture can elevate your basket from ordinary to extraordinary!
Accurate measurements are vital for creating a well-proportioned basket. Take your time to measure and cut the rope effectively; this ensures a professional-looking finish. A good rule of thumb is to plan out the size of your basket before cutting, as it can save you from potential mistakes later on.
Once your materials are ready, it's time to start assembling your basket. Follow a step-by-step process to create a sturdy base and build the sides, ensuring stability and shape. This part is where your vision starts to come to life!
Start by forming a circular base for your basket. This foundational step is essential for achieving the desired shape and size, setting the stage for the rest of your creation. Think of the base as the roots of a tree; it needs to be strong to support everything that grows above it!
After establishing the base, gradually build up the sides of your basket. Use glue to secure the rope in place, ensuring it holds together as you shape your basket. Remember, patience is key here! Take your time to make sure everything is evenly spaced and secure.
Adding final details can elevate your DIY rope basket. Consider embellishments like handles or decorative stitching to personalize your creation and enhance its functionality. These finishing touches can make all the difference, turning a simple basket into a statement piece.
Incorporating handles makes your basket easier to carry and adds a stylish touch. Learn different methods for attaching handles securely to ensure they are both functional and attractive. Handles can be made from the same rope or a contrasting material for a fun twist!
Explore various decorative options, such as painting or adding fabric liners, to customize your basket further. These finishing touches can transform a simple project into a unique piece of art that reflects your personal style. Don't be afraid to get creative!
As you embark on your DIY rope basket journey, you might have a few questions. Here are some common inquiries:
- Can I use any type of rope? While you can use different types of rope, some may not hold up as well as others. It's best to choose a rope that suits the intended use of the basket.
- How do I clean my rope basket? Most rope baskets can be spot cleaned with a damp cloth. For deeper cleaning, check the material's care instructions.
- Can I paint my rope basket? Yes! Use fabric paint or spray paint to add color to your basket. Just ensure it's fully dry before using it.
Gathering Your Materials
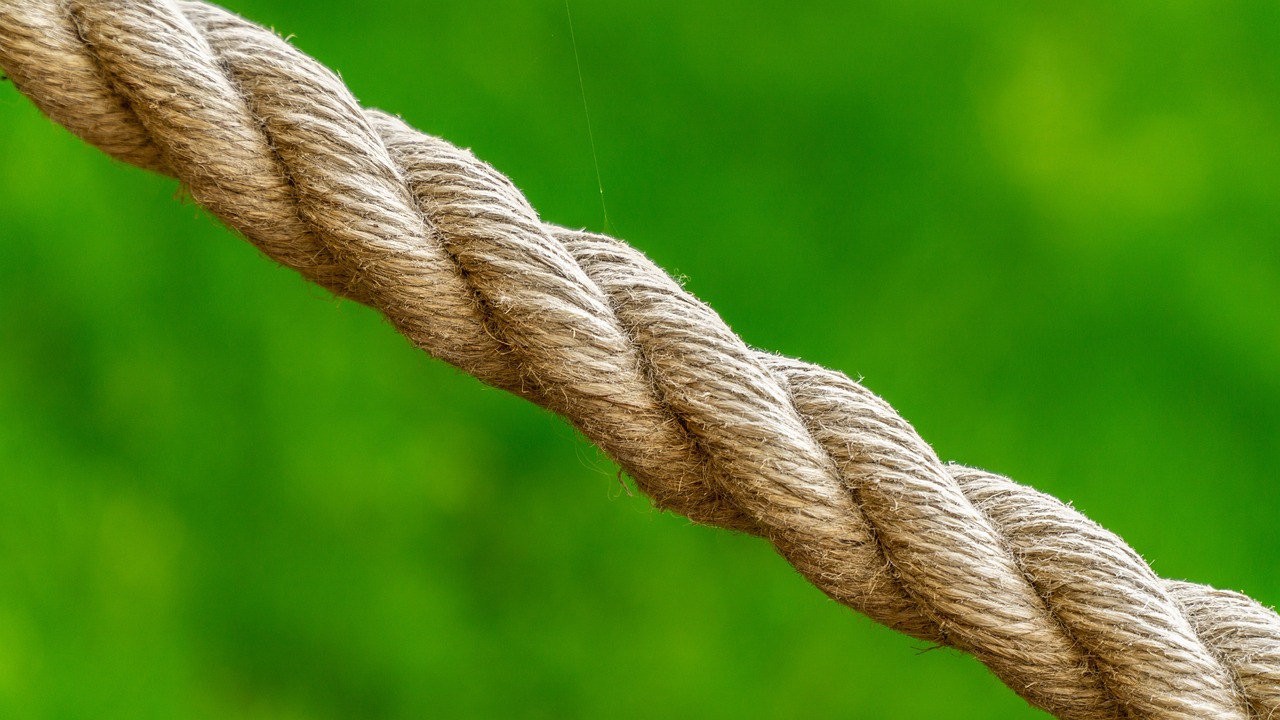
Before diving into the exciting world of DIY rope baskets, it's essential to gather all the necessary materials. Think of this step as laying the foundation for a great recipe; without the right ingredients, your basket might not turn out as planned. Here's what you'll need to create your stunning rope basket:
- Rope: Choose a type that suits your style and needs, whether it's cotton, jute, or a synthetic option.
- Scissors: A good pair of scissors is crucial for cutting your rope to the desired lengths.
- Glue: A strong adhesive will keep your basket together. Hot glue works wonders for this project.
- Bowl or a Mold: This will help shape your basket as you assemble it, giving it a nice round form.
Having all your materials ready not only streamlines the crafting process but also makes it more enjoyable. Imagine trying to bake a cake without flour or eggs – it wouldn’t be much fun, right? By preparing ahead of time, you’ll find yourself in a creative flow, ready to let your imagination run wild. Plus, you can avoid those frustrating moments of scrambling around looking for that one crucial item you forgot to gather.
Once you’ve collected your materials, take a moment to arrange them in your workspace. A clean and organized area can significantly enhance your crafting experience. Lay everything out so that it’s easily accessible; this way, you won’t have to interrupt your flow to hunt for your glue or scissors. Think of it as setting the stage for a performance – everything should be in its place, ready for the spotlight.
Now that you have your materials gathered and your workspace set up, you’re one step closer to creating your beautiful rope basket. Remember, the more prepared you are, the more fun you’ll have during the crafting process. So, let’s get ready to unleash your creativity and craft something truly special!

Choosing the Right Rope
When it comes to creating your DIY rope basket, is not just a matter of preference; it’s a crucial decision that can significantly impact both the durability and the aesthetic of your final product. With so many options available, you might feel a bit overwhelmed. But don't worry! Let’s break it down so you can find the perfect match for your project.
First and foremost, consider the material of the rope. Each type has its own unique characteristics that can either enhance or detract from your basket's functionality and style. For example:
- Cotton Rope: This is a popular choice due to its softness and flexibility. It’s great for a cozy, casual look and is easy to work with.
- Jute Rope: If you’re aiming for a more rustic feel, jute is your go-to. It adds a natural touch and is biodegradable, making it an eco-friendly option.
- Synthetic Rope: For those seeking durability, synthetic ropes like polypropylene are resistant to moisture and wear, making them ideal for outdoor use.
Next, think about the color and texture of the rope. Ropes come in a variety of colors and textures, allowing you to express your creativity. A bright, colorful rope can add a fun pop to your home decor, while a more neutral color can blend seamlessly into your existing aesthetic. Additionally, the texture can play a significant role in the overall look of your basket. Smooth ropes can give a modern vibe, while textured ropes can add depth and interest.
It’s also essential to weigh the pros and cons of natural versus synthetic ropes. Natural ropes are biodegradable and often more aesthetically pleasing, but they might not hold up as well in damp conditions. On the other hand, synthetic ropes are generally more durable and resistant to environmental factors, making them a practical choice for various settings. Think about where you plan to use your basket and choose accordingly.
Finally, before making your final decision, consider how the rope will complement your home decor. You want your basket to be a functional piece that also enhances the overall look of your space. Take a moment to visualize how different ropes will fit in with your existing color schemes and styles. This thoughtful approach will ensure that your DIY rope basket is not only practical but also a beautiful addition to your home.
Understanding Rope Characteristics
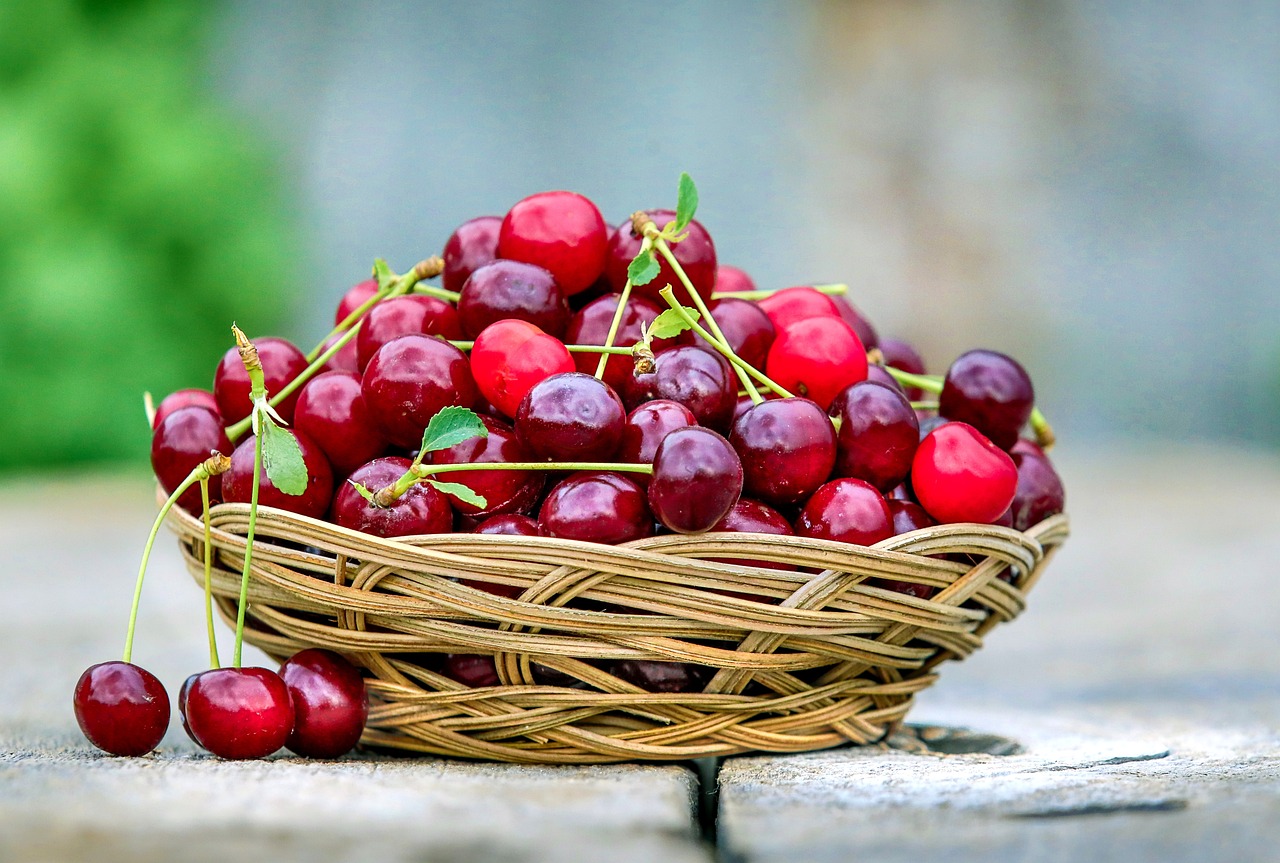
When it comes to creating your DIY rope basket, understanding the characteristics of different types of rope is essential for both aesthetics and functionality. Each material brings its own unique qualities to the table, influencing how your basket will look and perform. For instance, cotton rope is renowned for its softness and flexibility. This makes it an ideal choice if you’re aiming for a more delicate and inviting appearance. Imagine wrapping your hand around a cozy, soft cotton basket—there's something incredibly satisfying about that tactile experience!
On the other hand, jute rope exudes a rustic charm that can add an earthy vibe to your home decor. Its natural fibers give it a slightly coarse texture, which can be perfect for those looking to incorporate a more organic feel in their space. If you want your basket to feel like it’s straight out of a charming farmhouse, jute is the way to go. However, keep in mind that while jute is beautiful, it might not be as durable as other options.
Then we have synthetic ropes, which are often made from materials like nylon or polypropylene. These ropes are typically more durable and resistant to moisture, making them suitable for outdoor use or areas prone to spills. Imagine a basket that you can toss in the backyard during a picnic without worrying about it getting ruined—that’s the power of synthetic rope! However, they might lack the natural aesthetic that some people prefer.
When choosing your rope, consider the following characteristics:
- Durability: How much wear and tear will your basket face?
- Flexibility: Do you need a rope that bends easily for intricate designs?
- Aesthetic Appeal: What look are you going for? Rustic, modern, or somewhere in between?
Another aspect to think about is the color and texture of the rope. There are endless options available, from vibrant hues to muted tones, and the texture can range from smooth to rough. These elements will play a significant role in how well your basket fits into your existing decor. For example, a bright, smooth cotton rope might be perfect for a contemporary kitchen, while a natural jute rope could complement a bohemian living room.
In summary, understanding the characteristics of the rope you choose will not only help you create a basket that is practical and durable but also one that reflects your personal style. So, take your time, explore your options, and let your creativity shine!
Q1: What type of rope is best for beginners?
A1: Cotton rope is often recommended for beginners due to its flexibility and ease of use. It’s soft to work with and allows for a more forgiving crafting experience.
Q2: Can I use colored rope for my basket?
A2: Absolutely! Colored rope can add a fun and vibrant touch to your basket. Just make sure to choose colors that complement your home decor.
Q3: How do I clean my rope basket?
A3: Cleaning methods will depend on the type of rope used. Cotton can usually be washed by hand or in a gentle cycle, while synthetic ropes may be more resistant to stains and can often be wiped clean.
Natural vs. Synthetic Ropes
When embarking on your DIY rope basket journey, one of the most critical decisions you'll make is choosing between natural and synthetic ropes. Both types have their own unique benefits and drawbacks, and understanding these can help you select the best option for your project. Natural ropes, such as cotton and jute, are made from plant fibers, which makes them eco-friendly and biodegradable. This is a significant advantage if you are looking to minimize your environmental impact. They often have a soft texture and a rustic charm that can enhance the aesthetic of your home decor.
On the other hand, synthetic ropes, like nylon or polypropylene, are crafted from man-made materials. These ropes are generally more durable and resistant to moisture, which can be particularly beneficial if you plan to use your basket in humid environments or for outdoor purposes. They tend to hold their shape better over time, making them a practical choice for projects that require longevity.
To help you better understand the differences, here’s a quick comparison:
| Feature | Natural Ropes | Synthetic Ropes |
|---|---|---|
| Eco-Friendliness | Biodegradable | Not biodegradable |
| Durability | Less durable | Highly durable |
| Moisture Resistance | Poor moisture resistance | Excellent moisture resistance |
| Texture | Soft and flexible | Varies, often stiffer |
Ultimately, the choice between natural and synthetic ropes will depend on your specific needs and the intended use of your basket. If you're aiming for a stylish and eco-friendly option, natural ropes are a fantastic choice. However, if you prioritize durability and moisture resistance, synthetic ropes might be the way to go. Consider your project’s requirements and make an informed decision that aligns with your vision!
- What type of rope is best for beginners? Natural ropes like cotton are often easier to work with for beginners due to their flexibility and softness.
- Can I use synthetic rope for indoor baskets? Yes, synthetic ropes can be used for indoor baskets, especially if you want durability and moisture resistance.
- How do I clean my rope basket? You can clean your rope basket with a damp cloth. If it's made of natural fibers, avoid soaking it in water.
- Are there specific ropes to avoid? Avoid ropes that are treated with harsh chemicals, especially if you plan to use the basket for food storage.
Color and Texture Options
When it comes to creating your DIY rope basket, color and texture play a crucial role in defining its overall aesthetic. The right choice can transform a simple basket into a stunning centerpiece that complements your home decor. Imagine walking into a room and being greeted by a beautifully crafted basket that not only serves a purpose but also enhances the visual appeal of the space. This is why you should take the time to explore various options available to you.
Rope comes in an array of colors, from vibrant hues to muted tones, allowing you to express your personal style. For instance, if your home features a modern design, you might opt for bold colors like bright red or deep blue to make a statement. On the other hand, if your space leans towards a more rustic or bohemian vibe, earthy tones such as beige, olive green, or soft pastels can create a warm and inviting atmosphere.
Texture is another important aspect to consider. The feel of the rope can add depth and interest to your basket. Here are some common textures you might encounter:
- Smooth: Ideal for a sleek and contemporary look, smooth ropes are easy to handle and work with.
- Textured: Ropes with a rough finish can provide a more organic feel, perfect for a natural or rustic style.
- Twisted: Twisted ropes can add a dynamic element to your basket, creating visual interest and a unique appearance.
As you browse through different options, consider how the color and texture you choose will interact with the other elements in your space. For example, if you have a vibrant sofa, a neutral-colored basket can provide a lovely contrast without overwhelming the room. Alternatively, if your decor is more subdued, a pop of color in your basket can add a cheerful touch.
Ultimately, the choices you make regarding color and texture should reflect your personality and the atmosphere you wish to create in your home. Don't be afraid to experiment and mix different colors and textures to find the perfect combination that speaks to you. Your DIY rope basket is not just a functional item; it’s an opportunity to showcase your creativity and style!
Q1: Can I use any type of rope for my basket?
A1: While you can technically use any type of rope, it's best to choose one that is durable and has the right texture for your desired look. Natural fibers like cotton and jute are popular choices for their aesthetic appeal and ease of use.
Q2: How do I clean my rope basket?
A2: Cleaning your rope basket depends on the material. Generally, you can spot clean it with mild soap and water. For deeper cleaning, check if the rope is machine washable, but always follow the manufacturer's recommendations.
Q3: Can I paint my rope basket?
A3: Yes! You can use fabric paint or spray paint to add color to your rope basket. Just make sure to let it dry completely before using it to avoid any mess.
Q4: How do I make my basket more sturdy?
A4: To enhance the sturdiness of your basket, ensure that you securely glue the rope as you build it up. Additionally, using a thicker rope can provide more support and durability.
Measuring and Cutting the Rope
When it comes to creating a beautiful DIY rope basket, measuring and cutting the rope accurately is essential. Think of this step as the foundation of a house—without a solid base, everything else can crumble. First, you’ll want to determine the size of your basket. Consider what you plan to use it for; whether it’s for holding magazines, toys, or as a decorative piece, the size will dictate how much rope you'll need.
Once you have a size in mind, grab a measuring tape and start measuring out the length of rope you'll need. A good rule of thumb is to measure at least three times the diameter of your desired basket for the sides. For instance, if you want a basket that is 12 inches wide, you might want to cut about 36 inches of rope for the sides. This ensures you have enough material to work with while building up the basket's height.
After measuring, it’s time to cut the rope. Use a sharp pair of scissors or a utility knife to ensure a clean cut. A clean edge will not only make your basket look more polished but also help the rope adhere better when you start gluing. If you're working with thicker rope, a serrated knife can also be effective. Remember to cut slowly and carefully—rushing this step can lead to uneven lengths and a basket that doesn't hold its shape well.
As you cut, keep in mind the following tips:
- Always wear protective gloves if you're using sharp tools.
- Double-check your measurements before cutting to avoid waste.
- If you're using multiple colors or types of rope, label each cut piece to keep track of them easily.
Finally, once you've cut your rope, lay it out and visualize how it will come together. This step is crucial for ensuring that you have a cohesive design and that all pieces will fit well. After all, a little foresight can save you a lot of time and effort later on. Now that you have your rope cut and ready, you're one step closer to creating a stunning DIY rope basket!
Q: How do I choose the right type of rope for my basket?
A: Consider the purpose of your basket and the look you want to achieve. Natural fibers like cotton or jute offer a rustic feel, while synthetic ropes provide durability and moisture resistance.
Q: Can I use any type of glue for my rope basket?
A: While most craft glues will work, it's best to use a strong adhesive like hot glue or fabric glue for added strength and durability.
Q: How do I clean my finished rope basket?
A: Depending on the materials used, you can spot clean with a damp cloth or, for more thorough cleaning, hand wash with mild soap and water. Always allow it to air dry completely.
Assembling Your Basket
Once you've gathered all your materials, it's time to dive into the fun part: assembling your basket! This is where your creative vision starts to take shape, and you'll see your DIY project come to life. The assembly process can be broken down into a few key steps, ensuring that you create a sturdy and visually appealing basket. First, let’s talk about the base. A solid foundation is crucial for any structure, and your basket is no exception. Begin by laying out your rope in a circular pattern. This circular base will serve as the heart of your basket, so take your time to get it right. You might want to use a bowl as a mold to help maintain the shape as you work.
Next, once your base is ready, it’s time to build up the sides. This is where the magic happens! Gradually start winding the rope upwards, layering it neatly around the base. Use a strong adhesive to secure the rope in place as you go along. This will not only help the basket maintain its shape but also add to its durability. It's important to apply the glue evenly, ensuring that every part of the rope sticks together well. You might find it helpful to hold the sides together momentarily until the glue sets, especially if you're using a quick-drying adhesive.
As you build the sides, keep an eye on the height and shape of your basket. You can customize this to fit your personal style or the specific purpose you have in mind for your basket. Do you want a tall, elegant basket for storing blankets or a shorter, wider one for holding magazines? The choice is yours! Remember, the beauty of DIY projects is that they can be tailored to your needs.
While assembling, it’s also a good idea to check for any uneven spots or gaps. If you notice any inconsistencies, don’t hesitate to adjust the rope or add more glue. A well-assembled basket not only looks great but also stands the test of time. Once you've reached your desired height, it’s time for the finishing touches. This could involve trimming any excess rope or adding decorative elements that reflect your personal style.
Finally, let your basket dry completely before using it. This will ensure that all the glue has set properly and that your creation is as sturdy as possible. With patience and creativity, you'll have a beautiful DIY rope basket that not only serves a practical purpose but also adds a touch of charm to your home decor!
Here are some common questions you might have as you embark on your DIY rope basket journey:
- What type of rope is best for beginners? Cotton rope is often recommended for beginners due to its softness and ease of handling.
- Can I use any glue for this project? While any strong adhesive can work, hot glue or fabric glue tends to provide the best results for rope baskets.
- How do I clean my rope basket? Gently spot clean with a damp cloth and mild detergent. Avoid soaking the basket to prevent damage.
- Can I paint my rope basket? Absolutely! You can use fabric paint or spray paint to add color and personality to your basket.
Creating the Base
Creating the base of your DIY rope basket is the first and one of the most critical steps in the crafting process. This foundational layer sets the stage for the entire structure, ensuring that your basket will not only look good but also be functional and sturdy. To start, you’ll want to lay out a length of rope that will serve as the foundation. Typically, a circular base is ideal, as it provides a balanced shape and ample space for your items. Think of this base as the roots of a tree; without strong roots, the tree cannot grow tall and withstand the elements.
Begin by coiling the rope into a circular shape. It’s essential to maintain an even tension as you coil, ensuring that the base is uniform. If you notice that one side is larger than the other, gently adjust the rope until it’s balanced. This is where your eye for detail will pay off! Once you have your desired circle, use a strong adhesive to secure the rope in place. You can apply glue to the underside of the rope as you build, or you can add it in between layers for extra stability. Just remember, patience is key here—allow the glue to dry completely before moving on to the next step.
As you work on your base, consider the size of your basket and what you plan to store in it. For instance, if you’re creating a basket for toys, you might want a larger base compared to one intended for holding keys or small items. Here’s a quick tip: measure the diameter of the base and jot it down. This will help you maintain consistency as you build the sides later on.
Here's a simple visual representation of how to create your base:
| Step | Description |
|---|---|
| 1 | Coil the rope into a circular shape. |
| 2 | Ensure even tension throughout the coil. |
| 3 | Secure the base with strong adhesive. |
| 4 | Allow the glue to dry completely before proceeding. |
Once your base is securely glued and has dried, you can confidently move on to building the sides. This base is your canvas, and with each layer of rope you add, you’ll be painting a beautiful picture that reflects your personal style. So grab that glue and let’s get crafting!
Building Up the Sides
This article provides a straightforward guide to making beautiful and functional rope baskets. Follow these easy steps to enhance your home decor with personalized, handmade items that are both stylish and practical.
Before starting your DIY rope basket project, gather all necessary materials. This includes rope, scissors, glue, and a bowl for shaping. Having everything ready will streamline the process and make crafting more enjoyable.
Selecting the appropriate type of rope is crucial for your basket's durability and look. Explore different materials like cotton, jute, or synthetic options to find the perfect match for your project.
Each type of rope has unique properties. Cotton is soft and flexible, while jute offers a rustic feel. Consider these characteristics when deciding which rope to use for your basket.
Natural ropes are eco-friendly and biodegradable, while synthetic ropes are often more durable and resistant to moisture. Evaluate your needs to determine which type best suits your project.
Rope comes in various colors and textures, allowing for creative expression. Consider how these elements will complement your home decor before making a final choice.
Accurate measurements are vital for creating a well-proportioned basket. Learn how to measure and cut the rope effectively to ensure a professional-looking finish.
Once your materials are ready, it's time to start assembling your basket. Follow a step-by-step process to create a sturdy base and build the sides, ensuring stability and shape.
After establishing the base, the next step is to build up the sides of your basket. This is where your creativity truly shines, as you can decide on the height and shape of your basket. Begin by taking the end of your rope and positioning it vertically against the base. Use a generous amount of glue to secure it in place. This foundational rope will act as the first side of your basket.
As you continue, wrap the rope around the base while applying glue at regular intervals. Make sure to press down firmly to avoid any gaps. It’s essential to keep the rope taut to maintain an even shape. As you build up, you might find it helpful to rotate the basket occasionally, ensuring that you’re applying the rope evenly around the circumference. This technique not only strengthens the structure but also gives it a polished look.
Consider these tips while building up the sides:
- Consistency is Key: Aim for uniform spacing between each layer of rope to maintain a balanced appearance.
- Experiment with Patterns: Feel free to mix different colors or textures of rope to create unique designs.
- Height Matters: Decide how tall you want your basket to be; taller baskets may require additional support.
Once you reach your desired height, take a moment to evaluate the shape. If the sides appear uneven, don’t panic! You can always trim excess rope for a cleaner finish. The beauty of DIY projects is that they are inherently forgiving, allowing you to adjust as needed. After securing the last layer of rope, allow the glue to dry completely before moving on to the finishing touches.
Adding final details can elevate your DIY rope basket. Consider embellishments like handles or decorative stitching to personalize your creation and enhance its functionality.
Incorporating handles makes your basket easier to carry and adds a stylish touch. Learn different methods for attaching handles securely to ensure they are both functional and attractive.
Explore various decorative options, such as painting or adding fabric liners, to customize your basket further. These finishing touches can transform a simple project into a unique piece of art.
Q: Can I use any type of rope for my basket?
A: While you can use various types of rope, it's best to choose one that is durable and suitable for your desired aesthetic.
Q: How long will it take to make a rope basket?
A: The time it takes can vary based on the size and complexity of your design, but most baskets can be completed in a few hours.
Q: Can I wash my rope basket?
A: Yes, but it's recommended to spot clean or hand wash to maintain the integrity of the rope and glue.
Finishing Touches
As you approach the final stages of your DIY rope basket project, it's time to consider those that can truly elevate your creation from ordinary to extraordinary. Just like a painter adds the final strokes to a masterpiece, these details can make all the difference in your basket's appearance and functionality. Think about how you can personalize your basket to reflect your style while also enhancing its usability.
One of the most effective ways to add character to your basket is by incorporating handles. Handles not only make your basket easier to carry, but they also add a stylish flair. You can opt for various materials, such as leather, fabric, or even more rope, depending on the look you want. When attaching handles, ensure they are securely fastened; after all, no one wants a handle to give way under the weight of their belongings! Consider using a simple knot or a more intricate weaving technique to secure them. This not only ensures durability but also adds a unique touch to your basket.
Another exciting option for personalizing your basket is through decorative elements. You might want to explore painting your basket or adding a fabric liner for an extra pop of color and texture. A fabric liner can also protect the interior of your basket from wear and tear, making it both practical and stylish. If you choose to paint, consider using non-toxic, water-resistant paint to ensure longevity. You could even use stencils to create patterns or designs that resonate with your home decor.
Here’s a quick overview of some popular finishing options you might consider:
| Finishing Touch | Description |
|---|---|
| Handles | Adds functionality and style; can be made from various materials. |
| Fabric Liners | Protects the basket's interior and adds color and texture. |
| Painting | Customizes the basket with colors or designs; use non-toxic paint. |
| Embellishments | Adds unique touches like beads, charms, or decorative stitching. |
Incorporating these finishing touches can transform your simple rope basket into a unique piece of art that not only serves a purpose but also enhances your home decor. So, don’t rush through this part of the process; take your time to explore different ideas and find what resonates with you. Your basket should be a reflection of your personality and style, so let your creativity shine!
Q: What type of rope is best for beginners?
A: For beginners, cotton rope is an excellent choice due to its softness and flexibility, making it easier to work with.
Q: Can I wash my rope basket?
A: Yes, you can wash your rope basket! However, it's best to hand wash it with mild soap and air dry to maintain its shape.
Q: How can I make my basket more sturdy?
A: To enhance sturdiness, ensure you securely attach each layer of rope with glue, and consider using a thicker rope for added strength.
Q: Are there any eco-friendly options for rope?
A: Absolutely! Natural fibers like jute and cotton are biodegradable and eco-friendly options for your rope basket project.
Adding Handles
Incorporating handles into your DIY rope basket not only enhances its functionality but also adds a touch of style that can elevate your entire creation. Think about it: a basket without handles can be a bit cumbersome to carry around, especially when it's filled with your favorite items. By adding handles, you make it easier to transport your basket from one room to another or even take it outdoors for a picnic. But how do you go about adding these handles? Let’s break it down!
First, you need to decide on the type of handles you want to use. There are several options available, including:
- Rope Handles: Using the same rope as your basket gives a cohesive look.
- Fabric Handles: Adding fabric can introduce a splash of color and softness.
- Wooden Handles: For a rustic touch, consider using small wooden dowels or handles.
Once you've selected the type of handle, the next step is to determine the placement. Ideally, handles should be positioned opposite each other for balance. Measure and mark where you want to attach them, ensuring they are secure enough to hold the weight of the basket's contents. If you're using rope handles, simply braid or twist the rope to form a sturdy handle, then glue or stitch it to the sides of the basket. If you opt for fabric, you can sew or glue the ends to the basket, making sure they are tightly secured to withstand daily use.
Don’t forget to consider the length of your handles. They should be long enough to allow for easy gripping but not so long that they become unwieldy. A good rule of thumb is to make them about 6-8 inches long, depending on the size of your basket and how you plan to use it. Once you've attached the handles, give them a good test by lifting the basket to ensure they hold up well under pressure.
Adding handles is a simple yet effective way to make your DIY rope basket more practical and visually appealing. So, go ahead and experiment with different styles and materials to find what works best for your design. Your basket will not only be a functional piece but also a stunning addition to your home decor!
As you embark on your DIY rope basket journey, you may have some questions. Here are a few common queries that can help guide you:
- What type of rope is best for beginners? Cotton rope is often recommended for beginners due to its flexibility and ease of use.
- Can I wash my rope basket? Yes, but it's best to spot clean it or use a gentle cycle in the washing machine, depending on the materials used.
- How can I make my basket more durable? Consider using synthetic rope or applying a sealant to protect it from moisture.
Decorative Options
This article provides a straightforward guide to making beautiful and functional rope baskets. Follow these easy steps to enhance your home decor with personalized, handmade items that are both stylish and practical.
Before starting your DIY rope basket project, gather all necessary materials. This includes rope, scissors, glue, and a bowl for shaping. Having everything ready will streamline the process and make crafting more enjoyable.
Selecting the appropriate type of rope is crucial for your basket's durability and look. Explore different materials like cotton, jute, or synthetic options to find the perfect match for your project.
Each type of rope has unique properties. Cotton is soft and flexible, while jute offers a rustic feel. Consider these characteristics when deciding which rope to use for your basket.
Natural ropes are eco-friendly and biodegradable, while synthetic ropes are often more durable and resistant to moisture. Evaluate your needs to determine which type best suits your project.
Rope comes in various colors and textures, allowing for creative expression. Consider how these elements will complement your home decor before making a final choice.
Accurate measurements are vital for creating a well-proportioned basket. Learn how to measure and cut the rope effectively to ensure a professional-looking finish.
Once your materials are ready, it's time to start assembling your basket. Follow a step-by-step process to create a sturdy base and build the sides, ensuring stability and shape.
Start by forming a circular base for your basket. This foundational step is essential for achieving the desired shape and size, setting the stage for the rest of your creation.
After establishing the base, gradually build up the sides of your basket. Use glue to secure the rope in place, ensuring it holds together as you shape your basket.
Adding final details can elevate your DIY rope basket. Consider embellishments like handles or decorative stitching to personalize your creation and enhance its functionality.
Incorporating handles makes your basket easier to carry and adds a stylish touch. Learn different methods for attaching handles securely to ensure they are both functional and attractive.
When it comes to personalizing your rope basket, the decorative options are virtually limitless! You can transform a simple basket into a unique piece of art that reflects your style. One popular method is to paint the rope before assembly. Doing so allows you to match the colors with your home decor or create a vibrant contrast that catches the eye. Another option is to add a fabric liner, which can soften the look of the basket and add a pop of color or pattern. This is particularly useful if you plan to use the basket for items like toys or blankets, as it can provide a more polished appearance.
Additionally, consider using decorative stitching or embellishments such as beads or buttons to enhance the visual appeal. These little touches can bring your personality into the project, making it truly one-of-a-kind. You might even want to experiment with different textures by incorporating materials like lace or burlap alongside the rope. The combination of textures can create a more dynamic look that stands out in any room.
Ultimately, the key to successful decoration is to let your creativity flow! Think about how you want the basket to function and what aesthetic you wish to achieve. Whether you prefer a minimalist design or something more eclectic, the right decorative options can elevate your DIY project from ordinary to extraordinary.
- What type of rope is best for beginners? Cotton rope is often recommended for beginners due to its softness and ease of handling.
- Can I wash my rope basket? Yes, but it's best to spot clean it to avoid damaging the glue or any embellishments.
- How long does it take to make a rope basket? Depending on the size and complexity, it can take anywhere from 1 to 3 hours.
- Can I use other materials besides rope? Absolutely! You can experiment with twine, fabric strips, or even yarn for different effects.
Frequently Asked Questions
- What materials do I need to create a DIY rope basket?
To make a DIY rope basket, you will need rope, scissors, glue, and a bowl for shaping. Having all these materials handy will make your crafting experience smooth and enjoyable!
- How do I choose the right type of rope for my basket?
Choosing the right rope is essential for both durability and aesthetics. You can opt for cotton for a soft feel, jute for a rustic look, or synthetic options for added durability. Think about what fits best with your home decor and your basket's intended use.
- Can I use any kind of glue for assembling the basket?
While any glue might work, it's best to use a strong adhesive that is suitable for fabric or craft projects. This ensures that your basket holds its shape and can withstand regular use without falling apart.
- What are some creative ways to decorate my rope basket?
You can personalize your basket in various ways! Consider adding handles for functionality, or embellishing it with paint, fabric liners, or decorative stitching to make it uniquely yours. The options are endless!
- How do I ensure my basket is sturdy and well-constructed?
To achieve a sturdy basket, focus on creating a solid base and securely gluing the rope as you build up the sides. Take your time with each step, and don't rush the assembly process. A well-made basket will last longer and look better!


