Create DIY Wall Panels for a Chic Look
Are you tired of the same old boring walls in your home? Do you want to transform your space into something chic and modern without breaking the bank? Well, you’re in luck! This article explores creative methods for designing and installing DIY wall panels, offering step-by-step guidance to achieve a stylish and contemporary aesthetic in your home. Imagine walking into a room where the walls speak volumes about your personality and taste. With just a few materials and a bit of creativity, you can create stunning wall panels that will leave your guests in awe.
Whether you're a seasoned DIY enthusiast or a complete novice, this guide will equip you with the knowledge and skills needed to embark on your wall paneling journey. We’ll dive into choosing the right materials, exploring design inspirations, and providing practical installation tips that ensure your panels not only look fantastic but also stand the test of time. So, roll up your sleeves and get ready to unleash your inner designer!
Selecting suitable materials is crucial for both durability and appearance. The right material can make all the difference in achieving that chic look you desire. Here, we’ll discuss various options, including wood, MDF (Medium Density Fiberboard), and fabric, helping you make an informed choice for your wall panels. Each material has its own unique benefits and aesthetic appeal. For instance, wood brings a natural warmth and texture, while MDF offers a smooth surface that’s easy to paint and customize. Fabric, on the other hand, can add a soft touch and is perfect for creating a cozy atmosphere.
When selecting materials, consider the overall style of your home. Are you leaning towards a modern, minimalist vibe, or do you prefer something more rustic and traditional? Here’s a quick comparison table to help you decide:
| Material | Pros | Cons |
|---|---|---|
| Wood | Durable, natural look, easy to work with | Can be expensive, may require maintenance |
| MDF | Cost-effective, smooth finish, easy to paint | Less durable than wood, can warp with moisture |
| Fabric | Soft texture, cozy feel, wide variety of patterns | May be harder to clean, less durable |
By weighing the pros and cons of each material, you can select the one that best fits your vision and lifestyle. Remember, the goal is not just to beautify your walls but to create an environment that resonates with who you are.
Now that you've chosen your materials, it’s time to get inspired! The world of DIY wall panels is rich with creative possibilities. From geometric patterns that can add a dynamic touch to your walls, to rustic finishes that offer a warm, inviting look, the options are endless. Let’s explore some design ideas that can help elevate your interior décor.
Geometric patterns can be a game-changer in interior design. They add a sense of modernity and can transform an ordinary wall into a stunning focal point. To create these patterns, you can use simple shapes like triangles, squares, or hexagons. With a bit of planning and creativity, you can incorporate these designs into your home effortlessly. Think of your wall as a blank canvas waiting for your artistic touch!
To further enhance your geometric designs, consider employing various paint techniques. Techniques like stenciling and color blocking can bring your wall panels to life, making them pop with personality. Imagine a wall where vibrant colors dance in a geometric rhythm, drawing the eye and sparking conversation. It’s all about layering colors and shapes to create a cohesive yet exciting look.
Layering textures is another fantastic way to enhance the visual appeal of your geometric patterns. By combining different materials, such as wood with metal accents or fabric with paint, you can achieve a multi-dimensional effect that captivates the senses. Think of it as creating a delicious dish where each ingredient adds its unique flavor, resulting in a delightful experience for anyone who enters the room.
If you’re leaning towards a more cozy and inviting aesthetic, rustic finishes are the way to go. Achieving a charming rustic look can be as simple as using reclaimed wood and natural stains for your wall panels. The beauty of rustic finishes lies in their imperfections; they tell a story and bring a sense of warmth that modern materials often lack. Imagine a room that feels like a cozy cabin, filled with character and history.
Once you’ve designed your wall panels, it’s time for the fun part—installation! Proper installation ensures that your wall panels look professional and last longer. Here are some essential tips and techniques for a seamless installation process.
Accurate measurements are vital for a successful installation. Before you start cutting or applying anything to your walls, take the time to plan your layout and take precise measurements. It’s like drawing a treasure map; you want to make sure you know exactly where you’re going to avoid any detours along the way!
Knowing the right tools and techniques simplifies the installation process. Essential tools you might need include a level, a saw, adhesive or nails, and a measuring tape. With the right tools in hand, you’ll be ready to attach your wall panels securely, ensuring they stay put for years to come.
After all the hard work you’ve put into creating your DIY wall panels, maintaining them is key to their longevity. This section offers advice on cleaning and caring for different materials to keep them looking fresh.
Regular cleaning helps preserve the beauty of your wall panels. Depending on the material, cleaning methods may vary. For wood, a simple dusting and occasional polish can do wonders, while fabric panels may require spot cleaning. Always remember to check the manufacturer’s recommendations for the best results!
Damage can occur over time, but repairs are often straightforward. Whether it’s a scratch on wood or a tear in fabric, this section guides you through common repair techniques to restore your wall panels to their original condition. Think of it as giving your walls a little TLC, ensuring they continue to shine and impress.
Q: What materials are best for DIY wall panels?
A: The best materials depend on your style. Wood offers warmth, MDF is cost-effective, and fabric adds softness.
Q: How do I clean my wall panels?
A: Cleaning methods vary by material. Wood can be dusted and polished, while fabric may need spot cleaning.
Q: Can I install wall panels myself?
A: Absolutely! With the right tools and a bit of planning, DIY wall panel installation is achievable for anyone.
Q: How do I repair damage to my wall panels?
A: Most repairs are straightforward. For scratches, use wood filler or paint; for fabric, patch or sew as needed.
Choosing the Right Materials
When it comes to creating stunning DIY wall panels, is absolutely essential. Not only do the materials you select affect the overall appearance of your panels, but they also play a significant role in their durability and longevity. So, how do you decide which materials are best suited for your project? Let’s explore some popular options that can help you achieve that chic look you’re aiming for.
First up, we have wood. This classic choice brings warmth and character to any space. Whether you opt for reclaimed barn wood or sleek plywood, wood panels can be stained or painted to match your decor. Plus, they’re relatively easy to work with, making them a favorite among DIY enthusiasts. Just imagine the rustic charm of a wooden accent wall in your living room!
Next, consider MDF (Medium Density Fiberboard). This engineered wood product is known for its smooth surface, making it perfect for painting and finishing. MDF is also less prone to warping compared to solid wood, which means it can withstand fluctuations in humidity better. If you’re looking for a cost-effective option that doesn’t skimp on style, MDF might just be your best friend. It's like the reliable sidekick in your DIY adventure!
If you’re feeling adventurous, you might want to explore fabric wall panels. Not only do they add texture and depth to a room, but they can also help with sound absorption, making them a practical choice for home theaters or music rooms. Think of fabric panels as the cozy blankets of your walls – they make everything feel a bit more inviting. You can choose from a variety of patterns and colors, allowing you to personalize your space effortlessly.
To help you visualize the differences, here’s a simple comparison table:
| Material | Durability | Cost | Appearance |
|---|---|---|---|
| Wood | High | Moderate to High | Warm, Natural |
| MDF | Moderate | Low to Moderate | Smooth, Versatile |
| Fabric | Moderate | Moderate | Textured, Cozy |
Ultimately, the right choice for your DIY wall panels will depend on your personal style, budget, and the specific look you want to achieve. Are you aiming for a modern, sleek finish or a rustic, homey vibe? Each material has its unique charm, and with the right vision, you can turn your walls into a stunning focal point of your home.
Don’t forget to consider the maintenance required for each material. For instance, wood may need periodic sealing to protect against moisture, while fabric panels might require occasional cleaning to keep them looking fresh. By thinking ahead, you’ll ensure that your DIY wall panels remain beautiful for years to come.
In conclusion, the materials you choose for your DIY wall panels can make or break your project. Take your time, weigh your options, and don’t hesitate to get creative. After all, this is your chance to express your unique style and transform your living space into something truly special!
Design Inspirations
When it comes to designing your DIY wall panels, the possibilities are truly endless. This section is all about sparking your creativity and helping you find the perfect style that resonates with your personal taste. Whether you’re leaning towards modern aesthetics or a more traditional vibe, there’s something here for everyone. Think of your walls as a blank canvas, ready to be transformed into a stunning work of art that reflects your unique personality.
One exciting approach is to explore geometric patterns. These designs can add a dynamic touch to any room. Imagine a living space where simple shapes interplay to create a sense of movement and rhythm. You can achieve this by using basic geometric forms like triangles, hexagons, or squares. The best part? You don’t need to be an artist to pull this off. With some patience and a bit of planning, anyone can create stunning geometric wall panels that serve as focal points in their home.
To dive deeper into geometric patterns, consider how you can play with color and shape. For instance, you might create a large triangle in a bold color that contrasts with the rest of the wall. This kind of design can be both eye-catching and fun. Think of it as a way to express your creativity—like a playful dance of shapes and colors that can energize your space.
Now, let’s talk about paint techniques. These can elevate your geometric designs from ordinary to extraordinary. Techniques like stenciling and color blocking can help you achieve a polished look. For instance, using stencils allows you to replicate intricate designs effortlessly. You can choose from a variety of patterns or even create your own. On the other hand, color blocking involves painting large sections of the wall in different colors, creating a bold statement that’s sure to impress.
Another fantastic way to enhance the visual appeal of your geometric patterns is through layering textures. By combining different materials, such as wood, fabric, or even metal, you can create a multi-dimensional effect that draws the eye. Imagine a wall panel where smooth wood contrasts with a rough fabric, or shiny metal accents highlight a matte finish. This interplay of textures adds depth and interest, making your wall panels not just a backdrop, but a conversation starter.
On the flip side, if you’re yearning for a more rustic finish, you can achieve that warm, inviting look with reclaimed wood and natural stains. This approach taps into the beauty of nature, bringing a sense of coziness and charm into your home. Picture a living room adorned with wall panels made from weathered wood, telling stories of their past while seamlessly blending with modern décor.
Rustic finishes can be incredibly versatile. You can choose to leave the wood in its natural state, allowing its imperfections to shine through, or you can opt for a more polished look with a light stain. Either way, the result is a beautiful, organic feel that creates a welcoming atmosphere. It’s like bringing a piece of the outdoors inside, creating a sanctuary that’s both stylish and comfortable.
In conclusion, whether you’re drawn to the sharp lines of geometric patterns or the warm embrace of rustic finishes, the world of DIY wall panels is yours to explore. Don’t be afraid to experiment with different designs and techniques. After all, your walls are a reflection of who you are, and there’s no right or wrong way to express that. So grab your tools, unleash your creativity, and let your walls tell your story!
Q: What materials are best for DIY wall panels?
A: The best materials depend on your style and budget. Common options include wood, MDF, and fabric. Each has its own benefits in terms of durability and appearance.
Q: How do I ensure my wall panels are installed correctly?
A: Accurate measuring and planning are key. Take your time to plan the layout and ensure you have the right tools for the job.
Q: Can I paint my wall panels?
A: Absolutely! Painting your wall panels can add a personal touch. Consider using stencils or color blocking techniques for a unique look.
Q: How do I maintain my DIY wall panels?
A: Regular cleaning is essential. Use appropriate cleaning methods based on the material of your wall panels to keep them looking fresh.
Geometric Patterns
Geometric patterns can transform your walls from ordinary to extraordinary, adding a dynamism that breathes life into your space. Imagine walking into a room where the walls seem to dance with shapes and colors, drawing your eyes and sparking conversation. The beauty of geometric designs lies in their versatility; you can create everything from sharp, angular shapes to soft, rounded forms. The best part? You don't need to be a professional artist to pull it off! With a little creativity and some basic tools, you can craft stunning geometric wall panels that reflect your personal style.
To get started, think about the shapes that resonate with you. Do you prefer the clean lines of triangles and squares, or are you more drawn to the fluidity of circles and curves? Once you've settled on a theme, you can begin sketching out your design. Use graph paper to map out your layout, ensuring that the proportions work harmoniously within your space. This planning stage is crucial; it’s like laying the foundation for a house. Without a solid plan, your geometric patterns might end up looking more chaotic than chic!
When it comes to creating these designs, paint techniques can be your best friend. For instance, you can use stenciling to easily replicate intricate shapes or opt for color blocking to create bold statements. By alternating colors and shapes, you can craft a visually captivating wall that feels both modern and inviting. If you’re feeling adventurous, consider layering different patterns to add depth. Just like a delicious cake, the more layers you have, the more interesting it becomes!
But don't stop at just paint! Layering textures can take your geometric patterns to the next level. Imagine combining smooth panels with rough textures, like reclaimed wood or fabric, to create a multi-dimensional effect. This approach not only enhances the visual appeal but also adds tactile interest. Your wall panels will become a feast for the eyes and hands, inviting guests to come closer and explore.
In summary, geometric patterns are a fantastic way to inject personality into your home. They allow for endless creativity and can be tailored to fit any aesthetic, whether you’re going for sleek modernity or a cozy, eclectic vibe. So grab your tools, unleash your imagination, and start creating a wall that truly reflects who you are!
- What materials are best for creating geometric wall panels?
Wood, MDF, and even fabric are great options. Choose based on the look you want and your budget.
- How do I ensure my geometric patterns look professional?
Planning your design carefully and using precise measurements will help achieve a polished look.
- Can I mix different geometric patterns in one space?
Absolutely! Just make sure they complement each other in color and style to avoid visual chaos.
Using Paint Techniques
When it comes to transforming your DIY wall panels, paint techniques can be your best friend. They not only enhance the visual appeal of your designs but also allow you to showcase your personal style. Imagine walking into a room where the walls speak to you, whispering tales of creativity and flair! With the right paint techniques, you can achieve just that. Let’s dive into some methods that can breathe life into your wall panels.
One of the most popular techniques is stenciling. This method involves using pre-made designs to create intricate patterns on your wall panels. It's like having your own wallpaper but with a personal touch! You can choose from various stencil designs—floral, geometric, or even abstract patterns. The best part? Stenciling is incredibly versatile; you can use it on any material, from wood to MDF. Just ensure that you use a good quality stencil brush and paint to avoid smudging.
Another fantastic technique to consider is color blocking. This approach involves painting large sections of your wall panels in different colors, creating a bold and modern look. Think of it as a painter's canvas where each block tells a story. You can opt for contrasting colors for a vibrant feel or softer shades for a more subdued atmosphere. The key here is to plan your color scheme ahead of time. A simple sketch can help visualize how the colors will interact with each other.
Layering paint is another exciting technique that can add depth and dimension to your wall panels. By applying multiple layers of paint in varying shades, you can create a rich, textured effect. For instance, start with a base coat of a lighter color, and then apply a darker shade on top, using a sponge or brush to blend them together. This technique can mimic the look of natural materials like stone or wood, giving your panels an organic feel.
To help you choose the right paint finishes for your project, here's a quick comparison table:
| Paint Finish | Best For | Durability |
|---|---|---|
| Matte | Low-traffic areas | Low |
| Satin | Living rooms, bedrooms | Medium |
| Gloss | Kitchens, bathrooms | High |
Lastly, don't forget about the importance of prep work. Before you start painting, make sure to clean your wall panels thoroughly and apply a primer if necessary. This step ensures that the paint adheres well and lasts longer. Think of it as laying a solid foundation before building a house—without it, everything else can come crashing down!
In conclusion, using paint techniques can elevate your DIY wall panels from ordinary to extraordinary. Whether you choose stenciling, color blocking, or layering, the possibilities are endless. So grab your brushes, unleash your creativity, and watch your walls come to life!
- What type of paint is best for wall panels? It's best to use acrylic or latex paint for wall panels as they provide good coverage and durability.
- Can I use spray paint for my wall panels? Yes, spray paint can be used, but ensure you work in a well-ventilated area and use a primer for better adhesion.
- How do I clean my painted wall panels? Use a soft cloth and mild detergent to clean painted surfaces. Avoid abrasive cleaners that can damage the finish.
Layering Textures
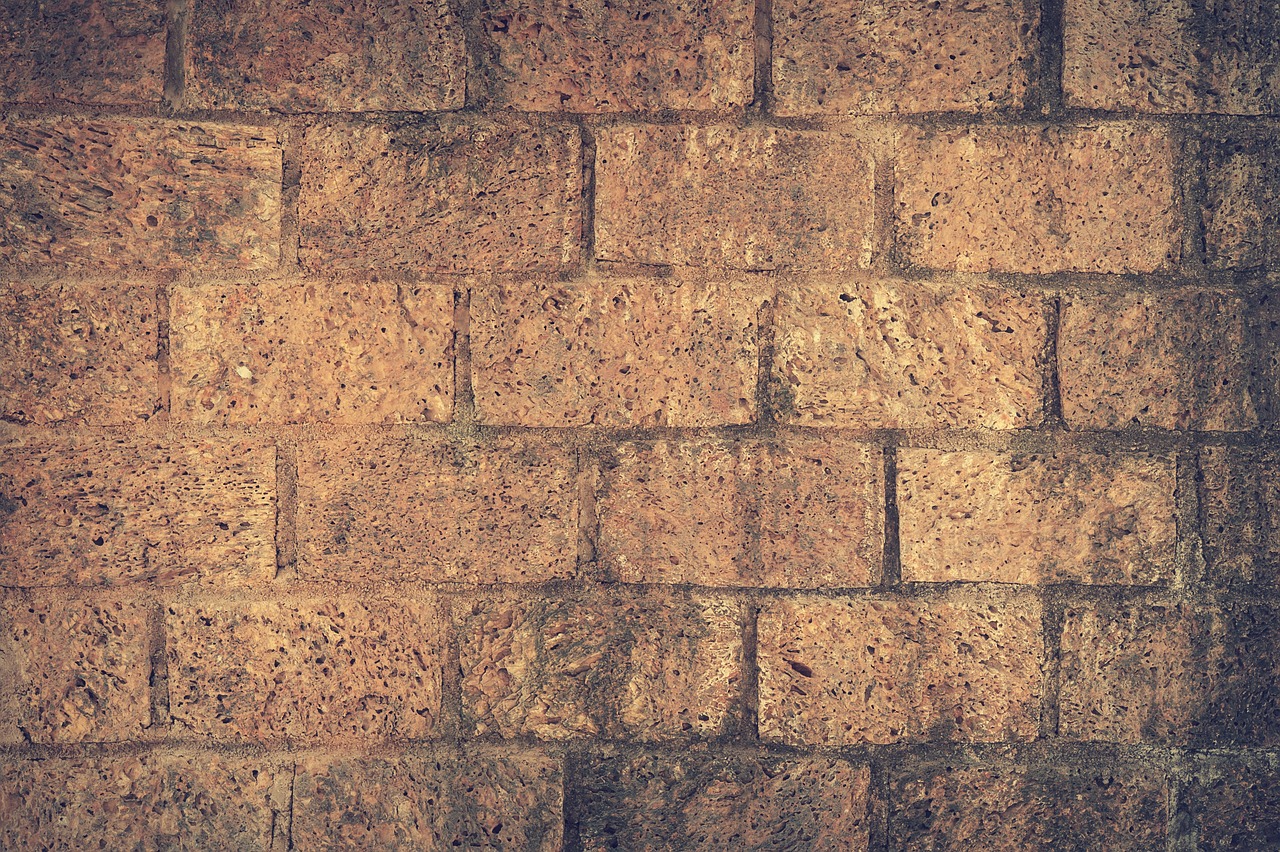
When it comes to creating stunning DIY wall panels, is where the magic truly happens. Think of it as dressing your walls in a beautiful outfit—just like you wouldn't wear a single fabric for every occasion, your walls can benefit from a rich tapestry of materials. By combining different textures, you can achieve a multi-dimensional effect that adds depth and interest to your space.
To start, consider the various materials you can use. For instance, pairing smooth surfaces with rough textures can create a striking contrast that catches the eye. Imagine the warmth of reclaimed wood alongside the sleekness of painted MDF. Not only does this combination look fantastic, but it also brings a sense of balance to your interior. When you layer textures, you can create a visual story that resonates with your personal style.
Here are some ideas to get your creative juices flowing:
- Wood and Fabric: Consider using wooden panels as a base and then adding fabric accents. This could be in the form of upholstered panels or even fabric wall hangings that complement the wood.
- Paint and Natural Materials: Use natural elements like stone or bamboo and paint them in vibrant colors. This not only enhances the texture but also adds a pop of color to your design.
- Metal Accents: Incorporating metal elements, such as brushed aluminum or copper, can add a modern twist to your textured wall panels. The reflective quality of metal contrasts beautifully with matte surfaces.
By thoughtfully layering these materials, you can create a unique look that speaks to your personality. Moreover, don’t forget about the importance of scale. Large panels can dominate a space, while smaller accents can provide subtle interest. Mixing sizes can also add another layer of complexity to your design, making your walls feel more dynamic and engaging.
Finally, lighting plays a crucial role in showcasing your layered textures. Consider how different light sources will interact with your materials. For example, soft, warm lighting can enhance the natural grains in wood, while direct lighting can highlight the sheen of metallic surfaces. Experiment with different lighting angles and intensities to see how they transform your textured wall panels.
In conclusion, layering textures is not just about aesthetics; it's about creating a rich sensory experience in your home. So, unleash your creativity, mix and match materials, and watch as your walls come to life with personality and charm!
Q: What materials are best for layering textures in wall panels?
A: The best materials include wood, MDF, fabric, stone, and metal. Each offers unique qualities that can enhance your design.
Q: How can I ensure my layered textures complement each other?
A: Choose materials with contrasting yet complementary colors and finishes. Experiment with different combinations before finalizing your design.
Q: Is it difficult to install textured wall panels?
A: While it can be a bit challenging, proper planning and the right tools can make the installation process much smoother.
Q: How do I maintain my textured wall panels?
A: Regular cleaning and occasional touch-ups will keep your panels looking fresh. Always follow care instructions specific to the materials used.

Rustic Finishes
When it comes to home décor, nothing beats the **warmth** and **charm** of rustic finishes. Imagine stepping into a room where the walls tell a story, showcasing the beauty of nature and the craftsmanship of yesteryears. Rustic finishes can transform your DIY wall panels into a stunning focal point that evokes a sense of comfort and nostalgia. By using materials like reclaimed wood and natural stains, you can create a cozy atmosphere that feels both inviting and stylish.
Reclaimed wood is a fantastic option for achieving that rustic look. Not only is it environmentally friendly, but each piece has its own unique history, adding character to your space. You might find yourself drawn to the rich textures and imperfections that come with reclaimed wood. Think of it as nature's way of adding a little personality to your walls. To get started, consider sourcing your wood from local salvage yards, or even old barns and warehouses. You’ll be amazed at the treasures you can find!
Natural stains are equally important in enhancing the rustic appeal of your wall panels. Unlike synthetic finishes, natural stains allow the wood's grain to shine through while adding a subtle hue that complements the overall aesthetic. Whether you prefer a deep walnut or a lighter oak, natural stains can enrich the wood's texture and bring out its inherent beauty.
To achieve the perfect rustic finish for your DIY wall panels, here are some essential tips to consider:
- Choose the Right Wood: Opt for woods that have a natural patina or interesting grain patterns. Pine, cedar, and oak are popular choices.
- Prep Your Wood: Before applying any stain, ensure that your wood is clean and sanded down. This will help the stain adhere better and result in a more even finish.
- Experiment with Stains: Don’t hesitate to mix different stains to create a custom color that suits your style.
- Seal the Finish: Once you’re satisfied with the color, apply a natural sealant to protect the wood and enhance its longevity.
Incorporating rustic finishes into your DIY wall panels is not just about aesthetics; it's about creating a space that feels alive and connected to nature. The tactile quality of wood, combined with the warmth of natural finishes, can make your home feel like a sanctuary. So, roll up your sleeves and let your creativity flow! With a little effort and the right materials, you can achieve a rustic look that is both stylish and timeless.
Q: What types of wood are best for rustic finishes?
A: Popular choices include reclaimed wood, pine, cedar, and oak. Each type offers unique textures and colors that can enhance the rustic aesthetic.
Q: How do I maintain the rustic finish on my wall panels?
A: Regular dusting and occasional cleaning with a damp cloth will help maintain the beauty of your rustic finishes. Avoid harsh chemicals that can damage the wood.
Q: Can I achieve a rustic look with painted wall panels?
A: Absolutely! You can use techniques like distressing or layering paint to create a rustic appearance on your wall panels.
Q: Is it necessary to seal rustic finishes?
A: Yes, sealing your rustic finishes helps protect the wood from moisture and wear, ensuring its longevity.
Installation Tips
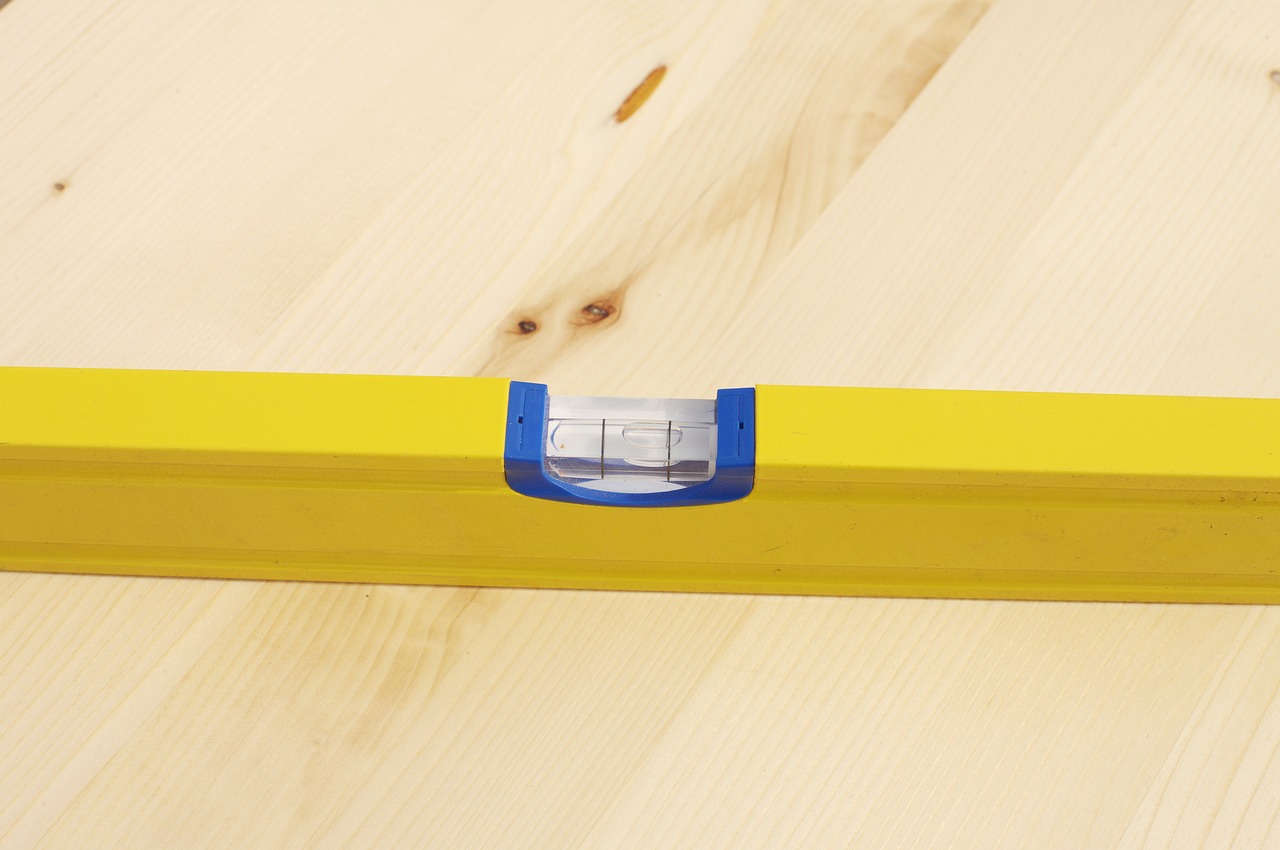
When it comes to installing your DIY wall panels, getting it right is crucial for achieving that polished, professional look you desire. Think of installation as the foundation of a beautiful home; if it’s not solid, everything else will crumble. The first step is to ensure that you have a clear plan in place. This means taking accurate measurements and planning your layout meticulously. You wouldn’t build a house without a blueprint, right? The same principle applies here. Take the time to sketch out where each panel will go and how they will fit together, ensuring that your design flows seamlessly across the wall.
Next, let’s talk about the tools you'll need. Having the right tools on hand can make a world of difference in your installation process. Here’s a quick rundown of essential tools:
- Measuring Tape: For precise measurements.
- Level: To ensure your panels are straight.
- Stud Finder: To locate wall studs for secure attachment.
- Power Drill: For easy installation of screws.
- Adhesive: If you’re opting for a no-nail approach.
Once you have your tools ready, it’s time to get down to the nitty-gritty of installation. Start by preparing your wall surface. Make sure it’s clean, dry, and free of any debris. If you’re working with an uneven wall, consider using a primer or leveling compound to create a smooth base for your panels. This step is often overlooked, but it’s essential for ensuring that your panels adhere properly and look great.
As you begin attaching your panels, remember to work from one side of the wall to the other. This will help you maintain alignment and ensure that everything fits together as planned. If you’re using adhesive, apply it generously but avoid overdoing it; too much can lead to messy results. For those using screws, make sure to drill into the studs for maximum stability. Nothing is worse than a panel that pops off the wall because it wasn’t secured properly!
Finally, take a step back and admire your work. After installation, it’s important to allow the adhesive to cure if you used it. Follow the manufacturer’s instructions regarding curing times, and resist the urge to touch or adjust the panels during this period. Once everything is set, you can finish off with paint or stain to achieve that chic look you were aiming for. Just like that, you’ve transformed your space with stunning DIY wall panels!
Q: How do I ensure my wall panels are level?
A: Use a level tool after each panel is attached to confirm that they are even. Adjust as necessary before the adhesive sets or screws are tightened.
Q: Can I install wall panels on any type of wall?
A: Most wall panels can be installed on drywall, plaster, or wood surfaces. However, ensure that the wall is clean and structurally sound before proceeding.
Q: What should I do if I accidentally damage a panel?
A: Minor damage can often be repaired with wood filler or touch-up paint. For larger issues, you may need to replace the panel entirely.

Measuring and Planning
When it comes to creating stunning DIY wall panels, are your best friends. Imagine trying to bake a cake without measuring your ingredients—chaos, right? The same principle applies here. Accurate measurements ensure that your panels fit perfectly and look professionally done. Start by gathering your tools: a measuring tape, a level, a pencil, and some graph paper to sketch your layout. Trust me, this little bit of prep work will save you a ton of headaches later on!
First, decide where you want to install your wall panels. Is it a feature wall in the living room or perhaps an accent wall in the bedroom? Once you’ve chosen your spot, it’s time to measure the wall. Measure the height and width of the wall, and jot down these numbers. Don’t forget to account for any outlets, switches, or architectural features that might affect your panel layout.
Next, sketch a basic layout on your graph paper. This doesn’t have to be a work of art; just a simple representation of how you want your panels to look. Are you going for a symmetrical design or something more eclectic? Visualizing your design will help you make better decisions about how many panels you need and their dimensions. If you’re feeling adventurous, consider creating a 3D mock-up using software or cardboard cutouts to see how your design will come together in real life.
Now, let’s talk about the panel sizes. Depending on the look you’re going for, you might want to use large panels for a bold statement or smaller ones for a more intricate design. Here’s a quick breakdown of common panel sizes and their effects:
| Panel Size | Effect |
|---|---|
| 4' x 8' | Creates a dramatic, seamless look |
| 2' x 4' | Allows for more intricate designs and patterns |
| 1' x 1' | Perfect for geometric patterns and layering |
Once you’ve finalized your measurements and design, double-check everything. Measure twice, cut once! This old saying rings true in DIY projects. If you’re using multiple materials, ensure that you have a clear plan for how they will fit together. You might want to create a simple list of materials you’ll need based on your measurements:
- Wood or MDF panels
- Adhesive or nails for installation
- Paint or stain (if applicable)
- Tools (saw, level, measuring tape)
With all your measurements in hand and a solid plan laid out, you’re ready to move on to the next step: installation! Remember, taking the time to measure and plan properly will not only make the installation process smoother but will also yield a stunning finished product that you can be proud of. So roll up your sleeves and get ready to transform your space with your beautiful DIY wall panels!
Q1: How do I determine the right height for my wall panels?
A1: A good rule of thumb is to install panels at eye level, which is typically around 54 to 60 inches from the floor. However, this can vary based on your personal preference and the overall design of the room.
Q2: Can I mix different materials for my wall panels?
A2: Absolutely! Mixing materials can create a unique and textured look. Just make sure the materials complement each other in terms of color and style.
Q3: How do I ensure my panels are level during installation?
A3: Use a level tool as you install each panel. It’s also helpful to draw a light pencil line along the wall to guide your installation.
Tools and Techniques
When embarking on your DIY wall panel project, having the right tools and techniques at your disposal can make all the difference. Imagine trying to bake a cake without the right ingredients or tools—it's a recipe for disaster! Similarly, having the right tools not only simplifies the process but also ensures that your wall panels look professionally done. So, let’s dive into the essential tools you’ll need and some techniques that can help you along the way.
First things first, let’s talk about the tools. You’ll need a few basic items that will serve as your trusty sidekicks throughout the project. Here’s a quick rundown:
- Measuring Tape: Precision is key! A good measuring tape will help you get accurate dimensions for your panels.
- Level: To ensure your panels are straight and even, a level is indispensable.
- Utility Knife: Perfect for cutting materials like MDF or fabric to size.
- Drill: This will be your best friend when it comes to attaching panels to the wall.
- Adhesive: Depending on your material, you might need construction adhesive or double-sided tape.
Now that we have our tools, let’s explore some techniques that will elevate your installation game. For instance, when measuring and cutting your panels, always remember the golden rule: measure twice, cut once! This will save you from making costly mistakes and wasting materials. Additionally, if you’re working with large panels, consider enlisting a friend to help hold them in place while you secure them. Teamwork can make even the trickiest jobs feel manageable.
Another handy technique is to use a template for your wall panels. If you're going for a geometric design, create a cardboard template of your desired shapes. This allows you to visualize how the final product will look and ensures consistency across all panels. Plus, it’s a fun way to experiment with different layouts before committing to the final design.
Lastly, don’t underestimate the power of finishing touches. Once your panels are up, consider adding trim or molding around the edges for a polished look. This not only enhances the aesthetic appeal but also gives your installation a professional finish. It’s like putting icing on a cake—just makes everything look so much better!
In conclusion, the right tools and techniques can transform your DIY wall panel project from a daunting task into a rewarding experience. With a little preparation and creativity, you’ll be well on your way to creating stunning wall panels that reflect your personal style.
Q: What is the best material for DIY wall panels?
A: The best material really depends on your style and budget. Wood offers a warm, classic look, while MDF is cost-effective and easy to work with. Fabric panels can add a unique texture and softness to your space.
Q: How do I ensure my wall panels are level?
A: Using a level during installation is crucial. Always check your panels after attaching them to ensure they are straight. If you notice any discrepancies, adjust them before the adhesive sets.
Q: Can I use paint on my wall panels?
A: Absolutely! Paint can dramatically change the look of your panels. Consider using stenciling or color blocking techniques to add visual interest.
Q: What should I do if my wall panels get damaged?
A: Repairing wall panels is usually straightforward. Depending on the material, you can fill in small dents with wood filler or patching compound, sand it down, and repaint for a fresh look.
Maintenance and Care
Once you've invested your time and creativity into crafting stunning DIY wall panels, it’s essential to keep them looking fresh and vibrant. Just like a beautiful painting, your wall panels deserve regular attention to maintain their charm and functionality. Maintenance is not just about cleaning; it’s about ensuring that your hard work pays off for years to come. So, how do you keep your wall panels in tip-top shape? Let’s dive in!
First and foremost, cleaning is key. Depending on the materials you've chosen, the cleaning methods may vary. For wood panels, a simple dusting with a microfiber cloth is often enough to remove any accumulated dust. If you encounter stains, a damp cloth with mild soap can work wonders. However, be cautious with excessive moisture, as it can warp the wood over time. For fabric panels, vacuuming with a brush attachment helps to lift away dirt without damaging the fabric. You might also consider spot cleaning with a fabric-safe cleaner to tackle any pesky spills.
For MDF wall panels, the maintenance routine is slightly different. Since MDF is more susceptible to moisture, it’s crucial to keep them dry. Regularly wipe them down with a dry cloth, and if necessary, use a slightly damp cloth for tougher stains. Avoid soaking the panels, as this can lead to swelling and damage. Additionally, consider applying a sealant every few years to protect the surface and enhance durability.
But what about repairs? Over time, it’s not uncommon for wall panels to sustain minor damage, whether from furniture bumps or general wear and tear. The good news is that many repairs are straightforward. For small scratches on wooden panels, a touch-up with matching paint or a wood marker can blend the blemish seamlessly. If you have fabric panels, a little fabric glue can help reattach any loose edges. Knowing how to repair your wall panels can save you from costly replacements and keep your home looking sharp.
To give you a better idea of what to do, here’s a quick reference table:
| Material | Cleaning Method | Repair Tip |
|---|---|---|
| Wood | Dust with a microfiber cloth; damp cloth for stains | Use wood marker for scratches |
| MDF | Dry cloth; slightly damp for tougher stains | Sealant application every few years |
| Fabric | Vacuum; spot clean with fabric-safe cleaner | Fabric glue for loose edges |
Ultimately, the secret to maintaining your DIY wall panels lies in regular care and attention. Treat them like the artwork they are, and they will reward you with beauty and character in your home for years to come. Now, let’s wrap things up with a Frequently Asked Questions section to address some common queries you might have about maintaining your wall panels.
- How often should I clean my wall panels? It’s best to dust them weekly and do a deeper clean every month, depending on the material.
- Can I use harsh chemicals on my wall panels? Avoid harsh chemicals, as they can damage the finish. Stick to mild soap and water.
- What should I do if my wall panels get damaged? Assess the damage first; minor scratches can usually be repaired easily with touch-up paint or glue.
Cleaning Tips
Keeping your DIY wall panels looking fresh and vibrant is easier than you might think! A little regular maintenance goes a long way in preserving their beauty. First and foremost, it’s essential to identify the material of your wall panels, as different materials require different cleaning methods. For instance, if your panels are made of wood, you’ll want to avoid excessive moisture, which can warp the wood over time. Instead, use a slightly damp cloth to wipe down the surface, followed by a dry cloth to prevent any moisture from lingering.
For those with MDF or painted panels, a gentle all-purpose cleaner can work wonders. Just make sure to test it on a small, inconspicuous area first to avoid any unwanted surprises! When cleaning, use a soft cloth or sponge to gently scrub away any dirt or grime. Remember, harsh chemicals can damage the finish, so stick to mild solutions.
If you have fabric-covered panels, vacuuming them regularly can help keep dust at bay. You can use a soft brush attachment to gently remove dirt without damaging the fabric. For stains, spot cleaning with a fabric cleaner is usually effective, but always follow the manufacturer's instructions to ensure you don’t ruin your panels.
Here’s a quick reference table to help you remember the best cleaning methods for different materials:
| Material | Cleaning Method | Tips |
|---|---|---|
| Wood | Wipe with a damp cloth | Follow with a dry cloth; avoid excessive moisture |
| MDF/Painted | Use a gentle all-purpose cleaner | Test in a small area first |
| Fabric | Vacuum regularly; spot clean as needed | Use a soft brush attachment |
In addition to regular cleaning, it’s also wise to keep an eye out for any signs of damage or wear. If you notice scratches or dents, don’t panic! Most minor imperfections can be easily repaired with a bit of touch-up paint or wood filler. The key is to address these issues promptly to prevent them from worsening.
Finally, consider applying a protective finish to your wall panels, especially if they are made of wood. A good sealant can help repel moisture and dirt, making cleaning even easier in the long run. Think of it as giving your panels a little armor to keep them looking their best!
- How often should I clean my wall panels? It’s best to clean them every few months, but if you notice dust or stains, feel free to clean them more often!
- Can I use bleach to clean my wall panels? It’s not recommended, as bleach can damage the finish and color of your panels. Stick to mild cleaners instead.
- What should I do if my wall panels get damaged? Minor damages can often be repaired with touch-up paint or wood filler. For larger issues, consider consulting a professional.
Repairing Damage
Over time, even the most beautifully crafted DIY wall panels can experience wear and tear. Whether it's a scratch from moving furniture, water damage from a leaky roof, or simply the effects of time, knowing how to repair these damages can save you both money and heartache. The good news is that many repairs are straightforward and can be done with a little patience and the right materials.
First, assess the damage. Is it a small scratch or a larger hole? For minor scratches, a simple touch-up with paint may be all you need. You can use the same paint you applied initially, or if you’ve lost the original color, a color-matching tool can help you find the perfect shade. For deeper gouges, consider using a wood filler or spackling compound. Apply it with a putty knife, let it dry, and then sand it down until it's smooth. Once you’ve achieved a seamless finish, repaint the area to blend it with the surrounding panel.
For larger holes, the repair process may require a bit more effort. Here’s a quick guide on how to tackle these repairs:
- Step 1: Cut a piece of wood or MDF that is slightly larger than the damaged area.
- Step 2: Secure the new piece behind the panel using construction adhesive.
- Step 3: Fill any gaps with wood filler, let it dry, and sand it smooth.
- Step 4: Finally, paint over the repair to match the rest of the panel.
If your panels are made of fabric, repairs can be a bit different. Small tears can often be stitched up with a needle and thread, while larger areas may require patching. Choose a fabric that closely resembles the original and use fabric glue to secure it in place. Once it’s dry, you can use a fabric paint to blend the patch into the surrounding area.
To prevent future damage, consider applying a protective coating or sealant to your wall panels. This can be particularly beneficial for wooden panels, as it helps guard against moisture and scratches. Regular maintenance, such as cleaning and inspecting your panels, can also help catch issues before they become larger problems.
In summary, repairing damage to your DIY wall panels doesn’t have to be daunting. With a little know-how and some basic materials, you can restore your panels to their former glory and keep your home looking chic and stylish.
- What materials do I need for repairing wall panels?
Basic materials include wood filler, paint, sandpaper, and a putty knife. For fabric panels, you might need fabric glue and a matching fabric patch. - Can I repair water damage on my wall panels?
Yes, if the damage is minor, you can sand the affected area, apply a wood filler, and repaint. For extensive water damage, you may need to replace the affected panels. - How can I prevent future damage to my wall panels?
Applying a protective sealant and regularly cleaning your panels can help prevent scratches and moisture damage.
Frequently Asked Questions
- What materials are best for DIY wall panels?
Choosing the right materials is crucial for both durability and aesthetics. Popular options include wood for a classic look, MDF for a smooth finish, and fabric for a softer touch. Each material has its own unique benefits, so consider what fits your style and budget best!
- How do I choose a design for my wall panels?
When it comes to design, think about the vibe you want to create. Geometric patterns can add a modern twist, while rustic finishes offer a warm, cozy feel. Browse online for inspiration or even sketch out your ideas to visualize how they’ll look on your walls!
- What tools do I need for installation?
To install your DIY wall panels, you’ll need a few essential tools: a measuring tape for accuracy, a level to ensure everything is straight, and a drill or nail gun for securing the panels. Having the right tools on hand makes the process smoother and more enjoyable!
- How do I maintain my wall panels?
Keeping your wall panels looking fresh is easier than you think! Regular cleaning with a soft cloth and appropriate cleaners for the material will do wonders. For wood, a gentle polish can enhance its natural beauty, while fabric panels might need occasional vacuuming to remove dust.
- What should I do if my wall panels get damaged?
No need to panic! Most damages can be repaired quite easily. For minor scratches on wood, a touch-up stain can work wonders. If a panel is severely damaged, you might need to replace it, but with careful handling, you can often restore it to its original glory!


