Crafting a Solar Oven: A Tasty Science Lesson for Kids
Have you ever thought about how the sun can be a powerful tool in the kitchen? Well, get ready to dive into the exciting world of solar cooking! In this article, we will explore the engaging process of building a solar oven, providing a fun and educational experience for children while teaching them about renewable energy and basic cooking techniques. Imagine turning sunlight into a delicious meal—sounds like magic, right? But it’s actually science at work! So, roll up your sleeves and let’s embark on this creative journey together!
Solar energy is a renewable resource that harnesses sunlight for various applications. It’s like having a giant battery in the sky, ready to power our cooking adventures! By using a solar oven, children will learn how solar energy can be converted into heat, making it essential for cooking. This process is not only fascinating but also crucial for understanding how we can use natural resources responsibly. Think of it this way: just as plants use sunlight to grow, we can use that same sunlight to cook our food. Isn’t that an amazing connection to nature?
Gathering the right materials is crucial for building an effective solar oven. You don’t need fancy equipment; in fact, you can find most of these items around your house! Here’s a list of common household items and tools required to create a simple yet functional solar cooker:
- Cardboard box (pizza box works great!)
- Aluminum foil
- Plastic wrap or a transparent oven bag
- Black construction paper
- Scissors
- Tape
- Cooking thermometer (optional)
With these materials in hand, you’re ready to start building your very own solar oven!
Now that we have our materials, let’s follow these easy-to-understand instructions to construct your solar oven. Each step is designed to be kid-friendly, ensuring an enjoyable building experience while learning practical skills. Are you ready? Let’s get started!
The base of the solar oven is vital for stability. Using a sturdy cardboard box or wood, you’ll want to create a solid foundation. This ensures that your oven can withstand outdoor conditions, especially if it’s a breezy day. Make sure to cut a flap in the top of the box that can be opened and closed easily. This flap will help you direct sunlight into the oven. Think of it as the oven's 'window' to the sun!
The reflector is essential for directing sunlight into the oven. This is where the magic happens! By lining the inside of your flap with aluminum foil, you can maximize heat absorption for cooking. The shiny surface of the foil will reflect sunlight into the box, creating a mini greenhouse effect. It’s like giving your solar oven a shiny new coat that attracts sunlight like a magnet!
Once the solar oven is built, it’s time to explore cooking techniques. The beauty of solar cooking lies in its simplicity and the joy it brings. You can experiment with a range of recipes, from melting s'mores to baking cookies. The process is not just about cooking; it’s about experiencing the sun’s energy in a delicious way!
Safety is paramount when cooking outdoors. Always supervise children while using the solar oven and ensure that they understand the importance of handling hot materials carefully. Here are some important safety tips:
- Use oven mitts when handling hot pots.
- Keep the cooking area clear of flammable materials.
- Make sure to monitor the temperature with a thermometer if possible.
By following these guidelines, you can ensure a safe and enjoyable cooking experience for everyone involved!
Encouraging creativity is key! Here are some fun recipes that can be cooked in a solar oven:
- Solar s'mores: Layer graham crackers, chocolate, and marshmallows.
- Mini pizzas: Use English muffins, sauce, cheese, and toppings.
- Fruit kabobs: Skewer your favorite fruits for a healthy treat.
Kids will learn how different foods react to solar heating, fostering a love for science and cooking. It’s all about experimenting and discovering what works best!
Building a solar oven offers numerous educational benefits. Children will gain hands-on experience with sustainability concepts, energy conversion, and problem-solving skills. They’ll learn that cooking doesn’t have to rely on electricity or gas—it can be powered by the sun! This project encourages critical thinking as kids troubleshoot and adapt their designs to improve efficiency. Plus, they’ll walk away with a delicious treat and a sense of accomplishment!
Q: Can I use my solar oven on cloudy days?
A: While it’s best to use a solar oven on sunny days, you can still cook on cloudy days, but it may take longer.
Q: How long does it take to cook food in a solar oven?
A: Cooking times vary depending on the recipe and sunlight intensity, but expect it to take 1-3 hours.
Q: Is it safe to leave the solar oven unattended?
A: It’s best to supervise the solar oven while in use, especially with children around.
Understanding Solar Energy
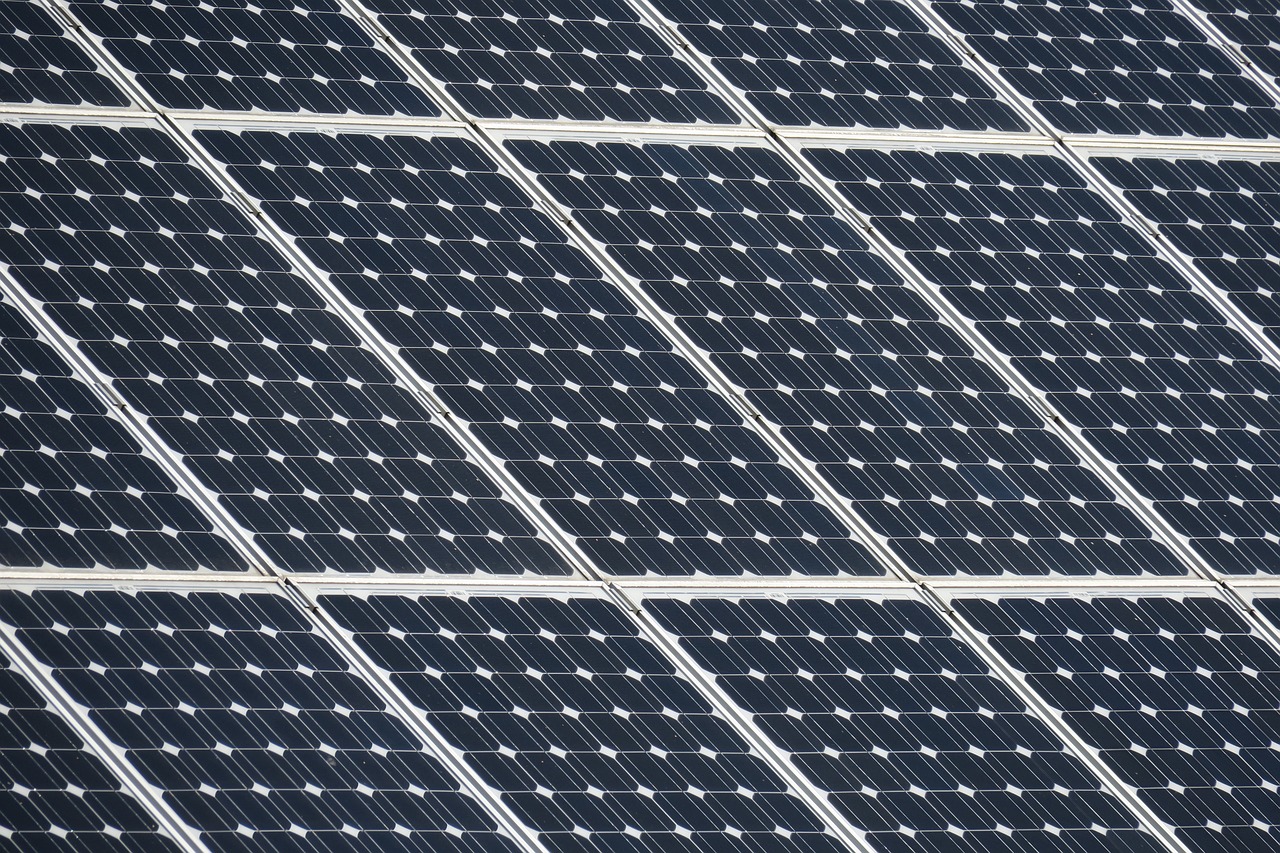
Solar energy is a powerful and renewable resource that harnesses the sun's rays to generate heat and electricity. Imagine the sun as a giant battery in the sky, constantly charging up our planet with energy. This energy can be captured and converted into usable forms, making it a fantastic option for cooking, especially with a solar oven. When we talk about solar energy, we are primarily referring to two forms: solar thermal energy, which is used for heating, and solar photovoltaic energy, which is used for generating electricity.
In the context of a solar oven, we focus on solar thermal energy. The process is quite simple: sunlight hits the surface of the solar oven, and that energy is absorbed, which in turn heats up the interior. It's like how a car can heat up on a sunny day; the sun's rays penetrate the glass and warm up the inside. This heat can reach temperatures high enough to cook food, making solar ovens a practical and fun project for kids to learn about energy conversion.
To better understand how solar energy works, let's break it down into a few key concepts:
- Absorption: The materials used in the solar oven, such as black paint or aluminum foil, are excellent at absorbing sunlight. Dark colors absorb more heat, which is why they are often used in solar cookers.
- Concentration: Reflectors are used to focus sunlight into the cooking area. This is crucial because it maximizes the amount of heat generated, allowing for efficient cooking.
- Insulation: Keeping the heat inside the oven is essential. Insulation materials help maintain high temperatures, ensuring that the food cooks evenly.
By building a solar oven, children not only get to experience the joy of cooking but also gain a practical understanding of how renewable energy works. They learn that the sun is a limitless source of energy, and by harnessing it, we can reduce our reliance on fossil fuels. This hands-on project is not just about cooking; it's about instilling a sense of responsibility towards our environment and understanding the importance of sustainability.
As we delve deeper into the construction of a solar oven, kids will discover the fascinating science behind energy conversion. They will witness firsthand how sunlight can transform into heat, cooking their favorite foods. This connection between science and practical application is what makes the project so engaging and educational.
Materials Needed
Building a solar oven is not only a fun project but also an excellent way to teach kids about sustainability and renewable energy. To kick off this exciting venture, you'll need to gather a few common materials that you likely already have at home. The beauty of this project lies in its simplicity—most of what you need can be found in your kitchen or garage. Here’s a breakdown of what you’ll require:
First and foremost, you'll need a sturdy base for your solar oven. This can be made from either cardboard or wood. Cardboard is lightweight and easy to work with, making it perfect for younger kids, while wood provides a more durable option for outdoor use. Whichever you choose, make sure it’s large enough to support the rest of your oven components.
Next, you’ll need to create a reflector that captures sunlight and directs it into the cooking chamber. For this, aluminum foil is your best friend. It’s highly reflective and will help maximize the heat that enters your solar oven. You will also need a piece of cardboard to serve as the base for the foil, so you can easily shape it into the desired angle for optimal sunlight capture.
In addition to these primary materials, you’ll also require:
- Plastic wrap or a clear plastic lid to create a greenhouse effect inside your oven.
- A small cooking pot or a baking tray to hold your food.
- Black paint or black construction paper to absorb heat more effectively.
- Scissors and tape for assembling your solar oven.
Once you have all these materials, you’ll be ready to embark on your solar cooking adventure. Remember, the goal is to have fun while learning about how solar energy works. Each item plays a crucial role in ensuring your oven functions effectively, so make sure to gather everything before you start building!
As you prepare to create your solar oven, think of it as a mini science lab where you can experiment and learn. Not only will you be amazed at how the sun can cook food, but you'll also gain valuable insights into renewable energy and environmental stewardship. So, roll up your sleeves, gather your materials, and get ready for a delightful journey into the world of solar cooking!
Step-by-Step Construction
Building a solar oven is not just a fun project; it's an exciting journey into the world of science and cooking! With a few simple materials and some guidance, kids can create their very own solar cooker that uses the power of the sun to prepare delicious meals. Let’s dive into the step-by-step instructions that will make this process easy and enjoyable for everyone involved.
First things first, gather all your materials. You’ll need:
- Cardboard box (a pizza box works great!)
- Aluminum foil
- Plastic wrap
- Black construction paper
- Scissors
- Glue or tape
- Cooking pot (preferably black)
- Thermometer (optional, but fun for measuring temperature!)
Now that you have your materials ready, let’s get started with the construction:
The base of your solar oven is crucial for stability and functionality. If you're using a pizza box, it already has a built-in structure that works perfectly. If not, you can use a piece of cardboard or wood as a sturdy foundation. Make sure the base is flat and can hold the weight of your cooking pot. Reinforce the edges with tape if necessary, ensuring it can withstand the outdoor elements. This is where the magic begins, so make it strong!
Next up is the reflector, which is essential for directing sunlight into your oven. Grab your aluminum foil and carefully cover the inside of the box lid with it, shiny side facing out. This shiny surface will reflect sunlight into the oven, maximizing heat absorption. You can attach the foil using glue or tape, making sure there are no wrinkles that could reduce its effectiveness. The goal here is to create a smooth, reflective surface that can capture as much sunlight as possible.
Once the foil is secure, it’s time to assemble the oven. Close the lid and secure it in place with tape. You’ll want to create a small opening at the top so that the sunlight can enter, but make sure it’s not too big that it lets heat escape. You can also use a piece of plastic wrap to cover the opening, which helps trap the heat inside while still allowing sunlight to enter.
Now comes the fun part—preparing the cooking surface! Cut a piece of black construction paper to fit the bottom of your oven. The color black absorbs heat better than lighter colors, making it perfect for cooking. Place this paper inside the oven, and then set your cooking pot on top of it. If you’re feeling adventurous, you can even add a thermometer to monitor the temperature inside your solar oven. This is a great way for kids to learn about how heat works in a fun, hands-on way!
Finally, position your solar oven in a sunny spot, ideally facing south, to catch the most sunlight. Make sure it’s stable and won’t tip over. Now, you’re all set to start cooking! Keep an eye on your solar oven, and adjust the angle of the reflector as needed to maximize sunlight exposure. It’s like a mini science experiment right in your backyard!
As you and the kids watch the magic happen, you’ll not only enjoy the delicious results but also learn valuable lessons about energy, sustainability, and the power of the sun. So grab your ingredients, set your solar oven, and get ready to cook up some sunshine!
Q: How long does it take to cook food in a solar oven?
A: Cooking times can vary depending on the food and the amount of sunlight available. Generally, it can take anywhere from 30 minutes to several hours.
Q: What types of food can I cook in a solar oven?
A: You can cook a variety of foods, including s'mores, nachos, baked potatoes, and even some simple casseroles!
Q: Can I use my solar oven on cloudy days?
A: Yes, but the cooking times will be longer. It’s best to use the solar oven on sunny days for optimal results.
Q: Is it safe to use a solar oven?
A: Absolutely! Just be sure to follow safety precautions, like using heat-resistant gloves when handling hot pots and keeping the oven stable to prevent spills.
Preparing the Base
Building a solid foundation for your solar oven is crucial, as it provides the necessary stability and support for the entire structure. Think of the base as the roots of a tree; without strong roots, the tree cannot thrive. For this project, you can use materials like cardboard or wood, both of which are commonly found around the house. Cardboard is lightweight and easy to work with, making it ideal for younger children, while wood offers greater durability and can withstand outdoor conditions better.
To start, gather your materials. If you opt for cardboard, look for sturdy boxes that can hold their shape. If you prefer wood, you might need a few wooden planks or even an old wooden crate. Whichever material you choose, ensure that it is clean and free from any contaminants. You wouldn’t want your delicious solar-cooked treats to taste like old pizza boxes, right?
Next, measure and cut your material to create a base that is at least 24 inches by 24 inches. This size is spacious enough to accommodate your cooking pot and any additional items you may want to place inside the oven. If you're using cardboard, a simple box cutter will do the trick, but be sure to ask an adult for help if you're not comfortable with sharp tools. For wooden bases, a saw may be necessary, and safety should always come first!
Once you have your base cut out, it’s time to reinforce it. If using cardboard, you can stack multiple layers to increase sturdiness. This will also help insulate the oven, keeping the heat inside where it belongs. If you’re working with wood, consider using screws or nails to secure the planks together. A solid base will ensure that your solar oven can withstand the elements, especially if it’s a breezy day.
After constructing your base, it’s a good idea to paint or cover it with a weather-resistant material. This will protect it from moisture and prolong its life. A simple coat of non-toxic paint or even wrapping it in plastic can do wonders. Remember, the goal here is to create a base that not only supports your oven but also looks good while doing it!
Finally, once your base is ready, place it in a sunny spot in your yard or on your balcony. Make sure it’s positioned where it will receive maximum sunlight throughout the day. You want your solar oven to soak up as much heat as possible, so avoid shaded areas or spots that are obstructed by trees or buildings. With your base prepared, you’re one step closer to creating your very own solar oven!
Creating the Reflector
Creating the reflector is a crucial step in building your solar oven, as it plays a significant role in maximizing the sunlight that enters the cooking chamber. The reflector's primary function is to direct sunlight towards the cooking area, enhancing the oven's ability to generate heat. To make an effective reflector, you will need a few simple materials, primarily aluminum foil and cardboard. These items are not only easy to find but also provide excellent heat reflection properties.
First, start by cutting a piece of cardboard into a large rectangular shape. The size of your cardboard will depend on how big you want your solar oven to be. A larger reflector will gather more sunlight, but it also needs to be manageable for kids to handle. Once you have your cardboard base, the next step is to cover one side of it with aluminum foil. Make sure to apply the foil shiny side up, as this is the side that reflects the most light.
When applying the foil, try to smooth it out as much as possible to avoid any wrinkles, which can diminish its reflective capabilities. You can use glue or tape to secure the aluminum foil to the cardboard. If you want to take it a step further, consider creating a curved shape for your reflector. A parabolic or concave shape will focus sunlight more effectively. To do this, gently bend the cardboard into a curve, ensuring that the shiny side is facing outward.
Now, let’s discuss the positioning of your reflector. Once the reflector is complete, it should be attached to the solar oven at an angle that captures the maximum amount of sunlight. Ideally, the angle should be adjustable so you can reposition it throughout the day as the sun moves. You can use a simple hinge mechanism made from more cardboard or even a clothespin to allow for easy adjustments. This flexibility will ensure that your oven remains efficient, no matter the time of day.
In summary, the reflector is a vital component of your solar oven, and by using aluminum foil and cardboard, you can create an effective tool for cooking with the sun. Not only does this process teach kids about practical engineering and design, but it also provides a hands-on lesson in renewable energy. Remember, the more reflective and well-positioned your reflector is, the better your solar oven will perform!
- What materials do I need to create the reflector? You will need cardboard and aluminum foil, along with glue or tape to secure the foil.
- Can I use other materials instead of aluminum foil? While aluminum foil is the most effective, you could experiment with other reflective materials, but they may not work as well.
- How do I adjust the reflector during the day? You can create a hinge or use a simple support system that allows you to change the angle of the reflector as the sun moves.
- Why is the angle of the reflector important? The angle affects how much sunlight is directed into the oven. A well-angled reflector can significantly increase the cooking temperature.

Cooking with Your Solar Oven
Once you've successfully built your solar oven, it's time to dive into the exciting world of cooking with sunlight! Imagine the thrill of preparing a meal using nothing but the energy from the sun. It's like harnessing a superpower right in your backyard! Cooking with a solar oven not only teaches kids about renewable energy but also allows them to experiment with different ingredients in a fun, hands-on way.
Before you start cooking, it's important to understand how to maximize the efficiency of your solar oven. The key is to position it correctly to catch the most sunlight. Ideally, you want to set up your oven around noon when the sun is at its highest. This way, you can soak up those rays like a sponge! It's also a good idea to periodically adjust the angle of your oven to keep it aligned with the sun as it moves across the sky.
Now, let’s talk about some simple and delicious recipes that are perfect for your solar oven. Here are a few ideas to get you started:
- S'mores: A classic favorite! All you need are graham crackers, chocolate, and marshmallows. Layer them up in a small pan, cover with foil, and let the sun work its magic.
- Solar-Powered Pizza: Use a small pizza base, add sauce, cheese, and your favorite toppings. Bake it in your solar oven for a delightful treat that everyone will love!
- Veggie Medley: Chop up some vegetables, toss them with a little olive oil and seasoning, and place them in a heat-safe dish. This is a healthy option that can be cooked alongside other recipes.
Each of these recipes is not only easy to prepare but also allows children to learn about the cooking process and the effects of heat on different ingredients. As they watch their food transform under the sun, they'll gain a deeper appreciation for how solar energy can be used in everyday life.
While cooking, it’s essential to remember some safe cooking practices. Always supervise children while they are using the solar oven, and ensure they understand the importance of not touching hot surfaces. It's also wise to use heat-resistant gloves when handling dishes that have been in the oven for a while. Safety first, right?
As your little chefs experiment with these recipes, encourage them to ask questions and take notes on their observations. How long did it take to cook the pizza? Did the marshmallows melt perfectly? This not only fosters a love for cooking but also integrates scientific inquiry, making it a fantastic educational experience.
Cooking with a solar oven is more than just a fun activity; it’s an opportunity for kids to engage with science, technology, engineering, and mathematics (STEM) concepts in a practical way. They’ll learn about heat transfer, energy efficiency, and the importance of sustainability—all while enjoying tasty treats!
Q: Can I cook anything in a solar oven?
A: While you can cook many foods, it's best to stick with items that require longer cooking times, like stews or baked goods, as solar ovens typically take longer to heat up.
Q: How long does it take to cook food in a solar oven?
A: Cooking times can vary depending on the recipe and the sunlight's intensity, but generally, expect cooking times to be longer than traditional ovens—up to several hours.
Q: What if it's cloudy?
A: Solar cooking is best on sunny days, but you can still cook on overcast days—just be prepared for longer cooking times and potentially less effective results.
So, gather your materials, fire up that solar oven, and let the sun do the cooking! It's a delicious way to learn about renewable energy while creating mouthwatering meals.
Safe Cooking Practices
When it comes to cooking with a solar oven, safety should always be your top priority. While the idea of harnessing the sun's energy to whip up delicious meals is exciting, it's essential to ensure that the experience is safe for everyone involved, especially children. Just like a superhero needs a sidekick, your solar cooking adventures need a few safety guidelines to keep things fun and secure.
First and foremost, always supervise children while they are using the solar oven. This is not just about keeping an eye on them; it's about teaching them the importance of safety in the kitchen. Explain to them the concept of heat and how the solar oven can get really hot, even if it doesn’t look like it. Remind them that just because sunlight is involved doesn’t mean they can be careless. Always use oven mitts or heat-resistant gloves when handling the solar oven or any cooking pots inside it. This simple step can prevent burns and make the cooking experience enjoyable.
Another crucial aspect is to set up your solar oven in a safe location. Choose a spot that is away from flammable materials like dry grass or leaves. Think of your solar oven like a campfire; you wouldn’t want to start one too close to your tent, right? Make sure the area is clear and that the oven is stable, so it doesn’t tip over while you’re cooking. A sturdy base ensures that your culinary creations can bask in the sun without any accidents.
It’s also essential to keep the solar oven covered when not in use. This protects it from unexpected rain or debris that could damage the oven or contaminate your food. Just like you wouldn’t leave your bike out in the rain, your solar oven deserves some protection too! Ensure that the oven is clean and free from any dirt or leftover food particles before you start cooking. A clean oven not only helps in cooking food evenly but also keeps everything hygienic.
Lastly, while cooking with a solar oven, it's a good idea to have some basic first-aid supplies on hand. Accidents can happen, and it's better to be prepared. Having band-aids, antiseptic wipes, and burn ointment nearby can give you peace of mind. Remember, even the best chefs have had their share of mishaps, but being prepared can make all the difference.
In summary, safe cooking practices are essential when using a solar oven. By supervising children, using protective gear, choosing a safe location, keeping the oven clean, and being prepared for minor accidents, you can ensure a fun and educational cooking experience that inspires a love for science and sustainability.
- What types of food can I cook in a solar oven? You can cook a variety of foods, including vegetables, rice, and even baked goods like cookies!
- How long does it take to cook food in a solar oven? Cooking times vary based on the food and the intensity of the sunlight, but it generally takes longer than conventional ovens.
- Can I use a solar oven on a cloudy day? Yes, but the cooking time will be significantly longer due to reduced sunlight.
- Is it safe to leave the solar oven unattended? It's best to supervise the solar oven while in use, especially when children are involved.
Experimenting with Recipes
Once your solar oven is up and running, it’s time for the fun part: cooking! The beauty of a solar oven is that it opens the door to a world of culinary adventures that are not only delicious but also educational. Imagine the excitement on your child's face as they watch their food transform under the power of the sun! This is where science meets the kitchen, and the possibilities are endless.
To kick things off, why not start with some simple recipes that are perfect for young chefs? Solar cooking is all about patience and experimentation, so encourage your kids to get creative! Here are a few ideas to spark their imagination:
- Solar S'mores: Layer graham crackers, chocolate, and marshmallows in a small pan. Cover it with foil to trap the heat, and let the sun work its magic!
- Veggie Kabobs: Thread colorful veggies onto skewers, drizzle with olive oil, and season with salt and pepper. Place them in your solar oven and watch them roast to perfection.
- Fruit Leather: Puree fresh fruits, spread them on a tray, and let the sun dry them out. This is a fun and healthy snack kids will love!
As you guide your little ones through these recipes, encourage them to observe and record their cooking times and results. How long did it take for the s'mores to melt? Did the kabobs cook evenly? These questions not only promote critical thinking but also deepen their understanding of how solar energy works. Plus, it’s a great way to incorporate a bit of math and science into the cooking process!
Don’t forget to remind them that different foods will react differently to solar cooking. For instance, foods with higher water content, like fruits and vegetables, will cook faster than denser items like meats. This provides a fantastic opportunity to discuss the science behind heat absorption and moisture evaporation. You could even set up a small experiment to see which foods cook best in the solar oven!
As safety is paramount, be sure to supervise your kids closely during the cooking process. Explain the importance of handling hot items with care, and ensure they understand the need for adult supervision when using the solar oven. This not only keeps them safe but also teaches them responsibility in the kitchen.
In the end, the experience of cooking with a solar oven is about much more than just the food; it’s about learning, exploring, and having fun together. So gather your ingredients, soak up some sun, and let the culinary experiments begin!
Q: Can I cook meat in a solar oven?
A: Yes, you can! However, it’s important to ensure that the meat reaches safe cooking temperatures. Use a food thermometer to check the internal temperature, and remember that cooking times may vary.
Q: What types of dishes work best in a solar oven?
A: Dishes that are simple and require longer cooking times, like stews, casseroles, and baked goods, are ideal. Foods that require a lot of moisture tend to do well, too.
Q: How long does it take to cook food in a solar oven?
A: Cooking times can vary greatly depending on the intensity of the sunlight and the type of food. Generally, expect cooking times to be longer than conventional ovens, often ranging from 1 to 4 hours.
Q: Can I use my solar oven on cloudy days?
A: While solar ovens work best in direct sunlight, you can still use them on cloudy days, though cooking times will be longer. Just be sure to monitor the temperature and adjust your cooking times accordingly.
Learning Outcomes
Building a solar oven is not just a fun project; it’s a gateway to a world of educational benefits that can ignite a passion for science and sustainability in children. Through this hands-on experience, kids will engage with several key concepts that are crucial for their understanding of the world around them. For starters, they will learn about renewable energy sources and how harnessing the power of the sun can lead to sustainable cooking practices. This knowledge is particularly relevant in today’s world, where understanding the impact of energy consumption is vital.
Moreover, constructing a solar oven encourages problem-solving skills. As children navigate through the building process, they will face challenges that require critical thinking and creativity to overcome. For instance, they might need to adjust the angle of the reflector to maximize sunlight exposure or find innovative ways to insulate the oven for better heat retention. This hands-on approach not only makes learning enjoyable but also fosters a sense of achievement when they see their efforts come to fruition.
Another significant outcome of this project is the understanding of energy conversion. Kids will grasp how sunlight is transformed into heat energy, which is a fundamental principle in physics. This concept can be reinforced through practical examples, such as measuring the temperature inside the oven at different times of the day or comparing the cooking times of various foods. By engaging in such activities, children will develop a deeper appreciation for the science behind solar cooking.
Furthermore, this project can serve as an excellent platform for discussing broader topics such as environmental stewardship and the importance of reducing our carbon footprint. By utilizing the sun's energy instead of traditional fuel sources, children will learn about the implications of their choices and how they can contribute to a healthier planet. This is an invaluable lesson that extends beyond the kitchen and into their everyday lives.
To summarize, the learning outcomes of building a solar oven encompass:
- Understanding renewable energy and its applications.
- Enhancing problem-solving skills through hands-on construction.
- Grasping the principles of energy conversion.
- Fostering a sense of environmental responsibility.
In essence, this project is not just about cooking; it’s about cultivating a mindset that values innovation, sustainability, and scientific inquiry. As children experiment, learn, and create, they are not only making delicious meals but also paving the way for a brighter, more sustainable future.
Q: What materials do I need to build a solar oven?
A: You will need common household items such as cardboard, aluminum foil, plastic wrap, and a black pot or container. These materials are easily accessible and make for an effective solar cooker.
Q: How long does it take to cook food in a solar oven?
A: Cooking times can vary based on the intensity of the sunlight, the type of food, and the design of your solar oven. Generally, it can take anywhere from 30 minutes to several hours to cook food thoroughly.
Q: Is it safe for kids to use a solar oven?
A: Yes, solar ovens are generally safe for kids to use, especially when supervised by an adult. It's important to teach children about safe cooking practices and to handle hot items carefully.
Q: Can I use a solar oven on cloudy days?
A: While solar ovens work best on sunny days, they can still function on cloudy days, albeit less efficiently. It's a great way to teach kids about the variability of solar energy!
Frequently Asked Questions
- What materials do I need to build a solar oven?
To create a solar oven, you'll need some common household items like a cardboard box, aluminum foil, plastic wrap, and black construction paper. These materials are easy to find and make the building process fun and engaging for kids!
- How does a solar oven work?
A solar oven works by trapping sunlight and converting it into heat. The reflective surfaces direct sunlight into the cooking chamber, where the black interior absorbs the heat, allowing you to cook food using just the power of the sun!
- Can I cook anything in a solar oven?
Absolutely! You can cook a variety of foods in a solar oven, such as s'mores, baked potatoes, or even simple casseroles. The key is to choose recipes that require slow cooking, as solar ovens typically take longer to cook than conventional ovens.
- Is it safe for kids to use a solar oven?
Yes, using a solar oven can be a safe activity for kids, especially with adult supervision. It's important to teach them about safety practices, like avoiding direct contact with hot surfaces and ensuring the oven is stable during use.
- How long does it take to cook food in a solar oven?
Cooking times can vary based on the type of food and the intensity of the sunlight. Generally, expect cooking times to be longer than traditional methods, often ranging from 30 minutes to several hours. Patience is key when cooking with solar energy!
- What are some fun recipes to try in a solar oven?
Some fun recipes to try include solar s'mores, nachos, or even baked apples. These recipes are not only delicious but also provide a great opportunity for kids to experiment and learn about how different foods react to solar heating.
- Can I use a solar oven on cloudy days?
While solar ovens work best in direct sunlight, they can still cook food on cloudy days, albeit more slowly. The sunlight that penetrates through the clouds can still generate some heat, making it possible to use your solar oven even when the weather isn’t perfect!
- What are the educational benefits of building a solar oven?
Building a solar oven teaches kids about renewable energy, sustainability, and the science of heat transfer. It encourages hands-on learning and problem-solving skills, making it an enriching experience that combines science with cooking.


