DIY Doctor’s Kit: Medical Themed Crafts for Kids
Are you looking for a fun and engaging way to teach your kids about healthcare? Creating a DIY doctor’s kit can be a fantastic project that combines creativity with learning. This article explores various fun and educational crafts that allow children to create their own doctor’s kit, promoting imaginative play and learning about healthcare in an engaging way. By diving into these projects, kids not only get to explore their artistic side but also gain valuable insights into the world of medicine. So, roll up your sleeves and let’s get crafting!
Let’s kick things off with a simple and fun project: making a stethoscope! Using household materials like a plastic funnel and some flexible tubing, kids can create their very own stethoscope. This craft encourages creativity while teaching kids about the importance of this medical instrument in a doctor’s toolkit. Imagine your little one pretending to listen to their stuffed animal’s heartbeat, learning that a stethoscope helps doctors check on our health. It’s a fantastic way to spark curiosity about how our bodies work!
Next up, let’s discover how to assemble a pretend first aid kit! Gather some items like band-aids, cotton balls, and small containers to create a mini first aid kit. This activity helps children understand basic first aid concepts and the significance of being prepared for minor injuries. You can even create labels for each item, teaching them what each one is used for. This not only makes the kit look professional but also helps kids learn about safety and care in a fun way.
Now, let’s get creative by designing colorful bandages! This fun craft allows kids to personalize their first aid supplies, making them feel more involved in the process of healing and care. Using plain bandages or fabric strips, kids can use markers, stickers, or even stamps to create unique designs. Imagine a world where every bandage is a canvas for creativity! Not only does this make healing more fun, but it also helps children express their feelings and creativity.
What’s a doctor without a coat? Find out how to make a simple doctor’s coat from fabric or even paper! This craft adds an element of role play, encouraging kids to step into the shoes of a healthcare professional. A white coat can be easily crafted by cutting and sewing fabric or by using a large white shirt. Kids can even add their names to the coat, making it feel extra special. When they wear their coat, they’ll feel empowered to take on the role of a doctor, enhancing their imaginative play!
Now, let’s explore the creation of a medical chart where kids can track their patients' health. This craft fosters organizational skills while introducing children to the basics of patient care. Using a large piece of paper or a poster board, kids can create a chart where they can write down symptoms, treatments, and even funny diagnoses for their stuffed animals. It’s a playful way to learn about responsibility and care while keeping everything organized!
Introduce kids to anatomy using play-dough models! This hands-on activity helps them learn about the human body in a tactile and enjoyable manner, enhancing their understanding of health. Kids can use different colors of play-dough to create organs, muscles, and even a skeleton. This not only makes learning about anatomy fun but also allows them to visualize how our bodies work. Imagine them proudly showing off their play-dough creations and explaining how everything fits together!
Last but not least, let’s learn how to create faux prescription pads for imaginative play. This craft encourages kids to engage in role-playing scenarios, enhancing their storytelling and social skills. Using paper and markers, children can design their own prescription pads, complete with funny prescriptions for their stuffed animals. This not only sparks creativity but also teaches them about the importance of prescriptions in healthcare.
Finally, encourage kids to design and create their own medical tools from recycled materials. This creative project promotes environmental awareness while allowing children to think innovatively about healthcare instruments. Items like cardboard tubes, bottle caps, and old kitchen utensils can be transformed into pretend syringes, thermometers, and scalpels. Not only is this a fun way to recycle, but it also encourages kids to think outside the box and understand the tools doctors use!
Q: What materials do I need for these crafts?
A: Most of the materials can be found around your house, such as cardboard, fabric, markers, and recycled items. Get creative!
Q: Are these activities safe for young children?
A: Yes, most of these crafts use safe, non-toxic materials. However, adult supervision is recommended when using scissors or small items.
Q: How can I adapt these crafts for different age groups?
A: You can simplify tasks for younger children, like using stickers for bandage decorating, while older kids can handle more complex projects like sewing a doctor’s coat.
Q: Can these crafts be used in educational settings?
A: Absolutely! These crafts can be excellent for classrooms or educational workshops, promoting teamwork and learning about healthcare in a fun way.
Crafting a Stethoscope
Have you ever wondered what it feels like to be a doctor? Well, crafting a stethoscope at home can be your first step into that exciting world! Not only is this a fun and engaging activity, but it also gives children a chance to learn about one of the most essential tools in a doctor's toolkit. Imagine your little one walking around with their very own stethoscope, listening to the 'heartbeats' of their stuffed animals or even their friends. It's a fantastic way to blend creativity with education!
To make a simple stethoscope, you won't need to visit a medical supply store. Instead, gather some household materials that are probably lying around your home. Here’s what you’ll need:
- A plastic funnel (the kind you use for pouring liquids)
- A long piece of flexible tubing (like the kind used for aquariums)
- A few pieces of tape
- Some scissors
- Optional: paint or markers for decoration
Now, let’s dive into the crafting process! Start by taking the plastic funnel and attaching one end of the flexible tubing to it. Make sure it fits snugly; you can use tape to secure it if needed. The funnel will act as the part that goes on the patient’s chest, while the tubing will carry the sound to the listener. Next, take the other end of the tubing and place it around your neck or hold it up to your ears. Voila! You now have a homemade stethoscope!
But why stop there? Encourage your kids to personalize their stethoscopes! They can paint the funnel in vibrant colors or add stickers to make it truly their own. This not only makes the craft more enjoyable but also instills a sense of ownership and pride in their creation.
As your little doctors start using their stethoscopes, you can introduce them to the basics of how a stethoscope works. Explain that it amplifies sounds from the body, allowing doctors to listen to heartbeats and breathing. You can even create a fun game where they have to identify different 'heartbeats' from various stuffed animals. This kind of imaginative play not only fosters creativity but also helps children understand the importance of medical tools in healthcare.
In summary, crafting a stethoscope is not only a delightful activity but also an educational experience that opens the door to discussions about health and medicine. So, gather those materials, unleash your creativity, and let the little ones step into their roles as doctors for a day!
Creating a First Aid Kit
Creating a pretend first aid kit is not just a fun craft project; it's an exciting way to teach children about the importance of being prepared for minor injuries. Imagine your little ones, armed with their very own kits, ready to tackle any imaginary boo-boo that comes their way! This activity allows kids to explore the world of healthcare while fostering a sense of responsibility and care for others. So, how do you get started?
First, gather some household items that can be easily transformed into first aid supplies. You can use a small box or a bag as the main container for your kit. This will be the treasure chest of their medical tools! Here’s a list of items you might consider including:
- Band-aids (you can make your own colorful versions too!)
- Gauze and tape (cut pieces of paper or fabric can work as well)
- Small containers for ointments (empty bottles or jars)
- Play scissors (for pretend cutting)
- Plastic tweezers (you can make these from cardboard)
- Thermometer (a stick with markings can represent this)
As you assemble the kit, engage your kids in conversations about each item. Ask them questions like, “What do you think this band-aid is for?” or “How would you use the gauze?” This not only makes the experience interactive but also instills knowledge about basic first aid concepts. For instance, explain that a band-aid is used to cover small cuts and help them heal. This kind of dialogue can spark curiosity and encourage them to think critically about health and safety.
Next, let’s add a dash of creativity! Encourage your kids to decorate the box or bag that holds their first aid kit. They can use markers, stickers, or even paint to personalize it. This step makes the kit feel special and unique to them, enhancing their bond with their pretend medical supplies. You could even create labels for each item, which can be a fun way to practice reading and writing skills.
Once the kit is complete, it’s time for some role-playing! Set up scenarios where they can use their first aid kit. For example, they could play doctor to a stuffed animal that has a “hurt paw” or a sibling who needs a “bandage” after a “fall.” This imaginative play not only makes learning fun but also helps them understand the significance of being prepared for minor injuries in real life. After all, who knows when a scraped knee might happen during playtime?
In conclusion, creating a first aid kit is a wonderful blend of fun, creativity, and education. It empowers children to take charge of their health and the health of others in their imaginative world. By engaging in this craft, they learn valuable lessons about care, responsibility, and the basics of first aid, all while having a blast!
Q: What age is appropriate for this activity?
A: Children aged 4 and up can enjoy this activity, but supervision is recommended for younger kids, especially when using scissors or small items.
Q: Can we use real first aid supplies?
A: While it's great to have real supplies for actual emergencies, this craft focuses on pretend play. Using safe, non-hazardous items is best for imaginative play.
Q: How can I encourage my child to take this activity seriously?
A: Explain the importance of first aid and how it can help friends and family. Role-playing can also help them understand the significance of their pretend kit.
Decorating Bandages
Who said bandages have to be boring? In this delightful craft, kids can unleash their creativity by with vibrant colors and fun designs. This activity not only makes first aid supplies more appealing but also engages children in the healing process. Imagine a child proudly wearing a bandage they’ve decorated themselves, turning a simple injury into a badge of honor! With just a few materials, such as plain adhesive bandages, markers, and stickers, your little ones can transform ordinary bandages into unique works of art.
To get started, gather some basic supplies. You can use:
- Plain adhesive bandages
- Washable markers or fabric paints
- Stickers or stamps
- Glitter (if you’re feeling extra sparkly!)
Once you have everything ready, let the fun begin! Encourage your kids to think about their favorite colors, characters, or themes. They can create bandages that reflect their personality or even make themed bandages for friends and family. For instance, they might design superhero bandages for a friend who loves comics or floral patterns for someone who enjoys nature. This not only encourages artistic expression but also fosters a sense of empathy as they consider how their creations can cheer someone up when they’re feeling down.
After the decorating session, it’s time for a little role play. Kids can take turns pretending to be doctors and patients, using their personalized bandages in imaginative scenarios. This not only makes the healing process fun but also helps children understand the importance of caring for others. They’ll learn that a little creativity can go a long way in making someone feel better, both physically and emotionally.
Moreover, this craft can spark discussions about health and hygiene. As children decorate their bandages, you can talk about why we use bandages, how they help protect wounds, and the importance of keeping cuts clean. This turns a simple craft into a valuable learning experience, blending creativity with essential life skills.
So, gather those supplies, and let your kids’ imaginations run wild! By decorating bandages, they’re not just creating art; they’re learning about care, compassion, and the fun side of healthcare. Who knows? You might just inspire the next generation of doctors, nurses, or artists!
Q: Can we use any type of bandages for decorating?
A: Yes! While adhesive bandages are the most common, you can also use fabric bandages or even make your own from gauze and tape. Just ensure that whatever you use is safe for the skin.
Q: What if my child wants to decorate bandages for a friend?
A: That’s a fantastic idea! Decorating bandages for friends can be a wonderful way to spread cheer and show support. Just make sure to check for any allergies to materials used in the decorations.
Q: How can we clean up after decorating?
A: Since you’ll likely be using markers or paints, it’s best to lay down some newspapers or a plastic tablecloth to protect surfaces. Most washable markers will come off with soap and water, but it’s always good to check the packaging for specific cleaning instructions.

Making a Doctor's Coat
Have you ever watched your little one play pretend doctor, expertly diagnosing their stuffed animals or giving their siblings "check-ups"? One way to elevate that imaginative play is by creating a doctor's coat! Not only does this craft allow kids to dive deeper into their role-playing, but it also gives them a sense of ownership over their pretend healthcare practice. Plus, making a doctor’s coat is a fun and engaging activity that can be done with just a few materials you likely already have at home!
To get started, you don’t need to be a professional seamstress or have fancy fabric. In fact, you can use items like old t-shirts, pillowcases, or even large pieces of paper to create a simple yet effective doctor’s coat. The idea is to make something that resembles a coat without the need for complex patterns or sewing skills. Here’s a quick rundown of how you can make one:
- Materials Needed:
- Old white t-shirt or large piece of fabric
- Fabric scissors
- Fabric markers or paint for decoration
- Safety pins or fabric glue (optional)
Start by taking an old white t-shirt and cutting off the sleeves to create a sleeveless coat. If you're using fabric, cut it into a T-shape, leaving enough length for the coat to drape nicely. You can even add a collar for that extra touch of authenticity! Once you have the basic shape, let your child decorate it with fabric markers or paint. They can draw fun designs, write their name, or even add some medical symbols like a stethoscope or a heart!
For an added layer of fun and realism, you can create pockets on the coat. These pockets can hold essential "doctor tools" like toy syringes, band-aids, or even some of the crafts you’ve made together, like the colorful bandages. This way, the coat isn’t just a costume; it becomes a functional part of their play, enhancing their creativity and encouraging them to think like a healthcare professional.
Once the coat is complete, watch as your child transforms into the doctor they’ve always dreamed of being. They can practice their “doctor skills” on family members, friends, or even their favorite toys. This not only boosts their confidence but also helps them learn about empathy and care—two vital traits for anyone in the medical field. Plus, it’s a fantastic way to spark conversations about health and wellness in a fun, approachable way!
Q: Can I use other colors besides white for the doctor's coat?
A: Absolutely! While traditional doctor’s coats are white, you can use any color your child prefers. This can make the coat more personalized and fun!
Q: What if I don’t have fabric or a t-shirt?
A: No worries! You can use large sheets of paper or even a plastic poncho. Just be creative with what you have at home!
Q: How can I make the coat more durable?
A: If you want to make the coat last longer, consider using fabric glue to secure any decorations instead of just markers. You can also reinforce the seams if you’re sewing.
Q: Is this activity suitable for all ages?
A: Yes! Younger kids may need assistance, especially with scissors, but older children can enjoy making and decorating their own coats independently.

Building a Medical Chart
Creating a medical chart is an exciting way for kids to step into the world of healthcare while developing essential organizational skills. Imagine your child as a little doctor, ready to take notes on their imaginary patients! This craft not only enhances their creativity but also introduces them to the basics of patient care. Think of it as a fun mix of art and science, where they can express themselves while learning something valuable.
To get started, all you need are a few simple materials: some colorful paper, markers, and perhaps a binder or folder to keep everything organized. The goal is to create a chart that resembles a real medical record, complete with sections for patient information, symptoms, and even treatment plans. This can be a fantastic way for kids to learn about the importance of keeping accurate records in healthcare settings.
Here’s a simple way to structure their medical chart:
| Section | Description |
|---|---|
| Patient Name | Where kids can write the name of their imaginary patient. |
| Age | A space to note the age of the patient, helping them understand demographics. |
| Symptoms | A section for kids to list out what the patient is feeling, fostering empathy. |
| Treatment Plan | Encourages them to think critically about how to help their patient. |
Encourage your kids to decorate their charts with drawings or stickers, making it a personal and fun project. This not only enhances their artistic skills but also makes them feel more connected to the task at hand. Plus, it’s a great way to spark conversations about health and wellness. They can role-play different scenarios, perhaps even discussing what they would do if a patient had a cold or a scraped knee. This imaginative play promotes critical thinking and problem-solving skills, all while having a blast!
As they build their medical charts, you can introduce them to real-life medical terminology. For instance, explain what a "diagnosis" is or what "vital signs" refer to. This not only enriches their vocabulary but also gives them a sense of real-world application. You could even turn this into a mini-lesson about the human body or common illnesses, making the experience educational as well as entertaining.
In conclusion, building a medical chart is more than just a craft; it’s an engaging way for children to learn about healthcare, responsibility, and empathy. By encouraging them to take on the role of a doctor, you’re not only fostering creativity but also instilling a sense of care for others. So gather those materials, let their imaginations run wild, and watch as they create their very own medical world!
Q: What materials do I need to create a medical chart?
A: You will need colorful paper, markers, and optionally a binder or folder to keep everything organized.
Q: How can I make this activity more educational?
A: Introduce medical terminology and discuss real-life scenarios related to health and wellness.
Q: Can this activity be done alone or is it better with friends?
A: While kids can certainly enjoy this activity alone, doing it with friends can enhance the fun and promote collaborative play!
health.
This article explores various fun and educational crafts that allow children to create their own doctor’s kit, promoting imaginative play and learning about healthcare in an engaging way.
Learn how to make a simple stethoscope using household materials. This craft encourages creativity while teaching kids about the importance of this medical instrument in a doctor’s toolkit.
Discover how to assemble a pretend first aid kit with various items. This activity helps children understand basic first aid concepts and the significance of being prepared for minor injuries.
Get creative by designing colorful bandages. This fun craft allows kids to personalize their first aid supplies, making them feel more involved in the process of healing and care.
Find out how to make a simple doctor’s coat from fabric or paper. This craft adds an element of role play, encouraging kids to step into the shoes of a healthcare professional.
Explore the creation of a medical chart where kids can track their patients' health. This craft fosters organizational skills while introducing children to the basics of patient care.
Introduce kids to anatomy using play-dough models. This hands-on activity helps them learn about the human body in a tactile and enjoyable manner, enhancing their understanding of health.
Learn how to create faux prescription pads for imaginative play. This craft encourages kids to engage in role-playing scenarios, enhancing their storytelling and social skills.
Encourage kids to design and create their own medical tools from recycled materials. This creative project promotes environmental awareness while allowing children to think innovatively about healthcare instruments.
When we talk about health, we often think of physical well-being, but it encompasses so much more. Health is a holistic concept that includes mental, emotional, and social well-being. It’s like a three-legged stool: if one leg is weak, the entire structure becomes unstable. For children, understanding health is crucial as it sets the foundation for a lifetime of healthy habits.
Teaching kids about health can be both fun and informative. For instance, engaging them in discussions about nutrition, exercise, and hygiene can spark their interest in taking care of their bodies. You can even incorporate these lessons into your DIY doctor’s kit activities. For example, while creating a first aid kit, you can explain the importance of keeping wounds clean and how to prevent infections.
Moreover, health education can also cover emotional and mental well-being. Kids can learn about expressing feelings and the importance of talking to someone when they feel down. This can be integrated into role-playing scenarios where they act as doctors helping their “patients” not just physically, but emotionally too. It’s all about creating a safe space for them to explore these concepts.
Here are some key aspects to discuss with kids regarding health:
- Nutrition: Explain the benefits of eating a balanced diet with fruits, vegetables, and whole grains.
- Exercise: Encourage them to engage in physical activities they enjoy, whether it's playing outside or participating in sports.
- Hygiene: Teach the importance of washing hands and maintaining personal cleanliness to prevent illness.
- Mental Health: Discuss feelings and emotions, emphasizing the importance of talking about them.
By integrating these health concepts into their DIY doctor’s kit, children not only learn about the tools and practices of healthcare but also develop a comprehensive understanding of what it means to be healthy. It's like giving them a roadmap to navigate their health journey, equipping them with knowledge and skills they'll carry into adulthood.
Q: What materials do I need to create a DIY doctor’s kit?
A: You can use common household items like cardboard, fabric, markers, and even recycled materials to create instruments and supplies.
Q: How can I engage my child in learning about health?
A: Involve them in discussions about nutrition, exercise, and hygiene while participating in related crafts and role-playing activities.
Q: Are these crafts suitable for all ages?
A: Most of these crafts can be adapted for various age groups, but younger children may need assistance with certain tasks.
Q: How can I make health education fun for my child?
A: Incorporate games, storytelling, and hands-on activities that relate to health topics to make learning enjoyable.
This craft fosters organizational skills while introducing children to the basics of patient care.
This article explores various fun and educational crafts that allow children to create their own doctor’s kit, promoting imaginative play and learning about healthcare in an engaging way.
Learn how to make a simple stethoscope using household materials. This craft encourages creativity while teaching kids about the importance of this medical instrument in a doctor’s toolkit.
Discover how to assemble a pretend first aid kit with various items. This activity helps children understand basic first aid concepts and the significance of being prepared for minor injuries.
Get creative by designing colorful bandages. This fun craft allows kids to personalize their first aid supplies, making them feel more involved in the process of healing and care.
Find out how to make a simple doctor’s coat from fabric or paper. This craft adds an element of role play, encouraging kids to step into the shoes of a healthcare professional.
Explore the creation of a medical chart where kids can track their patients' health. This craft fosters organizational skills while introducing children to the basics of patient care.
Creating a medical chart is not just about drawing lines and filling in boxes; it's a fantastic way for kids to learn how to keep track of important information. Imagine a world where every detail matters—like a detective piecing together clues. Kids can jot down symptoms, track temperature, and note any medications, all while learning the importance of keeping records. This simple yet effective exercise introduces them to the basics of patient care, making them feel like real doctors!
To make this activity even more engaging, you can encourage your little ones to design their own medical chart templates. They can use colorful markers, stickers, and even photographs to personalize their charts. It’s a fantastic way to blend creativity with learning, making the process enjoyable and memorable. Plus, it helps them develop essential organizational skills that will serve them well in school and beyond.
Here’s a quick overview of what can be included in their medical chart:
| Section | Description |
|---|---|
| Patient Name | Who is the patient? (Could be a stuffed animal!) |
| Symptoms | What are they feeling? (e.g., cough, fever) |
| Temperature | What is their temperature? (Use a toy thermometer) |
| Treatment | What will they do to help? (Bandage, rest, etc.) |
As they fill out their charts, they’ll not only learn about the importance of keeping track of health information but also develop a sense of responsibility and care for others. This craft is a gateway to understanding how healthcare professionals manage patient information, making it an invaluable learning experience.
Introduce kids to anatomy using play-dough models. This hands-on activity helps them learn about the human body in a tactile and enjoyable manner, enhancing their understanding of health.
Learn how to create faux prescription pads for imaginative play. This craft encourages kids to engage in role-playing scenarios, enhancing their storytelling and social skills.
Encourage kids to design and create their own medical tools from recycled materials. This creative project promotes environmental awareness while allowing children to think innovatively about healthcare instruments.
- What age group is this DIY doctor’s kit suitable for? This activity is perfect for children aged 4 and above, as it encourages imaginative play and basic learning.
- Do I need special materials for these crafts? No, most materials can be found around the house, making it accessible and budget-friendly.
- How long does each craft take? Each craft can take anywhere from 30 minutes to an hour, depending on the child's engagement and creativity.
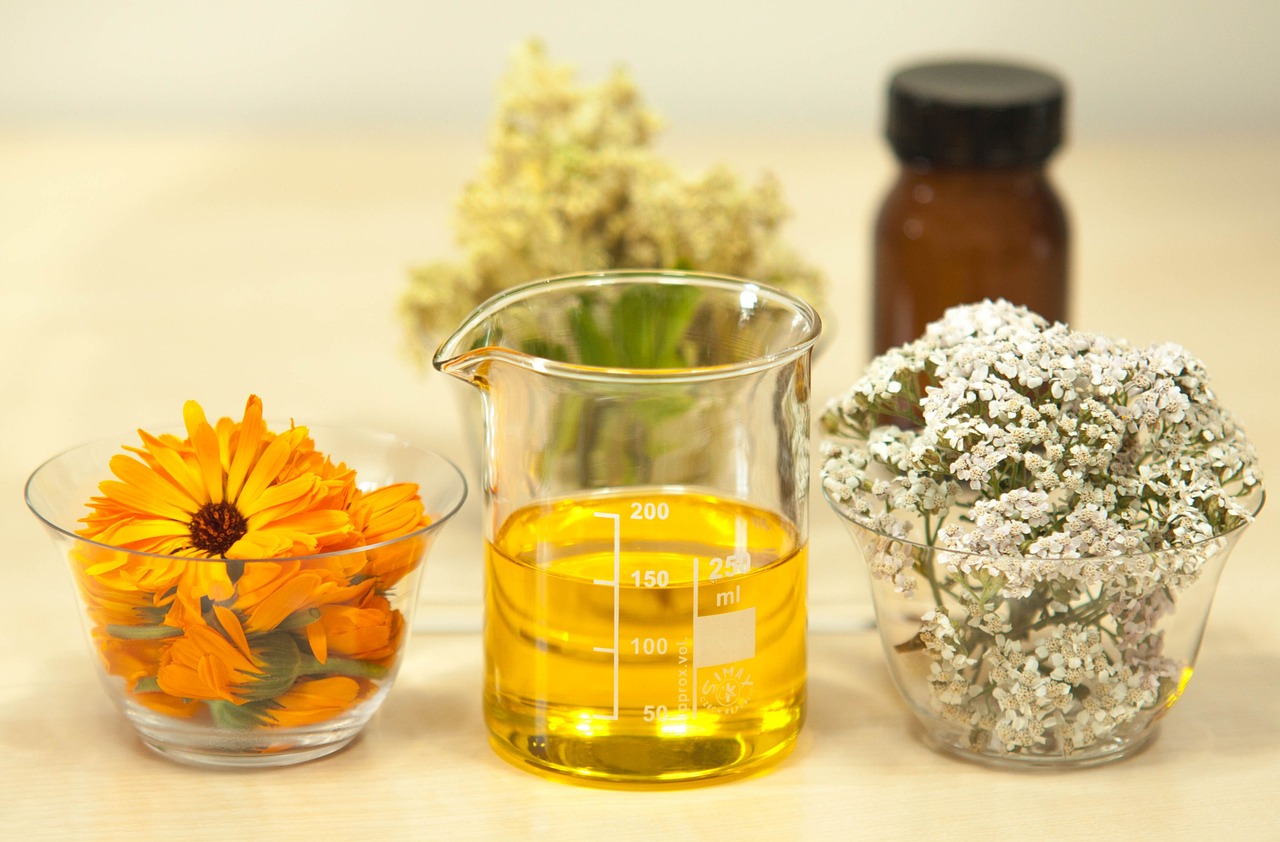
Using Play-Dough for Anatomy
Have you ever thought about how fun and educational it can be to learn about the human body using something as simple as play-dough? This hands-on activity not only allows kids to mold and shape their own anatomical models, but it also makes learning about anatomy an exciting adventure. Imagine your child creating a colorful representation of the heart, lungs, and other organs, all while engaging their creativity!
To get started, gather some basic supplies: a variety of play-dough colors, a rolling pin, and some simple tools like plastic knives or cookie cutters. These materials will empower your little ones to craft their own anatomy models. As they work, you can guide them through the different parts of the body, explaining their functions in a fun and relatable way. For instance, you might say, “The heart is like a pump that keeps our blood flowing, just like how this play-dough keeps its shape when we mold it!”
While creating their models, encourage children to explore the following anatomical features:
- Heart: A small red or pink blob can represent the heart. Discuss how it pumps blood throughout the body.
- Lungs: Use two pieces of dough shaped like balloons to illustrate how we breathe.
- Brain: A squishy gray or purple mass can symbolize the brain. Talk about how it controls everything we do.
- Skeleton: Create bones using white play-dough sticks to explain the importance of our skeletal system.
As your child builds each part, you can ask questions that spark their curiosity, such as, “What do you think happens when we breathe?” or “Why is it important for our heart to be strong?” This not only reinforces their learning but also enhances their critical thinking skills.
One of the best aspects of using play-dough for anatomy is that it’s incredibly versatile. If your child is particularly interested in a specific organ, they can spend extra time perfecting that model. Or, if they want to create an entire body, they can combine all their creations on a larger scale, perhaps even using a cardboard base to represent the human body. This can lead to a deeper understanding of how all the systems work together.
Moreover, this activity can be an excellent opportunity for family bonding. Parents can join in on the fun, creating their own models and sharing knowledge. You might find yourself laughing and learning together, which is a fantastic way to make education enjoyable. Not to mention, you can turn it into a mini-competition: who can make the most accurate representation of a body part?
In summary, using play-dough to explore anatomy is not just a craft; it's a gateway to understanding the complexities of the human body in a fun, interactive way. So, roll up your sleeves, grab that play-dough, and let the anatomical adventures begin!
Q: What age is appropriate for this activity?
A: This activity is suitable for children aged 4 and up, depending on their dexterity and ability to follow instructions.
Q: Can I use other materials instead of play-dough?
A: Absolutely! You can use clay, modeling foam, or even edible materials like marshmallows and gummy candies for a tasty twist.
Q: How long does this activity usually take?
A: The duration can vary, but typically it takes about 30 minutes to an hour, depending on how detailed the models are.
Q: Is this activity educational?
A: Yes! It teaches children about anatomy, encourages creativity, and enhances fine motor skills.

Crafting Prescription Pads
Crafting your own prescription pads is not just a fun activity; it’s a gateway into the imaginative world of healthcare that kids adore. Imagine your little one donning their doctor’s coat, stethoscope around their neck, and a personalized prescription pad in hand, ready to diagnose their stuffed animals! This craft is simple yet engaging, allowing children to explore the role of a doctor while developing their creative skills.
To get started, gather some basic materials you probably already have at home. You’ll need:
- White paper or cardstock
- Colored markers or crayons
- Scissors
- Glue or tape
- Optional: Stickers or stamps for decoration
First, cut the paper into smaller rectangles, mimicking the size of a real prescription pad. This tactile experience is great for kids as they practice their cutting skills! Next, let them unleash their creativity by designing the top of the pad. They can write “Prescription Pad” in bold letters and even add fun drawings of medical tools or their favorite cartoon characters. This step not only makes the pad personal but also helps them understand what a prescription pad typically looks like.
Once the design is complete, it’s time to create the actual prescription lines where they can scribble their “medical advice.” Encourage them to draw horizontal lines across the paper, leaving space for the patient’s name, diagnosis, and prescribed treatment. This is a fantastic opportunity to teach them about the structure of a prescription while keeping the activity light-hearted and enjoyable.
After they’ve filled in a few prescriptions for their toys, it’s fun to role-play! You can pretend to be the patient, describing your “symptoms,” while your child writes down their diagnosis and treatment plan. This interactive play not only enhances their storytelling skills but also helps them understand the importance of communication in healthcare.
Moreover, you can take this craft a step further by creating a “doctor’s office” setting. Use a table as the examination area, and arrange their toys as patients waiting for their turn. This imaginative play fosters social skills and empathy as they learn to care for others, even if it's just their stuffed animals.
Incorporating a little bit of learning into this craft can also be beneficial. For instance, you can discuss the different reasons why doctors write prescriptions and the importance of following medical advice. This not only enriches their understanding of health but also instills a sense of responsibility.
So, gather those materials and let your kids dive into the world of medicine with their very own crafted prescription pads. They’ll be having so much fun, they won’t even realize they’re learning!
Q: What age group is this activity suitable for?
A: This activity is perfect for children aged 5 and up, as it encourages creativity and role-playing in a safe environment.
Q: Can we use digital tools for this craft?
A: Absolutely! If your child enjoys using technology, you can create digital prescription pads using simple graphic design software or apps.
Q: How can I make this activity more educational?
A: You can integrate lessons about health and wellness by discussing what doctors do, the importance of medicine, and how to take care of oneself.

Designing Medical Tools
Creating your own medical tools is not just a fun craft; it’s a fantastic way for kids to unleash their creativity while learning about the world of healthcare. Imagine your child transforming everyday household items into innovative medical instruments! By using recycled materials, children can design and build tools like syringes, scalpels, or even surgical scissors. This hands-on project encourages them to think outside the box and understand the purpose of each tool they create.
To kick off this exciting crafting adventure, gather some common materials you might already have at home, such as:
- Plastic bottles
- Cardboard tubes
- Old utensils (like spoons or spatulas)
- Colored paper
- Glue and tape
Once you have your materials ready, the next step is to brainstorm what kinds of tools your child wants to create. This can be a wonderful opportunity for them to learn about different medical instruments and their uses. For example, they can make a stethoscope by decorating a cardboard tube and attaching it to two smaller tubes for the earpieces. Or, they might create a thermometer using a plastic straw and some colored water to demonstrate how temperature is measured.
As they craft, encourage your child to think critically about their designs. Ask questions like, “How would a doctor use this tool?” or “What materials do you think are best for making this?” This not only enhances their understanding of the tools but also promotes problem-solving skills. Plus, it’s a great way to integrate some science lessons into your crafting session!
When the tools are complete, why not set up a mini clinic at home? This can be a fun role-playing scenario where your child can practice using their newly crafted tools on stuffed animals or dolls. They can take on the role of a doctor, nurse, or even a patient, allowing them to explore different perspectives in a healthcare setting. This imaginative play not only solidifies their understanding of medical tools but also enhances their social skills as they interact with friends or family members during playtime.
To wrap up this creative endeavor, consider creating a display area for their tools. A simple table can serve as a “medical station” where they can showcase their designs. You might even want to create labels for each tool, explaining its purpose and how it’s used in real-life medical situations. This not only reinforces their learning but also gives them a sense of pride in their creations.
| Question | Answer |
|---|---|
| What materials are best for designing medical tools? | Recycled materials like plastic bottles, cardboard, and old utensils work great for crafting medical tools. |
| How can I encourage my child during this project? | Ask open-ended questions about their designs and the tools’ functions to stimulate critical thinking. |
| Can this activity be educational? | Absolutely! It teaches kids about healthcare, tool usage, and promotes creativity and problem-solving skills. |
Frequently Asked Questions
- What materials do I need to create a DIY doctor’s kit?
To craft your own doctor’s kit, you’ll need some common household items. Think about using cardboard, paper, fabric, markers, and even recycled materials. Items like scissors, glue, and tape will also come in handy. The beauty of this project is that you can get creative and use whatever you have at home!
- How can making a stethoscope help my child learn?
Creating a stethoscope is a fun way for kids to learn about the importance of this medical tool. As they craft, they’ll discover how doctors use stethoscopes to listen to heartbeats and check on their patients. It’s a hands-on experience that makes learning about healthcare engaging and memorable!
- What should I include in a pretend first aid kit?
A pretend first aid kit can include various items like band-aids (which your kids can decorate!), cotton balls, gauze, and even a toy thermometer. You can also add a toy syringe or a small notepad for writing down 'patient' information. This not only sparks imaginative play but also teaches them about basic first aid concepts!
- How do I make a doctor’s coat for my child?
Making a doctor’s coat is super simple! You can use an old white shirt or cut out a coat shape from fabric or paper. Let your child help decorate it with fabric markers or stickers to add a personal touch. This craft encourages role play and lets them step into the shoes of a healthcare professional!
- What is the purpose of a medical chart in this activity?
A medical chart helps kids learn about organization while introducing them to the basics of patient care. They can create their own charts to track their 'patients’ health, which fosters responsibility and attention to detail. Plus, it’s a fun way to mimic what real doctors do!
- Can play-dough really help kids learn about anatomy?
Absolutely! Using play-dough to create models of body parts is a tactile way for children to learn about anatomy. They can mold different organs, muscles, and bones, making the learning experience both fun and interactive. It’s like bringing their biology lessons to life!
- How do crafting prescription pads enhance play?
Crafting faux prescription pads encourages imaginative role-playing. Kids can write out prescriptions for their toys or friends, which enhances their storytelling and social skills. It’s a delightful way for them to engage in creative play while learning about the role of a doctor!
- What are some ideas for designing medical tools?
Encouraging kids to design their own medical tools can be a fantastic creative project! They can use items like bottle caps, cardboard tubes, and plastic containers to create unique instruments. This not only promotes environmental awareness but also allows them to think innovatively about healthcare instruments!


