
Homemade Marble Runs: Great Craft Activity for Kids
Are you looking for a fun and engaging way to keep your kids entertained while also sparking their creativity? Look no further than homemade marble runs! This exciting craft activity is not only a fantastic way for children to play but also an opportunity for them to learn and develop essential skills. Imagine the joy on their faces as they watch marbles race down the tracks they built themselves! In this article, we will explore the fun and creativity of building marble runs at home, providing you with ideas, materials needed, and step-by-step instructions for an engaging craft project that kids will absolutely love.
Building a marble run is like creating a mini amusement park right in your living room. It’s an adventure that encourages children to think critically and problem-solve as they figure out how to design tracks that allow marbles to roll smoothly from start to finish. Plus, it’s a great way to spend quality time together as a family, bonding over the shared experience of crafting something unique. So, roll up your sleeves and get ready to dive into the world of marble runs!
Throughout this article, we’ll cover everything you need to know to get started, from the benefits of marble runs to the materials you’ll need, along with some creative design ideas. Whether you want to keep it simple or go all out with complex structures, there’s something here for everyone. So, let’s get those creative juices flowing and start building some amazing marble runs!
Benefits of Marble Runs
Marble runs are not just a source of entertainment; they are a fantastic educational tool that provides numerous developmental benefits for children. When kids engage in building and playing with marble runs, they are not only having fun but also developing essential skills that will serve them well in life. For instance, as they design their tracks, they enhance their fine motor skills by manipulating small pieces, cutting materials, and assembling components. This hands-on experience is crucial for young children who are still mastering their hand-eye coordination.
Moreover, marble runs promote problem-solving abilities. As kids experiment with different designs, they encounter challenges such as how to keep the marbles from falling off the track or how to create a path that allows for the fastest descent. These challenges encourage them to think critically and devise creative solutions. It’s like being a mini-engineer, where every twist and turn of the track becomes a new puzzle to solve.
In addition to these cognitive benefits, marble runs also foster imaginative play. Children can create their own themes and stories around their marble runs, transforming a simple craft into an exciting adventure. For example, they might imagine that their marbles are racing in a grand tournament or navigating through a treacherous jungle. This kind of imaginative play is vital for cognitive development as it allows children to explore different scenarios and outcomes.
Furthermore, the collaborative aspect of building marble runs can’t be overlooked. When children work together, they learn the value of teamwork and communication. They share ideas, negotiate designs, and help each other troubleshoot problems, which are all essential skills for their social development. In essence, marble runs are more than just a craft; they are a multifaceted learning experience that combines creativity, critical thinking, and social interaction.
To summarize, the benefits of marble runs can be categorized as follows:
- Fine Motor Skills: Enhances dexterity and coordination through hands-on crafting.
- Problem-Solving: Encourages critical thinking and experimentation.
- Imaginative Play: Fosters creativity and storytelling.
- Teamwork: Promotes collaboration and communication among peers.
In conclusion, engaging with marble runs is a delightful way for children to play while simultaneously developing skills that are crucial for their growth. So, gather those recyclable materials and let the creativity flow!
Materials Needed
Creating a homemade marble run is not only a fun activity but also a fantastic opportunity to unleash creativity. The best part? You don't need to rush out to buy expensive materials; you can find most of what you need right at home! By using everyday items, you not only save money but also teach kids the value of recycling and reusing. So, what exactly do you need to get started on this exciting project? Let's dive into the essential materials that will help you build an amazing marble run!
First and foremost, you'll want to gather some recyclable materials. These items are perfect for crafting because they can be transformed into something new and exciting. Some common materials you might consider include:
- Cardboard tubes: Think of those empty toilet paper rolls or paper towel tubes. They are incredibly versatile and can be cut and arranged in various ways to create tracks.
- Plastic bottles: Old soda or water bottles can be repurposed into fun marble run sections. They can add a unique twist to your design!
- Cardboard boxes: A sturdy box can serve as a base for your marble run or can be cut up to create additional tracks and supports.
- Scissors and tape: These tools are essential for cutting and assembling your materials. Make sure you have a good pair of scissors and some strong tape or glue to hold everything together.
Now, let's take a closer look at how to effectively use these materials. Cardboard tubes can be cut into various lengths to create different track sections. You can also experiment with angles to make your marble run more exciting. For instance, a slight incline can add speed to the marbles as they race down the track. On the other hand, plastic bottles can be cut in half to create funnel-like sections that can either slow down the marbles or send them flying off in a new direction. The possibilities are endless!
Additionally, don't forget about decorative materials! Markers, stickers, and paint can be used to personalize your marble run and make it visually appealing. You could even create themed runs, like a jungle or a space adventure, by adding small toys or decorations that fit the theme. This not only makes the project more engaging but also allows children to express their creativity.
In summary, the materials needed for your marble run are simple and often found around your home. By using recyclable items, you not only contribute to a healthier planet but also inspire creativity in your children. So gather your supplies, roll up your sleeves, and get ready for an unforgettable crafting experience!
Q: Can I use any type of marble for my marble run?
A: Yes, you can use any small, round balls that fit through your tracks. Just make sure they are not too small to avoid choking hazards.
Q: How long does it take to build a marble run?
A: The time it takes can vary depending on the complexity of your design. A simple run might take an hour, while a more elaborate one could take several hours or even days.
Q: Is this activity safe for young children?
A: Yes, as long as you supervise them while using scissors and other tools. Always ensure that any small parts are kept away from very young children to avoid choking hazards.
Q: What if I don't have any recyclable materials?
A: If you don't have recyclable materials, you can use craft supplies from a local store, such as foam sheets, popsicle sticks, or even LEGO blocks to create your marble run!

Recyclable Materials
When it comes to creating a homemade marble run, the possibilities are endless, especially when you turn to . Not only does this approach help reduce waste, but it also ignites the imagination of both kids and adults alike. Imagine transforming everyday items into exciting components of a marble run! Items you might otherwise throw away can become the building blocks of a thrilling adventure for your marbles. So, what materials can you use? Here are some fantastic options:
- Cardboard Tubes: These are perhaps the most versatile materials you'll encounter. Whether they're from toilet paper rolls or paper towels, cardboard tubes can be cut, arranged, and stacked to create winding tracks that will keep marbles racing down to the finish line.
- Plastic Bottles: Don't toss those empty soda bottles just yet! With a little creativity, you can cut them in half and use them as funnels or ramps, adding an exciting twist to your marble run.
- Egg Cartons: These can be used to create multi-level tracks. Imagine marbles rolling down from one carton to another, creating a cascading effect that kids will love!
- Old Boxes: Any sturdy box can be transformed into a base for your marble run. They provide structure and stability, allowing for more ambitious designs.
By using these recyclable materials, you not only foster creativity but also teach kids the importance of sustainability. It’s a win-win situation! As you gather these items, encourage your little ones to brainstorm how they might fit into their marble run design. Maybe a plastic bottle can become a loop-de-loop, or a cardboard tube can serve as a bridge. The only limit is your imagination!
Additionally, when constructing your marble run, consider the environmental impact of your project. By choosing to repurpose items, you’re not just having fun; you're also instilling valuable lessons about recycling and resourcefulness in your children. So, gather those recyclable materials, roll up your sleeves, and let the creativity flow!
Q: What age group is suitable for building marble runs?
A: Marble runs can be enjoyed by children of various ages. Younger kids (ages 3-5) may need assistance, while older children (ages 6 and up) can take on more complex designs independently.
Q: How long does it take to build a marble run?
A: The time it takes to build a marble run depends on its complexity. Simple designs can be completed in under an hour, while more intricate structures might take several hours or even days, depending on how detailed you want to get!
Q: Can we use other materials besides recyclable ones?
A: Absolutely! While recyclable materials are fantastic for this project, you can also incorporate craft supplies like wooden blocks, foam pieces, or even LEGO bricks to enhance your marble run.
Q: What safety precautions should we take?
A: Always supervise young children when using scissors or other tools. Ensure that the marble run is stable and that there are no sharp edges. It's also a good idea to use non-toxic glue if you're assembling parts together.
Cardboard Tubes
Cardboard tubes are not just your average waste; they are a treasure trove of possibilities when it comes to creating a homemade marble run. Think about it: these simple, cylindrical shapes can easily be transformed into a variety of tracks, tunnels, and even ramps that will keep your little ones engaged for hours. The beauty of using cardboard tubes lies in their versatility. You can cut, bend, and arrange them in countless ways to create a unique marble run that suits your child's interests and abilities.
To get started, gather some used cardboard tubes from paper towels, toilet paper, or even wrapping paper. Once you have a collection, the fun begins! Here are a few tips to effectively use cardboard tubes in your marble run design:
- Cutting: Use scissors to cut the tubes into different lengths. Shorter pieces can create quick drops, while longer sections can serve as straightaways.
- Connecting: You can connect multiple tubes using tape or glue. This allows you to create winding paths or even loops that will make the marble's journey more exciting.
- Decorating: Let your child's creativity shine! Encourage them to paint or decorate the tubes with markers, stickers, or washi tape. This not only makes the marble run visually appealing but also adds a personal touch to the project.
Another fun idea is to create a multi-level marble run. By stacking cardboard tubes vertically, you can design a structure that allows marbles to travel down from one level to another. This adds an element of surprise and excitement, as kids will love watching the marbles race down the different paths. Plus, it’s a fantastic way to teach them about gravity and motion through hands-on play!
Incorporating cardboard tubes into your marble run project is not only an eco-friendly choice but also an excellent way to engage your child’s problem-solving skills. As they figure out how to connect the tubes and create a functional run, they are learning valuable lessons about engineering and design. So, don’t throw away those cardboard tubes; they are the building blocks of a fantastic marble run adventure!

Plastic Bottles
Plastic bottles are not just for your favorite beverages; they can be transformed into exciting and unique components for your homemade marble run! Imagine the thrill of watching a marble race through a tunnel made from a repurposed soda bottle—it's like giving new life to something that would otherwise be tossed in the recycling bin! The beauty of using plastic bottles lies in their versatility and availability. Most households have a few lying around, making them an excellent choice for this creative project.
To get started, gather some plastic bottles of various sizes. You can use everything from small water bottles to larger soda bottles, depending on the scale of your marble run. Here’s a simple step-by-step guide on how to effectively cut and attach plastic bottles:
- Cut the Bottle: Use scissors or a craft knife to carefully cut the bottle in half or create openings. Make sure to wear safety gloves to protect your hands!
- Design the Track: Consider how the cut sections will connect. You can create slopes by cutting the bottle at an angle or use the bottom half as a base for your marble run.
- Secure Connections: Use hot glue or tape to attach the bottle pieces together. Ensure they are sturdy enough to withstand the marble's movement.
- Decorate: Get creative! Paint the bottles or use markers to add color and personalization to your marble run.
One of the most exciting aspects of using plastic bottles is that you can create different sections for your marble run. For instance, you can make a vertical drop with a long bottle, or a twisty turn with a bottle cut into a spiral. The possibilities are endless! Plus, children will love the process of experimenting with different designs and seeing how their marbles navigate the course.
Another fun idea is to create a multi-level marble run using several plastic bottles stacked on top of each other. By cutting holes in the sides and connecting them with cardboard tubes, you can create a thrilling structure that adds an element of surprise as the marbles race down through various levels. This not only enhances the play experience but also encourages kids to think critically about gravity and motion.
Incorporating plastic bottles into your marble run project not only promotes creativity and problem-solving skills but also teaches kids the importance of recycling and reusing materials. So, the next time you finish a drink, think twice before tossing that bottle in the bin—your homemade marble run might just need it!
Q: Can I use any type of plastic bottle for the marble run?
A: Yes! You can use various types of plastic bottles, including water bottles, soda bottles, and even larger containers. Just ensure that the openings are big enough for the marbles to pass through.
Q: How do I secure the plastic bottles together?
A: You can use hot glue, tape, or even zip ties to securely attach the bottles. Make sure the connections are sturdy to withstand the movement of the marbles.
Q: Are there any safety concerns when using plastic bottles?
A: Always be cautious when cutting plastic bottles. Use safety gloves and scissors or a craft knife with care. Supervise children during the crafting process to ensure safety.
Q: Can I paint the plastic bottles?
A: Absolutely! Use non-toxic paint or markers to decorate the bottles. This adds a personal touch and makes the marble run visually appealing.
Crafting Techniques
When it comes to creating your own homemade marble run, mastering a few basic can make all the difference. First and foremost, you'll want to gather your materials and tools, ensuring you have everything at hand before diving into this exciting project. A good pair of scissors, a hot glue gun, and some colorful markers for decoration will be essential. Now, let’s break down the crafting process into manageable steps that will help you build a marble run that is not only fun to play with but also visually appealing.
One of the most important techniques is cutting. Whether you're using cardboard tubes or plastic bottles, precise cuts will ensure that your marble run pieces fit together snugly. For cardboard tubes, you can cut them into different lengths to create various track segments. Remember, the angles at which you cut can affect the slope and speed of the marbles, so feel free to experiment! If you're using plastic bottles, cut them in half or at an angle to create exciting drop zones or funnel effects that will add an element of surprise as the marbles race through.
Next up is gluing. A hot glue gun is your best friend here, as it provides a strong bond that can withstand the excitement of rolling marbles. When attaching pieces, make sure to hold them in place for a few seconds until the glue sets. This will prevent any mishaps during playtime. Additionally, consider using decorative tape or stickers to embellish your marble run. Not only does this add a personal touch, but it also makes the structure more visually appealing, which can enhance the overall play experience for kids.
As you assemble your marble run, think about incorporating some creative elements. For instance, you might want to add loops and jumps using flexible materials like straws or pipe cleaners. These can create thrilling moments as marbles soar through the air or spiral downwards. If you’re feeling adventurous, consider building multi-level runs. You can achieve this by stacking your tracks on top of each other, using cardboard boxes or sturdy books as platforms. This not only adds complexity to the design but also encourages kids to think critically about how the marbles will navigate through the different levels.
Finally, don’t forget to test your marble run as you go! This is where the real fun begins. After assembling a section, drop a marble and watch how it travels. This will help you identify any areas that need adjustment, whether that's adding more support or altering the angle of a track. Plus, it’s a great way to engage kids in the process, allowing them to see their ideas come to life. Remember, crafting is about exploration and creativity, so embrace the process and let your imagination run wild!
Q: What materials are best for building a marble run?
A: You can use a variety of materials, including cardboard tubes, plastic bottles, straws, and even wooden blocks. The key is to use items that are lightweight yet sturdy enough to hold the weight of the marbles.
Q: How can I make my marble run more challenging?
A: To increase the challenge, incorporate loops, jumps, and multi-level designs. You can also adjust the angles of the tracks to change the speed and direction of the marbles.
Q: Is it safe for kids to use hot glue guns?
A: While hot glue guns can be safe for older children under supervision, it's important to supervise younger kids closely to prevent burns. Always prioritize safety and consider using non-toxic glue alternatives if needed.
Q: How long does it take to build a marble run?
A: The time required can vary based on the complexity of your design. Simple marble runs can take less than an hour, while more elaborate structures may take several hours or even a couple of days to perfect.
Design Ideas
When it comes to designing your homemade marble run, the sky's the limit! You can let your imagination run wild, creating anything from simple tracks to complex structures that will leave your kids in awe. The beauty of building a marble run is that you can tailor it to your child's interests, whether they love dinosaurs, space, or even their favorite cartoon characters. Let's dive into some exciting design ideas that will spark creativity and fun!
For those just starting out, simple designs can be incredibly rewarding. Think of a basic track that consists of a few straight lines and gentle slopes. You can use cardboard tubes arranged in a zigzag pattern or even lay down a flat surface with a slight incline. The objective here is to get the marble rolling and see how far it can go. This not only teaches kids about gravity and motion but also allows them to experiment with angles and heights. For a touch of flair, consider decorating the track with colorful markers or stickers, transforming it into a vibrant raceway!
If you're feeling adventurous and your little ones are ready for a challenge, complex structures can take your marble run to the next level. Imagine incorporating loops, jumps, and even multi-level designs! You can create a thrilling roller coaster effect by strategically placing cardboard tubes that spiral up and down. Adding a jump can be as simple as using a small ramp made from a piece of cardboard, giving the marble a delightful lift. You might also consider creating a multi-level run by stacking boxes or using plastic bottles to elevate parts of the track, allowing marbles to cascade down from one level to another.
Don't forget about the theme of your marble run! Themes can make the project even more engaging. For instance, if your child loves the ocean, you can decorate the run with blue and green colors, adding fish stickers or even creating a mini underwater scene. Alternatively, a space theme could feature dark colors and stars, with marbles representing planets racing through the cosmos. The possibilities are endless, and incorporating a theme can turn a simple craft into a captivating adventure.
Lastly, consider involving your children in the design process. Ask them what shapes or features they would like to include in their marble run. This not only makes them feel invested in the project but also enhances their creativity and problem-solving skills. You might be surprised by the wild ideas they come up with! Remember, the most important part of this activity is to have fun and enjoy the creative journey together.
Here are some common questions parents might have about building homemade marble runs:
- What age is appropriate for building a marble run? Marble runs are suitable for children aged 4 and up, but younger kids can participate with supervision.
- What materials are best for creating a marble run? Cardboard tubes, plastic bottles, and other recyclable materials are great for building marble runs.
- How can I ensure the marble run is safe for my child? Always supervise young children, ensure that all materials are non-toxic, and avoid sharp edges when crafting.
- Can we reuse the materials for other projects? Absolutely! The beauty of using recyclable materials is that they can be repurposed for various craft projects.
Simple Designs
Creating simple designs for your homemade marble run is a fantastic way to introduce kids to the world of engineering and creativity without overwhelming them. These designs can be both fun and educational, allowing children to explore the principles of gravity, momentum, and balance while they play. One of the best aspects of simple marble run designs is that they don’t require a ton of materials or advanced crafting skills. With just a few items, you can create an engaging experience that keeps kids entertained for hours.
To start, think about the basic structure of your marble run. A straightforward design might consist of a series of ramps and tunnels that guide the marbles from the top to the bottom. For instance, you can use cardboard tubes as the main tracks and create a sloped ramp using a piece of cardboard. This simple setup will allow marbles to roll smoothly down, providing instant gratification for young builders. Plus, it’s easy to modify! If a ramp is too steep, simply adjust the angle, or if the track is too short, add another tube to extend it.
Here’s a quick overview of how to create a simple marble run:
- Gather Materials: Collect cardboard tubes, tape, scissors, and a base to hold everything together.
- Design Your Track: Sketch a basic layout on paper before you start building. Think about where the marbles will enter and exit.
- Assemble the Components: Cut the tubes to your desired lengths and attach them to your base using tape or glue. Ensure they’re secure enough to withstand the marble’s weight.
- Test and Adjust: Once assembled, test the marble run with a marble. Observe how it moves and make necessary adjustments to improve the flow.
Simple designs can also incorporate fun elements like tunnels or turns. For example, you can create a tunnel by cutting a hole in a cardboard box and placing a tube inside it. This not only adds an exciting feature but also makes the run visually appealing. Encourage the kids to decorate their marble run with markers, stickers, or paint to personalize their creation. This aspect of crafting allows for imaginative play, as they can create themes around their marble runs, such as a jungle safari or a space adventure.
Overall, simple designs serve as a perfect starting point for kids to learn about construction and physics while having a blast. They can easily evolve into more complex structures as their skills and confidence grow, making marble runs a versatile and engaging craft project for all ages. So, gather your materials, unleash your creativity, and let the marble rolling begin!
Q: What age group is suitable for making marble runs?
A: Marble runs can be enjoyed by children of various ages. For younger kids, simple designs are best, while older children can tackle more complex structures.
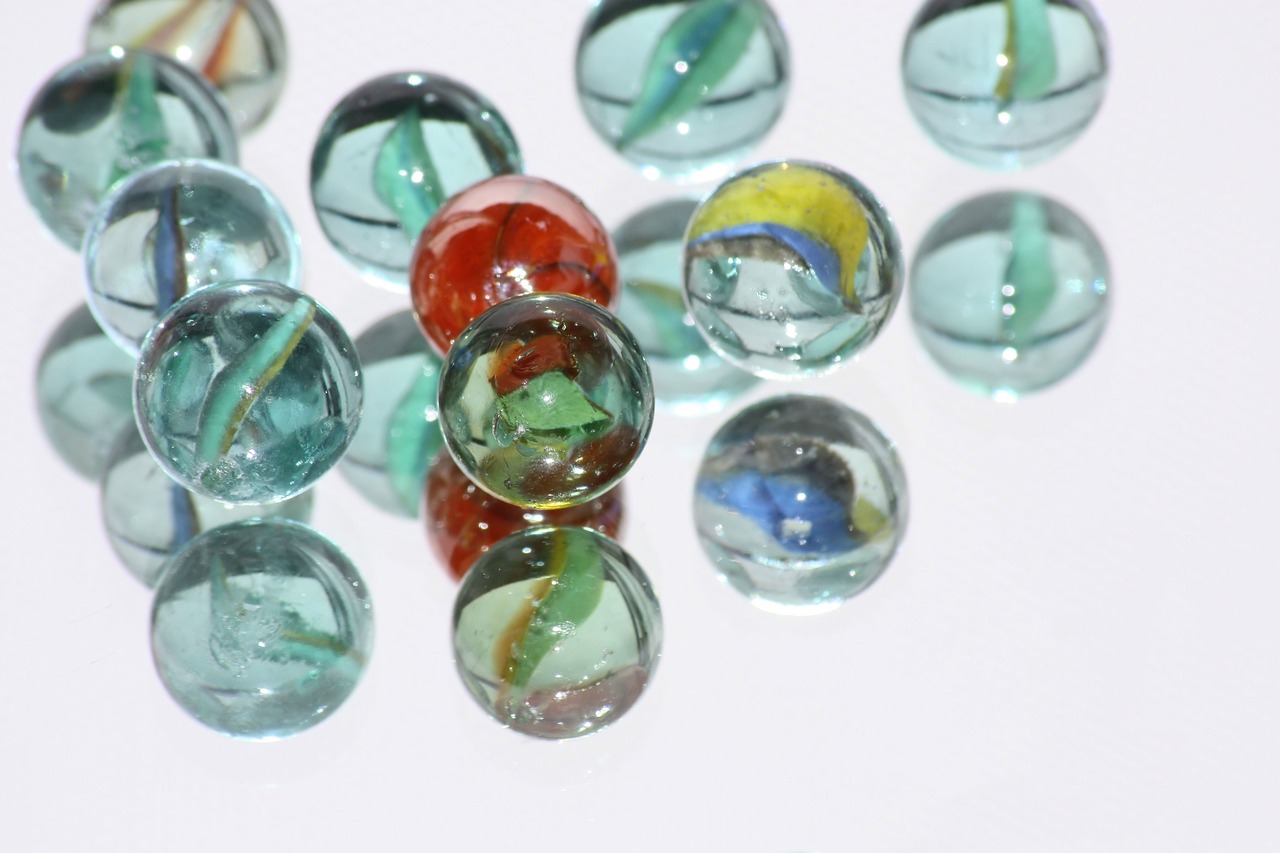
Q: Can I use any type of marble?
A: Yes! While traditional glass marbles work well, you can also use plastic marbles or even small balls to see how they perform differently on the track.
Q: How can I make the marble run more challenging?
A: To increase the challenge, add obstacles, loops, or varying heights to your marble run. This encourages problem-solving and critical thinking.
Q: What if I don't have cardboard tubes?
A: No worries! You can use other materials like plastic bottles, paper cups, or even LEGO bricks to create your marble run.
Complex Structures
When it comes to building marble runs, taking the leap into can be an exhilarating experience for both kids and adults alike. Imagine the thrill of watching a marble twist and turn through loops, jump over ramps, and navigate multi-level designs! These intricate builds not only provide a more challenging project but also enhance problem-solving skills and foster creativity. So, how do you go about creating these remarkable marble runs? Let's dive into some exciting ideas and techniques!
To start off, consider incorporating loops into your design. Loops add an element of surprise and excitement, as marbles race around in a circular motion before continuing down the track. You can create loops using cardboard tubes or flexible materials like plastic bottles. The key is to ensure that the loop is wide enough for the marble to pass through smoothly, but not so wide that the marble loses momentum. A well-constructed loop can be the centerpiece of your marble run, captivating the attention of anyone watching.
Next up, think about adding jumps. Jumps can be created by elevating a section of the track and allowing the marble to leap from one point to another. This can be achieved by using small ramps made from cardboard or even plastic bottle caps. The thrill of seeing a marble soar through the air is sure to bring joy and excitement to the crafting process. Just remember to test the height of your jump; you want to strike a balance between thrilling and achievable!
To take it a step further, consider designing multi-level tracks. This can transform your marble run into a miniature amusement park! Using sturdy cardboard boxes or stacked books as platforms, you can create different levels for your marbles to travel between. Be sure to connect the levels with ramps or slides, allowing marbles to flow seamlessly from one height to another. This not only increases the complexity of your marble run but also adds a dynamic visual element that will keep kids engaged.
As you embark on this creative journey, don’t forget to experiment with different themes. Perhaps you want to create a space-themed run with stars and planets, or a jungle adventure filled with animal cutouts. Themes can add an extra layer of fun and storytelling to your marble run, making it more than just a craft project. You can even encourage your kids to come up with their own themes, fostering their imagination and creativity.
Lastly, while building these complex structures, remember that collaboration can enhance the experience. Encourage your children to work together, sharing ideas and techniques as they build. This not only makes the project more enjoyable but also teaches valuable lessons about teamwork and communication. After all, the joy of building a marble run lies not just in the final product, but in the shared experience of creating something amazing together!
- What materials are best for building complex marble runs?
While you can use various materials, cardboard tubes, plastic bottles, and even wooden blocks are great options for creating complex structures. The key is to use items that are sturdy enough to support the design.
- How can I ensure my marble run is stable?
Make sure to use strong adhesives, like glue or tape, to secure your pieces. Additionally, building a wide base will help prevent tipping over, especially for taller structures.
- Can I add decorations to my marble run?
Absolutely! Decorating your marble run can enhance its visual appeal. Use paints, stickers, or even natural elements like leaves to create a unique look.

Safety Tips
When diving into the exciting world of homemade marble runs, safety should be your top priority. While crafting with kids can be a blast, it's important to ensure that everyone stays safe throughout the process. First and foremost, always supervise children during the building phase. Kids can get a bit enthusiastic with scissors and glue, so having an adult nearby to guide them can prevent accidents. Remember, safety scissors are a great option for younger children, allowing them to participate without the risk of injury.
Additionally, when working with materials like cardboard and plastic, make sure that edges are smooth and not jagged. You can use sandpaper to smooth out any rough edges or cut pieces. This not only makes the marble run safer but also enhances the overall aesthetic of the project. Moreover, it’s wise to keep small items, like marbles themselves, out of reach of toddlers or younger siblings who might be tempted to put them in their mouths. In fact, consider using larger, safer balls for younger kids to eliminate any choking hazards.
Another essential aspect of safety is the workspace. Make sure the area where you’re crafting is clean and free from clutter. A tidy workspace minimizes distractions and reduces the risk of tripping over stray materials. Also, consider using a stable surface for building your marble run. A sturdy table or workbench will help prevent accidental collapses, which can happen if the structure is built on an unstable surface.
Finally, after your marble run is complete, take a moment to inspect it for any potential hazards. Check that all pieces are securely attached and that there are no sharp edges or loose parts. Encourage kids to play gently with their creations, and remind them that while the marble run is designed for fun, rough play could lead to accidents. By following these safety tips, you can ensure that your marble run experience is filled with joy and creativity, rather than mishaps.
Here are some common questions parents might have about homemade marble runs:
- What age is appropriate for kids to start building marble runs? Generally, children aged 5 and up can start crafting their own marble runs with adult supervision.
- Can I use any type of marble? While most marbles are fine, ensure they are not too small to avoid choking hazards. Larger marbles or balls are safer for younger children.
- How can I make my marble run more challenging? Incorporate loops, jumps, and varying heights to create a more complex structure that will engage older kids.
- What if my kids want to decorate their marble run? Encourage creativity! Use non-toxic paints, stickers, and other craft materials to personalize the marble run.
Frequently Asked Questions
- What materials do I need to create a homemade marble run?
To build a marble run, you can use common household items such as cardboard tubes, plastic bottles, tape, scissors, and marbles. These materials are not only easy to find but also allow for creativity and innovation in your designs!
- Are marble runs safe for young children?
Yes, marble runs can be safe for young children as long as proper supervision is provided. Make sure to use non-toxic materials and avoid small parts that could pose a choking hazard. Always encourage kids to play safely and responsibly.
- Can I use recycled materials for my marble run?
Absolutely! Using recycled materials like cardboard boxes, toilet paper rolls, and plastic containers not only helps the environment but also adds a unique touch to your marble run. Get creative and see what you can repurpose!
- What are some simple designs for beginners?
For beginners, starting with a straightforward track design is ideal. You can create a basic slope using cardboard tubes or a flat surface with small ramps. This allows kids to grasp the concept of gravity and motion without overwhelming complexity.
- How can I make my marble run more challenging?
If you're looking to add complexity, consider incorporating loops, jumps, or multi-level tracks. You can also introduce obstacles or themed sections to enhance the experience and keep the excitement alive!
- What are some crafting techniques I should know?
Key crafting techniques include cutting materials to the desired length, securely gluing components together, and decorating your marble run for a personal touch. These techniques will help ensure that your marble run is both sturdy and visually appealing.
- How can I clean up after building a marble run?
Cleaning up is simple! Gather any leftover materials, dispose of non-recyclable items properly, and store any reusable components for future projects. Encourage kids to help with the cleanup to instill a sense of responsibility.


