DIY Puzzles: A Fun and Educational Craft for Kids
Are you looking for a creative way to engage your kids while boosting their learning and motor skills? Well, look no further! DIY puzzles are not just a fun craft; they are a fantastic educational tool that can transform playtime into a productive learning experience. Imagine your children piecing together colorful shapes while enhancing their critical thinking and problem-solving abilities. It’s like giving them a treasure map where each piece they fit together leads them closer to discovering new skills!
Creating DIY puzzles allows children to explore their creativity while developing essential cognitive skills. As they work through the challenges of assembling their puzzles, they are also sharpening their hand-eye coordination and fine motor skills. It’s a win-win situation! Plus, the satisfaction they feel upon completing their own creations is immeasurable. Who wouldn’t want to see that proud smile on their child’s face when they finish a puzzle they crafted themselves?
In this article, we will explore the myriad benefits of DIY puzzles, share materials you can easily gather, and provide step-by-step instructions to guide you through the crafting process. So, roll up your sleeves and get ready to dive into the wonderful world of DIY puzzles, where fun meets education!
Creating DIY puzzles fosters critical thinking, improves hand-eye coordination, and enhances problem-solving skills in kids, making it an excellent educational tool for parents and educators alike. When children engage in puzzle-making, they learn to recognize patterns, shapes, and colors, all while having a blast. It’s like a brain workout disguised as play!
Moreover, working on puzzles together can strengthen family bonds. Imagine sitting around the table, working side by side with your little ones, sharing laughs, and helping each other out when someone gets stuck. These moments create lasting memories and teach children the value of teamwork. So, not only are they learning, but they’re also building relationships!
Gathering the right materials is crucial for creating effective DIY puzzles. Common items include cardboard, scissors, markers, and glue, which can be easily sourced from home or local craft stores. You may even find that you have everything you need lying around your house!
Selecting sturdy cardboard is essential for durability. Consider using recycled boxes or purchasing specialty puzzle boards to ensure your DIY puzzles withstand repeated use and play. The sturdier the material, the longer your puzzles will last, giving your kids countless hours of fun!
Encouraging creativity, decorating puzzle pieces with colors, patterns, or themes can make the crafting process more enjoyable for kids. Allowing them to express their artistic flair while creating personalized puzzles not only makes the project more engaging but also enhances their creativity. Think of it as turning a blank canvas into a masterpiece!
Now, let’s get into the nitty-gritty of making these delightful puzzles. Here’s a simple guide to help you and your kids create your own DIY puzzles:
- Gather your materials: cardboard, scissors, markers, and glue.
- Draw your desired puzzle design on the cardboard.
- Carefully cut out the puzzle pieces.
- Decorate each piece with colors or patterns.
- Assemble the puzzle to ensure all pieces fit together.
Starting with simple shapes makes it easier for younger kids to engage with DIY puzzles. Basic designs can help build confidence and skills before advancing to more complex creations. Think about starting with popular shapes like hearts, stars, or animals — these are familiar and fun!
For older children, introducing more intricate designs can challenge their problem-solving abilities, allowing them to explore different themes or even incorporate educational elements into their puzzles. Imagine a geography puzzle that teaches them about continents or a math puzzle that helps with addition and subtraction!
DIY puzzles can serve as educational tools by incorporating subjects like math, geography, or language arts, making them not only fun but also a valuable resource for learning at home. For instance, you can create puzzles that feature vocabulary words, historical figures, or even math problems that need to be solved to complete the puzzle.
Keeping kids engaged during the puzzle-making process is essential. Use interactive techniques, such as storytelling or collaborative designs, to spark their interest and make the experience enjoyable. Perhaps you can create a story around the theme of the puzzle, turning the crafting session into an adventure!
Proper storage and maintenance of DIY puzzles ensure longevity. Learn effective ways to organize and care for puzzles, keeping them in excellent condition for repeated enjoyment and learning. Use small boxes or bags to store each puzzle separately and keep them away from moisture to prevent damage.
Q: What age group is suitable for DIY puzzles?
A: DIY puzzles can be tailored for various age groups. Younger children can start with simple shapes, while older kids can handle more complex designs.
Q: Can I use materials other than cardboard?
A: Absolutely! You can use foam sheets, wood, or even thick paper. Just ensure the material is sturdy enough to hold up as a puzzle piece.
Q: How can I make puzzles more educational?
A: Incorporate educational themes, such as math problems, vocabulary words, or historical facts, into your puzzle designs to enhance learning while having fun.
The Benefits of DIY Puzzles
Creating DIY puzzles is not just a fun activity; it’s a fantastic way to help children develop essential skills while they play. When kids engage in making their own puzzles, they are not only tapping into their creativity but also fostering critical thinking. This process encourages them to think outside the box, analyze shapes, and solve problems, which are invaluable skills in today’s world.
One of the most significant advantages of DIY puzzles is the improvement of hand-eye coordination. As children cut, assemble, and fit the pieces together, they are honing their fine motor skills. This hands-on activity requires precision and control, which can translate to better performance in other areas, such as writing and sports. Additionally, the sensory experience of handling different materials can enhance their tactile awareness, making learning more engaging.
Moreover, DIY puzzles can be tailored to suit various learning objectives. For example, parents and educators can introduce educational themes into the puzzles, such as numbers, letters, or even geographical locations. This approach not only makes the puzzles more exciting but also reinforces learning in a playful manner. Imagine a puzzle where each piece represents a different country, complete with fun facts that spark curiosity about the world!
Furthermore, working on DIY puzzles encourages collaboration among children. Whether they are teaming up with siblings, friends, or parents, they learn to communicate effectively and share ideas. This social interaction can boost their confidence and help them develop teamwork skills, which are crucial in both academic and personal settings. Plus, let’s be honest, there’s something incredibly satisfying about completing a puzzle together, right?
In summary, the benefits of DIY puzzles extend far beyond mere entertainment. They are a powerful tool for enhancing critical thinking, improving motor skills, and fostering teamwork. So, why not gather some materials and start crafting? Your kids will thank you for the fun, and you’ll be amazed at how much they learn along the way!
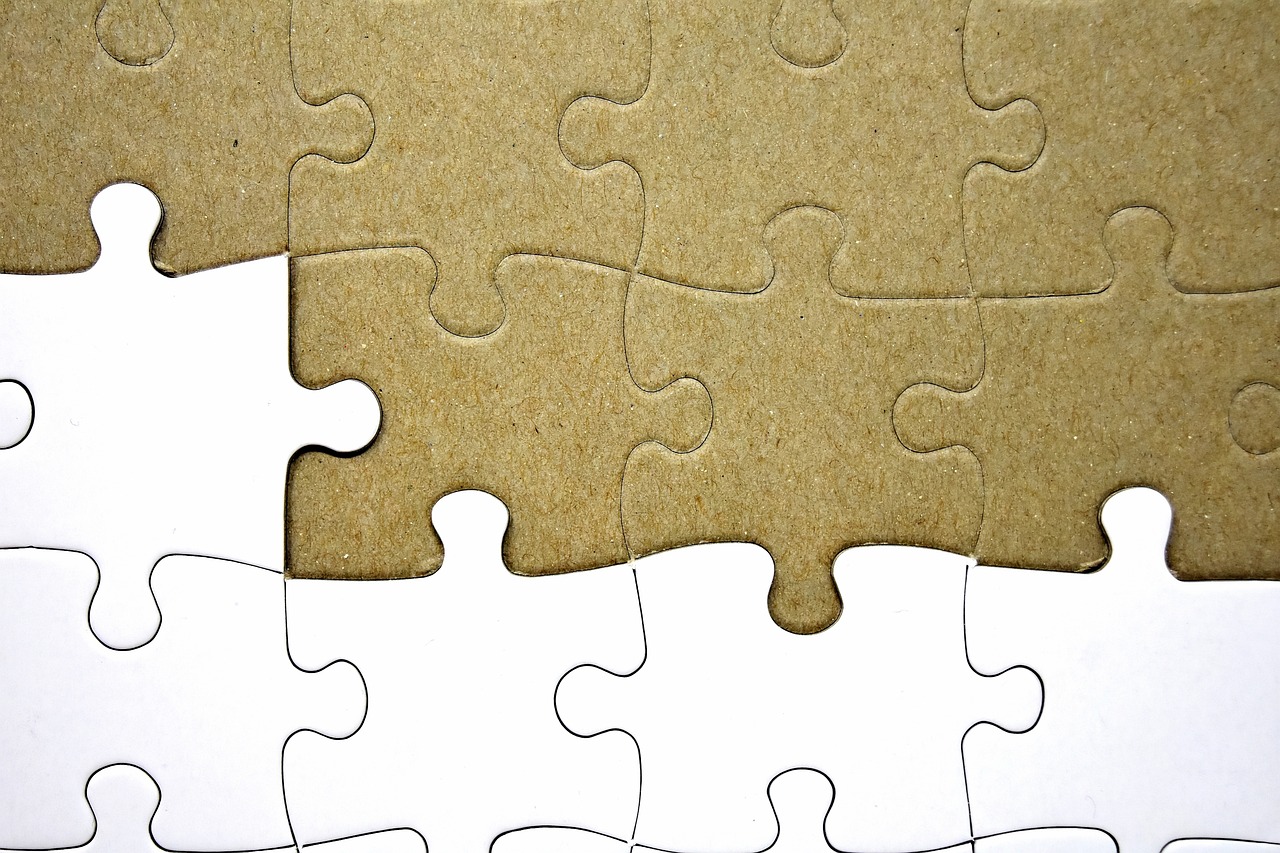
Materials Needed for DIY Puzzles
When it comes to creating your own DIY puzzles, having the right materials is key to ensuring a fun and successful crafting experience. You don’t need to break the bank or spend hours searching for supplies; many of the items you’ll need can be found right at home or easily purchased from a local craft store. The beauty of DIY puzzles is that they can be customized to fit your child’s interests and skill level, making them not just a craft but also an engaging educational tool.
To kick things off, let’s talk about the basic materials you’ll need to gather:
- Cardboard: This is the backbone of your puzzle. Look for sturdy cardboard, which can come from old boxes or even packaging materials. If you want something a bit more durable, consider purchasing specialty puzzle boards.
- Scissors: A good pair of scissors is essential for cutting out your puzzle pieces. Make sure they are appropriate for your child's age and skill level to avoid any accidents.
- Markers or Paint: These will be used to decorate your puzzle pieces. Encourage your kids to unleash their creativity by using various colors and patterns.
- Glue: If you’re planning to layer materials or attach decorations, glue will be your best friend. A non-toxic option is ideal, especially for younger children.
- Ruler and Pencil: These tools come in handy for measuring and marking out your puzzle design before cutting.
Once you have your materials ready, the real fun begins! You can adapt the complexity of your puzzle based on what you have available. For instance, if you’re using thicker cardboard, you might want to create larger pieces that are easier for younger kids to handle. Alternatively, thinner cardboard allows for more intricate designs, perfect for older children who are ready for a challenge.
Don't forget about the importance of recycling in this process. Using old boxes not only saves money but also teaches kids about sustainability. Plus, it adds a personal touch to their puzzles as they can decorate them in unique ways. Encourage your children to think outside the box—literally!—by incorporating different shapes, textures, and colors.
In summary, gathering materials for DIY puzzles is straightforward and can be a fun part of the crafting process itself. With just a few common items, you can create an engaging and educational activity that will not only entertain your children but also help them develop critical skills. So, roll up your sleeves, gather your supplies, and get ready for a creative adventure!
Q1: What age group is suitable for making DIY puzzles?
A1: DIY puzzles can be tailored for various age groups. Younger children can start with simple shapes, while older kids can tackle more complex designs.
Q2: Can we use other materials besides cardboard?
A2: Absolutely! While cardboard is the most common material, you can also use foam sheets, wood, or even recycled plastic to make your puzzles.
Q3: How can we store our DIY puzzles to keep them in good condition?
A3: Store your puzzles in a cool, dry place. Consider using a box or a folder to keep the pieces together and prevent them from getting damaged.
Choosing the Right Cardboard
When it comes to creating DIY puzzles, is a crucial step that can significantly impact the durability and overall quality of your finished product. Not all cardboard is created equal; some are flimsy and won't hold up to the enthusiastic handling of children, while others are robust enough to withstand repeated use. So, how do you know which cardboard to pick? Let’s dive into some helpful tips!
First and foremost, consider using recycled cardboard. This is not only an eco-friendly option but also a great way to repurpose materials you already have at home. Look for old cereal boxes, shipping boxes, or any sturdy packaging that can be transformed into puzzle pieces. Ensure that the cardboard is clean and free from any tears or holes that could compromise the integrity of your puzzle.
If you prefer to go the store-bought route, specialty puzzle boards are available at craft stores. These boards are designed specifically for crafting puzzles and are typically thicker than regular cardboard, making them ideal for more intricate designs. They come in various sizes, so you can choose one that best fits your project needs. Additionally, they are often smoother, allowing for a better drawing surface if you plan to decorate your puzzle pieces.
Another important factor to consider is the weight of the cardboard. A heavier cardboard will provide more sturdiness, making it easier for little hands to manipulate the pieces without bending or breaking them. A good rule of thumb is to look for cardboard that is at least 300 gsm (grams per square meter) if you want to ensure durability. This weight is typically found in thicker shipping boxes or craft boards.
Lastly, don't forget about the finish of the cardboard. A smooth finish will allow for easier drawing and coloring, while a textured surface can add an interesting element to your puzzle. If you're planning on painting or using markers, a smooth surface will yield better results and make the colors pop. Remember, the goal is to create a fun and engaging experience for kids, so the right cardboard can make all the difference!
In summary, selecting the right cardboard for your DIY puzzles involves considering factors such as durability, weight, and finish. Whether you choose to recycle old boxes or invest in specialty puzzle boards, making the right choice will ensure that your puzzles stand the test of time and provide hours of educational fun for children.
- What type of cardboard is best for DIY puzzles? - Look for sturdy cardboard like recycled shipping boxes or specialty puzzle boards, ideally around 300 gsm in weight.
- Can I use regular cardboard from cereal boxes? - Yes, as long as the cardboard is clean and in good condition, it can be a great option for making puzzles.
- How can I make my puzzles more durable? - Consider using thicker cardboard or applying a sealant after decorating to protect the surface.
Decorating Your Puzzle Pieces
When it comes to , the sky's the limit! This is where the fun truly begins, transforming plain cardboard shapes into vibrant, eye-catching creations that reflect your child's personality. Not only does decorating enhance the visual appeal of the puzzle, but it also allows children to express their creativity and imagination. Imagine your child taking a simple puzzle piece and turning it into a colorful butterfly or a roaring dinosaur. How cool is that?
One of the best things about decorating is that it can be as simple or as intricate as your child desires. Here are a few ideas to get those creative juices flowing:
- Coloring with Markers or Crayons: Simple yet effective, using markers or crayons can help children fill their puzzle pieces with their favorite colors.
- Stickers and Stamps: Kids love stickers! Incorporating stickers or stamps can add a fun dimension to the pieces, making them pop with personality.
- Painting: If you're feeling adventurous, grab some washable paints. Painting can be a great way for kids to learn about mixing colors while creating a masterpiece.
- Collage Techniques: Encourage your child to cut out pictures from magazines or use scrap paper to create a collage on their puzzle pieces. This not only enhances creativity but also develops fine motor skills.
While decorating, it's essential to keep in mind that the process should be enjoyable. Allow children to pick their themes, whether it be animals, space, or their favorite cartoon characters. This personal touch makes the puzzle even more special and engaging. Plus, it can serve as a fantastic conversation starter when they show off their creations to friends and family.
As you embark on this decorating adventure, don't forget to use materials that are safe and easy to clean up. Water-based paints, non-toxic markers, and glue are excellent choices. This way, you can focus on the fun without worrying about the mess. And remember, the more colorful and unique the puzzle pieces, the more exciting the game becomes!
Incorporating these creative activities not only makes the crafting process enjoyable but also reinforces the idea that learning can be fun. So, grab those materials and let your child's imagination run wild as they decorate their very own DIY puzzle pieces!
Q: What materials do I need for decorating puzzle pieces?
A: You can use markers, crayons, stickers, stamps, paints, and even scrap paper for collage techniques. Just make sure they are safe and non-toxic!
Q: Can I use any type of cardboard for my puzzles?
A: It's best to use sturdy cardboard to ensure durability. Recycled boxes work well, or you can purchase specialty puzzle boards for a more professional finish.
Q: How can I encourage my child to decorate their puzzle pieces?
A: Let them choose their themes and materials. You can also participate in the decorating process to make it a fun bonding activity!
Step-by-Step Instructions for Making Puzzles
Creating your own DIY puzzles can be an incredibly rewarding experience, not just for the kids but for parents too! It's like embarking on a mini-adventure right in your living room. So, let’s dive into the step-by-step instructions that will guide you through this exciting process. First, gather all your materials. You’ll need some sturdy cardboard, scissors, markers, and glue. If you want to add a personal touch, grab some stickers or decorative paper as well. Having everything at hand will make the crafting flow smoothly, like a well-oiled machine.
Once you have your materials ready, start by deciding on the design of your puzzle. This can be as simple as a basic shape, like a star or a heart, or something more complex like a scene from your child's favorite story. If you’re unsure, you can even sketch it out on paper first. Preparation is key! After finalizing your design, transfer it onto the cardboard. Use a pencil to lightly outline your shapes so you can easily cut them out later.
Now comes the fun part—cutting out the pieces! Use scissors to carefully cut along the lines you’ve drawn. Make sure to supervise younger children during this step, as scissors can be tricky. Once you have your pieces cut out, it’s time to decorate! This is where creativity shines. Let your kids unleash their artistic flair by coloring the pieces with markers, painting them, or even gluing on decorative paper. The goal is to make each piece unique, adding a personal touch that reflects their personality.
After decorating, it’s essential to let everything dry completely. While waiting, you could engage your kids in a fun story about the theme of the puzzle they are creating. This not only keeps their interest piqued but also enhances their imagination. Once the pieces are dry, you can assemble them to see how they fit together. If you want to take it a step further, consider adding a backing to your puzzle. This can be done by gluing the pieces onto a larger piece of cardboard, which makes it more durable and easier to handle.
Finally, once everything is assembled and dry, it’s time to put your puzzle to the test! Challenge your kids to put it together, and watch as they engage in problem-solving and critical thinking. You can even make it a family activity by timing each other and seeing who can complete the puzzle the fastest. Remember, the joy of DIY puzzles lies not just in the end product but in the process of creating them together.
For those interested in making more intricate designs, consider using a template. There are many online resources where you can find free templates to print and trace onto your cardboard. This can help you create themed puzzles that incorporate educational elements, such as maps for geography or numbers for math. The possibilities are endless!
In conclusion, making DIY puzzles is not only a fun activity but also a fantastic way to bond with your children while boosting their cognitive skills. So roll up your sleeves, gather your materials, and let the puzzle-making adventure begin!
Q: What age is appropriate for DIY puzzles?
A: DIY puzzles can be suitable for children as young as 3, but the complexity of the puzzle should match their developmental stage.
Q: Can I use materials other than cardboard?
A: Absolutely! You can use foam board, wood, or even thick paper, depending on the durability you need.
Q: How can I store the puzzles after making them?
A: Store your puzzles in a dedicated box or bag to keep them organized and prevent damage.
Simple Shapes for Beginners
When it comes to introducing kids to the world of DIY puzzles, starting with simple shapes is a fantastic way to ignite their creativity and build their confidence. Think about it: just like learning to walk before you run, kids need to grasp the basics before tackling more complex designs. Simple shapes such as circles, squares, and triangles can be both fun and educational. They help children develop essential skills while allowing them to express their artistic flair.
One of the best things about using simple shapes is that they can be easily transformed into various themes. For example, a square can become a house, a circle can represent the sun, and a triangle can morph into a tree. This versatility not only keeps the crafting process exciting but also encourages kids to think outside the box. To make it even more engaging, you can incorporate storytelling elements. Ask your child to create a puzzle that tells a story, using simple shapes as characters or settings.
Here's a quick overview of how to get started with simple shapes:
- Gather Materials: Collect cardboard, scissors, and markers. You can also use colored paper for added flair!
- Draw Shapes: Have your child draw their favorite shapes on the cardboard. Encourage them to use different sizes and colors.
- Cut Out Shapes: Assist them in carefully cutting out the shapes. This step helps improve their hand-eye coordination.
- Decorate: Let them unleash their creativity by decorating the shapes with colors, stickers, or drawings.
As they create their puzzle pieces, remind them that the goal is not just to finish but to enjoy the process. Making mistakes is part of learning, and every slip-up can lead to a newfound idea or a unique design! Once they've completed their simple shapes, they can mix and match to create their own puzzles, enhancing their problem-solving skills in the process.
In summary, starting with simple shapes is a wonderful way to engage young children in DIY puzzles. It not only makes the activity accessible but also sets the stage for more advanced designs in the future. So, grab some cardboard and let the fun begin!
Q: What age is appropriate for kids to start making DIY puzzles?
A: Kids as young as three can start with simple shapes, while older children can tackle more complex designs.
Q: How can I make the puzzle-making process more educational?
A: Incorporate themes related to math, science, or language arts to make the puzzles both fun and educational.
Q: What should I do if my child loses interest in making puzzles?
A: Keep the activity fresh by introducing new themes or materials, and consider making it a collaborative project.
Advanced Puzzle Designs
When it comes to , the sky's the limit! These puzzles can be a fantastic way for older children to stretch their creativity and problem-solving skills. By introducing more intricate shapes and themes, you can transform a simple cardboard piece into a brain-teasing masterpiece that not only challenges their minds but also keeps them engaged for hours. Have you ever thought about how a puzzle can be more than just a game? It can be a journey, a story, or even an adventure!
To kick things off, consider incorporating educational elements into your advanced puzzle designs. For instance, you could create a geography-themed puzzle where each piece represents a different country, complete with fun facts about each location. This not only makes the puzzle more engaging but also serves as a learning tool, reinforcing knowledge in a playful manner. Imagine your child piecing together a map of the world while learning about various cultures—how cool is that?
Another idea is to craft puzzles that feature math problems or language arts challenges. For example, you could design a puzzle where each piece contains a math equation, and the only way to fit the pieces together is by solving them correctly. This method not only challenges their logic but also reinforces their understanding of math concepts. Alternatively, you could create a word puzzle where children have to assemble pieces to form sentences or even stories, encouraging literacy and creativity.
For those who are feeling particularly adventurous, consider using mixed media in your puzzle designs. Why not combine cardboard with fabric, buttons, or even small trinkets? This approach not only adds texture but also makes the puzzle more visually appealing and interactive. Kids love tactile experiences, and incorporating different materials can turn a simple puzzle into a dynamic learning experience.
As you delve into advanced puzzle designs, remember to keep the difficulty level appropriate for your child's age and skill set. You want to challenge them, but not frustrate them. Start with moderate complexity and gradually increase the difficulty as they become more adept at solving puzzles. This incremental approach helps build their confidence and keeps them motivated to tackle even bigger challenges.
Lastly, don’t forget the importance of collaboration! Encourage your kids to work together on these advanced designs. Not only does this foster teamwork, but it also allows them to share ideas and learn from one another. You might even find that they come up with solutions you never thought of! So gather those craft supplies, unleash your imagination, and let the puzzle-making adventure begin!
- What materials do I need for advanced puzzle designs?
For advanced puzzles, you can use cardboard, scissors, markers, glue, and any other decorative items like fabric or buttons to enhance the design. - How can I make puzzles educational?
Incorporate themes like geography, math, or language arts into your puzzles. Each piece can represent a concept or question that needs to be solved. - What age group are advanced puzzles suitable for?
Advanced puzzles are typically suitable for children aged 8 and up, depending on their skill level and interest in challenges. - Can I use recycled materials for puzzles?
Absolutely! Using recycled materials is a great way to create puzzles while being eco-friendly. Just ensure the materials are sturdy enough for repeated use.
Incorporating Educational Themes
DIY puzzles are not just a fun way to spend time; they can also be an incredible educational tool that enhances learning in various subjects. By incorporating educational themes into your puzzles, you can turn a simple craft into an engaging learning experience for your child. Imagine your little one piecing together a puzzle that not only challenges their mind but also teaches them about math concepts, geography, or even language arts. This multifaceted approach not only makes learning enjoyable but also reinforces knowledge through hands-on activity.
For instance, you could create a puzzle featuring different countries of the world. Each piece could represent a country, complete with its flag and a fun fact. As your child assembles the puzzle, they’re not just having fun; they’re also absorbing information about geography and cultures. Similarly, math-themed puzzles can incorporate basic arithmetic problems on each piece, where solving the problem correctly allows them to fit the piece into the puzzle. This method of learning through play is not only effective but also memorable.
Moreover, incorporating themes into your DIY puzzles can be as simple or complex as you wish. You might want to consider the following educational themes:
- Math: Create puzzles that require solving equations to complete the picture.
- Language Arts: Use letters or vocabulary words as puzzle pieces to promote literacy.
- Science: Design puzzles that illustrate the life cycle of plants or animals.
- History: Develop puzzles that showcase significant historical events or figures.
In addition to these themes, you can encourage your child to create their own educational puzzles. This not only fosters creativity but also allows them to take ownership of their learning. Ask them what subjects they enjoy the most and help them brainstorm ideas for their puzzles. You might be surprised at how enthusiastic they become when they see their interests reflected in their creations!
By integrating educational themes into DIY puzzles, you’re not just crafting; you’re also paving the way for a deeper understanding of various subjects. The act of putting together a puzzle enhances cognitive skills, while the thematic content enriches their knowledge base. So, grab those materials and get started on a puzzle that is as educational as it is entertaining!
Q: What age is appropriate for DIY puzzles?
A: DIY puzzles can be tailored for various age groups. Simple shapes are great for toddlers, while older kids can handle more intricate designs.
Q: How can I make puzzles more challenging?
A: Introduce themes that require problem-solving or critical thinking, such as math equations or historical timelines.
Q: What materials do I need to get started?
A: Basic materials include cardboard, scissors, markers, and glue. You can also use recycled materials for a more eco-friendly approach.
Q: Can I store DIY puzzles for future use?
A: Yes! Properly storing your puzzles in a dry place and keeping them organized will ensure they last for many play sessions.
Tips for Engaging Kids in Puzzle-Making
Engaging kids in puzzle-making can be an exciting adventure that not only sparks their creativity but also enhances their cognitive skills. To make the experience enjoyable and memorable, consider adopting a few interactive techniques. For instance, storytelling can be a fantastic way to ignite their imagination. You could create a narrative around the puzzle theme, whether it's a treasure hunt, a journey through space, or a day in the life of their favorite animal. This narrative can serve as a backdrop for the puzzle they are about to create, making the entire process feel like a captivating story.
Another effective way to keep kids engaged is through collaborative designs. Encourage them to work together, perhaps with siblings or friends, to brainstorm ideas for their puzzles. This not only fosters teamwork but also allows them to share creative inputs and make decisions together. You might find that one child has a knack for drawing while another excels in planning out the puzzle's layout. By combining their strengths, they can create something truly special.
Incorporating themes that resonate with their interests can also keep their enthusiasm high. If your child loves dinosaurs, for example, suggest creating a dinosaur-themed puzzle. They could draw various species, and you could help them cut them out into puzzle pieces. This personal connection to the theme makes the crafting process much more engaging. Furthermore, don’t forget to celebrate their achievements! Once the puzzle is completed, take some time to admire their work, and perhaps even have a mini puzzle party where they can showcase their creations to family and friends.
Lastly, consider introducing challenges as they become more comfortable with the process. You might set a timer for them to see how quickly they can assemble their puzzle or challenge them to create a puzzle with specific criteria, like a certain number of pieces or a specific shape. This not only makes the activity more fun but also encourages them to think critically and improve their problem-solving skills. Remember, the goal is to create a joyful learning experience that they will cherish and want to revisit time and again!
Q: What age is appropriate for kids to start making DIY puzzles?
A: Kids as young as 4 years old can start making simple puzzles with parental guidance. As they grow older, the complexity of the puzzles can increase.
Q: What materials are best for making DIY puzzles?
A: Sturdy cardboard, scissors, markers, and glue are essential. You can also use foam sheets or wooden boards for more durable options.
Q: How can I make the puzzle-making process educational?
A: Incorporate educational themes such as math problems, geography maps, or language vocabulary into the puzzle designs to make learning fun.
Q: How can I store DIY puzzles to keep them in good condition?
A: Store puzzles in a cool, dry place. Use zip-lock bags or small containers to keep pieces together and prevent loss.
Storing and Maintaining Your DIY Puzzles
Once you've poured your creativity and effort into making DIY puzzles, it’s essential to ensure they remain in excellent condition for future enjoyment. Proper storage and maintenance not only prolong the life of your puzzles but also make them more enjoyable to use over time. So, how can you keep those colorful creations safe and sound? Let’s dive into some effective strategies!
First and foremost, storage is crucial. Consider investing in a sturdy, labeled box or container specifically designed for your puzzles. This will help to keep all the pieces together and prevent them from getting lost or damaged. If you’re using a cardboard box, make sure it’s strong enough to withstand regular handling. You might also want to use a ziplock bag for smaller puzzles or pieces, as this can provide an extra layer of protection against moisture and wear.
When it comes to maintaining your DIY puzzles, regular checks are a must. After each use, take a moment to inspect the pieces for any signs of wear or damage. If you notice any fraying edges or creases, consider repairing them with a little bit of tape or glue. This simple act can save your puzzles from becoming unusable and ensures they stay fun for the kids. Additionally, if your puzzles are decorated with markers or paint, ensure that the decorations are sealed properly to prevent fading. Using a clear spray sealant can help protect the artwork and keep those vibrant colors intact.
Another tip for maintaining your puzzles is to keep them away from direct sunlight and moisture. Sunlight can fade the colors, while moisture can warp the cardboard, making the pieces difficult to fit together. A cool, dry place is ideal for storage. If you have a dedicated craft area, consider designating a shelf or drawer just for your DIY puzzles. This not only keeps them organized but also makes them easily accessible for the kids when they want to play.
Lastly, consider creating a simple inventory system. You can keep a
| Puzzle Name | Theme | Pieces Count | Condition |
|---|---|---|---|
| Animal Kingdom | Wildlife | 12 | Good |
| Space Adventure | Science | 20 | Needs Repair |
| Ocean Wonders | Nature | 15 | Excellent |
By following these simple storage and maintenance tips, you can ensure that your DIY puzzles remain a source of joy and learning for your children for years to come. Remember, a little care goes a long way in preserving those precious creations!
Q: How can I clean my DIY puzzles?
A: For cleaning, gently wipe the surface of the puzzle pieces with a damp cloth. Avoid soaking them in water to prevent warping.
Q: What should I do if a piece gets lost?
A: If you lose a piece, consider creating a replacement piece using cardboard. You can even let your child decorate it to match the rest of the puzzle!
Q: Can I store puzzles in a humid area?
A: It’s best to avoid storing puzzles in humid areas, as moisture can damage the cardboard. Opt for a cool, dry place instead.
Frequently Asked Questions
- What materials do I need to create DIY puzzles?
To create DIY puzzles, you'll need some basic materials like cardboard, scissors, markers, and glue. These items are usually easy to find at home or can be purchased at local craft stores. The more creative you get with your materials, the more fun your puzzles can be!
- How can DIY puzzles benefit my child's learning?
DIY puzzles are fantastic for enhancing your child's critical thinking and problem-solving skills. As they piece together their creations, they improve their hand-eye coordination and develop a sense of achievement. Plus, incorporating educational themes into the puzzles can make learning subjects like math or geography much more engaging!
- What types of designs are best for beginners?
If you're just starting out, it's best to stick with simple shapes for younger kids. Basic designs help them build confidence and skills before moving on to more complex puzzles. Think of it like learning to walk before you run—start small and gradually increase the challenge!
- How can I keep my kids engaged during the puzzle-making process?
To keep kids interested in making puzzles, try using interactive techniques like storytelling or collaborative designs. Invite them to come up with themes or characters for their puzzles, turning the crafting session into a fun adventure that sparks their creativity!
- What should I do to maintain and store DIY puzzles?
Proper storage is key to ensuring your DIY puzzles last. Consider using ziplock bags or storage boxes to keep the pieces organized. Regularly check for wear and tear, and repair any damaged pieces to keep the puzzles in excellent condition for repeated enjoyment!


