
How to Build a Wooden Garden Shed: A Guide
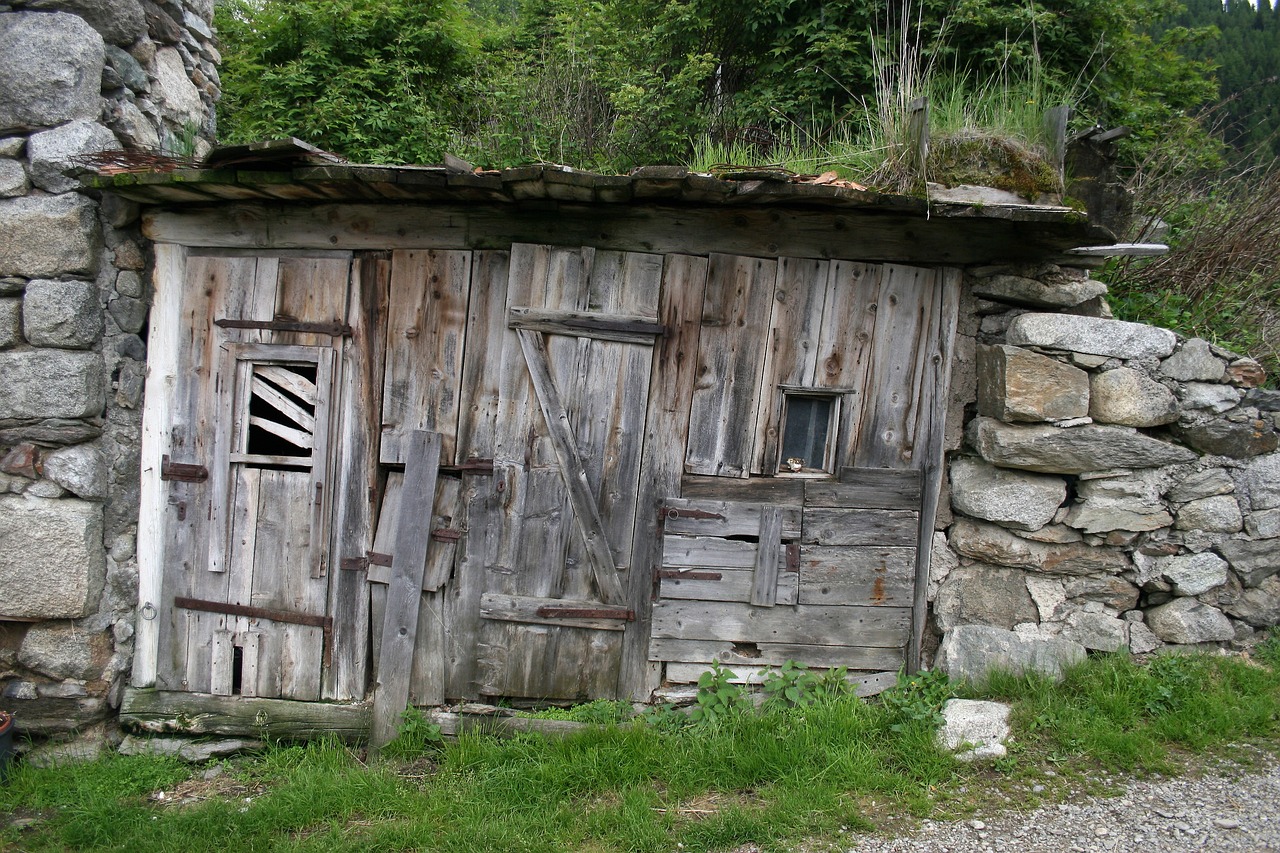
Building a wooden garden shed can feel like embarking on a thrilling adventure. It's not just about hammering nails and cutting wood; it's about creating a personal sanctuary for your gardening tools, a cozy space for hobbies, or even a workshop where creativity flows. This guide provides a comprehensive overview of building a wooden garden shed, covering essential planning, materials, construction techniques, and tips for maintaining your shed to ensure longevity and functionality. So, roll up your sleeves, grab your tools, and let’s dive into the world of shed building!
Effective planning is crucial for a successful shed project. Think of it as laying the groundwork for a strong relationship; without proper planning, things can go awry. Start by determining the size of your shed based on what you intend to store. Do you need a compact space for a few tools, or are you looking for a larger area to accommodate gardening supplies, bicycles, or even a potting bench? Next, consider the location. It should be easily accessible yet not obstructive to your garden's flow. Finally, think about the design. Are you leaning towards a rustic look, or do you prefer something more modern? Sketching out your ideas can help visualize the final product.
Selecting high-quality materials is essential for durability and aesthetics. Think of your shed as the armor for your garden tools; it needs to withstand the elements while looking good. Various wood types have different characteristics, and choosing the right one can make all the difference in how your shed performs and looks over time.
Different wood types offer various benefits, much like choosing the right ingredients for a delicious recipe. Here’s a quick rundown of popular choices:
| Wood Type | Pros | Cons |
|---|---|---|
| Cedar | Natural resistance to decay, beautiful grain | More expensive than other options |
| Pine | Affordable, easy to work with | Less durable, may require treatment |
| Plywood | Strong, cost-effective, versatile | Can warp if not sealed properly |
Budgeting for materials is vital. Just like planning a vacation, you need to know how much you can spend. The costs will vary based on the wood type you choose, so it’s wise to shop around and compare prices. For instance, while cedar is beautiful and durable, it might stretch your budget. If you're looking for cost-effective alternatives, consider using treated pine or plywood for the frame and cedar for the exterior finish.
For environmentally conscious builders, sustainable wood choices can make a significant difference. Look for woods certified by organizations like the Forest Stewardship Council (FSC). By opting for these materials, you’re not just building a shed; you're contributing to the health of our planet. Additionally, consider using reclaimed wood, which not only adds character to your shed but also minimizes waste.
Having the right tools can make the building process smoother. Imagine trying to bake a cake without the right utensils; it just won’t turn out well! Here’s a list of essential tools you’ll need:
- Measuring tape
- Level
- Hammer
- Saw (hand saw or power saw)
- Drill
- Safety goggles
Make sure to familiarize yourself with each tool's purpose and how to use them effectively. Safety should always come first, so don’t forget your goggles!
Understanding construction techniques is key to building a sturdy shed. It’s like knowing the rules of a game before you play; it sets you up for success. From laying a solid foundation to framing and roofing, each step is crucial to ensure your shed stands the test of time.
A solid foundation is critical for stability. Think of it as the bedrock of your shed. There are several options available:
- Concrete Slabs: Durable and stable, ideal for heavy loads.
- Wooden Skids: Easier to install, great for lighter sheds.
- Block Foundations: Flexible and cost-effective for uneven terrain.
Choose a foundation type that suits your shed design and the ground conditions of your garden.
Framing provides the structure of your shed. It’s like building the skeleton of a body; without it, everything else falls apart. Here, we discuss step-by-step assembly techniques, including wall framing and roof installation, to achieve a robust build. Make sure to follow your plans closely and double-check measurements to avoid costly mistakes.
Finishing touches enhance both functionality and aesthetics. This is where your creativity can shine! Consider painting your shed in colors that complement your garden or adding decorative trim to elevate its appeal. Don’t forget about practical features like ventilation or windows for natural light.
Choosing the right paint and sealants protects your shed from the elements. Look for weather-resistant products that will stand up to rain, sun, and snow. A good sealant can significantly extend the life of your shed, much like sunscreen protects your skin!
Maximizing interior space is crucial for efficiency. Here, we provide tips on shelving, hooks, and storage solutions to keep your garden shed organized and functional. Consider using vertical space for storage—shelves or pegboards can help keep tools off the ground and easily accessible.
Q: How long does it take to build a wooden garden shed?
A: Depending on your experience level and the complexity of the shed, it can take anywhere from a weekend to a few weeks. Planning and preparation can significantly speed up the process!
Q: Do I need a permit to build a garden shed?
A: This depends on local regulations. It's always best to check with your local zoning office before starting your project to ensure compliance.
Q: How can I maintain my wooden shed?
A: Regular maintenance includes cleaning, checking for rot or damage, and applying a fresh coat of paint or sealant every few years to protect it from the elements.

Planning Your Shed
Effective planning is crucial for a successful shed project. Before you dive into the exciting world of building your very own wooden garden shed, it’s essential to take a step back and think about a few key factors. First, consider the size of your shed. How much space do you need? Are you looking to store just a few tools, or do you envision a workshop where you can unleash your creativity? The size will dictate not only the materials you’ll need but also the overall design.
Next up is the location. Where will you place your shed? Ideally, you want a spot that’s easily accessible but also complements your garden’s layout. Think about sunlight exposure; you don’t want your shed casting a shadow over your prized plants. Additionally, consider any local zoning laws or regulations that may impact where you can build. A quick check with your local authority can save you a lot of headaches later on.
Design is another significant aspect of planning. What style do you envision? A traditional wooden shed, a modern minimalist design, or perhaps something more rustic? When deciding on the design, think about how it will fit into the overall aesthetics of your garden. You might want to sketch out your ideas or even use software to visualize your thoughts. Remember, the design should reflect your personality and the functionality you need.
Moreover, it’s wise to think about the foundation of your shed. A solid foundation is key to longevity and stability. Will you be using concrete slabs, gravel, or wooden skids? Each option has its pros and cons, and your choice may depend on the soil type and climate in your area. For instance, if you live in a region with heavy rainfall, a raised foundation might be your best bet to prevent water damage.
Lastly, don’t forget to create a budget. Building a shed can be a delightful project, but costs can add up quickly if you’re not careful. Factor in all your materials, tools, and any additional features you might want to include. It’s always a good idea to allocate a little extra for unexpected expenses. You might be surprised by how quickly costs can escalate!
In summary, planning your shed involves thoughtful consideration of size, location, design, foundation, and budget. By taking the time to plan effectively, you set yourself up for a successful and enjoyable building experience. Remember, this shed is not just a structure; it’s an extension of your gardening journey, a place where you can nurture your hobbies and passions.
- What is the best size for a garden shed? The best size depends on your storage needs. A small shed (6x8 feet) is great for tools, while a larger shed (10x12 feet or more) can accommodate gardening equipment and a workspace.
- Do I need a permit to build a shed? This varies by location. Always check with your local zoning office to see if you need a permit before starting your project.
- What materials are best for a garden shed? High-quality wood like cedar or treated pine is ideal for durability. Plywood can also be a cost-effective option.
- How long does it take to build a shed? It typically takes a weekend to a few weeks, depending on your skill level and the complexity of the design.
Choosing the Right Materials
When it comes to building your wooden garden shed, is paramount. Not only do the materials you select affect the overall durability and aesthetic appeal of your shed, but they also play a crucial role in how well your shed withstands the elements over time. Imagine investing your time and effort into a project only to have it succumb to rot or weather damage a few years down the line. To avoid this, let’s dive into the various wood types, fasteners, and finishes that can enhance both the longevity and appearance of your shed.
First off, the type of wood you choose can make a world of difference. Different wood species come with unique characteristics that can impact everything from cost to maintenance. For instance, cedar is often praised for its natural resistance to moisture and insects, making it an excellent choice for outdoor structures. On the other hand, pine is more affordable and readily available, but it may require more maintenance to prevent rot and damage. Understanding these differences will help you make an informed decision that aligns with your budget and longevity goals.
| Wood Type | Pros | Cons |
|---|---|---|
| Cedar | Natural resistance to decay and insects, beautiful appearance | Higher cost |
| Pine | Cost-effective, widely available | Requires treatment to resist rot |
| Plywood | Strong and versatile, economical | Can delaminate if not properly treated |
Next, let’s talk about fasteners. Using high-quality screws, nails, and brackets is essential for ensuring your shed remains structurally sound. You wouldn’t want to cut corners here, as improper fasteners can lead to sagging roofs or walls that buckle under pressure. Look for corrosion-resistant options, especially if you live in a humid or rainy area. Investing in the right fasteners is akin to using the right glue in a craft project; it holds everything together and ensures your hard work doesn’t come apart at the seams.
Lastly, the finishes you choose can dramatically affect both the look and longevity of your garden shed. A good quality paint or sealant will not only enhance the visual appeal of your shed but will also protect the wood from moisture, UV rays, and pests. Consider using a weather-resistant stain that allows the natural beauty of the wood to shine through while providing a protective barrier. Think of it as giving your shed a stylish raincoat that keeps it looking fresh and vibrant, even in the harshest conditions.
In summary, selecting the right materials for your garden shed involves careful consideration of wood types, fasteners, and finishes. The right choices will not only enhance the durability and aesthetics of your shed but will also ensure that your investment stands the test of time. So, take a moment to weigh your options and choose wisely—you’ll be glad you did!
- What is the best wood for a garden shed?
Cedar is often considered the best due to its natural resistance to decay, but pressure-treated pine is also a popular choice for its affordability. - How long will my shed last?
With proper materials and maintenance, a well-built wooden shed can last anywhere from 15 to 30 years or more. - Do I need a permit to build a garden shed?
It depends on your local regulations. Always check with your local authorities before starting construction.
Wood Types for Construction
When it comes to building your wooden garden shed, the choice of wood is not just a matter of aesthetics; it significantly impacts the durability and overall functionality of your shed. You want materials that can withstand the elements while also providing a pleasing look. So, let’s dive into some popular wood types and weigh their pros and cons, helping you make an informed decision that suits both your needs and budget.
Cedar is often hailed as the gold standard for outdoor structures. This wood is naturally resistant to rot and insects, which means it can last for decades with minimal maintenance. Its rich, warm color adds a beautiful touch to any garden, but be prepared for a higher price tag. If you’re looking for longevity and don’t mind spending a little more, cedar is a fantastic choice.
On the other hand, pine is a more budget-friendly option. It’s widely available and easy to work with, making it a popular choice for DIY enthusiasts. However, pine is more susceptible to rot and insects compared to cedar, so it requires regular treatment with sealants and preservatives to extend its life. If you’re willing to put in the maintenance work, pine can still be an excellent option for your shed.
Then there’s plywood, which is often used for the interior and flooring of sheds. It’s made from thin layers of wood veneer glued together, providing strength and stability. While plywood is versatile and relatively inexpensive, it’s essential to choose exterior-grade plywood that can handle moisture without warping. If you’re looking for a cost-effective material for the inside of your shed, plywood is a solid choice.
To give you a clearer picture, here’s a quick comparison of these wood types:
| Wood Type | Durability | Cost | Maintenance |
|---|---|---|---|
| Cedar | High | High | Low |
| Pine | Medium | Low | High |
| Plywood | Medium | Low | Medium |
In summary, the wood you choose will largely depend on your budget and how much time you’re willing to invest in maintenance. If you want a shed that looks great and lasts long, consider investing in cedar. If you're more price-conscious and ready to do some upkeep, pine might be your best bet. And for the interior, plywood can provide a functional and economical solution. Remember, your choice of wood is not just about today; it’s about how your shed will stand the test of time!
1. How do I choose the best wood for my garden shed?
Consider factors like durability, cost, and maintenance. Cedar is great for longevity, while pine is more affordable but requires upkeep.
2. Can I use treated wood for my shed?
Yes, treated wood is an excellent choice as it resists rot and insects, making it suitable for outdoor structures.
3. How often should I maintain my wooden shed?
It depends on the wood type. Cedar may need less frequent maintenance, while pine may require annual treatments.
Cost Considerations
When embarking on the journey of building your very own wooden garden shed, one of the most critical factors to keep in mind is the budget. It's like planning a road trip; if you don't know how much gas you'll need, you might end up stranded in the middle of nowhere! So, let's break down the costs associated with various materials and see how you can keep your expenses in check without compromising on quality.
The first thing to consider is the type of wood you'll choose. Different woods come with different price tags. For instance, cedar is often more expensive due to its natural resistance to rot and insects, making it a long-lasting choice. On the other hand, pine is usually more affordable but may require additional treatment to enhance its durability. Here’s a quick comparison of some common wood types and their average costs:
| Wood Type | Average Cost per Board Foot | Durability |
|---|---|---|
| Cedar | $3.00 - $5.00 | High |
| Pine | $2.00 - $3.00 | Medium |
| Plywood | $1.50 - $2.50 | Medium |
In addition to wood, you’ll also need to factor in costs for fasteners, roofing materials, and paint or sealants. Fasteners like screws and nails are often overlooked but can add up quickly, especially if you’re building a larger shed. Roofing materials can vary widely based on the style and type you choose, from basic shingles to more durable metal options. A rough estimate for roofing materials can range from $100 to $500, depending on your choice.
Now, let’s not forget about the tools you might need. If you're starting from scratch, investing in quality tools can be a bit of a hit to your wallet. However, consider borrowing or renting tools like saws, drills, and levels to save some cash. It’s like borrowing a cup of sugar from your neighbor instead of buying a whole bag when you only need a little!
Another crucial aspect of budgeting is considering eco-friendly options. Sustainable wood choices may come at a premium, but they can save you money in the long run through reduced maintenance and increased durability. Plus, you’ll be doing your part for the environment – a win-win situation!
To wrap up, while building your wooden garden shed can seem like a daunting financial commitment, careful planning and smart choices can help you keep costs manageable. Think of it as a balancing act: you want to invest wisely in quality materials while also keeping an eye on your budget. With the right approach, you can create a beautiful and functional shed that meets your needs without breaking the bank!
- How much does it typically cost to build a wooden garden shed? The cost can range from $500 to $3,000 depending on size, materials, and finishes.
- Can I build a shed without professional help? Yes, many DIY enthusiasts successfully build their own sheds with the right tools and guidance!
- What type of wood is best for outdoor use? Cedar and redwood are excellent choices due to their resistance to rot and insects.
- How do I maintain my wooden shed? Regularly check for signs of wear and tear, and apply sealants or paint to protect the wood from the elements.
Eco-Friendly Options
In today's world, where sustainability is becoming increasingly important, building a wooden garden shed can be an opportunity to make environmentally conscious choices. The good news is that there are plenty of available that not only minimize your environmental impact but also enhance the overall quality of your shed. One of the first steps is to consider using sustainably sourced wood. Look for certifications such as FSC (Forest Stewardship Council) or PEFC (Programme for the Endorsement of Forest Certification), which ensure that the wood comes from responsibly managed forests. This way, you can enjoy your shed while knowing you’re doing your part to protect our planet.
Another eco-friendly option is to explore reclaimed wood. This type of wood is salvaged from old buildings, furniture, or other structures and can add a unique character to your shed. Not only does using reclaimed wood reduce waste, but it also often comes with a lower price tag compared to new lumber. However, keep in mind that reclaimed wood may require some additional treatment to ensure it’s suitable for construction, but the effort is often worth it for the charm it brings.
Furthermore, consider incorporating natural finishes instead of synthetic paints or sealants. Natural oils and waxes can protect your shed without the harmful chemicals found in many commercial products. These eco-friendly finishes not only preserve the wood but also allow it to breathe, reducing the risk of rot and decay. Plus, they often have a much lower environmental impact, making them a smart choice for the eco-conscious builder.
Lastly, think about adding features that promote sustainability, such as a rainwater collection system. This allows you to gather rainwater from your shed roof, which can be used for watering your garden or cleaning purposes. Implementing such systems not only conserves water but also reduces your overall utility costs. In essence, when you choose eco-friendly options for your garden shed, you’re not just building a structure; you’re creating a sustainable space that benefits both you and the environment.
Q: What are the benefits of using reclaimed wood for my shed?
A: Reclaimed wood is not only sustainable but also adds character and uniqueness to your shed. It often requires less energy to process, reducing your carbon footprint.
Q: How can I ensure the wood I buy is sustainably sourced?
A: Look for certifications like FSC or PEFC, which indicate that the wood comes from responsibly managed forests.
Q: Are natural finishes really effective for protecting my shed?
A: Yes, natural oils and waxes can provide excellent protection while allowing the wood to breathe, which helps prevent rot.
Q: What is a rainwater collection system, and how does it work?
A: A rainwater collection system captures rainwater from your shed's roof, which can then be stored and used for various purposes, promoting water conservation.
Essential Tools for the Job
This guide provides a comprehensive overview of building a wooden garden shed, covering essential planning, materials, construction techniques, and tips for maintaining your shed to ensure longevity and functionality.
Effective planning is crucial for a successful shed project. This section discusses the key steps in determining size, location, and design to meet your gardening needs and preferences.
Selecting high-quality materials is essential for durability and aesthetics. Here, we explore various wood types, fasteners, and finishes that will enhance your shed's longevity and appearance.
Different wood types offer various benefits. This subsection analyzes the pros and cons of popular choices like cedar, pine, and plywood, helping you make an informed decision.
Budgeting for materials is vital. This section breaks down the costs associated with different wood types and suggests cost-effective alternatives without sacrificing quality.
For environmentally conscious builders, this part discusses sustainable wood choices and practices that minimize environmental impact while constructing your garden shed.
Having the right tools can make the building process smoother and more enjoyable. Imagine trying to bake a cake without a mixer or measuring cups—it just wouldn't work! Similarly, when it comes to building your wooden garden shed, the right tools can be the difference between a smooth project and a frustrating experience. Here’s a rundown of essential tools you’ll need:
First and foremost, you'll want a good circular saw for cutting wood to size. This tool is a real game-changer, allowing you to make precise cuts quickly. Alongside the circular saw, a power drill is indispensable for drilling holes and driving screws. Think of it as the heart of your project, powering through tasks that would otherwise take a lot of elbow grease.
Additionally, a measuring tape is crucial for ensuring your cuts are accurate. You wouldn’t want to end up with a shed that’s too small or, worse, too large for your yard! To complement your measuring tape, a level will help ensure that everything is straight and even, preventing any wonky walls or roofs.
For assembling your shed, you’ll need screwdrivers and a hammer. These basic tools are like the bread and butter of construction. You can’t go wrong with having both manual and power options at your disposal. And don’t forget about a safety kit—gloves, safety glasses, and ear protection are must-haves to keep you safe while you work.
Here’s a quick reference table for your essential tools:
| Tool | Purpose |
|---|---|
| Circular Saw | For cutting wood to size |
| Power Drill | For drilling holes and driving screws |
| Measuring Tape | For accurate measurements |
| Level | To ensure everything is straight |
| Screwdrivers | For assembling parts |
| Hammer | For driving nails |
| Safety Kit | For personal protection |
With these tools in hand, you’ll be well on your way to building a sturdy and beautiful garden shed. Remember, having the right tools is just as important as knowing how to use them. So take some time to familiarize yourself with each tool and practice using them before you dive into your shed project.
Understanding construction techniques is key to building a sturdy shed. This section covers foundational, framing, and roofing methods to ensure your shed stands the test of time.
A solid foundation is critical for stability. This subsection explores different foundation types, such as concrete slabs and wooden skids, and their suitability for various shed designs.
Framing provides the structure of your shed. Here, we discuss step-by-step assembly techniques, including wall framing and roof installation, to achieve a robust build.
Finishing touches enhance both functionality and aesthetics. This section highlights painting, sealing, and additional features that can elevate your garden shed's appeal and usability.
Choosing the right paint and sealants protects your shed from the elements. This subsection covers the best products and techniques for long-lasting finishes.
Maximizing interior space is crucial for efficiency. Here, we provide tips on shelving, hooks, and storage solutions to keep your garden shed organized and functional.
Q: How long does it take to build a garden shed?
A: The time to build a garden shed varies based on size and complexity, but most DIYers can complete it in a weekend or two.
Q: Do I need a permit to build a shed?
A: It depends on your local regulations. Always check with your local building authority before starting your project.
Q: What is the best location for my shed?
A: Choose a spot that is level, has good drainage, and is easily accessible. Consider sunlight exposure for your gardening needs.

Construction Techniques
Understanding construction techniques is key to building a sturdy shed that can withstand the elements and serve your gardening needs for years to come. When you embark on this journey, it’s like crafting a piece of art; each step matters, and the end result is a reflection of your effort and planning. Think of your shed as a protective cocoon for your tools and plants—if the foundation isn’t solid, the whole structure could crumble like a house of cards. So, let’s dive into the essential construction techniques that will help you create a robust and reliable garden shed.
First and foremost, let’s talk about the foundation. A solid foundation is critical for stability, and you have a couple of options to choose from. You can opt for a concrete slab, which offers a durable and level base, perfect for sheds that will house heavy equipment. Alternatively, wooden skids can be used for a more portable solution, allowing you to move your shed if necessary. Each option has its own set of benefits and considerations, so it’s important to assess your specific needs before making a decision. Here’s a quick comparison:
| Foundation Type | Pros | Cons |
|---|---|---|
| Concrete Slab | Durable, stable, good for heavy equipment | Permanent, more expensive |
| Wooden Skids | Portable, easier to construct | Less stable, may rot over time |
Once you’ve settled on a foundation, it’s time to tackle the framing and assembly of your shed. Framing is like the skeleton of your structure—it gives it shape and support. Start by laying out the walls, ensuring they’re square and level. This is crucial because any misalignment can lead to a crooked shed that’s a nightmare to work with. You’ll want to use 2x4 lumber for framing, as it provides the strength you need without breaking the bank. When assembling the walls, consider using screws instead of nails; they offer better holding power and are less likely to pull out over time.
As you frame your shed, pay special attention to the roof installation. The roof is your shed's first line of defense against rain and snow, so it needs to be built to last. Depending on your design, you might choose a gable roof for its classic look and excellent water runoff, or perhaps a shed roof for a more modern aesthetic. Whichever style you choose, make sure to use high-quality roofing materials—this is not the place to cut corners! Remember, a well-constructed roof will not only protect your belongings but also enhance the overall appearance of your shed.
In summary, building a wooden garden shed involves several crucial construction techniques. From selecting the right foundation to framing and roofing, each step contributes to the overall durability and functionality of your shed. So, roll up your sleeves and get ready to create a space that not only meets your gardening needs but also adds charm to your backyard!
Q: How long does it take to build a wooden garden shed?
A: The time it takes to build a wooden garden shed can vary widely depending on your experience level and the complexity of the design. On average, you can expect to spend a weekend to a couple of weeks on the project.
Q: Do I need a permit to build a garden shed?
A: It depends on your local regulations. Some areas require permits for sheds over a certain size, while others do not. Always check with your local building authority to ensure compliance.
Q: What is the best way to maintain my wooden garden shed?
A: Regular maintenance includes checking for rot, applying sealants, and repainting as needed. Keeping the shed clean and ensuring proper drainage around the foundation will also help extend its life.
Foundation Options
When it comes to building your wooden garden shed, one of the most crucial aspects to consider is the foundation. A solid foundation ensures that your shed remains stable, secure, and functional for years to come. Think of it as the bedrock of your shed; without it, everything else could come tumbling down. There are several foundation options available, each with its own set of benefits and considerations. Let's dive into some of the most popular choices.
First up, we have the concrete slab foundation. This option is often favored for its durability and stability. A concrete slab involves pouring a thick layer of concrete on the ground where you plan to place your shed. Not only does this provide a solid base, but it also helps protect your shed from moisture and pests. However, keep in mind that installing a concrete slab can be labor-intensive and may require additional tools and skills.
Another option to consider is the wooden skid foundation. This method involves placing your shed on treated wooden skids, which are long beams that provide a stable base. Wooden skids are particularly useful if you plan to move your shed in the future, as they allow for easier relocation. However, it's important to ensure that the ground underneath is level and well-drained to prevent the skids from sinking or rotting over time.
If you’re looking for a more temporary solution, consider using pavers or blocks. This foundation method involves placing your shed on concrete blocks or pavers, which can be adjusted for leveling. While this option is less permanent, it can be a great choice if you want flexibility in your shed's placement. Just make sure to space the blocks adequately to support the weight of the shed evenly.
When deciding on the right foundation, consider factors like your local climate, soil type, and the intended use of your shed. For example, if you live in an area with heavy rainfall, a concrete slab may be the best choice to prevent water damage. On the other hand, if you want the ability to move your shed around, wooden skids or pavers might be more suitable.
In summary, here’s a quick table comparing the different foundation options:
| Foundation Type | Durability | Flexibility | Cost |
|---|---|---|---|
| Concrete Slab | Very High | Low | Medium to High |
| Wooden Skids | Medium | High | Medium |
| Pavers/Blocks | Medium | High | Low to Medium |
Ultimately, the right foundation for your garden shed will depend on your specific needs and circumstances. Take your time to weigh the pros and cons of each option to ensure that you’re making a well-informed decision that will support your shed for years to come.
- What is the best foundation for a wooden garden shed? The best foundation depends on your location and needs. Concrete slabs offer durability, while wooden skids provide flexibility.
- Can I build a shed without a foundation? While it's technically possible, it's not advisable as it may lead to structural issues and increased wear over time.
- How do I prepare the ground for a shed foundation? Ensure the ground is level and well-drained, removing any vegetation or debris before laying your foundation.
Framing and Assembly
When it comes to building your wooden garden shed, are the heart and soul of the structure. This is where your vision starts to take shape, and it’s crucial to get it right. Think of framing as the skeleton of your shed; it supports everything else and ensures that your shed remains standing strong against the elements. To begin, you'll want to gather your materials and tools. Essential items include lumber for the frame, nails or screws, a level, a square, and a tape measure. Having these tools on hand will make the process smoother and more efficient.
The first step in framing is to lay out the base. You’ll need to create a rectangular frame using treated lumber, which will serve as the foundation for your shed. This base will help prevent moisture from seeping into the wood, which can lead to rot over time. Once your base is secure, it’s time to start erecting the walls. Each wall frame typically consists of vertical studs spaced either 16 or 24 inches apart, depending on your design preferences. Make sure to use a level to ensure that each stud is perfectly vertical; this is key for a sturdy build.
After framing the walls, it’s time to assemble them. This is where teamwork can be incredibly beneficial, especially when lifting and securing the walls. You can use a temporary brace to hold each wall in place while you attach them to the base. For fastening, screws are often preferred over nails, as they provide a stronger hold. Once all four walls are up, you can move on to the roof framing. The roof can be framed using a simple gable design or a more complex design, depending on your aesthetic preferences and functional needs.
During the roof assembly, ensure that the rafters are evenly spaced and securely attached to the top plates of the wall frames. A well-constructed roof not only protects your shed from rain and snow but also adds to its overall appearance. If you plan on adding insulation or a ceiling, consider framing those aspects during this stage as well. Remember, the goal is to create a structure that is not just functional but also visually appealing.
After everything is framed and assembled, take a moment to step back and admire your work. This is a significant milestone in your shed-building journey! However, don’t forget to double-check all your measurements and ensure that everything is square and level. It’s much easier to fix any issues now rather than later when you start adding the siding and roofing materials.
In summary, framing and assembly are crucial steps in your garden shed project. By paying attention to detail and using quality materials, you can create a sturdy and attractive structure that will serve you well for years to come. So grab your tools, gather your materials, and let’s get building!
- What type of wood is best for framing a garden shed? Generally, pressure-treated lumber is recommended for framing due to its resistance to moisture and pests.
- How long does it take to frame a garden shed? Depending on your experience and the complexity of the design, framing can take anywhere from a few hours to a couple of days.
- Do I need a permit to build a shed? This varies by location. It's best to check with your local building authority to determine if a permit is required.

Finishing Touches
When it comes to building your wooden garden shed, the are where you can truly let your creativity shine. These final details not only enhance the overall look of your shed but also improve its functionality and longevity. Think of it as the icing on the cake; without it, your shed may feel incomplete. So, what are the essential elements to consider when adding those finishing touches? Let's dive in!
First and foremost, painting and sealing your shed is crucial. A high-quality exterior paint or stain not only adds a pop of color but also acts as a protective barrier against the elements. The right sealant will ensure that moisture doesn’t seep into the wood, preventing rot and decay over time. When selecting paint, consider using weather-resistant options that can withstand harsh conditions. Here’s a quick comparison of popular paint types:
| Paint Type | Durability | Finish Options |
|---|---|---|
| Acrylic Paint | High | Matte, Satin, Gloss |
| Oil-Based Paint | Very High | Gloss, Semi-Gloss |
| Wood Stain | Medium to High | Transparent, Semi-Transparent |
Next, let’s talk about interior organization. A well-organized shed is not only more functional but also makes it easier to find your gardening tools and supplies. Consider installing shelves, hooks, and pegboards to maximize your space effectively. For instance, you can create a designated area for tools by mounting a pegboard on the wall. This not only keeps your tools within reach but also adds a touch of charm to your shed’s interior. Here are a few tips to keep in mind:
- Use clear storage bins to easily identify contents.
- Label shelves and bins for quick access.
- Incorporate a workbench if space allows for added functionality.
Finally, don’t forget about additional features that can elevate your garden shed from ordinary to extraordinary. Consider adding a small porch or overhang for a cozy touch, or install windows for natural light. Ventilation is another important factor; adding vents or a small fan can help reduce humidity and keep your tools in top condition. You might also want to think about decorative elements, such as flower boxes or a unique door handle, which can add personality to your shed.
In summary, the finishing touches on your garden shed are what transform it into a personalized space that reflects your style while being practical. From choosing the right paint and sealants to organizing the interior and adding unique features, each detail contributes to the overall functionality and aesthetic appeal of your shed. So, take your time, get creative, and enjoy the process!
Q: How often should I repaint or seal my garden shed?
A: It's generally recommended to repaint or reseal your shed every 3-5 years, depending on the weather conditions in your area.
Q: What’s the best way to organize tools inside my shed?
A: Use a combination of shelves, pegboards, and storage bins. Label everything for easy access and consider creating a designated tool area.
Q: Can I use leftover paint for my shed?
A: Yes, as long as the paint is suitable for exterior use and hasn’t expired. Always check the label for recommended applications.
Paint and Sealants
When it comes to protecting your wooden garden shed from the elements, choosing the right paint and sealants is crucial. Not only do they enhance the aesthetic appeal of your shed, but they also provide a vital barrier against moisture, UV rays, and pests. A well-painted and sealed shed can last for years, maintaining its beauty and functionality. So, what should you consider when selecting these products?
First off, it's essential to understand the different types of paints and sealants available on the market. For outdoor wooden structures, you generally have two main options: oil-based paints and water-based paints. Oil-based paints are known for their durability and resistance to wear, making them ideal for high-traffic areas. However, they can take longer to dry and require solvents for cleanup. On the other hand, water-based paints dry quickly, are easier to clean up, and emit fewer fumes, making them a popular choice for DIY enthusiasts.
When it comes to sealants, you'll want to look for products specifically designed for exterior wood. Polyurethane sealants are excellent for providing a tough, protective coating, while water repellents help prevent moisture absorption. Consider using a sealant that contains UV blockers to protect your shed from sun damage, which can cause fading and deterioration over time.
Here’s a quick comparison of some popular paint and sealant options:
| Type | Pros | Cons |
|---|---|---|
| Oil-Based Paint | Durable, excellent adhesion | Long drying time, requires solvents |
| Water-Based Paint | Quick drying, easy cleanup | Less durable than oil-based |
| Polyurethane Sealant | Strong protection, tough finish | Can be difficult to apply evenly |
| Water Repellent | Prevents moisture absorption | May need frequent reapplication |
Before applying any paint or sealant, it’s essential to prepare the surface properly. Start by cleaning the shed thoroughly to remove dirt, grime, and any old peeling paint. Sanding the wood will also help the new paint adhere better. Once the surface is clean and dry, you can apply a primer if you're using oil-based paint, as this will enhance the paint's durability and provide a smoother finish.
After priming, it's time to apply your chosen paint. Use a high-quality brush or roller to ensure an even coat. Depending on the product, you may need to apply multiple coats for optimal coverage. Don’t forget to allow adequate drying time between coats, as this will help achieve a professional-looking finish.
Once your paint job is complete, consider applying a sealant for an added layer of protection. This is especially important if your shed is located in a region with harsh weather conditions. A good sealant will not only protect against moisture but also against UV rays that can cause the wood to crack and fade.
In summary, investing time and effort into selecting the right paint and sealants for your wooden garden shed will pay off in the long run. Not only will it look fantastic, but it will also stand up to whatever Mother Nature throws its way. So, roll up your sleeves, get those brushes ready, and give your shed the care it deserves!
- How often should I repaint my garden shed? It depends on the climate, but generally every 5-7 years is a good rule of thumb.
- Can I use interior paint for my outdoor shed? No, interior paint is not designed to withstand outdoor conditions and will deteriorate quickly.
- What is the best way to clean my shed before painting? Use a pressure washer or a stiff brush with soapy water to remove dirt and mildew.
Interior Organization
When it comes to maximizing the efficiency of your wooden garden shed, is key. Imagine opening the door to your shed and being greeted by a chaotic mess of tools, pots, and gardening supplies. It’s overwhelming, right? Instead, you want to step into a well-organized space where everything has its place—this not only saves time but also makes your gardening tasks more enjoyable. So, how do you achieve this? Let’s dive into some effective strategies!
First off, think about vertical space. Many people overlook the walls of their shed, but they can be a treasure trove of storage potential. Installing shelves or wall-mounted racks can transform those empty walls into functional storage areas. For instance, you might consider adding a pegboard where you can hang tools like shovels, rakes, and even gloves. This not only keeps your tools easily accessible but also helps prevent damage from being tossed carelessly into a pile.
Next, consider using storage bins and containers. Clear plastic bins are fantastic for storing smaller items like seeds, fertilizers, and gardening gloves. Labeling these bins can save you from the frustration of rummaging through them every time you need something. You could even create a simple inventory list that hangs inside the shed door, so you always know what you have and where it is. Additionally, using stackable bins can help you utilize vertical space even further, creating a tidy and organized environment.
Another great tip is to incorporate multi-functional furniture. For example, a sturdy workbench can serve as both a workspace for potting plants and a storage area for tools and supplies. You can also add drawers or cabinets beneath the workbench to keep items out of sight but still within reach. This way, you maintain a clean aesthetic while ensuring that everything you need is close at hand.
Don’t forget about the floor space! Keeping the floor clear is essential for safety and accessibility. Consider using wall-mounted hooks or racks for larger tools like hoses and ladders. You can also designate specific areas for different types of tools or supplies, which will help you quickly find what you need without digging through piles of stuff. A simple outline on the floor where each item belongs can serve as a visual guide, ensuring everything is returned to its rightful place after use.
Lastly, think about seasonal organization. As the seasons change, so do your gardening needs. Create a system that allows you to easily swap out tools and supplies based on the time of year. For instance, during the spring, you might need more seed trays and potting soil, while in the fall, you may want to store away summer tools and bring out winter supplies. This not only keeps your shed organized but also ensures that you’re always prepared for whatever gardening tasks come your way.
In summary, organizing the interior of your wooden garden shed is not just about aesthetics; it’s about creating a functional space that enhances your gardening experience. By utilizing vertical space, using storage bins, incorporating multi-functional furniture, keeping the floor clear, and adapting to seasonal changes, you can create an organized and efficient shed that meets all your gardening needs. So, roll up your sleeves and get started on transforming that cluttered space into a gardener’s paradise!
- What are the best materials for shed interior organization?
Using durable materials like plywood for shelves and clear plastic bins for storage can greatly enhance your shed's organization.
- How can I keep my shed organized long-term?
Regularly reassess your storage solutions and make adjustments as needed. Consistency is key!
- Are there any eco-friendly storage options?
Yes! Look for recycled materials or sustainable wood options for shelving and storage solutions.
Frequently Asked Questions
- What size should I make my garden shed?
The size of your garden shed largely depends on your needs and available space. Think about what you want to store and how much room you need for movement. A good rule of thumb is to aim for at least 10x12 feet for a basic garden shed, but you can always go larger if you have the space and budget!
- What type of wood is best for building a shed?
When it comes to choosing wood, it often boils down to personal preference and budget. Cedar is a fantastic choice for its natural resistance to rot and insects, while pine is more affordable but may require more maintenance. Plywood is great for the interior, but make sure to use treated wood for the exterior to withstand the elements.
- How much does it cost to build a wooden shed?
The cost can vary widely based on the size, materials, and features you choose. On average, you might spend anywhere from $1,500 to $5,000. It's wise to create a budget beforehand and stick to it, considering both materials and tools you'll need.
- What tools do I need to build a garden shed?
You'll need a variety of tools to get the job done right. Essential tools include a circular saw, drill, level, measuring tape, and a hammer. If you're planning on doing more complex work, a nail gun and a miter saw can also be incredibly helpful!
- How do I ensure my shed has a solid foundation?
A solid foundation is key to the longevity of your shed. You can choose between concrete slabs, gravel pads, or wooden skids. Each option has its pros and cons, but make sure the ground is level and well-drained to prevent water damage.
- What finishing touches should I consider for my shed?
Finishing touches can really make your shed stand out! Consider painting it in a color that complements your home or garden. Additionally, adding shelves, hooks, and storage bins inside can help you keep everything organized and easily accessible.
- How can I maintain my garden shed?
Regular maintenance is crucial! Make sure to check for any signs of rot or damage, especially after harsh weather. Periodically clean the exterior and apply sealants or paint as needed to protect the wood from moisture and pests.


