
10 Must-Try Projects for Intermediate Woodworkers
This article presents ten engaging woodworking projects tailored for those with intermediate skills. Each project is designed to enhance techniques, creativity, and craftsmanship while providing practical applications for your woodworking endeavors. Whether you’re looking to impress your friends or simply want to hone your skills, these projects will challenge you and help you grow as a woodworker. So, roll up your sleeves, grab your tools, and let’s dive into these exciting woodworking adventures!
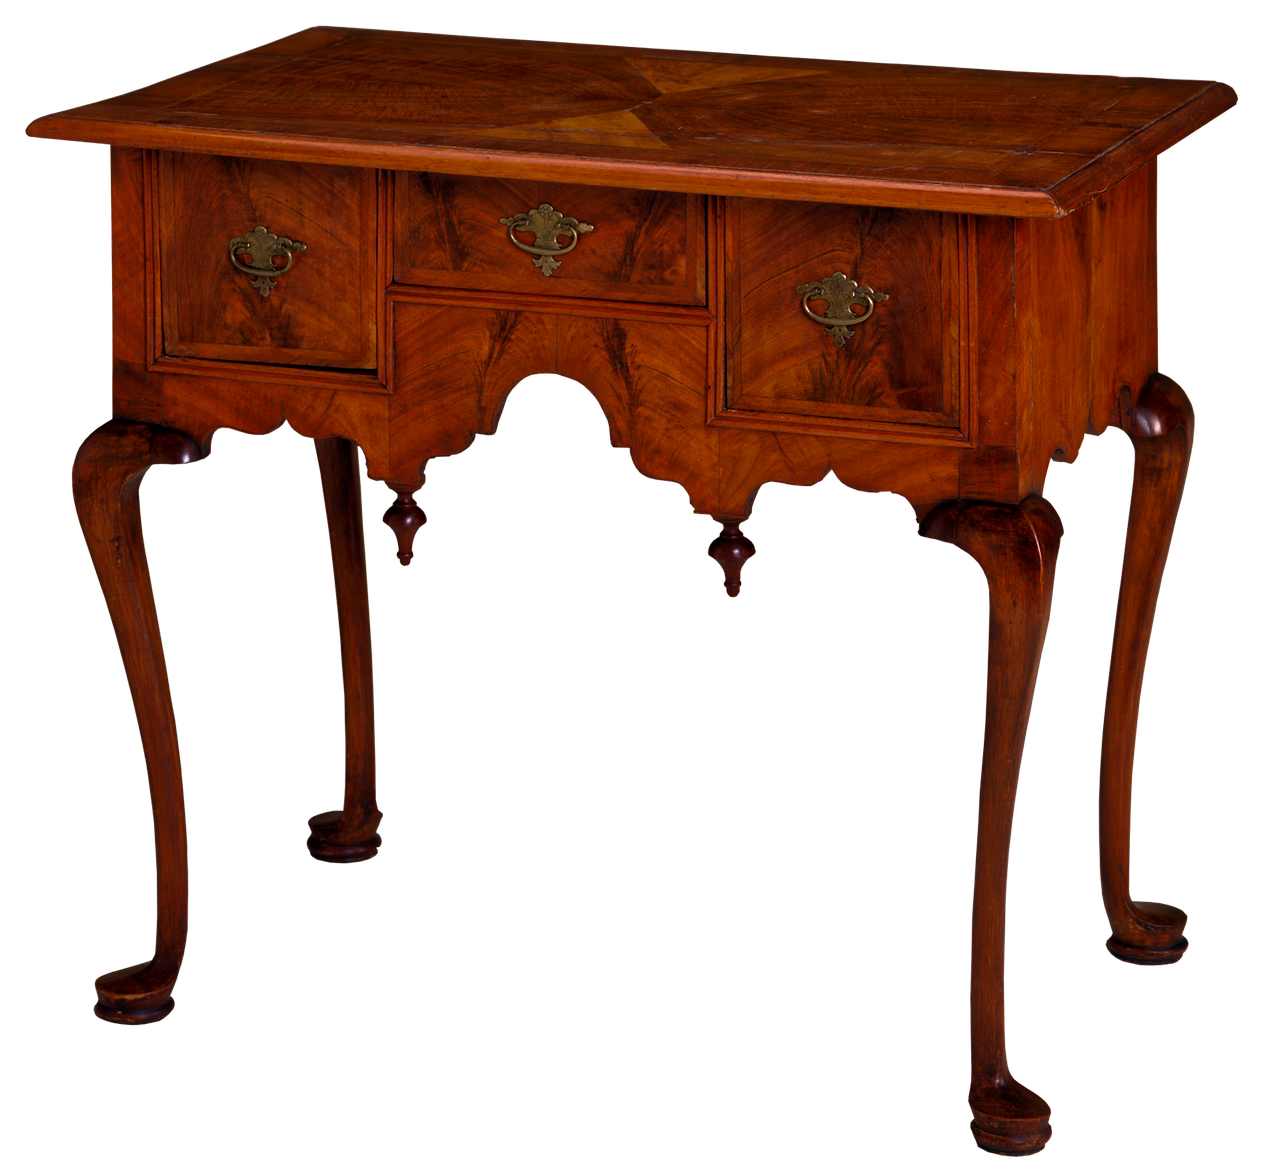
Creating a rustic coffee table combines functionality and aesthetics, allowing woodworkers to explore joinery techniques while crafting a centerpiece for their living space. This project emphasizes the beauty of natural wood grains, inviting you to appreciate the unique patterns and textures that each piece of wood offers. Imagine the satisfaction of sitting down with friends and family around a table that you built yourself, complete with the rich aroma of wood and the warmth of its natural finish. Plus, it’s a fantastic way to practice your skills in sanding, staining, and finishing.
A bookshelf with a hidden compartment adds an element of surprise and security to your home. This project challenges woodworkers to master precision cuts and innovative design while enhancing storage solutions. Picture this: you’re showing off your beautiful bookshelf filled with your favorite novels, and then you reveal a secret compartment for storing valuables or personal items. It’s like having your very own treasure chest right in your living room! This project will not only boost your woodworking skills but also impress anyone who sees it.
Building outdoor Adirondack chairs is an excellent way to practice curved cuts and comfortable seating designs. This project is perfect for those who want to create inviting spaces for relaxation in their gardens or patios. Imagine sipping a cold drink on a warm summer evening, surrounded by friends, while lounging in a chair you crafted with your own hands. The design allows for creativity in choosing colors and finishes, making it a great opportunity to express your personal style and enhance your outdoor living area.
Creating a wooden toy box is a rewarding project that combines practicality with creativity. This piece offers ample storage for toys while allowing woodworkers to experiment with colorful finishes and personalized designs. Think about how delightful it would be to craft a toy box that not only holds your child’s favorite toys but also becomes a cherished piece of furniture in their room. You can even add their name or favorite characters to make it uniquely theirs, turning a simple storage solution into a treasured memory.
Crafting a dining table with bench seating provides an opportunity to work on larger projects. This undertaking encourages collaboration and creativity, making it an ideal centerpiece for family gatherings and celebrations. Picture your family and friends gathered around a table that you built, sharing stories and laughter over a home-cooked meal. The bench seating not only adds a rustic charm but also maximizes space, making it perfect for entertaining. This project will truly elevate your woodworking skills while creating a lasting family heirloom.
A wall-mounted wine rack is a stylish way to display your collection while saving space. This project allows woodworkers to explore different styles and finishes, adding a personal touch to home decor. Imagine your favorite wines elegantly showcased on a beautifully crafted rack, turning your wall into a stunning focal point. Whether you prefer a minimalist design or something more ornate, this project will challenge your creativity and craftsmanship, making it a perfect addition to your home.
Building garden planter boxes is a practical project that enhances outdoor spaces. This endeavor encourages woodworkers to experiment with different designs, sizes, and wood types while promoting sustainable gardening practices. Imagine the joy of growing your own herbs, vegetables, or flowers in a planter box you made yourself. Not only does it beautify your garden, but it also provides a hands-on way to connect with nature. This project is a perfect blend of functionality and creativity, allowing you to personalize your outdoor space.
Creating custom picture frames is a delightful way to showcase memories. This project allows woodworkers to explore various styles, joinery methods, and finishes, resulting in personalized gifts for loved ones. Think about how special it would be to gift a beautifully crafted frame containing a cherished photo. This project not only hones your skills but also adds a personal touch to your home decor. You can experiment with different woods and designs, making each frame a unique expression of your creativity.
Constructing a birdhouse with a unique design provides an opportunity to blend functionality with creativity. This project encourages woodworkers to experiment with shapes and colors while supporting local wildlife in their gardens. Imagine watching colorful birds flitting about your yard, all thanks to a cozy home you built for them. It’s a fun and fulfilling project that can also be a conversation starter among friends and family. Plus, you can get creative with the design, making it as whimsical or as classic as you like!
Q: What tools do I need for these projects?
A: Basic woodworking tools such as a saw, drill, measuring tape, and sandpaper are essential. Depending on the project, you may also need specific tools like clamps or wood glue.
Q: Can I modify these projects to suit my style?
A: Absolutely! Each project is a canvas for your creativity. Feel free to change dimensions, add personal touches, or choose different finishes to make it your own.
Q: How do I ensure the durability of my woodworking projects?
A: Use high-quality materials and proper joinery techniques. Additionally, applying a protective finish can help preserve the wood and extend its lifespan.
1. Rustic Coffee Table
Creating a rustic coffee table is not just about assembling wood; it’s about crafting a piece that tells a story. Imagine inviting friends over and having them gather around a table that not only serves a purpose but also sparks conversations about its unique grains and imperfections. The beauty of a rustic coffee table lies in its natural aesthetics. Each knot and swirl in the wood is a testament to its history, making it a stunning centerpiece in any living space.
This project is ideal for intermediate woodworkers looking to enhance their skills. It allows you to explore various joinery techniques, such as mortise and tenon or pocket holes, which can elevate your craftsmanship to the next level. Not only will you learn how to create a solid structure, but you’ll also gain experience in selecting the right type of wood. For a rustic look, consider using reclaimed wood or hardwoods like oak or pine, which provide durability and a beautiful finish.
One of the most exciting aspects of building a rustic coffee table is the freedom to customize it. You can choose the size, shape, and finish that best suits your style. Whether you prefer a distressed look or a smooth, polished surface, the choice is yours. Adding features like a lower shelf for books or decorative items can enhance its functionality while maintaining its rustic charm.
Before diving into the project, it’s essential to gather the right tools and materials. Here’s a quick overview of what you might need:
| Tools | Materials |
|---|---|
| Table saw | Wood (reclaimed or hardwood) |
| Drill | Wood glue |
| Sander | Wood screws |
| Clamps | Finish (stain or sealant) |
Once you have your materials ready, start by measuring and cutting your wood pieces. Precision is key here, especially when it comes to the tabletop and legs. After cutting, sand down the edges to ensure a smooth finish. You wouldn’t want any splinters ruining the cozy vibe of your living room, right?
After assembling the frame, it’s time to bring your rustic coffee table to life with a beautiful finish. Stains can enhance the natural beauty of the wood, while a clear coat can protect it from scratches and spills. Remember, the goal is to create a piece that not only looks good but also stands the test of time.
In conclusion, building a rustic coffee table is a fulfilling project that combines creativity and functionality. It’s a chance to express your style while honing your woodworking skills. So, grab your tools, unleash your imagination, and create a piece that will be cherished for years to come!

2. Bookshelf with Hidden Compartment
Imagine walking into your living room and being greeted by a beautifully crafted bookshelf that not only holds your favorite novels but also conceals a hidden compartment. This project is more than just a practical storage solution; it’s a conversation starter and a clever way to keep your valuables safe. The bookshelf with a hidden compartment is perfect for intermediate woodworkers looking to enhance their skills while adding a touch of mystery to their home décor.
To embark on this project, you’ll want to focus on a few key techniques that will elevate your woodworking game. First, mastering precision cuts is crucial. A well-fitted compartment is essential for both functionality and aesthetics. Using a table saw or miter saw will help you achieve those clean edges and snug fits that make your bookshelf look professionally crafted.
Next, consider the design of your hidden compartment. You could opt for a simple drawer that slides out from the bottom or a more intricate design with a hinged top. This is where your creativity can shine! Think about how you want the compartment to blend into the overall look of the bookshelf. Will it have a decorative handle or a secret latch? The possibilities are endless!
As you plan your build, it’s essential to choose the right materials. Solid wood is a fantastic choice for durability and aesthetics, but you can also experiment with different types of wood for the compartment itself. For instance, using a contrasting wood can create a striking visual effect that draws the eye while keeping the secret safe. Here’s a quick comparison of popular woods you might consider:
| Wood Type | Characteristics | Best For |
|---|---|---|
| Oak | Durable, strong, and has a beautiful grain | Bookshelves, furniture |
| Maple | Hard, fine grain, and takes stain well | Cabinetry, fine furniture |
| Pine | Lightweight, easy to work with, and affordable | Beginner projects, decorative pieces |
Once you have your materials, it’s time to gather your tools. A drill, screws, wood glue, and clamps will be your best friends during this project. The assembly process will require patience and attention to detail, especially when installing the hidden compartment. Remember, the goal is to make it as seamless as possible to ensure it remains a secret!
Finally, don’t forget about the finishing touches. Sanding your bookshelf and applying a stain or paint will not only protect the wood but also enhance its beauty. You might want to consider a clear coat for a natural look or a vibrant color to make a statement. Whatever you choose, make sure it reflects your personal style and complements your home.
In conclusion, the bookshelf with a hidden compartment is an exciting project that combines function with creativity. It challenges you to think outside the box and refine your woodworking techniques. So, gather your tools, unleash your creativity, and prepare to impress your guests with this stunning and practical addition to your home!
- What tools do I need for this project? A basic set of woodworking tools, including a saw, drill, screws, and clamps, will suffice.
- Can I customize the size of the bookshelf? Absolutely! You can adjust the dimensions to fit your space and needs.
- What type of wood is best for beginners? Pine is a great choice for beginners due to its affordability and ease of use.
3. Outdoor Adirondack Chairs
Building outdoor Adirondack chairs is not just a project; it's an experience that brings the joy of craftsmanship right to your backyard. These iconic chairs, known for their wide armrests and slanted backs, are perfect for lounging on a sunny afternoon or sipping hot cocoa by the fire pit. Imagine sinking into one of these beautifully crafted chairs after a long day, feeling the wood beneath you and the gentle breeze around you. It's not just furniture; it's a cozy retreat!
This project is ideal for intermediate woodworkers looking to refine their skills. You'll get to practice curved cuts, which can be a bit tricky but incredibly rewarding once mastered. The design of the Adirondack chair allows you to explore different angles and techniques that will enhance your overall woodworking abilities. Plus, you can personalize the chairs to match your outdoor decor by choosing different wood types, stains, and finishes. Whether you prefer the rustic charm of cedar or the durability of teak, the choice is yours!
When embarking on this project, here are a few tips to keep in mind:
- Measure Twice, Cut Once: Precision is key when it comes to the angles and dimensions of your chair. Take your time with measurements to ensure a perfect fit.
- Choose Quality Materials: Investing in high-quality wood will not only make your chairs more durable but also enhance their aesthetic appeal.
- Finish with Care: A good finish will protect your chairs from the elements. Consider using a weather-resistant sealant to prolong their lifespan.
As you work on your Adirondack chairs, remember to enjoy the process. Each cut and joint is a step towards creating something functional and beautiful. Once completed, these chairs will not only serve as a testament to your woodworking skills but also as a gathering spot for family and friends. Picture summer evenings spent on your porch, laughter filling the air as everyone relaxes in their new favorite chairs. It’s more than just a project; it’s a way to create memories.
In conclusion, building outdoor Adirondack chairs is a fantastic project that combines creativity with practical application. It challenges your skills while allowing you to create a piece of furniture that enhances your outdoor space. So grab your tools, choose your wood, and get started on crafting a chair that will be the envy of your neighborhood!
Here are some common questions that arise when tackling the project of building outdoor Adirondack chairs:
| Question | Answer |
|---|---|
| What type of wood is best for Adirondack chairs? | Cedar and teak are popular choices due to their natural resistance to weather and insects. |
| How long will it take to build one chair? | Depending on your skill level and tools, it can take anywhere from a few hours to a couple of days. |
| Do I need special tools to build these chairs? | A circular saw, jigsaw, drill, and sander are the main tools you'll need, along with basic hand tools. |
| Can I customize the design? | Absolutely! Feel free to adjust the dimensions and add personal touches to make it your own. |

4. Wooden Toy Box
Creating a wooden toy box is not only a rewarding project but also a fantastic way to merge practicality with creativity. Imagine a beautifully crafted box that not only holds your child's toys but also serves as a stunning piece of furniture in your home. This project offers ample opportunities to experiment with different styles, sizes, and finishes, allowing you to tailor the design to fit your personal taste and the decor of your space.
When embarking on this project, you can choose from a variety of wood types. Pine is a popular choice due to its affordability and ease of work, while oak offers durability and a beautiful grain. Consider using a combination of woods for a unique look. Additionally, incorporating colorful finishes or playful designs can make the toy box more appealing to children, transforming it into a captivating storage solution.
One of the best aspects of building a wooden toy box is the chance to implement joinery techniques that can elevate your woodworking skills. Techniques like dovetail joints or box joints not only provide strength but also add a touch of elegance to your project. As you work on this toy box, take the time to focus on the details, such as sanding the edges smoothly and applying a protective finish to ensure it stands the test of time.
Moreover, you can personalize the toy box by adding features that cater to your child's needs. For instance, consider incorporating a lid with safety hinges to prevent accidental slamming, or even a removable divider to help organize different types of toys. The possibilities are endless, and this project can truly become a family heirloom that carries sentimental value for years to come.
In summary, building a wooden toy box is an enriching project that combines functionality, creativity, and skill development. Not only does it provide a practical storage solution, but it also allows you to express your artistic side and create something special that your family will cherish. So grab your tools, unleash your imagination, and let’s get started on crafting a beautiful wooden toy box!
- What type of wood is best for a toy box? Pine is a great choice for beginners due to its ease of use, while oak offers durability and a beautiful finish.
- How can I personalize my wooden toy box? You can add your child's name, use colorful paints, or incorporate fun designs to make it unique.
- What safety features should I include? Consider using safety hinges on the lid to prevent pinching and ensure that the box is stable and sturdy.
- Can I use reclaimed wood for my toy box? Absolutely! Reclaimed wood can add character and uniqueness, but ensure it is safe and free from harmful chemicals.
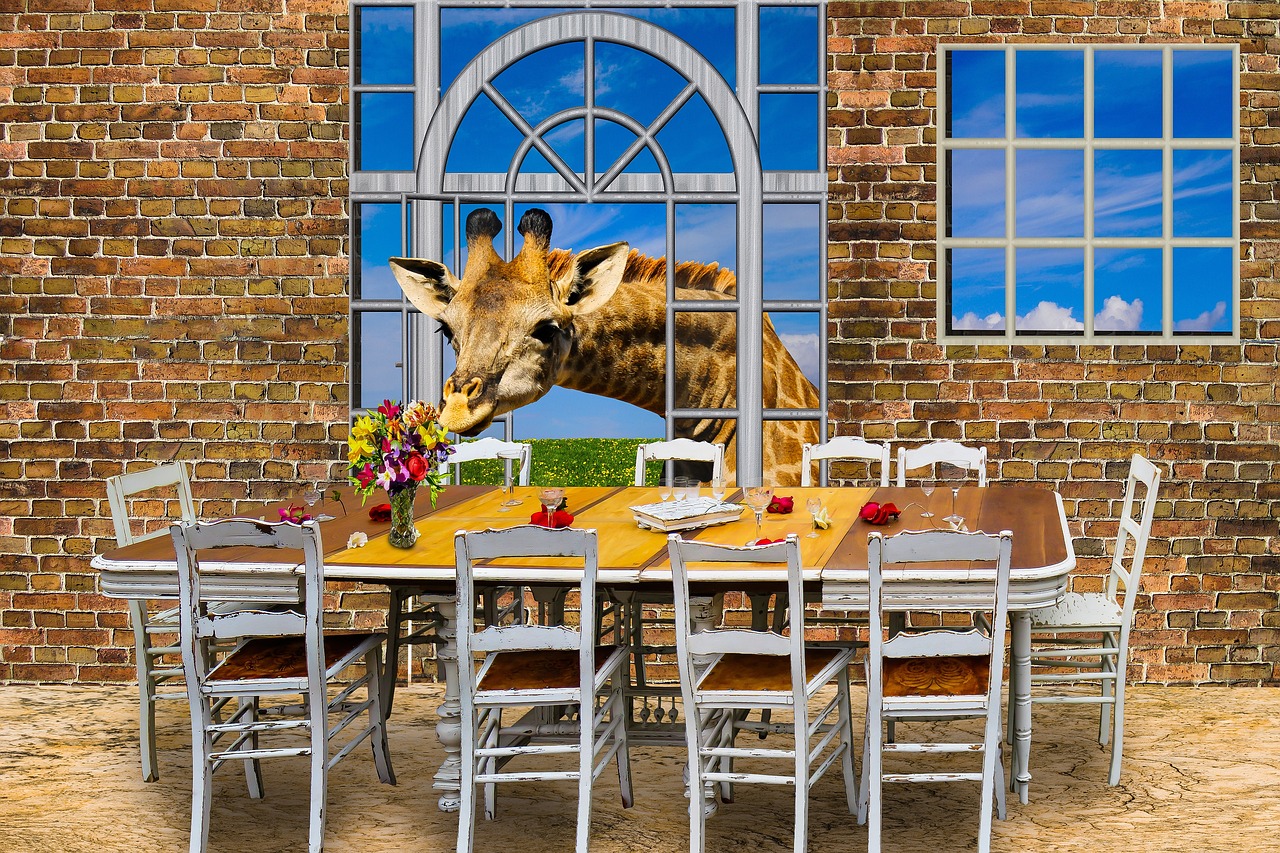
5. Dining Table with Bench Seating
Crafting a dining table with bench seating is like orchestrating a symphony of creativity and practicality. Imagine gathering your loved ones around a beautifully crafted table, sharing meals, laughter, and memories. This project is not just about wood and tools; it’s about creating a central hub for family gatherings and celebrations. With intermediate woodworking skills, you can transform raw materials into a stunning centerpiece that enhances your dining experience.
When embarking on this project, the first step is to decide on the dimensions and design that will best fit your space. Will it be a rustic farmhouse style or a sleek modern look? The choice is yours! This project gives you the freedom to express your personal style while honing your woodworking skills. As you measure and cut, you'll practice essential techniques like joinery and sanding, ensuring that every piece fits together seamlessly.
One of the most exciting aspects of building a dining table with bench seating is the opportunity to experiment with different types of wood. Each species has its own unique grain and color, which can dramatically change the look and feel of your finished piece. For instance, oak offers durability and a classic feel, while walnut provides a rich, dark hue that adds elegance. Consider creating a contrast by using a lighter wood for the table and a darker wood for the benches, or vice versa. This can add a striking visual element to your dining area.
As you assemble your table, think about the functionality of the benches. You can choose to make them fixed or movable, depending on your needs. If you often host large gatherings, movable benches might be more practical, allowing for flexible seating arrangements. Alternatively, you could incorporate storage into the benches, making them perfect for stowing away table linens or board games. The possibilities are endless!
Once the construction is complete, it’s time to finish your masterpiece. Staining or painting your table and benches not only protects the wood but also enhances its beauty. Consider a food-safe finish if you plan to use your table for dining. This ensures that your creation is not only beautiful but also safe for everyday use. Plus, applying a finish is an excellent way to showcase your craftsmanship and attention to detail.
Ultimately, building a dining table with bench seating is more than just a woodworking project; it’s a chance to create a space where memories are made. Whether you’re hosting a holiday feast or a casual Sunday brunch, your handcrafted table will be a testament to your skills and creativity. So grab your tools, unleash your imagination, and get ready to create a piece that will be cherished for years to come!
Here are some common questions that may arise when tackling this project:
- What type of wood is best for a dining table? - Hardwoods like oak, maple, and walnut are popular choices due to their durability and aesthetic appeal.
- How do I ensure my table is sturdy? - Use strong joinery techniques such as mortise and tenon or pocket holes to reinforce the structure.
- Can I customize the size? - Absolutely! Measure your space and adjust the dimensions to fit your needs.
- What finish should I use? - A food-safe polyurethane or natural oil finish is recommended for durability and safety.

6. Wall-Mounted Wine Rack
Imagine walking into your dining room and being greeted by a stunning wall-mounted wine rack that not only showcases your favorite bottles but also adds a touch of elegance to your space. This project is perfect for intermediate woodworkers looking to combine creativity with functionality. A wall-mounted wine rack can be designed in various styles—from rustic farmhouse to sleek modern, allowing you to express your unique taste. The beauty of this project lies in its versatility; you can customize the size, shape, and finish to perfectly fit your home decor.
Constructing a wall-mounted wine rack involves several essential woodworking techniques that will help you enhance your skills. You'll need to master precise measurements and cuts, ensuring that each bottle fits snugly in its designated space. Additionally, you can experiment with different types of wood, such as oak or pine, to achieve the desired aesthetic. Not only does this project challenge your craftsmanship, but it also provides a practical solution for storing your wine collection, keeping it organized and easily accessible.
When designing your wine rack, consider incorporating features that elevate its functionality. For instance, you might want to include:
- Stemware Storage: Adding a shelf for glasses can streamline your serving process.
- Label Visibility: Consider an angled design that allows for easy reading of wine labels.
- Decorative Elements: Personalize your rack with carvings or a unique finish that reflects your style.
Moreover, the wall-mounted aspect of this project saves valuable floor space, making it an excellent choice for smaller homes or apartments. You can install it in various locations, such as the dining room, kitchen, or even a cozy corner of your living room. Just imagine how impressed your guests will be when they see your handcrafted wine rack displaying your collection!
As you embark on this project, take the time to plan your design carefully. Sketch out your ideas, choose the right materials, and consider the best location for installation. With the right approach, your wall-mounted wine rack will not only be a functional storage solution but also a beautiful piece of art that enhances your home decor.
Q: What type of wood is best for a wall-mounted wine rack?
A: Hardwoods like oak or maple are excellent choices due to their durability and attractive grain patterns. However, softer woods like pine can also work well if treated properly.
Q: How many bottles can a typical wall-mounted wine rack hold?
A: This depends on the design and size of your rack. A small rack may hold 4-6 bottles, while larger, custom designs can accommodate 12 bottles or more.
Q: Do I need special tools to build a wine rack?
A: Basic woodworking tools such as a saw, drill, and measuring tape are typically sufficient. However, having clamps and sanders can make the process easier and result in a more polished finish.
7. Garden Planter Boxes
Building garden planter boxes is not just a practical woodworking project; it's a gateway to creating your own little piece of paradise right in your backyard. Imagine stepping outside to a vibrant display of flowers or fresh herbs, all neatly housed in your custom-made planter boxes. This project allows you to tap into your creativity while also providing a functional space for your plants to thrive. Plus, who wouldn’t want to show off their handiwork to friends and family?
One of the best parts about crafting your own planter boxes is the freedom to design them according to your personal style and the needs of your garden. Whether you prefer a rustic look with reclaimed wood or a sleek modern design, the possibilities are endless. You can even incorporate different sizes and shapes to create a stunning visual effect in your outdoor space. Think of it like creating a piece of art that also happens to be functional!
When you start this project, consider the following key points:
- Material Selection: Choose durable wood that can withstand the elements, such as cedar or redwood, which are naturally resistant to decay.
- Drainage: Ensure your planter boxes have adequate drainage holes to keep your plants healthy and thriving.
- Finish: Think about applying a non-toxic sealant or stain to protect the wood and enhance its natural beauty.
As you embark on this journey, remember that the joy of woodworking lies in the details. Take your time with the cuts and joints to ensure a sturdy structure. You might even want to incorporate some decorative elements, like carvings or painted designs, to add a personal touch. Not only will you enjoy the satisfaction of building something with your own hands, but you’ll also get to nurture the plants that will grow in your creation.
Lastly, consider how these planter boxes can contribute to sustainable gardening practices. By growing your own herbs and vegetables, you can reduce your carbon footprint and enjoy the freshest produce right from your garden. It’s a win-win situation: you get to enjoy the fruits of your labor, and your garden becomes a more vibrant space.
Here are some common questions that aspiring woodworkers might have about building garden planter boxes:
| Question | Answer |
|---|---|
| What type of wood is best for planter boxes? | Cedar and redwood are excellent choices due to their natural resistance to rot and insects. |
| How deep should my planter box be? | A depth of 12-18 inches is generally sufficient for most flowers and vegetables. |
| Do I need to line my planter box? | It's recommended to line the inside with landscape fabric to prevent soil from escaping while allowing drainage. |

8. Custom Picture Frames
Creating custom picture frames is not just a woodworking project; it's a heartfelt journey into preserving memories. Imagine walking into a room filled with your favorite photographs, each beautifully framed, telling a story of its own. This project allows woodworkers to express their creativity while honing their skills, making it perfect for those looking to elevate their craft. Whether you're framing family portraits, vacation snapshots, or art pieces, the right frame can transform an ordinary picture into a stunning focal point.
When embarking on this project, consider the variety of styles and materials you can use. From sleek modern designs to rustic, weathered looks, the options are virtually limitless. Here’s where your creativity can really shine! You can choose to work with different types of wood, such as pine, oak, or even reclaimed wood, each offering a unique texture and color that can complement the artwork or photo being displayed.
One of the most exciting aspects of making custom picture frames is the ability to experiment with various joinery methods. For instance, you might want to try miter joints for a clean, professional look or go for a more rustic feel with lap joints. Each technique has its charm and can significantly impact the overall appearance of the frame. Additionally, consider adding embellishments like carved designs or decorative moldings to further personalize your creation.
To get started, gather your materials and tools. Here’s a simple checklist to guide you:
- Wood of your choice (dimensions will depend on the size of the picture)
- Measuring tape
- Table saw or miter saw
- Wood glue
- Clamps
- Sandpaper (various grits)
- Finish (stain or paint, depending on your preference)
Once you have your materials ready, measure the dimensions of the picture you want to frame. Cut the wood pieces to size, ensuring that your corners are perfectly mitered for a seamless finish. After assembling the frame using wood glue and clamps, don’t forget to sand it down to achieve a smooth surface. Finally, apply your chosen finish to protect the wood and enhance its natural beauty.
Custom picture frames also make for wonderful gifts. Imagine the joy on a loved one’s face when they receive a beautifully framed photo that holds special meaning. You can even personalize the frame with engravings or by incorporating their favorite colors, making it a truly unique present.
In conclusion, creating custom picture frames is a fulfilling project that combines skill, creativity, and personal expression. It not only allows you to practice your woodworking techniques but also results in beautiful pieces that can be cherished for years to come. So, gather your tools, unleash your creativity, and start framing those precious memories!
Q1: What type of wood is best for making picture frames?
A1: The best type of wood depends on your style preference. Popular choices include pine for a budget-friendly option, oak for durability, and reclaimed wood for a rustic aesthetic.
Q2: Can I customize the size of the frame?
A2: Absolutely! You can measure your picture and cut the wood accordingly to create a frame that fits perfectly.
Q3: What finishes can I use on my picture frames?
A3: You can use stains, paints, or sealants. Choose a finish that complements the wood and matches your décor.
Q4: Do I need special tools to create custom picture frames?
A4: While a basic set of woodworking tools will suffice, having a miter saw or table saw will help you achieve more precise cuts.

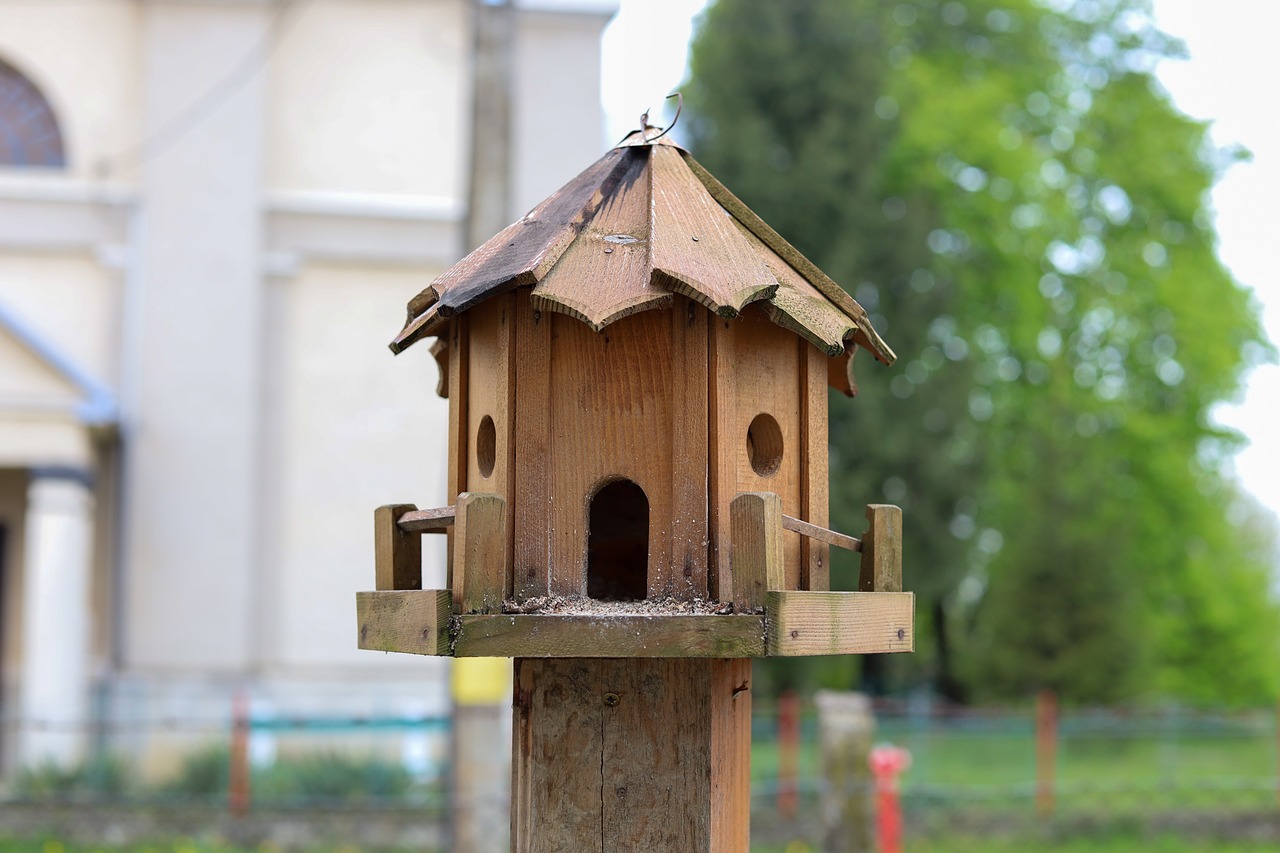
9. Birdhouse with Unique Design
Constructing a birdhouse with a unique design is not just a project; it's an adventure that blends creativity with functionality. Imagine standing in your backyard, watching birds flit about, and knowing that you’ve created a cozy little haven for them. This project is perfect for intermediate woodworkers who want to stretch their creative muscles while providing a home for local wildlife. By experimenting with different shapes, sizes, and colors, you can create a birdhouse that not only serves its purpose but also becomes a charming focal point in your garden.
When designing your birdhouse, consider the type of birds you want to attract. Different species have varying requirements for nesting. For instance, bluebirds prefer a house with a specific entrance hole size, while wrens enjoy smaller openings. Here’s a quick reference table to help you choose the right dimensions based on the birds in your area:
| Bird Species | Entrance Hole Diameter | Dimensions (H x W x D) |
|---|---|---|
| Bluebird | 1.5 inches | 10 x 8 x 8 inches |
| Wren | 1.25 inches | 6 x 6 x 8 inches |
| Chickadee | 1.125 inches | 8 x 8 x 8 inches |
As you embark on this project, think about the materials you’ll use. While cedar is a popular choice due to its durability and resistance to rot, you can also explore reclaimed wood for a more rustic aesthetic. The beauty of woodworking lies in the ability to breathe new life into old materials. Plus, incorporating vibrant paints or natural stains can add a splash of personality to your birdhouse, making it a unique piece of art.
Another exciting aspect of this project is the opportunity to incorporate creative designs. Why not try a birdhouse shaped like a cottage or a whimsical tree? You can add decorative touches such as a tiny chimney or a colorful roof. Not only will this attract birds, but it will also delight your family and friends. After all, who wouldn’t smile at a birdhouse that looks like it came straight out of a fairy tale?
In addition to aesthetics, don't forget about functionality. Ensure that your birdhouse has proper ventilation and drainage holes to keep the interior dry and comfortable for its feathered inhabitants. A removable roof or side panel will make cleaning out the house easy once nesting season is over. This attention to detail not only showcases your craftsmanship but also demonstrates your commitment to the well-being of the birds.
Lastly, consider where you’ll place your birdhouse. Position it in a quiet, sheltered spot that offers some protection from the elements. A good location can make all the difference in attracting birds. So, grab your tools, unleash your creativity, and create a birdhouse that will bring joy to both you and your avian friends!
Q: What materials are best for building a birdhouse?
A: Cedar and pine are great choices due to their durability. Reclaimed wood can also add character.
Q: How do I attract birds to my birdhouse?
A: Ensure the entrance hole is the right size for the species you want to attract and place the birdhouse in a quiet, sheltered location.
Q: How often should I clean my birdhouse?
A: It's best to clean it out once nesting season is over, usually in late summer or early fall.
Frequently Asked Questions
- What skill level do I need to start these projects?
These projects are designed for intermediate woodworkers. If you have a basic understanding of woodworking techniques and tools, you should be well-equipped to tackle these engaging projects!
- How long will each project take to complete?
The time required varies depending on the complexity of the project and your skill level. On average, you can expect to spend anywhere from a few hours to a couple of weekends on each project.
- What tools will I need for these woodworking projects?
You'll need a basic set of woodworking tools, including a saw, drill, sander, and measuring tools. Specific projects may require additional tools, so it’s a good idea to check the project details before starting!
- Can I customize these projects to fit my style?
Absolutely! Each project offers plenty of room for personalization. You can choose different wood types, finishes, and designs to make each piece uniquely yours!
- Where can I find the best materials for these projects?
Local lumberyards, home improvement stores, and online retailers are great places to find quality materials. Don't forget to check for reclaimed wood options for a rustic touch!
- Are there any safety tips I should follow while woodworking?
Definitely! Always wear safety gear like goggles and ear protection, keep your workspace clean, and ensure you understand how to use each tool properly to avoid accidents.
- What if I run into problems while working on a project?
Don’t worry! It’s common to face challenges. Consider joining woodworking forums or local clubs where you can ask for advice and share experiences with fellow woodworkers.
- Can these projects be made as gifts?
Absolutely! Many of these projects, like custom picture frames and toy boxes, make fantastic gifts for friends and family, showcasing your craftsmanship and thoughtfulness.


