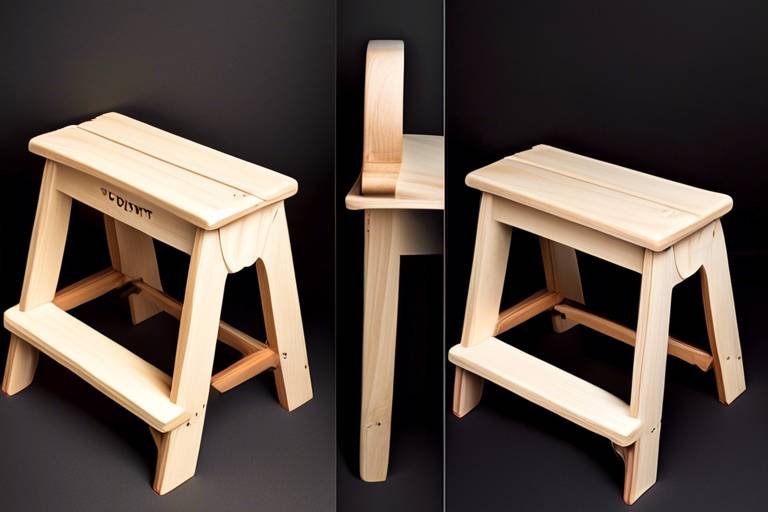
Creating a Wooden Spice Rack: A DIY Guide
Are you tired of rummaging through cluttered cabinets every time you need a spice? A wooden spice rack could be just the solution you need! Not only does it enhance your kitchen organization, but it also adds a personal touch to your culinary space. Imagine walking into your kitchen and seeing all your spices neatly arranged, easily accessible, and beautifully displayed. In this guide, we’ll take you through the entire process of creating your very own wooden spice rack, from choosing the right materials to putting on the finishing touches. Let’s dive in!
When embarking on your spice rack project, the first step is selecting the appropriate type of wood. This choice is crucial for both durability and aesthetics. You might consider options like pine, oak, or maple. Each of these woods has its unique characteristics:
- Pine: Affordable and lightweight, making it easy to work with.
- Oak: A strong and durable option with a beautiful grain pattern.
- Maple: Known for its fine grain and resistance to moisture.
Think about factors such as grain, color, and resistance to moisture as you make your choice. The right wood will not only make your spice rack sturdy but also complement your kitchen’s decor.
Before you start building, it’s important to gather all the necessary tools and materials. Here’s a quick rundown of what you’ll need:
- Tools: Miter saw, hand saw, drill, measuring tape, and sandpaper.
- Materials: Wood boards, screws, wood glue, and finish (stain or paint).
Having everything prepared in advance will ensure a smooth and efficient building process, allowing you to focus on creating rather than searching for tools.
Accurate measurements and precise cuts are vital for a well-fitting spice rack. Start by measuring the space where you plan to place your rack. Use a measuring tape to ensure you have the right dimensions. When cutting the wood, safety is paramount. Always wear protective gear and follow the manufacturer's instructions for your tools. For clean edges, consider using a straight edge as a guide when cutting.
A miter saw is an excellent tool for making precise angled cuts, which can enhance the design of your spice rack with clean, professional-looking corners. To operate it safely:
- Always secure your wood firmly.
- Keep your hands away from the blade.
- Double-check your measurements before cutting.
With practice, you’ll find that using a miter saw can significantly improve your woodworking skills.
If you don’t have access to power tools, don’t worry! Hand saw techniques are essential and can produce excellent results. Focus on maintaining straight lines by using a guide or marking your cuts clearly. Take your time, and remember that patience is key. The satisfaction of crafting your spice rack by hand will make the effort worthwhile.
Once you have all your pieces cut, it’s time to assemble your spice rack. There are several joining methods you can use, including glue, screws, and dowels. Each method has its advantages:
- Glue: Provides a seamless look and is easy to apply.
- Screws: Offer extra strength and durability.
- Dowels: Create a strong joint while keeping the exterior clean.
Choose the method that best suits your design and comfort level, and watch your spice rack come together beautifully!
Now that your spice rack is assembled, it’s time for the finishing touches. This step can elevate your spice rack's appearance and protect the wood. Consider options like sanding, staining, or painting. Sanding not only smooths out rough edges but also prepares the wood for a finish. Staining can enhance the wood's natural beauty, while paint can add a pop of color to your kitchen.
Selecting the right finish is important for both aesthetics and protection. Here are some finishes you might consider:
- Polyurethane: Provides a durable, water-resistant coating.
- Oil-based stains: Penetrate the wood for a rich color.
- Water-based paints: Offer a wide range of colors and are easy to clean up.
Choose a finish that complements your kitchen decor and protects your spice rack from everyday wear and tear.
Labeling your spice jars not only enhances organization but also makes it easier to find what you need while cooking. You can get creative with your labeling ideas, using chalkboard paint, printed labels, or even handwritten tags. Arrange your spices alphabetically or by frequency of use to make your cooking experience more enjoyable.
Proper maintenance ensures longevity for your wooden spice rack. Here are a few tips to keep your spice rack looking great:
- Regularly clean with a damp cloth to remove dust and spills.
- Reapply finishes as needed to protect the wood.
- Check for wear and tear, and make repairs promptly.
With a little care, your spice rack will serve you well for years to come, adding both functionality and charm to your kitchen.
Q: How much does it cost to build a wooden spice rack?
A: The cost can vary based on the type of wood and materials you choose, but on average, you can expect to spend between $30 to $100.
Q: What is the best wood for a spice rack?
A: Hardwoods like oak or maple are excellent choices due to their durability and resistance to moisture.
Q: Can I customize the size of my spice rack?
A: Absolutely! You can modify the dimensions to fit your kitchen space perfectly.
Q: How do I prevent spices from getting moisture?
A: Ensure your spice rack is placed in a dry area, away from heat sources and direct sunlight.

Choosing the Right Wood
When it comes to crafting your very own wooden spice rack, the choice of wood is not just a matter of aesthetics; it's a crucial decision that impacts both the durability and the overall look of your kitchen masterpiece. Imagine walking into your kitchen and seeing a beautifully crafted spice rack that not only organizes your spices but also complements your decor. The right wood can make that vision a reality.
First off, let’s talk about the different types of wood you might consider. Each type comes with its unique characteristics that can influence your project:
- Pine: This is a popular choice for DIY projects because it's affordable and easy to work with. Pine has a light color and a fine grain, making it perfect for a rustic or country-style kitchen.
- Oak: Known for its strength and durability, oak has a beautiful grain that adds a touch of elegance. It’s a bit pricier but worth every penny for its longevity and classic look.
- Maple: If you’re after a smooth finish, maple is your go-to. It’s hard and resistant to scratches, making it a fantastic option for a spice rack that will see a lot of use.
When choosing your wood, you should also consider factors like moisture resistance. Kitchens can be humid places, and wood that isn’t treated properly can warp or swell over time. Look for woods that are naturally resistant to moisture or consider sealing your wood with a protective finish after assembly.
Another important aspect is the grain pattern and color of the wood. Some people prefer the subtlety of a straight grain, while others might lean towards the dramatic flair of a more pronounced grain. Think about how the spice rack will fit into your kitchen’s color scheme. A light wood like pine can brighten up a dark space, while a rich oak can add warmth to a light kitchen.
To help you visualize your options, here’s a quick comparison table of the woods mentioned:
| Type of Wood | Durability | Moisture Resistance | Cost |
|---|---|---|---|
| Pine | Moderate | Low | Low |
| Oak | High | Moderate | High |
| Maple | High | High | Moderate |
In conclusion, the wood you choose for your spice rack can greatly influence its functionality and style. Don’t rush this decision; take your time to explore different types and think about how they will fit into your kitchen’s vibe. Remember, a well-chosen wood not only enhances the beauty of your spice rack but also ensures that it stands the test of time.

Essential Tools and Materials
Before diving into the exciting world of DIY, it's essential to gather all the tools and materials you'll need for building your wooden spice rack. Think of this step as laying the foundation for a successful project; without the right gear, you're setting yourself up for a frustrating experience. So, what exactly do you need? Let's break it down.
First off, you'll need some basic tools. A circular saw or a miter saw is crucial for making those clean, precise cuts. If you're going for a more traditional approach, a good old hand saw will do the trick, but it requires a bit more elbow grease. Don't forget a measuring tape for accuracy; after all, "measure twice, cut once" is a mantra for a reason!
Next on the list is a drill for making holes and driving screws. A cordless drill is incredibly handy and versatile, so if you have one, great! If not, a basic hand drill will suffice. You'll also need screws and wood glue for assembly. The combination of these two will ensure your spice rack is sturdy and reliable.
For a polished finish, sanding paper is a must-have. You want your spice rack to feel as good as it looks, right? Sanding will help smooth out any rough edges and prepare the surface for whatever finish you choose later on. Speaking of finishes, if you're planning on staining or painting your spice rack, pick up some brushes or rollers to apply your chosen product evenly.
Here’s a quick overview of the essential tools and materials you'll need:
| Tool/Material | Purpose |
|---|---|
| Circular Saw / Miter Saw | For making precise cuts |
| Measuring Tape | For accurate measurements |
| Drill | For driving screws and making holes |
| Screws | For assembly |
| Wood Glue | To reinforce joints |
| Sanding Paper | For smoothing surfaces |
| Brushes/Rollers | For applying finishes |
Finally, don’t underestimate the power of safety gear. A good pair of safety goggles and a dust mask can save your eyes and lungs from harm while you’re busy crafting away. Remember, safety first! With all the right tools and materials in hand, you're now ready to tackle the next steps in building your spice rack. Exciting, right?
Q: What type of wood is best for a spice rack?
A: Woods like pine, oak, and maple are excellent choices due to their durability and aesthetic appeal. Choose based on your kitchen decor and personal preference.
Q: Do I need power tools to build a spice rack?
A: While power tools make the process easier and quicker, you can definitely build a spice rack using hand tools. Just be prepared for a bit more manual work!
Q: How can I ensure my spice rack lasts a long time?
A: Proper maintenance, like regular cleaning and reapplying finishes, will help keep your spice rack looking great for years to come.

Measuring and Cutting the Wood
When it comes to creating your very own wooden spice rack, accurate measurements and precise cuts are the foundation of your project. Think of it like baking a cake; if you don’t measure your ingredients correctly, you might end up with a lopsided dessert! The same principle applies here. Start by gathering your tools: a tape measure, a square, and a pencil are essential for marking your wood. Measure twice, cut once—this old adage holds true in woodworking. It’s better to take your time and ensure your measurements are spot on rather than rushing and making mistakes.
Begin by deciding on the dimensions of your spice rack. A typical spice rack might be about 24 inches wide and 12 inches high, but feel free to customize it according to your kitchen space. Once you have your dimensions, use a square to mark straight lines on the wood. This will help you achieve clean, straight cuts. If you're using a miter saw, set the angle for any beveled edges you want to incorporate. For manual cutting, ensure your hand saw is sharp; a dull blade can lead to jagged edges and frustration.
When cutting the wood, employ the following techniques to ensure precision:
- Stabilize Your Wood: Use clamps to hold your wood securely in place. This prevents any movement that could result in uneven cuts.
- Follow Your Lines: Always cut along the marked lines. If you stray off course, you might end up with pieces that don’t fit together.
- Practice Safety: Always wear safety goggles and keep your fingers clear of the blade. Safety should be your top priority!
After cutting, take a moment to inspect your pieces. Look for any rough edges or splinters that could affect the assembly. A little sanding at this stage can go a long way in ensuring your spice rack not only looks fantastic but is safe to use as well. Remember, the goal is to create a spice rack that not only serves its purpose but also adds a touch of personality to your kitchen.
By following these measuring and cutting techniques, you’ll be well on your way to crafting a spice rack that’s both functional and visually appealing. Once you've mastered the art of measurement and cutting, you'll find that the rest of the assembly process becomes a breeze!
Q: What tools do I need for measuring and cutting wood?
A: You’ll need a tape measure, a square, a pencil, clamps, and a saw (either a miter saw or hand saw).
Q: How do I ensure my cuts are straight?
A: Use a square to mark straight lines and make sure to stabilize your wood with clamps while cutting.
Q: Can I make a spice rack without power tools?
A: Absolutely! Hand saw techniques can be just as effective. Just ensure your saw is sharp and take your time.

Using a Miter Saw
When it comes to creating a wooden spice rack, precision is key, and that's where a miter saw shines. This powerful tool is designed for making accurate angled cuts, which are essential for achieving those clean, professional-looking corners that can elevate your spice rack from basic to beautiful. Imagine the satisfaction of seeing your project come together with such precision! But before you dive in, let’s talk about how to safely and effectively use a miter saw.
First off, you’ll want to make sure you’re familiar with the miter saw's components. The saw features a blade that rotates around a pivot, allowing you to make both straight and angled cuts. To get started, set your wood securely on the saw’s base, ensuring it’s stable and won’t shift as you cut. Always use the clamp that comes with the saw to hold your wood in place. Safety is paramount, so don’t forget to wear protective eyewear and ear protection!
Now, let’s discuss some important tips for using the miter saw:
- Measure Twice, Cut Once: Before making any cuts, double-check your measurements. It’s a classic adage for a reason—accurate measurements lead to fewer mistakes.
- Adjust the Angle: If your spice rack design calls for angled cuts, adjust the miter saw's angle accordingly. Most miter saws have a scale that makes this easy.
- Practice on Scrap Wood: If you’re new to using a miter saw, consider practicing on some scrap wood first. This will help you get a feel for the tool and improve your cutting technique.
Once you’re comfortable, it’s time to make your cuts. Start the saw and allow the blade to reach full speed before lowering it onto the wood. This ensures a smooth cut without splintering the edges. After you’ve made your cuts, take a moment to inspect the edges. They should be clean and smooth, ready for assembly. If you notice any rough spots, a quick pass with sandpaper can fix that right up!
Using a miter saw not only makes your spice rack construction easier but also adds a touch of professionalism to your project. With its ability to create precise angles, your spice rack will not only be functional but also a stunning addition to your kitchen. Remember, the goal is to enjoy the process and take pride in your work. So, gear up, grab your miter saw, and let’s get cutting!
Q: Can I use a miter saw for other projects?
A: Absolutely! A miter saw is versatile and can be used for various woodworking projects, such as picture frames, furniture, and even baseboards.
Q: Is it safe to use a miter saw?
A: Yes, as long as you follow safety precautions, such as wearing protective gear and ensuring the wood is secured before cutting.
Q: What is the difference between a miter saw and a compound miter saw?
A: A compound miter saw can tilt to make bevel cuts in addition to making miter cuts, while a standard miter saw only makes miter cuts.
Q: Do I need to sand the edges after cutting with a miter saw?
A: It’s a good practice to sand the edges, especially if you want a smooth finish for your spice rack.

Hand Saw Techniques
When it comes to crafting your own wooden spice rack, using a hand saw can be both a rewarding and challenging experience. Unlike power tools, hand saws require a bit more finesse and technique, but they also offer a sense of connection to the craft that many DIY enthusiasts cherish. To get started, it’s essential to understand the different types of hand saws available and how to use them effectively. Whether you’re cutting through soft pine or harder woods like oak, the right technique can make all the difference.
First and foremost, maintaining a steady hand is crucial. A shaky hand can lead to uneven cuts, which can compromise the overall look of your spice rack. To achieve that clean, straight line, consider the following techniques:
- Mark Your Cut Line: Before you even pick up the saw, take a moment to measure and mark where you want to cut. Use a square to ensure your lines are straight and accurate.
- Start with a Kerf: Begin your cut by creating a small notch along your marked line. This helps guide the saw and prevents it from wandering as you cut.
- Use Long, Even Strokes: When sawing, use long and even strokes, applying consistent pressure. This technique not only makes the cutting process smoother but also helps maintain the integrity of the wood.
- Don’t Rush: Patience is key. Rushing through your cuts can lead to mistakes. Take your time to ensure each cut is precise.
Additionally, it's important to choose the right saw for your project. A panel saw is great for larger cuts, while a back saw provides more control for intricate cuts. If you’re working with thicker pieces of wood, consider using a crosscut saw, which is designed to cut across the grain efficiently.
Remember, practice makes perfect! If you're new to using a hand saw, don’t hesitate to practice on scrap wood first. This will help you get a feel for the tool and improve your cutting technique without the pressure of ruining your main project. As you gain confidence, you’ll find that using a hand saw can be an enjoyable and satisfying part of building your spice rack.
In conclusion, while power tools can certainly speed up the process, mastering hand saw techniques not only enhances your woodworking skills but also allows for a more personal touch in your DIY projects. So, grab your saw, take a deep breath, and enjoy the journey of creating your own wooden spice rack!
Q: What type of hand saw should I use for my spice rack?
A: For most spice rack projects, a panel saw or a back saw is ideal as they provide good control for straight cuts.
Q: How can I ensure my cuts are straight?
A: Mark your cut line clearly with a square, and start with a kerf to guide the saw. Use long, even strokes and take your time.
Q: Is it difficult to use a hand saw?
A: It can be challenging at first, but with practice and the right techniques, you'll find it to be a rewarding experience.

Assembling the Spice Rack
Once you have all your pieces cut and ready, it’s time for the fun part: assembling your spice rack! This stage is where your vision starts to take shape, transforming those individual pieces of wood into a functional and stylish kitchen addition. But before you dive in, let’s take a moment to consider the different methods you can use to join your wood pieces together. Each method has its own strengths, so choosing the right one will ensure your spice rack is not only beautiful but also sturdy.
First up, we have the classic method of using wood glue. This is a great option for those who want a seamless appearance without visible hardware. Apply a generous amount of glue to the edges of the wood pieces that will be joined. Once you’ve pressed them together, use clamps to hold them in place while the glue dries. This method can create a very strong bond, but remember, patience is key! You’ll want to let the glue cure for at least a few hours, or even overnight, for the best results.
Next, let’s talk about screws. Using screws is a reliable way to ensure that your spice rack will stand the test of time. If you choose this method, it’s a good idea to pre-drill holes to prevent the wood from splitting. When screwing the pieces together, make sure to countersink the screws so they sit below the surface of the wood. This will allow you to fill in the holes later for a clean finish. Here’s a quick overview of the benefits of using screws:
- Strength: Provides a very sturdy assembly.
- Adjustability: If you need to take it apart later, screws make it easy.
- Speed: Quick to assemble, especially with a power drill.
Another option is to use dowels, which can create a seamless and strong joint. This method involves drilling holes into both pieces of wood and inserting a wooden dowel to join them. It requires a bit more precision, but the result is a professional-looking finish that can really enhance the overall aesthetic of your spice rack.
After you’ve chosen your preferred joining method, it’s time to assemble the pieces. Start with the base and work your way up. If your design includes shelves, make sure they are evenly spaced and securely attached. It may help to use a level to ensure everything is straight. Once the main structure is assembled, you can attach any additional features like a back panel or side supports, which will add stability and style.
Don’t forget to take a moment to step back and admire your work as you go. It’s easy to get caught up in the details, but remember, this is your creation! Once everything is assembled and secure, you can move on to the finishing touches that will make your spice rack uniquely yours.
Q: What type of wood is best for a spice rack?
A: Popular choices include pine for its affordability, oak for its durability, and maple for its beautiful grain. Choose based on your aesthetic preference and budget.
Q: How long should I wait for the glue to dry?
A: It’s best to let wood glue cure for at least 24 hours for maximum strength, although some types may dry quicker.
Q: Can I use a combination of joining methods?
A: Absolutely! Many DIYers use a combination of glue and screws or dowels for added strength and stability.

Finishing Touches
When it comes to creating your own wooden spice rack, the are what transform a simple project into a stunning centerpiece for your kitchen. Just like a chef adds the final sprinkle of seasoning to a dish, the right finish can elevate the look of your spice rack while providing essential protection against the elements of the kitchen environment. So, let’s dive into the world of finishes and see how you can make your spice rack not only functional but also a beautiful addition to your culinary space.
First off, you might be wondering, “What kind of finish should I choose?” Well, that depends on your personal style and the overall aesthetic of your kitchen. Here are some popular options:
- Stains: These come in various colors and can enhance the natural grain of the wood, giving it a rich, warm look. Stains are perfect if you want to highlight the beauty of the wood while providing a degree of protection.
- Paint: If you’re looking for a bold statement, painting your spice rack can be a fantastic choice. Choose colors that complement your kitchen decor or even go for a fun, vibrant hue that adds personality.
- Clear Finishes: A clear varnish or polyurethane can protect the wood without altering its natural appearance. This option is great if you love the original look of the wood and want to keep it intact.
Now that you have an idea of what finishes are available, the application process is next. Start by ensuring that your spice rack is sanded smoothly. This step is crucial because a rough surface can lead to an uneven finish. Once sanded, wipe down the wood with a damp cloth to remove any dust particles. After it dries, you can apply your chosen finish using a brush or a cloth, depending on the type. Always follow the manufacturer's instructions for the best results.
It's also worth considering how the finish will wear over time. In a busy kitchen, your spice rack will likely encounter spills, heat, and humidity. Therefore, opting for a durable finish, like a polyurethane, can help protect your hard work. Remember, a well-finished spice rack not only looks good but also stands the test of time.
Finally, don’t forget that you can add personal touches that reflect your style. Consider adding hardware like decorative knobs or handles, or even stencils for a custom design. These elements can make your spice rack truly one-of-a-kind. With these finishing touches, you’ll not only have a functional spice rack but also a piece that showcases your creativity and flair.
Q: How do I choose the right finish for my spice rack?
A: Consider the overall style of your kitchen and how much wear and tear the spice rack will endure. Stains enhance the wood's natural beauty, while paint can add a pop of color. Clear finishes protect without altering the wood's appearance.
Q: How many coats of finish should I apply?
A: Generally, two to three coats of finish are recommended for optimal protection. Make sure to let each coat dry completely before applying the next one.
Q: Can I use my spice rack immediately after finishing it?
A: It's best to wait at least 24 hours after applying the last coat of finish before using your spice rack to ensure everything is fully cured and dry.

Choosing a Finish
When it comes to giving your wooden spice rack that final touch, choosing the right finish is essential. Not only does a good finish enhance the beauty of the wood, but it also provides protection against moisture, spills, and wear and tear. Imagine your spice rack as a canvas; the finish is the paint that brings your masterpiece to life. So, what are your options? Let’s dive in!
One popular choice is polyurethane, which offers a durable, water-resistant coating. It comes in both oil-based and water-based forms. Oil-based polyurethane tends to have a richer, amber hue, which can deepen the color of the wood, while water-based options dry clear and are less odorous, making them easier to work with. If you’re looking for something with a bit more character, consider stains. Staining your spice rack not only adds color but also showcases the natural grain of the wood, giving it a unique appearance. You can choose from a variety of shades, from deep mahogany to light oak, depending on your kitchen’s decor.
Another option is natural oils, such as tung oil or linseed oil. These finishes penetrate the wood, providing a subtle sheen while enhancing the grain. They are particularly appealing for those who prefer a more eco-friendly approach. However, keep in mind that natural oils may require more frequent reapplication compared to synthetic finishes.
For those looking to make a bold statement, paint is always a viable option. A bright color can add a fun pop to your kitchen, turning your spice rack into a focal point. Just be sure to use paint designed for wood surfaces, and apply a protective topcoat to ensure durability.
Here’s a quick comparison table to help you decide:
| Finish Type | Durability | Appearance | Ease of Application |
|---|---|---|---|
| Polyurethane | High | Rich, glossy | Moderate |
| Stain | Moderate | Enhances grain | Easy |
| Natural Oils | Low to Moderate | Natural look | Easy |
| Paint | Moderate | Vibrant | Easy |
Ultimately, the choice of finish depends on your personal style and the overall look you want to achieve in your kitchen. It’s like choosing the icing on a cake; the right finish can elevate your spice rack from ordinary to extraordinary. So, take your time, experiment with samples, and don’t hesitate to ask for advice at your local hardware store. Your spice rack deserves to shine!
- What is the best finish for a spice rack? The best finish depends on your preferences, but polyurethane and stains are popular choices for durability and aesthetics.
- How often should I reapply the finish? It varies by finish type; natural oils may need reapplication every few months, while polyurethane can last for several years.
- Can I use food-safe finishes? Yes, if you plan to store spices directly on the wood, look for finishes labeled as food-safe.

Adding Labels and Organization
Once you've crafted your stunning wooden spice rack, it’s time to make it truly functional with some thoughtful labeling and organization. Imagine opening your spice rack and instantly knowing where everything is—sounds dreamy, right? By adding labels, you not only enhance the visual appeal of your rack but also streamline your cooking process. When you're in the middle of whipping up a culinary masterpiece, the last thing you want is to hunt down that elusive jar of cumin!
First off, let’s talk about labeling. There are countless ways to label your spice jars, and the method you choose can reflect your personal style. You might opt for simple handwritten labels on kraft paper, or perhaps you prefer a more polished look with printed labels. Either way, it’s important to ensure that the labels are clear and easy to read. Consider using a consistent font and size for a cohesive look. You could even get creative with colors that complement your kitchen decor. If you're feeling artistic, why not try your hand at some chalkboard paint on the jars? This allows you to easily update or change the labels as your spice collection evolves!
Now, let’s discuss organization. When it comes to arranging your spices, think about how you cook. Do you often reach for the same spices? Place those at the front for easy access. You can categorize your spices in several ways:
- By Cuisine: Group spices based on the type of cuisine you frequently prepare, such as Italian, Mexican, or Indian.
- By Flavor Profile: Organize spices by their flavors, such as sweet, savory, or spicy.
- By Frequency of Use: Keep the spices you use most often within arm's reach while storing less frequently used spices at the back.
Additionally, consider using tiered shelving or spice jars with clear labels and lids that allow you to see the contents at a glance. This not only makes it easier to find what you need but also adds an aesthetic appeal to your spice rack. If you have a lot of spices, you might even want to create a small index or chart that lists all your spices and their locations. That way, anyone in the kitchen can quickly find what they're looking for without disrupting your cooking flow.
Finally, maintaining your organized spice rack is crucial. As you use spices, it’s easy for things to get jumbled. Make it a habit to tidy up your spice rack every few weeks. Check for expired spices, refill jars, and adjust the arrangement if necessary. This little upkeep will not only keep your rack looking great but will also ensure that your culinary adventures remain smooth and enjoyable.
| Question | Answer |
|---|---|
| What materials are best for spice jar labels? | Water-resistant materials like vinyl or laminated paper work best to withstand spills and humidity. |
| How can I prevent my spices from losing flavor? | Store spices in a cool, dark place and keep them tightly sealed to maintain freshness. |
| How often should I replace my spices? | Ground spices typically last about 2-3 years, while whole spices can last 3-4 years. Check for aroma and flavor to determine freshness. |

Maintaining Your Spice Rack
Once you've built your beautiful wooden spice rack, the next step is to ensure it remains a stunning centerpiece in your kitchen for years to come. Just like any piece of furniture, your spice rack requires a bit of love and care to maintain its charm and functionality. Regular maintenance not only keeps it looking great but also ensures it serves its purpose effectively. So, what are some simple ways to keep your spice rack in tip-top shape?
First and foremost, cleaning is essential. Dust and spice residue can accumulate over time, making your rack appear less appealing. To clean it, simply use a soft cloth dampened with mild soap and water. Avoid using harsh chemicals, as they can damage the wood finish. It’s best to wipe down the surfaces regularly, especially if you frequently cook with spices. A quick wipe-down can prevent buildup and keep your spices fresh.
Next, consider reapplying finishes. Depending on the type of finish you used initially, your spice rack may require periodic touch-ups. If you notice the wood looking dull or worn, it might be time to sand it lightly and apply a new coat of stain or sealant. This not only enhances the wood’s natural beauty but also protects it from moisture and spills that are common in kitchens. A well-finished spice rack is less susceptible to warping or cracking, which can happen if the wood absorbs too much moisture.
Additionally, it's important to check for any signs of wear and tear. Inspect your spice rack regularly for loose screws, cracks, or any structural issues. If you find any loose parts, tighten them up to maintain stability. If you notice any cracks, you can fill them with wood filler and sand them down for a smooth finish. Addressing these issues promptly can prevent them from becoming bigger problems down the line.
Finally, let's not forget about organization! Keeping your spices organized not only makes cooking easier but also helps maintain the integrity of your spice rack. Consider rearranging your spices periodically to ensure you’re using the oldest ones first. This practice can help prevent waste and keep your spices fresh. You might even want to create a labeling system that makes it easy to find what you need at a glance. Whether you use a label maker, chalkboard labels, or handwritten tags, a little organization goes a long way in maintaining your spice rack’s functionality.
In summary, maintaining your wooden spice rack involves regular cleaning, reapplying finishes, checking for wear, and keeping your spices organized. By following these simple steps, you can ensure that your spice rack remains not only a beautiful addition to your kitchen but also a practical tool for all your culinary adventures.
Here are some common questions regarding the maintenance of your spice rack:
- How often should I clean my spice rack? It’s best to clean your spice rack at least once a month, or more frequently if you cook often.
- What type of finish should I use for my spice rack? A food-safe finish like mineral oil or a polyurethane sealant is recommended for durability and safety.
- Can I use regular household cleaners to clean my spice rack? It’s advisable to use mild soap and water instead of harsh chemicals to avoid damaging the wood.
- How do I prevent my spices from going stale? Store spices in a cool, dark place, and consider labeling them with purchase dates to keep track of freshness.
Frequently Asked Questions
- What type of wood is best for making a spice rack?
Choosing the right wood is essential for both durability and aesthetics. Popular options include pine for its affordability, oak for its strength, and maple for its beautiful grain. Consider how each type will fit into your kitchen's design and how well it can withstand moisture.
- What tools do I need for building a spice rack?
Before you start, gather essential tools like a miter saw for angled cuts, a hand saw if you prefer manual cutting, a drill for making holes, and screws or dowels for assembly. Having these tools ready will help ensure a smooth building process.
- How do I measure and cut the wood accurately?
Accurate measurements are key to a well-fitting spice rack. Use a tape measure to mark your cuts, and make sure to double-check your dimensions. When cutting, keep your saw steady for clean edges, and always follow safety precautions to avoid accidents.
- Can I build a spice rack without power tools?
Absolutely! You can use a hand saw and other manual tools to create your spice rack. While it may take a bit more time and effort, hand saw techniques can yield great results, allowing you to maintain control and precision in your cuts.
- What are the best methods for assembling the spice rack?
When it comes to assembly, you can use wood glue for a strong bond, screws for added stability, or dowels for a more seamless look. Choose the method that suits your design and skills best, ensuring your spice rack is sturdy and reliable.
- How can I finish my spice rack for a polished look?
Finishing touches can really elevate your spice rack's appearance. You can choose to sanding the surface for a smooth finish, apply stain to enhance the wood's natural color, or use paint to match your kitchen decor. Each option offers a unique look and protection for the wood.
- What should I consider when labeling my spice jars?
Labeling your spice jars can enhance organization and accessibility. Consider using chalkboard labels for a rustic feel, or printed labels for a modern touch. Arrange your spices in a way that makes sense for your cooking habits, so you can easily find what you need.
- How do I maintain my wooden spice rack?
To keep your spice rack looking great, regularly clean it with a damp cloth and mild soap. Check for any signs of wear and reapply finishes as needed to protect the wood. With a little care, your spice rack can last for years and remain a beautiful part of your kitchen.