Handcrafted Wooden Jewelry: DIY Tutorials
Have you ever looked at a piece of jewelry and thought, “I could make that”? Well, you absolutely can! Handcrafted wooden jewelry not only allows you to express your personal style but also gives you an opportunity to connect with the materials and the creative process. In this guide, we’ll explore the art of creating stunning wooden jewelry through a variety of DIY tutorials. Whether you’re a seasoned crafter or just starting, you’ll find inspiration and practical tips to help you craft unique pieces that reflect your individuality.
Imagine the satisfaction of wearing a necklace or a pair of earrings that you made with your own hands. Each piece tells a story, not just of your creativity but also of the time and love you poured into it. This guide will take you on a journey through the essential steps of crafting wooden jewelry—from selecting the right wood to mastering finishing techniques. So, roll up your sleeves and let’s dive into the wonderful world of DIY wooden jewelry!
When it comes to crafting wooden jewelry, the first step is to select the right type of wood. Each kind of wood offers its own unique aesthetics, durability, and workability. For example, maple is known for its light color and smooth texture, making it perfect for elegant pieces. On the other hand, walnut provides a rich, dark hue that can add a touch of luxury to your creations. But how do you choose the right wood for your project? Here are some factors to consider:
- Aesthetics: Consider the color and grain pattern of the wood.
- Durability: Some woods are more resistant to wear and tear.
- Workability: Softer woods are easier to cut and shape.
By keeping these factors in mind, you can ensure that your final designs not only look beautiful but also stand the test of time.
Before you start crafting, it’s crucial to understand the tools and materials you’ll need. Having the right equipment can make a world of difference in your crafting experience. Here’s a quick rundown of the essentials:
- Cutting Tools: Saws and chisels will be your best friends when shaping wood.
- Finishing Supplies: Sandpaper, sealants, and polish will help you achieve that professional look.
- Design Materials: Don’t forget about paints, stains, and embellishments to personalize your pieces.
With these tools at your disposal, you’ll be well-prepared to embark on your DIY journey into the world of handcrafted wooden jewelry.
Finding design inspiration can sometimes feel like searching for a needle in a haystack. But don’t worry! Nature is a fantastic source of inspiration for wooden jewelry. Think about the organic shapes and textures found in leaves, flowers, and even tree bark. These elements can influence your designs, creating pieces that resonate with the natural world.
Additionally, consider incorporating geometric patterns into your designs. These modern twists can elevate your jewelry, making it stand out. Simple shapes and lines can create striking contemporary designs that are both versatile and eye-catching.
Now that you’ve got your materials and inspiration, it’s time to get crafting! Our step-by-step tutorials will guide you through the process of creating specific pieces of wooden jewelry. For instance, you can start with simple earrings that are perfect for everyday wear. As you gain confidence, you can move on to crafting bold statement necklaces with unique wooden elements.
After all your hard work, you’ll want to ensure that your handcrafted wooden jewelry stays beautiful for years to come. Proper maintenance is key! Regular cleaning and careful storage can prevent scratches and damage. Use a soft cloth to gently clean your pieces, and store them in a padded box or a dedicated jewelry organizer to keep them safe.
Q: What type of wood is best for beginners?
A: Basswood is an excellent choice for beginners due to its softness and ease of carving.
Q: How do I finish my wooden jewelry?
A: Sand your pieces smooth, then apply a wood finish or sealant to protect them and enhance their appearance.
Q: Can I paint my wooden jewelry?
A: Absolutely! Acrylic paints work well on wood, allowing you to add color and personality to your pieces.
So, are you ready to unleash your creativity? With the right tools, materials, and a little inspiration, you can create stunning handcrafted wooden jewelry that’s uniquely yours. Happy crafting!
Choosing the Right Wood
When it comes to crafting your own handcrafted wooden jewelry, is absolutely essential. The type of wood you select not only affects the look and feel of your pieces but also determines their durability and ease of crafting. Different woods come with unique characteristics, and understanding these will help you make informed choices that align with your creative vision.
For instance, some woods are known for their rich colors and beautiful grains, making them visually striking options for jewelry. Others might be lighter and easier to work with, which is particularly beneficial for intricate designs. Here are a few popular types of wood to consider:
- Bamboo: Lightweight and sustainable, bamboo offers a unique appearance and is easy to carve.
- Walnut: Known for its rich, dark color, walnut creates stunning pieces that can be both elegant and rustic.
- Maple: With a light color and fine grain, maple is perfect for a clean, modern look.
- Cedar: This aromatic wood not only looks beautiful but also has natural resistance to moisture, making it ideal for jewelry.
- Cherry: Cherry wood darkens beautifully over time, adding character to your pieces.
Each wood type brings its own set of advantages and challenges. For example, while pine is readily available and easy to work with, it may not offer the same durability as hardwoods like oak or maple. Therefore, understanding the properties of the wood you choose is crucial for achieving the desired outcome in your jewelry-making projects.
Moreover, consider the environmental impact of your wood choice. Opting for sustainably sourced materials not only supports eco-friendly practices but also adds a meaningful story to your handcrafted pieces. Look for woods that are certified by organizations like the Forest Stewardship Council (FSC) to ensure they come from responsibly managed forests.
In summary, the right wood can elevate your jewelry from ordinary to extraordinary. By taking the time to understand the various types of wood available and their unique properties, you set the stage for crafting stunning pieces that truly reflect your personal style and creativity. So, before you dive into your next DIY project, make sure to choose wisely!
Essential Tools and Materials
When diving into the world of handcrafted wooden jewelry, having the right tools and materials at your disposal is absolutely essential. Imagine trying to paint a masterpiece without a brush; it just wouldn't work, right? The same goes for jewelry making. Each tool has its own unique purpose, and together they create a symphony of craftsmanship that will help you bring your creative visions to life.
First and foremost, you'll need some cutting tools. These are the backbone of your jewelry-making process. Hand saws and power saws will help you shape your wooden pieces with precision. Hand saws offer a level of control that many crafters appreciate, especially for intricate designs. On the other hand, power saws can save you time and effort if you're working on larger projects. But remember, each has its pros and cons:
| Tool Type | Pros | Cons |
|---|---|---|
| Hand Saws | Precision, control | Time-consuming for larger cuts |
| Power Saws | Speed, efficiency | Less control, requires safety precautions |
Next, let’s talk about chisels and carving tools. These tools are your magic wands for adding intricate details to your designs. Whether you're creating delicate patterns or bold textures, having a variety of chisels will allow you to express your creativity. Think of them as the fine-tipped markers in your art kit; they help you add those final touches that make your pieces truly stand out.
But don’t stop there! Finishing techniques are what will elevate your handcrafted jewelry from ordinary to extraordinary. You’ll need sanding tools to smooth out any rough edges, sealers to protect your wood from the elements, and polishing supplies to give your pieces that shiny, professional finish. The right finishing techniques can make all the difference, turning a simple piece of wood into a stunning work of art.
Now, let’s not forget about the materials. The type of wood you choose can dramatically affect not only the look but also the durability of your jewelry. Popular choices include:
- Bamboo: Lightweight and sustainable, perfect for everyday wear.
- Walnut: Known for its rich, dark color and strength.
- Maple: Light-colored and versatile, great for intricate designs.
When you gather your tools and materials, make sure to set up a dedicated workspace. Having a clean, organized area will help you focus on your craft. Just imagine trying to create a beautiful piece while surrounded by chaos; it can be quite the distraction!
In summary, equipping yourself with the right tools and materials is the first step in your journey of creating stunning handcrafted wooden jewelry. From cutting tools to finishing supplies, each element plays a vital role in the crafting process. So, get ready to unleash your creativity and let your imagination run wild!
Q: What is the best type of wood for beginners?
A: Softwoods like pine or cedar are great for beginners as they are easier to work with and less expensive.
Q: Do I need a lot of tools to start making wooden jewelry?
A: No, you can start with just a few essential tools and gradually expand your collection as you gain experience.
Q: How do I maintain my wooden jewelry?
A: Regular cleaning and proper storage are key to maintaining the beauty of your pieces. Avoid exposing them to extreme humidity or direct sunlight.

Cutting Tools
When it comes to crafting stunning handcrafted wooden jewelry, having the right is essential. These tools are your best friends in shaping and defining your wooden pieces, allowing you to bring your creative visions to life. Imagine trying to sculpt a beautiful statue without the proper chisel; it would be nearly impossible, right? The same principle applies to jewelry making. Whether you're a beginner or a seasoned artisan, understanding the various cutting tools available can significantly enhance your crafting experience.
First off, let's talk about the most common cutting tools you'll encounter in your woodworking journey. Each tool serves a unique purpose, and choosing the right one can make all the difference. Here's a quick overview of some essential cutting tools:
| Tool | Description | Best For |
|---|---|---|
| Hand Saw | A manual saw that provides control over cuts. | Intricate designs and small pieces. |
| Power Saw | An electric saw that speeds up the cutting process. | Larger pieces and straight cuts. |
| Scroll Saw | A specialized saw for intricate curves and shapes. | Detailed designs and patterns. |
| Chisels | Tools with sharp edges used for carving. | Adding details and textures. |
Now, let’s dive deeper into the two main categories of saws: hand saws and power saws. Each type has its own set of advantages and disadvantages, and understanding these can help you make an informed choice. Hand saws, for instance, offer a level of precision that is hard to beat, especially when working on intricate designs. They allow for a more tactile experience, giving you complete control over your cuts. However, they can be physically demanding and time-consuming, especially for larger projects.
On the other hand, power saws can cut through wood like butter, saving you time and effort. They are particularly useful for larger pieces or straight cuts, but they require a bit of practice to master. The speed of power saws can sometimes lead to mistakes if you're not careful. So, if you're just starting out, it might be wise to practice with hand saws before transitioning to power tools.
Another important aspect of cutting tools is the use of chisels and carving tools. These tools are fantastic for adding intricate details to your jewelry pieces. Think of them as the paintbrushes of woodworking; they allow you to express your creativity in unique ways. With a good set of chisels, you can transform a simple wooden pendant into a stunning work of art, complete with delicate carvings and textures that catch the eye.
In conclusion, investing in the right cutting tools is crucial for any DIY jewelry maker. The tools you choose will not only affect the quality of your work but also your overall crafting experience. So, whether you opt for hand saws for precision or power saws for efficiency, make sure to familiarize yourself with their uses and capabilities. Happy crafting!
- What is the best type of saw for beginners? Hand saws are often recommended for beginners due to their ease of use and control.
- Can I use power saws for intricate designs? Yes, but it requires practice. A scroll saw is ideal for detailed work.
- How do I maintain my cutting tools? Regular cleaning and proper storage will help maintain their sharpness and longevity.
Hand Saws vs. Power Saws
When it comes to crafting beautiful handcrafted wooden jewelry, one of the most crucial decisions you'll make is choosing between hand saws and power saws. Each type of saw has its own set of advantages and disadvantages, and understanding these can significantly impact your crafting experience. Hand saws, for example, offer a level of control and precision that many artisans cherish. They allow for intricate cuts and delicate details, making them perfect for those who appreciate the art of craftsmanship. However, they can be labor-intensive and require more time and effort to achieve the desired results.
On the other hand, power saws bring speed and efficiency to the table. With the ability to cut through wood quickly, they are ideal for larger projects or when you need to replicate designs multiple times. However, they can sometimes sacrifice precision for speed, which might not be suitable for every jewelry piece. The choice really depends on your personal style and the specific requirements of your project.
To help you weigh your options, here’s a quick comparison of the two:
| Feature | Hand Saws | Power Saws |
|---|---|---|
| Precision | High, great for detailed cuts | Moderate, can be less precise |
| Speed | Slow, more manual effort | Fast, efficient for larger cuts |
| Cost | Generally lower | Higher initial investment |
| Ease of Use | Requires practice and skill | Generally easier for beginners |
Ultimately, your choice between hand saws and power saws should align with your crafting goals. If you’re looking to create highly detailed and unique pieces, investing time in learning to use hand saws might be the way to go. However, if you’re more focused on efficiency and volume, power saws could be your best friend. Remember, there’s no right or wrong answer here—just the right tool for your specific vision!
Q: Can I use both hand saws and power saws in my projects?
A: Absolutely! Many artisans use a combination of both types of saws to achieve the best results for different aspects of their projects.
Q: Which saw is better for beginners?
A: Power saws are often easier for beginners due to their speed and efficiency, but hand saws can also be a great way to develop fine motor skills and precision.
Q: How do I maintain my saws?
A: Regular cleaning and proper storage are essential. For hand saws, keep the blades sharp and free from rust. For power saws, follow the manufacturer's maintenance guidelines.
Chisels and Carving Tools
When it comes to creating intricate designs in your handcrafted wooden jewelry, are your best friends. These tools allow you to add unique details that can transform a simple piece into a stunning work of art. Imagine being able to carve delicate patterns or shapes into your jewelry that reflect your personal style—it's like adding your signature to each piece!
Chisels come in various shapes and sizes, each designed for specific tasks. For instance, flat chisels are great for removing larger sections of wood, whereas v-tools are perfect for creating fine lines and details. The right chisel can make a world of difference in how your design turns out. But don’t just grab any chisel; consider what you want to achieve with your piece. Are you looking to create a smooth finish, or do you want to add texture? Your goals will determine the tools you need.
Here’s a quick overview of some essential chisels and carving tools you might want to have in your toolkit:
- Flat Chisels: Ideal for general shaping and removing large amounts of wood.
- V-Tools: Perfect for detailed line work and adding intricate designs.
- Gouges: Great for hollowing out areas and creating depth in your pieces.
- Carving Knives: Excellent for fine detailing and intricate cuts.
Using these tools effectively requires practice and patience. Start with softer woods as they are easier to carve, allowing you to hone your skills without becoming frustrated. As you gain confidence, you can move on to harder woods that offer a more challenging experience but yield beautiful results.
Remember, safety is paramount when working with chisels and carving tools. Always use a cutting mat and wear protective gloves to avoid any accidents. Additionally, keep your tools sharp—dull tools can slip and cause injuries, and they make the carving process more difficult. A well-maintained tool is not only safer but also more effective in achieving the clean cuts you desire.
So, whether you're aiming to create delicate floral motifs or bold geometric shapes, having the right chisels and carving tools at your disposal is essential. They are the magic wands of your crafting journey, allowing you to bring your creative visions to life. Dive into the world of woodworking with these tools, and watch as your handcrafted wooden jewelry evolves into something truly special.
Q: What type of wood is best for beginners when using chisels?
A: Softwoods like pine or basswood are excellent choices for beginners as they are easier to carve and allow for more forgiving mistakes.
Q: How do I maintain my chisels and carving tools?
A: Keep your chisels sharp by using a sharpening stone or honing guide. Regular cleaning and oiling will also help maintain their condition.
Q: Can I use chisels for other projects aside from jewelry?
A: Absolutely! Chisels are versatile tools that can be used for various woodworking projects, including furniture making and home decor.
Finishing Techniques
When it comes to handcrafted wooden jewelry, the finishing techniques you choose can make all the difference in the final appearance and durability of your pieces. Think of finishing as the icing on a cake; it enhances the overall look and protects the underlying structure. There are several techniques you can employ, each contributing uniquely to the aesthetics and longevity of your jewelry.
One of the most essential finishing techniques is sanding. Sanding smooths out any rough edges and surfaces, ensuring that your jewelry feels comfortable against the skin. Start with a coarser grit sandpaper to remove any major imperfections, and gradually move to a finer grit to achieve a silky finish. The process may seem tedious, but trust me, the results are worth it! A well-sanded piece not only looks better but also lasts longer.
Next up is sealing. This step is crucial for protecting your wooden jewelry from moisture and environmental factors that can cause damage over time. There are various sealing options available, including oils, waxes, and clear coats. For instance, using a natural oil like tung oil not only enhances the wood's natural grain but also provides a protective barrier. On the other hand, a clear polyurethane coat can offer a more robust defense against scratches and wear. The choice of sealant often depends on the look you’re going for and the type of wood you’re using.
Finally, let's talk about polishing. Polishing adds that final touch of brilliance to your jewelry. After sealing, applying a polish can bring out the depth of the wood grain, making your piece shine like it’s brand new. You can use a soft cloth and a natural beeswax polish for a gentle buffing, or opt for a commercial wood polish for a more intense shine. Just remember, less is more; a little polish goes a long way!
In summary, the finishing techniques you employ—sanding, sealing, and polishing—are not just about aesthetics; they are essential steps in ensuring the durability and beauty of your handcrafted wooden jewelry. By taking the time to finish your pieces properly, you’re not only enhancing their visual appeal but also extending their lifespan, allowing you to enjoy your creations for years to come.
- What type of wood is best for jewelry making? - Hardwoods like maple, walnut, and cherry are excellent choices due to their durability and beautiful grain patterns.
- Can I use any type of finish on my wooden jewelry? - It's best to use finishes that are non-toxic and safe for skin contact, such as natural oils and waxes.
- How do I clean my wooden jewelry? - Use a soft, damp cloth to gently wipe your pieces. Avoid soaking them in water, as this can damage the wood.
- Is it necessary to seal my wooden jewelry? - Yes, sealing helps protect the wood from moisture and wear, preserving its beauty over time.
Design Inspiration
Finding is like embarking on a treasure hunt; you never know what beautiful pieces you’ll uncover! When it comes to crafting wooden jewelry, the possibilities are endless, and inspiration can come from the most unexpected places. Whether you’re wandering through nature, flipping through design magazines, or scrolling through social media, the key is to keep your eyes open and your mind receptive. One of the most enriching aspects of working with wood is how it can be shaped and styled in a myriad of ways, allowing you to reflect your personal taste and creativity in every piece.
Nature is often a fantastic muse, offering an array of organic shapes and textures that can influence your designs. Think about the curves of a leaf, the roughness of bark, or the intricate patterns found in wood grain. These elements can seamlessly translate into stunning jewelry pieces. For instance, you might consider creating earrings that mimic the elegant silhouette of a willow branch or a necklace that showcases the unique patterns of a cross-section of wood. By observing the world around you, you can draw inspiration from the beauty of nature and incorporate it into your handcrafted jewelry.
On the other hand, if you’re leaning towards a more modern aesthetic, geometric patterns can offer a fresh twist to your creations. Imagine the clean lines of a triangle or the symmetry of a hexagon. These shapes can be combined and layered to create striking designs that stand out. For example, a necklace made from interlocking geometric shapes can serve as a bold statement piece, while simple wooden studs can add a touch of sophistication to any outfit. The beauty of geometric designs lies in their versatility; they can be both minimalistic and intricate, depending on how you choose to execute them.
To further ignite your creativity, consider exploring various resources for design inspiration. Here are a few ideas:
- Art and Craft Exhibitions: Visiting local galleries can expose you to innovative designs and techniques.
- Online Platforms: Websites like Pinterest and Instagram are treasure troves of creative ideas where you can follow artisans and see their work.
- Nature Walks: A simple stroll through a park can reveal countless shapes, colors, and textures that can inspire your next piece.
Ultimately, the key to finding your design inspiration lies in experimentation and exploration. Don’t be afraid to mix and match styles or draw from multiple sources. Your unique perspective will shine through in your creations, making each piece a reflection of your individuality. So grab your tools, let your imagination run wild, and start crafting jewelry that tells your story!
Q: What type of wood is best for jewelry making?
A: The best types of wood for jewelry making are lightweight and durable options like balsa, maple, or walnut, as they are easy to work with and provide a beautiful finish.
Q: Do I need special tools to get started?
A: While basic cutting tools and sanding supplies are essential, you can start with minimal equipment. As you progress, you may want to invest in more specialized tools.
Q: How can I ensure the longevity of my wooden jewelry?
A: Proper care, such as avoiding exposure to moisture and storing pieces in a safe place, can significantly extend the life of your handcrafted jewelry.
Nature-Inspired Designs
When it comes to creating wooden jewelry, nature serves as an endless well of inspiration. Just think about it: the organic shapes, the rich textures, and the vibrant colors found in the great outdoors can transform a simple piece of wood into a stunning work of art. Imagine crafting a necklace that mimics the delicate curves of a leaf or earrings that capture the rugged beauty of tree bark. The possibilities are as vast as the wilderness itself!
Nature-inspired designs often reflect the elements around us, allowing your jewelry to tell a story that resonates with the wearer. For instance, you might choose to incorporate floral motifs into your pieces, using intricate carvings that echo the beauty of blooming flowers. Or, you could opt for a more abstract approach, capturing the essence of a sunset with a gradient of colors in your wooden inlays. No matter your style, the key is to let your creativity flow, just like a river winding through a forest.
To help you get started, consider these elements when designing your nature-inspired jewelry:
- Shapes: Look at the natural forms around you. Curved lines, jagged edges, and asymmetrical shapes can all add character to your pieces.
- Textures: Experiment with different finishes to mimic the textures found in nature. For example, a rough finish can evoke the feel of tree bark, while a smooth polish can represent the glassy surface of a river stone.
- Colors: Use natural wood tones or incorporate vibrant stains to reflect the colors of flowers, leaves, or even the sky at dusk.
Moreover, consider the symbolism behind various natural elements. For example, a piece inspired by the lotus flower can symbolize purity and rebirth, while a design featuring pine cones may represent resilience and strength. By infusing your jewelry with these meanings, you create not just beautiful items but also pieces that carry emotional significance.
In conclusion, drawing inspiration from nature allows you to create wooden jewelry that is not only visually stunning but also deeply personal. As you embark on your crafting journey, take a moment to step outside, observe your surroundings, and let the beauty of the natural world guide your creativity. Who knows? You might just find the perfect inspiration for your next masterpiece!
Q: What types of wood are best for nature-inspired jewelry?
A: Some popular choices include maple for its light color, walnut for its rich hues, and cherry for its warm tones. Each type of wood offers unique characteristics that can enhance your designs.
Q: How can I incorporate natural elements into my designs?
A: You can use actual natural materials like leaves or flowers in your pieces, or you can draw inspiration from their shapes and colors to create your designs.
Q: Are there specific tools I need for carving nature-inspired designs?
A: Basic carving tools such as chisels, gouges, and a good quality saw will help you achieve intricate designs. Additionally, a rotary tool can be beneficial for adding finer details.
Q: How can I maintain the natural look of my jewelry?
A: Use natural finishes like beeswax or tung oil to protect your pieces while enhancing their beauty. Regular cleaning with a soft cloth will also help maintain their appearance.
Geometric Patterns
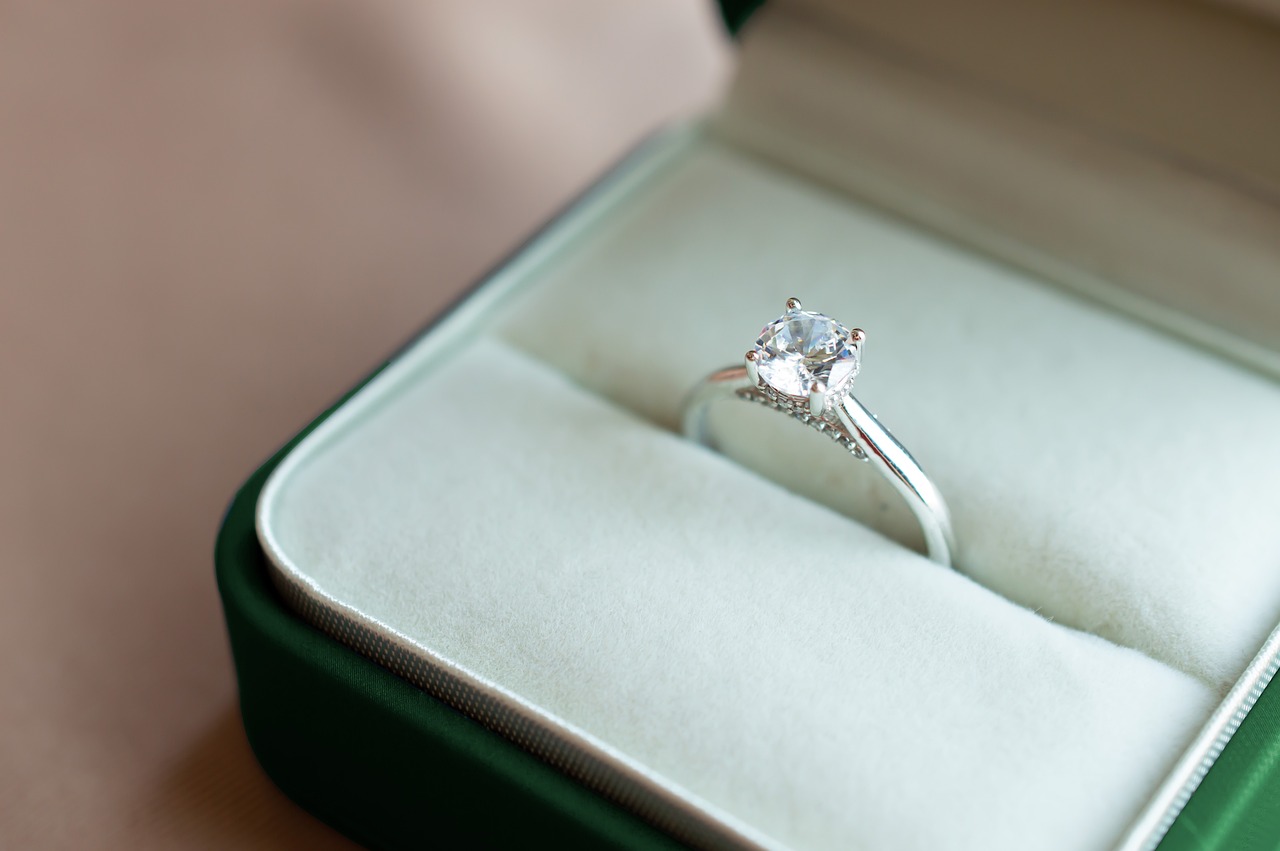
Geometric patterns have become a popular trend in the world of jewelry design, and for good reason! These designs are not only visually striking but also offer a modern twist that can elevate any piece of handcrafted wooden jewelry. Imagine wearing a necklace that features a stunning arrangement of triangles and circles, each shape perfectly aligned to create a harmonious look. This is the beauty of geometric patterns—they can be simple yet impactful, making your jewelry truly stand out.
When considering geometric designs for your wooden jewelry, think about the shapes that resonate with you. Do you prefer sharp angles, smooth curves, or a combination of both? The beauty of geometric patterns lies in their versatility. You can create a variety of designs by combining different shapes and sizes. For example, a series of small hexagons can be interspersed with larger squares to create a dynamic visual effect. This interplay of shapes not only adds interest but also reflects your personal style.
To get started with geometric designs, you might want to sketch out your ideas on paper before committing to the wood. This allows you to experiment with different arrangements and see what works best. Once you have a design you love, transfer it onto your wooden piece. You can use a pencil to lightly draw the shapes, ensuring they are evenly spaced and proportionate. This step is crucial, as it sets the foundation for your crafting process.
As you begin cutting and shaping your wooden pieces, remember that precision is key when working with geometric patterns. Using the right tools, such as a fine saw or chisels, will help you achieve clean edges and well-defined shapes. Don't be afraid to take your time; the beauty of handcrafted jewelry lies in the details. Once your pieces are cut, you can further enhance them by adding unique finishes or stains that highlight the natural grain of the wood while complementing the geometric design.
Moreover, geometric patterns can be incorporated into various types of jewelry, from earrings to bracelets to pendants. For instance, a pair of geometric earrings could feature interlocking triangles, while a pendant could showcase a larger, more intricate design. The possibilities are endless! By experimenting with different shapes, sizes, and arrangements, you can create a collection of wooden jewelry that is not only cohesive but also diverse in style.
As you explore the world of geometric patterns, consider how you can infuse your personality into your designs. Perhaps you could incorporate colors that reflect your favorite hues or add embellishments like beads or resin to create depth and dimension. The goal is to create pieces that not only catch the eye but also tell a story—your story. So, grab your tools, unleash your creativity, and let the beauty of geometric patterns inspire your next jewelry-making adventure!
- What types of wood are best for geometric jewelry designs? Hardwoods like maple, cherry, and walnut are excellent choices due to their durability and beautiful grain patterns.
- Can I mix geometric patterns with other design styles? Absolutely! Mixing geometric patterns with organic shapes can create a unique and eye-catching contrast.
- What finishes should I use for my geometric wooden jewelry? Natural oils, waxes, or clear coats can enhance the beauty of the wood while providing protection.

Step-by-Step Tutorials
Creating your own handcrafted wooden jewelry can be an incredibly rewarding experience, and the best way to dive into this art form is through . In this section, we’ll guide you through the process of making two popular pieces: simple earrings and a bold statement necklace. Each tutorial is designed to be easy to follow, ensuring that even beginners can create stunning pieces that showcase their personal style.
Let’s start with simple earrings. These earrings are perfect for everyday wear and can be customized to match any outfit. To make these earrings, you will need the following materials:
- Wood (choose a lightweight type like basswood or balsa)
- Wood glue
- Earring hooks
- Sandpaper (various grits)
- Paint or wood stain (optional)
Here’s how to craft them:
- Design Your Earrings: Sketch your desired earring shape on paper. Think about how big you want them and any patterns you might like.
- Cut the Wood: Using a hand saw or a power saw, carefully cut out your earring shapes from the wood. Remember to follow your design closely!
- Sanding: Smooth the edges and surfaces using sandpaper. Start with a coarser grit and then move to a finer grit for a polished finish.
- Finishing Touches: If desired, paint or stain your earrings to add color. Let them dry completely.
- Attach Earring Hooks: Use wood glue to attach the earring hooks to the top of your wooden shapes. Allow the glue to cure as per the manufacturer's instructions.
Now that you’ve mastered the art of simple earrings, let’s move on to creating a statement necklace. This piece is all about making a bold impression and can be a fantastic conversation starter. For this project, you’ll need:
- Wood pieces (various shapes and sizes)
- Leather cord or chain
- Wood glue
- Drill with a small drill bit
- Finishing oil or varnish
Follow these steps to create your statement necklace:
- Design Your Necklace: Lay out your wood pieces in a way that pleases your eye. Think about how they will hang together.
- Drill Holes: Carefully drill holes in the wood pieces where they will connect to the cord or chain.
- Assemble the Necklace: Start stringing the wood pieces onto your leather cord or chain. Play with the arrangement until you find the perfect look.
- Secure the Ends: Once you’re satisfied with the design, tie knots or use crimp beads to secure the ends of the cord or chain.
- Finish with Oil or Varnish: Apply a coat of finishing oil or varnish to protect your necklace and enhance the wood's natural beauty.
By following these tutorials, you can create beautiful, unique pieces of jewelry that express your individuality. Remember, the key to successful crafting is patience and practice. Don’t be afraid to experiment with different designs and techniques!
Q: What type of wood is best for beginners?
A: Lightweight woods like basswood or balsa are great for beginners due to their ease of cutting and shaping.
Q: Can I use any type of glue for wooden jewelry?
A: It's best to use wood glue as it provides a strong bond specifically designed for wood materials.
Q: How do I properly care for my wooden jewelry?
A: To maintain your wooden jewelry, clean it gently with a soft cloth and store it in a cool, dry place to prevent damage.
Q: Is it necessary to finish my wooden pieces?
A: Yes, finishing your pieces with oil or varnish helps protect them from moisture and enhances their appearance.
Simple Earrings
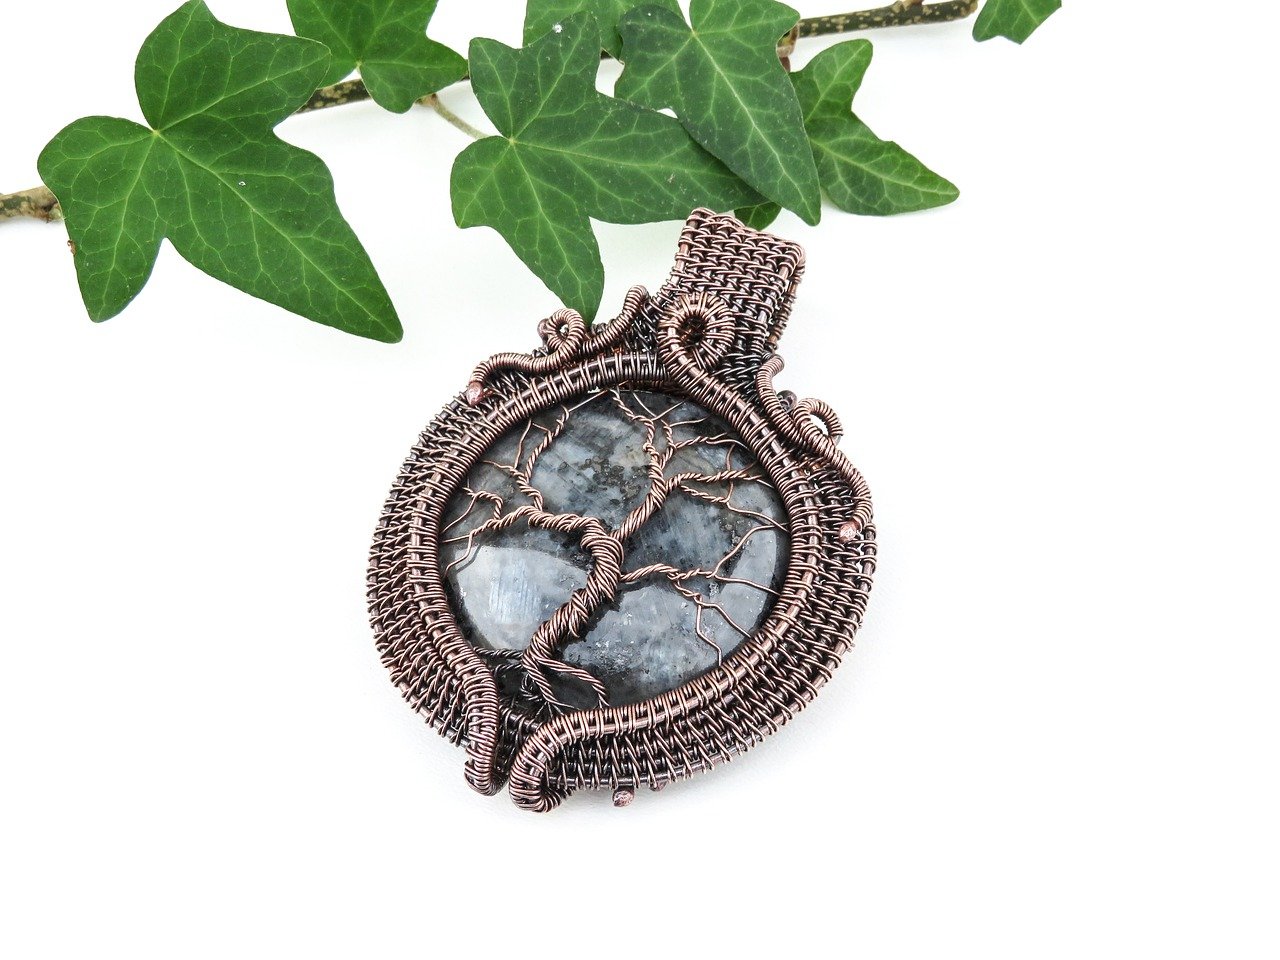
Creating your own simple wooden earrings can be a rewarding and enjoyable experience. Not only do you get to express your personal style, but you also have the satisfaction of wearing something you crafted with your own hands. To get started, you'll need a few basic materials and tools, but don’t worry; it’s not as complicated as it sounds!
First, let’s talk about the materials. You’ll want to choose a type of wood that is light and easy to work with. Some popular choices include basswood, birch, or maple. These woods are not only beautiful but also provide a smooth finish that looks great when polished. You can also experiment with different wood stains or paints to add some color and personality to your earrings.
Next, you’ll need some essential tools. Here’s a quick list of what you’ll need:
- Wooden sheets (choose your favorite type of wood)
- Jewelry wire or earring hooks
- Drill with a small bit for making holes
- Saw (a scroll saw is ideal for intricate designs)
- Sanding paper for smoothing edges
- Finishing oil or varnish to protect your earrings
Now, let’s dive into the crafting process. Begin by sketching your desired earring design on paper. Keep it simple; shapes like circles, teardrops, or even geometric forms work beautifully. Once you have your design, transfer it onto the wooden sheet using a pencil. Remember to consider the size of your earrings; they should be lightweight and comfortable to wear.
After you’ve outlined your design, it’s time to cut the wood. Carefully use your saw to follow the lines you drew. If you're using a scroll saw, take your time and let the saw do the work. Once you've cut out your shapes, it’s essential to sand the edges to ensure they are smooth and won’t snag on your skin or hair.
Next, drill a small hole at the top of each earring shape. This is where you’ll attach your earring hooks. If you want to add a little flair, consider adding beads or other decorative elements to your design. Simply thread them onto the wire before attaching it to the earring shape.
Finally, apply a coat of finishing oil or varnish to protect your earrings and enhance the wood's natural beauty. Allow them to dry completely before wearing them. And voilà! You have created a stunning pair of handcrafted wooden earrings that are sure to turn heads.
With just a few materials and some creativity, you can make beautiful wooden earrings that reflect your unique style. So, gather your supplies and let your imagination run wild!
Q: What type of wood is best for beginners?
A: Basswood is a great choice for beginners due to its softness and ease of cutting. It also has a beautiful grain that finishes nicely.
Q: Can I paint or stain my wooden earrings?
A: Absolutely! You can use wood stains or non-toxic paints to customize your earrings. Just make sure to apply a sealant afterward to protect your design.
Q: How do I clean my wooden earrings?
A: To clean your wooden earrings, simply wipe them with a soft, damp cloth. Avoid soaking them in water, as this can damage the wood.
Q: Are wooden earrings heavy?
A: No, wooden earrings are typically very lightweight, especially if you choose a softer wood. This makes them comfortable for all-day wear.

Statement Necklaces
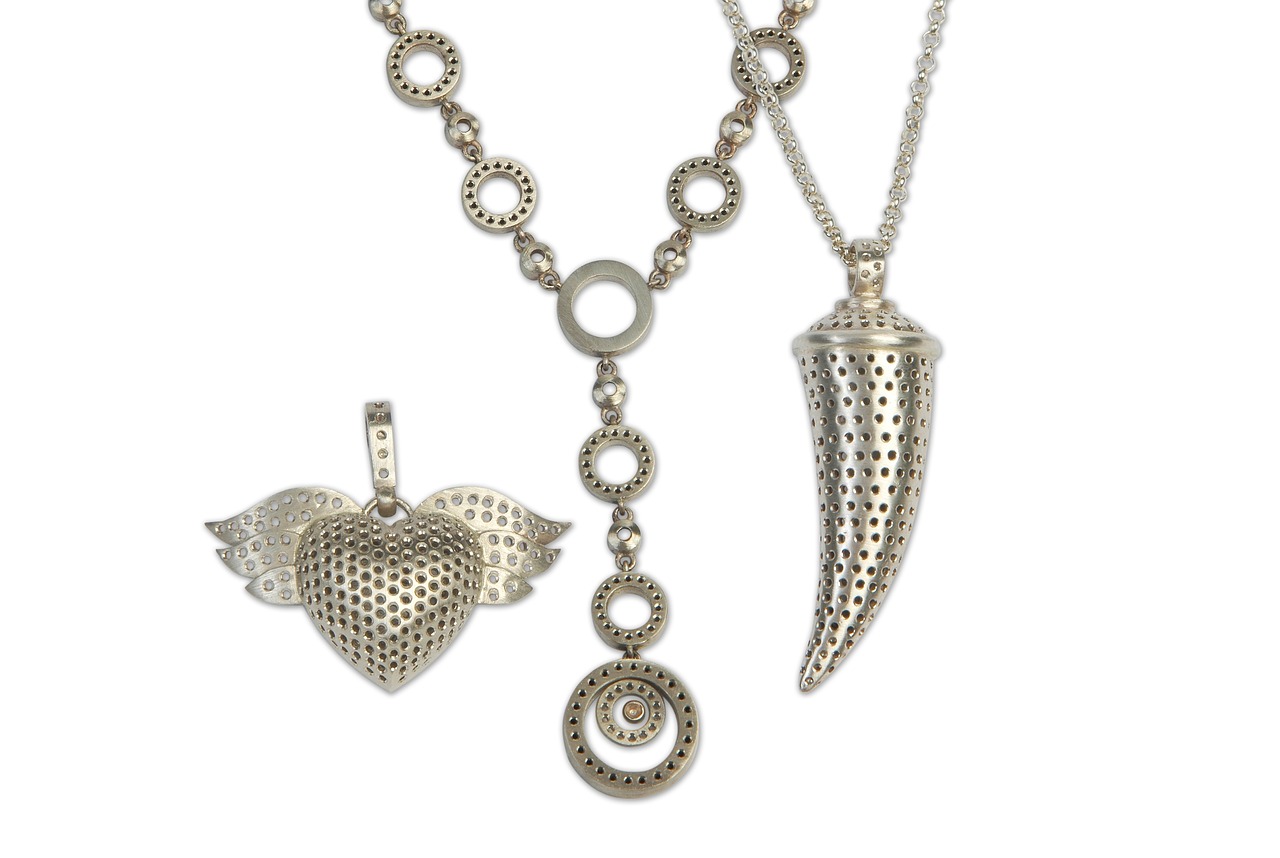
Creating bold is one of the most exciting aspects of crafting your own wooden jewelry. These pieces are not just accessories; they are expressions of your personality and style. Imagine walking into a room and having all eyes on your unique necklace, sparking conversations and admiration! In this tutorial, we will guide you through the process of designing and crafting a statement necklace that truly stands out.
First things first, let’s talk about the design choices. A statement necklace often features larger, more striking elements that can be made from various types of wood. You can choose from rich mahogany for a classic look, or lighter woods like pine for a more contemporary feel. Think about the colors and textures you want to incorporate. Mixing different woods can create a stunning contrast, while using a single type can give your piece a cohesive look.
Next, consider the assembly of your necklace. You’ll want to create a balance between the larger wooden pieces and any smaller accents you may add, such as beads or metal findings. This not only enhances the visual appeal but also ensures that the necklace hangs well. When assembling, take your time to play around with the layout before committing to the final design. You might find that what you initially envisioned changes when you start to see the pieces together!
Once you have your design laid out, it’s time to bring it to life. Start by cutting your wooden pieces to the desired shapes and sizes. A combination of geometric and organic shapes can add a dynamic touch to your necklace. After cutting, use chisels to carve intricate details or smooth out edges for a polished finish. Don't forget to sand the pieces thoroughly to avoid any splinters that could ruin the wearing experience.
After assembling your necklace, the finishing touches are crucial. You may want to apply a sealant to protect the wood and enhance its natural beauty. A clear varnish can give your necklace a shiny finish, while an oil finish can bring out the wood's grain and provide a more natural look. Whatever you choose, make sure to follow the manufacturer's instructions for the best results.
Finally, let’s talk about how to wear your statement necklace. Pair it with a simple outfit to let the necklace shine! A plain white shirt or a solid-colored dress can serve as the perfect backdrop for your handcrafted piece. Remember, the goal is to make a statement, so don’t shy away from bold colors and patterns in your clothing that complement your necklace.
In conclusion, crafting a statement necklace is not only a fun DIY project but also a rewarding way to express your creativity. With the right materials, tools, and a bit of imagination, you can create a stunning piece that is uniquely yours. So gather your supplies, unleash your creativity, and let your statement necklace tell your story!
- What types of wood are best for statement necklaces?
Hardwoods like oak, walnut, and maple are excellent choices for their durability and beautiful grain patterns. However, softer woods like pine can also be used for lighter pieces.
- How do I ensure my necklace is comfortable to wear?
Make sure to smooth all edges and apply a finish that feels good against your skin. Additionally, consider the weight of the necklace; it shouldn't be too heavy to wear comfortably.
- Can I incorporate other materials into my wooden necklace?
Absolutely! Metal accents, beads, and even fabric can add interesting textures and colors to your design. Just ensure that they complement the wood and overall aesthetic.
Maintaining Your Wooden Jewelry
Proper maintenance is crucial for preserving the beauty and longevity of your handcrafted wooden jewelry. Just like a cherished piece of art, your jewelry deserves care and attention to keep it looking its best. The natural materials used in wooden pieces can be sensitive to environmental factors, so taking the time to clean and store them correctly will ensure they remain vibrant and intact for years to come.
First and foremost, cleaning your wooden jewelry is essential. Dust and dirt can accumulate over time, dulling the finish and hiding the natural beauty of the wood. To clean your pieces, use a soft, dry cloth to gently wipe them down. Avoid using harsh chemicals or water, as these can damage the wood. Instead, if you encounter stubborn spots, you can lightly dampen the cloth with a mixture of mild soap and water, ensuring you dry the piece immediately afterward. This simple routine can help maintain the luster and shine of your jewelry.
When it comes to storage, consider your wooden jewelry's environment. Keeping your pieces in a dry, cool place away from direct sunlight is crucial, as excessive heat and light can cause the wood to warp or fade. A jewelry box lined with soft fabric can provide a safe haven for your pieces, preventing scratches and tangles. Alternatively, you can use a dedicated wooden jewelry organizer that complements the aesthetic of your handcrafted items. Not only does this keep your jewelry safe, but it also adds a touch of elegance to your display.
Another important aspect of maintenance is being mindful of how you wear your wooden jewelry. While it’s tempting to flaunt your beautiful creations every day, consider removing them during activities that could expose them to moisture or impact, such as swimming or exercising. By treating your jewelry with care, you can significantly extend its lifespan.
To further assist you in maintaining your wooden jewelry, here are some quick tips:
- Regularly clean your pieces with a soft cloth.
- Avoid exposure to water and harsh chemicals.
- Store your jewelry in a cool, dry place away from direct sunlight.
- Handle with care, especially during physical activities.
By following these maintenance tips, you can ensure that your handcrafted wooden jewelry remains a cherished part of your collection, reflecting your unique style and creativity for many years to come.
Q: How often should I clean my wooden jewelry?
A: It’s best to clean your wooden jewelry every few months, or whenever you notice dust or dirt accumulating. Regular maintenance will help keep your pieces looking their best.
Q: Can I wear my wooden jewelry in the shower?
A: It's advisable to avoid wearing wooden jewelry in the shower or while swimming, as exposure to water can damage the wood and affect its finish.
Q: What should I do if my wooden jewelry gets scratched?
A: If your wooden jewelry gets scratched, you can often buff it out with a fine-grit sandpaper or a soft cloth. For deeper scratches, consider applying a wood polish or wax to restore its shine.
Q: How can I prevent my wooden jewelry from fading?
A: To prevent fading, store your wooden jewelry in a dark place and avoid prolonged exposure to sunlight. Regularly applying a wood conditioner can also help maintain its color.
Cleaning Tips
Explore the art of creating beautiful handcrafted wooden jewelry through a variety of DIY tutorials. This guide will inspire you to craft unique pieces that reflect your personal style and creativity.
Selecting the appropriate type of wood is crucial for your jewelry project. Different woods offer various aesthetics, durability, and workability, influencing the final design and quality of your pieces.
Understanding the tools and materials required for crafting wooden jewelry is vital. This section outlines the basics you need, from cutting tools to finishing supplies, ensuring you’re well-prepared for your DIY journey.
Explore the different cutting tools necessary for shaping wooden pieces. From saws to chisels, each tool serves a specific purpose, enhancing the precision and quality of your handcrafted jewelry.
Discover the pros and cons of using hand saws versus power saws. Each option has its benefits, and choosing the right one can significantly affect your crafting experience and outcomes.
Learn about the various chisels and carving tools that can add intricate details to your designs. These tools allow for greater creativity and personalization in your wooden jewelry pieces.
Finishing techniques play a crucial role in enhancing the beauty of your jewelry. This section covers sanding, sealing, and polishing methods to elevate your handcrafted pieces.
Finding design inspiration is essential for any DIY project. This section provides ideas and resources to spark your creativity, helping you conceptualize unique wooden jewelry designs.
Nature often serves as a fantastic source of inspiration for wooden jewelry. Explore how organic shapes and textures can influence your designs, creating pieces that resonate with the natural world.
Geometric patterns offer a modern twist to wooden jewelry. This section discusses how to incorporate simple shapes and lines to create striking, contemporary designs that stand out.
This section features detailed step-by-step tutorials for creating specific pieces of wooden jewelry. Each tutorial guides you through the process, ensuring you can replicate the designs with ease.
Learn how to craft simple yet elegant wooden earrings. This tutorial covers materials, tools, and techniques to create beautiful pieces that are perfect for everyday wear.
Create bold statement necklaces with unique wooden elements. This tutorial provides guidance on design choices, assembly, and finishing touches to make your necklace truly one-of-a-kind.
Proper maintenance is crucial for preserving the beauty and longevity of your handcrafted wooden jewelry. This section offers tips on cleaning, storing, and caring for your pieces to keep them looking their best.
When it comes to cleaning your wooden jewelry, it's important to treat it with care to maintain its beauty and integrity. Regular maintenance not only keeps your pieces looking vibrant but also extends their lifespan. Here are some essential tips:
- Gentle Cleaning: Use a soft, lint-free cloth to gently wipe down your jewelry. This removes dust and oils without scratching the surface.
- Avoid Water: Water can warp and damage wood, so it's best to avoid soaking your pieces. If necessary, lightly dampen the cloth with water or a mild soap solution.
- Natural Oils: Occasionally, you can apply a small amount of mineral oil or beeswax to nourish the wood and enhance its shine. Just be sure to wipe off any excess.
By following these tips, you can keep your handcrafted wooden jewelry looking stunning and fresh for years to come. Remember, a little care goes a long way!
Explore creative storage solutions for your wooden jewelry collection. Proper storage helps prevent scratches and damage, allowing you to enjoy your handcrafted pieces for years to come.
Q: Can I use any type of wood for jewelry making?
A: While you can technically use any wood, some types are better suited for jewelry due to their durability and aesthetic appeal. Woods like mahogany, cherry, and walnut are popular choices.
Q: How do I prevent my wooden jewelry from getting damaged?
A: Avoid exposing your wooden jewelry to water, extreme temperatures, or harsh chemicals. Regularly clean and store them properly to maintain their condition.
Q: What tools do I need to start making wooden jewelry?
A: Basic tools include saws, chisels, sandpaper, and finishing supplies. As you progress, you might want to invest in more specialized tools.
Storage Solutions
When it comes to preserving the beauty of your handcrafted wooden jewelry, play a pivotal role. Just like a precious painting needs the right frame to shine, your jewelry deserves a protective and organized space. Proper storage not only prevents scratches and damage but also makes it easy for you to access and admire your creations. So, let's dive into some creative ways to store your wooden treasures!
First and foremost, consider the environment where you store your jewelry. A cool, dry place is essential to avoid moisture that can warp or damage the wood. Avoid direct sunlight, as UV rays can fade the natural colors and finish of your pieces. Think of your jewelry storage as a cozy little home for your creations, where they can rest and rejuvenate.
One popular method is to use jewelry boxes with compartments. These boxes not only keep your pieces organized but also protect them from dust and scratches. When choosing a jewelry box, look for one that is lined with soft fabric to cushion your wooden items. You might also want to consider boxes with adjustable dividers, allowing you to customize the space according to the size and shape of your jewelry.
If you prefer a more visual approach, display cases can be an excellent option. These cases allow you to showcase your handcrafted jewelry while keeping it safe. You can find display cases in various styles, from elegant glass cabinets to rustic wooden boxes. Just remember to place them in a location that’s not exposed to harsh sunlight.
For those who love a bit of DIY, creating your own storage solution can be a fun project! You can repurpose old wooden crates or small drawers, painting or staining them to match your decor. Not only does this add a personal touch, but it also gives you the satisfaction of creating something functional and beautiful. Imagine a small wooden crate filled with your favorite earrings—what a charming sight!
Another clever idea is to use hanging organizers. These can be as simple as a corkboard with hooks or a fabric organizer that hangs on the wall. This method not only saves space but also allows you to see all of your jewelry at a glance. It's like having an art display of your creations right on your wall!
In summary, the way you store your wooden jewelry can significantly impact its longevity and appearance. Whether you opt for a traditional jewelry box, a display case, or a DIY solution, the goal is to keep your pieces safe, organized, and easily accessible. Remember, your handcrafted jewelry deserves a special place to rest, just like any other work of art!
- How should I clean my wooden jewelry? Use a soft, dry cloth to gently wipe your pieces. Avoid using water or chemical cleaners, as they can damage the wood.
- Can I store my wooden jewelry with metal pieces? It's best to store them separately to prevent scratches. Consider using dividers or separate compartments in your storage solution.
- What’s the best way to prevent my wooden jewelry from fading? Keep your jewelry away from direct sunlight and moisture, and consider applying a protective sealant to maintain its color.
Frequently Asked Questions
- What type of wood is best for making jewelry?
When it comes to crafting jewelry, softer woods like basswood and pine are often preferred due to their ease of carving. However, if you're looking for durability, hardwoods like maple or walnut can provide a stunning finish and longevity. Ultimately, the choice depends on your design and personal preference!
- What tools do I need to start making wooden jewelry?
To kickstart your woodworking journey, you'll need some essential tools. A basic toolkit should include a hand saw or power saw, chisels, sandpaper, and a drill. These tools will help you shape, carve, and finish your wooden pieces with precision.
- How do I finish my wooden jewelry?
Finishing your wooden jewelry is key to enhancing its beauty and durability. Start by sanding your pieces to a smooth finish, then apply a wood sealant or oil to protect the surface. Finally, polishing with a soft cloth can give your jewelry that extra shine!
- Can I use any wood for jewelry making?
Not all woods are suitable for jewelry making. Avoid using woods that are too dense or heavy, as they can be uncomfortable to wear. Additionally, some woods may contain toxins that could irritate the skin. Always opt for safe, non-toxic varieties!
- What are some design ideas for wooden jewelry?
Design inspiration can come from anywhere! Consider nature-inspired designs, where you mimic organic shapes, or try geometric patterns for a modern touch. Mixing both styles can lead to truly unique pieces that reflect your creativity!
- How do I clean my wooden jewelry?
Cleaning your wooden jewelry is easy! Simply use a soft, damp cloth to wipe away dirt and oils. Avoid soaking your pieces in water, as this can warp the wood. For deeper cleaning, a gentle soap solution can work wonders!
- What is the best way to store wooden jewelry?
To keep your wooden jewelry in top shape, store it in a cool, dry place. Consider using a jewelry box lined with soft fabric to prevent scratches. Hanging pieces can also be a great way to display your collection while keeping them safe!


