Build Your Own Wooden Jewellery Stand: A Guide
Have you ever found yourself tangled in a mess of necklaces, bracelets, and rings, desperately searching for that one piece to complete your outfit? It’s a common struggle, and that’s where a beautifully crafted wooden jewellery stand comes into play. Not only does it keep your accessories organized, but it also adds a touch of elegance to your space. In this guide, we’ll walk you through the entire process of building your very own wooden jewellery stand, from selecting the right materials to the finishing touches that will make your stand truly shine. So, grab your tools and let’s get started on this exciting DIY adventure!
Selecting the appropriate wood and tools is crucial for building a durable jewellery stand. You want materials that not only look good but also stand the test of time. Hardwoods like oak, maple, or cherry are excellent choices due to their durability and beautiful grain patterns. If you’re looking for something more affordable, plywood can be a great alternative, especially if you plan to paint or stain it. When it comes to tools, having the right equipment can make your project smoother and more enjoyable. Here’s a quick list of essentials:
- Table saw or hand saw
- Drill with bits
- Sander (orbital or hand)
- Wood glue
- Measuring tape
- Clamps
Additionally, don’t forget to choose your finish wisely. A good stain or paint can enhance the beauty of the wood while providing protection against scratches and spills.
Now that you’ve got your materials, it’s time to unleash your creativity! Designing a jewellery stand that suits your style and needs is essential. Start by sketching out your ideas on paper. Consider the dimensions of the space where you plan to place the stand, and think about how many pieces of jewellery you want to store. A well-thought-out design can make all the difference in functionality. For instance, you might want to include:
- Spaces for hanging necklaces
- Sections for rings and earrings
- Drawers for larger pieces
Incorporating functionality into your design will ensure that your stand is not only beautiful but also practical.
Adding storage options can enhance the usability of your jewellery stand. Think about how you can incorporate various storage ideas, like drawers and hooks, to keep your accessories organized. For example, a small drawer can be perfect for storing earrings or brooches, while hooks can elegantly display necklaces, allowing them to be easily accessible without tangling.
When it comes to drawers, there are several styles you can integrate into your jewellery stand. Consider the size, placement, and ease of access for your pieces. A shallow drawer can be perfect for smaller items, while a deeper one can accommodate larger pieces. Make sure to measure carefully to ensure that your drawers fit snugly and operate smoothly.
Effective hook placements are crucial for hanging necklaces and bracelets. Think about the height and spacing of the hooks to ensure that your jewellery is displayed beautifully while remaining tangle-free. You might want to arrange hooks in staggered heights, allowing for longer necklaces to hang freely without getting caught.
The final steps in building your stand involve sanding, painting, or staining the wood. Sanding is essential for achieving a smooth surface, so take your time with this step. Once you’re satisfied with the feel of the wood, you can apply your chosen finish. Whether you opt for a vibrant paint or a natural stain, this is your chance to add a personal touch to your stand. Don’t forget to apply a protective coat to ensure longevity!
Understanding how to assemble the pieces correctly is vital for stability. Start by laying out all your materials and ensuring you have everything you need. Follow your design plan closely as you begin the assembly process. Begin by joining the base and vertical supports, making sure everything is square and level. Keep in mind that different joining techniques can affect the strength and aesthetics of your jewellery stand.
Popular joining methods include doweling, gluing, and using screws. Each method has its benefits and drawbacks. For instance, doweling provides a clean look and strong joint, while screws offer ease of assembly and disassembly. Choose the technique that best fits your skill level and desired outcome.
As you approach the final assembly, check for stability and make necessary adjustments. Ensure all parts fit together seamlessly, and don’t hesitate to sand down any rough edges. This will not only enhance the appearance but also ensure safety when handling your jewellery stand.
Once your jewellery stand is complete, maintaining its appearance is important. Regular cleaning will keep the wood looking fresh and new. Use a soft cloth to dust off any jewellery or debris, and consider applying a wood polish every few months to protect the finish. By taking these simple steps, you’ll ensure that your stand remains a beautiful and functional part of your space for years to come.
Q: What type of wood is best for a jewellery stand?
A: Hardwoods like oak, maple, or cherry are great choices due to their durability and aesthetic appeal. Plywood is also an affordable alternative if you plan to paint or stain.
Q: How can I prevent my necklaces from tangling?
A: Incorporating hooks at varying heights can help keep necklaces separate and tangle-free. Additionally, using a designated section for each type of jewellery can minimize tangling.
Q: What finish should I use on my wooden jewellery stand?
A: The finish depends on your preference. You can choose a natural stain to enhance the wood grain or paint for a pop of color. Just make sure to apply a protective coat for longevity.

Choosing the Right Materials
When it comes to building your own wooden jewellery stand, the choice of materials can make or break your project. You want something that not only looks great but is also durable enough to withstand the test of time. Wood is the star of the show here, and there are several types that can serve your purpose well. For instance, hardwoods like oak, maple, or walnut are excellent choices due to their strength and beautiful grain patterns. On the other hand, softwoods like pine or cedar are easier to work with and more budget-friendly, making them perfect for beginners.
Aside from wood, you’ll also need to consider the finishing materials. A good finish not only enhances the appearance of your jewellery stand but also protects it from scratches and moisture. You can choose from a variety of options, including paints, stains, and sealants. If you’re aiming for a natural look, a simple clear coat or oil finish might be your best bet.
Now, let’s talk tools. Having the right tools will make your project smoother and more enjoyable. Here’s a quick rundown of the essential tools you’ll need:
- Measuring Tape: For accurate measurements.
- Saw: A jigsaw or circular saw for cutting your wood.
- Sander: To smooth out those rough edges.
- Drill: For making holes and assembling your stand.
- Clamps: To hold pieces together while the glue dries.
Choosing the right materials is all about finding the right balance between aesthetics and functionality. You want your stand to be a reflection of your personal style while also being practical for everyday use. Think about what kind of jewellery you’ll be storing; if you have a lot of long necklaces, you might want to opt for a taller design that allows for hanging, while a shorter stand might suffice for rings and bracelets.
Finally, don’t forget about the environmental impact of your choices. If sustainability is important to you, consider sourcing reclaimed wood or purchasing from suppliers that practice responsible forestry. Not only will you be helping the planet, but your stand will also have a unique story to tell!
Designing Your Stand
When it comes to designing your wooden jewellery stand, the possibilities are as vast as your imagination! This is where you can truly express your personal style and create a piece that not only serves a purpose but also adds charm to your space. Start by thinking about the overall aesthetics you want to achieve. Are you leaning towards a rustic vibe, or perhaps something more modern and sleek? The design should reflect your personality and complement your home decor.
Before you dive into the actual building, it’s essential to sketch your ideas. Grab a pencil and paper, or use a design software if you’re tech-savvy. Consider dimensions carefully; you want your stand to fit comfortably in your chosen space without overwhelming it. Think about the height, width, and depth of your stand. A good rule of thumb is to measure the area where you plan to place your stand, ensuring that it doesn’t block light or access to other items.
Another critical aspect of your design is functionality. What type of jewellery do you own? Do you have a collection of necklaces, bracelets, or rings that need special attention? Incorporating elements like multiple tiers or compartments can enhance the usability of your stand. For instance, a tiered design allows you to display your pieces vertically, making it easier to see everything at a glance. You could even include a small mirror for those quick outfit checks!
As you sketch, consider using storage solutions to keep your accessories organized and tangle-free. This leads us to the next part of our discussion: how can you make your stand not only beautiful but also practical? Think about integrating drawers or hooks into your design. Drawers can be a great way to store smaller items like rings or earrings, while hooks can elegantly display necklaces and bracelets, keeping them easily accessible.
Adding storage options can significantly enhance the usability of your jewellery stand. Not only do they keep your pieces organized, but they also prevent them from getting damaged or tangled. Here are some ideas to consider:
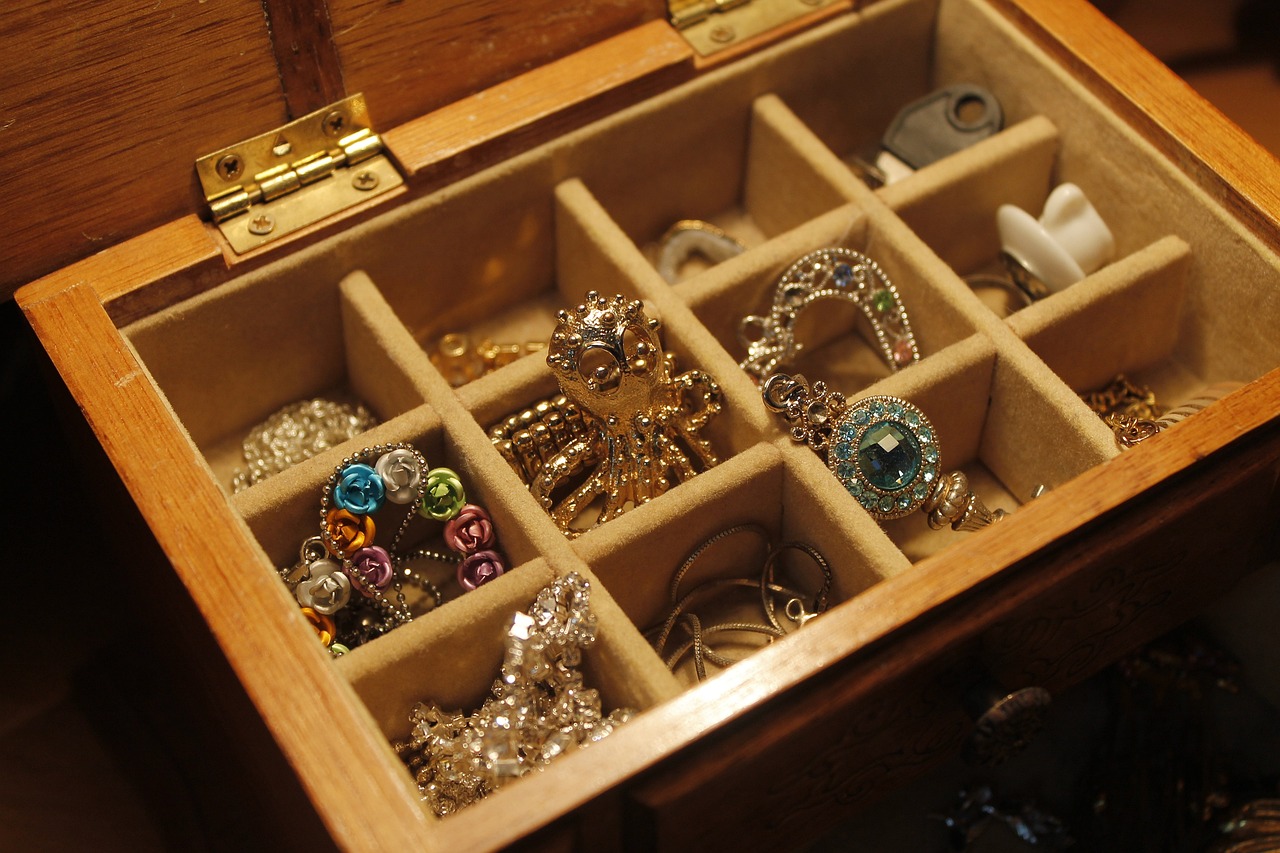
- Drawers: Perfect for rings, earrings, and other small items. They can be built into the base of your stand for a seamless look.
- Hooks: Ideal for hanging necklaces and bracelets. Position them at different heights to accommodate various lengths of jewellery.
- Trays: A simple tray on top can hold your most frequently worn items, making them easy to grab on the go.
When deciding on the placement of these features, think about accessibility. You want to make sure that everything is easy to reach, especially if you plan to use your stand daily. For example, placing hooks at eye level will make it easier to grab your favorite necklace without fussing around.
In conclusion, designing your wooden jewellery stand is an exciting process that combines creativity with practicality. By carefully considering your style, dimensions, and storage solutions, you can create a stunning piece that not only showcases your jewellery but also enhances your living space. So grab your tools, let your imagination run wild, and get ready to build something beautiful!
Incorporating Storage Solutions
When it comes to creating a wooden jewellery stand, is not just a luxury; it's a necessity. Imagine having a beautifully crafted piece that not only showcases your favourite accessories but also keeps them organized and easily accessible. The right storage options can transform your stand from a simple display into a functional masterpiece.
One of the most effective ways to enhance the functionality of your jewellery stand is by integrating drawers and hooks. Drawers can be a great way to store smaller items like earrings and rings, while hooks are perfect for hanging necklaces and bracelets, preventing them from tangling. You might be wondering how to go about this; well, let's dive into some creative ideas!
Firstly, let’s talk about drawers. Depending on the size of your stand, you can opt for a single large drawer or multiple smaller ones. For instance, if your stand is tall and narrow, consider placing a couple of shallow drawers at the bottom. This not only utilizes space efficiently but also keeps your more delicate items tucked away safely. You can even customize the drawer sizes to fit specific items. Here’s a quick look at some drawer design options:
| Drawer Type | Size (inches) | Purpose |
|---|---|---|
| Small | 6 x 4 | For rings and small earrings |
| Medium | 8 x 6 | For bracelets and watches |
| Large | 10 x 8 | For necklaces and bulkier items |
Next, let’s discuss hook placement strategies. The beauty of hooks is that they can be positioned at various heights and angles, allowing you to create a visually appealing display while maximizing space. For example, placing hooks at different levels can create a cascading effect that not only looks stunning but makes it easy to grab your favourite pieces without hassle. You might want to consider:
- Vertical Hooks: Ideal for long necklaces, preventing them from tangling.
- Horizontal Hooks: Great for bracelets, allowing them to hang freely.
- Combination Hooks: Using both styles can enhance the overall aesthetic and functionality of your stand.
By thoughtfully incorporating these storage solutions, you can create a jewellery stand that is not only a feast for the eyes but also a practical solution for your storage needs. Remember, the key is to balance aesthetics with functionality; after all, what good is a beautiful stand if it doesn't serve its purpose? So as you sketch out your design, keep these ideas in mind to elevate your project to the next level.
Q: What type of wood is best for building a jewellery stand?
A: Hardwoods like oak, maple, or walnut are excellent choices due to their durability and aesthetic appeal. Softwoods can be used, but they may not hold up as well over time.
Q: How do I ensure my jewellery stand is stable?
A: Make sure to use proper joining techniques like doweling or screws, and consider the weight distribution of your jewellery when designing your stand.
Q: Can I customize the dimensions of my stand?
A: Absolutely! Tailor the dimensions to fit your space and the specific items you want to store.
Q: What finishes should I use to protect my stand?
A: A good quality wood finish, such as polyurethane or varnish, will help protect the wood from wear and tear while enhancing its appearance.

Drawer Design Options
When it comes to designing drawers for your wooden jewellery stand, the options are as varied as the jewellery you’ll store inside them. Think of your drawers as the heart of your stand; they not only provide functionality but also contribute to the overall aesthetic. One of the first things to consider is the size of the drawers. Depending on the types of jewellery you have, you might need deeper drawers for larger items like bangles or shallower ones for earrings. A good rule of thumb is to create a mix of sizes to accommodate all your accessories comfortably.
Next, let’s talk about placement. Where you position your drawers can greatly affect the usability of your stand. For instance, placing a large drawer at the bottom allows for easier access to bulkier items, while smaller, shallower drawers can be positioned at the top for quick access to frequently used pieces. Consider this layout:
| Drawer Size | Recommended Placement | Best For |
|---|---|---|
| Large | Bottom | Bangles, larger necklaces |
| Medium | Middle | Bracelets, watches |
| Small | Top | Earrings, rings |
Another essential aspect is the ease of access. You want your drawers to slide smoothly, making it easy to retrieve your favourite pieces without fumbling. Consider using soft-close drawer slides for a touch of luxury that also prevents slamming. Additionally, think about incorporating pull handles or knobs that match your overall design theme. They can be a small detail that makes a big difference in both function and style.
Lastly, don’t forget about the interior design of your drawers. Adding dividers can help keep your jewellery organized and prevent tangling. You might want to use soft felt lining to protect delicate pieces from scratches. Imagine opening a drawer and seeing your jewellery neatly arranged, each piece in its own little compartment, just waiting to be worn. It’s not just practical; it’s visually appealing too!
In summary, when designing drawers for your jewellery stand, think about size, placement, ease of access, and interior organization. These elements will not only enhance the functionality of your stand but also ensure that your jewellery is displayed beautifully and remains tangle-free.
Hook Placement Strategies
When it comes to creating a wooden jewellery stand, hook placement is one of the most crucial elements to consider. The right placement not only enhances the visual appeal of your stand but also ensures that your necklaces and bracelets are easily accessible while remaining tangle-free. Imagine opening your jewellery box and finding every piece neatly arranged, ready to wear! To achieve this, you’ll want to think about the height, spacing, and overall layout of the hooks.
First off, consider the height of the hooks. If you have long necklaces, you’ll want to place the hooks high enough to prevent them from touching the surface below. A good rule of thumb is to position the hooks at least 6 to 8 inches apart, depending on the length of your pieces. This way, you can avoid the frustration of tangled chains that resemble a jumbled mess of spaghetti!
Next, let’s talk about spacing. You want to ensure that there’s enough room between each hook to accommodate your jewellery without crowding. If you have a mix of short and long necklaces, you might want to stagger the hooks at different heights. For example, place shorter hooks for shorter necklaces and gradually increase the height for longer ones. This not only saves space but also creates an attractive layered effect that draws the eye.
Another effective strategy is to incorporate decorative elements into your hook design. Instead of using plain hooks, consider using themed hooks that match your personality or the overall aesthetic of your room. For example, if you love the beach, you could use hooks shaped like seashells or starfish. This adds a personal touch while still serving a functional purpose.
Finally, think about the overall layout of your stand. A well-thought-out design can make a world of difference. You might want to create a central column with hooks on either side or even a circular arrangement that allows for easy access from all angles. Consider how you typically wear your jewellery and arrange the hooks accordingly. This will make your daily routine smoother and more enjoyable.
In summary, effective hook placement can transform your jewellery stand from a simple storage solution into an organized and stylish display. By paying attention to height, spacing, decorative elements, and layout, you’ll create a stand that not only showcases your beautiful pieces but also makes your life easier. So, grab your tools and start planning your perfect hook strategy!
- What type of wood is best for a jewellery stand? Softwoods like pine or hardwoods like oak are great choices due to their durability and ease of working with.
- How can I prevent my jewellery from tangling? Proper hook placement, as discussed, along with using different heights for hooks can help keep necklaces untangled.
- Do I need any special tools to build a jewellery stand? Basic woodworking tools such as a saw, drill, and sandpaper will suffice for most projects.
- Can I customize the size of my jewellery stand? Absolutely! Tailor the dimensions to fit your space and the amount of jewellery you have.

Finishing Touches
Once you've built your wooden jewellery stand, the excitement of seeing your creation come to life is palpable. However, the are what truly elevate your project from a simple wooden structure to a stunning display piece that showcases your jewellery beautifully. This stage is all about adding that polished look and ensuring your stand is protected against wear and tear.
First and foremost, sanding is crucial. Begin with a coarse sandpaper to remove any rough edges or imperfections. As you progress, switch to finer sandpaper to achieve a smooth surface. Imagine running your fingers over a freshly polished surface; that’s the sensation you want to create. Don’t rush this process! Take your time to ensure every part of the stand feels just right. A well-sanded piece not only looks better but also feels better, preventing any splinters or snags on your precious jewellery.
Next, consider applying a finish to your stand. There are various options available, and each brings its own unique charm:
- Paint: If you’re looking to add a splash of color, paint is your best friend. Choose a color that complements your room or your jewellery collection. Remember, a good primer will help the paint adhere better and provide a more vibrant finish.
- Stain: For those who want to showcase the natural beauty of the wood grain, a stain can enhance its appearance while providing some protection. Stains come in various shades, so you can choose one that matches your decor.
- Varnish: If durability is your priority, a clear varnish can be applied over paint or stain. This will create a hard protective layer that guards against scratches and spills.
After applying your chosen finish, allow it to dry thoroughly. This is not the time to rush! Depending on the type of finish you used, drying times can vary significantly. Always follow the manufacturer’s instructions for the best results.
Finally, once everything is dry, consider adding some protective pads to the bottom of your stand. This small step can prevent scratches on your furniture and also keep your stand steady. You can find adhesive felt pads at most hardware stores, and they’re incredibly easy to apply. Just peel and stick!
In summary, the finishing touches are where your creativity can truly shine. Whether you choose to paint, stain, or varnish, these final steps will not only enhance the aesthetic appeal of your jewellery stand but also ensure it lasts for years to come. So take a moment to appreciate your hard work, and get ready to display your beautiful jewellery in style!
Q: How long should I wait for the finish to dry?
A: Drying times vary based on the type of finish used. Generally, it’s best to wait at least 24 hours before handling the stand.
Q: Can I use any type of wood for my jewellery stand?
A: While you can use various types of wood, softer woods like pine are easier to work with but may not be as durable. Hardwoods like oak or maple offer better durability and a more refined look.
Q: What if I make a mistake while sanding?
A: Don't worry! If you accidentally sand too much, you can fill in the area with wood filler and sand it down again. Just remember to match the filler to your wood type for a seamless finish.
Assembly Process
Once you've gathered all your materials and completed the design phase, it's time to dive into the . This part can feel a bit daunting, but don't worry! Think of it as putting together a puzzle where each piece has its unique place. The key here is to ensure that every component fits snugly together, creating a sturdy and beautiful jewellery stand.
First, you'll want to lay out all your pieces on a flat surface. This allows you to visualize how everything will come together. Make sure to have your tools within reach—this includes your drill, screws, wood glue, and clamps. It's like preparing your kitchen before cooking; having everything at hand makes the process smoother and more enjoyable.
Start by assembling the base of your stand. This is the foundation that will support everything else, so it needs to be stable. Use joining techniques that suit your skill level and the design of your stand. For instance, if you're comfortable with it, consider using dowels for a clean look. Alternatively, screws can provide added strength, especially if you're using heavier wood. If you're opting for a simpler approach, wood glue can suffice, but make sure to clamp the pieces together until the glue sets.
As you progress, pay attention to the alignment of each piece. It’s crucial that everything is level and straight. You might find it helpful to use a square tool to check your angles. If something feels off, don’t hesitate to make adjustments. Remember, this is your creation, and it should reflect your craftsmanship!
Once the base is securely assembled, move on to the vertical components of your stand. This is where you can really let your creativity shine. Depending on your design, you may be adding shelves, hooks, or even decorative elements. Take your time here; ensuring these components are well-joined will enhance the overall stability of the stand.
Incorporating storage solutions is another exciting part of the assembly process. If you've decided to add drawers, now is the time to install them. Make sure the runners are aligned properly for smooth operation. For hooks, carefully mark their placement before drilling, ensuring they’re spaced appropriately to avoid any tangling of your jewellery.
After everything is assembled, it’s time for the final touches. Check for any rough edges and sand them down to avoid splinters. This step is essential not only for aesthetics but also for safety. A well-finished piece will not only look good but will also last longer.
Lastly, before applying any finish like paint or stain, do a final check on the stability of your stand. Give it a gentle shake; if it feels solid, you’re ready to move on to the finishing touches. If not, make any necessary adjustments to ensure everything is secure. Remember, a strong foundation leads to a lasting piece!
- How long does it take to assemble a wooden jewellery stand? The assembly process can take anywhere from a few hours to a full day, depending on your skill level and the complexity of your design.
- What tools do I need to assemble my jewellery stand? Basic tools include a drill, screws, wood glue, clamps, and a measuring tape. Optional tools like a square tool can help ensure precision.
- Can I modify the design after I’ve started assembling? Yes, but it’s best to have a clear plan beforehand. If you need to make changes, do so carefully to avoid damaging the pieces.
Joining Techniques
When it comes to building your own wooden jewellery stand, the way you join different pieces of wood together can make a world of difference. Think of it like building a house; if the foundation isn't solid, the structure will crumble. In woodworking, there are several joining techniques you can use, each with its own strengths and aesthetic appeal. Let's dive into some popular methods that can help you achieve a sturdy and visually pleasing result.
One of the most common techniques is dowel joints. This method involves drilling holes into the pieces of wood you want to join and inserting wooden dowels. Not only does this create a strong connection, but it also keeps the joint hidden for a cleaner look. Imagine it like connecting puzzle pieces; when done right, they fit together seamlessly. Dowel joints are perfect for your jewellery stand's base and shelves, ensuring they can support the weight of your accessories without wobbling.
Another popular option is gluing. This technique is straightforward and requires minimal tools, making it ideal for beginners. Wood glue creates a strong bond when applied correctly, and it allows for a clean aesthetic since there are no visible fasteners. However, it's crucial to clamp the pieces together while the glue dries to ensure a tight fit. Think of it like holding hands; if you don’t grip firmly, you might slip apart. For your jewellery stand, glue can be effectively used for attaching the side panels or securing the top to the base.
If you're looking for something a bit more robust, consider using screws. Screws provide excellent strength and are easy to work with. They can be used in combination with glue for added security, ensuring that your stand remains stable over time. When using screws, you might want to countersink them so that the heads sit below the surface, allowing for a smooth finish that won't snag on your jewellery. It's like having a hidden treasure; the strength is there, but it's not immediately visible.
Here’s a quick comparison of these joining techniques:
| Joining Technique | Strength | Aesthetic | Ease of Use |
|---|---|---|---|
| Dowel Joints | High | Clean, Hidden | Moderate |
| Gluing | Moderate | Clean, No Fasteners | Easy |
| Screws | Very High | Visible unless Countersunk | Easy |
In conclusion, the choice of joining technique will depend on your specific project requirements, your skill level, and the tools you have at your disposal. Each method has its unique advantages and can contribute to the overall durability and beauty of your wooden jewellery stand. So, whether you choose dowels, glue, or screws, make sure to take your time and execute each step with care. After all, the end result will be a reflection of your craftsmanship!
- What is the best type of wood for a jewellery stand?
Softwoods like pine are great for beginners, while hardwoods like oak or maple provide durability. - How long does wood glue take to dry?
Typically, wood glue takes about 30 minutes to set, but it's best to clamp for at least an hour. - Can I use nails instead of screws?
Yes, nails can be used, but screws provide a stronger hold and are easier to remove if needed.
Final Assembly Tips
As you reach the final stages of your wooden jewellery stand project, it’s essential to ensure everything fits together perfectly. Think of this phase as the grand finale of a concert; it needs to be flawless to leave a lasting impression. First, double-check that all your pieces are cut to the correct dimensions. It’s easy to overlook small discrepancies, but even a millimeter can make a difference in how well your stand holds together.
Next, consider the order of assembly. Start with the base, as this will provide the necessary stability for the entire structure. Once the base is secure, gradually build upwards, attaching the sides and then the top. This method not only helps maintain balance but also allows you to make adjustments as needed. If you find that certain parts aren’t aligning perfectly, don’t panic! A little bit of sanding can go a long way in ensuring smooth connections.
When it comes to joining methods, make sure you’re using the right technique for your materials. For instance, if you’re using screws, pre-drill the holes to prevent the wood from splitting. If you’re opting for glue, apply it evenly and clamp the pieces together until it sets. This will create a strong bond and prevent any wobbling in the future. Remember, a sturdy assembly is key to a long-lasting jewellery stand.
It’s also important to check for stability throughout the assembly process. Once you have all the pieces joined, gently rock the stand to see if it wobbles. If it does, you may need to adjust the base or add additional support. Consider using corner braces or additional screws to reinforce weak spots. This is where your attention to detail will really pay off, ensuring that your stand can withstand the weight of your beautiful jewellery collection.
Lastly, before you apply any finishing touches, take a moment to step back and assess your work. Is everything aligned? Does it look visually appealing? If something feels off, don’t hesitate to make adjustments. After all, this stand is a reflection of your creativity and craftsmanship. Once you’re satisfied with the assembly, you can move on to sanding and finishing, which will elevate your stand to a whole new level.
- What type of wood is best for a jewellery stand?
Hardwoods like oak or maple are excellent choices due to their durability and aesthetic appeal.
- Can I customize my jewellery stand design?
Absolutely! Feel free to incorporate your personal style and preferences into the design.
- How do I maintain my wooden jewellery stand?
Regular dusting and occasional polishing with a suitable wood conditioner will keep it looking great.
- What tools do I need for assembly?
A drill, screwdriver, wood glue, and clamps are essential tools for assembling your stand.
Maintenance and Care
Once you've crafted your beautiful wooden jewellery stand, the journey doesn't end there! Just like a cherished piece of art, your stand requires a bit of love and attention to keep it looking its best. Maintaining and caring for your jewellery stand is essential to ensure its longevity and functionality. First and foremost, cleaning is crucial. Regular dusting with a soft, lint-free cloth will prevent dust buildup, which can dull the finish and make it look less appealing. For deeper cleaning, consider using a damp cloth with a mild soap solution, but be sure to dry it immediately to avoid moisture damage.
Another important aspect of maintenance is polishing. Depending on the finish you've chosen for your stand, you may want to apply a wood polish or wax every few months. This not only enhances the shine but also adds a protective layer against scratches and wear. If you've opted for a stained finish, be cautious with the products you choose, as some can alter the color or sheen of the wood. Always test any new product on a small, inconspicuous area first.
Additionally, consider the environment where your jewellery stand is placed. Humidity and temperature fluctuations can cause wood to expand and contract, leading to cracks or warping. Ideally, keep your stand in a climate-controlled area away from direct sunlight, which can fade colors and damage finishes over time. If you notice any signs of wear, such as scratches or dents, don’t hesitate to repair them promptly. A simple wood filler can work wonders for minor imperfections, and a little sanding followed by a touch-up stain can restore its original charm.
Lastly, if your jewellery stand features any metal components, be sure to check them regularly for signs of tarnishing or rust. A gentle wipe with a metal polish can keep these parts looking pristine. Remember, a little bit of maintenance goes a long way in preserving the beauty and functionality of your handmade creation!
- How often should I clean my jewellery stand? Aim for a light clean weekly and a deeper clean monthly.
- Can I use regular household cleaners on my wooden stand? It's best to avoid harsh chemicals; stick to mild soap and water.
- What should I do if my stand gets scratched? Use wood filler for minor scratches, and sand lightly before applying touch-up stain.
- Is it necessary to polish my wooden stand? Regular polishing helps maintain the finish and protects the wood from wear.
Frequently Asked Questions
- What type of wood is best for building a jewellery stand?
When it comes to selecting wood for your jewellery stand, hardwoods like oak, maple, or cherry are excellent choices. They are durable and can handle the weight of your jewellery while providing a beautiful finish. If you're looking for something lighter and easier to work with, pine is a good option, but keep in mind it may not be as sturdy.
- Do I need special tools to create a jewellery stand?
Not necessarily! Basic woodworking tools like a saw, drill, and sandpaper will get you started. However, having tools like a router for decorative edges or a jigsaw for intricate cuts can enhance your design. The key is to make sure you have the essentials to safely and effectively complete your project.
- How can I ensure my jewellery stand is stable?
Stability is crucial for a jewellery stand, especially if it will hold multiple pieces. Make sure to use strong joining techniques like doweling or screws, and check that all parts fit snugly together. Adding weight at the bottom or using a wider base can also help prevent tipping.
- What are some creative design ideas for my jewellery stand?
Let your imagination run wild! You could create a multi-tiered stand for necklaces, incorporate drawers for rings, or even add decorative hooks for bracelets. Think about your personal style and how you want to display your jewellery—your stand can be as functional as it is beautiful.
- How do I finish and protect my jewellery stand?
To achieve a polished look, start by sanding the wood to a smooth finish. Then, you can apply a stain or paint of your choice, followed by a protective sealant. This will not only enhance the appearance but also protect your stand from scratches and moisture, ensuring it lasts for years.
- What maintenance does my jewellery stand require?
Keeping your jewellery stand in top shape is simple! Regularly dust it with a soft cloth and, if needed, use a mild wood cleaner. For added shine, you can apply wood polish every few months. Just be sure to avoid harsh chemicals that could damage the finish.


