Personalize Your Space with DIY Wooden Signs
Are you looking to add a splash of personality to your living space? Well, you’re in luck! Creating DIY wooden signs is not only a fun and fulfilling project, but it also allows you to express your unique style and make your home feel truly yours. Imagine stepping into a room adorned with signs that reflect your interests, favorite quotes, or even your family name. It’s like giving your walls a voice!
In this article, we will explore various creative ways to enhance your environment by crafting personalized wooden signs. From choosing the right type of wood to selecting the perfect design and display method, we’ve got you covered. So, grab your tools and let’s get started on this exciting journey of self-expression!
First off, let’s talk about the heart of your project: the wood itself. Selecting the appropriate type of wood is crucial for both durability and aesthetics. You want your sign to last, right? Different woods come with their own unique characteristics, which can significantly affect the overall look of your DIY project. For example, pine is lightweight and easy to work with, while cedar offers a beautiful natural grain and is resistant to decay. Understanding these options will help you make an informed choice that aligns with your vision.
Once you’ve chosen your wood, the next step is gathering the essential tools and materials. Having the right tools on hand is like having a trusty sidekick—your crafting experience will be much smoother! You’ll need items like a jigsaw for cutting, sandpaper for smoothing edges, and paints to add that pop of color. Don’t forget safety gear, either; it’s always better to be safe than sorry!
Now, let’s dive into the nitty-gritty of cutting techniques. Mastering various cutting methods is key to achieving clean edges and precise shapes. Whether you opt for jigsaw cutting or hand carving, each technique has its perks. Just think of it like cooking—different methods can yield different flavors! And while you’re at it, keep safety at the forefront of your mind. Using sharp tools can be a bit daunting, so make sure to follow essential safety tips to protect yourself while you work on your DIY wooden signs.
Once your sign is cut and shaped to perfection, it’s time to add color and protection. Painting and finishing options can transform your wooden signs from plain to stunning in no time! Explore various techniques such as staining, painting, or even using a wood burner for a rustic touch. The right finish not only enhances the beauty of your signs but also extends their lifespan, making them a worthy investment for your home.
Feeling inspired yet? Let’s move on to some design ideas for your signs. This is where the magic happens! From quirky quotes that make you smile every time you pass by to custom shapes that reflect your interests, the possibilities are endless. Incorporating quotes and sayings can add a personal touch that resonates with you and your family. It’s like having a little reminder of what matters most, right there on your wall.
If you’re not quite confident in your freehand skills, don’t fret! Using stencils and templates can simplify the design process, allowing you to create clean and professional-looking wooden signs with ease. It’s a fantastic way to achieve that polished look without the stress of drawing everything from scratch.
Finally, once your signs are complete, you’ll want to showcase them in a way that enhances their visual appeal. Whether you choose to hang them on the wall, lean them against a shelf, or even place them outdoors, displaying your personalized wooden signs creatively can make a world of difference. Think of it as the cherry on top of your DIY project!
In conclusion, crafting DIY wooden signs is a rewarding way to personalize your space and let your creativity shine. With the right materials, tools, and a sprinkle of imagination, you can create unique pieces that not only beautify your home but also tell your story. So, why not start today? Your walls are waiting for a voice!
- What type of wood is best for DIY signs? Pine and cedar are popular choices due to their workability and aesthetic appeal.
- Do I need special tools to make wooden signs? Basic tools like a jigsaw, sandpaper, and paintbrushes will suffice for most projects.
- Can I use outdoor paint for indoor signs? Yes, outdoor paint can provide extra durability, even for indoor use.
- How can I hang my wooden signs? You can use picture hooks, adhesive strips, or even decorative brackets for hanging.

Choosing the Right Wood
When it comes to crafting your own personalized wooden signs, the choice of wood is absolutely paramount. Not only does the type of wood you select influence the durability of your sign, but it also affects its overall aesthetic appeal. Imagine walking into a room and being greeted by a beautifully crafted sign that perfectly complements your decor; that’s the power of choosing the right wood!
There are several types of wood available, each with its unique characteristics and charm. Here’s a quick overview of some popular options:
| Type of Wood | Characteristics | Best For |
|---|---|---|
| Pine | Lightweight and easy to work with, has a natural light color. | Beginner projects, rustic signs. |
| Cedar | Resistant to decay, aromatic, and has a reddish hue. | Outdoor signs, decorative pieces. |
| Oak | Strong and durable, with a beautiful grain pattern. | High-end projects, long-lasting signs. |
| Birch | Smooth texture and light color, great for painting. | Detailed signs, painted designs. |
Choosing the right wood goes beyond just aesthetics; it is also about considering the environment where your sign will be displayed. For instance, if you plan to hang your sign outdoors, you’ll want to opt for weather-resistant woods like cedar or redwood. On the other hand, if your sign is going to be an indoor feature, you might prefer the lighter tones of pine or birch.
Another factor to consider is the texture of the wood. Some woods have a more pronounced grain, which can add a rustic charm to your sign, while others may offer a smoother finish, making them ideal for intricate designs or painted surfaces. Think about the style you want to achieve and how the wood will play into that vision.
Lastly, don't forget about sustainability! Opting for reclaimed or sustainably sourced wood not only helps the environment but also adds a unique story to your sign. Imagine telling your friends that your beautiful sign was made from reclaimed barn wood—now that’s a conversation starter!
In summary, the right wood can elevate your DIY wooden sign project from ordinary to extraordinary. Take your time to explore your options, consider the environment where your sign will live, and always keep your personal style in mind. Happy crafting!
Essential Tools and Materials
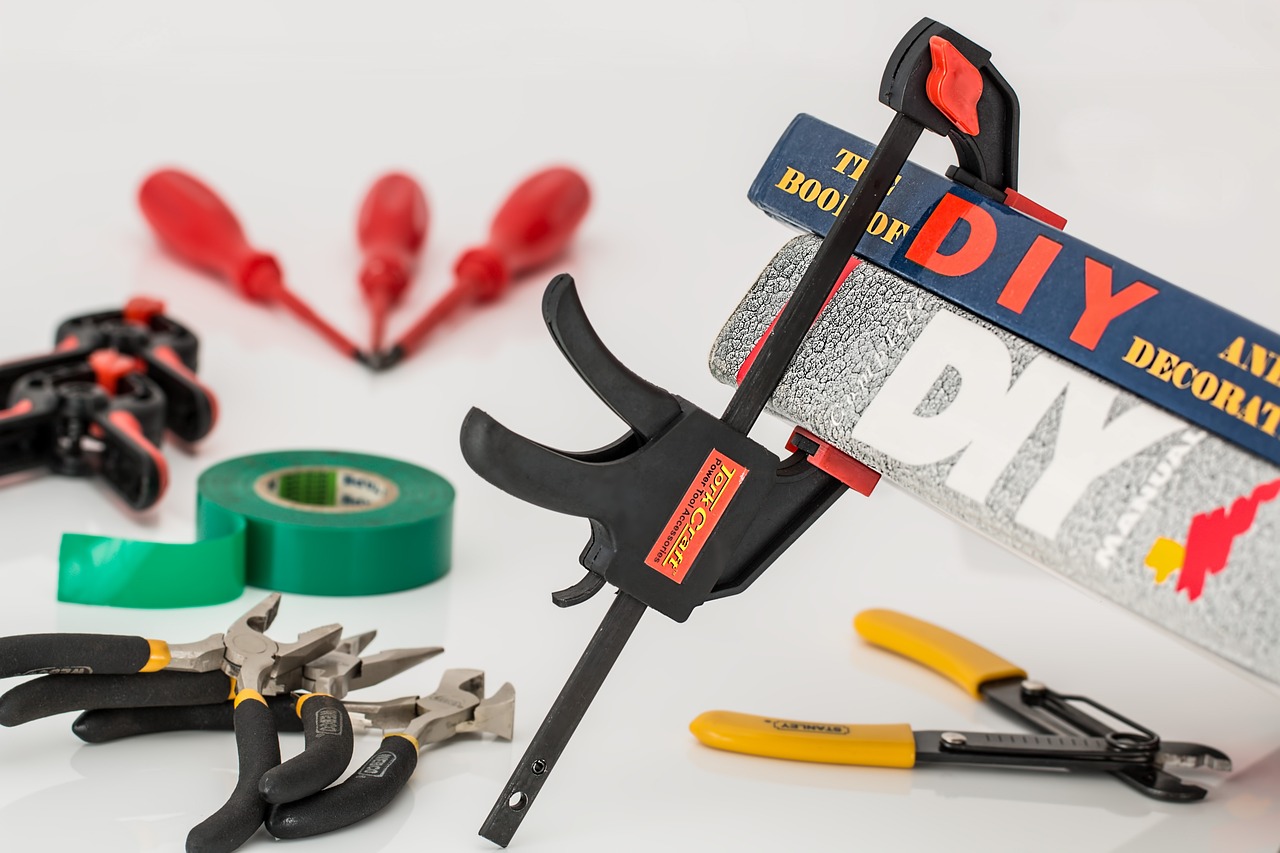
When diving into the world of DIY wooden signs, having the right tools and materials is like having the perfect recipe for a delicious dish. You wouldn't want to bake a cake without flour, right? Similarly, your crafting journey will be more enjoyable and successful if you gather everything you need beforehand. Let's explore the essential tools and materials that will set you up for success.
First off, you'll need some basic woodworking tools. A jigsaw is a fantastic choice for cutting your wooden pieces into shapes and sizes that suit your design. If you're looking to add intricate details, a router can help you achieve that professional finish. Remember, the type of wood you choose will also dictate the tools you'll need. For softer woods like pine, a standard jigsaw will do the trick. However, for harder woods, you might require a more robust tool.
Next, let's talk about safety gear. It’s easy to get caught up in the excitement of crafting, but don’t forget to protect yourself. A good pair of safety goggles and a dust mask are essential. They’ll keep dust and debris out of your eyes and lungs, ensuring that your creative process is both fun and safe.
Now, onto materials! The type of wood you choose can significantly impact the look of your sign. Here’s a quick overview of popular wood types:
| Wood Type | Characteristics | Best For |
|---|---|---|
| Pine | Soft, easy to work with, and affordable. | Beginners and simple designs. |
| Cedar | Durable, naturally resistant to decay, and aromatic. | Outdoor signs. |
| Birch | Strong, smooth, and great for detailed work. | Intricate designs and carvings. |
In addition to wood, you'll need some paints and finishes to bring your signs to life. Acrylic paints are a popular choice because they’re vibrant and easy to clean up. Don’t forget about wood sealants to protect your creation from the elements, especially if it’s going outdoors. A good sealant will ensure that your sign remains beautiful for years to come.
Finally, consider adding some decorative elements to your signs. Items like stencils, vinyl decals, or even wood-burning tools can elevate your design and make it truly unique. These little touches can turn a simple wooden sign into a stunning focal point in your home.
In summary, having the right tools and materials is crucial for creating beautiful DIY wooden signs. From cutting tools to decorative elements, each item plays a significant role in your crafting journey. So gather your supplies, put on your safety gear, and let your creativity flow!
Q: What is the best type of wood for outdoor signs?
A: Cedar is an excellent choice for outdoor signs due to its natural resistance to decay and moisture.
Q: Do I need any special tools for cutting wood?
A: A jigsaw is sufficient for most DIY wooden sign projects, but a router can help with more intricate designs.
Q: How can I ensure my paint lasts on my wooden sign?
A: Use a good quality wood sealant after painting to protect your sign from the elements.
Q: Can I use any paint for my wooden signs?
A: Acrylic paints are recommended as they are vibrant, easy to work with, and clean up easily.
Cutting Techniques
When it comes to crafting your own wooden signs, mastering is essential. Think of cutting as the foundation of your project—without a solid base, everything else can crumble. Whether you're aiming for intricate designs or simple shapes, the right technique can make all the difference. One popular method is using a jigsaw, which is fantastic for making curved cuts and detailed shapes. Imagine the freedom of transforming a plain piece of wood into a beautiful, personalized sign that reflects your style!
Another effective method is hand carving. This technique allows for a more personal touch, as each cut is made by hand, giving your sign a unique character. Hand carving can be a meditative process, where you can truly connect with your creation. However, it requires patience and a steady hand. If you're new to this, you might want to start with a simple design to build your confidence.
For those looking to achieve precise, straight cuts, a circular saw is your best friend. This tool is powerful and efficient, making it ideal for larger projects. However, it's crucial to practice safety measures when using such equipment. Always remember to secure your wood properly and wear protective gear.
To help you choose the right cutting technique for your project, here’s a quick comparison:
| Technique | Best For | Skill Level |
|---|---|---|
| Jigsaw | Curved and detailed shapes | Beginner to Intermediate |
| Hand Carving | Unique, personalized designs | Intermediate to Advanced |
| Circular Saw | Straight cuts on larger pieces | Intermediate |
Ultimately, the technique you choose depends on your project's complexity and your comfort level with each tool. Don’t hesitate to experiment! Each cut is a step toward creating something truly special. Remember, the journey of crafting your wooden sign is just as important as the final product. So, roll up your sleeves, grab your tools, and let your creativity flow!

Safety Tips for Cutting
When it comes to crafting your DIY wooden signs, safety should always be your top priority. Working with cutting tools can be exciting, but it also poses risks if proper precautions aren't taken. First and foremost, always wear the appropriate personal protective equipment (PPE). This includes safety goggles to shield your eyes from flying debris, ear protection if you're using loud machinery, and a dust mask to prevent inhalation of wood particles. Think of these items as your armor; they keep you safe while you create.
Another essential tip is to ensure that your workspace is well-lit and organized. A cluttered area can lead to accidents, as you might trip over tools or misplace your materials. Clear all unnecessary items from your workbench, and keep your cutting tools within easy reach. Additionally, make sure your work surface is stable and secure. If you're using a saw, it should be firmly clamped down to prevent any slipping while you cut.
Before you start cutting, take a moment to inspect your tools. Check for any damage to blades or other components, as a dull or broken blade can lead to unexpected accidents. If a blade is worn out, replace it before beginning your project. Furthermore, always use the right blade for the material you're cutting. Using a blade designed for wood will ensure smoother cuts and reduce the risk of kickback, which can be dangerous.
When you're ready to cut, remember to keep your hands at a safe distance from the blade. A good rule of thumb is to use a push stick or a similar tool to guide the wood through the saw, keeping your fingers well away from the cutting area. Never reach over the blade while it's in motion—this is a recipe for disaster. Instead, always move your hands to the side of the blade, maintaining a safe zone. If you're ever unsure about a cut, pause and reassess your approach rather than rushing through.
Lastly, it’s important to take breaks. Working for extended periods can lead to fatigue, which increases the likelihood of mistakes. Set a timer to remind yourself to step away for a few minutes, stretch, and clear your mind. This simple practice can greatly enhance your focus and reduce the risk of accidents. Remember, crafting should be enjoyable, and keeping safety in mind allows you to create without worry!
Here are some common questions regarding safety while cutting wood for your DIY projects:
- What should I wear while cutting wood? Always wear safety goggles, ear protection, and a dust mask to protect yourself from debris and noise.
- How can I prevent kickback? Use the correct blade for your material and ensure your workpiece is properly secured before cutting.
- Is it safe to cut wood when I'm tired? No, fatigue can lead to mistakes. Always take breaks to maintain focus and safety.

Choosing the Right Blade
When it comes to crafting your DIY wooden signs, selecting the right blade is essential for achieving the best results. Just like a chef wouldn’t use a butter knife to carve a turkey, you need the appropriate blade to ensure your cuts are clean and precise. There’s a variety of blades available, each designed for specific tasks, so let’s break it down and make the selection process a breeze!
First off, consider the type of wood you’re working with. Softer woods, like pine, are more forgiving and can be cut with a variety of blades, while harder woods, such as oak, require sharper and more durable blades. Here are some common types of blades you might encounter:
- Jigsaw Blades: Perfect for intricate cuts and curves. They come in various teeth configurations, so you can choose the right one based on the wood type.
- Scroll Saw Blades: Ideal for fine, detailed work. If your design includes tiny letters or delicate shapes, these blades will be your best friend.
- Band Saw Blades: Excellent for making straight cuts and resawing. These blades can handle thicker pieces of wood and are great for larger projects.
- Router Bits: If you’re looking to add decorative edges or grooves to your signs, router bits are essential. They come in various shapes to create different profiles.
Another important factor in choosing the right blade is the tooth count. Blades with more teeth provide smoother cuts, while those with fewer teeth cut faster but may leave a rougher edge. So, if you're aiming for a polished finish, opt for a blade with a higher tooth count. Conversely, if speed is your priority for a rough draft, go for the lower tooth count.
Additionally, consider the thickness of your wood. A thicker piece will require a sturdier blade that can withstand the pressure without bending or breaking. For instance, if you're working with a 1-inch thick piece of hardwood, a blade designed for heavy-duty cutting is a must. Always check the manufacturer's recommendations for the blade to ensure compatibility with the material you’re using.
In conclusion, choosing the right blade is not just about picking one off the shelf; it’s about understanding your project’s needs. Take the time to evaluate the wood type, desired cut quality, and blade specifications. By doing so, you'll set yourself up for success and create stunning wooden signs that truly reflect your personality and style.
Q: Can I use the same blade for different types of wood?
A: While some blades can handle various woods, it's best to choose blades specifically designed for the type of wood you're working with to ensure optimal results.
Q: How often should I replace my blades?
A: It depends on the frequency of use and the type of wood being cut. If you notice the cuts are becoming rough or the blade is struggling, it’s time for a replacement.
Q: Are there blades that can be used for both cutting and sanding?
A: Yes! Some multi-purpose blades can cut and sand, but for the best results, it’s advisable to use dedicated blades for each task.

Painting and Finishing Options
Once you've cut your wooden sign to perfection, the next exciting step is to add color and protection. Painting and finishing are not just about aesthetics; they're also crucial for the longevity of your masterpiece. You want your sign to look stunning while standing the test of time, right? Let's dive into the world of paints and finishes that can elevate your DIY wooden signs!
When it comes to painting, the options are nearly endless! You can choose from a variety of paints, including acrylic, chalk, and spray paints. Each type has its unique qualities:
| Type of Paint | Features | Best For |
|---|---|---|
| Acrylic Paint | Fast-drying, water-based, vibrant colors | Detailed designs and indoor signs |
| Chalk Paint | Matte finish, easy to distress | Rustic and vintage styles |
| Spray Paint | Quick coverage, smooth finish | Large surfaces and outdoor signs |
Before you start painting, it's essential to prepare your wood surface. Sand it down to create a smooth finish, and wipe away any dust with a damp cloth. This step ensures that the paint adheres well and looks flawless. If you're aiming for a more rustic look, consider leaving some areas unpainted or using a stain instead of paint to highlight the wood's natural grain.
Once your sign is painted, the next step is to protect your artwork. Applying a finish is crucial, especially for outdoor signs that will face the elements. Here are some popular finishing options:
- Polyurethane: Provides a durable, water-resistant layer.
- Varnish: Offers UV protection, ideal for outdoor use.
- Wood Oil: Enhances the wood grain while offering moisture resistance.
Before you apply any finish, make sure your paint is completely dry. Then, use a clean brush or cloth to apply your chosen finish evenly across the surface. Remember to follow the manufacturer's instructions for drying times, as this can vary significantly between products.
In conclusion, painting and finishing your wooden signs is where your creativity truly shines. The right paint and finish not only enhance the visual appeal but also ensure your signs last for years to come. So, unleash your inner artist and transform that piece of wood into a stunning reflection of your personality!
Q: What type of paint is best for outdoor wooden signs?
A: For outdoor signs, it's best to use weather-resistant paint, such as exterior acrylic or spray paint, combined with a protective finish like varnish.
Q: Can I use regular house paint on my wooden signs?
A: While you can use house paint, it may not adhere as well to wood as specialized paints. Acrylic or chalk paints are recommended for the best results.
Q: How do I achieve a distressed look on my wooden sign?
A: You can achieve a distressed look by using chalk paint and lightly sanding the edges after it's dry. This will expose the natural wood underneath and give it a rustic charm.
Q: How long should I wait before applying a finish?
A: It's important to let your paint dry completely before applying a finish, which can take anywhere from 30 minutes to several hours, depending on the type of paint used.

Design Ideas for Your Signs
When it comes to personalizing your space, the design of your wooden signs can make a world of difference. Think of your sign as a canvas that reflects your personality, interests, and style. Whether you’re aiming for a rustic charm or a modern flair, the possibilities are endless. Let’s dive into some creative design ideas that will help you transform simple wood into stunning statement pieces.
One fantastic way to make your signs truly unique is by incorporating quotes and sayings that resonate with you. Imagine walking into your home and being greeted by a warm, welcoming phrase like “Home is where the heart is” or a motivational quote that inspires you daily. These words can set the tone for your space and provide a sense of comfort. When choosing a quote, consider what speaks to you personally. It could be something humorous, uplifting, or even a line from your favorite book or song.
Another exciting idea is to play with shapes and sizes. Instead of sticking to the traditional rectangular sign, why not try a circular or even a custom shape that reflects your theme? For instance, if you love the beach, a wave-shaped sign with “Welcome to Paradise” can add a touch of coastal charm. The shape of your sign can also affect how the message is perceived, making it an essential part of the design process.
Using stencils and templates is a game-changer for those who may not feel confident in their freehand skills. They allow you to achieve a professional look without the stress of drawing everything from scratch. You can find a variety of stencils online or create your own using cardstock. This way, you can easily replicate your favorite designs over and over again, ensuring consistency across multiple signs.
Don’t forget about color selection. The colors you choose can evoke different emotions and set the atmosphere of your space. For a calming effect, consider soft pastels or earthy tones. If you want to make a bold statement, vibrant colors can do the trick. You can also think about using a color palette that complements your existing decor. For instance, if your living room has a lot of blues and whites, a sign painted in those shades will seamlessly integrate into the space.
To take your designs a step further, consider adding textures and embellishments. You can use materials like twine, burlap, or even metal accents to give your sign a three-dimensional feel. For example, a wooden sign can be adorned with a jute rope border or finished with a weathered look to enhance its rustic appeal. These little details can elevate your sign from ordinary to extraordinary, making it a true reflection of your creativity.
Finally, don’t shy away from combining different design elements. A sign that features a quote, unique shape, and various textures can be a beautiful focal point in your home. Think of it as a collage of creativity where each element works together to tell a story. This approach not only makes your sign more visually appealing but also creates a conversation starter for guests.
In summary, designing your wooden signs is an opportunity to express yourself and personalize your space. From meaningful quotes to creative shapes and colors, the options are limitless. So, grab your tools, unleash your imagination, and start crafting a sign that truly represents you!
Q: What type of wood is best for making signs?
A: Common choices include pine, cedar, and plywood. Each type has its unique characteristics, so choose based on your design needs and durability requirements.
Q: How can I ensure my paint lasts on the wooden sign?
A: Use a high-quality outdoor paint and seal it with a protective finish to enhance durability and longevity.
Q: Can I use my wooden signs outdoors?
A: Yes, but make sure to use weather-resistant materials and finishes to protect your signs from the elements.
Incorporating Quotes and Sayings
When it comes to personalizing your wooden signs, incorporating quotes and sayings can truly elevate your project. Think about it: a well-chosen phrase can not only reflect your personality but also convey a message that resonates with anyone who sees it. Whether it’s a motivational quote that inspires you every morning or a whimsical saying that brings a smile to your face, the right words can transform a simple wooden sign into a meaningful piece of art. So, how do you go about choosing the perfect quote?
First, consider what speaks to you. Do you have a favorite author, song lyric, or a saying that has stuck with you over the years? Jot down a few options and think about where you want to display your sign. For instance, a quote about family might be perfect for your living room, while a humorous saying could brighten up your kitchen. Here are a few categories to help you brainstorm:
- Inspirational Quotes: Think about phrases that uplift and motivate.
- Humorous Sayings: Light-hearted quotes can add a fun vibe to your space.
- Personal Mantras: Choose words that reflect your personal philosophy.
- Seasonal Quotes: Change your signs with the seasons to keep things fresh!
Once you’ve settled on a quote, it’s time to think about how to incorporate it into your design. You can either hand-paint the words directly onto the wood or use stencils for a more polished look. If you’re feeling adventurous, consider mixing fonts or even adding some decorative elements like borders or illustrations that relate to the quote. For example, if your quote is about nature, you might include some leaf designs around the text.
Another fun idea is to create a quote collage. This involves using multiple smaller signs, each featuring a different quote or word. Arranging these together on a wall can create a stunning visual impact and allow you to express various facets of your personality. Plus, it gives you the flexibility to change out quotes whenever you feel like refreshing your space!
Lastly, don’t forget about the power of placement. The placement of your sign can enhance its impact. Hang it at eye level in a high-traffic area of your home, or place it in a cozy corner where you can enjoy it daily. By thoughtfully incorporating quotes and sayings into your wooden signs, you’re not just decorating your space; you’re also sharing a piece of your story with everyone who visits.
Q: What type of wood is best for signs with quotes?
A: Softwoods like pine or cedar are great for beginners due to their ease of cutting and painting. However, hardwoods like oak or maple offer durability and a more refined look.
Q: Can I use digital designs for my quotes?
A: Absolutely! You can print your quote on adhesive vinyl and apply it to your wooden sign for a clean, professional appearance.
Q: How do I ensure my paint lasts on the wood?
A: Use a primer before painting and finish with a clear sealant to protect your design from wear and tear.
Q: What if I want to change the quote later?
A: Consider using removable vinyl or painting your sign in a way that allows for easy updates. This way, you can switch out quotes as your mood or style changes!
Using Stencils and Templates
When it comes to crafting personalized wooden signs, stencils and templates can be your best friends. They simplify the design process and help you achieve a polished, professional look without requiring advanced artistic skills. Imagine trying to paint a perfect letter "A" freehand; it's a daunting task! But with a stencil, you can effortlessly create that same letter with precision. So, how can you effectively incorporate stencils and templates into your DIY projects?
First, you'll want to choose the right stencil or template that fits your design vision. There are countless options available, from classic fonts to whimsical shapes. You can purchase pre-made stencils from craft stores or online retailers, or you can create your own using materials like cardstock or plastic sheets. The beauty of making your own is that you can customize it to fit your specific needs, ensuring that your wooden sign is truly unique.
Once you have your stencil ready, the next step is to secure it onto your wooden surface. This is crucial because any movement can lead to smudged edges or uneven paint application. You can use painter’s tape to hold the stencil in place, ensuring it doesn’t shift while you work. It's like having a dance partner—you need to stay in sync to create a beautiful performance!
Now, let’s talk about the application process. Using a foam brush or a spray paint can be effective for applying paint over your stencil. If you're using a brush, dab it lightly to avoid excess paint from seeping underneath the stencil. Think of it as a gentle pat rather than a heavy-handed slap. If you prefer spray paint, hold the can about 6-12 inches away from the stencil for an even coat. This technique will help you achieve crisp lines that make your design pop.
After painting, carefully remove the stencil while the paint is still wet to prevent any peeling or tearing. If you’ve used a stencil with intricate designs, you might want to use a craft knife to help lift it off gently. Once the paint dries, you can add additional layers or even embellishments to elevate your sign further. This could include adding borders, using different colors, or incorporating other materials like twine or fabric for a mixed-media effect.
Incorporating stencils and templates into your wooden sign-making process not only saves time but also enhances the quality of your finished piece. You'll find that even if you're not an artist, these tools can help you express your creativity and make your home feel more personalized. So why not give it a try? You might just find that your next DIY project turns out even better than you imagined!
- What type of paint is best for wooden signs? Acrylic paint is a popular choice because it adheres well to wood and is available in a wide range of colors.
- Can I use stencils on rough wood surfaces? Yes, but you may need to apply a base coat or sand the surface first to ensure a smoother finish.
- How do I clean my stencils after use? Wash them with soap and water immediately after use to prevent paint from drying and clogging the design.
- Are there any tips for creating my own stencils? Use a design software to create your desired shape, print it out, and then cut it from a sturdy material like cardstock or plastic.
Displaying Your Wooden Signs
Once you’ve poured your heart and soul into crafting your personalized wooden signs, the next exciting step is figuring out how to display them! The way you showcase your signs can significantly enhance the overall aesthetic of your space, making them not just decorations, but also conversation starters. So, where should you put them? Well, the possibilities are as vast as your creativity!
Think about the areas in your home that could use a little character. For instance, your living room is a fantastic canvas. Consider hanging a large wooden sign above your couch or mantelpiece. This not only draws the eye but also sets the tone for the entire room. A sign with a meaningful quote can create a warm and inviting atmosphere, making guests feel right at home.
Another popular option is the kitchen. Imagine a beautifully crafted sign that says “Gather” or “Eat Well” hanging on the wall. It adds a personal touch and can inspire a sense of community during family meals. You could even place smaller signs on your kitchen counter or shelves to complement your decor.
Don’t forget about outdoor spaces! Wooden signs can add charm to your garden or patio. Whether it’s a sign with your family name or a quirky saying about enjoying life, these pieces can withstand the elements if treated properly. Make sure to use weather-resistant finishes to keep your signs looking fresh and vibrant all year round.
If you're looking for something a bit more unconventional, consider using your signs as part of a gallery wall. Mix and match your wooden signs with photos, artwork, and other decorative items to create a stunning focal point. This not only showcases your craftsmanship but also allows you to express your unique style in a cohesive way.
In terms of mounting options, you have several choices:
- Hanging with Hooks: Simple and effective, using decorative hooks can make it easy to switch out signs as your mood changes.
- Wall Adhesive Strips: Perfect for renters, these strips allow you to hang signs without damaging the walls.
- Picture Frames: For a more polished look, consider framing your wooden signs, especially if they feature intricate designs.
Lastly, don’t underestimate the power of lighting! A well-placed spotlight or string lights can draw attention to your wooden signs, making them a stunning focal point even in the evening. Experiment with different lighting options to see how they transform the look of your signs and the overall ambiance of your space.
Q: What type of wood is best for outdoor signs?
A: Cedar and redwood are excellent choices due to their natural resistance to decay and insects. Make sure to apply a weatherproof finish for added protection.
Q: How can I ensure my paint lasts on wooden signs?
A: Always use a primer before painting, and finish with a clear sealant to protect your artwork from the elements.
Q: Can I create a wooden sign without power tools?
A: Absolutely! Hand tools like chisels and hand saws can be used to create beautiful signs. It may take a bit more time, but the results can be just as stunning.
Q: What if I make a mistake while painting or cutting?
A: Don’t worry! Mistakes can often be fixed with sandpaper or a little creativity. You can always paint over or repurpose your sign if needed.
Frequently Asked Questions
- What type of wood is best for DIY wooden signs?
Choosing the right wood is essential for both durability and aesthetics. Popular options include pine for its affordability, cedar for its resistance to decay, and plywood for a smooth finish. Each type of wood brings its own character, so consider what fits your style best!
- What tools do I need to make a wooden sign?
To get started on your DIY wooden sign, you'll need a few essential tools: a jigsaw or hand saw for cutting, sandpaper for smoothing edges, and paint or wood stain for finishing. Don’t forget safety gear like goggles and gloves to keep yourself protected while crafting!
- Are there safety tips I should follow when cutting wood?
Absolutely! Always wear protective eyewear and gloves. Ensure your workspace is clean and well-lit, and keep your fingers clear of the blade. Also, use clamps to secure your wood while cutting for added safety. Remember, safety first!
- How can I incorporate quotes into my wooden sign designs?
Incorporating quotes can add a personal touch to your signs! Choose phrases that resonate with you, and consider using stencils or templates for a clean look. You can paint them directly or use wood-burning techniques for a rustic effect!
- What are some creative display ideas for my wooden signs?
Displaying your wooden signs can be as creative as making them! Consider hanging them on walls, propping them on shelves, or even using easels for tabletop displays. You can also mix and match sizes and styles for an eclectic gallery wall!


