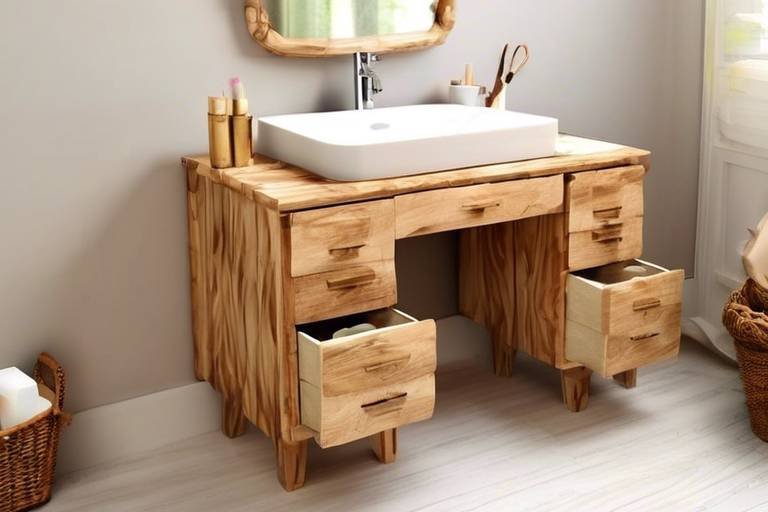
Fashioning Functional Wooden Shelving: A DIY Guide
Creating your own wooden shelves is not just a project; it’s an opportunity to infuse your space with personality and practicality. Imagine walking into a room where the shelves are not only functional but also tell a story—your story. Whether you need extra storage in your living room, a stylish display for your kitchen, or a cozy nook for your books, this guide will walk you through the art of crafting beautiful wooden shelving that serves a purpose. We’ll explore everything from choosing the right type of wood to the final finishing touches that will bring your vision to life. So, roll up your sleeves, grab your tools, and let’s dive into the world of DIY shelving!
When it comes to building wooden shelves, selecting the right wood is akin to choosing the right foundation for a house. It’s crucial for both durability and aesthetics. Different types of wood have unique characteristics, and understanding these can help you make an informed choice. For instance, hardwoods like oak and maple are known for their strength and longevity, making them ideal for heavy loads. On the other hand, softwoods such as pine and cedar are lighter and often more affordable, which can be perfect for lighter decorative shelves.
Here’s a quick comparison of some popular wood types:
| Wood Type | Durability | Cost | Aesthetic |
|---|---|---|---|
| Oak | High | $$$ | Rich grain |
| Pine | Medium | $ | Light, rustic |
| Cedar | Medium | $$ | Warm, aromatic |
| Maple | High | $$$ | Smooth, fine grain |
Consider the style of your home and the purpose of your shelves when making your choice. Will they hold heavy books? Or are they more for displaying decorative items? This decision will guide you to the best wood for your project.
Before you start cutting and assembling, it’s critical to gather the right tools. Think of your tools as the paintbrushes of an artist; the better the tools, the better the masterpiece. Here’s a rundown of essential tools you’ll need for your DIY shelving project:
- Measuring Tape: For precise measurements.
- Miter Saw: For making clean, angled cuts.
- Drill: Essential for making holes and driving screws.
- Level: To ensure your shelves are perfectly straight.
- Sandpaper: For smoothing edges and surfaces.
Having these tools on hand will not only make your project easier but also more enjoyable. There’s something incredibly satisfying about using the right tool for the job!
Accurate measurements and precise cuts are vital for a well-fitted shelf. Imagine trying to fit a square peg in a round hole; without the right measurements, that’s exactly what you’ll end up with! Start by measuring the space where your shelves will go. Use your measuring tape to find the width and depth you need, and don’t forget to consider any obstructions like outlets or light fixtures.
Once you have your measurements, it’s time to cut your wood. If you’re using a miter saw, ensure it’s set to the correct angle for your cuts. For hand saws, steady your wood on a flat surface and use slow, deliberate strokes for the cleanest cuts. Remember, measure twice, cut once!
A miter saw is a fantastic tool for making angled cuts. To set it up, place your wood securely on the saw’s base and adjust the angle to your desired cut. Always wear safety goggles, and keep your fingers clear of the blade. Once you’re ready, press down on the handle smoothly to make your cut. The precision of a miter saw can dramatically enhance the quality of your shelves.
If you prefer traditional methods, hand saws can also be effective. They may require a bit more elbow grease, but they offer a sense of craftsmanship that power tools sometimes lack. There are various hand saw options available, such as the panel saw or the coping saw. Each has its own strengths, and with a little practice, you can achieve clean cuts without the need for power tools.
Once your pieces are cut, it’s time to assemble. Think of this stage as putting together a puzzle; each piece must fit perfectly to create a cohesive whole. Start by laying out your pieces on a flat surface to visualize how they will come together. Use wood glue for added strength, and secure your shelves with screws for durability. Ensure everything is square and level before tightening the screws.
The finish can dramatically affect the look of your shelves. A well-applied finish not only enhances the wood’s natural beauty but also protects it from wear and tear. You have various options, including staining, painting, or sealing. Each has its own benefits and can create a different vibe in your space.
Selecting the right finish is essential for both aesthetics and longevity. If you want to highlight the natural grain of the wood, a clear stain or sealant might be your best bet. For a pop of color, consider painting your shelves. Keep in mind that darker finishes can make a space feel cozier, while lighter finishes can create an airy feel.
Proper application of finishes can elevate your project to a professional level. Use a high-quality brush or roller for even application, and don’t rush the process. Apply thin coats and allow each layer to dry completely before adding another. This will help prevent drips and ensure a smooth finish.
Q: What type of wood is best for heavy items?
A: Hardwoods like oak or maple are ideal for heavy loads due to their strength.
Q: Can I use reclaimed wood for my shelves?
A: Absolutely! Reclaimed wood adds character and is often more sustainable.
Q: How do I ensure my shelves are level?
A: Use a level tool during assembly to check that everything is straight.
Q: What’s the best way to clean my wooden shelves?
A: A soft cloth and mild soap solution work well; avoid harsh chemicals.
Choosing the Right Wood
When it comes to crafting your own wooden shelves, selecting the right type of wood is not just important; it’s absolutely crucial. The choice of wood affects not only the durability of your shelves but also their aesthetic appeal. Imagine walking into a room and being greeted by the warm, inviting tones of beautifully crafted wooden shelves. It’s not just about functionality; it’s about creating a space that feels like home. So, how do you choose the perfect wood for your project?
First, consider the different types of wood available. Each type has its own unique characteristics, which can influence your decision:
- Pine: This is a popular choice for DIY projects due to its affordability and ease of use. Pine is lightweight and easy to work with, making it perfect for beginners. However, it is softer and may dent or scratch more easily.
- Oak: Known for its strength and durability, oak is a fantastic option if you want shelves that can hold heavy items. Its grain pattern adds an elegant touch, but it can be more expensive than softer woods.
- Maple: If you’re looking for a wood that is both hard and beautiful, maple is a great choice. It has a fine, consistent grain that looks stunning when finished, but it can be a bit tricky to work with due to its density.
- Birch: Birch is another hardwood that offers a smooth surface and a light color. It’s strong and resistant to warping, making it a reliable option for shelving.
Next, think about the environment where your shelves will reside. Will they be in a damp basement or a dry living room? Some woods are more resistant to moisture than others. For example, cedar is naturally resistant to decay, making it an excellent choice for areas prone to moisture. On the other hand, softer woods like pine may not hold up as well in such conditions.
Additionally, consider the finish you plan to apply. Some woods take stain and paint better than others. For instance, oak and maple can absorb stains beautifully, enhancing their natural grain patterns, while pine may require a primer to achieve a smooth finish. Understanding how the wood reacts to finishes can save you time and frustration down the line.
Ultimately, the choice of wood should reflect both your personal style and the functional requirements of your shelving. Think about what look you want to achieve. Are you going for a rustic farmhouse vibe or a sleek modern aesthetic? The wood you choose can help you achieve that vision. Don’t hesitate to visit a local lumberyard to see and feel the wood options available. Sometimes, the experience of touching the wood can spark inspiration and help you make the right choice.
In summary, when choosing the right wood for your DIY shelving project, consider the following factors:
| Wood Type | Characteristics | Best Use |
|---|---|---|
| Pine | Lightweight, affordable, soft | Beginner projects |
| Oak | Strong, durable, elegant grain | Heavy-duty shelves |
| Maple | Hard, beautiful finish | Stylish, durable shelves |
| Birch | Smooth, light color, strong | Versatile shelving |
By carefully considering the type of wood that best suits your needs, you can create beautiful, functional wooden shelves that will enhance your home for years to come.
Q: What is the best wood for heavy-duty shelves?
A: Oak is often recommended for heavy-duty shelves due to its strength and durability.
Q: Can I use treated wood for indoor shelves?
A: While treated wood is great for outdoor projects, it may contain chemicals that are not ideal for indoor use. Opt for untreated wood for indoor shelving.
Q: How do I know if the wood is dry enough for my project?
A: Check for moisture content using a moisture meter. Ideally, indoor wood should have a moisture content of 6-8%.
Essential Tools for the Job
Before you dive headfirst into your DIY wooden shelving project, it’s crucial to gather all the essential tools that will make your life a whole lot easier. Think of these tools as your trusty sidekicks; without them, you might find yourself in a bit of a pickle! Having the right tools not only ensures a smoother workflow but also enhances the quality of your final product. So, let’s break down the must-haves for your woodworking adventure.
First and foremost, you'll need a measuring tape. This is your best friend when it comes to ensuring that everything fits just right. Remember, “measure twice, cut once” is more than just a catchy phrase; it’s a golden rule in woodworking! Next up is a level. A level will help you make sure your shelves are perfectly horizontal, which is crucial for both aesthetics and functionality. Nobody wants a shelf that looks like it’s about to slide off the wall!
Now, let’s talk about cutting tools. A miter saw is fantastic for making precise cuts, especially if you’re looking to create angled shelves. If you don’t have access to power tools, don’t fret! A good old-fashioned hand saw can do the trick too. Just remember, patience is key when using hand tools. It may take a little longer, but the satisfaction of making those clean cuts is totally worth it.
For assembling your shelves, a drill is essential. It allows you to make holes for screws and ensures that everything stays securely in place. Pair this with screws and brackets, and you’re well on your way to creating sturdy shelves that can hold all your favorite books, plants, or whatever else you might want to display.
To keep everything organized, consider investing in a toolbox. This way, you won’t waste precious time searching for that elusive screwdriver when you need it most. And let’s not forget about safety gear! Always wear safety goggles and a dust mask to protect yourself from flying debris and dust. Your eyes and lungs will thank you later!
Here’s a quick table summarizing the essential tools you’ll need:
| Tool | Purpose |
|---|---|
| Measuring Tape | For accurate measurements |
| Level | Ensures shelves are straight |
| Miter Saw | For precise angled cuts |
| Hand Saw | Alternative for cutting wood |
| Drill | For making holes and driving screws |
| Screws & Brackets | For assembling shelves |
| Toolbox | To keep tools organized |
| Safety Goggles & Dust Mask | For protection while working |
With your toolkit assembled, you’re ready to embark on your wooden shelving project! Remember, the right tools can make all the difference between a frustrating experience and a fun, rewarding one. So, go ahead and gather your gear, and let’s get started on crafting those beautiful shelves!
Q: What type of wood is best for shelving?
A: The best wood depends on your style and budget. Common choices include pine for affordability, oak for durability, and plywood for a smooth finish.
Q: Do I need special tools for cutting wood?
A: While a miter saw is great for precise cuts, a hand saw can also work well for smaller projects. Just ensure you have a steady hand!
Q: How do I ensure my shelves can hold heavy items?
A: Use sturdy brackets and screws during assembly, and consider using thicker wood for added strength.
Q: What finish should I use on my shelves?
A: It depends on your desired look! Stains can enhance the wood's natural beauty, while paint offers a pop of color. Just make sure to seal it for protection!

Measuring and Cutting Techniques
When it comes to DIY wooden shelving, are the backbone of your project. Imagine trying to fit a square peg into a round hole—frustrating, right? That’s what happens when your measurements are off. To avoid this, you need to be meticulous. Start by gathering your materials and tools, ensuring you have a reliable tape measure, a square, and a pencil for marking. These tools will be your best friends in achieving precision.
First, take accurate measurements of the space where your shelves will be installed. Consider the height, width, and depth you desire. It’s always wise to measure twice and cut once, as the old saying goes. To ensure your shelves fit perfectly, you might want to create a simple sketch of your shelving unit, marking the dimensions clearly. This visual guide will help you visualize the end product and keep your measurements organized.
Once you’ve got your measurements down, it’s time to cut your wood. The cutting process can make or break your project. For straight cuts, a circular saw or a table saw is ideal, but if you’re looking for more control and precision, a miter saw is the way to go. Using a miter saw allows you to make angled cuts effortlessly, which is particularly useful if you’re designing shelves with unique shapes or configurations. Remember to set the blade depth correctly to avoid cutting too deep into the wood.
If you're opting for hand saws, don’t fret! There are plenty of options available that can yield clean cuts. A hand saw can be just as effective, especially for smaller projects. To achieve a clean cut with a hand saw, you’ll want to ensure that your wood is firmly secured in place. Use clamps to hold your wood steady while you saw. This will not only help you cut straighter but also keep your fingers safe from unexpected slips!
Here’s a quick overview of the techniques you can employ:
- Marking: Use a square to draw straight lines where you plan to cut.
- Measuring: Always measure from the same end of the board to maintain consistency.
- Cutting: Choose the right tool for the job—power tools for speed, hand tools for control.
Lastly, after cutting, it’s crucial to sand the edges of your wood pieces. This step not only smooths out any rough spots but also prepares the surface for finishing. A smooth edge will make your shelves look professionally made and will help prevent splinters. So, take your time during the measuring and cutting phases—these foundational steps will pay off in the end with a stunning and functional shelving unit!
- What tools do I need to measure and cut wood?
You’ll need a tape measure, a square, a pencil, and a saw (either power or hand). Clamps are also helpful for securing your wood while cutting. - How do I ensure my cuts are straight?
Use a square to mark your cut line and make sure your saw is aligned properly. If using a hand saw, take your time and follow the line carefully. - Can I use a miter saw for straight cuts?
Yes, a miter saw can be used for straight cuts, but it’s particularly beneficial for making angled cuts. - What should I do if my measurements are off?
If you realize your measurements are incorrect after cutting, you may need to adjust your design or get additional wood to make up for the error.

Using a Miter Saw
When it comes to creating beautiful wooden shelves, precision is key, and that’s where a miter saw shines. This powerful tool is designed to make angled cuts with incredible accuracy, which is essential for achieving those perfect joints and clean edges that will elevate your shelving project. Imagine trying to fit two pieces of wood together without the right angles; it’s like trying to fit a square peg into a round hole—frustrating and often unsuccessful!
Before you dive in, it's important to understand how to set up your miter saw properly. First, ensure your workspace is clear and well-lit, as this will help you see your cuts more clearly and work safely. Place the miter saw on a stable surface, making sure it’s secured and won’t wobble during use. A good tip is to use clamps to hold your wood in place, preventing any movement that could lead to inaccurate cuts.
Now, let's talk about the settings. Most miter saws come with adjustable angles, typically ranging from 0 to 45 degrees. This feature allows you to make both straight cuts and miter cuts for corners. To set the angle, simply unlock the miter adjustment lever, turn the saw to your desired angle, and lock it back in place. If you're working on a shelf that will meet another at a corner, a miter cut will give you that seamless look.
Once you’ve set the angle, it's time to measure your wood. Use a tape measure to determine the length you need, marking it clearly with a pencil. Remember the golden rule of woodworking: measure twice, cut once. This simple mantra can save you a lot of time and frustration. After marking your wood, align it with the blade of the miter saw, ensuring that your mark is just in front of the blade, as the blade will remove a bit of material during the cut.
With everything in place, it’s time to make the cut. Stand firmly with your feet shoulder-width apart for stability, and grip the saw handle with both hands. Lower the blade slowly to make your cut, letting the saw do the work without forcing it. Once the cut is complete, raise the blade back up and turn off the saw. Take a moment to admire your work—if you’ve done everything correctly, you should have a clean, precise cut that fits perfectly into your shelving design!
Using a miter saw can seem daunting at first, but with a bit of practice, you’ll find it becomes an indispensable part of your woodworking toolkit. Remember, safety first! Always wear protective eyewear and keep your fingers clear of the blade. By mastering the miter saw, you’ll not only enhance your DIY skills but also ensure that your wooden shelves are not just functional, but also a stunning addition to your home.
- What is the difference between a miter saw and a chop saw?
A miter saw is designed for making angled cuts, while a chop saw is typically used for straight cuts and is often more powerful. - Can I use a miter saw for cutting thick wood?
Yes, but you may need to adjust the blade height and ensure that your saw is rated for the thickness of the wood you are using. - Is it safe to use a miter saw without experience?
While it is advisable to have some experience, you can safely use a miter saw by following all safety precautions and instructions.
Hand Saw Alternatives
While power tools like miter saws can make the job quicker, hand saws have their unique charm and effectiveness, especially for those who appreciate traditional woodworking techniques. If you're looking to embrace a more hands-on approach, there are several hand saw alternatives that can deliver clean, precise cuts without the need for electricity. These tools not only allow for greater control but also connect you to the art of woodworking in a way that feels rewarding and fulfilling.
One popular option is the crosscut saw, which is designed to cut across the grain of the wood. This saw features a relatively wide blade and sharp teeth that make quick work of cutting through softwoods like pine or fir. If you’re tackling larger pieces, a crosscut saw can be your best friend, allowing you to manage hefty boards with ease. On the other hand, if you're dealing with finer work, a back saw is a fantastic choice. Characterized by its reinforced back for stability, a back saw is perfect for making precise cuts, especially when you need to create joints or detailed angles.
Another excellent hand saw alternative is the Japanese pull saw, which operates on a different principle than western saws. Instead of pushing the blade through the wood, you pull it towards you, which can result in smoother cuts and less effort. The thin blade is particularly advantageous for making delicate cuts without excessive waste. Additionally, the coping saw is a versatile tool that excels at intricate cuts and curves, making it ideal for decorative shelving designs.
When choosing a hand saw, consider the following factors to ensure you select the right tool for your project:
- Type of Wood: Softer woods may require less aggressive saws, while harder woods may need more robust options.
- Type of Cuts: Think about whether you need straight cuts, angled cuts, or intricate shapes.
- Comfort: A comfortable grip and weight can make a significant difference during extended use.
In summary, while power tools certainly have their place in woodworking, hand saws can offer a satisfying and effective alternative. They not only provide a sense of connection to the craft but also allow for precision and control that can sometimes be lost with electric tools. So, whether you’re a seasoned woodworker or a curious beginner, don’t underestimate the power of a good hand saw!
1. Can I use a hand saw for thick wood?
Yes, a hand saw can be used for thick wood, but it may require more effort and time compared to power saws. Choose a saw with larger teeth for faster cutting.
2. How do I maintain my hand saw?
To maintain your hand saw, keep the blade clean and free from resin buildup. Regularly sharpen the teeth to ensure smooth cuts and store it in a dry place to prevent rust.
3. Are hand saws more affordable than power saws?
Generally, hand saws are less expensive than power saws, making them a great option for beginners or those on a budget.
4. Can I achieve the same precision with a hand saw as with a power saw?
Yes, with practice, you can achieve high precision with a hand saw. It may take longer, but the control you have can lead to very accurate cuts.
Assembling Your Shelves
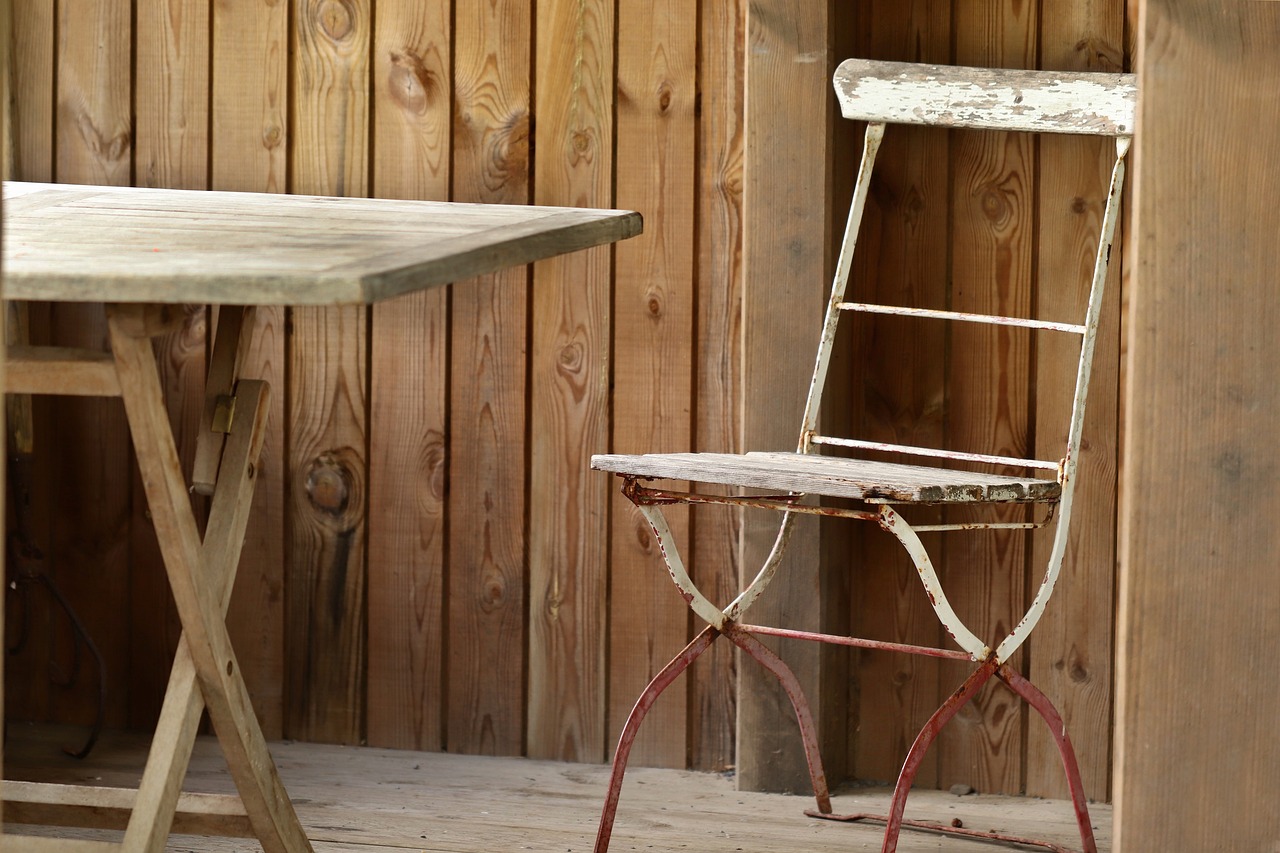
Now that you have your wooden pieces cut to size, it’s time to bring your shelving vision to life! Assembling your shelves can be both exciting and a bit daunting, but with the right approach, you'll find that it’s a straightforward process. First, gather all your cut pieces, along with the necessary hardware such as brackets, screws, and wood glue. It's like gathering your ingredients before cooking; having everything ready will make the assembly process smoother and more enjoyable.
Start by laying out your shelf pieces on a flat surface. This allows you to visualize how everything will come together. You’ll want to arrange them in the order you plan to assemble them. Think of it as a puzzle; each piece has its place, and once you find it, the picture will come together beautifully. The key here is to ensure that all your pieces fit snugly without any gaps. If you notice any irregularities, now is the time to make adjustments.
Next, it’s time to secure the shelves. If you’re using brackets, position them where you want your shelves to sit and mark the drill holes with a pencil. Remember, precision is crucial here! Use a level to ensure that your brackets are straight before drilling. This step is akin to laying a solid foundation for a house; if it’s off, everything built on top will be too. Once you’ve drilled the holes, attach the brackets securely. If you’re going for a floating shelf design, you’ll need to install hidden brackets that will support the shelf without being visible.
After securing the brackets, it's time to attach the shelves. If you’re using wood glue, apply a thin layer to the edges of the shelf before placing it on the brackets. This will not only enhance the stability of the shelf but also provide a seamless look. For added security, you can use screws to fasten the shelf to the brackets. This dual approach—glue and screws—acts as a safety net, ensuring your shelves can hold everything from books to decorative items without a hitch.
Once everything is assembled, take a step back and admire your handiwork! You’ve transformed raw wood into functional art. But before you start loading your shelves with your favorite items, allow the glue to dry completely. This might feel like waiting for a cake to bake, but patience is key to ensuring your shelves are sturdy and reliable.
In summary, assembling your shelves is a rewarding process that combines creativity with practical skills. Remember to take your time, measure twice, and enjoy the journey of crafting something that not only serves a purpose but also adds charm to your space. And don’t forget, if you run into any issues, the DIY community is full of resources and support. Happy assembling!
- What type of wood is best for shelves?
The best wood for shelves depends on your needs. Hardwoods like oak or maple are durable and aesthetically pleasing, while softer woods like pine are more budget-friendly and easier to work with.
- How much weight can my shelves hold?
The weight capacity of your shelves will depend on the type of wood, thickness, and how securely they are mounted. Generally, well-installed shelves can hold between 20 to 50 pounds per linear foot.
- Do I need to sand my shelves before painting or staining?
Yes, sanding your shelves is crucial. It smooths the surface, allowing for better adhesion of paint or stain, and enhances the final finish.
Finishing Touches
When it comes to DIY wooden shelving, the are where the magic happens. A well-finished shelf not only looks stunning but also protects the wood from wear and tear. Think of it like dressing up for a big event; the right outfit can make all the difference! In this section, we’ll delve into various finishing techniques, such as staining, painting, and sealing, that will enhance the natural beauty of your wood while ensuring its longevity.
First up, let’s talk about staining. Staining allows you to showcase the wood's grain while adding color. There are two main types of stains: oil-based and water-based. Oil-based stains penetrate deeper into the wood, offering a richer finish, but they take longer to dry. Water-based stains, on the other hand, dry quickly and are easier to clean up but may require more coats for the desired depth of color. When choosing a stain, consider the color palette of your space and how the wood's natural tones will complement it.
Next, we have painting. If you’re looking for a bold statement or want to match your shelves to your room’s decor, paint might be the way to go. When painting wooden shelves, it’s crucial to use a primer first, especially if you’re working with a lighter color over a darker wood. This not only helps the paint adhere better but also ensures a more vibrant finish. Remember to apply multiple thin coats rather than one thick coat to avoid drips and uneven coverage.
Lastly, let’s not forget about sealing. Sealing your shelves protects them from moisture, spills, and scratches. There are several types of sealers available, including polyurethane, varnish, and lacquer. Each offers different levels of durability and shine. For instance, polyurethane is highly durable and water-resistant, making it an excellent choice for kitchen or bathroom shelves. On the contrary, if you prefer a matte finish, a water-based polyurethane might be your best bet.
To help you decide on the right finish for your project, here’s a quick comparison table:
| Finish Type | Durability | Drying Time | Best For |
|---|---|---|---|
| Oil-based Stain | High | Long | Rich color and depth |
| Water-based Stain | Medium | Short | Quick projects |
| Polyurethane | Very High | Long | High-traffic areas |
| Varnish | Medium to High | Medium | General use |
| Lacquer | High | Very Short | Quick-drying finishes |
Now that you have a better idea of the different finishes available, let’s discuss application techniques. To achieve a professional look, ensure your workspace is clean and well-ventilated. Start by lightly sanding your shelves to create a smooth surface for the finish. After sanding, wipe down the shelves with a damp cloth to remove any dust. When applying stains or paints, use a high-quality brush or foam applicator to achieve even coverage. For sealers, consider using a spray application for a smooth, even coat.
In conclusion, the finishing touches on your wooden shelves are key to transforming them from simple wood pieces to functional art in your home. By selecting the right finish and applying it correctly, you can enhance the beauty and durability of your shelves, ensuring they serve you well for years to come. So, roll up your sleeves, grab those brushes, and let your creativity shine!
- What is the best type of wood for DIY shelves? - Popular choices include pine for its affordability, oak for its strength, and maple for its beauty.
- How do I choose the right finish for my shelves? - Consider the wood type, the room's decor, and how much wear and tear the shelves will experience.
- Can I use leftover paint or stain on my shelves? - Yes, but make sure it's suitable for wood and that you mix it well before application.
- How often should I reapply the finish on my shelves? - It depends on usage, but generally every few years or when you notice signs of wear.

Choosing the Right Finish
When it comes to finishing your wooden shelves, the choices can feel overwhelming. However, selecting the right finish is crucial for both the appearance and longevity of your project. A good finish not only enhances the natural beauty of the wood but also protects it from wear and tear, moisture, and other environmental factors. So, how do you decide? Let’s break it down.
First, consider the type of wood you’re using. Different woods absorb finishes differently. For instance, softwoods like pine will soak up stains more readily than hardwoods like oak. This means that the finish you choose can dramatically alter the final look of your shelves. If you’re working with a porous wood, a pre-stain conditioner can help ensure an even finish.
Next, think about the environment where your shelves will be placed. Are they going to be in a humid bathroom, or will they be in a dry living room? The location can dictate the type of finish you should use. For high-moisture areas, a water-resistant finish like polyurethane is ideal, while a simple varnish might suffice for drier settings. Here’s a quick comparison:
| Finish Type | Best For | Durability |
|---|---|---|
| Polyurethane | High moisture areas | Very durable |
| Varnish | Living spaces | Moderately durable |
| Oil Finish | Natural look | Less durable |
| Paint | Colorful accents | Varies |
Another factor to consider is the desired appearance. Do you want a glossy finish that reflects light, or a matte finish that gives a more natural look? Glossy finishes can highlight the grain of the wood and are easier to clean, while matte finishes can hide imperfections and create a more rustic appearance. Many DIYers enjoy experimenting with different finishes to find the perfect look for their home.
Lastly, don’t forget about the application process. Some finishes are easier to apply than others. For instance, spray finishes can provide a smooth, even coat but require more ventilation and protective gear. On the other hand, brush-on finishes allow for more control but may take a bit longer to apply. Whichever method you choose, make sure to follow the manufacturer's instructions for the best results.
In summary, choosing the right finish for your wooden shelves involves considering the type of wood, the environment, the desired appearance, and the application method. By taking the time to make an informed decision, you can ensure that your shelves not only look fantastic but also stand the test of time.
- What is the best finish for indoor wooden shelves? Polyurethane is often recommended due to its durability and resistance to moisture.
- Can I use paint on wooden shelves? Yes, paint can add color and character to your shelves, but be sure to use a primer for better adhesion.
- How do I apply a finish evenly? Use a high-quality brush or spray applicator and apply in thin layers, allowing each layer to dry before adding more.
Application Techniques
When it comes to applying finishes to your wooden shelves, the technique you use can make all the difference in achieving that professional look you desire. Whether you’re opting for a sleek stain, a vibrant paint, or a protective sealant, understanding the right application methods is key to ensuring a smooth, even finish. First off, always start with a clean surface; dust and debris can ruin your finish before it even begins. A light sanding with fine-grit sandpaper will not only remove imperfections but also help the finish adhere better.
Next, consider the tools you'll need for application. A high-quality brush is essential for painting and sealing, while foam brushes or cloths work wonders for staining. For large areas, a roller can speed up the process, but be cautious about leaving roller marks. Remember, the type of finish you choose can influence the application technique. For example, oil-based stains require a different approach compared to water-based ones. Always read the manufacturer's instructions for specific guidelines.
When applying the finish, use long, even strokes to avoid streaks and ensure a uniform coat. If you're staining, apply it generously and wipe off the excess with a clean rag after a few minutes. This not only enhances the wood grain but also prevents blotchiness. For paint, multiple thin coats are preferable to one thick coat; this reduces the risk of drips and uneven texture. Allow each coat to dry thoroughly before applying the next one. Patience is vital here—rushing can lead to unsightly results.
Lastly, don't forget about the drying and curing process. While a finish may feel dry to the touch in a few hours, it can take days or even weeks to fully cure. During this time, avoid placing heavy items on your new shelves to prevent dents or scratches. If you’re unsure about the curing time, refer to the product label for guidance. By following these application techniques, you’ll not only enhance the beauty of your wooden shelves but also ensure they stand the test of time.
- What is the best type of finish for wooden shelves? The best type of finish depends on the look you want to achieve and the wood type. Generally, oil-based stains provide a rich color, while water-based finishes are easier to clean up and dry faster.
- How many coats of finish should I apply? It's recommended to apply at least two to three coats of finish for optimal protection and appearance, allowing each coat to dry completely before adding the next.
- Can I use a spray finish instead of a brush? Yes, spray finishes can provide a smooth, even coat, but they require careful technique to avoid overspray and drips. Ensure you work in a well-ventilated area.
- How do I clean my shelves after finishing? Once your shelves are fully cured, you can clean them with a damp cloth. Avoid harsh chemicals that could damage the finish.
Frequently Asked Questions
- What type of wood is best for DIY shelving?
When it comes to choosing wood for your shelving project, you have several great options. Pine is a popular choice due to its affordability and ease of use, while oak offers durability and a beautiful grain. If you're looking for something a bit more unique, consider maple or walnut for a richer look. Ultimately, the best wood will depend on your budget, the weight of items you plan to store, and your aesthetic preferences.
- What tools do I need to build wooden shelves?
Before diving into your DIY project, make sure you have the essential tools on hand. You will need a measuring tape for accuracy, a miter saw for precise cuts, and a drill for assembly. Other handy tools include a level to ensure your shelves are straight, sandpaper for smoothing edges, and clamps to hold pieces together while you work. Having the right tools will make your project smoother and more enjoyable!
- How can I ensure accurate measurements for my shelves?
Accurate measurements are key to a successful shelving project. Start by measuring the space where you plan to install the shelves. Use a measuring tape and double-check your measurements to avoid mistakes. Mark your cut lines clearly on the wood, and remember the old saying: "Measure twice, cut once!" This simple tip can save you time and materials in the long run.
- What are some finishing techniques for wooden shelves?
The finish you choose can dramatically change the look of your shelves. You can opt for staining to enhance the wood's natural grain, painting for a pop of color, or sealing to protect against wear and tear. Each technique has its own application method, so be sure to follow the instructions for the best results. A well-applied finish not only improves aesthetics but also extends the life of your shelves!
- Can I use hand saws instead of power tools?
Absolutely! If you prefer traditional methods, hand saws can be a great alternative to power tools. They require a bit more effort and time, but they can provide a satisfying and precise cut if used correctly. Just make sure to choose a quality hand saw and practice your cutting technique to achieve clean edges. It's all about finding what works best for you!


