How to Choose the Right Wood for Your Project
Choosing the right wood for your project can feel like navigating a dense forest—overwhelming yet exciting! With so many options available, it’s easy to get lost in the details. But don’t worry; this article will guide you through the essential factors to consider when selecting wood, ensuring you make informed decisions that balance durability and aesthetics. Whether you're crafting a cozy coffee table or building a sturdy outdoor deck, understanding your options will help you achieve the best results.
When it comes to wood, the first step is to understand the two main categories: hardwoods and softwoods. Hardwoods come from deciduous trees, which lose their leaves in the fall, while softwoods come from coniferous trees, which remain evergreen. Each type has its unique characteristics, applications, and benefits:
- Hardwoods: Typically denser and more durable, hardwoods like oak, maple, and cherry are perfect for furniture and flooring. Their rich colors and intricate grain patterns add a touch of elegance to any project.
- Softwoods: Easier to work with and generally more affordable, softwoods such as pine, cedar, and fir are great for construction, cabinetry, and outdoor projects. They’re lighter and often come in larger dimensions.
So, which one should you choose? It largely depends on the project's requirements and your personal style. Think about where the wood will be used and how much wear and tear it will endure.
Quality is paramount in wood selection, and it can make or break your project. The first thing to look for is the grain pattern, which can significantly affect both the appearance and performance of the wood. A well-defined grain can enhance the beauty of your piece, while a poor grain can detract from it. Additionally, you should assess the presence of knots and other imperfections, as these can weaken the wood and impact its longevity.
Grain patterns are like the fingerprints of wood; no two pieces are exactly alike! They tell a story about the tree's growth and can dramatically influence your project's overall look. Here’s how to identify desirable grain types:
- Straight Grain: This is the most sought-after pattern for its uniformity and ease of finishing.
- Curly Grain: Offers a stunning visual effect, often found in woods like maple.
- Wavy Grain: Adds character and movement to the wood, perfect for artistic projects.
Some of the most common grain patterns you’ll encounter include:
| Wood Type | Grain Pattern | Best Use |
|---|---|---|
| Oak | Open Grain | Furniture, Cabinets |
| Maple | Straight Grain | Countertops, Flooring |
| Cedar | Wavy Grain | Outdoor Furniture, Decking |
Different grain patterns can also influence the finishing process. For instance, woods with open grains may require more filler to achieve a smooth finish, while tight grains can be more forgiving. Understanding these nuances will help you choose the right stain or sealant to highlight the wood's natural beauty.
Knots and defects can weaken wood, so it’s crucial to know how to spot them. Look for:
- Dark spots or holes that indicate knots.
- Cracks or splits that can compromise structural integrity.
- Color variations that may signal decay.
Being vigilant about these imperfections will ensure your project stands the test of time.
The finish you select can enhance wood's natural beauty while providing crucial protection. Various finishing options exist, and understanding how they relate to different wood types is essential for achieving the desired look and durability. For example, oil finishes penetrate the wood, enhancing its grain, while varnishes provide a hard protective layer.
When it comes to finishes, you have several options:
- Oil: Enhances natural beauty, great for indoor furniture.
- Varnish: Provides a durable, glossy finish, suitable for high-traffic areas.
- Lacquer: Dries quickly and offers a hard finish, ideal for intricate details.
Choosing the right finish will not only protect your wood but also elevate its aesthetic appeal.
Applying the finish correctly is just as important as choosing the right type. Techniques vary based on the finish you select, but here are some general tips:
- Always prepare the surface by sanding it smooth.
- Apply thin coats, allowing each to dry before adding the next.
- Use high-quality brushes or cloths for a professional look.
With the right technique, you can achieve a smooth, professional-looking result that enhances the wood's appearance and durability.
Q: What wood is best for outdoor projects?
A: Cedar and redwood are excellent choices for outdoor projects due to their natural resistance to decay and insects.
Q: Can I use softwood for furniture?
A: Absolutely! Softwoods like pine can be used for furniture, especially if you’re looking for a rustic or casual style.
Q: How do I maintain my finished wood projects?
A: Regular dusting and occasional reapplication of the finish will keep your wood looking great for years to come.

Understanding Wood Types
This article will guide you through the essential factors to consider when selecting wood for various projects, ensuring you make informed decisions for durability and aesthetics.
When it comes to woodworking, understanding the different types of wood is crucial. Wood can be broadly categorized into two main groups: hardwoods and softwoods. Each type has its own unique characteristics, benefits, and applications, making it essential to choose the right one for your specific project.
Hardwoods come from deciduous trees, which lose their leaves annually. These woods are generally denser and more durable than softwoods, making them ideal for furniture, cabinetry, and flooring. Common hardwoods include oak, maple, cherry, and walnut. Their natural beauty, grain patterns, and rich colors can elevate any project, but they often come with a higher price tag.
On the other hand, softwoods are derived from coniferous trees, which typically remain evergreen. Softwoods like pine, cedar, and spruce are lighter, easier to work with, and more affordable than hardwoods. They are commonly used in construction, framing, and outdoor projects. While they may not have the same level of durability as hardwoods, they can still be treated to enhance their longevity.
To help you better understand the differences, here’s a quick comparison:
| Type | Examples | Characteristics | Common Uses |
|---|---|---|---|
| Hardwood | Oak, Maple, Cherry | Dense, Durable, Rich Colors | Furniture, Cabinets, Flooring |
| Softwood | Pine, Cedar, Spruce | Lighter, Easier to Work With, Affordable | Construction, Framing, Outdoor Projects |
When selecting wood for your project, consider the environment in which it will be used. For instance, if you’re building outdoor furniture, you might want to opt for a durable hardwood like teak or a treated softwood like cedar, which is naturally resistant to decay. On the flip side, if you're crafting intricate indoor pieces, the stunning grain of cherry or walnut could be just what you need to make a statement.
In addition to these categories, understanding the specific properties of each wood species can help you make a more informed choice. Some woods are more prone to warping or shrinking, while others are more resistant to scratches and dents. By taking the time to research and understand these factors, you can ensure that your project not only looks fantastic but also stands the test of time.
So, whether you’re a seasoned woodworker or just starting out, remember that the type of wood you choose can significantly impact the outcome of your project. Take the time to explore your options, weigh the pros and cons, and you’ll be well on your way to creating something truly special.
Quality is paramount in wood selection. Here, we’ll discuss how to evaluate wood quality, including grain patterns, knots, and other imperfections that can affect both appearance and performance.
The grain pattern of wood significantly impacts its visual appeal. This subsection will explain how to identify desirable grain types and their implications for your project's overall look.
Learn about the most common grain patterns found in various wood species and how they can enhance or detract from your project’s design.
Discover how different grain patterns can influence the finishing process, including staining and sealing, to achieve the desired final look.
Knots and defects can weaken wood. This section will guide you on how to spot these imperfections and understand their potential impact on your project’s longevity.
The finish you select can enhance wood's natural beauty while providing protection. This section will cover various finishing options and how they relate to different wood types.
Explore the various types of finishes available, including oil, varnish, and lacquer, and how to choose the best one for your specific wood project.
Learn effective application techniques for different finishes to ensure a smooth, professional-looking result that enhances the wood's appearance and durability.
- What is the best wood for outdoor projects? - Cedar and redwood are excellent choices due to their natural resistance to moisture and insects.
- Can I use softwood for furniture? - Absolutely! Softwoods like pine can be used for furniture, especially if treated properly.
- How do I know if the wood is of good quality? - Look for straight grain, minimal knots, and a smooth surface. Avoid wood with excessive imperfections.

Assessing Wood Quality
When it comes to selecting wood for your project, quality is paramount. The right choice can mean the difference between a stunning piece that lasts for generations and a project that falls apart after a few months. So, how do you evaluate wood quality? It’s not just about the price tag; it’s about understanding the characteristics that make wood suitable for your specific needs. Here are some key factors to consider:
First off, grain patterns play a significant role in both aesthetics and structural integrity. The grain of the wood can tell you a lot about its strength and appearance. For instance, a straight grain is typically more stable and less prone to warping, while a wavy grain can add visual interest but may not be as strong. Identifying the right grain pattern for your project can elevate its overall look and performance.
The grain pattern of wood significantly impacts its visual appeal. When selecting wood, you should look for desirable grain types that not only enhance the beauty of your project but also align with its intended use. For example, if you’re crafting a dining table, you might want to opt for a wood species with a tight, even grain that can withstand daily wear and tear. On the other hand, a decorative piece might benefit from a more intricate grain pattern that draws the eye.
Some common grain patterns include:
- Straight Grain: Offers stability and a classic look, making it ideal for furniture.
- Wavy Grain: Adds character and uniqueness but may require more care in finishing.
- Curly Grain: Often found in hardwoods, this pattern creates stunning visual effects.
Understanding these patterns can help you choose the right wood species that complements your design vision.
Different grain patterns can also influence the finishing process. For instance, wood with a tight grain tends to absorb stains evenly, resulting in a smooth, uniform finish. In contrast, a wood with an open grain may require additional steps to achieve a polished look. This is crucial to consider, as the finish not only protects the wood but also enhances its natural beauty. A well-finished piece can elevate the entire project, making it look professionally crafted.
Knots and defects can weaken wood and compromise its structural integrity. When assessing wood quality, it’s essential to inspect for these imperfections. Knots can be beautiful and add character, but they can also lead to weaknesses in the material. Look for:
- Loose Knots: These can fall out over time, leaving holes in your project.
- Cracks and Splits: These can compromise the wood’s strength and should be avoided.
- Color Variations: While some variation can be desirable, drastic changes may indicate a problem.
By carefully examining the wood for these defects, you can ensure that you’re selecting high-quality materials that will stand the test of time.
In conclusion, assessing wood quality involves a keen eye for detail and an understanding of how various characteristics impact both appearance and performance. By focusing on grain patterns, identifying knots and defects, and considering how these elements affect finishing, you can make informed decisions that will enhance your project’s durability and aesthetic appeal.
Q: How can I tell if the wood is of good quality?
A: Look for straight grain patterns, minimal knots, and no signs of warping or cracking. A clean, smooth surface is also a good indicator of quality.
Q: Why are knots in wood sometimes considered desirable?
A: Knots can add character and uniqueness to a piece, making it visually interesting. However, they can also weaken the wood, so it’s essential to evaluate their impact based on your project.
Q: What is the best finish for my wood project?
A: The best finish depends on the type of wood and the intended use of the piece. For example, oil finishes are great for enhancing natural beauty, while varnishes provide more protection.
Grain Patterns
When it comes to woodworking, are more than just a visual feature; they are the very essence of the wood's character. Each piece of wood has a unique fingerprint, shaped by the way the tree grew, the environment it thrived in, and how it was processed. Understanding these patterns can make a significant difference in your project, transforming a simple piece of lumber into a stunning focal point. But what exactly should you look for when assessing grain patterns?
First, let’s dive into the types of grain patterns you might encounter. The most common include:
- Straight Grain: This is the classic look, with fibers running parallel to each other, providing a uniform appearance. It’s often sought after for its simplicity and elegance.
- Wavy Grain: As the name suggests, this pattern features gentle curves and can add a touch of dynamism to your project. It's perfect for pieces that need a bit of flair.
- Interlocked Grain: This pattern is characterized by fibers that twist around each other, which can create a striking visual effect. However, it can also make the wood more challenging to work with.
- Figured Grain: This includes patterns like flame or birdseye that result from unique growth conditions. These woods are often considered highly desirable for their aesthetic appeal.
Understanding these patterns is crucial not just for aesthetics but also for the performance of the wood. For instance, straight grain tends to be stronger and easier to work with, making it ideal for structural applications. On the other hand, figured grains might be perfect for decorative pieces where beauty outweighs the need for strength.
Now, let’s talk about how grain patterns affect the finishing process. Different patterns absorb stains and finishes in unique ways. For example, woods with a wavy grain might require more careful application of stain to ensure an even finish, whereas straight-grained woods typically take stain uniformly. If you’re aiming for a rich, dark finish, be prepared to experiment a bit to see how the grain reacts.
Ultimately, choosing the right grain pattern for your project is about balancing aesthetics and functionality. Ask yourself questions like: What is the purpose of my project? Will the wood be exposed to wear and tear? How do I want it to look? By considering these factors, you can select a grain pattern that not only enhances your design but also stands the test of time.
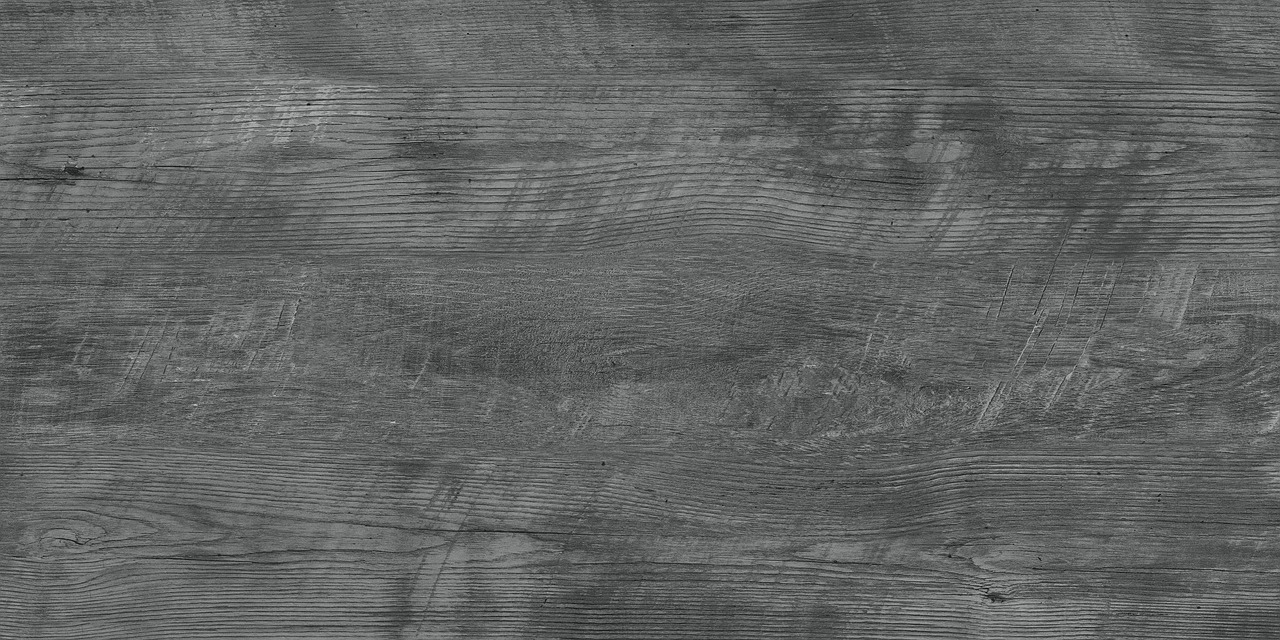
Common Grain Patterns
When it comes to woodworking, understanding grain patterns is crucial. These patterns not only affect the aesthetic appeal of your project but also influence its structural integrity. Different species of wood exhibit various grain patterns, and each type can evoke a distinct style and feel. For instance, oak typically showcases a prominent, open grain that gives a rustic charm, while maple often boasts a fine, smooth texture that lends a more refined look. By recognizing these common grain patterns, you can make informed choices that enhance your project's overall design.
Here are some of the most common grain patterns you might encounter:
- Straight Grain: This pattern runs parallel to the length of the wood, providing a clean and uniform appearance. It’s often found in woods like pine and fir.
- Curly Grain: Characterized by wavy lines, curly grain adds a unique visual effect and is often seen in maple and cherry. It’s particularly sought after for decorative pieces.
- Birdseye Grain: This distinctive pattern resembles small eyes or spots and is most commonly found in maple. It creates a stunning visual texture that can elevate any project.
- Quarter Sawn: This method of cutting wood results in a straight grain with a unique ray fleck pattern, often seen in oak. It’s favored for its stability and resistance to warping.
Understanding these patterns will not only help you choose the right wood for your project but also allow you to play with design elements creatively. For example, if you're crafting a piece of furniture, opting for a straight grain might provide a more contemporary look, while a curly or birdseye grain can add a touch of elegance and sophistication. Remember, the grain pattern you choose can significantly influence the visual impact of your work, so take the time to explore and appreciate the unique characteristics of each wood type.
Moreover, when selecting wood, consider how the grain will interact with your finishing choices. Some finishes can amplify the beauty of certain grain patterns, while others may obscure them. This interplay between grain and finish is a dance that can make or break your project. So, whether you're a seasoned woodworker or just starting, understanding grain patterns is a fundamental step in creating stunning and durable pieces.
- What is the best wood for furniture making?
The best wood often depends on the desired look and durability. Hardwoods like oak, maple, and cherry are popular choices due to their strength and aesthetic appeal. - How do I know if the wood is of good quality?
Look for consistent grain patterns, minimal knots, and no signs of warping or splitting. High-quality wood should feel smooth to the touch. - Can I change the grain pattern of wood?
While you cannot change the natural grain pattern, you can enhance its appearance through finishing techniques like staining or varnishing.
Effects of Grain on Finishing
When it comes to woodworking, the grain pattern of the wood isn't just a pretty face; it plays a crucial role in how the finishing process unfolds. Imagine the grain as the roadmap of the wood, guiding the way the finish interacts with the surface. Different types of grain can absorb stains and finishes in unique ways, leading to varying results that can either enhance or detract from your project's final look.
For instance, woods with a tight grain, such as maple or cherry, tend to absorb finishes evenly, resulting in a smooth, consistent appearance. On the other hand, woods with a loose grain, like oak or pine, may absorb stains unevenly, creating a blotchy effect if not treated properly. This means that if you're working with a wood type that has a pronounced grain, you'll need to take extra care during the finishing process to avoid surprises.
One effective technique to mitigate these issues is to use a pre-stain conditioner. This product helps to even out the absorption of the finish, allowing for a more uniform color across the surface. For those who prefer a more natural look, applying a clear finish can enhance the grain's beauty without altering its appearance significantly. However, be aware that the finish can also highlight imperfections, so it's essential to assess the wood closely before proceeding.
Moreover, the type of finish you choose can interact differently with the grain. For example:
- Oil-based finishes tend to penetrate deeply into the wood, accentuating the grain's natural beauty.
- Water-based finishes sit more on the surface, which can sometimes lead to a more pronounced grain pattern but may not provide the same depth of color.
- Lacquers dry quickly and can create a hard shell over the grain, giving a sleek, modern finish.
Ultimately, understanding how grain affects finishing allows you to make informed choices that align with your project's vision. Whether you're aiming for a rustic charm or a sleek modern look, considering the grain's interaction with your chosen finish can help you achieve stunning results.
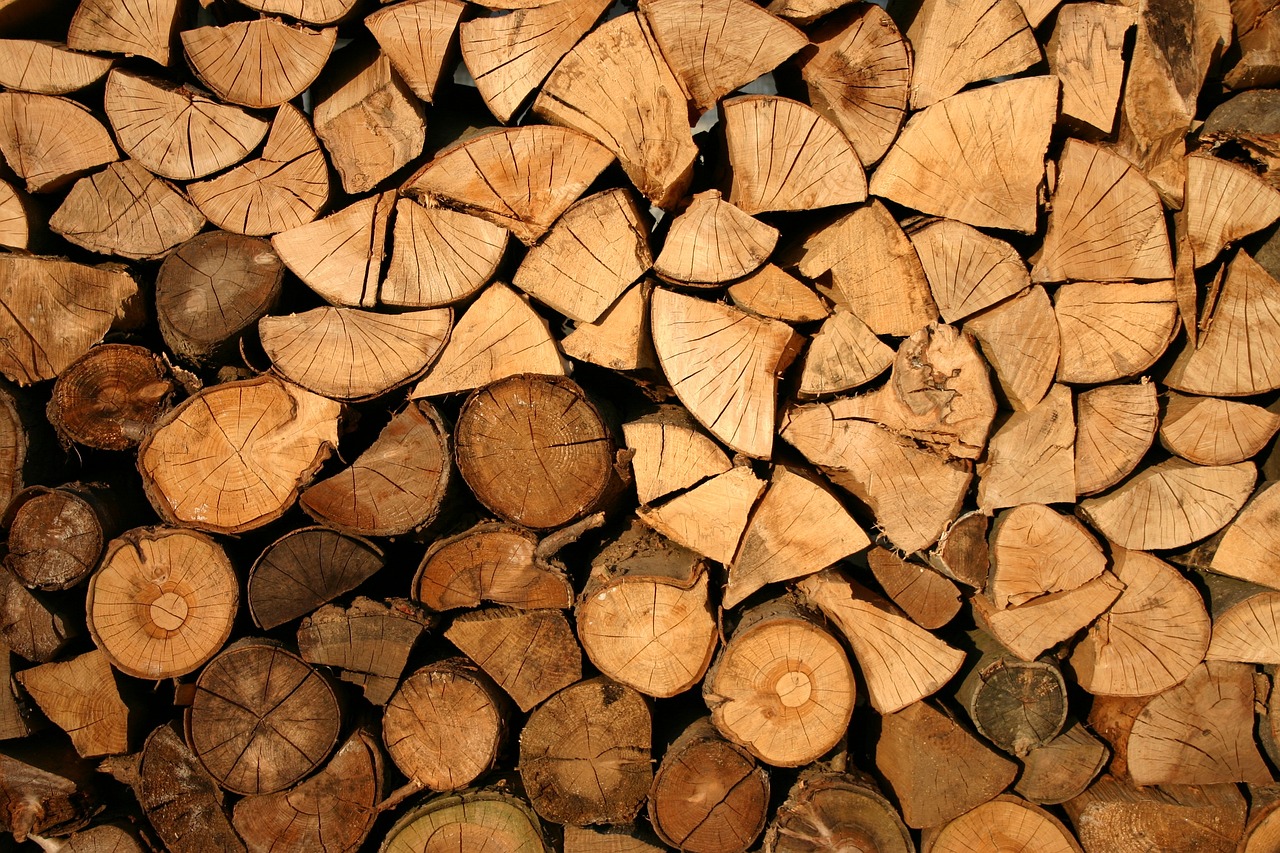
Identifying Knots and Defects
When it comes to selecting wood for your project, is crucial. These imperfections can significantly impact the wood's structural integrity and aesthetic appeal. Knots, which are essentially the remnants of branches that were once part of the tree, can vary widely in size and shape. While some may add character to your project, others can weaken the wood and lead to issues down the line. So, how do you spot these imperfections? Let's dive in!
First, take a close look at the surface of the wood. A well-crafted piece should have a smooth, even texture without any unexpected bumps or irregularities. To help you identify the types of knots and defects you might encounter, consider the following:
- Types of Knots:
- Live Knots: These knots are still attached to the tree and can be solid, but they may also weaken over time.
- Dead Knots: These are remnants of branches that have died off. They can fall out over time, leaving holes in the wood.
- Pin Knots: Small and often inconspicuous, these knots are typically less problematic but can still affect the finish.
- Defects to Watch For:
- Cracks: These can occur due to drying or stress and can compromise the wood’s strength.
- Checks: Similar to cracks, checks are small splits that run along the grain and can affect the finish.
- Wane: This refers to the absence of wood along the edge of a board, which can affect strength and aesthetics.
Next, it's essential to understand how these imperfections can impact your project. For instance, if you’re building a table, a large knot in a critical structural area could lead to failure over time. On the other hand, a small knot on a decorative piece may add charm and uniqueness. Therefore, always consider the intended use of the wood when evaluating knots and defects.
Additionally, remember that the location of the knots matters. Knots located near the ends of boards might not pose as much of a problem as those found in the middle, which could affect the wood's overall strength. To ensure that you’re selecting the best wood for your project, take the time to examine each piece carefully, and don’t hesitate to ask for assistance from knowledgeable staff at your local lumberyard.
In summary, while knots and defects can sometimes be seen as flaws, they can also contribute to the character and beauty of your wood project. The key is to understand their implications and choose wisely based on your project's needs. By doing so, you’ll not only enhance the durability of your work but also create a stunning final product that stands the test of time.
Q: What are the most common defects to look out for in wood?
A: The most common defects include knots, cracks, checks, and wane. Each of these can affect the wood's strength and appearance, so it's important to evaluate them carefully.
Q: Can I use wood with knots in my projects?
A: Yes, you can use wood with knots, but it's essential to consider their location and size. Knots can add character, but they may also weaken the structure, especially in load-bearing applications.
Q: How can I prevent defects in my wood projects?
A: To minimize defects, always store wood in a dry, stable environment and allow it to acclimate to the surrounding conditions before use. Additionally, choose high-quality wood from reputable sources.
Choosing the Right Finish
When it comes to woodworking, choosing the right finish is like picking the perfect outfit for a special occasion. Just as you wouldn’t wear flip-flops to a wedding, you want to ensure that the finish you select complements the wood and serves its purpose effectively. A good finish not only enhances the natural beauty of the wood but also provides protection against wear and tear, moisture, and UV rays. So, how do you make the right choice? Let's dive into the world of wood finishes!
First off, it's essential to understand that different types of wood require different finishing techniques. For instance, hardwoods like oak and maple often have tighter grain patterns, which can affect how they absorb finishes. Softwoods, such as pine and cedar, have larger pores and may need a different approach. Therefore, knowing your wood type is crucial before deciding on a finish.
There are several types of finishes to consider, each with its unique properties and applications. Here’s a quick overview:
| Type of Finish | Characteristics | Best Used On |
|---|---|---|
| Oil | Penetrates deep, enhances grain, easy to apply | Hardwoods, furniture |
| Varnish | Durable, water-resistant, glossy finish | Outdoor projects, tabletops |
| Lacquer | Quick-drying, smooth finish, high gloss | Cabinetry, fine furniture |
As you can see, each finish has its strengths and weaknesses. For example, oil finishes are fantastic for enhancing the wood's natural grain but may require more frequent reapplication compared to varnish, which is more durable but can sometimes obscure the grain. It’s like choosing between a comfy pair of sneakers and a sturdy pair of boots—each has its time and place!
Next, let’s talk about application techniques. The way you apply the finish can significantly impact the final result. For instance, when applying oil finishes, using a clean cloth to rub the oil into the wood can help achieve a more even absorption. On the other hand, varnish is often best applied with a brush or spray for a smooth, consistent coat. Remember, preparation is key; always sand the surface before applying any finish to ensure the best adhesion and appearance.
Finally, don’t forget to consider the environment where your finished project will reside. If it’s going to be outdoors, you’ll want a finish that can withstand the elements. On the flip side, indoor projects might benefit from finishes that emphasize aesthetics over durability. It’s all about finding that sweet spot between beauty and functionality.
- What is the best finish for outdoor furniture? Varnish or a marine-grade finish is recommended due to their water resistance and durability.
- Can I use the same finish for different types of wood? While some finishes can be used across different wood types, it's best to choose a finish that complements the specific characteristics of each wood.
- How often should I reapply finishes? This depends on the type of finish and the wear it experiences. For example, oil finishes may need reapplication every year, while varnish can last several years.
Types of Finishes
When it comes to enhancing the beauty and longevity of your wood projects, the finish you choose can make all the difference. A good finish not only protects the wood from environmental factors but also brings out its natural grain and color. There are several types of finishes available, each with its own unique properties and applications. Understanding these options will help you select the best one for your specific needs.
One popular choice is oil finishes, which penetrate the wood and provide a rich, natural look. They are easy to apply and maintain, making them ideal for furniture and decorative pieces. However, oil finishes can take longer to dry and may require more frequent reapplication compared to other finishes. On the other hand, varnish offers a more durable surface, forming a protective layer on top of the wood. This makes it perfect for high-traffic areas, such as floors and kitchen countertops. Varnishes come in various sheens, allowing you to achieve the desired look for your project.
Lacquer is another option that dries quickly and provides a hard, glossy finish. It's often used in fine furniture and cabinetry, as it can be easily sanded and polished to a high shine. However, it can be more challenging to apply due to its fast drying time, which may require skilled hands to achieve a flawless finish.
To help you navigate these options, here’s a quick comparison of the three main types of finishes:
| Type of Finish | Durability | Application Ease | Drying Time | Best Use |
|---|---|---|---|---|
| Oil Finish | Moderate | Easy | Slow | Furniture, Decorative Pieces |
| Varnish | High | Moderate | Moderate | Floors, Kitchen Countertops |
| Lacquer | High | Challenging | Fast | Fine Furniture, Cabinetry |
Additionally, the choice of finish can also influence the color and texture of the wood. For instance, an oil finish can enhance the warm tones of a wood species like walnut, while a clear varnish might leave the wood looking more natural. It's essential to test your chosen finish on a scrap piece of the same wood to see how it reacts before applying it to your entire project.
In conclusion, selecting the right finish is crucial for achieving the desired look and durability of your wood project. Whether you opt for an oil, varnish, or lacquer, understanding the characteristics of each will help you make an informed decision. Remember, a well-finished piece not only looks great but also stands the test of time, ensuring your hard work pays off in the long run.
- What is the best finish for outdoor furniture?
The best finish for outdoor furniture is typically a high-quality varnish or a specialized outdoor oil that can withstand the elements.
- How often should I reapply my wood finish?
This depends on the type of finish and the usage of the item. Generally, oil finishes may need reapplication every 6 months to a year, while varnishes can last several years.
- Can I mix different types of finishes?
It's not recommended to mix different types of finishes, as they may react negatively with each other. Always test on a small area first!

Application Techniques
When it comes to applying finishes to wood, the technique you choose can significantly impact the final appearance and durability of your project. Think of it like painting a masterpiece; the brush you use and the strokes you apply can make all the difference. First, it's essential to prepare the wood surface properly. Start by sanding the wood to create a smooth finish, removing any rough spots or imperfections. This step is crucial because a well-prepared surface allows the finish to adhere better and results in a more uniform appearance.
Once your surface is smooth, you can choose from a variety of application methods. Here are some common techniques:
- Brush Application: Using a high-quality brush is ideal for applying oil-based finishes. The key here is to use long, even strokes, following the wood grain. This method allows for better control and precision, especially in corners and edges.
- Spray Application: If you're looking for an ultra-smooth finish, spraying is the way to go. It’s perfect for larger projects, but it requires some practice to avoid drips and uneven coverage. Always wear a mask and work in a well-ventilated area when spraying finishes.
- Roller Application: Rollers can be a quick way to cover large surfaces, but they might not provide the same level of detail as brushes. They work well for flat surfaces and can be used in conjunction with brushes for edges and intricate areas.
After you've chosen your application method, it's time to consider the finish itself. Different finishes have different application requirements. For instance, oil finishes often require multiple coats, with light sanding in between to ensure proper adhesion. On the other hand, varnishes and lacquers may dry faster but can be more challenging to apply evenly.
Another important aspect is the environmental conditions during application. It’s best to apply finishes in a controlled environment, avoiding extreme temperatures and humidity levels. A stable environment helps the finish cure properly, preventing issues like bubbling or uneven drying.
Finally, don’t forget about cleanup! Using the right solvents to clean your brushes and tools after applying the finish is crucial to prolong their lifespan. For oil-based finishes, mineral spirits are typically used, while water-based finishes can be cleaned up with soap and water.
In summary, mastering application techniques is essential for achieving a beautiful and durable finish on your wood projects. By preparing the surface, choosing the right method, and considering environmental factors, you can elevate your woodworking skills and create stunning results.
Q: How many coats of finish should I apply?
A: It depends on the type of finish and the look you want to achieve. Generally, two to three coats are recommended for optimal protection and appearance, with light sanding between coats.
Q: Can I use the same brush for different finishes?
A: It's best to use different brushes for oil-based and water-based finishes to avoid contamination. Clean your brushes thoroughly after each use to maintain their quality.
Q: What should I do if my finish is uneven?
A: If you notice an uneven finish, allow it to dry completely, then lightly sand the area and apply another coat. Be sure to follow the wood grain for the best results.
Frequently Asked Questions
- What is the difference between hardwood and softwood?
Hardwoods come from deciduous trees that lose their leaves in winter, while softwoods come from coniferous trees that usually remain evergreen. Hardwoods are typically denser and more durable, making them ideal for furniture, while softwoods are often lighter and easier to work with, perfect for construction and crafting.
- How can I assess the quality of wood before purchasing?
To evaluate wood quality, check for consistent grain patterns, minimal knots, and no visible defects like cracks or splits. A smooth finish and a uniform color are also good indicators of high-quality wood. Remember, the better the quality, the longer your project will last!
- What are the most common grain patterns I should look for?
Common grain patterns include straight, wavy, and curly grains. Straight grains are often preferred for their classic look and ease of finishing, while wavy and curly grains can add a unique character to your project. Choosing the right pattern can significantly enhance the overall aesthetic!
- How do knots affect wood's strength and appearance?
Knots can weaken wood and may lead to structural issues over time. However, they can also add visual interest and character to your project. It's essential to balance aesthetics with functionality when deciding whether to use wood with knots.
- What types of finishes are best for wood projects?
Popular finishes include oils, varnishes, and lacquers. Oils penetrate the wood and enhance its natural beauty, while varnishes and lacquers provide a protective layer that can add gloss. The best choice depends on the type of wood and the desired look for your project.
- Can I apply multiple finishes to the same wood?
Yes, you can layer finishes, but it's crucial to ensure compatibility between them. For example, oil finishes should be applied before water-based finishes. Always test on a scrap piece first to see how the finishes interact!
- What techniques should I use for applying wood finishes?
For a smooth application, use a high-quality brush or cloth, and apply thin, even coats. Sand lightly between coats to promote adhesion and achieve a professional look. Patience is key; let each coat dry thoroughly before applying the next!


