How to Create DIY Geometric Decor
Welcome to the vibrant and exciting world of DIY geometric decor! If you've ever walked into a room and felt an instant surge of energy from the decor, chances are it had some striking geometric elements. These designs not only capture the eye but also bring a sense of order and creativity to any space. In this article, we're going to dive deep into the art of crafting your own geometric decorations, ensuring your home reflects your unique personality and style. Are you ready to unleash your inner artist and transform your space? Let’s get started!
Geometric design is more than just shapes; it's a language that speaks to our aesthetic senses! Think about it—when you see a perfectly arranged set of triangles, circles, or hexagons, there's an innate appeal that draws you in. This section is all about exploring the principles behind these shapes and how they can elevate your home decor. The beauty of geometric patterns lies in their versatility; they can be bold and vibrant or soft and subtle, making them suitable for any room. Whether you prefer sharp angles or smooth curves, understanding the basics of geometric design will help you create decor that is not only visually pleasing but also harmonizes with your existing style.
Before you jump into the fun of creating your geometric decor, it’s crucial to gather the right materials. Having everything at hand will make your DIY journey smoother and more enjoyable. Here’s a quick rundown of what you might need:
- Wood or Canvas: For wall art and shelves.
- Paint: Choose a palette that complements your space.
- Ruler and Compass: For precise measurements and shapes.
- Glue or Nails: Depending on your project type.
- Plants: If you’re making planters!
Having these materials ready will set you up for success, allowing your creativity to flow without interruptions.
Creating geometric wall art is one of the easiest and most rewarding DIY projects you can undertake. Imagine transforming a blank wall into a stunning focal point that reflects your personal style. Start by sketching out your design—don’t be afraid to mix shapes and colors! You can use painter's tape to outline your shapes on the wall or canvas, creating clean, crisp lines. Once you have your shapes outlined, grab your paint and let your creativity run wild. Whether you opt for bold colors or a monochromatic scheme, the result will be a unique piece of art that you can proudly display.
Indoor plants are a fantastic way to bring life into your home, and what better way to showcase them than in geometric planters? These stylish containers can be made from various materials, including wood, concrete, or even repurposed items. For instance, you can create a hexagonal planter from wooden dowels or a sleek triangular planter from concrete. Not only do these planters add a modern touch to your greenery, but they also serve as a conversation starter. Plus, they’re a great way to practice your geometric skills!
Who said shelves have to be boring? Geometric shelves can turn functional storage into a statement piece. Think of creating a series of floating shelves in various shapes, such as triangles or hexagons, to add dimension to your walls. You can even paint them in contrasting colors to make them pop! The process is relatively simple—cut your wood into the desired shapes, assemble them, and mount them securely on your wall. Not only will you have a unique storage solution, but you’ll also have a stunning display for your favorite books, plants, or decorative items.
Table centerpieces are the cherry on top of any dining experience. Why not craft a geometric centerpiece that will wow your guests? You can create a stunning arrangement using geometric vases, candle holders, or even a combination of both. Start by choosing a color scheme that matches your dining area. Then, gather your materials and assemble your centerpiece, mixing different shapes and heights for visual interest. The result? A breathtaking focal point that elevates your dining experience, making every meal feel special.
Paint is a magical tool that can transform any surface into a geometric masterpiece. Whether you’re looking to add a subtle touch or a bold statement, painting geometric patterns is an excellent way to customize your space. Consider using stencils for precision or freehand for a more organic feel. You can apply these patterns to walls, furniture, or even smaller decor items. The possibilities are endless! Just remember to prep your surfaces properly and choose colors that complement your overall decor.
Once you’ve crafted your geometric pieces, the next step is to incorporate them into your home. Think about the flow of your space and how each piece can enhance the overall aesthetic. For instance, placing a geometric wall art above a sleek sofa can create a beautiful focal point, while geometric shelves can be used in a corner to display plants and books. Don’t be afraid to mix and match different geometric shapes and sizes; the key is to create a cohesive look that feels balanced and intentional.
1. What are some easy geometric decor projects for beginners?
Some easy projects include geometric wall art, simple planters, and decorative trays. These projects require minimal materials and can be completed in a short amount of time.
2. Can I use recycled materials for my geometric decor?
Absolutely! Recycled materials can add a unique touch to your projects. Consider using old wooden crates, cardboard, or even plastic containers to create your geometric designs.
3. How do I choose colors for my geometric decor?
Choose colors that complement your existing decor. You can opt for a monochromatic scheme for a sleek look or use contrasting colors for a bold statement. Don’t forget to test paint samples before committing!
4. Where can I find inspiration for geometric designs?
Inspiration can be found everywhere! Check out design blogs, Pinterest, or even Instagram for ideas. You can also find inspiration in nature, architecture, and everyday objects.

Understanding Geometric Design
Geometric design is more than just a trend; it's a timeless approach to home decor that brings a sense of order and harmony to any space. The beauty of geometric shapes lies in their simplicity and versatility. Whether you're drawn to the sharp lines of triangles or the smooth curves of circles, these forms can create a stunning visual impact when used thoughtfully. Imagine walking into a room where the walls are adorned with bold geometric patterns, instantly capturing your attention and sparking conversation. That's the power of geometric design!
At its core, geometric design is about the relationship between shapes and how they interact with one another. It plays with balance, symmetry, and proportion, creating a sense of structure that can be both calming and dynamic. For instance, a room filled with angular shapes can evoke a feeling of energy, while rounded forms might bring a sense of softness and tranquility. Understanding these principles can help you make informed choices when decorating your home.
Consider the following key aspects of geometric design:
- Shapes and Patterns: Geometric decor often features a mix of basic shapes—such as squares, circles, and triangles—arranged in various patterns. These shapes can be repeated, overlapped, or combined to create intricate designs.
- Color and Contrast: The colors you choose can significantly affect the perception of geometric patterns. Bold, contrasting colors can make a statement, while softer tones can create a more subtle effect.
- Scale and Proportion: The size of geometric elements can influence the overall look of your space. Large geometric art pieces can serve as focal points, while smaller accents can add interest without overwhelming the room.
One of the most exciting things about geometric design is its adaptability. It can be integrated into virtually any style, from modern and minimalist to bohemian and eclectic. For example, a sleek, monochromatic geometric rug can anchor a contemporary living room, while colorful, patterned pillows can inject a playful vibe into a more traditional setting. The possibilities are endless!
Moreover, geometric design is not limited to just one area of your home. You can find it in furniture, wall art, textiles, and even outdoor spaces. Think about how a geometric garden trellis can enhance your backyard, or how a set of geometric coasters can add a touch of sophistication to your coffee table. By understanding the principles of geometric design, you can create a cohesive and visually stunning environment that reflects your personal style.
In conclusion, embracing geometric design allows you to explore your creativity while enhancing the aesthetics of your home. So, whether you're a DIY enthusiast or just looking to refresh your space, understanding these fundamental concepts will help you make the most of your geometric decor projects. Get ready to unleash your inner designer and transform your home into a geometric wonderland!
Materials Needed for DIY Projects
Before diving into the world of DIY geometric decor, it's vital to gather the right materials to ensure your projects turn out just as you envision. Think of this stage as laying the foundation for a beautiful house; without the right tools and supplies, your creative ideas might not come to life as you planned. So, let's break down what you'll need for your geometric masterpieces!
First and foremost, you'll want to have a solid selection of crafting materials at your disposal. These can vary based on your specific project, but here are some essentials that will serve you well across various DIY endeavors:
- Cardstock or Canvas: Perfect for wall art, these materials provide a sturdy base for your geometric designs.
- Wood or MDF Boards: Ideal for creating shelves and planters, wood gives a rustic yet modern vibe.
- Paint: Whether you prefer acrylics or spray paint, a variety of colors will help you bring your geometric visions to life.
- Glue and Adhesives: Hot glue guns and wood glue are essential for assembling your projects securely.
- Ruler and Compass: Precision is key in geometric design, so having the right measuring tools will ensure your shapes are accurate.
In addition to these materials, don't forget about the tools that will make your DIY experience smoother. Here’s a quick rundown of some handy tools you might need:
- Scissors or Craft Knife: For cutting paper or wood, a sharp blade is non-negotiable.
- Paintbrushes: A variety of sizes will help you achieve different effects when painting your designs.
- Sandpaper: If you're working with wood, this will help you smooth out rough edges for a polished look.
- Drill or Screwdriver: Essential for assembling larger projects like shelves.
Now that you have a grasp on the materials and tools needed, it's time to consider your workspace. A clean, well-lit area will not only keep you organized but also spark your creativity. Having a designated space to spread out your materials can make the process more enjoyable and less chaotic. Think of it as your personal art studio!
Lastly, don’t underestimate the power of inspiration. Keep a notebook handy to jot down ideas or sketch out designs as they come to you. You might find that the best geometric decor ideas strike when you least expect them!
By gathering these materials and tools, you're setting yourself up for a successful DIY experience. Remember, the journey of creating is just as important as the finished product. So, put on some music, unleash your creativity, and let the geometric decor transformation begin!
Simple Geometric Wall Art
Creating geometric wall art is not only a fun DIY project but also an excellent way to infuse your personality into your living space. Imagine walking into a room where the walls are adorned with stunning shapes and colors that reflect your unique style. It's like having a piece of your creativity on display for everyone to see! The beauty of geometric designs lies in their versatility; whether you prefer bold colors or muted tones, there's a geometric design that can fit your aesthetic perfectly.
To get started, you'll need to gather a few materials. Here’s a simple list of what you might need:
- Canvas or wooden boards
- Acrylic or spray paint in your chosen colors
- Painter's tape for clean lines
- Ruler and pencil for measurements
- Brushes or sponges for painting
Once you have your materials ready, it’s time to unleash your creativity! Start by deciding on the geometric shapes you want to use. Triangles, circles, and squares are great options to begin with. You can create a simple pattern or go for something more complex, like a series of overlapping shapes that create a sense of depth. Use the painter's tape to outline your shapes on the canvas or board. This will ensure that you get those crisp, clean lines that make geometric art so appealing.
After taping off your shapes, it’s time to paint! Choose a color palette that complements your existing decor. You can go for a monochromatic scheme for a sophisticated look or mix and match vibrant colors for a more playful vibe. Apply the paint within the taped areas, and don’t be afraid to experiment with different techniques. For instance, you could use a sponge to create a textured effect or even blend two colors for a gradient look. Once you’ve finished painting, carefully remove the tape while the paint is still wet to achieve the best results.
Let your artwork dry completely before hanging it up. You can create a gallery wall by combining several pieces of geometric art, varying the sizes and colors to create visual interest. The result? A stunning focal point that draws the eye and sparks conversation. Geometric wall art is not just a decoration; it’s a statement piece that showcases your artistic flair.
Incorporating geometric wall art into your home is a fantastic way to personalize your space. It allows you to express your creativity while also enhancing the overall aesthetic of your rooms. So why not grab those supplies and start creating? Your walls are waiting for a splash of geometric magic!
Q: What if I don't have a steady hand for painting?
A: No worries! You can use stencils to guide your painting and ensure clean edges. There are plenty of geometric stencils available online or you can make your own with cardstock.
Q: Can I use other materials besides paint?
A: Absolutely! Consider using washi tape, fabric, or even paper cutouts to create your geometric designs. The possibilities are endless!
Q: How do I hang my geometric wall art?
A: You can use picture hooks, adhesive strips, or even a simple nail, depending on the weight of your artwork. Just make sure to choose a method that suits your wall type.

Geometric Planters for Indoor Plants
Incorporating geometric planters into your home is not just a trend; it’s a way to infuse your living space with a touch of modern elegance while also nurturing your love for plants. Imagine a cozy corner of your room adorned with plants that are not only vibrant and lush but also housed in stunning geometric containers that catch the eye. These planters can range from simple shapes like cubes and pyramids to more intricate designs that mimic the beauty of nature through a geometric lens.
Creating your own geometric planters can be a rewarding DIY project. You can choose materials that resonate with your personal style, whether it’s sleek metal, rustic wood, or even vibrant ceramics. The beauty of geometric designs lies in their versatility; they can fit into any decor style, from minimalist to bohemian, making them a perfect addition to your indoor garden.
When designing your geometric planters, consider the following factors:
- Size: Make sure the size of the planter complements the space it will occupy. A large geometric planter can serve as a statement piece, while smaller ones can be clustered together for a dynamic look.
- Shape: Choose shapes that contrast or complement the plants you intend to use. For instance, tall, spiky plants look great in narrow, angular planters, while trailing plants can spill beautifully from wider, rounded containers.
- Color: Select colors that enhance your interior decor. Neutral tones can create a calming effect, while bold colors can add a pop of excitement to your space.
To get started, you’ll need some basic materials. Here’s a quick overview:
| Material | Purpose |
|---|---|
| Wood or MDF | For creating the structure of the planter |
| Paint or Stain | To finish the planter and add color |
| Drill or Saw | For cutting and assembling the planter |
| Potting Soil | For planting your greenery |
| Plants | Your choice of indoor plants |
Once you have your materials ready, the process of making your geometric planters can be straightforward and enjoyable. Start by sketching your design on paper to visualize the final outcome. Then, cut your chosen material into the desired geometric shapes, ensuring that you have a base and sides for your planter. Assemble the pieces using strong adhesive or screws, depending on the material. After assembling, give your planter a fresh coat of paint or stain to bring it to life. Finally, fill it with potting soil and your favorite indoor plants, and voilà! You have a stunning geometric planter that’s sure to be a conversation starter.
Don't forget to consider the placement of your geometric planters. They can be displayed on shelves, hung from walls, or even placed on tables as centerpieces. The key is to create a visual balance in your space. Group different sizes and shapes together for an eclectic look, or stick to a uniform style for a more streamlined appearance. The possibilities are endless, and the joy of seeing your plants thrive in their stylish new homes is truly rewarding.
DIY Geometric Shelves
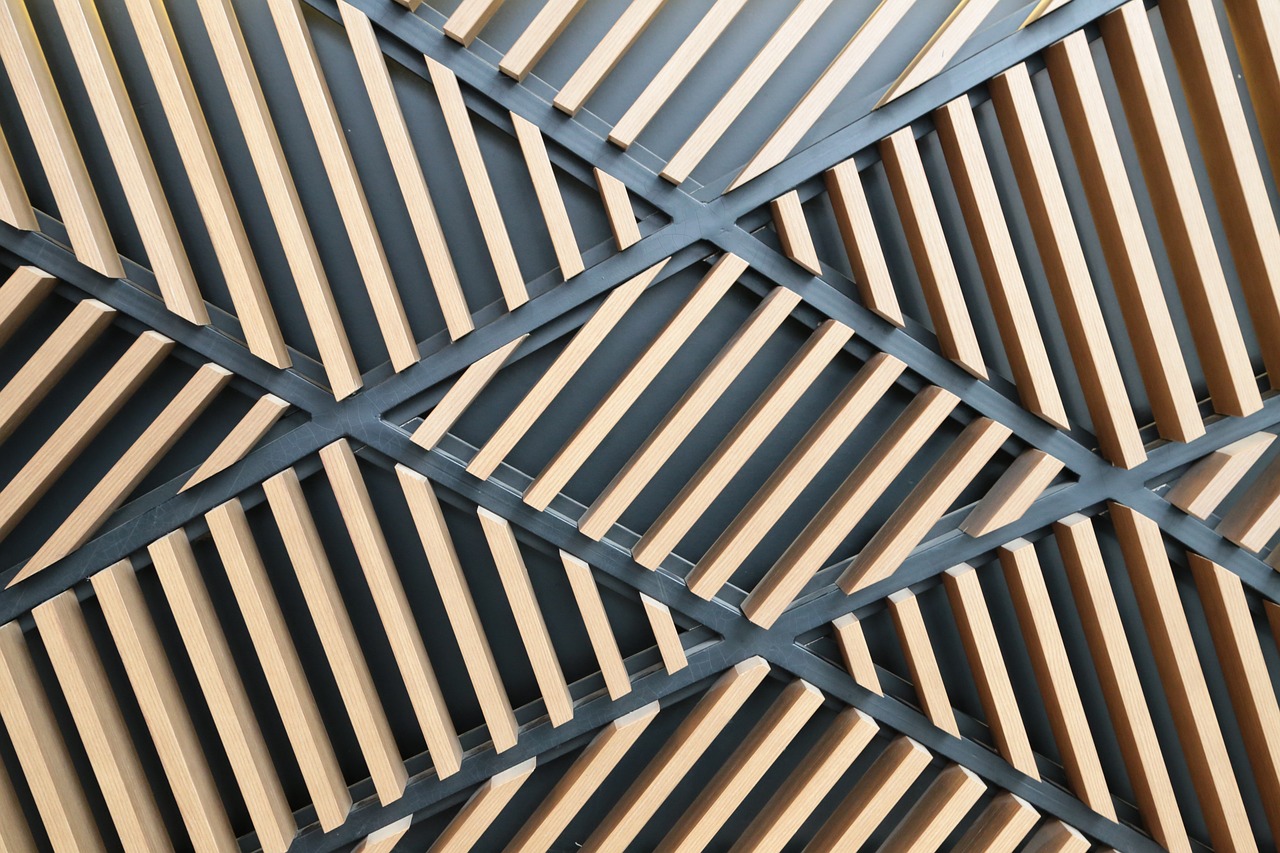
Creating your own geometric shelves is not just a fun project; it's a fantastic way to infuse your personal style into your home. These shelves can serve as functional storage while also acting as stunning decor pieces that draw the eye and spark conversation. Imagine walking into a room and being greeted by a unique shelf design that not only holds your favorite books but also showcases your creativity. It's like turning your wall into a piece of art!
To get started on your geometric shelves, the first step is to decide on the shapes you want to incorporate. Geometric designs can range from simple triangles to complex hexagons. The beauty of geometric shapes lies in their versatility; they can be combined to create a visually striking arrangement that suits your space perfectly. For instance, you could create a series of interlocking triangles that form a larger diamond shape, or you might prefer a more minimalist approach with single shapes spaced evenly apart.
Next, you'll need to gather your materials. Here's a quick list of what you'll typically need:
- Wood boards (plywood or MDF work well)
- Wood glue or screws
- Sandpaper
- Paint or wood stain (optional)
- Brackets for wall mounting
- Measuring tape and a saw
Once you've got your materials, it's time to bring your design to life! Start by measuring and cutting your wood into the desired shapes. Remember to sand the edges to avoid any splinters. If you're feeling adventurous, you can paint or stain the wood before assembling the shelves. This step allows you to add a pop of color or a rustic finish that complements your existing decor.
After cutting and finishing your pieces, it's time for assembly. Using wood glue or screws, carefully attach the pieces according to your design. Make sure everything is secure and allow the glue to dry thoroughly if you choose that method. Once your shelves are assembled, it's time to hang them up. Use brackets to ensure that they are mounted securely to the wall. Always double-check for levelness; you want your geometric shelves to look polished and professional!
Now comes the fun part: styling your new shelves! You can use them to display an array of items, from books to plants to your favorite knick-knacks. Consider using a mix of heights and textures to create visual interest. For an added effect, you might even incorporate some geometric decor items, like vases or sculptures, that echo the shapes of your shelves. This will create a cohesive look that ties everything together beautifully.
In summary, DIY geometric shelves are a rewarding project that allows you to express your creativity while enhancing your living space. With just a few materials and a bit of time, you can create stunning pieces that are both functional and artistic. So, grab your tools and let your imagination run wild!
Q: Do I need advanced woodworking skills to create geometric shelves?
A: Not at all! Basic skills like measuring, cutting, and assembling are all you need. There are plenty of tutorials available to guide you through the process.
Q: What type of wood is best for geometric shelves?
A: Plywood or MDF are popular choices because they are easy to work with and can be painted or stained to match your decor.
Q: How can I ensure my shelves are sturdy?
A: Make sure to use strong brackets for mounting and secure your pieces properly during assembly. Following these steps will help ensure your shelves can hold the weight of your items.

Creating Geometric Table Centerpieces
When it comes to hosting a dinner party or simply sprucing up your dining area, geometric table centerpieces can truly transform your table into a captivating focal point. Imagine walking into a room where the table is adorned with stunning geometric shapes that not only catch the eye but also spark conversation. These centerpieces blend creativity with style, allowing you to express your personality while adding a modern touch to your decor.
One of the best things about creating geometric centerpieces is the variety of materials you can use. From wood and metal to glass and ceramics, the possibilities are endless. For example, you could craft a centerpiece using wooden cubes, painted in vibrant colors, stacked at different heights, or create a sleek metal sculpture that complements your dining set. The key is to choose materials that resonate with your overall decor theme while keeping the design intriguing and fresh.
To start your project, gather some basic supplies. You might need:
- Geometric shapes (store-bought or handmade)
- Paint or spray paint for finishing touches
- Floral foam or oasis for incorporating flowers
- Hot glue gun or adhesive for assembly
- Decorative elements like candles, pebbles, or fairy lights
Once you have your materials ready, the next step is to brainstorm ideas. Here are a few creative concepts to inspire you:
- Floating Geometric Vases: Use glass or acrylic geometric shapes as vases. Fill them with water and place a few floating candles or delicate flowers inside.
- Layered Shapes: Stack different geometric shapes, such as triangles and circles, to create a multi-dimensional effect. This adds depth and interest to your table.
- Illuminated Centerpiece: Incorporate LED lights within geometric frames to create a glowing centerpiece that will dazzle your guests.
As you craft your centerpiece, consider the size and scale in relation to your table. A centerpiece should enhance the dining experience, not overwhelm it. For larger tables, you might opt for a grand geometric sculpture, while a smaller table might benefit from a simple arrangement of smaller shapes clustered together. The balance is crucial; think of it like creating a harmonious melody where each note plays a role in the overall composition.
Don't forget about the color scheme! Choosing the right colors can make or break your geometric centerpiece. You can go for a monochromatic palette for a sleek, modern look or mix and match bold colors for a more playful vibe. If you're feeling adventurous, consider using geometric patterns in your table linens or dinnerware to tie everything together.
Lastly, think about how you can change things up with the seasons or occasions. For instance, during the holidays, you could incorporate festive elements like pinecones or ornaments into your geometric designs. In the spring, fresh flowers can breathe life into your centerpieces while maintaining their geometric charm.
In conclusion, creating geometric table centerpieces is not just about aesthetics; it's about crafting an experience. Your table becomes a canvas where creativity meets functionality. So gather your materials, unleash your imagination, and let your geometric designs shine. You'll be amazed at how a simple centerpiece can elevate your dining experience and leave a lasting impression on your guests!
Q: What materials are best for geometric centerpieces?
A: You can use a variety of materials including wood, metal, glass, and ceramics. Choose based on your decor style and personal preference.
Q: How can I ensure my centerpiece is the right size?
A: Consider the dimensions of your table. A good rule of thumb is to keep your centerpiece below 12 inches in height to maintain visibility across the table.
Q: Can I change my centerpiece for different occasions?
A: Absolutely! Geometric centerpieces can be easily adapted by changing colors, materials, or seasonal elements to fit various themes and celebrations.

Using Paint for Geometric Patterns
When it comes to transforming your space, paint is your best friend, especially when you're diving into the world of geometric patterns. Imagine walking into a room where the walls seem to dance with shapes, each telling a story of creativity and flair. Using paint to create geometric designs can be a game-changer, allowing you to express your personality while adding a modern twist to your home decor. But where do you start? Let’s explore some techniques that will help you unleash your inner artist!
First off, think about the color palette. Choosing the right colors is crucial. You want shades that complement each other and create a harmonious vibe in your space. For instance, if you're going for a calming atmosphere, consider soft pastels or monochromatic schemes. On the other hand, if you want to make a bold statement, vibrant contrasts can do wonders. Here’s a quick tip: use a color wheel to help you select colors that work well together.
Next, it's time to plan your design. Grab a piece of paper and sketch out your ideas. This step is essential because it allows you to visualize how the geometric patterns will look on your walls. You might want to consider classic shapes like triangles, squares, or hexagons, or even more intricate designs that incorporate curves and lines. Once you have your design, you can measure and mark the wall to ensure everything is aligned perfectly.
Now, let’s talk about the tools you’ll need. Here’s a quick list:
- Painter's tape
- Paintbrushes and rollers
- Primer (if necessary)
- Paint in your chosen colors
- Ruler or level for precision
Before you start painting, it’s essential to prep your wall. Make sure the surface is clean and free of any dust or grease. If your wall has a dark color, applying a primer can help the new colors pop. Once your wall is prepped, use painter's tape to outline your geometric shapes carefully. This tape will act as a barrier, ensuring that your lines are crisp and clean. Trust me; nothing ruins a geometric pattern faster than paint bleeding outside the lines!
Now for the fun part—painting! Start with the lightest color first and work your way to the darkest. This method helps to avoid any accidental mixing of colors. Use a roller for larger areas and a brush for the edges and corners. Remember to take your time; great art isn’t rushed! After applying your first coat, let it dry completely before removing the painter's tape. This will help prevent any smudging or tearing of the paint.
Once you’ve completed your geometric masterpiece, step back and admire your work! You’ve just transformed a plain wall into a stunning focal point. To take it a step further, consider adding some geometric decor elements like framed prints or 3D shapes that echo the patterns on your wall. This will create a cohesive look that ties the entire room together.
In conclusion, painting geometric patterns on your walls is an exciting way to express your creativity and breathe new life into your home. With the right colors, tools, and a bit of patience, you can create a space that not only looks good but also feels uniquely yours. So, what are you waiting for? Grab those paintbrushes and let your imagination run wild!
Q: Do I need to be an artist to create geometric patterns?
A: Not at all! With some planning and the right tools, anyone can create beautiful geometric designs.
Q: How do I choose the right colors?
A: Consider the mood you want to create in the room. Use a color wheel to find complementary colors that work well together.
Q: Can I paint over existing paint?
A: Yes, just make sure the surface is clean and consider using a primer if the existing color is dark.
Q: How long does it take for the paint to dry?
A: It typically takes a few hours for paint to dry, but always check the manufacturer's instructions for specific drying times.

Incorporating Geometric Decor into Your Home
Once you've unleashed your creativity and crafted stunning geometric decor pieces, the next exciting step is to incorporate them into your home. Think of your space as a blank canvas; each geometric element you introduce adds a new layer of depth and personality. The beauty of geometric decor lies not just in its visual appeal but also in its versatility. From bold statement pieces to subtle accents, there are countless ways to integrate these designs into your living environment.
Start by considering the color palette of your home. Geometric designs can complement or contrast with existing colors, so think about how you want your decor to interact with the overall aesthetic. For instance, if your walls are painted in a soft pastel, introducing geometric pieces in vibrant hues can create a striking focal point. On the other hand, if your space is filled with rich, dark tones, metallic or white geometric decor can provide a refreshing contrast.
One popular method for incorporating geometric decor is through focal points. Choose a prominent wall in your living room or bedroom and adorn it with a large geometric wall art piece. This not only draws the eye but also sets the tone for the rest of the room. Pair it with smaller geometric accents, such as decorative pillows or vases, to create a cohesive look. You can even create a gallery wall by mixing various geometric shapes and sizes, allowing your creativity to shine.
Another effective way to integrate geometric decor is through furniture. Consider investing in geometric shelves or coffee tables that serve both a functional and decorative purpose. These pieces can act as conversation starters while providing practical storage solutions. Moreover, when selecting furniture, look for items that feature geometric patterns or shapes, such as a hexagonal coffee table or a triangular bookshelf, to enhance the theme throughout your space.
Don't forget about the power of lighting. Geometric pendant lights or lamps can add an artistic flair to your home while illuminating your space beautifully. A well-placed geometric light fixture can act as a centerpiece, drawing attention to the room's design and enhancing its overall ambiance. For a more subtle approach, consider geometric lampshades that can transform ordinary lamps into stylish decor pieces.
Lastly, consider the outdoor space as well. Geometric planters can bring a touch of modernity to your garden or balcony. By selecting planters in various shapes and sizes, you can create a visually appealing display that showcases your plants while enhancing the outdoor environment. Remember, the key is to maintain balance; too many geometric shapes can overwhelm a space, while too few may not make the desired impact. Aim for a harmonious blend that reflects your personal style.
In summary, incorporating geometric decor into your home is all about balance and creativity. By thoughtfully selecting pieces that resonate with your style and harmonize with your existing decor, you can create a space that feels both inviting and visually stimulating. So go ahead, unleash your inner designer, and let your geometric decor transform your home into a masterpiece!
- What are some easy geometric decor projects for beginners? Start with simple wall art or painted geometric patterns on canvas. These projects require minimal materials and can be completed quickly.
- Can I mix geometric styles? Absolutely! Mixing different geometric shapes and styles can create a dynamic and visually interesting space. Just ensure that the colors and patterns complement each other.
- How do I maintain balance with geometric decor? Aim for a mix of large and small pieces and vary the shapes to avoid a cluttered look. Incorporating solid colors alongside geometric patterns can also help maintain balance.
Frequently Asked Questions
- What materials do I need to start my DIY geometric decor projects?
To kick off your DIY geometric decor, you'll need some basic materials. Common supplies include wood, cardboard, paint, glue, scissors, and a ruler. Depending on your project, you might also want to gather items like plants for planters, screws for shelves, or fabric for centerpieces. Having the right tools at hand will make your creative journey smoother!
- Can I use geometric designs in any room of my house?
Absolutely! Geometric designs are incredibly versatile and can enhance the aesthetic of any room. Whether it's a living room, bedroom, or even a kitchen, these designs add a modern touch. Just think of them as the spice that brings your decor to life! You can mix and match geometric pieces to create a cohesive look throughout your home.
- How do I choose the right colors for my geometric decor?
Choosing the right colors is crucial for achieving the desired effect in your space. Consider using a color palette that complements your existing decor. You might want to go for bold colors for a statement piece or neutral tones for a more subtle approach. Don't be afraid to experiment—sometimes, the most unexpected combinations can create stunning results!
- Are there any beginner-friendly geometric decor projects?
Definitely! If you're just starting out, consider simple projects like geometric wall art or planters. These can be made with minimal materials and tools, making them perfect for beginners. Plus, they allow you to express your creativity without overwhelming yourself. Start small, and as your confidence grows, you can tackle more complex projects like geometric shelves or table centerpieces.
- What techniques can I use to paint geometric patterns?
Painting geometric patterns can be a fun and rewarding process! You can use techniques like tape masking to create clean lines or stenciling for more intricate designs. Just make sure to plan your design on paper first, so you have a clear vision. Remember, practice makes perfect, so don’t hesitate to try a few test runs on scrap materials!
- How can I incorporate geometric decor into a small space?
In a small space, every piece counts! Opt for multifunctional furniture that features geometric designs, like a shelf that doubles as a planter. Use wall-mounted geometric art to save floor space and create an illusion of depth. Remember, layering different geometric shapes can add visual interest without overcrowding your area!


