Unique DIY Decor Ideas Using Old Magazines
Have you ever looked at a pile of old magazines and thought, "What on earth am I going to do with these?" Well, you're in for a treat! This article explores creative and unique ways to repurpose those forgotten magazines into stunning decor items that not only breathe new life into your space but also promote an eco-friendly lifestyle. Imagine transforming those glossy pages into vibrant wall art, stylish baskets, or even charming paper flowers. It's like giving your old magazines a second chance at life, and the best part? You can do it all yourself!
In a world where sustainability is becoming increasingly important, embracing DIY decor projects is not just a trend; it's a lifestyle choice. By using materials you already have, you can create stunning pieces that reflect your personality and style. Whether you're a seasoned crafter or a newbie looking to explore your creative side, this guide will provide you with step-by-step instructions, tips, and inspiration to turn those old magazines into something truly spectacular.
So, grab those magazines, gather your crafting supplies, and let's dive into the world of DIY decor! From collages that tell a story to functional baskets that organize your space, the possibilities are endless. And who knows? You might just discover a hidden talent for crafting that you never knew you had!

Creative Wall Art
Transforming old magazines into vibrant wall art is not just a creative outlet; it’s a fantastic way to add a personal touch to your space while being eco-friendly. Imagine walking into a room adorned with colorful collages and framed pieces that tell a story—your story. The beauty of using old magazines lies in the endless possibilities they offer. You can mix and match colors, textures, and patterns to create something that truly reflects your personality.
To get started, gather your materials. You’ll need:
- Old magazines
- Scissors
- Glue or Mod Podge
- Canvas or a large piece of sturdy paper
- Frames (optional)
Once you have everything on hand, the real fun begins! Start by flipping through your magazines and tearing out pages that catch your eye. Don't be afraid to get creative—look for images, colors, and textures that resonate with you. This is your chance to express yourself! Next, lay out your chosen pieces on the canvas. Play around with the arrangement until you find a layout that feels right. This is like a puzzle where you get to decide how the pieces fit together.
Once you're satisfied with the arrangement, start gluing the pages down. Use a brush to apply a thin layer of glue or Mod Podge to both the canvas and the back of the magazine pages. This will ensure that everything sticks well and looks neat. After you’ve glued down your pieces, apply a layer of glue over the top to seal your artwork. This not only adds a nice finish but also protects your creation from dust and fading.
For an added touch of flair, consider framing your artwork. Frames can elevate your piece and make it look like a professional art installation. You can choose simple frames for a minimalist look or go for ornate ones to add a touch of elegance. The key is to let your personality shine through—your wall art should be a reflection of who you are.
Feeling adventurous? Try creating a themed collage! For instance, you could focus on a color scheme, such as all blues and greens for a calming effect, or go wild with a vibrant mix of colors for a more energetic vibe. The options are limitless, and the only limit is your imagination.
In conclusion, creating wall art from old magazines is not just a way to declutter your space; it’s a journey of self-expression and creativity. So gather those magazines, unleash your inner artist, and watch as your walls come to life with your unique flair!
Q: What type of magazines work best for wall art?
A: Look for magazines with vibrant colors, interesting textures, and unique images. Fashion, travel, and art magazines often provide great content for collages.
Q: Can I use other materials along with magazine pages?
A: Absolutely! You can incorporate fabric, paint, or even photographs to enhance your wall art further.
Q: How do I hang my magazine wall art?
A: You can use traditional frames, clips, or even washi tape for a more casual look. Just make sure whatever method you choose is secure enough to hold your art!
Decorative Baskets
Have you ever looked at a pile of old magazines and thought, "What on earth am I going to do with these?" Well, let me tell you, they can be transformed into something truly special! made from magazine pages are not only a fantastic way to declutter but also a creative outlet that adds a unique flair to your home. Imagine a colorful basket sitting on your coffee table, filled with your favorite knick-knacks or perhaps even some fresh flowers. Sounds delightful, right?
To get started on this fun project, you'll need a few materials. Here’s a quick rundown of what you’ll need:
- Old magazines: The more colorful, the better!
- Scissors: For cutting the pages into strips.
- Glue: A strong adhesive that can hold the paper together.
- Basket mold: You can use an old bowl or a store-bought basket as a form.
- Optional: Paint or varnish for finishing touches.
Now that you have your materials ready, let’s dive into the step-by-step process of weaving your own decorative basket:
- Prepare the Magazine Strips: Start by cutting your magazine pages into strips. Aim for about 1 inch wide and 6-8 inches long. You can mix and match colors and patterns to create a vibrant look.
- Start Weaving: Take one strip and begin wrapping it around your basket mold. Use glue to secure the ends as you go. Continue adding strips, alternating colors and patterns to create a visually appealing design.
- Build Up the Sides: As you weave, gradually build up the sides of the basket. Make sure to keep the tension even to ensure a sturdy structure.
- Finish the Top Edge: Once you’ve reached your desired height, finish the top edge by folding the strips inward and securing them with glue. This will give your basket a neat finish.
- Let It Dry: Allow your basket to dry completely before removing it from the mold. This will ensure that it holds its shape.
And voilà! You now have a stunning decorative basket that not only serves a purpose but also showcases your creativity. You can use these baskets in various ways around your home:
- As storage for magazines and books.
- To hold crafting supplies and materials.
- As a unique gift basket for friends and family.
These decorative baskets are perfect for adding a pop of color and a personal touch to any room. Plus, they are a fantastic conversation starter! When guests see your handmade creations, they’ll be in awe of your creativity and eco-friendly approach. So, gather those old magazines and start weaving your way to a more organized and beautifully decorated home!
Q: Can I use any type of magazine for this project?
A: Yes! Any magazine will work, but glossy pages tend to have more vibrant colors and patterns.
Q: How long does it take for the glue to dry?
A: It typically takes about 30 minutes to an hour for the glue to set, but it’s best to let your basket dry overnight for maximum sturdiness.
Q: Can I paint or decorate my basket after it's finished?
A: Absolutely! You can personalize your basket further by painting it or adding embellishments like ribbons or beads.
Magazine Coasters
Are you tired of boring, plain coasters cluttering your coffee table? Why not add a splash of creativity with ? These unique creations not only protect your surfaces but also serve as a conversation starter. The best part? They’re incredibly easy to make, and you can customize them to reflect your personal style. Let’s dive into the process of crafting these stylish and practical coasters!
To get started, you’ll need a few simple materials:
- Old magazines (the more colorful, the better!)
- Scissors
- Mod Podge or any craft glue
- Coaster blanks or sturdy cardboard
- A foam brush or paintbrush for applying glue
- Clear acrylic spray (for finishing)
First, gather your old magazines and flip through them to find pages that catch your eye. Look for vibrant colors, interesting patterns, and images that resonate with you. Once you’ve selected your pages, it’s time to cut them into shapes. You can go with traditional square coasters or experiment with fun shapes like circles or hexagons. The choice is yours!
Next, take your coaster blanks or sturdy cardboard and start arranging the cut-out magazine pieces on top. This is where the magic happens! Play around with different layouts until you find a design that you love. Once satisfied, use your foam brush to apply a layer of glue on the coaster surface and carefully place the magazine pieces on top, smoothing out any bubbles as you go. Don’t forget to cover the entire surface with another layer of glue to seal everything in place!
After your coasters have dried, it’s time for the finishing touch. To ensure your magazine coasters are durable and water-resistant, apply a clear acrylic spray. This will protect your coasters from moisture and wear, ensuring they last for years to come. Just make sure to do this in a well-ventilated area and follow the instructions on the spray can for best results.
Now that you have your fabulous magazine coasters, let’s talk about how to personalize them further. Consider using a consistent color scheme or theme that matches your home decor. For instance, if your living room has a bohemian vibe, opt for earthy tones and floral patterns. If you prefer a modern look, go for sleek designs with geometric shapes. The possibilities are endless!
Incorporating magazine coasters into your home decor not only adds a unique touch but also allows you to showcase your creativity. Plus, it’s a fantastic way to recycle old magazines that might otherwise end up in the trash. So grab those magazines, unleash your inner artist, and start crafting your very own magazine coasters!
Q: Can I use any type of magazine for coasters?
A: Yes, you can use any type of magazine! Just make sure the pages are thick enough to withstand moisture.
Q: How do I clean my magazine coasters?
A: Simply wipe them down with a damp cloth. Avoid soaking them in water to maintain their integrity.
Q: How long do the coasters last?
A: With proper sealing and care, your magazine coasters can last for several years!
Protective Finishing Techniques
When it comes to crafting with old magazine pages, one of the most important aspects to consider is how to protect your creations. After all, you want your beautiful coasters and decor items to last, right? Think of protective finishing techniques as the armor for your artistic endeavors. They not only enhance the durability of your projects but also elevate their overall aesthetic. So, how do you achieve that perfect finish? Let’s dive into some effective methods!
First and foremost, you’ll want to ensure that your coasters are water-resistant. This is crucial, especially if they will be used for drinks. A popular choice for sealing magazine coasters is using a clear acrylic sealer. This type of finish is easy to apply and dries quickly, making it a favorite among DIY enthusiasts. Simply spray or brush on a thin layer of the sealer, ensuring that you cover all surfaces evenly. Allow it to dry completely, and then apply a second coat for added protection. This method not only seals the paper but also gives it a lovely sheen, enhancing the colors and patterns of your magazine pages.
Another effective technique is using Mod Podge, a versatile crafting glue that doubles as a sealer. It’s perfect for decoupage projects and comes in various finishes, such as matte, glossy, and satin. To use Mod Podge, start by applying a thin layer over your magazine pages using a foam brush. Once it’s dry, add a second layer, and don’t forget to seal the edges! This is where you’ll want to pay extra attention since edges are often the most vulnerable to wear and tear. Mod Podge not only protects but also helps to create a cohesive look across your project.
For those looking for a more natural approach, consider using beeswax as a protective finish. It’s eco-friendly and provides a beautiful, soft luster to your creations. To apply, melt the beeswax and then brush it onto your coasters or decor items. Once it cools, it forms a protective barrier that is both durable and water-resistant. Plus, it adds a delightful scent to your projects!
Here’s a quick comparison table of the different protective finishes you can use:
| Finishing Technique | Durability | Water-Resistant | Finish Type |
|---|---|---|---|
| Clear Acrylic Sealer | High | Yes | Glossy |
| Mod Podge | Medium to High | Yes | Matte/Glossy/Satin |
| Beeswax | Medium | Yes | Natural Luster |
In addition to these techniques, always remember to store your finished products in a cool, dry place. Humidity can wreak havoc on paper items, leading to warping or damage over time. By taking these protective steps, you can ensure that your magazine coasters and other decor items remain stunning and functional for years to come.
Q: How long does it take for the protective finishes to dry?
A: Drying times vary depending on the product you use. Typically, acrylic sealers dry within 30 minutes to an hour, while Mod Podge may take a bit longer, around 1-2 hours for each layer.
Q: Can I use regular glue instead of Mod Podge?
A: While regular glue can work in a pinch, it may not provide the same level of sealing and finish quality as Mod Podge. It’s better to use products specifically designed for decoupage.
Q: Will the finishes change the color of my magazine pages?
A: Some finishes, especially glossy sealers, can enhance the colors of your magazine pages, making them appear more vibrant. However, it’s always a good idea to test a small area first.
By employing these protective finishing techniques, you can ensure that your DIY projects not only look fantastic but also stand the test of time. Happy crafting!
Design Ideas for Coasters
When it comes to designing your own coasters from old magazines, the possibilities are as vast as your creativity! Imagine sipping your morning coffee while resting it on a coaster that reflects your personality and style. The beauty of using magazine pages is that they come in a plethora of colors, patterns, and textures. You can create coasters that not only serve a practical purpose but also act as a conversation starter.
Start by considering the theme of your home decor. Are you going for a modern, minimalist look, or do you prefer something more eclectic? This will guide your choices in magazine clippings. For a modern aesthetic, opt for pages with clean lines and monochromatic colors. On the other hand, if you love a bohemian vibe, vibrant, mixed patterns will do wonders. Here are a few design ideas to inspire you:
- Color Blocking: Choose a few contrasting colors from your magazine pages and create a bold, color-blocked design. This technique can make your coasters pop!
- Nature-Inspired: Look for pages featuring florals, landscapes, or animal prints. These designs can bring a fresh, organic feel to your space.
- Typography: Use pages that have interesting fonts or quotes. This can add a unique touch and a bit of personality to your coasters.
Don’t forget about finishing touches. Once you’ve created your coasters, consider adding embellishments like glitter or a glossy finish to enhance their appeal. You can also mix and match designs, creating a set that tells a story or represents different aspects of your life. For instance, one coaster might feature travel memories, while another showcases your favorite hobbies.
Lastly, think about functionality as well as aesthetics. Ensure that the designs you choose are not only visually appealing but also practical. Consider using darker colors or patterns that can hide stains, especially if you expect to use your coasters regularly. Remember, the goal is to create something that is not just beautiful but also durable and functional!
Q: Can I use any type of magazine for coasters?
A: Yes, you can use any magazine! However, glossy pages tend to work better as they are more durable and easier to seal.
Q: How do I seal my coasters for durability?
A: Use a waterproof sealant spray or a decoupage medium like Mod Podge to protect your coasters from moisture and damage.
Q: Can I create coasters with a theme?
A: Absolutely! You can choose magazine pages that reflect a specific theme, such as travel, nature, or even your favorite movies.
Q: How long will my coasters last?
A: With proper sealing and care, your coasters can last for many years. Just avoid soaking them in water and clean them with a damp cloth.

Magazine Paper Flowers
Creating beautiful paper flowers from old magazines is not just a fun activity; it’s an eco-friendly way to bring a splash of color and creativity into your home. Imagine transforming those dusty, forgotten magazines into stunning floral arrangements that can brighten up any room! The process is simple, yet the results can be incredibly rewarding. Not only do these flowers look fantastic, but they also serve as a conversation starter when guests come to visit.
To get started, gather your materials. You’ll need:
- Old magazines
- Scissors
- Glue or a glue gun
- Floral wire or sticks
- Green tape (optional, for stems)
Once you have everything ready, it’s time to unleash your creativity! The first step is to choose the colors and patterns from the magazines that inspire you. Think about the overall look you want to achieve. Do you want vibrant, bold flowers, or soft, pastel hues? The choice is entirely yours!
Next, cut out petal shapes from the magazine pages. You can create a variety of shapes and sizes to mimic different types of flowers. For instance, round petals can be used for daisies, while elongated petals can resemble tulips or lilies. The beauty of this project lies in its versatility; you can mix and match shapes to create unique floral designs. Once you have your petals cut out, it’s time to assemble your flowers. Start by layering the petals, gluing them together in the center to create a fuller look. You might want to curl the edges slightly for a more natural appearance.
After your flower is assembled, attach it to a floral wire or stick to create a stem. If you want to add a touch of realism, wrap the stem with green tape. This not only enhances the look but also gives it a sturdier feel. You can create a bouquet of various flowers or even a single statement piece to display in a vase. The best part? You can change the colors and styles according to the season or your mood!
Now, let’s talk about where to display your beautiful creations. These magazine paper flowers make excellent centerpieces for dining tables, decorations for special events, or even as a charming addition to your office space. They’re a fantastic way to add a personal touch to your decor while also being a testament to your creativity and resourcefulness.
In conclusion, making magazine paper flowers is not just a craft; it’s a delightful journey into creativity that allows you to express yourself while being environmentally conscious. So, grab those old magazines and start crafting your floral masterpieces today!
Q: How long do magazine paper flowers last?
A: Magazine paper flowers can last for a long time if kept in a dry environment. However, they are not waterproof, so it's best to keep them away from moisture.
Q: Can I use other types of paper for this project?
A: Absolutely! You can use wrapping paper, colored paper, or even leftover scrapbook paper to create your flowers.
Q: How can I make my flowers more durable?
A: To make your flowers more durable, consider spraying them with a clear acrylic sealant. This will protect them from dust and minor wear and tear.
Furniture Makeovers
Revamping old furniture is not just a creative outlet; it’s a fantastic way to breathe new life into pieces that may have seen better days. Imagine transforming a dull, worn-out table into a vibrant centerpiece that tells a story! Using old magazines for decoupage is an exciting method to achieve this. You can select pages that resonate with your personal style, whether it’s colorful patterns, vintage illustrations, or chic typography. Each piece you create is not only unique but also a reflection of your personality and creativity.
Before diving into the decoupage process, it’s essential to choose the right furniture. Not every piece is suitable for this kind of makeover. Ideally, you want to select items that have smooth surfaces and are structurally sound. For example, wooden tables, chairs, or even dressers can be excellent candidates. Here are a few tips to help you pick the perfect piece:
- Condition: Look for furniture that is stable and doesn’t require extensive repairs.
- Surface: Ensure the surface is clean and smooth for better adhesion of the magazine pages.
- Size: Consider the size of the furniture; smaller pieces are often easier to work with, especially for beginners.
Once you've selected your furniture, the next step is to prepare it for decoration. Start by cleaning the surface thoroughly to remove any dust or grease. If the piece has a previous finish, you might want to sand it lightly to help the glue adhere better. After prepping, it’s time to gather your materials. You’ll need:
- Old magazines
- Mod Podge or any decoupage glue
- Scissors
- A paintbrush or sponge applicator
- Clear sealant (optional)
Now, let’s dive into the fun part—the decoupage techniques! Start by tearing or cutting out your chosen magazine pages into various shapes and sizes. This irregularity adds a dynamic touch to your furniture piece. Apply a layer of Mod Podge on the surface of the furniture and carefully place your magazine cutouts. Use your brush to smooth out any bubbles or wrinkles, ensuring that the pages adhere well. Once you’ve covered the desired area, apply another layer of Mod Podge over the top to seal it. This step is crucial as it not only protects your design but also gives it a polished finish.
After the initial layers have dried, you can add more cutouts or embellishments to create depth and interest. Don’t hesitate to mix and match different styles and colors; this is your chance to get creative! Once you’re satisfied with your design, allow it to dry completely. For added durability, consider applying a clear sealant after the final layer of Mod Podge has dried. This will protect your artwork from scratches and spills.
Furniture makeovers with old magazines are not just about aesthetics; they also promote sustainability. By repurposing items that might otherwise be discarded, you’re contributing to a more eco-friendly lifestyle. Plus, each piece becomes a conversation starter, showcasing your artistic flair and commitment to creativity. So, gather those old magazines and let your imagination run wild—your home deserves it!
Q: Can I use any type of magazine for decoupage?
A: Absolutely! You can use any magazines, but glossy pages tend to work better as they offer vibrant colors and designs.
Q: How long does the decoupage process take?
A: The time can vary based on the size of the furniture and the complexity of your design. Typically, expect to spend a few hours on the project, including drying time.
Q: Is it necessary to apply a sealant?
A: While it's not mandatory, applying a sealant can significantly increase the durability of your project, especially if the furniture will be used frequently.
Choosing the Right Furniture
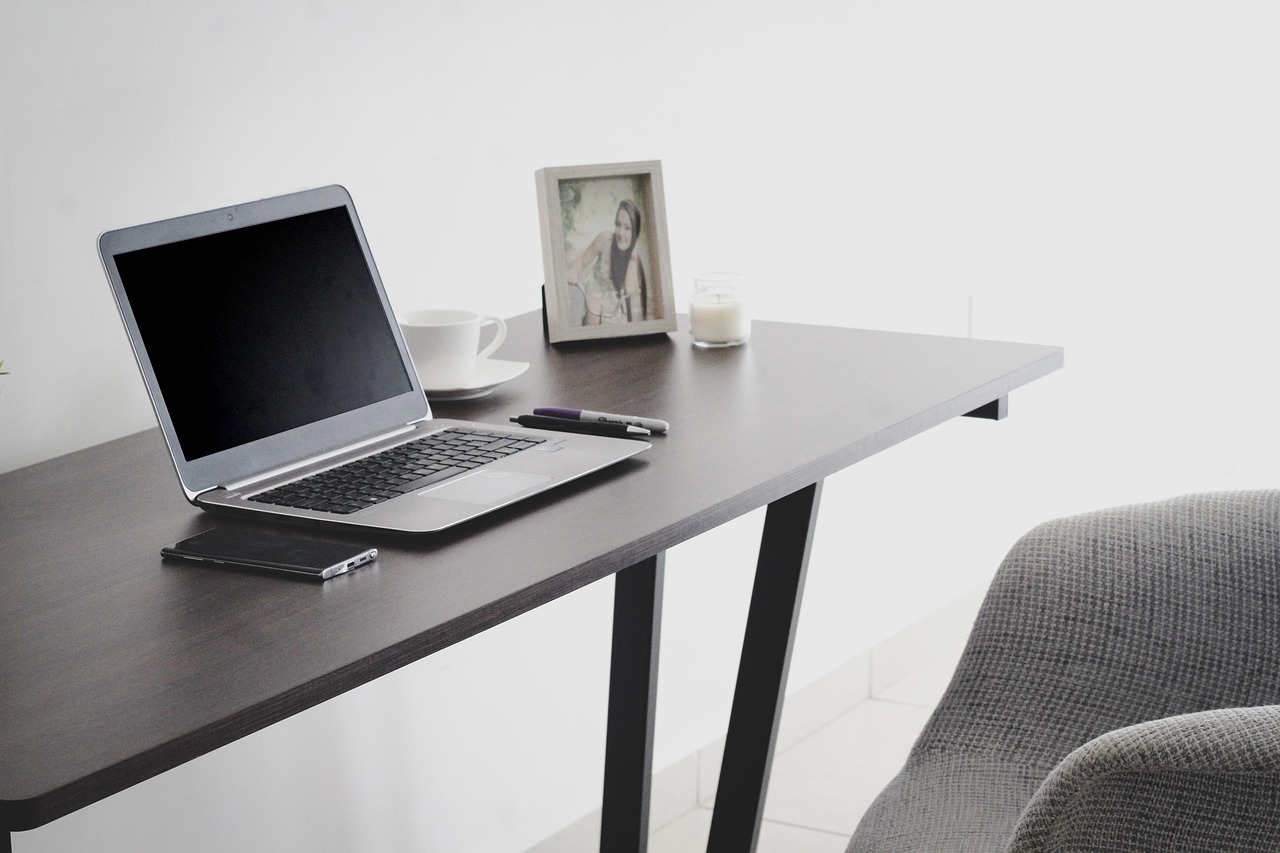
When it comes to revamping your space with magazine decoupage, selecting the right furniture is crucial to achieving that stunning transformation. Not all pieces are created equal, and the right choice can make your DIY project not only easier but also more visually appealing. So, what should you look for? First, consider the shape and size of the furniture. Larger surfaces, like tables and dressers, offer ample space for your magazine clippings, allowing for more creativity in your design. Smaller items, such as stools or side tables, can also be great, especially if you want to try out your skills without committing to a big project.
Next, think about the material of the furniture. Wooden surfaces are often ideal for decoupage because they readily accept glue and finish, providing a smooth canvas for your artwork. Avoid furniture with glossy finishes, as they can make it difficult for the decoupage medium to adhere properly. If you have a piece that’s a bit shiny, don’t fret! A quick sanding can create a better surface for your magazine pages to stick to.
Additionally, the style of the furniture plays a significant role in your project. Vintage or rustic pieces often lend themselves well to magazine clippings, giving an eclectic vibe that can be both charming and stylish. On the other hand, modern furniture might require a more curated selection of magazine images to maintain a sleek appearance. Consider the overall aesthetic of your home and choose pieces that will complement your existing decor.
Before diving into your project, it’s also essential to prepare your furniture properly. Clean the surfaces thoroughly to remove any dust or grease, as this will ensure the best adhesion for your magazine pages. If you’re working with a painted piece, check for any peeling or chipping paint, as these imperfections can affect the final look of your decoupage. If needed, strip the old paint or give the piece a fresh coat before you begin.
Ultimately, the right furniture choice is about combining practicality with your personal style. Whether you’re transforming a beloved family heirloom or picking up a thrift store find, your creativity can shine through in the final result. Remember, the journey of creating beautiful decor from old magazines starts with that perfect piece of furniture!
- What types of furniture are best for decoupage? Wooden tables, dressers, and chairs are ideal, while glossy surfaces should be avoided unless prepared correctly.
- Can I use any type of magazine? Yes, but consider the quality and color scheme of the pages to ensure they match your decor.
- Do I need to sand the furniture before decoupaging? It is recommended to sand glossy surfaces for better adhesion.
- How do I protect my decoupage? Use a sealant or finishing spray to protect your work from wear and tear.
Decoupage Techniques
Decoupage is an art form that can breathe new life into your old furniture, and using magazine pages is a fantastic way to achieve a unique look. The beauty of decoupage lies in its versatility; you can create anything from a chic coffee table to a whimsical chair. To get started, you’ll need a few essential materials: old magazines, scissors, a brush, decoupage glue (like Mod Podge), and a sealant for finishing touches. Are you ready to dive into the wonderful world of decoupage? Let’s break down the techniques that will help you master this craft!
First, you’ll want to prepare your furniture. This means cleaning the surface thoroughly and, if necessary, sanding it down to ensure the glue adheres properly. Once your surface is prepped, it’s time to select the magazine pages you want to use. Think about the color palette and theme you want to achieve. For example, if you’re going for a vintage look, choose pages with muted colors and classic designs. If you prefer something more modern, bright and bold images will do the trick!
Next comes the fun part: cutting out your magazine pieces. You can cut them into various shapes—squares, circles, or even intricate designs. The key here is to have a mix of sizes and shapes to create a visually appealing collage. Once you have your pieces ready, start arranging them on your furniture without glue first. This way, you can play around with the layout until you find something that speaks to you. Once you’re satisfied with the arrangement, it’s time to glue them down.
To apply the decoupage glue, use a brush to spread a thin layer on the back of each magazine piece before placing it on the furniture. After positioning it, brush another layer of glue over the top of the piece. This will not only secure it but also give it a nice finish. Don’t worry if it looks a bit messy at first; it will dry clear! Make sure to overlap the edges of the pieces slightly to avoid any gaps.
After applying all your magazine pieces, let the glue dry completely. This usually takes about 15-20 minutes. Once dry, it’s time to seal your masterpiece. Applying a sealant will protect your work from scratches and stains, ensuring that your decoupage project lasts for years to come. You can use the same decoupage glue as a sealant; just apply a few thin layers over the entire surface, allowing each layer to dry before adding the next.
Now, let’s talk about some common mistakes and how to avoid them. One of the biggest pitfalls is using too much glue—this can lead to wrinkling and bubbling. Always aim for a thin, even layer. Another mistake is not allowing enough drying time between layers, which can result in a tacky finish. Remember, patience is key in decoupage!
In summary, mastering decoupage techniques with magazine pages can transform your furniture into a stunning focal point in your home. With some creativity and the right approach, you can create a personalized piece of art that reflects your style. So gather those old magazines and get started on your next DIY project!
- What type of glue is best for decoupage? Mod Podge is a popular choice because it acts as both glue and sealant.
- Can I use any type of paper for decoupage? While magazine pages work great, you can also use tissue paper, wrapping paper, and even fabric.
- How do I fix wrinkles in my decoupage project? If you notice wrinkles, you can gently lift the paper and reposition it while the glue is still wet.
Frequently Asked Questions
- What materials do I need to start my DIY decor projects with old magazines?
To kick off your creative journey, you'll need a few basic materials: old magazines, scissors, glue (like Mod Podge), a cutting mat, and a craft knife. Depending on your project, you might also want to gather additional supplies like paint, brushes, or even some embellishments to add that extra flair!
- Can I use any type of magazine for these projects?
Absolutely! Any magazine can work, but glossy magazines tend to have vibrant colors and images that pop. Just keep in mind that thicker pages may be a bit harder to work with, so it’s best to stick with standard magazine paper for most projects.
- How do I ensure my magazine coasters are waterproof?
To make your coasters water-resistant, you'll want to apply a few layers of a good sealant. Mod Podge is a popular choice, but you can also use a clear acrylic spray or resin for a more durable finish. Just make sure to allow each layer to dry completely before applying the next!
- What are some creative ideas for wall art using magazine pages?
The sky's the limit! You can create vibrant collages, framed pieces, or even 3D art by layering cutouts. Think about themes, like nature or abstract designs, and don’t hesitate to mix colors and textures to make your wall art truly unique!
- Are there any tips for selecting the right furniture for decoupage?
When choosing furniture for your magazine decoupage project, look for pieces with flat surfaces and simple shapes. Avoid overly detailed furniture, as it can complicate the application process. Also, make sure the furniture is clean and free of any old finishes or paint to ensure the best adhesion.
- Can I use this technique for outdoor furniture?
While you can technically use magazine pages for outdoor furniture, it’s important to note that they may not hold up well against the elements. If you decide to go for it, make sure to use a high-quality outdoor sealant to protect your creations from moisture and UV rays.
- How long does it take for these projects to dry?
Drying times can vary depending on the materials used and the thickness of the layers. Generally, you should allow at least 24 hours for glue and sealants to dry completely. Patience is key—it's worth the wait to ensure a durable finish!
- Can kids participate in these DIY projects?
Definitely! Many of these projects are kid-friendly and can be a fun way to spend time together. Just make sure to supervise them, especially when using scissors or craft knives. It’s a great way to spark creativity and teach them about recycling!


