Start Early! DIY Christmas Crafts for Kids
As the holiday season approaches, there's a magical feeling in the air that invites creativity and joy. What better way to embrace this festive spirit than by diving into some DIY Christmas crafts with your kids? Not only does crafting bring families together, but it also sparks imagination and encourages a sense of accomplishment. Imagine the delight on your child's face as they transform simple materials into beautiful decorations or heartfelt gifts! In this article, we will explore a variety of easy and fun projects that are perfect for children of all ages. From colorful paper crafts to creative recycled projects, there’s something for everyone to enjoy. So, grab your crafting supplies and let’s get started on making this holiday season truly special!
Engaging in DIY crafts is not just about creating pretty decorations; it also offers a multitude of benefits for children. When kids get involved in crafting, they are developing fine motor skills as they cut, glue, and assemble different materials. These activities enhance their hand-eye coordination and dexterity, which are essential for their overall development. Furthermore, crafting allows children to express their creativity and individuality. It’s like giving them a blank canvas where they can paint their ideas and dreams. Additionally, DIY projects can be a fantastic way for kids to learn about problem-solving. As they navigate through the crafting process, they encounter challenges that require them to think critically and come up with solutions. This hands-on experience is not just fun; it’s educational! So, why not make crafting a regular part of your holiday traditions?
Before diving into the fun, it’s essential to gather the right materials for your Christmas crafts. Having a well-stocked crafting area can make the entire process smoother and more enjoyable. Here are some essential supplies you might consider:
- Colored paper and cardstock
- Glue, tape, and scissors
- Markers, crayons, and paints
- Recycled materials like cardboard boxes and plastic bottles
- Nature items such as pinecones and leaves
When sourcing materials, think about getting creative with what you already have at home. Not only does this save money, but it also teaches kids about sustainability and reusing materials. You can even involve your children in the process of collecting items, turning it into an exciting treasure hunt!
Paper crafts are an excellent starting point for young crafters. They are simple, affordable, and can be completed with minimal supervision. Plus, the possibilities are endless! Kids can create everything from handmade decorations to personalized gifts. Let’s dive into some delightful paper-based projects that will keep your little ones engaged.
Creating personalized Christmas cards is a fantastic way for kids to express their creativity and share heartfelt messages with family and friends. To get started, gather some colorful cardstock, markers, and any decorative items you have on hand, like stickers or glitter. Encourage your children to design their cards with festive drawings or messages. It’s a wonderful opportunity for them to practice writing while spreading holiday cheer!
Kids can also make beautiful paper ornaments to hang on the tree. Using various designs and techniques, they can craft unique decorations from paper. For instance, they can cut out shapes such as stars, angels, or snowflakes, and decorate them with drawings or glitter. Stringing them together can also create a lovely garland to adorn your home. The best part? Each ornament tells a story and carries a memory of the fun you had creating it together!
Using recycled materials for crafts teaches kids about sustainability and the importance of reducing waste. Instead of throwing away old items, why not transform them into something festive? This section highlights innovative projects that turn everyday items into delightful holiday decorations.
Transforming plastic bottles into snowmen is a fun and eco-friendly craft that kids will love. Start by cleaning out some empty plastic bottles and then let your children paint them white. Once dry, they can add features like eyes, a nose, and a scarf using colorful materials. These adorable holiday figures can serve as charming decorations around the house or even as gifts for loved ones!
Kids can repurpose cardboard boxes into creative gift boxes. This not only encourages creativity but also teaches them the value of reusing materials. Have them decorate the boxes with paint, wrapping paper, or even drawings. Personalizing these boxes makes gift-giving even more special, as they come from the heart and showcase your child’s artistic flair!
Nature can provide unique crafting materials that inspire creativity. Using natural items like pinecones and leaves can yield stunning results that capture the essence of the holiday season. Let’s explore how to incorporate these treasures into fun projects!
Crafting pinecone trees is a simple yet delightful project that can brighten up your holiday decor. Gather some pinecones from your backyard or a local park, and then let your kids paint them green or decorate them with glitter to resemble a Christmas tree. They can even add mini ornaments for a personal touch. These charming creations can be displayed on tables or given as gifts!
Using leaves to create prints can yield stunning results. Simply gather some leaves, dip them in paint, and press them onto paper to create beautiful patterns. This process not only enhances creativity but also fosters an appreciation for nature. Kids will love experimenting with different colors and types of leaves, resulting in unique decorations that can be hung around the house!
Q: What age group is suitable for DIY Christmas crafts?
A: Most DIY crafts can be adapted for various age groups, but younger children may require more supervision and guidance. Choose projects that match their skill level to ensure a fun experience!
Q: How can I encourage my child to be creative while crafting?
A: Allow your child to express themselves freely during the crafting process. Provide a variety of materials and let them explore different techniques without strict guidelines. Celebrate their creativity!
Q: What should I do with the finished crafts?
A: Display the crafts around your home, use them as gifts, or even donate them to local charities. This not only showcases your child's hard work but also spreads joy to others!

Benefits of DIY Crafts for Kids
Engaging in DIY crafts during the holiday season is not just about keeping kids entertained; it’s a treasure trove of benefits that can significantly enhance their development. Think of crafting as a magical journey where children can explore their creativity while simultaneously sharpening essential skills. When kids dive into the world of arts and crafts, they are not only having fun but also developing their fine motor skills. These skills are crucial for everyday tasks like writing, buttoning shirts, or even tying shoelaces. The act of cutting, gluing, and assembling materials helps improve hand-eye coordination and dexterity.
But wait, there's more! Crafting also serves as a wonderful outlet for self-expression. Kids can channel their emotions and ideas into tangible creations, allowing them to communicate their thoughts in ways words sometimes can't capture. Imagine a child creating a colorful card for a loved one; it's not just a card, but a heartfelt message wrapped in creativity. This kind of expression can boost their confidence and sense of accomplishment, making them feel proud of what they’ve made.
Moreover, DIY crafts foster problem-solving abilities. When kids encounter challenges—like figuring out how to make a paper ornament stand upright or deciding which colors to use—they learn to think critically and come up with solutions. This skill is invaluable as they grow, preparing them for future challenges in school and life. Plus, it encourages them to embrace trial and error, teaching that failure is just a stepping stone to success.
Social skills also get a boost during crafting sessions. Whether they’re working alongside siblings, friends, or parents, kids learn the importance of teamwork and communication. They share ideas, negotiate designs, and even help each other out with tricky tasks. This collaborative spirit can lead to stronger bonds and lasting memories. Think of it as a mini workshop where laughter and creativity flow freely!
Lastly, engaging in crafts can be a fantastic way to teach kids about sustainability. When they use recycled materials, they not only create something beautiful but also learn the importance of taking care of our planet. They begin to understand that everyday items can have a second life, sparking conversations about recycling and environmental responsibility. This knowledge can shape them into more conscious consumers as they grow.
In summary, the benefits of DIY crafts for kids are multifaceted. From enhancing fine motor skills and boosting creativity to fostering problem-solving abilities and social skills, crafting is an enriching experience that goes beyond mere fun. So, as you prepare for the holiday season, remember: each craft project is a stepping stone in your child’s development journey!

Materials Needed for Christmas Crafts
When it comes to crafting, having the right materials can make all the difference. As you embark on your DIY Christmas journey with your kids, it's essential to gather a variety of supplies that are not only affordable but also kid-friendly. Think of it as gathering your toolbox before starting a fun project; you wouldn't want to start without your hammer, right? The beauty of Christmas crafts is that many materials can be found around the house or sourced easily, making it both a fun and economical endeavor.
Here’s a quick rundown of some essential materials you might want to gather:
- Colored Paper: Construction paper, scrapbooking paper, or even old wrapping paper can be transformed into beautiful decorations.
- Glue and Tape: A good quality glue stick or liquid glue, along with tape, will be your best friends during crafting.
- Scissors: Safety scissors are a must for younger children, while older kids can use regular scissors for more intricate designs.
- Markers and Crayons: These are perfect for adding color and personalization to any project.
- Natural Materials: Items like pinecones, leaves, and twigs can bring a touch of nature into your crafts.
- Recycled Items: Think outside the box! Old magazines, cardboard boxes, and plastic bottles can be repurposed into festive creations.
Now, let’s dive into sourcing these materials. Many of these items can be found in your home, but if you need to go shopping, consider visiting local dollar stores or craft shops. They often have sales around the holiday season, making it easy to stock up without breaking the bank. Additionally, don’t hesitate to reach out to friends or family; they might have extra supplies lying around that they would be happy to share. Crafting is not just about creating; it's about sharing experiences and making memories together.
As you gather your materials, remember to keep the spirit of creativity alive. Encourage your kids to think about what they want to create and how they can use the materials at hand. The more involved they are in the process of selecting supplies, the more excited they will be to jump into crafting. So, roll up those sleeves, unleash your imagination, and let the crafting begin!
Easy Paper Crafts
When it comes to DIY Christmas crafts, paper crafts are a fantastic choice for kids of all ages. Not only are they simple and inexpensive, but they also allow children to unleash their creativity in a fun and engaging way. Imagine the joy on their faces as they transform plain sheets of paper into vibrant decorations and heartfelt gifts! These projects require minimal supervision and supplies, making them perfect for a cozy afternoon at home. So, gather your crafting materials and let’s dive into some delightful paper projects that will keep your little ones entertained this holiday season!
One of the most enjoyable paper crafts is creating DIY Christmas cards. Kids can express their feelings through art, making personalized cards for family and friends. To get started, all you need are some colored paper, markers, stickers, and a little imagination. Encourage your kids to think outside the box—what if they drew a funny Santa or wrote a silly poem? The beauty of these cards lies in their uniqueness, so every creation is special. Plus, it’s a wonderful way for children to practice their writing skills while spreading holiday cheer!
Another exciting project is making paper ornaments. These can adorn your Christmas tree or even be used as gift tags! Start with some construction paper or old magazines, and let your kids cut out shapes like stars, snowflakes, or even gingerbread men. Once they have their shapes, they can decorate them with glitter, paint, or markers. To add a bit of fun, you could even create a family ornament challenge where each member of the family designs their own ornament. Hang them up and watch your tree transform into a colorful display of creativity!
For those who love a little challenge, consider making paper chains. This classic craft is not only easy but also a great way to work on fine motor skills. Kids can cut strips of colored paper and then glue or tape them together to form a long chain. This can be draped around the house or used to countdown the days until Christmas. It’s a simple project that teaches kids about teamwork if they work together, and it’s a great way to decorate your home for the holidays!
To wrap up, paper crafts are a wonderful way for kids to engage in the holiday spirit while developing their creativity and motor skills. They can explore their artistic side and create gifts, decorations, and cards that carry a personal touch. So, gather your supplies and let the crafting begin! The memories made during these creative sessions will last a lifetime, and who knows, you might just discover a hidden artist in your little ones!
Q: What materials do I need for paper crafts?
A: Basic materials include colored paper, scissors, glue, markers, and decorative items like stickers or glitter.
Q: Are paper crafts safe for younger children?
A: Yes, as long as you supervise them, especially when using scissors. You can also provide child-safe scissors for added safety.
Q: How can I make paper crafts more fun?
A: Encourage creativity by allowing kids to choose their colors and designs. You can also turn it into a family activity!
Q: Can we use recycled materials for paper crafts?
A: Absolutely! Old magazines, wrapping paper, and cardboard can all be repurposed into fun and creative projects.

DIY Christmas Cards
Creating personalized Christmas cards is not just a fun activity; it's a wonderful way for kids to express their creativity and share heartfelt messages with family and friends. Imagine the joy on a loved one's face when they receive a card made with love by a child! This project is simple yet impactful, allowing children to unleash their artistic flair while also learning the value of giving. So, how can you get started with this delightful DIY project?
First, gather some basic materials. You'll need:
- Cardstock or thick paper
- Colored markers or crayons
- Stickers and embellishments
- Glue and scissors
- Optional: glitter for a festive touch!
Once you have your materials ready, it's time to dive into the fun! Start by cutting the cardstock into your desired card size. A classic foldable card is always a hit, but kids can get creative with shapes—think stars, trees, or even snowflakes. The sky's the limit!
Next, encourage the kids to decorate the front of the card. They can draw festive images, write cheerful messages, or even use stickers to create a 3D effect. For example, a simple drawing of a Christmas tree can come to life with colorful ornaments made from stickers or glitter. The more personal and unique, the better!
Don’t forget the inside! This is where the magic happens. Kids can write a message that warms the heart. Here are a few prompts to spark their creativity:
- What do you love most about Christmas?
- What is your favorite family tradition during the holidays?
- A special memory you have with the person receiving the card.
Once the cards are complete, consider hosting a mini card exchange party. This can be a great way for kids to share their creations and spread holiday cheer. They can even add a personal touch by delivering the cards themselves, making it a memorable experience for both the giver and the receiver.
In addition to being a fun activity, making DIY Christmas cards fosters essential skills in children. They practice fine motor skills while cutting and gluing, and they also enhance their creativity and self-expression. Plus, it teaches them the importance of sharing and kindness during the holiday season. So, gather your supplies, let the creativity flow, and watch as your kids create beautiful, heartfelt cards that will be cherished for years to come!
Q: What age is appropriate for kids to start making DIY Christmas cards?
A: Children as young as 3 can participate with supervision. Older kids can take on more complex designs independently.
Q: Can we use recycled materials for making Christmas cards?
A: Absolutely! Old wrapping paper, magazines, and even cardboard can be repurposed to create unique and eco-friendly cards.
Q: How can we make the card-making process more engaging?
A: Consider adding themes for each card, such as "Winter Wonderland" or "Santa's Workshop," to inspire creativity and make it more fun!
Paper Ornaments
Creating beautiful is not only a delightful way for kids to express their creativity, but it also adds a personal touch to your holiday decorations. Imagine the joy of hanging these unique creations on your Christmas tree, each one telling a story of laughter and fun shared during the crafting process. The best part? You don't need a ton of fancy supplies to get started! With just a few basic materials, you can help your little ones craft ornaments that will be cherished for years to come.
To kick things off, gather some essential materials. You will need:
- Colored construction paper
- Scissors
- Glue or glue sticks
- Markers or crayons
- String or ribbon for hanging
Once you have your materials ready, it's time to unleash the creativity! One simple idea is to make paper snowflakes. Kids can fold the paper into quarters and cut out various shapes to create intricate designs. When they unfold the paper, they’ll be amazed at the beautiful snowflakes they've made, each one unique, just like a real snowflake!
Another fun project is to create paper stars. Start by cutting out star shapes from colored paper. Kids can then decorate these stars with glitter, stickers, or even drawings to make them truly their own. Once decorated, simply punch a hole at the top and thread a piece of string through to hang them on the tree or around the house.
For a more interactive experience, consider making paper chains. This classic craft involves cutting strips of paper and linking them together to form a colorful garland. Kids can choose their favorite colors, and as they create, they can learn about patterns and sequences. Not only are these chains beautiful, but they also make for a great decoration that can be draped around the tree or across the mantelpiece.
As you embark on this crafting journey, encourage your children to think outside the box. They can experiment with different shapes, colors, and sizes. Perhaps they want to create a paper gingerbread man or a Christmas bell. The possibilities are endless! Not only does this foster creativity, but it also helps improve their fine motor skills as they cut, glue, and assemble their ornaments.
Incorporating storytelling into the crafting process can also enhance the experience. As you work together, ask your kids about their favorite holiday memories or traditions. This not only makes the crafting session more meaningful but also strengthens family bonds. Plus, when you hang these ornaments on the tree, they will remind everyone of the fun times spent creating them.
After all the crafting is done, don’t forget to display these lovely ornaments proudly. They can adorn your Christmas tree, hang in windows, or even be used as gifts for family and friends. Each ornament is a little piece of art, infused with love and creativity, making your holiday season even more special.
Q: What types of paper are best for making ornaments?
A: Any kind of colored paper works well, but construction paper and cardstock are particularly sturdy and easy to work with.
Q: Can we use recycled materials for paper ornaments?
A: Absolutely! Old wrapping paper, magazines, and even newspapers can be repurposed into beautiful ornaments.
Q: How can we make the ornaments more durable?
A: To make them last longer, consider laminating the ornaments or applying a clear sealant once they are finished.
Q: What age group is this craft suitable for?
A: Paper ornament crafting is suitable for children of all ages, with adult supervision for younger kids, especially when using scissors.
Creative Recycled Crafts
Engaging in is not only a fun way for kids to express their artistic side, but it also teaches them the importance of sustainability and resourcefulness. By repurposing everyday items that would otherwise end up in the trash, children can create delightful holiday decorations that are both unique and environmentally friendly. Imagine turning something as simple as a plastic bottle or an old cardboard box into a festive masterpiece! It’s like giving new life to forgotten objects, and the joy of crafting becomes even more rewarding.
One of the most exciting aspects of recycled crafts is the endless possibilities. Kids can let their imaginations run wild, transforming materials into something extraordinary. For instance, a plastic bottle can become a charming snowman, while a cardboard box can morph into a beautifully decorated gift box. The beauty of these projects lies in their simplicity and the fact that they often require minimal supplies. Plus, they provide a fantastic opportunity for parents and children to bond over creativity.
Let’s dive into a couple of fantastic projects that exemplify the magic of recycled crafting:
Transforming plastic bottles into snowmen is a fun and eco-friendly craft that kids will love. To create these adorable holiday figures, start by collecting a few empty plastic bottles. Clean them thoroughly and let them dry. Once ready, gather your crafting supplies which may include:
- White paint or spray paint
- Colored markers or paints
- Buttons, fabric scraps, and other decorative items
- Glue
- Scarves made from old socks or fabric
Now, here’s how to get started:
- Paint the bottles white to give them a snow-like appearance.
- Once dry, use colored markers or paints to add facial features and buttons.
- Wrap a scarf around the neck of your snowman using an old sock or fabric scrap.
- Get creative! Add a hat or any other decorations you like.
This project not only encourages creativity but also promotes the idea of reusing materials, making it a perfect holiday craft!
Next up, we have the delightful cardboard box gifts. Instead of buying new gift boxes, why not repurpose old cardboard boxes into personalized gift containers? Kids can have a blast decorating these boxes, making each gift unique and special. Here’s what you’ll need:
- Old cardboard boxes (shoe boxes, for example)
- Wrapping paper or paint
- Markers, stickers, and other decorative supplies
To create your custom gift box, follow these simple steps:
- Start by cleaning the cardboard box and removing any old labels.
- Let your child unleash their creativity by painting the box or wrapping it in festive paper.
- Use markers and stickers to add a personal touch, such as the recipient's name or festive designs.
Not only does this project encourage creativity, but it also teaches kids about the importance of reducing waste during the holiday season. After all, who wouldn’t love to receive a beautifully decorated gift in a box made with love?
In conclusion, engaging in creative recycled crafts is a fantastic way to celebrate the holiday season. It fosters creativity, teaches sustainability, and provides a wonderful bonding experience for families. So gather those old bottles and boxes, and let the crafting begin!
1. What types of materials can we use for recycled crafts?
You can use a variety of materials such as plastic bottles, cardboard boxes, old newspapers, glass jars, and even fabric scraps. The options are endless!
2. Are recycled crafts safe for young children?
Yes! As long as you supervise them and ensure there are no sharp edges or hazardous materials, recycled crafts can be very safe and fun for kids.
3. How can I encourage my kids to be more creative with recycled materials?
Provide them with a variety of materials and let them experiment! Avoid giving them strict instructions; instead, encourage them to think outside the box and come up with their own ideas.
4. Can recycled crafts be used as gifts?
Absolutely! Handmade gifts made from recycled materials are often more meaningful and personal, making them perfect for friends and family.

Plastic Bottle Snowmen
Creating is not only a fun and creative project, but it also promotes eco-friendly practices by repurposing items that would otherwise end up in the trash. This craft is perfect for kids of all ages and can be done with minimal supervision, making it a great activity for parents to enjoy with their little ones. Plus, who doesn’t love a cute snowman to brighten up their holiday décor?
To get started, you’ll need a few basic materials. Gather some empty plastic bottles (the size can vary, but 16 oz. bottles work well), white paint, brushes, and an assortment of decorative items such as buttons, fabric scraps, and markers. You might also want some glue, scissors, and a black marker for drawing on facial features. The beauty of this project is that you can let your imagination run wild, using whatever materials you have on hand.
Here’s a simple step-by-step guide to creating your very own plastic bottle snowman:
- Prepare the Bottles: Start by cleaning and drying the plastic bottles. Once they are ready, paint the outside of each bottle with white paint. You may need to apply two coats for an even finish. Allow the paint to dry completely.
- Decorate the Snowman: Once the bottles are dry, it’s time for the fun part! Use buttons for the snowman’s eyes and mouth, and fabric scraps for a scarf. You can even use a small piece of orange paper or a pom-pom for the nose. Let the kids get creative!
- Create a Base: If you want your snowman to be more stable, you can create a base by cutting a circle out of cardboard and gluing the bottle to it. This step is optional, but it can help keep your snowman upright.
- Finishing Touches: Add any additional decorations like a hat made from a small piece of fabric or a paper cup. This is where the snowman’s personality really shines, so encourage the kids to think outside the box!
Once your snowmen are complete, they can be displayed on a mantel, table, or even outside to greet holiday visitors. This project not only provides a fun crafting experience but also teaches children about sustainability and the joy of reusing materials. Plus, every snowman will be unique, showcasing each child’s creativity!
As a bonus, you can even turn this into a fun competition. Have the kids create their snowmen and then vote on categories like “Most Creative” or “Best Use of Recycled Materials.” It’s a great way to encourage friendly competition while fostering a sense of community and teamwork.
In conclusion, crafting plastic bottle snowmen is a delightful way to celebrate the holiday season while engaging in a fun and educational activity. It encourages kids to think creatively and appreciate the importance of recycling. So gather those plastic bottles and let the crafting begin!
- What age group is this craft suitable for? While younger children may need assistance, this craft is suitable for kids aged 5 and up. Older children can take the lead and explore their creativity.
- Can we use other materials? Absolutely! Feel free to use any materials you have at home, such as yarn, old clothing, or even glitter for a bit of sparkle.
- How do we store the snowmen after the holidays? To keep your snowmen looking great, store them in a cool, dry place. If they get dusty, a gentle wipe with a damp cloth should do the trick.
Cardboard Box Gifts
Cardboard boxes are not just for shipping or storing items; they can be transformed into creative gift boxes that add a personal touch to your holiday gifting. Imagine the surprise on a loved one's face when they receive a beautifully decorated box, crafted with love by your little ones! This DIY project is not only fun but also serves as a fantastic way to teach kids about recycling and reusing materials.
To get started, gather some cardboard boxes of various sizes. You can use old shoe boxes, delivery boxes, or any other sturdy cardboard you have lying around. The beauty of this craft is that it allows for unlimited creativity. Kids can paint the boxes, wrap them in colorful paper, or even decorate them with stickers, ribbons, and other embellishments. Here are some ideas to inspire their creativity:
- Painted Boxes: Use acrylic paints to create festive designs like snowflakes, Christmas trees, or even their favorite characters.
- Gift Wrap: Wrap the boxes in holiday-themed wrapping paper or fabric for a polished look.
- Nature Elements: Glue on pinecones, leaves, or twigs for a rustic touch that brings the outdoors in.
Once the boxes are decorated, it’s time to fill them with gifts! Encourage your kids to think about what their friends or family members would love to receive. This could be handmade crafts, baked goods, or even a heartfelt letter. The act of creating the gift box itself becomes a part of the gift, adding a layer of thoughtfulness that store-bought options simply can't match.
As an added bonus, let’s talk about how to make these cardboard creations even more special. Consider creating a themed gift box tailored to the recipient's interests. For example:
| Theme | Contents |
|---|---|
| Art Lover | Art supplies, coloring books, and a personalized sketch. |
| Nature Enthusiast | Seeds, gardening tools, and a handmade plant marker. |
| Bookworm | A favorite book, bookmarks, and a cozy blanket. |
By personalizing the gift box and its contents, children learn the value of thoughtfulness and the joy of giving. Plus, they’ll feel a sense of accomplishment seeing their beautifully crafted boxes bring smiles to others. So grab those cardboard boxes, unleash your child’s creativity, and let the holiday spirit shine through their handmade gifts!
1. What materials do I need to decorate cardboard boxes?
You will need cardboard boxes, paints, markers, wrapping paper, scissors, glue, and any decorative items like stickers or ribbons.
2. Can I use any type of cardboard box?
Yes, you can use any sturdy cardboard boxes you have at home, such as shoe boxes, delivery boxes, or leftover packaging materials.
3. How can I ensure the boxes are safe for kids to use?
Make sure to supervise younger children when using scissors or glue. Opt for non-toxic materials and ensure that the finished product doesn’t have any sharp edges.
4. What types of gifts can I put in the decorated boxes?
You can fill the boxes with homemade crafts, baked goods, toys, or personalized items that reflect the recipient's interests.
5. How can I encourage my kids to think creatively when decorating the boxes?
Provide them with various materials, show them examples, and encourage them to brainstorm unique ideas that represent their personality or the recipient's interests.
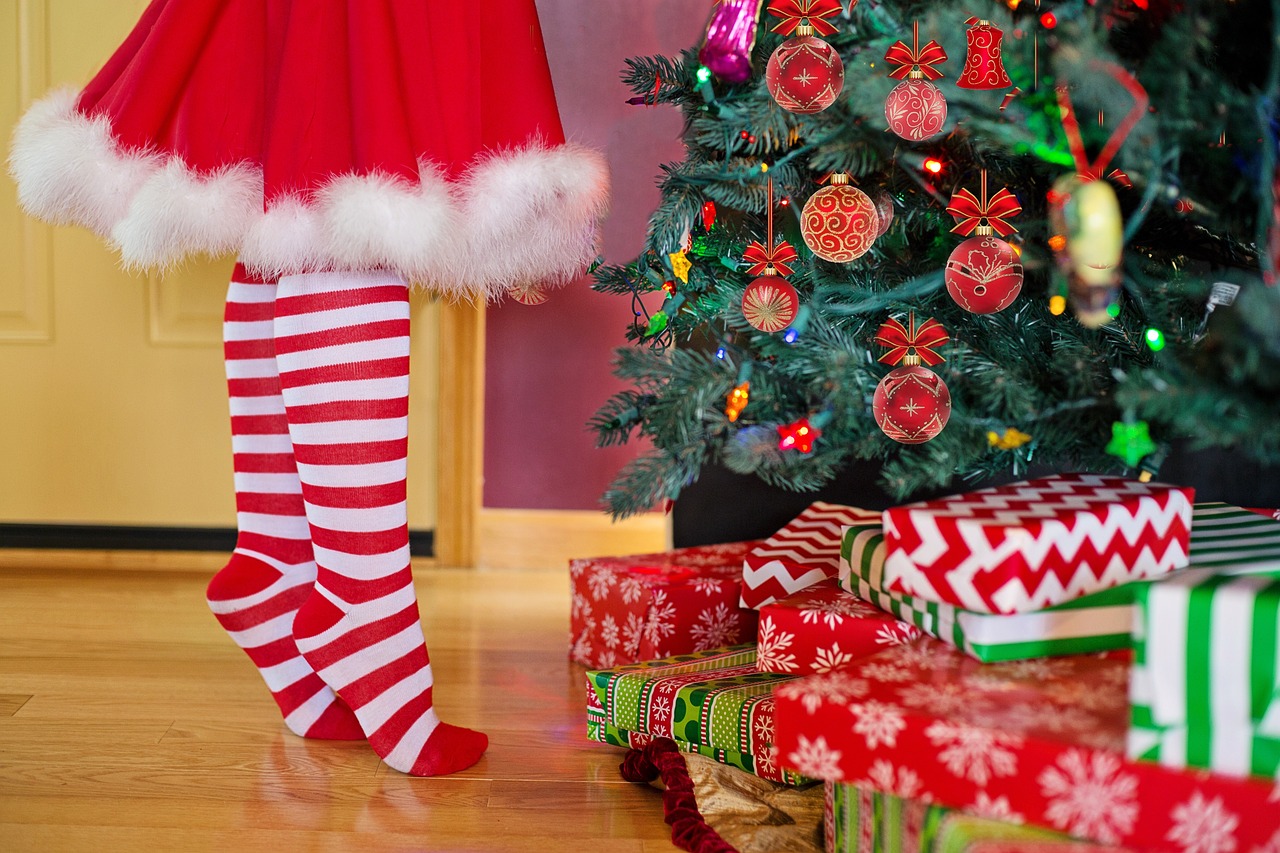
Fun with Nature-Inspired Crafts
Nature is a treasure trove of inspiration, especially when it comes to crafting with kids. Imagine wandering through a park or your backyard, collecting bits and pieces of the great outdoors. Those pinecones, leaves, and twigs can be transformed into stunning holiday decorations that not only look beautiful but also teach children about the environment. Crafting with natural materials fosters a sense of appreciation for nature and encourages kids to think creatively. Plus, it’s a fantastic way to spend quality time together as a family, making memories that last a lifetime.
One of the most delightful projects you can embark on is creating Pinecone Christmas Trees. These charming little trees are not only easy to make but also allow for a lot of creativity. Start by gathering a few pinecones from your local park or garden. Once you have your pinecones, gather some green paint, glitter, and small decorations like beads or sequins. Kids can paint the pinecones green, sprinkle them with glitter for that magical touch, and then adorn them with the tiny decorations. It’s like creating a miniature forest of festive trees right in your living room!
Another fantastic project is making Leaf Print Decorations. This craft is not only fun but also educational, as it encourages kids to observe the different shapes and sizes of leaves. To get started, collect a variety of leaves and some washable paint. Kids can paint one side of the leaf and press it onto paper or fabric to create beautiful prints. Each print can be unique, showcasing the intricate details of the leaf's veins and shape. Once the prints are dry, they can be used to create holiday cards, wall art, or even festive table decorations. This project not only enhances creativity but also instills a sense of wonder about the natural world.
To make your crafting session even more exciting, consider creating a Nature Craft Station. Here’s a simple table of materials you might want to include:
| Material | Use |
|---|---|
| Pinecones | Make Christmas trees and ornaments |
| Leaves | Create prints and decorations |
| Twigs | Craft frames and structures |
| Acorns | Use as embellishments or create characters |
By setting up a nature craft station, you can encourage kids to explore their creativity while also learning about the materials they are using. It’s like bringing a bit of the outdoors inside, allowing children to connect with nature even during the winter months. As they craft, engage them in conversations about where the materials come from and the importance of taking care of our environment. What better way to celebrate the holiday season than by creating beautiful decorations while fostering a love for nature?
Q: What age group is suitable for nature-inspired crafts?
A: Nature-inspired crafts can be enjoyed by children of all ages. For younger kids, simple projects like leaf prints or pinecone decorations are ideal, while older kids can tackle more complex crafts.
Q: How do I ensure the materials are safe for kids?
A: Always supervise children during crafting sessions, especially when using paint or small decorations. Opt for non-toxic materials and check for any allergies.
Q: Can these crafts be done indoors?
A: Absolutely! While collecting materials outside is fun, you can easily do the crafting indoors. Just lay down some newspaper to catch any mess.
Q: What if I can't find natural materials?
A: If natural materials are scarce, consider using items from your recycling bin, like cardboard or paper, to create decorations that mimic the look of nature.
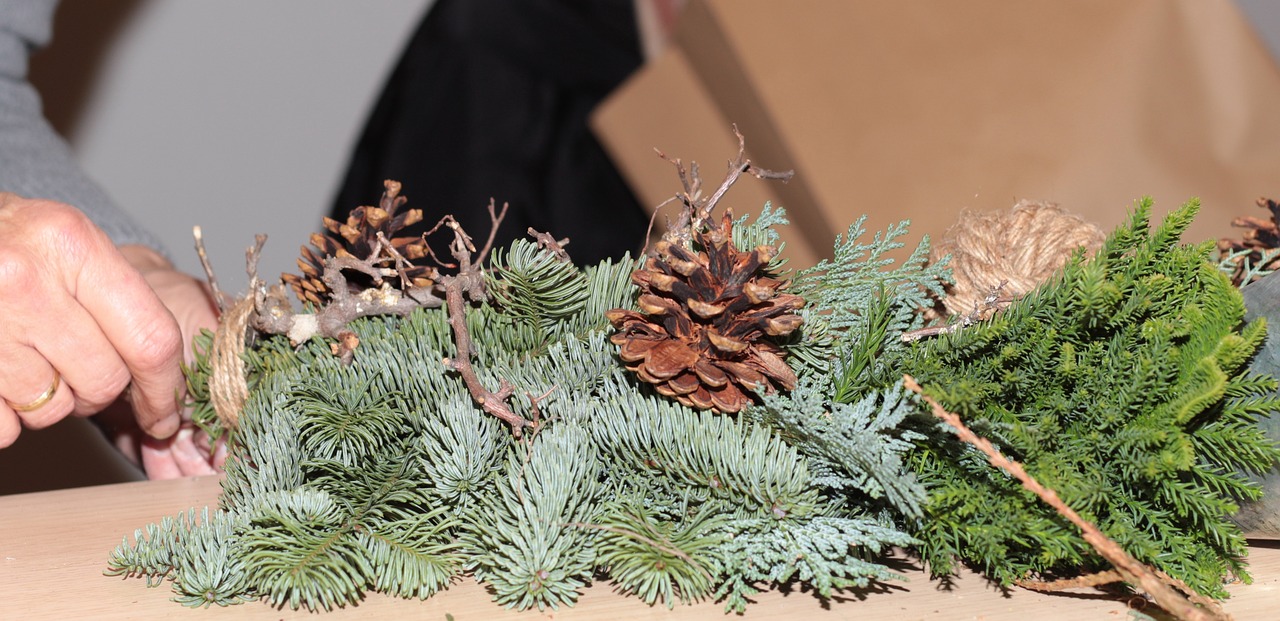
Pinecone Christmas Trees
Crafting is a delightful and simple project that brings the beauty of nature right into your home during the holiday season. Not only do these charming little trees add a rustic touch to your decorations, but they also offer a fantastic opportunity for kids to engage with the environment. Imagine wandering through a winter wonderland, collecting pinecones, and transforming them into festive masterpieces! This project is not just about crafting; it's about creating memories and sharing joy.
To get started, you'll need a few basic materials. First, gather your pinecones. You can find these treasures in your backyard, at a local park, or even purchase them from a craft store. Next, you'll need some paint, glitter, and a few embellishments like beads or ribbons to add that extra sparkle. The beauty of this craft is that it allows kids to unleash their creativity and express their unique style. Each tree can be a reflection of their personality!
Here's a simple step-by-step guide to making your own pinecone Christmas trees:
- Step 1: Start by cleaning your pinecones. Shake off any dirt or debris and let them dry completely.
- Step 2: Paint the pinecones in your desired colors. Traditional green is always a classic choice, but don't shy away from vibrant reds, blues, or even glittery golds! Let the paint dry.
- Step 3: Once the paint is dry, it's time to decorate! Use glue to attach beads, sequins, or any other embellishments that catch your fancy. This is where the kids can really have fun and let their imaginations run wild.
- Step 4: If you want to create a tree trunk, you can use a small piece of wood or even a cardboard tube. Attach your painted pinecone to the base using glue.
- Step 5: Finally, display your beautiful pinecone trees around the house. They make great centerpieces or can be placed on mantels or windowsills to spread holiday cheer!
What makes this craft even more special is its eco-friendly aspect. By using natural materials, you're teaching kids about sustainability and the importance of respecting our environment. Plus, it’s a wonderful way to bond as a family—imagine the laughter and creativity flowing as you work together to create your festive forest!
In conclusion, making pinecone Christmas trees is not just a craft; it's an experience filled with fun, creativity, and learning. So gather your materials, invite your little ones to join in, and let the holiday crafting begin!
Q: Can we use artificial pinecones for this project?
A: Absolutely! Artificial pinecones can be just as fun to decorate and can be reused for many holiday seasons.
Q: What age group is this craft suitable for?
A: This craft is perfect for kids of all ages! Younger children may need some assistance with painting and decorating, while older kids can take the lead.
Q: How can we display our pinecone trees?
A: You can place them on tables, windowsills, or even give them as gifts to family and friends. They also make great additions to holiday table settings!

Leaf Print Decorations
Creating is not only a fantastic way to bring the beauty of nature indoors, but it also offers a unique opportunity for kids to engage with their environment. Imagine walking through a park on a crisp autumn day, collecting vibrant leaves of all shapes and sizes. Each leaf has its own story to tell, and now, with a little creativity, your children can turn those stories into stunning holiday decorations!
To get started, you’ll need a few simple materials: some leaves, non-toxic paint, and paper or canvas. The process is incredibly easy and can be a fun family activity. First, gather a variety of leaves—think about using maple, oak, or even ferns for different textures and shapes. Once you have your collection, it’s time to unleash your creativity!
Here’s how to create beautiful leaf prints:
- Prepare Your Workspace: Lay down some newspaper or an old tablecloth to protect your surfaces from paint.
- Paint the Leaves: Use a paintbrush to apply a thin layer of non-toxic paint to one side of a leaf. This is where kids can really have fun choosing colors—think reds, greens, and golds for that festive flair!
- Press and Print: Carefully press the painted side of the leaf onto your paper or canvas. Apply even pressure to ensure a good print. Kids can experiment with different leaves and colors to create unique patterns.
- Let It Dry: Once all the prints are made, allow them to dry completely. This is the perfect time to clean up your workspace and maybe even enjoy a warm drink together!
- Display Your Art: After the prints are dry, you can frame them, hang them as garlands, or even use them as festive wrapping paper for gifts!
Not only does this craft result in beautiful decorations, but it also teaches kids about the importance of nature and sustainability. Plus, it’s a wonderful way to bond as a family during the holiday season. Imagine the pride on your child’s face as they show off their leaf prints to family and friends. It’s a delightful mix of creativity and learning that can spark a lifelong appreciation for art and nature.
So, gather those leaves, roll up your sleeves, and let the creativity flow! Who knew that something as simple as a leaf could turn into a cherished holiday decoration? It’s all about the memories you create together and the joy of crafting something special.
- What type of paint should I use for leaf printing? Non-toxic acrylic or tempera paints work best for this project. They provide vibrant colors and are safe for kids.
- Can I use leaves from any tree? Yes, but make sure they are not toxic. Avoid leaves from plants like poison ivy, and stick to common trees like maple or oak.
- How can I preserve my leaf prints? Once dry, you can spray them with a clear sealant to protect them from fading or damage.
- What other materials can I use for printing? You can also experiment with fabric, canvas bags, or even wood to create unique prints!
Frequently Asked Questions
- What age group is suitable for DIY Christmas crafts?
DIY Christmas crafts are perfect for kids of all ages! Younger children can enjoy simpler projects with supervision, while older kids can tackle more complex crafts. The key is to choose projects that match their skill level and interests.
- What materials do I need for Christmas crafts?
You'll need a variety of materials, including paper, scissors, glue, markers, and recycled items like cardboard boxes and plastic bottles. Don't forget to gather natural materials like pinecones and leaves for nature-inspired crafts!
- How can I encourage my kids to be creative with their crafts?
Encouraging creativity is all about providing freedom! Let your kids experiment with colors, shapes, and designs. Offer suggestions but allow them to express their own ideas. Remember, there are no mistakes in crafting—just opportunities to create something unique!
- Are DIY crafts safe for kids?
Absolutely! Most DIY crafts are safe, especially when you supervise younger children. Just ensure that you use non-toxic materials and keep sharp objects like scissors out of reach. Always prioritize safety while having fun!
- Can we make Christmas crafts using recycled materials?
Yes! Using recycled materials is not only eco-friendly but also a fantastic way to teach kids about sustainability. Items like old wrapping paper, cardboard boxes, and plastic bottles can be transformed into amazing holiday decorations!
- How long do these crafts typically take to complete?
The time it takes to complete a craft project can vary. Simple paper crafts might take just 30 minutes, while more elaborate projects, like creating recycled gift boxes, could take an hour or more. It’s all about enjoying the process!
- Can I participate in the crafts with my kids?
Of course! Crafting together can be a wonderful bonding experience. It’s a chance to share creativity, laugh, and create lasting memories. Plus, kids often love having their parents involved in their projects!
- What should I do if my kids lose interest in a craft?
If your kids lose interest, don’t force it! Take a break and come back to it later or switch to a different project. Keeping the crafting experience fun and stress-free is the key to sparking their creativity.


