Crafting with Waste: Fun Recycling Projects for Kids
In today’s world, where environmental concerns are at the forefront of our minds, teaching kids about recycling and sustainability has never been more crucial. Crafting with waste is not just a fun way to spend time; it’s also an opportunity to instill valuable lessons about taking care of our planet. Imagine the joy on a child's face when they transform something that would have ended up in the trash into a beautiful piece of art or a functional item! This article dives into a treasure trove of creative and engaging recycling projects that kids can enjoy, sparking their imagination while nurturing a sense of responsibility towards the environment.
Recycling is a simple yet powerful action that can lead to a significant impact on our planet. It helps reduce waste, conserves natural resources, and minimizes pollution. By engaging in crafting projects that utilize recycled materials, children not only foster their creativity but also learn the importance of sustainability in a hands-on way. Think of it as planting a seed of environmental consciousness that will grow with them as they develop into responsible adults. So, let’s roll up our sleeves and dive into the wonderful world of crafting with waste!
Recycling is more than just a buzzword; it’s a lifestyle choice that can lead to substantial benefits for our environment. When we recycle, we help to reduce the amount of waste that ends up in landfills, which in turn conserves precious natural resources. For instance, did you know that recycling one ton of paper can save 17 trees? That’s a staggering number! Teaching kids about recycling not only helps them understand the impact of their actions but also empowers them to contribute positively to their communities. By incorporating these lessons into fun crafting projects, we can make learning about recycling an enjoyable experience.
The first step in any crafting project is gathering materials. Fortunately, many items that can be repurposed for fun and educational recycling crafts are usually found around the house. Here’s a quick list of common household items that can be transformed into creative projects:
- Old newspapers and magazines
- Cardboard boxes
- Plastic bottles and containers
- Old t-shirts and fabric scraps
- Egg cartons
- Jars and bottles
These materials can serve as the foundation for countless imaginative projects. The beauty of crafting with waste is that it encourages kids to look at everyday items with a fresh perspective. Instead of viewing them as trash, they can see the potential for creating something new and exciting!
Paper and cardboard are some of the most versatile materials available for crafting. With just a little creativity, old newspapers and boxes can be transformed into exciting art projects that kids will love. For instance, consider making colorful collages from old magazines or constructing intricate models from cardboard boxes. The possibilities are endless!
Paper mache is an engaging technique that allows kids to create sculptures and masks using recycled paper. It’s a messy but fun process that can be done with just a few simple ingredients: torn paper, water, and flour. The joy of seeing a flat piece of paper evolve into a three-dimensional creation is incredibly rewarding. Plus, it’s a fantastic way for kids to express their artistic flair!
Cardboard boxes can become anything from playhouses to vehicles. With a little imagination and some basic supplies like scissors and tape, kids can construct their own mini-worlds. Imagine a cardboard spaceship ready for an adventure to outer space, or a cozy playhouse where they can host tea parties. The only limit is their imagination!
Plastic bottles are another fantastic resource that can be turned into fun and useful items. From bird feeders to planters, the ideas are endless. By discovering various projects that teach kids how to reuse plastic bottles creatively, we not only promote fun but also raise awareness about the importance of reducing plastic waste. It’s a win-win!
Old clothes and textiles are perfect for upcycling projects. Instead of tossing away those worn-out t-shirts or fabric scraps, kids can transform them into new items, fostering creativity and resourcefulness. Upcycling is not just about saving the environment; it’s also about making something unique and personal.
Transforming old t-shirts into tote bags is a simple and practical project that kids can easily tackle. All it takes is a few cuts and some knots, and they’ll have a reusable bag ready for groceries or toys. This project not only teaches them about recycling but also about the importance of reducing single-use plastic bags.
Fabric scraps can be used for colorful art projects. Kids can create unique collages and crafts that inspire creativity while reducing waste. The vibrant colors and textures of different fabrics can spark their imagination, leading to one-of-a-kind masterpieces that they can be proud of.
Using eco-friendly materials is essential for sustainable crafting. This means opting for safe, non-toxic paints and supplies that can be made from natural ingredients. Kids can have fun experimenting with these materials while learning about the importance of using safe products.
Creating natural dyes from fruits and vegetables is a fun way to color materials. Not only is it safe and non-toxic, but it also encourages kids to explore the colors and textures found in nature. Imagine dyeing fabric with beet juice for a deep red hue or turmeric for a sunny yellow. It’s like a science experiment and an art project rolled into one!
Making your own glue from simple ingredients is another exciting project. Discovering recipes for homemade adhesives that are safe for children and easy to use in crafts can be a fun bonding experience. Plus, it reinforces the idea that crafting can be done sustainably.
A recycling craft day can be a fun community or family event. It’s a fantastic way to bring people together while promoting creativity and environmental awareness. Planning a craft day can be as simple as setting a date, gathering materials, and inviting friends and family to join in on the fun.
Getting others involved makes crafting more enjoyable. Learn tips on how to invite friends and family to join in on the recycling fun and share ideas. Whether it’s a small gathering or a larger community event, the more, the merrier!
Creating designated craft stations can streamline the crafting process. This guide provides ideas for setting up different areas for various projects to keep kids engaged and organized. Having a variety of stations will allow kids to explore different crafts and techniques, making the day even more exciting!
1. What age group is suitable for recycling crafts?
Most recycling crafts can be adapted for various age groups. Younger children may need more guidance, while older kids can work more independently. Always ensure that the materials used are safe and appropriate for the child's age.
2. How can I encourage my child to be more interested in recycling?
Lead by example! Show enthusiasm for recycling and involve your child in the process. Crafting projects that utilize recycled materials can also spark their interest and make learning about recycling fun.
3. Are there any safety precautions I should take?
Absolutely! Always supervise children during crafting activities, especially when using scissors or other tools. Ensure that all materials used are non-toxic and safe for children.
4. Can we sell the crafts we make?
Yes, if you and your child create items that are safe and appealing, consider selling them at local craft fairs or online. It can be a great way to teach kids about entrepreneurship while promoting sustainability!
Understanding the Importance of Recycling
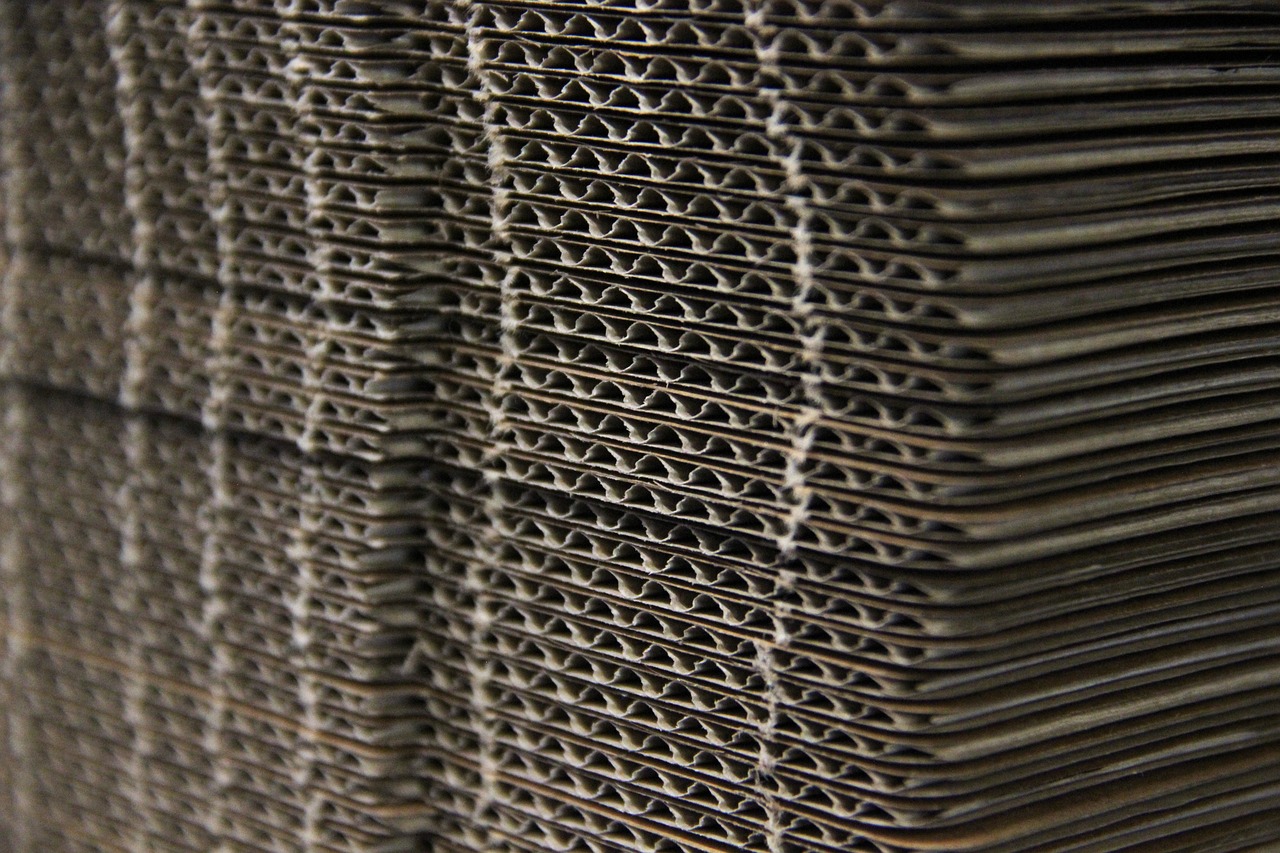
Recycling is not just a trendy buzzword; it’s a crucial practice that helps protect our planet. By reprocessing materials, we can significantly reduce the amount of waste that ends up in landfills, which in turn conserves natural resources. Think of it this way: recycling is like giving a second life to materials that would otherwise be tossed aside. This process not only minimizes our environmental footprint but also promotes sustainability, a concept that is essential for the future of our children.
When we recycle, we are actively contributing to a healthier planet. For instance, recycling one ton of paper can save over 17 trees, 7,000 gallons of water, and 4,100 kilowatts of electricity. Imagine the impact if every child understood the importance of these numbers! Teaching kids about recycling from a young age instills a sense of responsibility and encourages them to be mindful of their consumption habits. They learn that their actions have consequences, and they can make a difference in the world.
Moreover, recycling has numerous environmental benefits that are worth mentioning:
- Conserves Resources: Recycling helps in conserving natural resources such as timber, water, and minerals.
- Reduces Pollution: The recycling process generates less pollution compared to producing new products from raw materials.
- Saves Energy: Recycled materials often require less energy to process than new materials, leading to lower greenhouse gas emissions.
Additionally, recycling can foster a sense of community. When families participate in recycling initiatives, they often come together to discuss ways to reduce waste and share creative ideas. This communal effort not only strengthens bonds but also creates a culture of sustainability that can inspire future generations. Imagine kids coming together to create art from recycled materials; it’s a fun and engaging way to learn about the environment while sparking creativity!
In conclusion, understanding the importance of recycling is vital for our children. It teaches them to value resources, promotes environmental stewardship, and encourages creativity. By integrating these lessons into fun projects, we can ensure that the next generation is equipped to take care of our planet. So, let’s get crafting and show our kids that recycling is not just a chore but a fantastic opportunity to create something beautiful!

Simple Materials to Get Started
Before diving into the world of creative recycling projects, it's essential to gather some basic materials that you likely already have at home. The beauty of crafting with waste is that it not only sparks creativity but also teaches kids about the importance of reusing and repurposing. So, what do you need to kick off these exciting projects? Let’s explore some simple materials that can serve as the foundation for countless imaginative crafts.
First and foremost, paper and cardboard are your best friends in the recycling craft world. Old newspapers, magazines, and cereal boxes can be transformed into a variety of art pieces. For instance, you can cut them into shapes for collages or use them to create intricate paper mache sculptures. Cardboard boxes, on the other hand, can be turned into anything from mini-forts to imaginative vehicles. Just think about how kids love to play in boxes—now imagine the fun they can have creating their own worlds from them!
Another household staple that’s often overlooked is plastic bottles. These versatile items can be repurposed into numerous fun projects. Kids can create bird feeders, planters, or even musical instruments with just a little creativity. The process of turning something that would typically go in the trash into a functional item is not only rewarding but also instills a sense of environmental responsibility in young minds. For example, have you ever thought about how a simple plastic bottle can become a colorful watering can with just a few snips and some paint?
Additionally, don’t forget about old clothing and textiles. T-shirts that have seen better days can be cut up and sewn into tote bags, while fabric scraps can be stitched together to create unique art pieces or quilts. This not only keeps textiles out of landfills but also allows kids to express their style and creativity. The tactile experience of working with fabric is also incredibly engaging for young hands, making it a perfect medium for crafting.
Lastly, consider adding some natural supplies to your crafting toolkit. Items like leaves, twigs, and stones can be used to enhance projects and add an organic touch. They can be glued onto cardboard for texture or painted to create stunning nature-inspired art. The possibilities are truly endless! By using materials that are readily available and often discarded, you're not just crafting; you're teaching kids the value of sustainability in a fun and engaging way.
In summary, the journey of crafting with waste begins with simple materials that are easy to find. By utilizing paper, cardboard, plastic bottles, old textiles, and natural elements, you can inspire creativity while promoting environmental awareness. So gather those materials, roll up your sleeves, and get ready for a fun-filled crafting adventure!

Paper and Cardboard Projects
When it comes to crafting, paper and cardboard are two of the most versatile materials you can find in your home. They’re not only easy to source but also incredibly fun to work with, making them perfect for kids' projects. Imagine turning a mundane cardboard box into a magnificent castle or a stack of old newspapers into a colorful collage! These projects not only spark creativity but also teach children the value of reusing materials instead of tossing them away. Let’s dive into some exciting ideas that can transform your recycling bin into a treasure trove of artistic potential.
One of the classic activities that kids love is making paper mache creations. This technique involves soaking strips of paper in a flour-water mixture and layering them over a mold to create sculptures. It’s a fantastic way to let kids express their imagination. For instance, they can create masks for a costume party or even whimsical animals. To get started, all you need is some old newspaper, a balloon (for the mold), and a simple paste made from flour and water. Just remember to let the creations dry completely before painting them!
Another fantastic project is crafting cardboard box structures. Cardboard boxes can morph into anything your child dreams of, from a pirate ship to a cozy little house. The beauty of these projects is that they encourage imaginative play. You can provide your kids with markers, scissors, and some basic craft supplies, and let them design and decorate their structures. A simple cardboard box can become a canvas for creativity, where they can draw, paint, and even add fabric or other embellishments to personalize their creation.
To keep things organized, consider setting up a craft station with all the necessary supplies. Having a designated area for crafting can help minimize mess and make the process more enjoyable. You can include items like scissors, glue, paints, and decorative materials, all within easy reach. This way, your little artists can dive right into their projects without any interruptions.
In addition to these projects, you can also encourage kids to think outside the box (pun intended!) by challenging them to create something entirely new. For example, ask them to come up with a new game using cardboard pieces or to design a storybook using paper cutouts. The possibilities are endless, and the only limit is their imagination!
Engaging in paper and cardboard projects not only fosters creativity but also instills a sense of responsibility towards the environment. By using materials that would otherwise be thrown away, children learn the importance of sustainability in a fun and engaging way. So, gather those old newspapers and cardboard boxes, and let the crafting adventure begin!
Making Paper Mache Creations
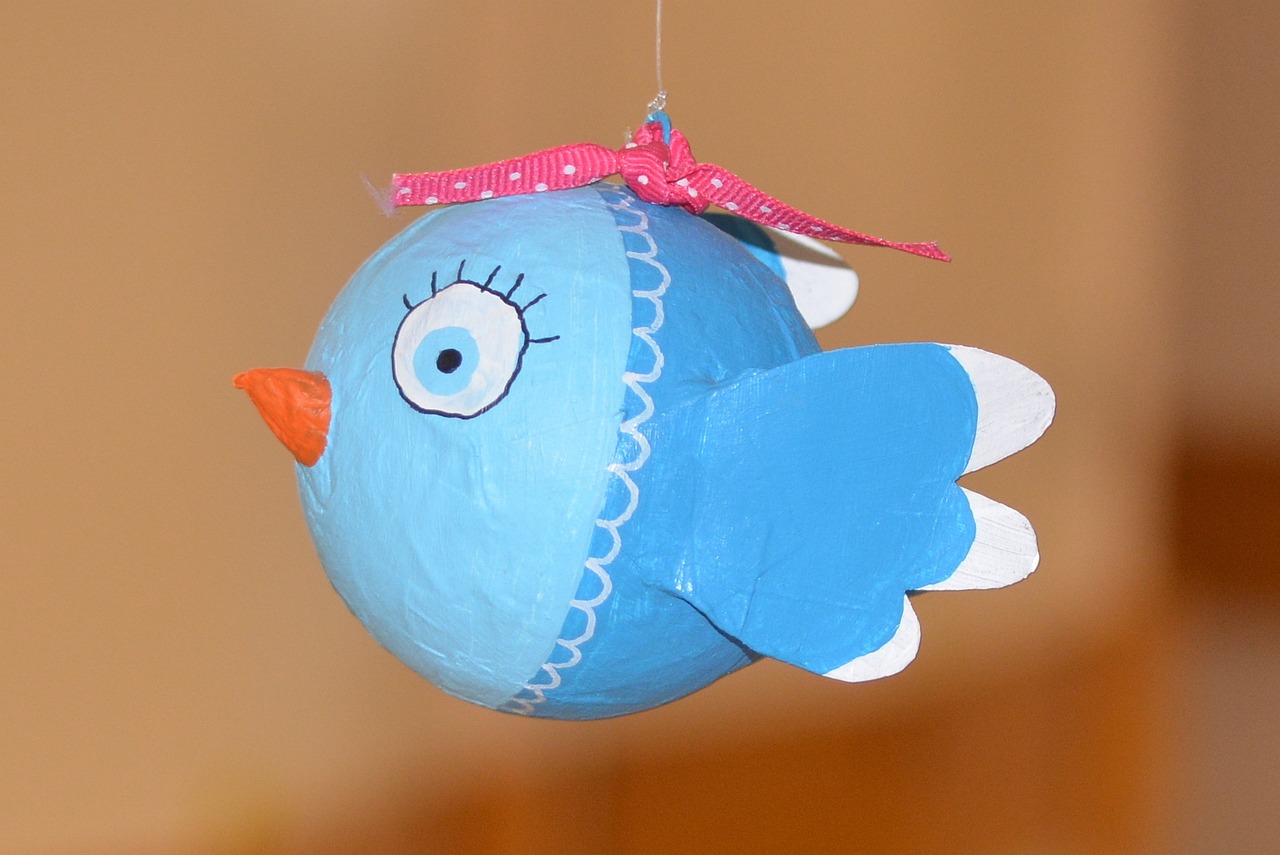
Paper mache is not just a fun craft; it’s a magical way to transform simple, everyday materials into stunning and imaginative creations. Imagine taking old newspapers, mixing them with a bit of glue and water, and then molding them into whatever your heart desires! This hands-on activity is perfect for kids as it not only sparks their creativity but also teaches them the value of reusing materials. The beauty of paper mache lies in its versatility—whether it’s creating colorful masks, whimsical sculptures, or even decorative bowls, the possibilities are endless!
To get started with paper mache, you’ll need a few basic supplies, most of which you likely already have at home. Here’s a quick rundown of what you’ll need:
- Old newspapers or scrap paper
- Flour and water (for the paste)
- A balloon or any mold (to shape your creation)
- Paint and decorations (to finish your masterpiece)
The first step is to prepare your paste. Simply mix one part flour with two parts water in a bowl until you achieve a smooth consistency. This mixture will act as your adhesive. Next, tear the newspaper into strips—this is a great task for kids, as it allows them to get hands-on right from the start! Once your strips are ready, inflate a balloon or use any mold you have chosen. Dip each strip into the paste, ensuring it’s fully coated, and then layer it over your mold. Repeat this process until the entire surface is covered, leaving a small opening if you're using a balloon so you can deflate it later.
After applying several layers, let your creation dry completely, which may take up to 24 hours. Once it’s dry, you can pop the balloon or remove the mold, revealing your paper mache form! Now comes the fun part—painting and decorating your creation. Use non-toxic, eco-friendly paints to add vibrant colors and patterns. Encourage the kids to let their imaginations run wild. They could create anything from a dragon to a flower pot, or even a unique piece of abstract art!
Paper mache not only provides an outlet for creativity but also serves as a wonderful opportunity for kids to learn about recycling and sustainability. By repurposing old newspapers and other materials, they gain a deeper understanding of how their actions can positively impact the environment. So gather those old papers, roll up your sleeves, and dive into the world of paper mache—where waste becomes art!
Q: What types of paper can I use for paper mache?
A: You can use any type of paper, but newspaper is ideal due to its thinness and flexibility. Other options include scrap paper, old magazines, or even tissue paper for a different texture.
Q: How long does it take for paper mache to dry?
A: Drying time can vary depending on the thickness of the layers and the humidity in your environment. Generally, it can take anywhere from 12 to 24 hours for a project to dry completely.
Q: Can I use paint other than eco-friendly options?
A: While you can use regular paint, eco-friendly paints are safer for kids and better for the environment. They are made from natural ingredients and are non-toxic.

Cardboard Box Structures
Cardboard boxes are like magic portals to a world of imagination! With just a few simple cuts and folds, these ordinary items can transform into extraordinary creations that spark joy and creativity in kids. Think about it: a plain cardboard box can become a cozy playhouse, a speedy race car, or even a majestic castle! The possibilities are endless, and the best part is that it encourages children to think outside the box—literally!
To kick off your cardboard crafting adventure, gather some materials. You’ll need:
- Cardboard boxes of various sizes
- Scissors or a craft knife (with adult supervision, of course!)
- Markers, paints, or stickers for decoration
- Glue or tape for assembly
Once you have your supplies ready, it’s time to dive into the fun! Start by brainstorming ideas with your kids. Ask them questions like, "What do you want to build today?" or "If you could create anything from this box, what would it be?" This not only makes them feel involved but also boosts their creativity. You might be surprised by their wild ideas!
Here are a few exciting projects to inspire your cardboard box creations:
- Playhouses: Cut out windows and doors, and let the kids decorate the exterior with paint or markers. Add some cushions inside for a cozy touch!
- Vehicles: Turn a box into a car, boat, or airplane. Paint it in bright colors and add wheels made from bottle caps for an extra touch of realism.
- Animal Habitats: Create a zoo or farm by constructing different enclosures for stuffed animals. Kids can decorate each section and learn about the animals as they play!
Not only does crafting with cardboard boxes provide hours of entertainment, but it also teaches valuable skills such as problem-solving, teamwork, and resourcefulness. As children work together to construct their cardboard masterpieces, they learn how to communicate their ideas and collaborate effectively. Plus, it’s a fantastic way to reinforce the importance of recycling and reusing materials instead of throwing them away.
So, the next time you have a few empty boxes lying around, don’t toss them in the recycling bin just yet! Gather your kids and embark on a cardboard adventure that will ignite their imaginations and create lasting memories. Who knows? You might just end up with the coolest cardboard castle on the block!
Plastic Bottle Crafts
When it comes to recycling, plastic bottles are often overlooked, yet they hold endless possibilities for creative projects! Imagine transforming a simple plastic bottle into something useful or decorative; it’s not just fun, but it also teaches kids the value of reusing materials. You can create everything from bird feeders to planters, and the best part is that these crafts are not only entertaining but also environmentally friendly.
One of the simplest and most engaging projects is making a plastic bottle planter. With just a few cuts and some soil, kids can create their very own mini garden. This project not only gives them a sense of accomplishment but also helps them learn about plant care and responsibility. To make it even more exciting, you can decorate the bottles with paint or markers, turning each planter into a unique piece of art.
Another fantastic idea is to create a bird feeder. By cutting holes in the sides of a plastic bottle and filling it with birdseed, children can attract local wildlife to their backyard. This project is a wonderful way to teach kids about nature and the importance of caring for our feathered friends. They can personalize their feeders with bright colors or even add a perch using a wooden dowel. It’s amazing how something so simple can bring so much joy and learning!
For those who love a bit of whimsy, consider making plastic bottle wind chimes. Cut the bottles into various shapes and sizes, then paint them in vibrant colors. Hang them from a sturdy branch or a porch ceiling, and watch as they dance in the wind, creating a delightful sound. This project not only sparks creativity but also encourages kids to think about sound and motion in art.
To help you get started, here’s a quick overview of some popular plastic bottle craft projects:
| Project | Materials Needed | Benefits |
|---|---|---|
| Planter | Plastic bottle, soil, seeds | Teaches plant care, promotes responsibility |
| Bird Feeder | Plastic bottle, birdseed, dowel | Encourages wildlife observation |
| Wind Chimes | Plastic bottles, paint, string | Enhances creativity, explores sound |
These projects are not only a fantastic way to keep kids engaged but also an opportunity to instill a sense of responsibility towards the environment. By showing them how to repurpose plastic bottles, you’re teaching them that waste can be transformed into something beautiful and useful. So gather those bottles, unleash your creativity, and enjoy the fun of crafting together!
Q: What types of plastic bottles are best for crafting?
A: Any clean and empty plastic bottle will work, but larger bottles like 2-liter soda bottles are particularly versatile for many projects.
Q: Are there any safety tips for crafting with kids?
A: Yes! Always supervise children when using scissors or sharp tools, and ensure they wear protective gear if needed. It's also a good idea to use non-toxic paints and adhesives.
Q: How can I encourage my kids to be more creative with recycling?
A: Lead by example! Show them your own projects, provide a variety of materials, and encourage them to think outside the box. Let them come up with their own ideas and designs!
Upcycling Clothing and Textiles
Upcycling clothing and textiles is not just a fun activity; it’s a fantastic way for kids to learn about sustainability while expressing their creativity. Imagine transforming that old t-shirt with a stain into a stylish tote bag or using fabric scraps to create vibrant art pieces. This process of upcycling not only reduces waste but also fosters a sense of resourcefulness in children. They begin to understand that the value of an item isn't solely based on its condition but also on its potential to be reinvented into something new and exciting.
One of the most rewarding aspects of upcycling is the opportunity to create something practical out of items that would otherwise end up in the trash. For instance, kids can take their worn-out clothes and give them a new life. This encourages them to think outside the box and see the possibilities in what they might consider garbage. By engaging in these projects, children also develop fine motor skills and an appreciation for craftsmanship.
Here are a couple of engaging projects that can be done with old clothing:
- Creating Tote Bags from T-Shirts: This is a simple yet effective way to recycle old t-shirts. Kids can cut and tie the shirt to make a functional bag that they can use for shopping or carrying their belongings. It’s not only practical but also a great way for kids to showcase their personal style!
- Making Fabric Scrap Art: Gather those leftover fabric pieces and let the imagination run wild! Kids can create stunning collages, patchwork designs, or even plush toys. This project not only utilizes scraps but also allows for endless creativity.
Incorporating these projects into your child's routine can spark a lifelong interest in sustainability. By showing them how easy and fun it is to upcycle, you're helping them understand the importance of reducing waste and being responsible consumers. Plus, the joy of seeing their creations come to life is truly priceless!
Q: What materials do I need for upcycling clothing projects?
A: You typically need old clothing items, scissors, sewing supplies (if applicable), and any additional embellishments like buttons or fabric paint to enhance your projects.
Q: Are upcycling projects safe for kids?
A: Yes, most upcycling projects are safe for kids, especially those that do not involve sharp tools or hazardous materials. Always supervise younger children and provide them with age-appropriate tasks.
Q: Can upcycling clothing save money?
A: Absolutely! Upcycling allows you to create new items from what you already have, which can save money on new purchases while also being environmentally friendly.
Creating Tote Bags from T-Shirts
Transforming old t-shirts into tote bags is not just a fun and creative activity; it’s also a fantastic way to teach kids about sustainability and resourcefulness. Imagine the excitement on their faces as they turn a worn-out shirt into something practical and stylish! With a few simple steps, you can guide your children through this engaging project that not only reduces waste but also sparks their creativity.
To get started, gather the following materials:
- Old t-shirts (preferably cotton for ease of cutting and tying)
- Scissors
- Fabric markers (optional, for decoration)
- Ruler (to measure and cut straight lines)
Once you have your materials ready, you can dive into the crafting process. Here’s a simple step-by-step guide to help you and your kids create your very own tote bags:
- Choose Your T-Shirt: Pick a t-shirt that you no longer wear. The brighter and more colorful, the better!
- Cut the Sleeves: Use scissors to cut off the sleeves of the t-shirt. This will create an opening for the bag's handles.
- Cut the Neckline: Next, cut around the neckline to create a wider opening for easy access to the bag.
- Fringe the Bottom: Cut fringe along the bottom of the shirt, about 6-8 inches deep. Make sure to cut evenly across the entire bottom.
- Tie the Fringe: Take the front and back pieces of fringe and tie them together in knots. This will close the bottom of the bag and create a sturdy base.
- Decorate (Optional): Let your kids use fabric markers to draw or write on their new tote bags. This personal touch makes the bag truly one-of-a-kind!
And just like that, you have a unique tote bag ready to be used for shopping, carrying books, or even as a stylish accessory at the park! The best part is that this project not only repurposes old clothing but also encourages kids to think creatively about how they can reuse items that might otherwise end up in the trash.
In addition to being an enjoyable crafting experience, creating tote bags from t-shirts can also open up discussions about fashion waste and the importance of reducing our carbon footprint. Encourage your little ones to think about how many t-shirts they have that they no longer wear and how many others might be out there waiting for a new life.
So, gather those old t-shirts and get crafting! You’ll not only create something useful but also foster a sense of environmental responsibility in your kids. Plus, it’s a great way to spend quality time together and unleash your inner artists!
Q: Can I use any type of t-shirt for this project?
A: Yes, you can use any old t-shirt, but cotton shirts work best since they are easier to cut and tie.
Q: What if I don’t have fabric markers?
A: If you don’t have fabric markers, you can use regular markers or even fabric paint to decorate your tote bag.
Q: Is this project suitable for younger kids?
A: Absolutely! Just make sure to supervise them while using scissors, and they can help with tying the knots and decorating the bags.

Making Fabric Scrap Art
Have you ever looked at a pile of fabric scraps and thought, "What on earth can I do with these?" Well, get ready to unleash your inner artist because making fabric scrap art is not only fun but also a fantastic way to reduce waste! Imagine transforming those leftover bits of fabric into vibrant, eye-catching masterpieces that can adorn your walls or be used as gifts. This activity is perfect for kids, as it encourages creativity while teaching them the importance of reusing materials.
To get started, gather up any fabric scraps you have lying around. These could be remnants from old clothing, leftover pieces from sewing projects, or even fabric swatches you’ve collected over time. The beauty of fabric scrap art is that you don’t need to have precise shapes or colors; in fact, the more eclectic your collection, the more unique your artwork will be!
Once you have your fabric ready, you can dive into various techniques. One popular method is to create a fabric collage. Start by choosing a canvas or a sturdy piece of cardboard as your base. Then, cut the fabric scraps into different shapes—think triangles, circles, and squares. Lay them out on your canvas to create a design you love. Don’t be afraid to overlap pieces or mix patterns; this is all about expressing your creativity!
After you’re satisfied with your layout, it’s time to adhere the fabric. You can use a simple homemade glue made from flour and water, or opt for a non-toxic craft glue. Apply the glue generously to the back of each fabric piece and press it down firmly onto the canvas. Allow it to dry completely before adding any additional embellishments, like buttons, beads, or even drawings with fabric markers. These little touches can really make your fabric art pop!
For those who want to take their fabric scrap art to the next level, consider making a fabric scrap quilt. This project is a bit more involved but incredibly rewarding. You can sew together your fabric scraps into squares or rectangles, creating a patchwork effect. Not only will this result in a cozy blanket, but it also serves as a beautiful reminder of your creative journey. Plus, it’s a great way to practice sewing skills!
As you embark on your fabric scrap art adventure, keep in mind that the goal is to have fun and experiment. There’s no right or wrong way to create art, especially when it comes to reusing materials. So, gather your scraps, invite some friends over, and let your imaginations run wild. The only limit is your creativity!
- What types of fabric can I use for scrap art? You can use almost any fabric, including cotton, felt, denim, and even old t-shirts. Just make sure they are clean and free from any major stains.
- Do I need special tools to create fabric scrap art? While basic scissors and glue are essential, having a sewing machine can enhance your projects. However, many fabric scrap art projects can be done by hand.
- Can I involve younger kids in this activity? Absolutely! Just supervise them closely, especially when using scissors or glue, and let them explore their creativity at their own pace.
Eco-Friendly Paints and Supplies
In today's world, where sustainability is becoming increasingly important, using in crafting is a fantastic way to teach kids about environmental responsibility. Not only do these materials reduce harmful emissions and waste, but they also encourage creativity without compromising health. Imagine the joy on a child's face when they realize they can create vibrant art using materials that are safe for them and the planet!
One of the best ways to engage children in eco-friendly crafting is by using natural ingredients to create paints. For instance, DIY natural dyes can be made from fruits, vegetables, and even spices. Think about using beet juice for a rich red, turmeric for a sunny yellow, or spinach for a refreshing green. Not only are these colors beautiful, but they also allow kids to explore their creativity while learning about the origins of the materials they are using. Here’s a simple recipe to get started:
| Ingredient | Color | How to Use |
|---|---|---|
| Beet Juice | Red | Extract juice by blending and straining beets. |
| Turmeric Powder | Yellow | Dissolve in water to create a vibrant paint. |
| Spinach | Green | Blend spinach leaves with water and strain. |
Additionally, making your own homemade glue is an exciting project that can further enhance your eco-friendly crafting experience. Instead of relying on commercial adhesives that often contain harmful chemicals, you can use simple ingredients to create a safe alternative. A basic recipe involves mixing flour and water to form a paste. This glue works well for paper crafts and is non-toxic, making it perfect for kids. Here’s how to make it:
1. Mix 1 cup of flour with 1 cup of water in a bowl.
2. Stir until smooth, adding more water if necessary to reach desired consistency.
3. Store in an airtight container for up to a week.
By using these natural materials, kids not only get to enjoy the process of crafting but also gain a deeper understanding of the impact their choices have on the environment. It’s a win-win situation! You can even encourage them to experiment with different ingredients to see what colors they can create, fostering a sense of exploration and innovation.
In summary, incorporating eco-friendly paints and supplies into your crafting projects is a wonderful way to promote sustainability while sparking creativity in kids. By choosing natural ingredients and making your own materials, you create a fun, educational environment that teaches valuable lessons about caring for our planet. So, gather your fruits and veggies, roll up those sleeves, and let the crafting begin!
Q: What are eco-friendly paints made from?
A: Eco-friendly paints are typically made from natural ingredients such as plants, minerals, and non-toxic substances. They avoid harmful chemicals found in conventional paints.
Q: Can kids use homemade paints safely?
A: Yes! Homemade paints made from fruits, vegetables, and natural ingredients are safe for kids. Just ensure they don’t ingest any materials while crafting.
Q: How long do natural dyes last?
A: Natural dyes can fade over time, especially when exposed to sunlight. However, they can last for several months if stored properly in a cool, dark place.
DIY Natural Dyes
Creating natural dyes from fruits and vegetables is not just an exciting project; it's a fantastic way for kids to learn about colors and the world around them! Imagine transforming a simple carrot or beet into a vibrant hue that can be used for coloring fabrics or crafting projects. This hands-on activity not only fosters creativity but also instills a sense of environmental responsibility as children discover how to utilize what nature provides. Plus, it’s a wonderful way to engage them in discussions about sustainability and the importance of using natural resources wisely.
To get started, you’ll need a few common kitchen items that can easily be found in your pantry or refrigerator. Here’s a quick guide on how to create your own natural dyes:
| Material | Color Produced | Instructions |
|---|---|---|
| Beets | Bright Pink/Red | Chop beets and boil them in water for about 30 minutes. Strain the liquid and use it as a dye. |
| Spinach | Green | Blend fresh spinach with water, strain, and use the liquid for dyeing. |
| Turmeric | Yellow | Dissolve turmeric powder in hot water and stir well to create a vibrant yellow dye. |
| Red Cabbage | Blue/Purple | Chop red cabbage and boil in water. The dye changes color depending on the pH of the fabric! |
Once you have your natural dyes ready, it’s time to experiment! You can use plain cotton or wool fabrics to see how the colors turn out. Encourage the kids to dip, soak, or even paint with the dyes. Each method will yield different results, and that’s part of the magic! It’s a bit like a science experiment where the outcome is as unpredictable as it is beautiful.
Don’t forget to talk about the environmental impact of using natural dyes compared to synthetic ones. By using what we have at home, we reduce waste and minimize our carbon footprint. Plus, it’s a great way to teach kids about the life cycle of materials and how they can contribute to a more sustainable future.
So gather your materials, roll up your sleeves, and dive into the colorful world of DIY natural dyes. It’s a fun, educational, and eco-friendly project that will leave lasting memories and perhaps even inspire a lifelong love for crafting and sustainability.
- What fabrics work best for natural dyeing? Natural fibers like cotton, linen, and wool absorb dyes better than synthetic fabrics.
- How long do natural dyes last? Natural dyes can fade over time, especially with washing and exposure to sunlight, but they can last a long time if properly cared for.
- Can I mix different natural dyes? Absolutely! Mixing dyes can create unique shades and colors, so feel free to experiment!

Homemade Glue and Adhesives
Creating your own homemade glue and adhesives is not only a fun project for kids, but it also promotes sustainability by using everyday ingredients found around the house. Imagine transforming simple items like flour, sugar, or cornstarch into a sticky solution that can hold your crafts together! Not only does this activity teach kids about resourcefulness, but it also allows them to experiment with different textures and consistencies.
One of the easiest recipes for homemade glue involves just a few ingredients. Here’s a simple guide to making your own glue:
- Flour Glue: Mix 1 part flour with 2 parts water in a saucepan. Stir over medium heat until it thickens. Let it cool before using.
- Sugar Glue: Combine equal parts sugar and water in a pot. Heat until the sugar dissolves, then let it cool. This glue is great for lightweight materials.
- Cornstarch Glue: Mix 1 tablespoon of cornstarch with 2 tablespoons of water. Heat until it thickens. This glue works well for paper crafts.
These recipes are not only safe for kids but also easy to clean up, making them perfect for crafting sessions. With homemade glue, kids can let their creativity run wild without worrying about toxic substances. Plus, they can enjoy the satisfaction of knowing they made the glue themselves!
When using homemade glue, it's important to keep in mind that it may not have the same strength as store-bought options. However, it works wonderfully for most craft projects, especially when working with paper, cardboard, and other lightweight materials. Encourage kids to test their creations and see how well their homemade glue holds up. This can lead to discussions about the properties of different adhesives and how they work, fostering a deeper understanding of the materials they are using.
As an added bonus, you can turn this glue-making activity into a fun science experiment. Have the kids measure the ingredients, observe the changes as they heat the mixture, and even try to modify the recipes to create different types of glue. This hands-on approach not only makes crafting more exciting but also integrates learning into the process.
So, the next time you’re gearing up for a crafting day, consider whipping up some homemade glue. It’s a fantastic way to engage kids in both art and science while promoting a sustainable mindset. Plus, it’s a great conversation starter about the importance of using eco-friendly materials in our projects!
Q: Is homemade glue safe for children?
A: Yes! Most homemade glue recipes use common kitchen ingredients that are safe for children, making them perfect for crafting.
Q: How long does homemade glue last?
A: Homemade glue can typically last about a week if stored in an airtight container in the refrigerator. However, it’s best to use it fresh for optimal results.
Q: Can I use homemade glue for heavier materials?
A: While homemade glue works well for lightweight materials like paper and cardboard, it may not hold up as effectively for heavier items. For those projects, consider using a stronger adhesive.
Organizing a Recycling Craft Day
Organizing a Recycling Craft Day can be an incredibly fun and fulfilling experience, not just for the kids, but for the entire community or family. Imagine a day filled with laughter, creativity, and the joy of transforming waste into wonderful crafts! To kick things off, you’ll want to gather everyone’s enthusiasm and ideas. Start by choosing a date that works for most people and consider the weather if you're planning to host it outdoors. The goal is to create a vibrant atmosphere where everyone feels welcome to explore their creative side.
Once you have a date in mind, it's time to spread the word! You can use various methods to invite friends and family, such as sending out colorful invitations or creating a fun event page on social media. Don't forget to highlight the theme of recycling and crafting, as this will spark interest and excitement. You might even want to include a short note about what materials to bring along, encouraging everyone to rummage through their homes for items that can be repurposed.
Next, consider setting up craft stations to keep the event organized and engaging. Each station can focus on a different type of craft, allowing kids to rotate and try their hands at various projects. For example, you could have a paper mache station, a plastic bottle crafting area, and a textile upcycling corner. This not only keeps kids entertained but also encourages them to learn new skills and techniques. You can even create a simple table layout like the one below to plan out your stations:
| Craft Station | Materials Needed | Activity Description |
|---|---|---|
| Paper Mache | Old newspapers, flour, water, balloons | Create fun sculptures or masks! |
| Plastic Bottle Crafts | Empty plastic bottles, scissors, paint | Transform bottles into planters or bird feeders. |
| Textile Upcycling | Old clothes, fabric scraps, sewing supplies | Make tote bags or colorful fabric art. |
As the day unfolds, encourage collaboration and teamwork among the kids. Perhaps set up a show-and-tell session at the end of the day where everyone can display their creations. This not only boosts their confidence but also allows them to appreciate each other's efforts and creativity. It’s a wonderful way to celebrate their hard work and reinforce the idea that recycling can lead to beautiful and useful items.
Finally, don’t forget to provide snacks and drinks to keep everyone energized! You could even incorporate some eco-friendly options to tie back to the theme of sustainability. After all, a happy and nourished group is more likely to unleash their creativity! With a little planning and enthusiasm, your Recycling Craft Day can become a cherished event that inspires kids to think about sustainability and the environment in a fun and hands-on way.
Q: What age group is best for a Recycling Craft Day?
A: A Recycling Craft Day is suitable for kids of all ages! Just ensure that the projects are age-appropriate and that younger children have adult supervision for safety.
Q: What materials should I ask participants to bring?
A: Encourage participants to bring items like old newspapers, cardboard boxes, plastic bottles, and unwanted clothing. The more diverse the materials, the more creative the projects!
Q: How can I ensure the event is eco-friendly?
A: Use biodegradable plates and cups for snacks, minimize waste by encouraging people to bring their own reusable containers, and consider using natural or homemade paints and glues for crafts.
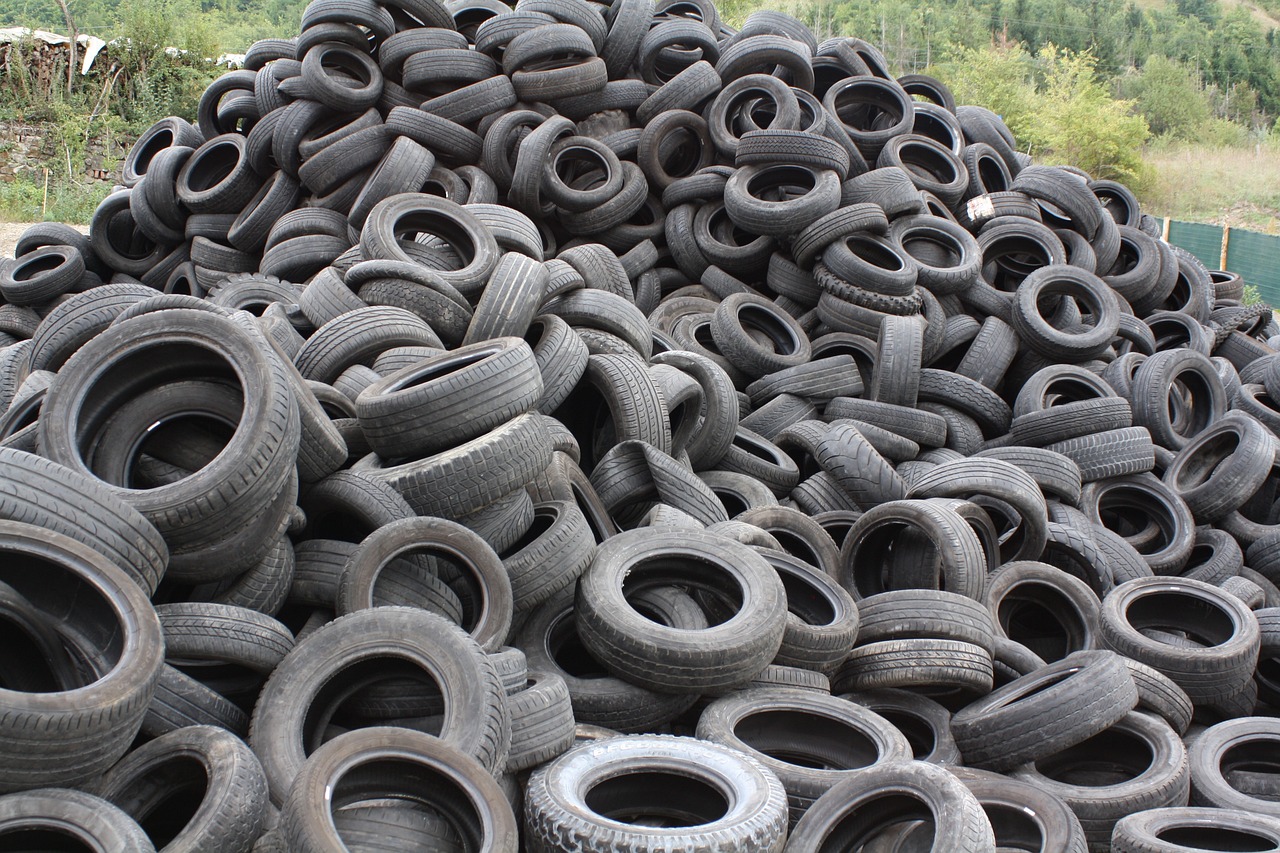
Inviting Friends and Family
Inviting friends and family to join in on a recycling craft day can turn an ordinary afternoon into an extraordinary adventure filled with creativity and laughter. Imagine the joy of watching kids transform ordinary trash into treasures while bonding with their loved ones. It’s not just about crafting; it’s about creating memories! So how do you get everyone on board? Start by sending out enthusiastic invitations that convey the excitement of the day. You can use colorful paper or even create digital invites featuring some of the projects you’ll tackle together.
Consider mentioning the benefits of recycling and crafting in your invitations. Highlight how this event can be a fun and educational experience for everyone involved. You might say something like, “Join us for a fun-filled day of crafting where we’ll turn waste into wonderful art! Let’s make a difference together while having a blast!” This not only sets the tone but also emphasizes the importance of the activity.
When planning the event, think about the space you have available. Will it be indoors or outdoors? Do you have enough tables and chairs? Make sure to prepare your crafting area so it’s inviting and organized. You might want to set up a few different crafting stations, each dedicated to a specific project. This way, everyone can choose what they want to work on, keeping the energy high and the creativity flowing.
If you’re worried about logistics, you can create a simple schedule for the day. Include time for introductions, crafting, and perhaps a snack break. A well-organized event can help everyone feel comfortable and engaged. To make it even more exciting, consider adding a friendly competition element. For example, you could have a “Best Craft” award, where everyone votes for their favorite project at the end of the day. This adds a fun twist and encourages participants to showcase their creativity!
Lastly, don’t forget to follow up with your guests after the event. Share photos of the creations and express gratitude for their participation. This can foster a sense of community and encourage them to join you for future crafting days. Remember, the goal is to have fun, inspire creativity, and promote the importance of recycling. So grab those scissors, glue, and recycled materials, and get ready for a day filled with joy and imagination!
Setting Up Craft Stations
Creating designated craft stations is a fantastic way to streamline the crafting process and keep kids engaged. Imagine walking into a vibrant room filled with creativity, where each station is a new adventure waiting to unfold! By setting up different areas for various projects, you not only make it easier for kids to navigate their crafting experience but also encourage them to explore their creativity in a structured way.
Start by identifying the different types of projects you want to include in your recycling craft day. For instance, you might have a paper mache station, a plastic bottle craft area, and a textile upcycling zone. Each station should be equipped with all the necessary materials and tools needed for that specific project. This way, kids can easily jump from one creative endeavor to another without any interruptions.
To keep things organized, consider using tables or large trays to set up each station. Labeling each area can also help the little ones understand what they’ll be making. You could use colorful signs or even let the kids decorate the labels themselves! This adds an extra layer of fun and ownership to the crafting experience. Here’s a simple example of what your craft station setup might look like:
| Craft Station | Materials Needed | Project Idea |
|---|---|---|
| Paper Mache | Newspaper, flour, water, balloons | Sculptures and masks |
| Plastic Bottle Crafts | Plastic bottles, scissors, paint, markers | Bird feeders, planters |
| Textile Upcycling | Old t-shirts, scissors, fabric glue | Tote bags, fabric art |
Don't forget to create a space for cleanup! Crafting can get messy, so having a designated area with wipes, trash bins, and recycling containers will help keep everything tidy and teach kids about the importance of cleaning up after themselves. Plus, it’s a great opportunity to reinforce the recycling message by encouraging them to sort their scraps properly.
Lastly, consider incorporating a rotation system where kids can move from one station to another after a set amount of time. This keeps the energy high and allows them to experience a variety of projects throughout the day. With a little planning and creativity, your craft stations will not only be organized but also bursting with fun and inspiration!
Q: What age group is suitable for these recycling craft projects?
A: These projects are designed for children aged 5 and up, but with adult supervision, younger kids can participate in simplified versions.
Q: How can I ensure safety during crafting?
A: Always supervise children, especially when using scissors or other sharp tools. Provide age-appropriate materials and ensure that all supplies are non-toxic.
Q: What if I don’t have all the materials listed?
A: Get creative! Many crafting projects can be adapted based on the materials you have at home. The goal is to inspire creativity and resourcefulness.
Frequently Asked Questions
- What are some easy recycling projects for kids?
There are plenty of fun and easy recycling projects for kids! Some popular ones include making paper mache sculptures, creating tote bags from old t-shirts, and turning plastic bottles into planters or bird feeders. These projects not only spark creativity but also teach kids about the importance of reusing materials.
- How can I encourage my children to recycle?
Encouraging kids to recycle can be as simple as making it fun! Start by involving them in recycling activities at home, like sorting materials or crafting with recyclables. You can also explain the benefits of recycling through engaging stories or games. The more they understand its importance, the more likely they are to adopt these habits.
- What materials can we use for recycling crafts?
You can use a variety of materials for recycling crafts! Common household items include cardboard boxes, old newspapers, plastic bottles, fabric scraps, and even glass jars. The key is to look at everyday waste items and think creatively about how they can be transformed into something new and exciting.
- Are there any eco-friendly supplies for crafting?
Absolutely! There are many eco-friendly supplies available for crafting. Look for non-toxic paints, natural glues, and even homemade dyes made from fruits and vegetables. These materials are not only safe for kids but also help instill a sense of environmental responsibility while crafting.
- How do I organize a recycling craft day?
Organizing a recycling craft day can be a blast! Start by inviting friends and family to join in the fun. Set up different craft stations with various projects to keep everyone engaged. Make sure to have plenty of recycled materials on hand and encourage participants to bring their own items. This way, everyone can contribute to a creative and sustainable crafting experience!


