
Creating Functional Artwork: Crafting a Wooden Pipe
In a world where mass-produced items dominate the market, the allure of handmade creations stands out like a beacon of individuality. Crafting a wooden pipe is more than just a project; it’s an opportunity to blend artistry with functionality. Imagine holding a piece of art that not only looks stunning but also serves a practical purpose. This article will guide you through the intricate process of designing and crafting your very own wooden pipe, exploring the materials, techniques, and sheer joy that comes from creating something with your own hands.
When it comes to crafting a wooden pipe, selecting the right type of wood is crucial. Not all woods are created equal; each variety brings its own unique characteristics that can significantly affect both the pipe's appearance and the smoking experience. For instance, maple is known for its durability and smooth grain, making it an excellent choice for beginners. On the other hand, cherry wood offers a rich color and pleasant aroma, enhancing the overall experience. Here are a few popular woods to consider:
- Maple: Durable and smooth, ideal for beginners.
- Cherry: Beautiful color and aromatic qualities.
- Oak: Strong and resilient, perfect for long-lasting pipes.
- Mahogany: Offers a deep, rich color and is easy to work with.
Choosing the right wood not only impacts the aesthetics but also the longevity and functionality of your pipe. So take your time, explore your options, and pick a wood that resonates with your personal style!
Before diving into the crafting process, it’s essential to gather the right tools and materials. Having everything at your fingertips not only makes the project smoother but also more enjoyable. Here’s a rundown of the necessary equipment you’ll need:
Cutting tools are the backbone of any woodworking project. Understanding the various cutting tools required for shaping wood can enhance precision and efficiency. Here are some must-have tools:
- Saws: A band saw or coping saw works great for making intricate cuts.
- Chisels: Essential for detailed work and shaping.
- Drills: Necessary for creating the bowl and stem holes.
Chisels and gouges play a significant role in detailing and refining the pipe’s design. Their versatility allows you to create smooth curves and intricate patterns that elevate your pipe from ordinary to extraordinary. Using a variety of sizes can help you achieve different effects, so be sure to invest in a good set.
Once you have shaped your pipe, proper sanding and finishing are essential for achieving a smooth and polished surface. Using a range of sandpaper grits—from coarse to fine—will help you eliminate any rough edges and prepare the wood for finishing. Additionally, consider using finishing oils or waxes to enhance the wood’s natural beauty while providing protection against wear and tear.
Assembling the components of your wooden pipe requires skill and attention to detail. It’s important to ensure that each part fits snugly and functions correctly. A few techniques to keep in mind include:
- Dry fitting: Assemble the parts without glue first to check the fit.
- Using clamps: Clamps can help hold pieces together while the glue dries.
- Checking airflow: Make sure the airflow is unobstructed for a smooth smoking experience.
Creating a unique design is where your artistry truly shines. This is the stage where you can let your creativity flow. Think about the shapes and sizes that appeal to you. Are you drawn to a classic, elegant look, or do you prefer something more modern and edgy? The choice is yours!
Adding personal flair to your pipe can make it truly one-of-a-kind. Consider engraving your initials or a meaningful symbol on the pipe. You could also experiment with different colors or finishes to reflect your personality. Remember, this is your creation, and it should tell your story.
While aesthetics are important, balancing them with functionality is key to a successful pipe design. Essential features to consider include:
- Airflow: Ensure that the design allows for easy airflow to enhance the smoking experience.
- Bowl Size: Choose a bowl size that matches your smoking preferences—larger for longer sessions, smaller for quick hits.
By keeping these functional aspects in mind, you can create a beautiful pipe that performs well, ensuring that your artistic endeavor is also practical.
Q: What type of wood is best for beginners?
A: Maple and cherry are excellent choices for beginners due to their workability and aesthetic appeal.
Q: How long does it take to craft a wooden pipe?
A: The time can vary, but expect to spend several hours to a few days depending on your skill level and design complexity.
Q: Can I customize my pipe design?
A: Absolutely! Personalizing your pipe is part of the fun. Feel free to experiment with shapes, engravings, and finishes.

Choosing the Right Wood
When it comes to creating a wooden pipe, is paramount. Not only does the type of wood influence the overall look of your pipe, but it also affects the smoking experience. Imagine sipping a fine wine from a delicate glass versus a rugged mug; the material can transform the entire experience! Each type of wood carries its own unique characteristics, which can enhance both the aesthetics and functionality of your creation. So, what should you consider when selecting your wood?
First off, you need to think about durability. Some woods are naturally more resilient than others, which is essential for a pipe that will be used regularly. Hardwoods like maple, oak, and cherry are excellent choices because they can withstand heat and wear. On the other hand, softer woods like pine may look great but can warp or crack under heat. Thus, if you want your pipe to last, opt for a hardwood.
Next, let’s talk about appearance. The grain, color, and texture of the wood can make your pipe truly stand out. For instance, mahogany offers a rich, deep color that can be stunning when polished, while walnut presents a beautiful contrast with its dark tones and striking grain patterns. If you’re aiming for a more rustic look, consider birch, which has a lighter color and a unique texture. Remember, your choice of wood is not just about functionality; it’s also about making a statement!
Another important factor is smoking properties. Different woods can impart various flavors to the smoke, which can enhance or detract from the experience. For instance, some enthusiasts prefer briar wood for its heat resistance and ability to absorb moisture, leading to a cleaner smoke. Others might choose olive wood for its aromatic qualities. If you’re uncertain about what to choose, consider experimenting with a few different types to discover what you enjoy most.
To help you navigate your options, here’s a quick comparison of popular woods used in pipe making:
| Wood Type | Durability | Flavor Profile | Aesthetic Appeal |
|---|---|---|---|
| Briar | High | Neutral | Rich grain |
| Maple | Medium | Sweet | Light color |
| Cherry | Medium | Fruity | Warm tones |
| Olive | Medium | Aromatic | Unique patterns |
| Walnut | High | Earthy | Dark color |
In conclusion, the process of for your wooden pipe is a blend of art and science. It requires careful consideration of durability, appearance, and smoking properties. By selecting the right wood, you're not just crafting a pipe; you're creating a unique piece of art that reflects your style and enhances your smoking experience. So, take your time, explore your options, and remember: the right wood can make all the difference!
Essential Tools and Materials
When embarking on the journey of crafting a wooden pipe, having the right tools and materials is not just important; it's essential. Think of it like preparing for a grand adventure: you wouldn’t set out without the proper gear, would you? The same principle applies here. The tools you choose will not only affect the quality of your work but also the enjoyment of the process. So, let’s dive into what you’ll need to get started!
First and foremost, you’ll need to select your wood. The type of wood you choose can significantly influence both the appearance and functionality of your pipe. Popular choices include maple, cherry, and olive wood, each bringing its own unique characteristics to the table. Maple, for instance, is known for its durability and fine grain, while cherry offers a warm hue that deepens with age. The choice of wood is akin to selecting the canvas for a masterpiece; it sets the stage for your creativity to unfold.
Next, let’s talk about the tools. A well-equipped workspace is like a chef's kitchen—it allows you to create without limitations. Here are some of the essential tools you’ll need:
- Saws: A band saw or coping saw is ideal for cutting the wood into the desired shape. Precision is key here, so opt for a tool that you can handle comfortably.
- Chisels and Gouges: These are your best friends when it comes to detailing. A variety of sizes will allow you to create intricate designs and smooth out rough edges.
- Sandpaper: Different grits of sandpaper are crucial for achieving that silky smooth finish. Start with a coarser grit to shape your pipe and work your way to finer grits for polishing.
- Finishing Tools: Consider using oils or waxes to protect and enhance the wood’s natural beauty. These finishing touches can make all the difference in the final product.
As you gather your tools, don’t forget about safety equipment. A good pair of safety goggles and a dust mask will protect you from flying debris and fine wood dust. Remember, safety first! Just like wearing a seatbelt in a car, it’s a small step that can prevent big problems.
Once you have your tools ready, you’ll also want to gather some materials that will help you in the assembly process. This includes items like wood glue for securing joints, drill bits for creating airflow passages, and possibly a pipe stem if you’re designing a more complex piece. Think of these materials as the seasoning in your dish; they enhance the overall experience and functionality of your creation.
In summary, the right tools and materials are the backbone of your wooden pipe crafting project. They not only facilitate the process but also inspire creativity and innovation. So, as you prepare to embark on this exciting journey, ensure you have everything you need at your fingertips. After all, a well-prepared artisan is a successful one!
Q1: What type of wood is best for making a wooden pipe?
A1: Woods like maple, cherry, and olive are popular choices due to their durability and aesthetic appeal. Each type has unique characteristics that can enhance your smoking experience.
Q2: What tools do I need to start crafting a wooden pipe?
A2: Essential tools include saws, chisels, gouges, sandpaper, and finishing tools. Safety equipment like goggles and dust masks are also important for protection.
Q3: How can I ensure my wooden pipe is functional?
A3: Pay attention to airflow and bowl size when designing your pipe. Balancing aesthetics with functionality is key to creating a successful piece.
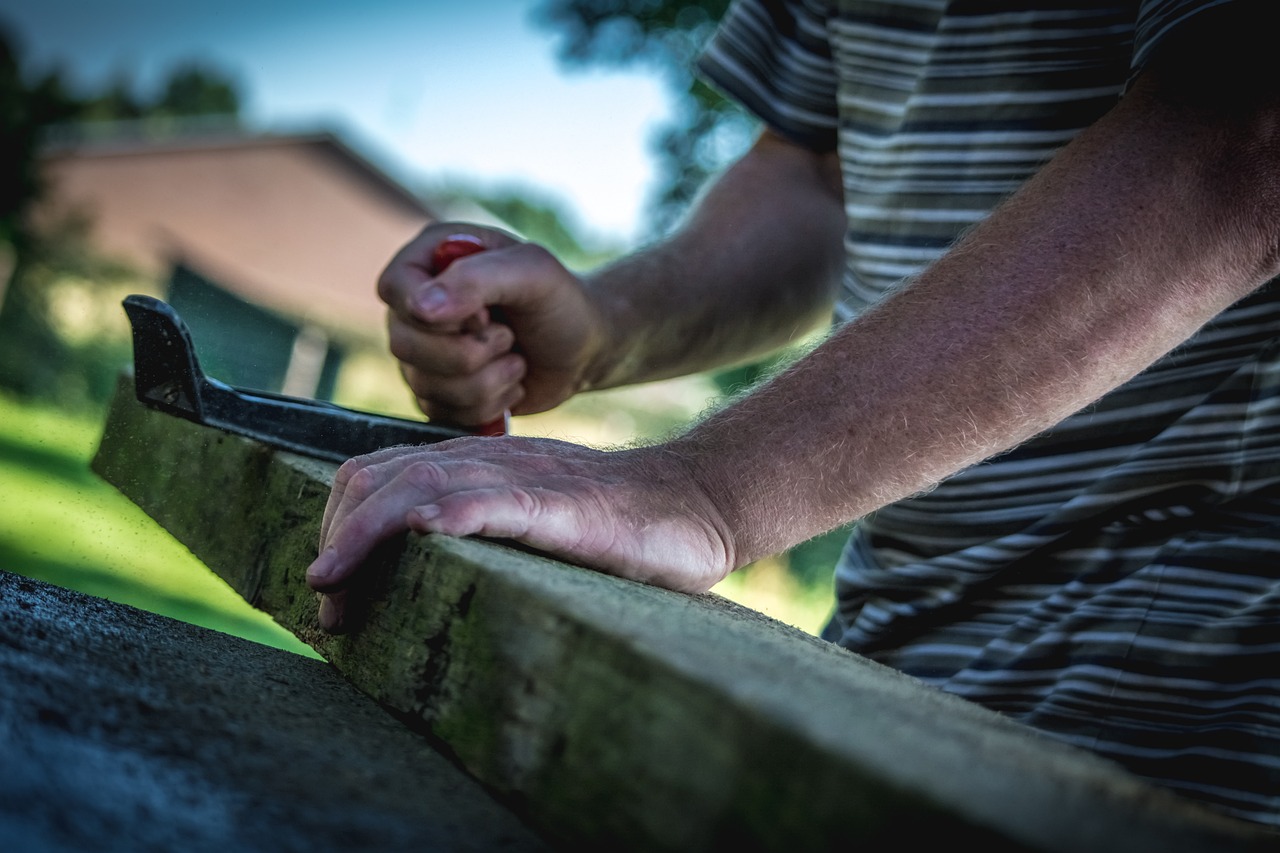
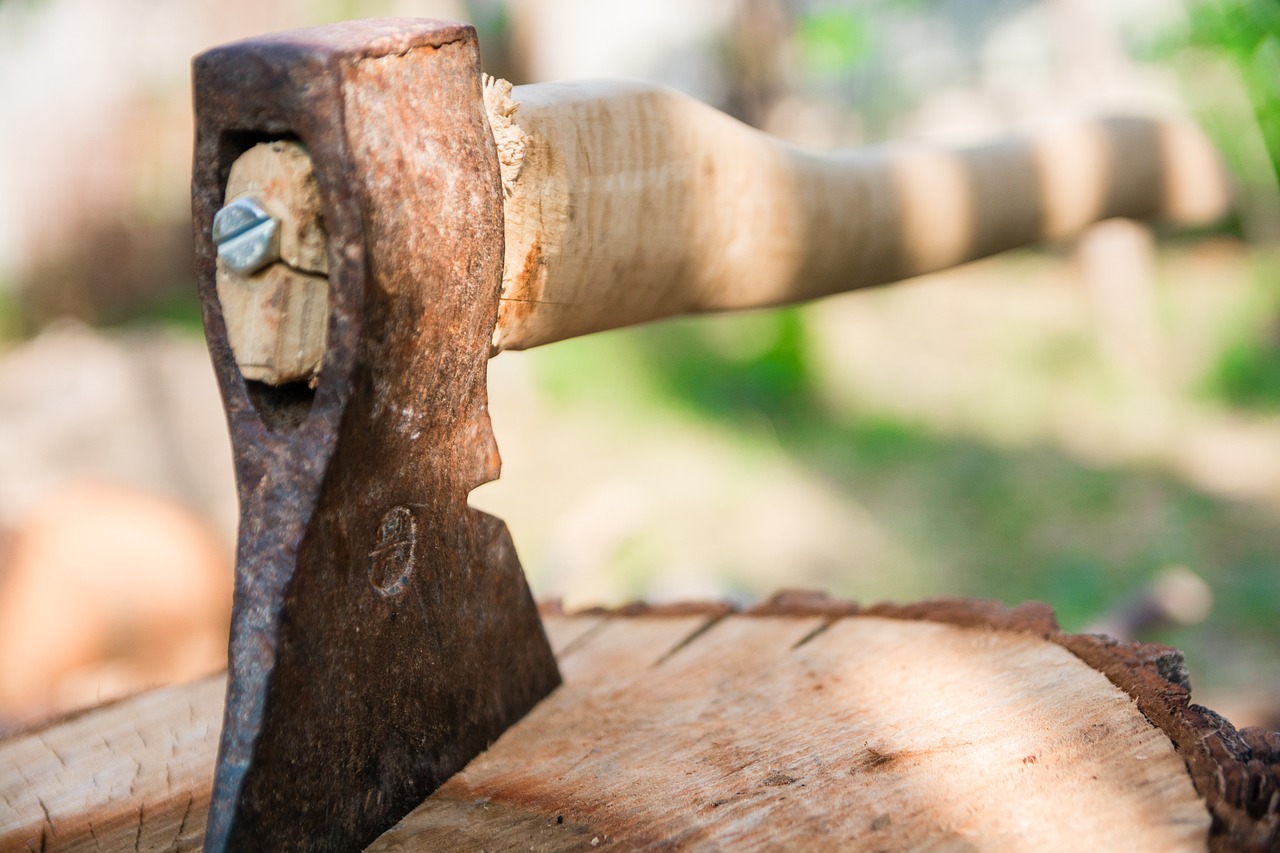
Cutting Tools
When it comes to crafting a wooden pipe, the right cutting tools are your best friends. They can make or break your project, transforming a simple block of wood into a stunning piece of functional art. To kick off your journey, you’ll want to familiarize yourself with some essential cutting instruments. Not only will they enhance your precision, but they’ll also significantly boost your efficiency. Imagine trying to carve a masterpiece with a dull knife—it just won’t cut it, right?
First on the list is the **saw**, a fundamental tool that comes in various forms. Whether you prefer a hand saw for that intimate, hands-on feel or a band saw for smoother, faster cuts, each type has its place in the crafting process. For instance, a band saw can help you achieve intricate curves that would be nearly impossible with a hand saw alone. Think of it as the difference between painting with a broad brush versus a fine-tipped one; each serves its purpose beautifully.
Next up are **chisels and gouges**, which are your go-to tools for detailing and refining the pipe’s design. These tools allow you to carve out the nuances that make your pipe unique. A chisel is fantastic for straight cuts and creating defined edges, while a gouge excels at hollowing out areas and adding depth to your design. If you’re looking to create a swirling pattern or a smooth contour, these tools will be indispensable. Just remember, practice makes perfect! Start with softer woods to hone your skills before moving on to denser varieties.
Now, let’s talk about **router tools**. These nifty devices can take your pipe design to the next level by allowing you to create grooves and decorative edges. Think of them as the icing on the cake; they add that extra flair that can elevate your piece from ordinary to extraordinary. When using a router, ensure you have the right bit for the job—different bits create different profiles, so choose wisely!
Finally, don’t underestimate the power of **sanding tools**. While they may not be cutting tools in the traditional sense, they play a crucial role in the finishing process. Sandpaper, both coarse and fine, is essential for smoothing out rough edges and preparing the wood for a beautiful finish. You can also invest in a sanding block or an electric sander for larger projects. Think of sanding as the polishing of a gem; it brings out the beauty hidden beneath the surface.
In summary, the right cutting tools are vital in the crafting of a wooden pipe. Each tool serves a specific purpose, and mastering their use will enable you to bring your creative visions to life. So, gather your tools, roll up your sleeves, and get ready to carve out a masterpiece!
- What type of wood is best for crafting a pipe? - Hardwoods like briar or maple are often preferred due to their durability and heat resistance.
- Do I need advanced woodworking skills to make a wooden pipe? - While some experience helps, beginners can start with simple designs and gradually improve their skills.
- How long does it take to make a wooden pipe? - The time varies based on complexity, but a simple pipe can take a few hours to a couple of days.
- Can I personalize my wooden pipe? - Absolutely! Adding personal touches is one of the most enjoyable parts of the process.
Chisels and Gouges
When it comes to crafting a wooden pipe, chisels and gouges are your best friends. These tools are not just for cutting; they are your instruments of artistry, allowing you to shape the wood into a masterpiece. Imagine chiseling away at a block of wood, watching it transform under your hands—it's a bit like sculpting a statue from marble, where every stroke reveals a new facet of your creation. The right chisel can make all the difference in ensuring that your pipe not only looks good but feels good to use.
Chisels come in various shapes and sizes, each designed for specific tasks. For instance, a straight chisel is perfect for making clean, straight cuts, while a bevel-edged chisel can help you create intricate designs and curves. On the other hand, gouges are essential for hollowing out the bowl of the pipe. They come in different profiles, such as U-shaped or V-shaped, which makes them versatile for various carving techniques. When selecting chisels and gouges, consider the following:
- Material: High-carbon steel is preferred for its durability and edge retention.
- Size: A variety of sizes will allow you to tackle both large and small details.
- Handle comfort: Ergonomic handles can make a significant difference during long carving sessions.
Using chisels and gouges effectively requires practice and patience. Start with softer woods to hone your skills before moving on to denser varieties. As you become more comfortable, you’ll find that the process of carving becomes a meditative experience, allowing you to focus on the nuances of your design. Remember, the goal is not just to create a functional pipe but to craft a piece of art that reflects your personality and craftsmanship.
In the end, the relationship between a woodworker and their chisels and gouges is akin to that of a painter and their brushes. Each tool has its own character, and together, they allow you to express your creativity in ways that are both functional and beautiful. So, as you embark on your wooden pipe-making journey, take the time to explore the world of chisels and gouges—they are the keys to unlocking your artistic potential.
Q: What type of wood is best for making a pipe?
A: The best woods for pipe making include briar, maple, and cherry due to their durability and heat resistance.
Q: How do I maintain my chisels and gouges?
A: Regular sharpening and proper storage are essential for maintaining your tools. Always clean them after use to prevent rust.
Q: Can I use power tools for pipe making?
A: While power tools can speed up the process, hand tools like chisels and gouges offer more control and precision, especially for intricate designs.
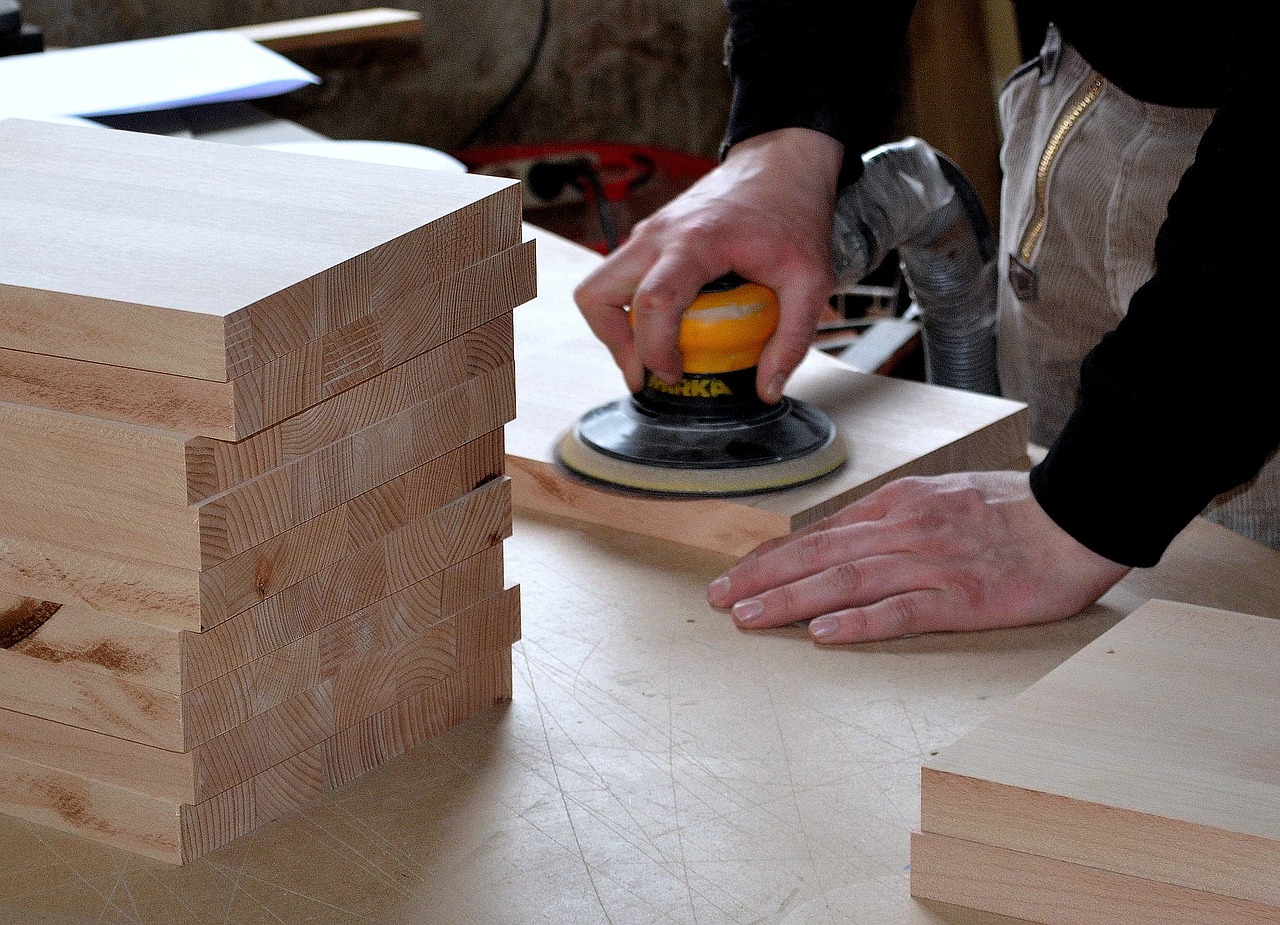
Sandpaper and Finishing Tools
When it comes to crafting a wooden pipe, the finishing touches can make all the difference. Achieving a smooth, polished surface not only enhances the aesthetic appeal but also improves the overall smoking experience. Sandpaper is your best friend in this endeavor, and understanding the various types and grits available is essential for a successful finish. Generally, sandpaper comes in different grits, ranging from coarse to fine, allowing you to gradually refine the surface of your pipe.
Starting with a coarser grit, like 80 or 120, is ideal for removing any rough edges or imperfections in the wood. This initial step is crucial, as it sets the groundwork for a more refined finish. As you progress, moving to medium grits such as 220 or 320 will help smooth out the surface further. Finally, finishing with fine grit sandpaper, like 400 or higher, will give your pipe a soft, silky feel that’s a joy to hold. Remember, the goal here is to create a surface that not only looks good but feels great in the hand.
In addition to sandpaper, you’ll want to consider other finishing tools that can elevate your project. For instance, wood finishes such as oils, lacquers, or waxes can protect the wood and enhance its natural beauty. Each finishing product has its own application method and drying time, so it’s essential to follow the manufacturer’s instructions for the best results. Applying a finish not only adds a layer of protection against moisture and wear but can also bring out the unique grain patterns in the wood, making your pipe a true work of art.
Furthermore, using a buffer can help achieve that extra shine that will make your pipe stand out. Buffing tools, whether electric or manual, can polish the surface to a mirror-like finish. However, it’s crucial to be gentle during this process to avoid damaging the wood. In summary, investing time in sanding and finishing will not only enhance the beauty of your wooden pipe but also ensure it lasts for years to come.
- What type of sandpaper is best for wood finishing? Generally, a progression from coarse (80-120 grit) to fine (400 grit or higher) is recommended for the best results.
- Can I use regular paint to finish my wooden pipe? It’s best to use wood-specific finishes like oils or lacquers to ensure the best protection and appearance.
- How long should I let the finish dry? Drying times vary by product, so always refer to the instructions on the finish you choose.

Assembly Techniques
Assembling the components of your wooden pipe is where the magic truly happens. This stage requires not just skill, but also a keen eye for detail. When you’ve meticulously crafted each part, it’s time to bring them together into a cohesive whole. The assembly process can be likened to putting together a puzzle; each piece must fit perfectly to ensure functionality and aesthetic appeal. You wouldn’t want to end up with a beautiful pipe that doesn’t work, right?
First, let’s talk about the importance of dry fitting your pieces before adhering them together. This means taking the time to place all the components in their intended positions without any glue or fasteners. It allows you to visualize the final product and make any necessary adjustments. You might find that a slight tweak in the angle or a minor shift in the position can make a world of difference. Think of it as a dress rehearsal before the big performance!
Once you’re satisfied with the layout, it’s time to move on to the assembly itself. Here are a few techniques to ensure a strong and lasting bond:
- Use Wood Glue: A high-quality wood glue is essential for creating a durable bond. Apply it evenly to the surfaces that will join together, and clamp them securely while it dries. This will prevent any shifting that could compromise the integrity of your pipe.
- Drill and Pin: For added strength, consider drilling small holes through the joints and inserting wooden dowels or pins. This technique not only reinforces the bond but also adds an element of craftsmanship that showcases your attention to detail.
- Finishing Touches: Once the glue has set and your pipe is assembled, it’s important to check for any rough edges or misalignments. A little sanding here and there can smooth out any imperfections, ensuring that your pipe is not only functional but also comfortable to hold and use.
Finally, don’t forget about the importance of testing your assembly. After everything is put together, take a moment to inspect the airflow and make sure that each component is functioning as intended. Lighting it up for the first time can be a thrilling experience, akin to unveiling a masterpiece. You’ve poured your heart and soul into this creation, and now it’s time to enjoy the fruits of your labor!
Q: What type of glue should I use for assembling my wooden pipe?
A: It is recommended to use a high-quality wood glue that dries clear and provides a strong bond. Look for options that are specifically designed for woodworking.
Q: How can I ensure my pipe has good airflow?
A: During the assembly process, make sure that the bowl and stem are aligned properly. Test the airflow before finalizing the assembly to make any necessary adjustments.
Q: Should I seal my wooden pipe after assembly?
A: Yes, sealing your pipe can protect the wood and enhance its longevity. Use a food-safe finish or oil that won’t affect the flavor of the tobacco.

Designing Your Pipe
Creating a unique design for your wooden pipe is where your creativity can truly flourish. This is the moment when you can let your imagination run wild, transforming a simple piece of wood into a stunning piece of functional art. Think of it like sculpting a masterpiece; every curve and contour you carve out tells a story and reflects your personal style. But how do you balance creativity with functionality? It's not as daunting as it sounds! By considering a few key elements, you can craft a pipe that not only looks great but also performs well.
First, let’s talk about the shapes and sizes. The shape of your pipe can greatly influence the smoking experience. For instance, a straight pipe might offer a cooler smoke, while a bent pipe can provide a more comfortable hold. You might want to consider the following shapes:
- Straight Pipe: Offers a classic look and cooler smoke.
- Bent Pipe: Provides a comfortable grip and a unique aesthetic.
- Freeform Shapes: Let your imagination guide you!
Next, size matters! A larger bowl means more tobacco, which can be great for longer sessions, while a smaller bowl is perfect for quick breaks. Think about what you typically prefer when enjoying a smoke. Do you like to savor the moment with a long, leisurely session, or are you more of a quick puffer? Your answer will guide your design choices.
Now, let’s not forget about the personal touches that make your pipe truly yours. This is the fun part! You can incorporate elements that reflect your personality, such as:
- Engravings: Add initials, symbols, or designs that resonate with you.
- Color Stains: Experiment with different wood stains to achieve a look that matches your style.
- Custom Mouthpiece: Consider shaping a unique mouthpiece that fits comfortably and looks fantastic.
However, while you’re getting creative, it’s essential to keep functionality in mind. A beautiful pipe is great, but it must also serve its purpose well. Here are some functional considerations to keep in mind:
- Airflow: Ensure that the design allows for smooth airflow. A pipe that’s too tightly packed can lead to a frustrating smoking experience.
- Bowl Size: Adjust the bowl size according to your smoking habits. A larger bowl can hold more tobacco, but it can also heat up more quickly.
- Weight and Balance: The pipe should feel comfortable in your hand. A well-balanced pipe enhances the overall smoking experience.
In conclusion, designing your wooden pipe is a delightful blend of artistry and practicality. By considering the shape, size, and personal elements, you can create a pipe that not only looks stunning but also enhances your smoking enjoyment. So grab your tools, let your creativity flow, and start crafting a piece that is uniquely you!
Q: What type of wood is best for making a pipe?
A: Hardwoods like briar, cherry, and maple are popular choices due to their durability and heat resistance.
Q: How do I ensure proper airflow in my pipe?
A: Make sure the bowl and stem are proportionate in size, and avoid packing the tobacco too tightly.
Q: Can I customize the shape of my pipe?
A: Absolutely! The beauty of crafting your own pipe is that you can design it in any shape that appeals to you, as long as it remains functional.
Q: What finishing techniques can I use?
A: Sanding followed by applying a food-safe finish or wax can give your pipe a smooth, polished look.

Incorporating Personal Style
When it comes to crafting a wooden pipe, incorporating your personal style is what truly transforms a simple piece of wood into a unique work of art. Think of your pipe as an extension of your personality—a canvas where your creativity can flourish. Whether you prefer a sleek modern aesthetic or a rustic, vintage look, there are countless ways to make your pipe reflect who you are.
One of the first decisions you'll face is the shape and size of your pipe. Do you envision a classic straight pipe, or perhaps a more elaborate bent design? Each shape not only impacts the visual appeal but also influences the smoking experience. For instance, a larger bowl can hold more tobacco, while a smaller, more compact style may be easier to carry around. It's essential to consider how you intend to use your pipe when making these choices.
Next, think about the wood finish. The finish you choose can dramatically alter the look and feel of your pipe. A natural oil finish can highlight the wood's grain, showcasing its beauty, while a lacquer finish offers a sleek, polished appearance. You might even want to experiment with different staining techniques to add color and depth to your pipe. The beauty of working with wood is that each piece is unique, and your finishing choices can enhance those distinctive characteristics.
In addition to shape and finish, consider incorporating personal engravings or carvings. This is where you can truly let your imagination run wild! Perhaps you want to carve a meaningful symbol, your initials, or even a favorite quote into the wood. Not only does this add a personal touch, but it also makes your pipe a conversation starter. Imagine sharing the story behind your design with friends—it's these little details that create lasting connections.
Furthermore, the choice of accessories can also reflect your style. Think about the mouthpiece: would you prefer a simple design, or something more ornate? You could choose materials like acrylic or even metal for a more modern look. The key is to ensure that whatever you select complements the overall design of the pipe while still being functional.
Lastly, don’t forget about the color palette. While wood itself has its natural hues, you can enhance or contrast these colors through your choice of stains and finishes. A dark stain can give a more sophisticated vibe, while lighter finishes can evoke a more casual, earthy feel. Remember, the goal is to create a piece that resonates with you and tells your story.
Incorporating personal style into your wooden pipe not only enhances its visual appeal but also makes the smoking experience more enjoyable. After all, a pipe is more than just a tool; it's a reflection of who you are. So, take your time, explore your options, and let your creativity shine through in every aspect of your design.
- What type of wood is best for crafting a pipe? - Hardwoods like briar, maple, or cherry are excellent choices due to their durability and aesthetic qualities.
- How can I ensure my pipe is functional? - Focus on airflow, bowl size, and ensure all components fit securely during assembly.
- Can I customize the mouthpiece? - Absolutely! You can choose materials and designs that suit your style and comfort.
- What finishing techniques are recommended? - Oil finishes are popular for highlighting grain, while lacquer can provide a glossy finish.

Functional Considerations
When it comes to crafting a wooden pipe, striking the right balance between aesthetics and functionality is essential. After all, a beautifully designed pipe is only as good as its ability to deliver a satisfying smoking experience. So, what should you keep in mind while designing your masterpiece? Let’s dive into some crucial considerations that can make or break your wooden pipe.
First off, airflow is a critical factor. The way air moves through your pipe directly affects the smoking experience. If the airflow is too restricted, you might find yourself struggling to get a decent puff, which can be quite frustrating. On the other hand, excessive airflow can lead to a harsh smoke that diminishes the overall enjoyment. To achieve the perfect balance, consider the diameter of the stem and the bowl. A wider stem allows for better airflow, while a well-sized bowl can help retain heat without overheating the tobacco.
Next, let’s talk about bowl size. The size of the bowl determines how much tobacco you can pack in, which in turn affects how long your smoke will last. A larger bowl might seem appealing for longer sessions, but it also requires more tobacco, which can lead to waste if you don’t finish it. Conversely, a smaller bowl is great for quick smokes but might not be satisfying for those who enjoy a more prolonged experience. Think about how you plan to use your pipe and choose a bowl size that fits your smoking habits.
Another important aspect to consider is the material used for the bowl and the stem. Different woods can impart unique flavors to the smoke. For instance, briar is a popular choice due to its heat resistance and flavor neutrality. However, if you’re looking to experiment, you might consider using other woods like cherry or maple, which can add subtle flavor notes to your smoking experience. Just be sure to research the properties of each type of wood to ensure it aligns with your vision.
Lastly, don’t overlook the ergonomics of your pipe. It should feel comfortable in your hand and easy to hold while smoking. The shape and weight of the pipe can greatly influence how enjoyable it is to use. A well-balanced pipe that fits snugly in your grip can enhance the overall experience, making each puff feel effortless. So, as you design your pipe, take the time to mold it into a shape that not only looks good but feels good too.
In summary, when designing your wooden pipe, remember to consider airflow, bowl size, material, and ergonomics. Each element plays a vital role in creating a functional piece that you’ll love to use. Balancing these factors will not only enhance the smoking experience but also ensure that your creation stands out as a true work of art.
- What type of wood is best for making a pipe?
While briar is the most commonly used wood for pipes due to its durability and heat resistance, other woods like cherry or maple can also be used for unique flavor profiles. - How do I ensure proper airflow in my pipe?
To achieve optimal airflow, pay attention to the diameter of the stem and bowl. A wider stem generally allows for better airflow. - What size bowl should I choose?
The size of the bowl should reflect your smoking habits. A larger bowl is suitable for longer sessions, while a smaller bowl is great for quick smokes. - How can I make my pipe comfortable to hold?
Focus on the ergonomics of the design. A well-balanced pipe that fits comfortably in your hand will enhance your smoking experience.
Frequently Asked Questions
- What type of wood is best for crafting a wooden pipe?
Choosing the right wood is crucial for both durability and aesthetics. Popular choices include maple, cherry, and oak, each offering unique characteristics that can enhance the smoking experience. For instance, maple is known for its smooth finish, while cherry can add a subtle sweetness to the smoke.
- What tools do I need to make a wooden pipe?
To successfully craft a wooden pipe, you'll need essential tools such as saws, chisels, and sandpaper. A good set of chisels and gouges is particularly important for detailing your design. Don't forget to have finishing tools on hand to achieve that polished look!
- How do I ensure my pipe is functional?
Balancing aesthetics with functionality is key. Pay attention to features like airflow and bowl size. A well-designed pipe should allow for easy inhalation while providing enough space for your tobacco or herbs. It's all about creating a harmonious blend of form and function!
- Can I personalize my wooden pipe?
Absolutely! Personalizing your pipe is where your creativity shines. You can incorporate unique shapes, sizes, and even engravings to reflect your personal style. Think of it as turning a simple object into a piece of art that tells your story.
- What finishing techniques should I use?
Finishing techniques are essential for achieving a smooth and polished surface. Start with a variety of sandpaper grits to gradually smooth out any rough edges. After sanding, consider applying a natural oil or wax finish to protect the wood and enhance its natural beauty.
- Is it difficult to make a wooden pipe?
While crafting a wooden pipe requires some skill and patience, it's definitely achievable! If you're willing to learn and practice, you can create a beautiful and functional piece. Just remember, every expert was once a beginner!


