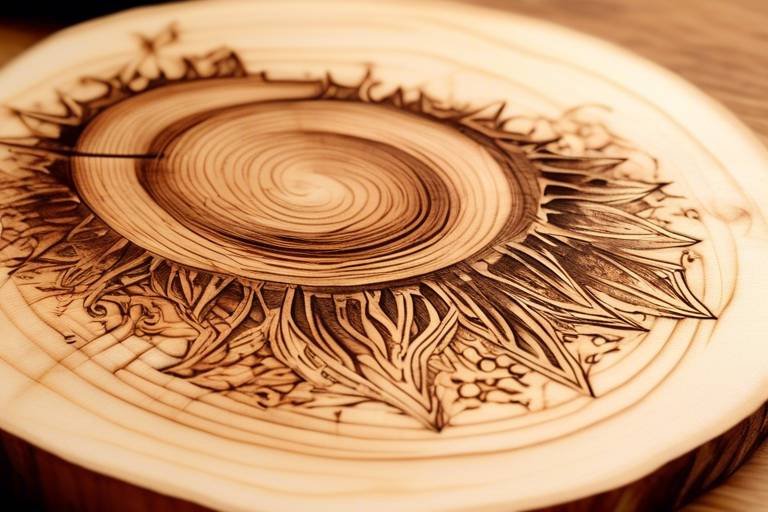
Preparing Your Wood for Carving: A Comprehensive Guide
Carving wood can be an incredibly rewarding experience, allowing you to transform a simple block of timber into a stunning piece of art. However, the secret to achieving beautiful results lies in the preparation of your wood. In this guide, we'll take you through the essential steps and techniques for preparing wood for carving, ensuring that you achieve optimal results every time. From selecting the right type of wood to drying and treating it, we've got you covered. So, grab your tools and let's dive into the world of wood carving!
When it comes to wood carving, the first and perhaps most crucial step is selecting the appropriate wood. Different types of wood come with their own unique characteristics, such as hardness, grain patterns, and overall workability. For instance, softer woods like pine and basswood are often favored by beginners due to their ease of carving, while hardwoods like oak and maple offer durability and intricate grain patterns that can elevate your finished piece. Think of wood like a canvas; the type you choose will dramatically affect the final artwork. So, before you start carving, consider the following:
- Softwoods: Easier to carve, ideal for beginners.
- Hardwoods: More durable, better for detailed work.
- Grain Patterns: Affects aesthetics and carving techniques.
Once you've selected your wood, the next step is to ensure it is properly dried and seasoned. This is crucial because improperly dried wood can crack and warp during the carving process, leading to frustration and wasted materials. There are several methods for drying wood effectively, and understanding these can help you maintain the integrity of your wood throughout the carving journey. Let's explore these methods further.
Air drying is one of the most natural methods to remove moisture from wood. It allows moisture to evaporate slowly and evenly, which is essential for preventing cracks. To maximize airflow and drying conditions, you need to stack and position your wood correctly. Imagine creating a mini-forest of lumber, where each piece has room to breathe! Here are some tips:
Correctly stacking your wood is vital for effective air drying. A common method is to use spacers between the layers of wood, allowing air to circulate freely. Here’s a simple guide to stacking:
1. Choose a dry, well-ventilated area.
2. Use stickers (thin strips of wood) to separate layers.
3. Stack wood in a crisscross pattern for stability.
4. Avoid direct sunlight to prevent uneven drying.
Keeping track of moisture content is essential during the drying process. You don't want to start carving only to find that your wood is still too wet! There are various tools available for measuring moisture levels, such as moisture meters, which can give you a clear indication of when your wood is ready for carving. Regularly checking moisture levels will save you time and effort in the long run.
If you're looking for a faster method, kiln drying might be the answer. This controlled process accelerates the drying of wood, ensuring that it reaches the desired moisture content more quickly than air drying. The benefits of kiln drying include:
- Reduced risk of warping and cracking.
- Uniform moisture content throughout the wood.
- Faster turnaround time for projects.
Understanding the key steps involved in kiln drying can help you make informed decisions about your wood preparation.
Once your wood is dry, the next step is treating it to enhance durability and workability. Treatment can include sealing and finishing methods that prepare your wood for the carving process. Proper treatment not only protects your wood but also enhances its natural beauty.
Wood sealants are crucial for protecting against moisture and environmental damage. When applied correctly, they can preserve your wood and make it more resistant to wear and tear. Choosing the right sealant is essential, as different types offer various levels of protection. It's like putting on a raincoat before heading out in a storm—better safe than sorry!
Finally, finishing techniques can greatly enhance the aesthetic appeal of your carved wood. Options such as oils, stains, and varnishes allow you to achieve your desired look while also providing protection. Imagine the difference between a raw, unfinished piece and one that gleams with a rich finish—it's like night and day!
Q: How long does it take for wood to air dry?
A: The drying time can vary based on the type of wood and environmental conditions, but generally, it can take several months.
Q: Can I carve wood that hasn't been fully dried?
A: It's not recommended, as it can lead to cracking and warping during the carving process.
Q: What is the best wood for beginners?
A: Softwoods like basswood or pine are excellent choices for beginners due to their ease of carving.
Q: How do I know when my wood is ready for carving?
A: Use a moisture meter to check that the wood's moisture content is around 6-8% for optimal carving conditions.
Choosing the Right Type of Wood
When it comes to carving, the choice of wood is not just a matter of preference; it’s a crucial step that can make or break your project. Imagine trying to sculpt a masterpiece from a block of concrete—frustrating, right? That's how it feels when you select the wrong type of wood. Each type of wood has its own unique characteristics, including hardness, grain patterns, and workability, which can significantly influence the carving experience and the final outcome of your work.
First off, let’s talk about hardness. Generally, woods are categorized into two types: hardwoods and softwoods. Hardwoods, like oak and maple, tend to be denser and more challenging to carve, but they offer stunning finishes and durability. On the other hand, softwoods, such as pine and cedar, are easier to carve, making them ideal for beginners or intricate designs. However, they may not hold fine details as well as hardwoods. So, ask yourself: what kind of project are you working on? If you’re looking for durability and a polished finish, hardwoods might be the way to go. If you're just starting or working on a less detailed piece, softwoods could be your best friend.
Next, let’s consider the grain pattern. The grain not only affects the aesthetics of the finished piece but also influences how the wood behaves during carving. For instance, woods with straight grains, like birch, are easier to carve and less likely to splinter, while woods with irregular or interlocked grains, like cherry, can be more challenging but may yield beautiful results when carved correctly. The key is to choose a wood that complements your carving style and the design you have in mind.
Additionally, it’s essential to think about the wood’s moisture content. Freshly cut wood, or “green wood,” can be tempting due to its workability, but it can also lead to issues like warping and cracking as it dries. Instead, opting for properly seasoned wood will give you more control over your carving process. You might find it helpful to consult a wood moisture meter, which can help you determine the wood's moisture content before you commit to a carving project.
Here’s a quick comparison of some popular woods used for carving:
| Wood Type | Hardness | Grain Pattern | Best For |
|---|---|---|---|
| Oak | Hard | Open grain | Detailed carvings |
| Pine | Soft | Straight grain | Beginners, rough carvings |
| Maple | Hard | Fine, even grain | Fine details, furniture |
| Cedar | Soft | Straight grain | Outdoor projects, rustic carvings |
| Cherry | Medium | Fine, smooth grain | Elegant carvings, furniture |
Ultimately, the right type of wood for your carving project depends on your skill level, the design you envision, and the intended use of the finished piece. Don’t rush this decision; take the time to explore various options and consider how each type of wood aligns with your creative goals. Remember, the journey of carving starts with the right wood, so choose wisely!

Drying and Seasoning Wood
When it comes to carving, one of the most crucial steps is . Properly dried wood not only prevents issues like cracking and warping but also enhances the overall quality of your carving project. Imagine starting a beautiful carving only to find that the wood has twisted or split halfway through your work—it's a nightmare for any artist! So, let’s dive into the methods that will help you prepare your wood for the best carving experience possible.
First off, it's important to understand that wood is a natural material that contains moisture. This moisture can cause various problems if not managed correctly. When wood is freshly cut, it can have a moisture content of 50% or more. To achieve optimal carving results, you typically want your wood to have a moisture content of around 6-8%. This is where the art of drying and seasoning comes into play.
There are two primary methods for drying wood: air drying and kiln drying. Each method has its own set of advantages and disadvantages, and the choice largely depends on your specific needs and resources. Air drying is a more traditional, slower method that allows moisture to evaporate naturally, while kiln drying is a faster, more controlled process that can help you achieve the desired moisture content in a fraction of the time.
Air drying is often favored by woodworkers who appreciate the natural characteristics of the wood. It allows for a gradual release of moisture, which minimizes the risk of cracks. To air dry wood effectively, you'll need to consider a few key factors:
- Location: Choose a dry, well-ventilated area away from direct sunlight.
- Stacking: Properly stack your wood to promote airflow.
- Time: Be patient; air drying can take several months depending on the wood species and thickness.
Correctly stacking wood is vital for effective air drying. You should create a stack that allows air to circulate freely around each piece. Use spacers, known as stickers, between the layers of wood to create gaps that promote airflow. Aim for a stack that is at least 12 inches off the ground to prevent moisture absorption from the ground. The ideal setup would look something like this:
| Layer | Action |
|---|---|
| 1 | Place wood on a flat surface, ensuring it’s elevated. |
| 2 | Insert stickers every 24 inches to separate layers. |
| 3 | Cover the top with a tarp to protect from rain. |
Keeping track of moisture content is essential during the drying process. Using a moisture meter can help you determine when your wood has reached the desired level. Most moisture meters are easy to use and provide quick readings. Regularly checking your wood can save you from unpleasant surprises later on in your carving journey.
If you're looking for a quicker method, kiln drying might be the way to go. This controlled process uses heat and humidity to remove moisture from the wood more rapidly than air drying. The benefits of kiln drying include:
- Faster drying times—often just a few days!
- Reduced risk of defects like warping or cracking.
- Consistent moisture content across the entire piece.
However, it's worth noting that kiln drying can sometimes alter the wood’s color and grain, so if you’re after that natural look, air drying may be your best bet. Whichever method you choose, remember that is a foundational step that can make or break your carving experience.
Q: How long does it take to air dry wood?
A: Air drying can take anywhere from a few months to a couple of years depending on the type of wood and thickness.
Q: Can I carve wood that hasn't fully dried?
A: While you can carve green wood, it’s not recommended as it can lead to warping and cracking.
Q: What tools do I need to measure moisture content?
A: A moisture meter is the best tool for accurately measuring the moisture content in wood.

Air Drying Techniques
Air drying is one of the most natural and effective methods for preparing wood for carving. By allowing moisture to evaporate slowly from the wood, you can significantly reduce the chances of cracking and warping, which are common issues when carving with improperly dried wood. But how do you go about air drying your wood properly? Let’s dive into some essential techniques that will help you achieve optimal results.
First and foremost, it's crucial to understand the environment in which you are drying your wood. Ideally, you want to choose a location that is well-ventilated and has a consistent temperature. A space that is too humid can prolong the drying process, while a dry, hot environment can lead to rapid moisture loss, causing the wood to crack. So, think of your wood as a delicate flower; it needs just the right conditions to bloom beautifully without wilting.
When stacking your wood for air drying, you'll want to ensure that there is enough space between each piece to allow for adequate airflow. This is where the art of stacking comes into play. You should aim to create a structure that promotes circulation around each piece. One effective method is to use wooden stickers—small spacers placed between layers of wood. This not only helps with airflow but also prevents the wood from sticking together, which can trap moisture and lead to mold growth.
| Best Practices for Stacking Wood | Description |
|---|---|
| Use Stickers | Place wooden spacers between layers to promote airflow. |
| Elevate the Stack | Keep the wood off the ground using pallets or racks to prevent moisture absorption from the soil. |
| Cover the Stack | Use a tarp or breathable cover to protect from rain while allowing moisture to escape. |
Additionally, consider the orientation of your wood during the drying process. Positioning the wood with the bark side facing up can help direct moisture away from the core. Think of it as giving your wood a sunbath; it needs to soak up the right conditions to dry evenly and effectively. Remember, the goal is to maintain uniform moisture levels throughout the wood, which will make your carving experience much smoother.
Monitoring moisture levels is another vital aspect of air drying. You can use a moisture meter to check the content regularly. Ideally, you want your wood to reach a moisture level of around 6-8% for optimal carving conditions. If you find that your wood is still too moist, don’t rush the process. Patience is key here, as forcing the drying can lead to disastrous results.
In conclusion, air drying techniques, when executed properly, can set the stage for a fantastic carving experience. By choosing the right environment, stacking your wood thoughtfully, and monitoring moisture levels, you can ensure that your wood is perfectly prepared for the artistic journey ahead. So, grab your tools and get ready to unleash your creativity on that beautifully air-dried wood!
- How long does it take to air dry wood? The drying time can vary based on the type of wood and environmental conditions, but it generally takes several months to a year.
- Can I speed up the air drying process? While you can’t rush nature, ensuring good airflow and optimal stacking can help speed up the process slightly.
- What types of wood are best for carving? Softwoods like pine and hardwoods like walnut and cherry are popular choices for carving due to their workability and aesthetic appeal.
Stacking Wood for Air Drying
When it comes to air drying wood, the way you stack your lumber plays a pivotal role in ensuring that moisture is evenly distributed and evaporated. Imagine each piece of wood as a sponge; if they’re too close together, they won’t dry properly, leading to uneven moisture levels that can cause warping or cracking. To achieve the best results, follow these essential tips for stacking your wood:
First and foremost, always stack your wood in a well-ventilated area. This means avoiding spots that are cramped or enclosed, as stagnant air can hinder the drying process. Ideally, you want a space where air can circulate freely around each piece of wood. Think of it like setting up a cozy outdoor picnic; you wouldn’t want to crowd everyone together in a small tent. Instead, allow for space so that everyone can enjoy the fresh air!
Next, consider using stickers—these are small pieces of wood placed between each layer of your stacked lumber. Stickers elevate the wood off the ground and create spaces for air to flow. A good rule of thumb is to space the stickers about 24 inches apart along the length of the stack. This method not only promotes even drying but also helps to prevent the wood from absorbing moisture from the ground.
Another important factor is the alignment of your wood. Stack the boards with their ends facing up to allow moisture to escape more easily. You can visualize this as standing a group of people in a circle; if they all face outward, they can see and interact with each other better than if they were all facing the same direction. This orientation facilitates better airflow and helps to dry the ends, which tend to retain moisture longer.
Lastly, be mindful of the weight of the wood you’re stacking. Heavier pieces should be placed at the bottom of the stack, while lighter pieces can go on top. This layering technique not only stabilizes the stack but also reduces the risk of crushing the lighter boards underneath. Think of it like a game of Jenga; if the heavier blocks are at the bottom, the structure remains steady and balanced.
In summary, effective stacking for air drying involves:
- Choosing a well-ventilated area.
- Using stickers to promote airflow.
- Aligning the wood with ends facing up.
- Layering heavier pieces at the bottom.
By following these guidelines, you’ll not only enhance the drying process but also set yourself up for a more enjoyable carving experience. Remember, patience is key when it comes to drying wood; taking the time to stack it properly will pay off in the long run!
Q: How long does it typically take for wood to air dry?
A: The drying time can vary significantly based on the type of wood, thickness, and environmental conditions. On average, it can take anywhere from a few months to over a year.
Q: Can I speed up the air drying process?
A: While air drying is a natural method, ensuring good airflow and stacking correctly can help speed up the process. However, avoid rushing it too much, as this can lead to defects.
Q: Is it necessary to use stickers when stacking wood?
A: Yes, using stickers is highly recommended as they allow air to flow between the layers and prevent the wood from sticking together, ensuring uniform drying.
Q: What should I do if I notice cracks developing in my wood?
A: If cracks appear, it may indicate that the wood is drying too quickly. To mitigate this, you can cover the wood with a tarp or move it to a more humid location temporarily.
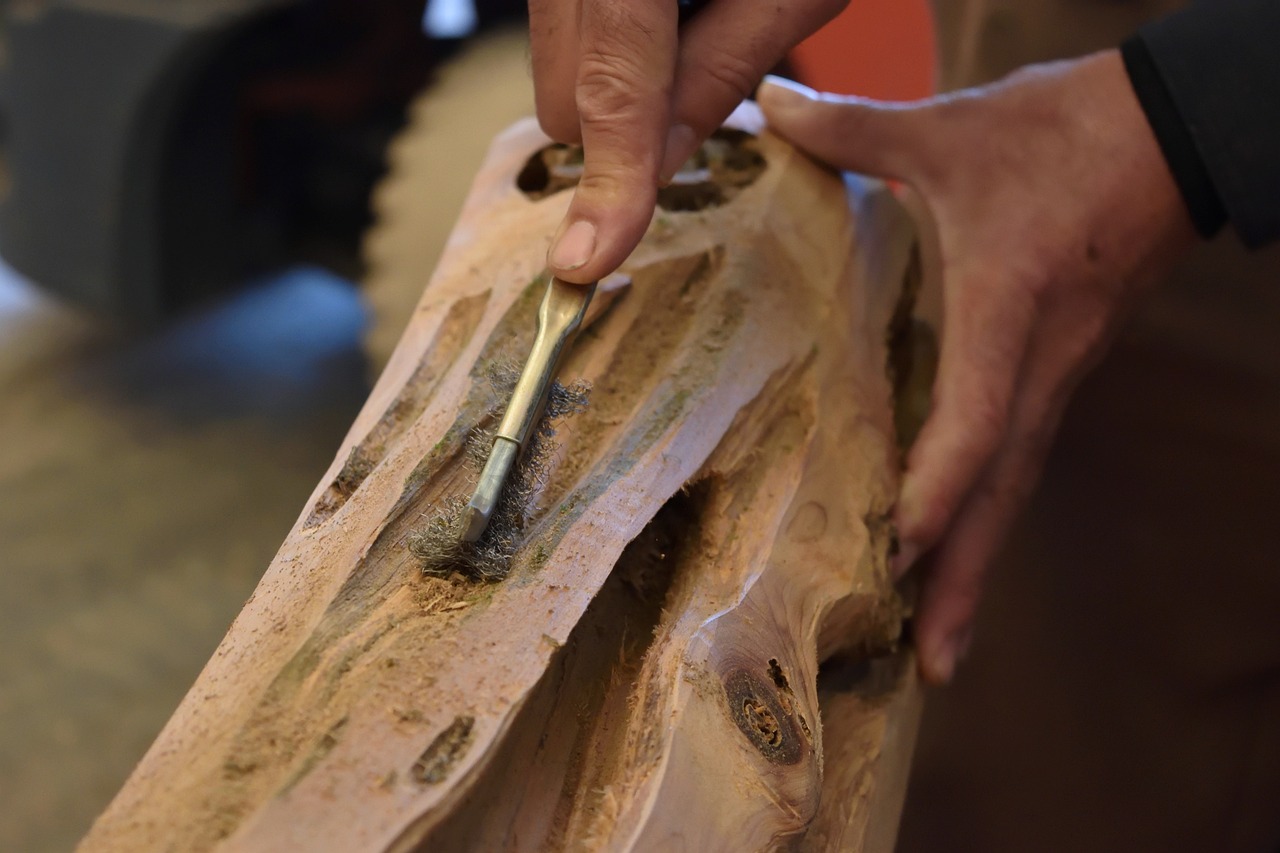
Monitoring Moisture Levels
When it comes to preparing wood for carving, one of the most critical aspects to consider is the moisture content. If the wood is too wet, it can lead to cracking, warping, and other issues that can ruin your carving project. So, how do you keep an eye on those moisture levels? Fortunately, there are several methods and tools that can help you monitor the moisture content effectively.
First off, you might want to invest in a moisture meter. This handy device can give you a quick reading of your wood's moisture level. Most moisture meters work by inserting two metal probes into the wood, which then measure the electrical resistance between them. The more moisture present, the lower the resistance, and the meter will display a corresponding percentage. For best results, make sure to test in multiple areas of your wood to get an accurate average.
In addition to using a moisture meter, you can also gauge moisture levels through a more traditional method known as the weight method. This involves weighing your wood before and after drying. By tracking the weight loss over time, you can estimate how much moisture has evaporated. Just remember, this method requires a bit more patience and precision, as you’ll need to keep a close eye on your wood and weigh it regularly.
Another technique is the oven-dry method. This involves cutting a small sample from your wood, weighing it, and then placing it in an oven at a low temperature. After a specific period, you weigh it again. The difference in weight gives you an idea of the moisture content. However, be cautious with this method, as it can be time-consuming and might not be practical for larger pieces of wood.
To help you understand moisture content better, here's a simple table that outlines the ideal moisture levels for various types of wood:
| Type of Wood | Ideal Moisture Content (%) |
|---|---|
| Softwoods (Pine, Cedar) | 12-15% |
| Hardwoods (Oak, Maple) | 6-8% |
| Exotic Woods (Mahogany, Teak) | 8-12% |
Remember, the goal is to reach the appropriate moisture level before you start carving. This not only ensures that your wood will hold its shape but also enhances the overall quality of your finished piece. So, keep those moisture levels in check, and you’ll be well on your way to creating stunning wood carvings that stand the test of time!
- How often should I check the moisture levels? It's a good idea to check moisture levels every few days, especially if you're air drying your wood.
- Can I carve wood that is still wet? While it's possible, it's not recommended, as it can lead to cracking and warping in your final piece.
- What is the best moisture content for carving? Generally, a moisture content of around 6-8% is ideal for hardwoods, while softwoods can be slightly higher at 12-15%.
Kiln Drying Process
The is a game changer for woodworkers looking to prepare their lumber efficiently. Unlike traditional air drying, which can take months or even years, kiln drying expedites the moisture removal process, allowing you to work with wood that is optimally seasoned. This method not only saves time but also significantly reduces the risks of warping and cracking, ensuring that your carving experience is as smooth as possible.
So, how does kiln drying work? The process involves placing the wood in a large, temperature-controlled chamber called a kiln. Here, the humidity and temperature are carefully monitored and adjusted to create the perfect environment for drying. Typically, the wood is heated to a temperature that effectively kills off any pests or fungi, while also drawing out the moisture content. This controlled environment allows for a more uniform drying process, which is crucial for maintaining the integrity of the wood.
One of the biggest benefits of kiln drying is that it can significantly reduce the moisture content of the wood to a desirable level, usually between 6% and 8%. This is ideal for carving and other woodworking projects, as it minimizes the likelihood of post-carving issues, such as warping or splitting. Additionally, kiln-dried wood is often more stable and easier to work with, allowing for cleaner cuts and more intricate designs.
Here’s a quick overview of the key steps involved in the kiln drying process:
| Step | Description |
|---|---|
| 1. Preparation | Wood is cut to size and stacked in the kiln. |
| 2. Heating | The kiln is heated to a specific temperature to begin moisture evaporation. |
| 3. Humidity Control | Humidity levels are monitored and adjusted to optimize drying. |
| 4. Cooling | Once the desired moisture content is reached, the wood is gradually cooled. |
However, it's important to note that not all wood species respond the same way to kiln drying. Some woods, particularly those with high resin content, may require special considerations to avoid damage during the process. Therefore, always consult with professionals or conduct thorough research on the specific wood type you’re working with.
In conclusion, the kiln drying process is an invaluable technique for woodworkers who want to ensure their materials are ready for carving. By understanding and utilizing this method, you can enhance the quality of your work and enjoy a more efficient carving experience.
- What types of wood are best suited for kiln drying? Most hardwoods and softwoods can be kiln dried, but it’s essential to consider the specific characteristics of each type.
- How long does the kiln drying process take? The duration varies depending on the type of wood and its initial moisture content, but it typically ranges from a few days to a couple of weeks.
- Is kiln-dried wood more expensive? Yes, kiln-dried wood often costs more due to the energy and resources involved in the drying process.
Treating Wood for Carving
Treating wood before you dive into the carving process is like laying a solid foundation for a house; it ensures that your masterpiece stands the test of time. Proper wood treatment not only enhances the durability of your carvings but also makes the wood easier to work with. Think of it as giving your wood a protective armor that shields it from the elements and wear and tear. This section will explore various methods to treat your wood, focusing on sealing and finishing techniques that prepare your wood for the carving journey ahead.
One of the first steps in wood treatment is applying wood sealants. These sealants act as a barrier against moisture, preventing it from seeping into the wood and causing damage over time. When selecting a sealant, look for products that are specifically designed for your type of wood and the conditions it will face. For instance, if you plan to carve outdoor pieces, opt for sealants that offer UV protection and are resistant to mold and mildew. Applying sealants correctly can significantly prolong the life of your carving. Make sure to follow the manufacturer's instructions regarding application methods and drying times.
Once your wood is sealed, it’s time to think about finishing techniques. Finishing not only enhances the visual appeal of your carved pieces but also adds an extra layer of protection. There are several options available, each with its unique characteristics:
- Oils: These penetrate deeply into the wood, providing a rich finish that highlights the grain. Oils like linseed or tung oil are popular choices.
- Stains: Stains allow you to change the color of the wood while still showcasing its natural beauty. They can be used alone or in conjunction with a sealant.
- Varnishes: Varnishes create a hard, protective surface on the wood, making it resistant to scratches and moisture.
When applying finishes, always ensure that your wood is clean and free from dust. A well-prepared surface will absorb the finish evenly, resulting in a more professional look. Depending on the finish you choose, you may need to apply multiple coats, allowing each layer to dry completely before adding the next. This process might seem tedious, but the results are worth the effort, transforming your carved wood into a stunning work of art.
In summary, treating wood for carving is a crucial step that shouldn’t be overlooked. By applying appropriate sealants and finishes, you can enhance the durability and beauty of your carvings, ensuring they remain a cherished part of your collection for years to come. Remember, the time spent on preparation will pay off in the quality and longevity of your work.
- What type of sealant should I use for my wood?
It depends on the type of wood and the environment it will be in. Look for sealants that offer protection against moisture and UV rays if your piece will be outdoors. - How long should I wait before applying a finish?
After sealing, it's best to wait at least 24 hours to ensure the sealant is completely dry before applying any finish. - Can I use multiple types of finishes on the same piece?
Yes, but make sure to follow the drying instructions for each type and ensure compatibility between products to avoid issues.

Applying Wood Sealants
When it comes to preparing wood for carving, is a crucial step that many enthusiasts overlook. Sealants serve as a protective barrier, shielding your wood from moisture, dirt, and other environmental factors that could compromise its integrity over time. Think of sealants as a raincoat for your wood; just as a raincoat keeps you dry and comfortable in bad weather, sealants keep your wood safe from the elements, ensuring it remains in prime condition for carving.
Choosing the right sealant can be a game-changer in your carving project. There are various types of sealants available, each with its unique properties. For example, polyurethane sealants offer a durable, water-resistant finish, making them ideal for outdoor projects. On the other hand, oil-based sealants penetrate the wood, enhancing its natural grain while providing a warm, rich finish. When selecting a sealant, consider the type of wood you are working with and the intended use of the finished piece.
Applying the sealant correctly is just as important as choosing the right one. Here’s a simple step-by-step guide to help you through the process:
- Preparation: Start by ensuring the wood surface is clean and free of dust. Sand the surface lightly to create a smooth finish that allows the sealant to adhere better.
- Application: Using a brush or a clean cloth, apply the sealant in the direction of the wood grain. Ensure even coverage, and don't forget to get into any crevices or detailed areas.
- Drying: Allow the first coat to dry completely before applying additional coats. Depending on the sealant, this could take anywhere from a few hours to overnight.
- Finishing Touches: After the final coat has dried, consider lightly sanding the surface again for a smoother finish.
It's also essential to monitor the environment while applying sealants. Ideally, you should work in a well-ventilated area with moderate humidity. High humidity can affect the drying process, leading to a less effective seal. If you're applying sealants indoors, open windows and use fans to promote airflow.
Remember, the goal of using a sealant is to enhance the wood's durability and appearance. A well-sealed piece not only looks better but also stands the test of time, making it a worthy investment for your carving endeavors. So, whether you're crafting a beautiful sculpture or a functional item, never skip this vital step in your woodworking process!
Q: How many coats of sealant should I apply?
A: It's generally recommended to apply at least two coats of sealant for optimal protection. However, the number of coats can depend on the type of sealant and the wood being used.
Q: Can I use sealants on already carved wood?
A: Yes, you can apply sealants to already carved wood. Just ensure that the surface is clean and properly sanded to achieve the best results.
Q: How do I know when the sealant is dry?
A: Most sealants will indicate drying times on their labels. As a rule of thumb, if the surface feels tacky or sticky, it needs more time to dry.
Q: Is it necessary to use a sealant for indoor projects?
A: While indoor projects may not be exposed to the same elements as outdoor ones, using a sealant can still enhance the wood's longevity and appearance.
Finishing Techniques
When it comes to finishing your carved wood, the options are as varied as the types of wood themselves. A good finish not only enhances the aesthetic appeal of your project but also protects it from wear and tear. Imagine putting in hours of work on a beautiful piece, only to see it fade or deteriorate over time due to lack of protection. That's where finishing techniques come into play, acting as a shield against the elements while showcasing the natural beauty of the wood.
One of the most popular finishing options is oil. Oils penetrate deep into the wood, enhancing its grain and giving it a rich, warm appearance. Tung oil and linseed oil are two favorites among woodworkers. They are easy to apply and can be built up over several coats to achieve a glossy finish. However, keep in mind that oils can take longer to dry, so patience is key! If you prefer a quicker solution, consider using a polyurethane finish, which provides a durable layer on the surface and dries much faster.
Another popular choice is stains, which allow you to change the color of the wood while still showcasing its natural grain. Stains come in a variety of shades, from light to dark, and can be applied over a sealer for added depth. The application process is straightforward: simply wipe on the stain, let it sit for a few minutes, and then wipe off the excess. This method not only adds color but also highlights the unique characteristics of the wood.
For those who want a high-gloss finish, varnish is an excellent option. Varnish forms a hard, protective layer on the wood surface, making it resistant to scratches and moisture. It's particularly useful for items that will see a lot of use, like furniture or kitchen utensils. Just remember to apply it in thin coats, allowing each layer to dry thoroughly before adding the next. This will help prevent bubbling and ensure a smooth finish.
Lastly, don't forget about the importance of preparation before applying any finish. Sanding your carved piece to a smooth surface is crucial. Start with a coarser grit and gradually work your way to a finer grit to achieve the best results. Once sanded, wipe the surface with a damp cloth to remove any dust, ensuring that your finish adheres properly and evenly.
In summary, the finishing technique you choose can dramatically affect the look and longevity of your carved wood. Whether you opt for oils, stains, or varnishes, remember that each method has its unique benefits. Take the time to experiment and find the perfect finish that resonates with your style and the intended use of your piece. Happy carving!
- How long should I wait between coats of finish? It depends on the type of finish you're using. Oils may take several hours to dry, while varnishes can dry in as little as 30 minutes. Always check the manufacturer's instructions for the best results.
- Can I mix different types of finishes? It's generally not advisable to mix different types of finishes, as they may not adhere properly to each other. Stick to one type for the best outcome.
- What is the best way to clean my finished wood? Use a soft, damp cloth to wipe down your finished piece. Avoid harsh chemicals that could damage the finish.
Frequently Asked Questions
- What type of wood is best for carving?
Choosing the right type of wood is essential for successful carving. Generally, softer woods like basswood or butternut are great for beginners due to their ease of carving. Hardwoods like oak or maple are more challenging but can produce stunning results for experienced carvers. It all depends on your skill level and the intricacy of your project!
- How do I properly dry wood for carving?
Drying wood is crucial to prevent cracking and warping. You can use air drying or kiln drying methods. Air drying involves stacking wood in a well-ventilated area and allowing it to dry naturally, while kiln drying uses controlled heat to expedite the process. Whichever method you choose, be sure to monitor the moisture levels using a moisture meter!
- What are the best practices for air drying wood?
To effectively air dry wood, stack the pieces with spacers in between to promote airflow. Position them off the ground on a flat surface to avoid moisture absorption from the ground. Ensure they are in a shaded area to prevent direct sunlight from causing uneven drying. This way, you can maintain the integrity of the wood!
- How can I tell if my wood is dry enough for carving?
One of the best ways to determine if your wood is ready for carving is by using a moisture meter. Ideally, you want the moisture content to be around 6-8% for optimal carving. If you don't have a moisture meter, you can also do the "knock test"—if it sounds hollow when you tap it, it’s likely dry!
- What treatments should I apply to my wood before carving?
Before you start carving, it's a good idea to treat your wood to enhance its durability. Applying a wood sealant can protect against moisture and environmental damage. Additionally, finishing techniques like oils or varnishes can not only preserve the wood but also enhance its appearance, making your carvings stand out!
- Can I use any sealant on my carving wood?
While you can use various sealants, it's essential to choose one that is compatible with your wood type and intended finish. Look for products specifically designed for wood, and ensure they are non-toxic if you plan to use the carved item for food or display. Always test on a small area first!
- What finishing techniques can enhance my carved wood?
There are several finishing techniques you can use to enhance your carved wood. Oils, stains, and varnishes are popular choices. Oils penetrate the wood, providing a natural look, while stains can add color. Varnishes offer a protective layer and a glossy finish. Choose based on the look you want to achieve!


