Crafting DIY Fabric Baskets for A Classy Vibe
Have you ever walked into a room and felt that something was just missing? It’s often the little touches that can transform a space from ordinary to extraordinary. One such touch is the addition of stylish fabric baskets. Not only do they serve a practical purpose, but they also add a classy vibe to your home décor. Imagine having beautiful baskets that not only organize your clutter but also reflect your personal style! In this guide, we will explore the art of creating DIY fabric baskets that are both functional and fabulous. Get ready to unleash your creativity and elevate your home with these personalized storage solutions!
Selecting the appropriate fabric is crucial for durability and aesthetics. When it comes to fabric, the options are endless! You can choose from cotton, canvas, linen, or even felt, depending on the look you want to achieve. Each fabric type has its unique advantages: for instance, cotton is lightweight and easy to sew, while canvas is robust and perfect for larger baskets. But don’t just stop at the type; consider the patterns and textures as well. Floral prints can add a fresh touch, while geometric patterns can bring a modern flair. Remember, the right fabric will not only enhance the overall look of your DIY baskets but also ensure they last for years to come.
Before diving into your basket-making adventure, it’s important to gather all the necessary tools and materials. Here’s a quick checklist:
- Sewing machine
- Fabric of your choice
- Thread that matches your fabric
- Scissors
- Measuring tape
- Pins or clips
- Iron and ironing board
Having everything at your fingertips will ensure a seamless crafting experience. Imagine the frustration of getting halfway through your project only to realize you’re missing a crucial item! So, take a moment to prepare and set yourself up for success.
Accurate measurements and cutting are vital for a polished finish. Think of measuring fabric like baking a cake; if you don’t get the ingredients just right, the result can be a disaster! To achieve the desired dimensions for your baskets, use a measuring tape and mark your fabric with a fabric chalk or pen. When cutting, ensure your scissors are sharp for clean edges. Remember, precision is key! If you’re making multiple baskets, consider cutting all your pieces at once to save time.
Using a cutting template can simplify the process significantly. A template not only ensures consistency in size but also speeds up your cutting. To create a template, you can use cardboard or thick paper. Simply draw the shape and size of your basket on the template material, then cut it out. This way, you can trace around it on your fabric, making the cutting process a breeze!
Preparing your fabric properly can enhance the basket's appearance. Before you start sewing, it’s crucial to wash and iron your fabric. Washing removes any chemicals or sizing that might have been used during manufacturing, while ironing helps eliminate wrinkles, giving you a smooth surface to work with. If you want your baskets to maintain their shape, consider using interfacing, which adds structure and durability. Think of it as giving your fabric a little armor!
If you're new to sewing, don’t worry! This section offers beginner-friendly techniques to help you assemble your fabric baskets with ease. Start with basic stitches like straight stitch and zigzag stitch. These stitches are the foundation of sewing and will give you the confidence to tackle more complex projects in the future. Practice makes perfect, so don’t hesitate to experiment!
Personalization makes your fabric baskets unique. After you’ve sewn the basic structure, it’s time to add your flair. Consider embellishments like embroidery, appliqué, or even fabric paint. These details can take your basket from basic to stunning! For example, a simple monogram can add a touch of elegance, while colorful fabric paint can make your baskets pop with personality. Remember, this is your chance to express your style!
Color and pattern selection can dramatically affect the look of your baskets. Think about the overall theme of your home décor. Do you prefer a minimalist vibe with neutral tones, or are you drawn to vibrant colors and bold patterns? Experiment with different color schemes to see what resonates with you. A well-chosen color palette can harmonize your space and create a cohesive look.
To ensure your baskets last, proper finishing techniques and care instructions are essential. Reinforcing seams is a great way to add durability; consider using a zigzag stitch along the edges to prevent fraying. When it comes to maintenance, regularly clean your fabric baskets according to the fabric type. Most cotton fabrics can be machine washed, but always check the care label. With a little love and care, your DIY fabric baskets will remain a stylish addition to your home for years to come!
Q: Can I use any fabric for my baskets?
A: While you can use various fabrics, it's best to choose those that are sturdy and durable, like cotton or canvas, for optimal results.
Q: How do I clean my fabric baskets?
A: Most cotton fabrics can be machine washed. Always check the care instructions specific to your fabric choice.
Q: Can I customize the size of my baskets?
A: Absolutely! Just adjust your measurements when creating your cutting template to make baskets of any size.
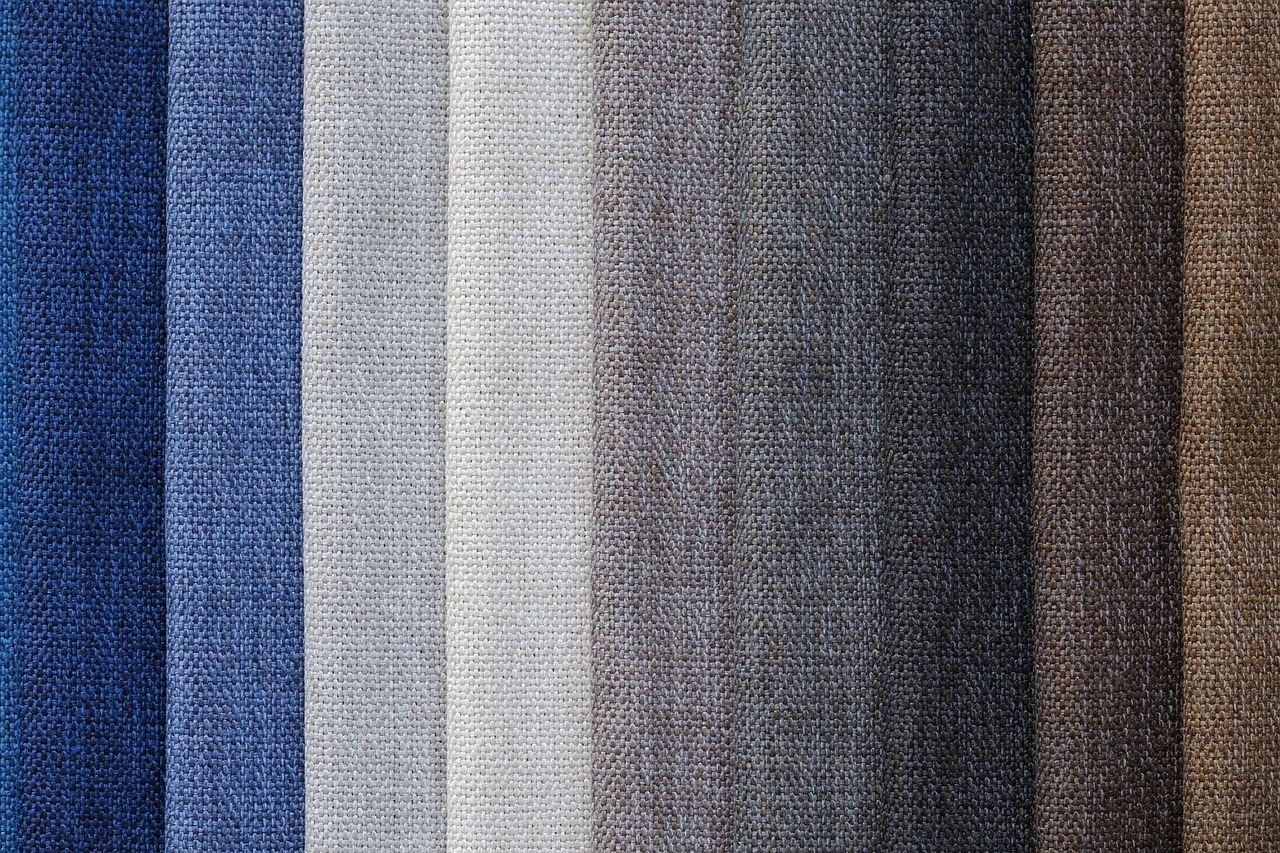
Choosing the Right Fabric
When it comes to crafting your own fabric baskets, is absolutely crucial. Not only does the fabric affect the durability of your basket, but it also plays a significant role in the overall aesthetic appeal. Imagine walking into a room and being greeted by a vibrant, beautifully crafted basket that perfectly complements your décor. Sounds delightful, right? Let's dive into the world of fabrics and explore the options that will help you create stunning baskets.
First off, consider the type of fabric you want to use. Cotton is a popular choice for DIY projects due to its versatility and ease of use. It comes in a myriad of colors and patterns, making it easy to find something that fits your style. However, if you're looking for something a bit more robust, canvas or denim can provide the durability you need, especially for larger baskets that will hold heavier items. On the flip side, if you're after a more luxurious feel, consider fabrics like linen or upholstery materials that add a touch of class.
Next, think about the patterns and textures that will enhance your basket's appeal. A solid color can provide a sleek, modern look, while a floral or geometric pattern can add a fun twist. Mixing textures can also create visual interest; for example, pairing a soft cotton with a sturdier canvas can make your basket stand out. If you're feeling adventurous, you might even consider using fabric scraps from old clothes or home décor items, giving your basket a unique, eclectic vibe.
In addition to choosing the right type and pattern, it's essential to consider the weight of the fabric. Heavier fabrics are great for larger baskets that need to hold more weight, while lighter fabrics work well for smaller, decorative baskets. Always remember to take into account how you plan to use your baskets. Will they hold toys, blankets, or perhaps serve as decorative storage for magazines? Your intended use will guide your fabric choices.
Lastly, don't forget about fabric care. Some fabrics may require special washing instructions or may not hold up well over time. Always check the care label before making your final decision. If you want your baskets to last, investing in high-quality fabric is worth it. A little extra care in the selection process can go a long way in ensuring your DIY projects are both beautiful and functional.
So, as you embark on your fabric basket-making journey, keep these considerations in mind. The right fabric will not only elevate your project but will also ensure that your baskets are both practical and stylish. Happy crafting!
Essential Tools and Materials
Before diving into the exciting world of DIY fabric baskets, it's essential to gather all the tools and materials you'll need for a smooth crafting experience. Think of this as your treasure map; having everything at hand will save you time and frustration, allowing you to focus on creating something beautiful. So, what exactly do you need? Let’s break it down!
First and foremost, a reliable sewing machine is a must-have. If you’re just starting, you don’t need the fanciest model out there; a basic machine that can handle straight stitches and zigzags will suffice. Pair it with a selection of thread in various colors to match your fabric choices. Remember, the thread is like the icing on the cake—it can make or break your design!
Next, you’ll want to stock up on some quality fabric. Choose materials that are both durable and aesthetically pleasing. Cotton is a popular choice due to its versatility and ease of use. You can also explore other options like canvas or denim for a sturdier basket. Don’t forget to consider different patterns and textures that can elevate your design. A floral print can add a touch of whimsy, while a solid color can lend a more modern vibe.
In addition to fabric and thread, having the right cutting tools is crucial. A good pair of fabric scissors will make cutting precise and easy. You might also want to invest in a rotary cutter and a cutting mat for larger projects; they can save you a lot of time and effort. And let’s not overlook the importance of a ruler and measuring tape—these tools will help you achieve those perfect dimensions for your baskets.
To keep everything organized, consider using a sewing box or a designated area in your home where you can store your materials. This will not only help you find what you need quickly but will also inspire you to get crafting whenever the mood strikes! And speaking of inspiration, having a notebook handy to jot down ideas or sketches can be a game-changer. You never know when a burst of creativity will hit!
Lastly, don’t forget about the finishing touches. Items like iron-on interfacing can provide extra support to your baskets, making them sturdier and more durable. You might also want to keep some embellishments on hand—think buttons, ribbons, or even fabric paint—to personalize your creations further.
To summarize, here’s a quick table of the essential tools and materials you’ll need:
| Tool/Material | Purpose |
|---|---|
| Sewing Machine | To sew fabric pieces together |
| Thread | To stitch fabric securely |
| Fabric | Main component for the baskets |
| Fabric Scissors | To cut fabric accurately |
| Ruler & Measuring Tape | For precise measurements |
| Iron-on Interfacing | To reinforce fabric |
| Embellishments | To personalize your baskets |
With these tools and materials in hand, you’ll be well on your way to crafting stunning fabric baskets that not only look great but also serve a practical purpose in your home. Let your creativity flow, and remember, the only limit is your imagination!
As you embark on your DIY fabric basket journey, you might have a few questions. Here are some common ones:
- What type of fabric is best for beginners? Cotton is highly recommended for its ease of use and availability.
- Do I need a sewing machine to make fabric baskets? While a sewing machine makes the process faster, you can also hand sew if you prefer.
- How can I make my baskets more durable? Consider using interfacing and double-stitching seams for added strength.
- Can I wash my fabric baskets? Yes, but it's best to check the care instructions for your specific fabric.

Measuring and Cutting Fabric
When it comes to crafting your DIY fabric baskets, measuring and cutting fabric accurately is one of the most crucial steps that can make or break your project. Imagine trying to fit a square peg into a round hole; that’s what it feels like when your fabric pieces don’t match up! To ensure a polished finish, you need to take your time and follow a few simple guidelines.
First off, gather your tools. A good quality measuring tape, fabric scissors, and a rotary cutter can make all the difference. You might also want to have a cutting mat handy to protect your surfaces and ensure clean cuts. Before you dive into the cutting process, lay your fabric flat on a clean, even surface. This not only helps you see the entire piece but also minimizes the chances of any wrinkles that could throw off your measurements.
Next, start by measuring your desired dimensions. For a standard fabric basket, you might want to aim for a base that is about 12 inches by 12 inches and a height of around 8 inches. However, feel free to adjust these dimensions to suit your needs. Once you have your measurements, use a fabric marking pen to outline where you’ll cut. This step is essential because it gives you a visual guide, making it easier to cut straight lines.
Now, let’s talk about cutting techniques. When using scissors, always cut with the blade facing away from you to avoid accidents. If you’re using a rotary cutter, make sure to apply even pressure as you glide it along the cutting mat. This technique not only speeds up the process but also ensures that your cuts are clean and precise.
If you’re feeling a bit overwhelmed, don’t worry! Here’s a quick recap of the key steps to remember:
- Gather your measuring tools and cutting equipment.
- Lay the fabric flat, ensuring it’s wrinkle-free.
- Measure and mark your cutting lines carefully.
- Use the appropriate cutting technique for clean edges.
By following these steps, you’ll ensure that your fabric pieces are accurate and ready for the next phase of your crafting adventure. Remember, the more precise your measurements and cuts, the better your final product will look. And trust me, once you see your beautifully crafted baskets come together, you’ll be glad you took the time to measure and cut correctly!
Q: What if I don't have a rotary cutter?
A: No worries! A good pair of fabric scissors will work just fine. Just make sure they are sharp for clean cuts.
Q: How do I know if my fabric is straight?
A: Look for the selvage edges, which are the finished edges of the fabric. Align these edges to help you cut straight lines.
Q: Can I use a regular ruler instead of a measuring tape?
A: Yes! A regular ruler can work for smaller pieces, but a measuring tape is more versatile for larger fabrics.
Creating a Cutting Template
Creating a cutting template is a game-changer when it comes to making fabric baskets. Think of it as your blueprint—without it, you might end up with uneven pieces that don’t fit together, which can be frustrating. To start, you’ll need some sturdy paper or cardboard to draft your template. The goal here is to ensure that each piece you cut out of your fabric is consistent in size and shape, ultimately leading to a more polished final product.
Begin by deciding on the dimensions of your basket. Consider how you intend to use it—whether for storing toys, magazines, or even as a stylish planter. Once you have a size in mind, use a ruler to measure and mark the dimensions onto your paper or cardboard. Remember, it’s wise to add a seam allowance of about 1/4 inch around your measurements, which will give you enough fabric to sew the pieces together without cutting too close to the edge.
Next, cut out the template carefully. This is where precision matters; the cleaner your cuts, the better your fabric pieces will align. If you’re feeling adventurous, you can also create different shapes for your baskets—rectangular, circular, or even hexagonal. Each shape can bring a unique flair to your home décor. Once you’ve cut out your template, it’s a good idea to label each piece, especially if your basket has multiple components like a base and sides.
To make the process even easier, you can use pattern weights or pins to secure your template to the fabric when you’re ready to cut. This prevents any shifting that could result in uneven edges. If you’re cutting multiple pieces, consider using a rotary cutter for a faster and more accurate cut, especially if you’re working with thicker fabrics.
In summary, creating a cutting template is an essential step in your DIY fabric basket project. By taking the time to ensure accuracy in your cuts, you set the foundation for a beautifully crafted basket that not only looks good but also functions well. So grab your materials, make that template, and let your creativity flow!
- What materials are best for making a cutting template? Sturdy paper or cardboard works well. It should be durable enough to withstand multiple uses.
- How do I determine the right dimensions for my basket? Think about what you want to store in the basket and measure accordingly. Adding a seam allowance is crucial.
- Can I use my cutting template for different basket designs? Absolutely! Feel free to experiment with various shapes and sizes to create unique baskets.

Fabric Preparation Techniques
When it comes to crafting your DIY fabric baskets, the preparation of your fabric is an essential step that can significantly enhance the overall appearance and durability of your finished product. Think of fabric preparation as the foundation of a house; without a solid base, everything built on top may crumble. So, let’s dive into some effective techniques to ensure your fabric is ready for crafting!
First and foremost, washing your fabric is crucial. Many fabrics come with a finish that can affect how they behave when you start sewing. Washing your fabric not only removes any chemicals or dirt but also pre-shrinks it, preventing any nasty surprises after your basket is complete. Always follow the care instructions on the fabric label to avoid damaging it. For instance, if you’re working with cotton, a gentle cycle in cold water usually does the trick.
After washing, the next step is ironing your fabric. This might seem tedious, but trust me, it’s worth it! Ironing helps to smooth out any wrinkles and creases that could interfere with your cutting and sewing. A flat surface is key to achieving clean lines and precise cuts. If you have fabric that tends to fray, consider using a bit of starch while ironing to give it extra stiffness and prevent those pesky threads from unraveling.
Another technique to consider is interfacing. This is particularly useful if you want your baskets to be more structured and hold their shape. Interfacing comes in various weights and types, such as fusible or sew-in, allowing you to choose based on how sturdy you want your basket to be. To apply fusible interfacing, simply place it on the wrong side of your fabric, cover it with a pressing cloth, and apply heat with your iron. This will bond the interfacing to the fabric, giving it a nice, firm feel.
Lastly, don’t overlook the importance of cutting techniques. Using a rotary cutter and a cutting mat can make a world of difference compared to scissors, especially for straight edges. Ensure your fabric is laid out flat and smooth before making any cuts. If you’re cutting multiple pieces, stacking your fabric can save time, but make sure to pin it securely to avoid any shifts.
In summary, fabric preparation is not just a preliminary step; it’s an art form that can elevate your DIY fabric baskets from ordinary to extraordinary. By washing, ironing, interfacing, and cutting your fabric with care, you set the stage for a successful crafting experience. So, roll up your sleeves and get ready to unleash your creativity!

Sewing Techniques for Beginners
Getting started with sewing can feel like stepping into a new world, but don't worry! It's like learning to ride a bike; once you get the hang of it, you'll be zooming along in no time. The key is to start with some basic sewing techniques that will set you up for success in crafting your DIY fabric baskets.
First off, the most fundamental stitch you should master is the straight stitch. This is your bread and butter. It’s used for sewing seams and is the backbone of most sewing projects. You can achieve a straight stitch using a sewing machine or even by hand. For machine sewing, simply adjust the stitch length to your preference—generally, a medium length works well for fabric baskets. If you're sewing by hand, make sure to keep your stitches even and consistent for a polished look.
Another essential technique is the backstitch. This stitch is perfect for reinforcing seams, ensuring that your fabric baskets can withstand daily use. To do this, simply sew a few stitches forward and then backtrack over them. This creates a secure seam that won’t easily unravel. Think of it as a safety net for your sewing projects!
As you gain confidence, you might want to explore zigzag stitches. These are fantastic for finishing raw edges and preventing fraying, which is especially important for fabric baskets that may see a lot of wear and tear. You can use a zigzag stitch along the edges of your fabric pieces before you sew them together, giving your baskets a clean, professional finish.
Now, you might be wondering about the importance of pressing your seams. It might seem tedious, but pressing is crucial in sewing. After you sew a seam, use an iron to press it open. This step will help your fabric baskets maintain their shape and look crisp. Think of it as giving your project a little spa treatment!
Finally, don't shy away from using pins and clips to hold your fabric pieces together before sewing. This is especially useful when working with curves or when you have multiple layers. Using pins helps to keep everything in place, ensuring that your stitches will be straight and your baskets will turn out beautifully. Just make sure to remove the pins as you sew to avoid any unfortunate accidents!
To wrap it up, here’s a quick summary of the essential sewing techniques for beginners:
| Technique | Description |
|---|---|
| Straight Stitch | The basic stitch used for seams. |
| Backstitch | A reinforcing stitch for durability. |
| Zigzag Stitch | Used to finish edges and prevent fraying. |
| Pressing Seams | Helps maintain shape and neatness. |
| Pins and Clips | Hold fabric pieces together while sewing. |
With these techniques under your belt, you're well on your way to creating stunning fabric baskets that not only look great but are also functional. Remember, practice makes perfect, so don’t hesitate to experiment and find your unique sewing style!
- How do I choose the right needle for my fabric? It depends on the fabric type. For lightweight fabrics, use a smaller needle, while heavier fabrics require a larger needle.
- Can I sew without a sewing machine? Absolutely! Hand sewing is a great way to start, especially for smaller projects.
- What if I make a mistake while sewing? Mistakes are part of the learning process. Just unpick the stitches and try again!
Adding Personal Touches
When it comes to crafting your DIY fabric baskets, adding personal touches is what truly transforms them from generic storage solutions into unique expressions of your style. Think of it as seasoning a dish; just as a sprinkle of spice can elevate the flavor, a few carefully chosen embellishments can make your baskets pop with personality. So, how can you infuse your creativity into these functional pieces? Let’s explore some exciting options!
One of the simplest yet most effective ways to personalize your baskets is through embroidery. Whether you choose to stitch your initials, a favorite quote, or even a whimsical design, embroidery adds a handcrafted charm that is hard to beat. Imagine a cozy corner in your home adorned with a basket that not only serves a purpose but also tells a story through its embroidered art. If you’re new to embroidery, don't worry! There are plenty of tutorials online that can guide you through the basics.
Another fantastic option is appliqué. This technique involves sewing a piece of fabric onto your basket to create a design or pattern. You can use contrasting colors or patterns that complement your main fabric, giving your basket a layered look. Picture a vibrant floral appliqué on a neutral-toned basket—such a striking combination! Plus, this method allows for endless creativity; you can even use scraps from other projects, making it a sustainable choice.
If you're feeling particularly adventurous, consider using fabric paint. With fabric paint, the possibilities are practically limitless! You can create intricate designs, fun patterns, or even abstract art. Just imagine a basket splashed with vibrant colors that brighten up your room. To get started, make sure to choose fabric paint that is specifically designed for textiles, as this ensures your designs will withstand the test of time and washing.
As you think about personalizing your baskets, also consider the color schemes and patterns you want to incorporate. Choosing colors that resonate with your home décor can create a cohesive look throughout your space. For instance, if your living room features earthy tones, selecting fabrics in soft greens and browns can create harmony. On the other hand, if you want your baskets to be a statement piece, bold colors and geometric patterns can add a fun pop to your décor.
Ultimately, personalizing your fabric baskets is all about expressing your individual style. Whether you opt for embroidery, appliqué, fabric paint, or a combination of these techniques, the key is to have fun and let your creativity shine. After all, these baskets are not just for storage; they are a reflection of you and your unique aesthetic. So gather your materials, unleash your imagination, and start crafting baskets that are as stylish as they are functional!
- What type of fabric is best for making baskets? Cotton fabric is often recommended due to its durability and ease of handling.
- Can I wash my fabric baskets? Yes, but it's best to check the care instructions for your specific fabric and embellishments.
- How do I ensure my embroidery or appliqué stays intact? Use a stabilizer while stitching and follow up with proper care instructions to maintain the design.
Choosing Colors and Patterns
When it comes to crafting your DIY fabric baskets, the colors and patterns you choose can make all the difference. Imagine walking into a room where your baskets not only serve a purpose but also enhance the overall aesthetic. It's like adding a splash of color to a black-and-white photo; it just brings everything to life! So, how do you choose the right hues and designs that resonate with your personal style and home décor?
First, consider the theme of your space. Are you going for a cozy, rustic vibe or a modern, minimalist look? The colors you select should complement your existing palette. For instance, if your room features soft pastels, opting for muted floral patterns can create a harmonious feel. On the other hand, if you have bold, vibrant walls, consider using solid colors or geometric patterns that can stand out without clashing.
Next, think about the functionality of the baskets. If they will be placed in a high-traffic area, darker colors or busy patterns can help hide wear and tear, while lighter colors may show stains more easily. Additionally, using patterns that have a bit of texture can add visual interest without overwhelming the space. For example, a fabric with a subtle herringbone pattern can add depth without being too loud.
Don't forget to play with contrast! Combining light and dark fabrics can create stunning visual dynamics. For instance, a dark navy basket with a bright yellow lining can create a striking look that draws the eye. It's all about balance—too much of one color can make the design feel flat, while a well-placed contrast can elevate it.
Lastly, consider incorporating seasonal colors into your fabric choices. Just as you would swap out your wardrobe, your fabric baskets can reflect the changing seasons. Think warm oranges and browns for autumn, vibrant greens and florals for spring, and cool blues and whites for winter. This not only keeps your décor fresh but also adds a fun, dynamic element to your home.
In summary, choosing the right colors and patterns for your fabric baskets can transform them from simple storage solutions into stunning decorative pieces. Remember to consider your space's theme, the functionality of the baskets, the importance of contrast, and the beauty of seasonal colors. With these tips in mind, you're sure to create fabric baskets that are not just practical but also a true reflection of your unique style!
- What types of fabric are best for DIY baskets? Cotton and canvas are popular choices due to their durability and variety in patterns.
- How do I care for my fabric baskets? Regularly clean them according to the fabric type, and store them in a dry place to maintain their shape.
- Can I use recycled fabrics for my baskets? Absolutely! Recycled fabrics can add a unique touch and are an eco-friendly option.
- What is the best way to choose a color scheme? Consider the existing colors in your room and choose complementary shades that enhance the overall décor.
Finishing Touches and Care Instructions
Once you've meticulously crafted your DIY fabric baskets, it’s time to focus on the finishing touches that will elevate your creation from good to absolutely stunning. This is where the magic happens! Adding those final details not only enhances the visual appeal but also ensures that your baskets stand the test of time. One of the most important aspects of finishing your baskets is to reinforce the seams. This can be done by going over the edges with a zigzag stitch or using pinking shears to prevent fraying. Trust me, a little extra care here can make a world of difference.
Next, consider adding a lining to your baskets. A well-fitted lining not only adds an extra layer of durability but also provides a polished look. Choose a contrasting or complementary fabric to give your basket a pop of color. When sewing the lining, make sure to leave a small opening so you can turn it inside out for a clean finish. Once you’ve done that, tuck it neatly into your basket and secure it with a few hand stitches at the top.
Now, let’s talk about care instructions. To keep your fabric baskets looking fresh and vibrant, it’s essential to maintain them properly. Most fabric baskets can be spot cleaned with a damp cloth and mild detergent. However, if your baskets are made from cotton or another machine-washable fabric, feel free to toss them in the washing machine on a gentle cycle. Just remember to air dry them to prevent any shrinkage.
Here’s a quick overview of care instructions in a table format:
| Care Instructions | Details |
|---|---|
| Spot Clean | Use a damp cloth and mild detergent for small stains. |
| Machine Wash | Wash on a gentle cycle for cotton or machine-washable fabrics. |
| Air Dry | Always air dry to maintain shape and prevent shrinkage. |
Additionally, if you want to keep your baskets looking brand new, consider storing them in a cool, dry place away from direct sunlight. This will help prevent fading and keep the fabric looking vibrant for years to come. If you notice any wrinkles after washing, a quick iron on a low setting can help restore the fabric’s smooth finish. Just be cautious with any embellishments you’ve added, as they may require special care.
In conclusion, your DIY fabric baskets are not just storage solutions; they are a testament to your creativity and style. By paying attention to these finishing touches and care instructions, you can ensure that your baskets remain functional and beautiful for a long time. Remember, the effort you put into these details will reflect in the final product, making your home décor truly unique and classy.
- What type of fabric is best for making baskets? Cotton and canvas are great choices due to their durability and ease of handling.
- Can I customize the size of my baskets? Absolutely! Just adjust your measurements according to your needs.
- How do I prevent my baskets from losing shape? Reinforcing seams and using interfacing can help maintain their structure.
- Is it safe to wash my fabric baskets in the washing machine? Yes, but make sure they are made from machine-washable fabrics and always air dry.
Frequently Asked Questions
- What type of fabric is best for making DIY baskets?
When it comes to choosing the right fabric for your DIY baskets, look for materials that are both durable and aesthetically pleasing. Cotton canvas, denim, and upholstery fabric are excellent choices due to their sturdiness. If you want a more decorative touch, consider fabrics with fun patterns or textures that reflect your personal style.
- Do I need a sewing machine to make fabric baskets?
While a sewing machine can make the process quicker and easier, you can absolutely create fabric baskets by hand-sewing if you prefer. Just keep in mind that hand-sewing may take more time and patience. If you're new to sewing, starting with a machine can help you achieve cleaner and more consistent stitches.
- How can I ensure my fabric is ready for crafting?
Preparing your fabric properly is key to a successful basket. Always wash and iron your fabric before cutting it. This not only removes any dirt or chemicals but also helps to prevent shrinkage later on. If you're using lightweight fabrics, consider adding interfacing for extra structure.
- What embellishments can I use to personalize my baskets?
The sky's the limit when it comes to personalizing your fabric baskets! You can use embroidery, fabric paint, or even appliqué to add a unique touch. Think about your home décor and choose embellishments that enhance your style. Adding buttons or patches can also give your baskets a fun, quirky vibe!
- How do I care for my fabric baskets?
To keep your fabric baskets looking great, it's essential to follow proper care instructions. Spot clean them with a damp cloth for minor stains, and for deeper cleaning, check if the fabric is machine washable. Always air dry your baskets to maintain their shape and avoid any shrinkage.


