
How to Use Sketchbooks for Drawing and Painting
Sketchbooks are more than just blank pages waiting to be filled; they are a canvas for creativity, a playground for your imagination, and a valuable tool for artists of all skill levels. Whether you're a beginner just starting your artistic journey or a seasoned artist looking to refine your skills, sketchbooks offer a unique opportunity to explore, experiment, and express yourself. In this article, we will delve into the various ways sketchbooks can enhance your drawing and painting skills, providing practical tips and techniques that will help you make the most of your sketchbook experience.
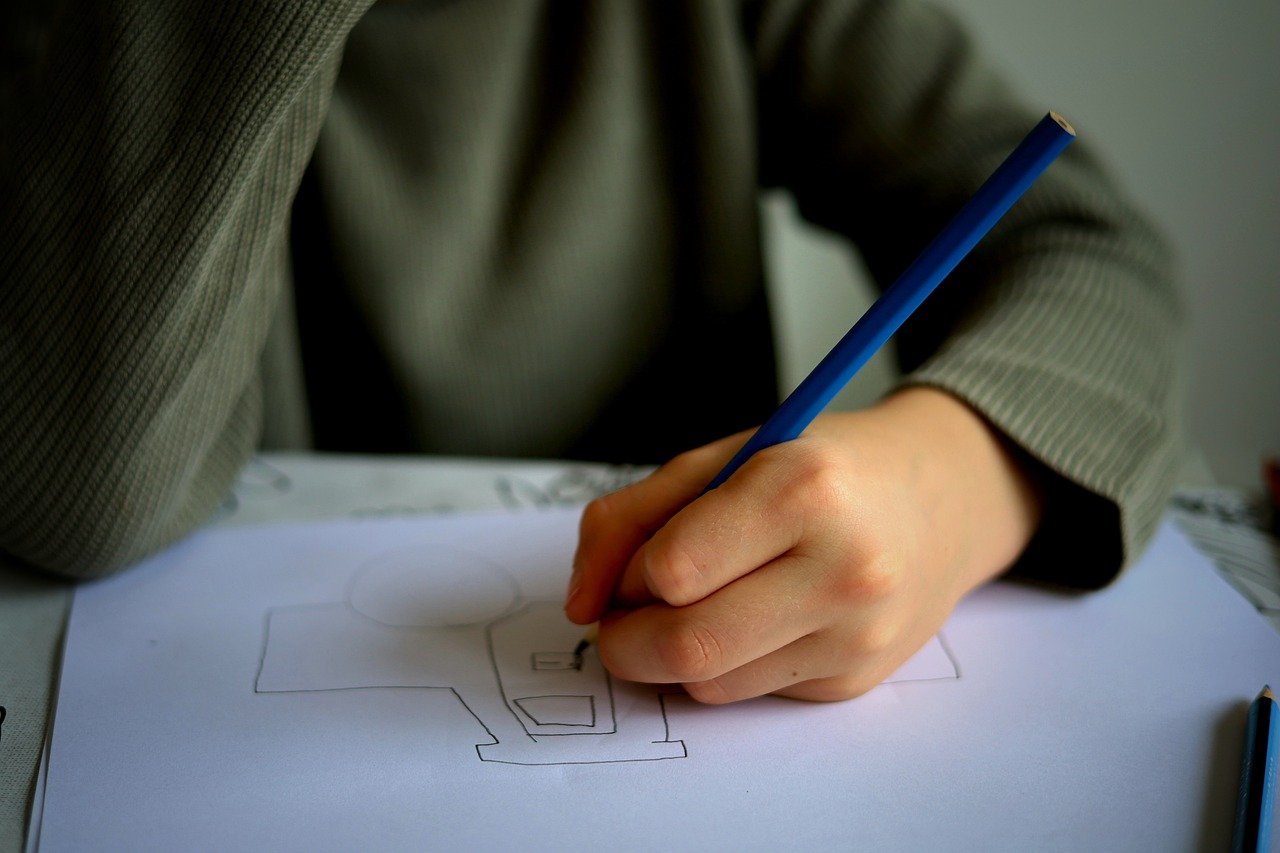
Imagine your sketchbook as a personal diary, but instead of words, you fill it with images, colors, and ideas. This space allows you to document your thoughts, emotions, and artistic evolution over time. It's a place where you can take risks without the pressure of creating a "perfect" piece of art. With each stroke of your pencil or brush, you're not just creating art; you're unleashing your inner artist and discovering your unique style.
Throughout this article, we will cover essential aspects of using sketchbooks effectively, from choosing the right one to mastering basic techniques, incorporating color, and even using your sketchbook for concept development. We'll also explore how to document your artistic journey and engage in challenges that will push your creativity to new heights. So, grab your favorite sketchbook and let's dive into the wonderful world of drawing and painting!
Selecting the right sketchbook is crucial for artists. The type of paper, size, and binding can significantly impact your drawing experience and the results you achieve. For instance, if you prefer using watercolors, you'll want a sketchbook with thicker, textured paper that can handle moisture without warping. On the other hand, if you're more into pencil sketches, a smooth paper surface may be your best bet.
When considering size, think about how you plan to use your sketchbook. A larger sketchbook provides ample space for detailed drawings, while a smaller one is more portable and perfect for on-the-go sketching. Additionally, the binding type can affect how the sketchbook lays flat when open, which is essential for comfortable drawing. Here’s a quick breakdown:
| Type | Best For |
|---|---|
| Spiral Bound | Easy to lay flat, great for various mediums |
| Hardcover | Durable, ideal for detailed work |
| Softcover | Lightweight and portable |
Mastering basic sketching techniques lays the foundation for more advanced drawing. Essential skills such as line control, shading, and perspective are vital in creating compelling artwork. Let’s break down these techniques to help you enhance your skills.
Understanding line quality is vital for creating dynamic sketches. The way you control your lines can significantly alter the mood and energy of your artwork. For instance, a quick, fluid line can convey movement, while a slow, deliberate line can create a sense of calm. By varying your pressure and speed, you can add character and depth to your drawings.
Applying different pressure levels can create a range of line thicknesses. This technique adds depth and interest to your sketches, making them more visually appealing. Try practicing with varying pressure on a single line to see how it transforms your drawing.
Varying your drawing speed can influence the fluidity and expressiveness of your lines. Experimenting with fast and slow strokes can yield exciting results in your sketches, allowing you to discover your unique style.
Shading adds dimension to your sketches, making them more lifelike. Techniques like hatching, cross-hatching, and blending can help you achieve the desired effect. Don't shy away from experimenting with different methods to find what works best for you!
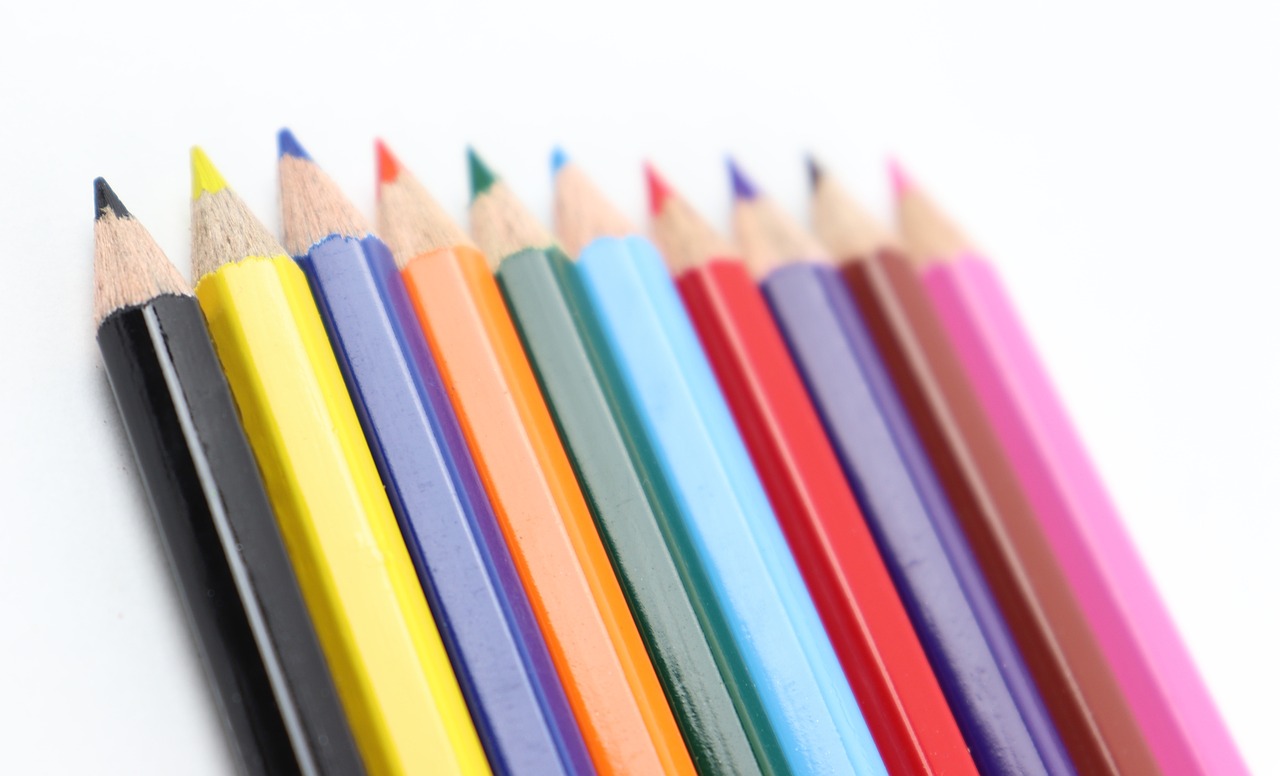
Color can transform your sketches into vibrant works of art. Using colored pencils, watercolors, and markers effectively can elevate your sketches to new heights. Each medium has its unique qualities, so take the time to explore them.
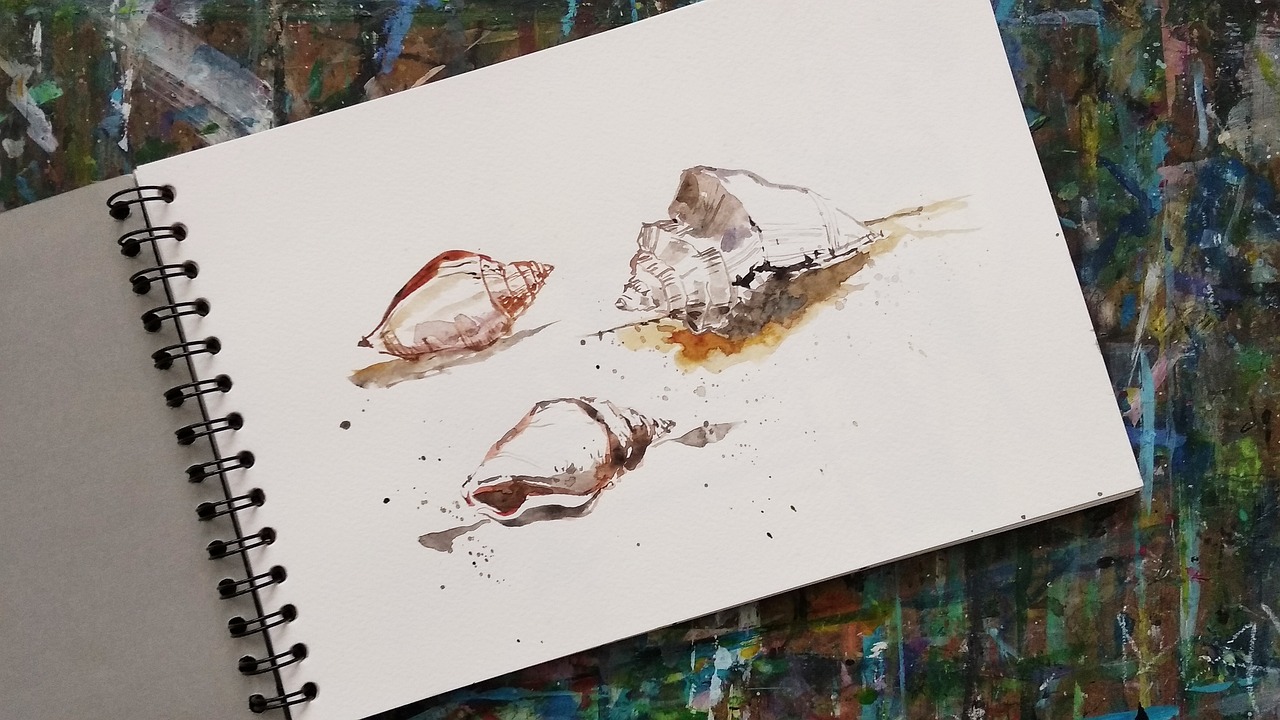
Watercolors offer a unique way to add color to your sketches. Techniques such as layering, wet-on-wet, and dry brushing can create stunning effects. Practice these techniques to see how they can enhance your artwork.
Blending colored pencils can produce smooth transitions and rich colors. Discover tips for layering and blending to achieve a professional finish in your sketches. Remember, the key is to build up color gradually for the best results.
Sketchbooks are invaluable tools for brainstorming and developing concepts. Use your sketches to plan larger projects and refine your ideas. It's a space where you can let your thoughts flow freely without judgment, allowing your creativity to flourish.
Keeping a sketchbook allows artists to document their progress and evolution. Reflecting on past sketches can provide valuable insights into your growth as an artist. It's like having a visual timeline of your artistic journey, showcasing your successes and areas for improvement.
Engaging in sketchbook challenges can spark creativity and push your artistic boundaries. Explore various prompts and challenges, like "draw something from your imagination" or "sketch your favorite object," to inspire your drawing practice.
Establishing a regular sketching routine is essential for growth. Set aside time each day or week to sketch, even if it's just for a few minutes. Staying motivated can be challenging, but remember, every stroke you make brings you closer to mastering your craft.
- How often should I sketch? Aim for daily practice, even if it's just a quick doodle.
- What materials do I need? Start with basic pencils and a sketchbook, then explore other mediums as you grow.
- Can I use my sketchbook for finished pieces? Absolutely! Many artists create stunning final works directly in their sketchbooks.

Choosing the Right Sketchbook
Choosing the right sketchbook is a pivotal step in your artistic journey. It's much like selecting the right canvas for a masterpiece; the wrong choice can hinder your creativity and impact your results. So, what should you consider when picking out your sketchbook? First and foremost, think about the paper type. Different mediums require different paper textures and weights. For instance, if you're planning to use watercolors, you’ll want a heavier, textured paper that can handle moisture without warping. Conversely, if you're mostly sketching with pencils or ink, a smoother surface may be more appropriate.
Next up is size. Sketchbooks come in a variety of dimensions, from pocket-sized to larger formats. The size you choose can affect how freely you express your creativity. A smaller sketchbook is portable and great for on-the-go sketches, while a larger one provides ample space for detailed work. Consider your typical drawing environment: do you sketch at home, or do you often find inspiration outdoors? Your answer will guide your choice.
Another crucial factor to consider is the binding of the sketchbook. There are various binding options available, each with its pros and cons. For example:
| Binding Type | Description |
|---|---|
| Spiral Bound | Allows the sketchbook to lay flat, making it easy to draw across pages. |
| Hardcover | Provides durability and protection but can be bulkier to carry around. |
| Softcover | Lightweight and flexible, ideal for sketching on the go. |
It's also worth mentioning that the number of pages can play a significant role in your decision. If you're the type of artist who loves to fill up pages quickly, a sketchbook with a higher page count is essential. However, if you prefer to take your time with each piece, a smaller sketchbook might be just right. The key is to find a balance that suits your personal style and workflow.
Lastly, don’t forget about the design of the sketchbook itself. Whether you prefer a classic look or something more modern and funky, the aesthetic can inspire you to pick it up and create. A sketchbook that resonates with you can make a world of difference in your motivation to sketch regularly.
In summary, when choosing the right sketchbook, consider the paper type, size, binding, number of pages, and design. Each of these elements can enhance your drawing experience and help you unleash your creative potential. So take your time, explore different options, and find the sketchbook that feels like an extension of your artistic self!
Basic Sketching Techniques
Mastering is like laying the groundwork for a beautiful house; without a solid foundation, everything that follows can be unstable. For artists, these techniques are essential for developing skills that will elevate your drawings from mere doodles to captivating pieces of art. Whether you're a beginner or a seasoned artist, honing these skills can significantly enhance your drawing abilities.
One of the first things to focus on is line control. Think of lines as the building blocks of your sketches. They define shapes, create movement, and convey emotions. By practicing different types of lines—straight, curved, thick, and thin—you'll develop a better understanding of how to express various forms and textures. Start by drawing simple shapes and gradually move on to more complex forms. Remember, every line you draw is a step towards improvement!
Understanding line quality is vital for creating dynamic sketches. A sketch that lacks variation in line quality can feel flat and lifeless. To make your lines more expressive, try varying your pressure and speed while drawing. For example, a gentle touch can create delicate, wispy lines, while firm pressure can produce bold, striking strokes. This variation not only adds character to your sketches but also enhances their overall visual appeal.
Applying different levels of pressure while sketching can create a range of line thicknesses. This technique adds depth and interest to your sketches. For instance, if you’re drawing a tree, you might want to use lighter pressure for the leaves to make them appear soft and airy, while applying more pressure for the trunk to give it strength and stability. Experiment with this technique to see how it can transform your drawings.
Varying your drawing speed can influence the fluidity and expressiveness of your lines. When you draw slowly, you can focus on precision, capturing every detail meticulously. On the other hand, quick strokes can convey movement and energy, adding a dynamic quality to your sketches. Try alternating between fast and slow strokes; you might be surprised at the exciting results you achieve!
Shading is another crucial aspect that adds dimension to your sketches, making them more lifelike. Without proper shading, even the most detailed drawings can appear flat. There are several techniques you can explore to enhance your shading skills:
- Hatching: This involves drawing parallel lines closely spaced together to create a shadow effect.
- Cross-hatching: By layering intersecting lines, you can achieve a richer texture and deeper shadows.
- Blending: Use a blending stump or your finger to smooth out pencil strokes, creating a soft gradient.
As you practice these techniques, pay attention to how light interacts with objects. Understanding the direction of light will help you determine where shadows should fall, making your sketches more realistic.
In conclusion, mastering these basic sketching techniques is essential for any artist looking to improve their craft. By focusing on line quality, control, shading, and texturing, you'll build a strong foundation that will serve you well in your artistic journey. So grab your sketchbook, put these techniques into practice, and watch your skills flourish!
Q: How often should I practice sketching?
A: Ideally, you should practice sketching daily, even if it's just for a few minutes. Consistency is key to improvement.
Q: What materials do I need to start sketching?
A: All you need is a sketchbook and a pencil. As you progress, you can explore other materials like charcoal, ink, or colored pencils.
Q: Can I use a digital device for sketching?
A: Absolutely! Digital sketching has become increasingly popular and offers unique tools and flexibility.
Q: What if I make mistakes while sketching?
A: Mistakes are part of the learning process. Embrace them, and consider them opportunities to grow and improve your skills.
Line Quality and Control
This article explores the various ways sketchbooks can enhance your drawing and painting skills, offering practical tips and techniques for artists at all levels to make the most of their sketchbooks.
Selecting the right sketchbook is crucial for artists. Factors like paper type, size, and binding can significantly impact your drawing experience and the results you achieve.
Mastering basic sketching techniques lays the foundation for more advanced drawing. This section will cover essential skills such as line control, shading, and perspective.
Understanding line quality is vital for creating dynamic sketches. The way you control your lines can breathe life into your drawings, making them not just images, but stories waiting to be told. Think of your lines as the brushstrokes of your thoughts; each stroke has a personality of its own. By varying pressure and speed, you can alter the character of your lines, enhancing the overall impact of your artwork.
For instance, when you press down hard on your pencil, you create a bold, dark line that demands attention. Conversely, a light touch produces softer, more delicate lines that can convey subtlety and nuance. This interplay between pressure and line quality can be likened to the way a musician plays a note—sometimes strong and resonant, other times soft and whispering. The key is to practice and become aware of how your hand movements translate onto the page.
Applying different pressure levels can create a range of line thicknesses. This technique adds depth and interest to your sketches, making them more visually appealing. Imagine drawing a tree; the trunk might require a thick, heavy line to convey strength, while the leaves could be represented with lighter, finer lines to suggest delicacy. By mastering pressure techniques, you can transform a flat sketch into a three-dimensional representation.
Varying your drawing speed can influence the fluidity and expressiveness of your lines. When you draw quickly, you can capture the essence of movement, almost like a photographer taking a snapshot of a fleeting moment. On the other hand, slow strokes can allow for more detailed work, giving you time to think about each line you place on the paper. Experimenting with fast and slow strokes can yield exciting results in your sketches, helping you discover a style that resonates with your artistic voice.
To illustrate this, consider the following table that summarizes the effects of pressure and speed on line quality:
| Technique | Effect on Line Quality |
|---|---|
| Heavy Pressure | Bold, dark lines that stand out |
| Light Pressure | Soft, delicate lines that blend |
| Fast Speed | Fluid, dynamic lines that suggest motion |
| Slow Speed | Controlled, detailed lines that allow for precision |
In conclusion, mastering line quality and control is essential for any artist looking to elevate their sketches. It's all about practice and experimentation. So grab your sketchbook, let your hand dance across the pages, and discover the power of your lines!
Color can transform your sketches into vibrant works of art. This section discusses how to effectively use colored pencils, watercolors, and markers in your sketchbook.
Watercolors offer a unique way to add color to your sketches. Learn techniques for layering, wet-on-wet, and dry brushing to create stunning effects.
Blending colored pencils can produce smooth transitions and rich colors. Discover tips for layering and blending to achieve a professional finish in your sketches.
Sketchbooks are invaluable tools for brainstorming and developing concepts. This section examines how to use sketches for planning larger projects and refining ideas.
Keeping a sketchbook allows artists to document their progress and evolution. This section highlights the importance of reflection and learning from past sketches.
Engaging in sketchbook challenges can spark creativity and push your artistic boundaries. Explore various prompts and challenges to inspire your drawing practice.
Establishing a regular sketching routine is essential for growth. This section offers tips on how to stay motivated and make sketching a daily habit.
- How often should I use my sketchbook? Regular use is key—aim for daily or several times a week to build your skills.
- What kind of materials should I use in my sketchbook? It depends on your style! Experiment with pencils, inks, and colors to find what you love.
- Can I mix different mediums in one sketchbook? Absolutely! Mixing mediums can lead to exciting results and enhance your creativity.

Pressure Techniques
When it comes to sketching, understanding can truly elevate your artwork. Think of your pencil as a conductor, and the pressure you apply as the music it creates. Just like a symphony, the variations in pressure can lead to a dynamic range of expressions in your sketches. By mastering how to control this pressure, you can add a whole new dimension to your drawings.
Applying different levels of pressure while drawing can drastically change the thickness and darkness of your lines. For instance, a light touch can create delicate, airy lines, perfect for sketching soft textures like feathers or petals. On the other hand, pressing down harder can yield bold, dramatic strokes that convey strength and intensity, ideal for outlining or emphasizing specific features in your sketches.
To practice this technique effectively, consider the following steps:
- Start with a light grip: Begin by holding your pencil lightly and sketching gentle lines. This will help you get comfortable with the feel of your pencil on the paper.
- Gradually increase pressure: As you gain confidence, gradually apply more pressure. Notice how the line changes in thickness and darkness.
- Experiment with pressure variations: Try alternating between light and heavy pressure within the same line. This technique can create a sense of movement and depth in your sketches.
Another effective way to explore pressure techniques is to create a pressure gradient. Start with a single line, applying minimal pressure at one end and gradually increasing it towards the other. This exercise not only helps you visualize the effects of pressure but also enhances your control over line quality.
Ultimately, mastering pressure techniques allows you to communicate emotions and ideas more effectively in your sketches. Just like a painter chooses their brush strokes to convey mood, you can use pressure to tell a story through your drawings. So, grab your sketchbook, and let your pencil dance across the page, varying your pressure as you go!
- What is the best way to practice pressure techniques? Start with simple lines and shapes, gradually incorporating pressure variations into your sketches.
- Can I use pressure techniques with different drawing tools? Absolutely! Pressure techniques can be applied with pencils, pens, and even brushes.
- How do I know how much pressure to apply? It's all about practice. Experiment with different pressures and see what feels comfortable and looks good to you.

Speed Variations
When it comes to drawing, speed is not just a matter of how fast you can move your pencil across the page; it's about how speed influences the character of your lines. Imagine you're a musician. Just like a piece of music can change dramatically with the tempo, your sketches can take on a whole new life depending on how quickly or slowly you draw. Fast strokes often create a sense of excitement and energy, while slower strokes can evoke calmness and precision.
Experimenting with speed can lead to some unexpected and delightful results. For instance, when you draw quickly, you might find that your lines are more fluid and expressive. This technique allows your hand to move freely, capturing the essence of a subject rather than getting bogged down in details. In contrast, slowing down can help you focus on accuracy and detail, giving you time to observe your subject more closely and translate that observation onto the page.
Here are a few techniques to help you explore speed variations in your sketches:
- Quick Gesture Drawings: Try setting a timer for one or two minutes and sketch a subject in that time frame. This exercise encourages you to capture the essence of the subject without overthinking.
- Slow and Steady: Take your time with a single line or shape, focusing on the pressure and texture. This method helps you develop line quality and control.
- Mix It Up: Alternate between fast and slow drawing techniques in the same sketch. This contrast can create a dynamic visual interest.
Additionally, consider creating a speed variation chart in your sketchbook. You can dedicate a page to practice drawing the same object at different speeds. For example:
| Speed | Technique | Result |
|---|---|---|
| Fast | Quick strokes | Fluid and energetic lines |
| Medium | Moderate pressure | Balanced and defined lines |
| Slow | Deliberate strokes | Detailed and controlled lines |
By practicing these techniques, you'll not only improve your drawing skills but also develop a more intuitive understanding of how speed affects your artistic expression. So, grab your sketchbook and start experimenting! Remember, the beauty of art lies in exploration and discovery.
Shading and Texturing
Shading is one of the most powerful techniques in an artist's toolkit, bringing depth and dimension to your sketches. It’s like adding a sprinkle of magic that transforms a flat image into something that feels alive and three-dimensional. By mastering shading, you can create the illusion of light and shadow, making your subjects pop off the page. But how do you achieve that? Let’s dive into some essential shading techniques that will elevate your artwork.
One of the most common methods of shading is hatching. This technique involves drawing parallel lines closely together to create a gradient effect. The closer the lines are, the darker the area appears. It’s a bit like creating a fabric texture; the tighter the weave, the more opaque it becomes. You can also experiment with cross-hatching, where you layer lines in different directions. This adds another dimension to your shading, allowing you to create richer textures. Imagine it as weaving a tapestry; each layer adds complexity and depth.
Another effective technique is blending. This is where you can really let your creativity flow. Blending allows you to smooth out your pencil strokes, creating soft transitions between light and dark areas. You can use blending stumps, your fingers, or even a soft cloth to achieve this effect. Think of it like smudging chalk on a blackboard; the more you blend, the softer and more atmospheric your shading becomes. However, be careful not to overdo it; sometimes a little bit of roughness can add character to your sketches.
To help you visualize these techniques, here’s a simple table summarizing the key shading methods:
| Technique | Description | Best For |
|---|---|---|
| Hatching | Parallel lines drawn closely together. | Creating gradients and textures. |
| Cross-Hatching | Layering lines in different directions. | Adding depth and complexity. |
| Blending | Softening lines for smooth transitions. | Creating atmospheric effects. |
When it comes to texturing, think of your sketch as a canvas waiting for life to be breathed into it. Texture can be achieved through various means, such as stippling, where you create patterns of dots to form shadows and highlights. This technique can be particularly effective for creating the illusion of rough surfaces, like tree bark or fabric. It’s like creating a mosaic; each dot contributes to the overall picture, adding detail and interest.
Additionally, don’t forget about the importance of light source. Understanding where your light is coming from will guide your shading and texturing choices. If the light is coming from above, the underside of objects will be darker, while the top will be lighter. This concept is crucial for achieving realistic results in your sketches. You can think of it as setting the stage for a play; the light highlights the main characters while casting shadows that add depth to the scene.
In conclusion, shading and texturing are essential skills that can dramatically enhance your drawings. By experimenting with different techniques, you can find your unique style and voice as an artist. So grab your sketchbook, and let those shadows dance across the page!
- What materials do I need for shading? You can use pencils, charcoal, or even ink. It all depends on the effect you want to achieve!
- How do I know which shading technique to use? It often depends on the subject you’re drawing. Experiment with different techniques to see what works best for you!
- Can I combine different shading techniques? Absolutely! Combining techniques can lead to unique effects and richer textures.
Incorporating Color in Sketchbooks
Color can truly transform your sketches from simple outlines into vibrant masterpieces. Whether you're doodling in your spare time or working on detailed studies, the way you incorporate color can significantly enhance the overall impact of your artwork. It's not just about slapping some hues onto the page; it's about understanding how color interacts with your drawings and how it can evoke emotions and set a mood. So, let’s dive into some techniques and tools that can help you effectively use color in your sketchbook.
When it comes to adding color, there are several mediums you can choose from. Each medium has its unique characteristics and can yield different effects. Here are some popular options:
- Colored Pencils: Perfect for detailed work and precise application. They allow for layering and blending, giving you control over the intensity of your colors.
- Watercolors: Known for their fluidity, watercolors can create soft washes and vibrant splashes. They are fantastic for landscapes and abstract art.
- Markers: Markers provide bold, saturated colors and can be used for both fine detail and broad strokes. They dry quickly, making them great for on-the-go sketches.
Each of these mediums can be used in various ways to enhance your sketches. For instance, when using watercolors, consider the technique of layering. Start with a light wash as your base and gradually build up darker shades. This method not only adds depth but also allows for more intricate details to shine through. Experimenting with techniques such as wet-on-wet can create beautiful, soft blends that are perfect for backgrounds.
Colored pencils offer a different approach. One of the most effective ways to use them is through blending. By layering different colors and using a blending tool or even your fingers, you can achieve a smooth transition that mimics the look of paint. This technique is particularly useful for skin tones or natural elements like leaves and flowers.
Don’t forget about the importance of contrast. Using contrasting colors can draw attention to specific areas of your sketch, making them pop. For example, pairing warm colors like reds and yellows with cool colors like blues and greens can create a dynamic visual experience. Think of it like seasoning in cooking; the right amount can elevate the dish, but too much can overwhelm it.
Incorporating color isn't just about aesthetics; it’s also about storytelling. Each color can evoke different feelings and moods. For instance, warm colors can create a sense of excitement or energy, while cool colors can evoke calmness or sadness. When you're sketching, think about the story you want to tell and choose your colors accordingly. This approach can make your sketches not only visually appealing but also deeply engaging.
As you practice incorporating color into your sketches, keep in mind that mistakes are part of the process. Don't be afraid to experiment and push your boundaries. The beauty of sketching is that it allows for exploration and discovery. So grab your sketchbook, select your colors, and let your creativity flow!
Q: What is the best medium for beginners to start incorporating color?
A: Colored pencils are often recommended for beginners because they offer control and precision, making it easier to experiment with color without the mess of paint.
Q: How do I prevent my watercolors from becoming muddy?
A: To avoid muddy colors, always clean your brush between color changes and start with lighter washes before layering darker colors.
Q: Can I use multiple mediums in one sketch?
A: Absolutely! Mixing mediums can create interesting textures and effects. Just be mindful of how they interact with each other.

Watercolor Techniques
Watercolors are a fantastic medium that can breathe life into your sketches, transforming simple lines into vibrant masterpieces. The beauty of watercolor lies in its versatility and the myriad of techniques you can employ to achieve different effects. Whether you're a beginner or a seasoned artist, understanding these techniques can elevate your work to new heights. So, let's dive into the world of watercolor and explore some essential methods!
One of the most popular techniques is layering. This involves applying multiple transparent washes of color, allowing each layer to dry before adding the next. Layering not only deepens the color but also creates a sense of depth in your artwork. Imagine building a cake, where each layer adds flavor and texture; similarly, each wash in watercolor adds richness to your painting.
Another exciting approach is the wet-on-wet technique. This method entails applying wet paint onto a wet surface, which allows colors to blend seamlessly, creating soft edges and beautiful gradients. It's akin to watching clouds merge in the sky, where colors flow and intermingle, resulting in stunning, ethereal effects. To achieve this, start by wetting your paper with clean water, then drop in your colors. Watch as they dance and swirl together!
For those looking to create more defined shapes and textures, the dry brushing technique is a must-try. This involves using a dry brush with minimal paint to create rough textures and fine details. It's like scratching the surface of an object to reveal its underlying texture. When using dry brushing, ensure your brush is not overloaded with paint; a little goes a long way!
In addition to these techniques, it's essential to understand the importance of color mixing. Mixing colors effectively can lead to stunning results. A basic color wheel can help you visualize how colors interact. For example, mixing complementary colors can create neutral tones, while analogous colors can produce harmonious blends. Here’s a simple table to illustrate some common color combinations:
| Primary Color | Secondary Color | Resulting Color |
|---|---|---|
| Red | Yellow | Orange |
| Blue | Yellow | Green |
| Red | Blue | Purple |
Moreover, don’t forget about the power of masking fluid. This is a liquid latex that you can apply to your paper to protect certain areas from paint. Once your painting is complete and dry, simply rub off the masking fluid to reveal the untouched white paper beneath. It’s like putting on sunscreen before hitting the beach; it protects your skin from the sun, just as masking fluid protects your paper from unwanted color.
Finally, remember that practice is key. Experiment with these techniques in your sketchbook. Allow yourself to make mistakes and learn from them. Just like a chef perfecting a recipe, every stroke and splash of color brings you closer to mastering the art of watercolor. So grab your brushes, unleash your creativity, and let the magic of watercolors transform your sketches into stunning works of art!
- What type of paper is best for watercolor painting?
Watercolor paper is specifically designed to handle the moisture and weight of watercolors. Look for 200 lb (heavyweight) or 300 lb (extra heavyweight) paper for best results.
- Can I use regular paints in my watercolor sketchbook?
While you can use regular paints, they may not achieve the same fluidity and transparency that watercolors offer. It's best to stick to watercolor-specific products for optimal results.
- How do I clean my watercolor brushes?
Rinse your brushes thoroughly with water after each use. For stubborn paint, use mild soap and reshape the bristles before allowing them to dry.
Colored Pencil Blending
When it comes to drawing with colored pencils, blending is like adding the secret ingredient to your favorite recipe—it elevates your artwork from good to absolutely stunning! Blending allows you to create smooth transitions between colors, resulting in a more polished and professional look. The beauty of colored pencils lies in their versatility; with the right techniques, you can achieve a wide range of effects that can make your sketches pop!
One of the most effective ways to blend colored pencils is by layering. Start with a light application of your base color, then gradually build up layers of additional colors. This method not only enriches the overall hue but also creates depth in your artwork. Think of it like painting a sunset; you wouldn’t just slap on one color and call it a day! Instead, you’d layer yellows, oranges, and reds to capture the true essence of that breathtaking view.
Another technique to consider is the use of a blending tool. You can use a variety of tools such as a blending stump, cotton swab, or even your fingers to achieve different effects. For instance, a blending stump can help you create a softer, more seamless blend, while your fingers can add a bit of texture. Just remember to keep your tools clean to avoid muddying your colors.
Additionally, you might want to explore the technique of burnishing. This involves applying heavy pressure with a lighter color over the darker layers, which can create a smooth, glossy finish. Burnishing is particularly useful when you want to achieve a vibrant, saturated look. Just be cautious—too much pressure can wear down your pencil leads quickly, so it's best used sparingly.
To further enhance your understanding of colored pencil blending, here’s a quick table summarizing some essential techniques:
| Technique | Description | Best For |
|---|---|---|
| Layering | Applying multiple layers of color to create depth. | Rich, complex colors. |
| Blending Tool | Using tools like blending stumps or fingers to smooth colors. | Soft transitions. |
| Burnishing | Applying pressure with a lighter color over darker layers. | Vibrant, glossy finishes. |
Incorporating these blending techniques into your sketching practice can dramatically change the outcome of your artwork. So grab your colored pencils, experiment with these methods, and watch as your sketches transform into vibrant masterpieces! Remember, blending is not just about mixing colors; it's about bringing your artistic vision to life and making your drawings truly unique.
Q: What is the best type of paper for colored pencil blending?
A: The best paper for colored pencil blending is one that has a bit of texture, such as bristol or watercolor paper. This texture allows the colored pencils to grip the surface better, making blending easier and more effective.
Q: Can I use water with colored pencils for blending?
A: Yes! You can use water with water-soluble colored pencils. Applying a wet brush over your colored pencil marks can create beautiful washes and enhance your blending techniques.
Q: How do I avoid wax bloom when blending with colored pencils?
A: Wax bloom occurs when the wax in colored pencils rises to the surface, creating a cloudy effect. To avoid this, try using less pressure when applying your colored pencils, and make sure to blend thoroughly to keep the colors integrated.
So, go ahead and dive into the world of colored pencil blending! With practice and experimentation, you'll find your unique style and techniques that work best for you.
Using Sketchbooks for Concept Development
Sketchbooks are not just a collection of random drawings; they are powerful tools for concept development. Whether you are an aspiring artist or an experienced professional, utilizing your sketchbook effectively can lead to the birth of incredible ideas. Think of your sketchbook as a playground for your imagination, where every doodle and note can evolve into something remarkable. The beauty of a sketchbook lies in its ability to capture fleeting thoughts and transform them into tangible concepts.
One of the most effective ways to use your sketchbook for concept development is to treat it as a brainstorming space. When you have an idea, no matter how vague, jot it down. You don’t have to create a masterpiece every time; sometimes, a simple sketch or a few words can ignite your creativity. For instance, if you're working on a character design, start with rough shapes and gradually add details. This iterative process allows you to explore different possibilities without the pressure of perfection.
Additionally, consider using your sketchbook for mind mapping. This technique helps you visualize connections between different ideas. Begin with a central theme in the middle of the page, then branch out with related concepts, sketches, and notes. This method not only organizes your thoughts but also reveals new avenues for exploration. Here’s a quick example of how a mind map might look:
    [Main Idea]
        ├── Idea 1
        │   ├── Detail A
        │   └── Detail B
        ├── Idea 2
        │   └── Detail C
        └── Idea 3
            ├── Detail D
            └── Detail E
Furthermore, incorporating visual references into your sketchbook can greatly enhance your concept development. You can cut out images from magazines, print photos, or even create collages that inspire you. By surrounding yourself with visual stimuli, you can spark fresh ideas and perspectives. Remember, the goal is to create a rich tapestry of inspiration that you can draw upon when developing your concepts.
Another essential aspect of using your sketchbook for concept development is to document your process. As you refine your ideas, make notes about what works and what doesn’t. This reflection will not only improve your current project but also serve as a valuable resource for future endeavors. You might be surprised to find that revisiting older sketches can reignite your passion for a concept you thought was long forgotten.
Lastly, don’t forget to challenge yourself! Set aside time for sketchbook prompts that push you out of your comfort zone. Whether it’s a daily drawing challenge or a themed sketch session, these activities can lead to unexpected breakthroughs in your concept development. Engaging with your sketchbook regularly helps to keep your ideas fresh and your creativity flowing.
In conclusion, your sketchbook is a vital companion in your artistic journey. By using it as a space for brainstorming, mind mapping, incorporating visual references, documenting your process, and challenging yourself, you can unlock a world of creative possibilities. So grab your favorite pencil, open that sketchbook, and let your imagination run wild!
- How often should I use my sketchbook for concept development?
It's beneficial to use your sketchbook regularly. Aim for daily or weekly sessions to keep your ideas flowing.
- What if I’m not good at drawing?
Remember, sketchbooks are about capturing ideas, not creating perfect art. Focus on expressing your thoughts rather than the quality of your drawings.
- Can I mix different mediums in my sketchbook?
Absolutely! Mixing mediums like pencil, ink, and watercolor can add depth and interest to your sketches.
Documenting Your Artistic Journey
Every artist knows that the path to mastery is often winding and filled with unexpected turns. When you keep a sketchbook, you’re not just creating art; you’re in a way that can be both enlightening and inspiring. Think of your sketchbook as a personal diary, but instead of words, it’s filled with your thoughts and emotions expressed through lines, colors, and textures.
As you flip through the pages, you’ll see the evolution of your skills and ideas. It’s like watching a time-lapse video of your growth as an artist. You can observe how your style has changed, how your techniques have improved, and how your understanding of art has deepened. This reflection is crucial because it allows you to identify patterns in your work, recognize what inspires you, and understand the areas where you still want to grow.
Moreover, documenting your artistic journey can serve as a powerful motivational tool. When you look back at your earlier sketches, you might be surprised by how far you’ve come. This realization can reignite your passion and fuel your desire to create even more. It’s a reminder that every artist starts somewhere, and progress, no matter how small, is still progress.
To make the most of your sketchbook as a documentation tool, consider incorporating the following practices:
- Date your sketches: Adding a date to each entry helps you track your progress over time.
- Write reflections: Spend a few moments jotting down your thoughts about each piece. What worked? What didn’t? What would you do differently next time?
- Include inspirations: Attach clippings, photos, or quotes that inspire you alongside your sketches. This creates a richer context for your work.
Additionally, you might want to create a table of contents in the front of your sketchbook. This can help you quickly find specific pieces or themes you want to revisit. For example:
| Page Number | Sketch Title | Date |
|---|---|---|
| 1 | First Attempt at Portraits | 01/01/2023 |
| 15 | Watercolor Experiment | 02/15/2023 |
| 30 | Abstract Inspirations | 03/10/2023 |
Ultimately, your sketchbook is a reflection of your unique artistic journey. It’s a space where you can explore, experiment, and express yourself without judgment. By documenting your progress, you’re not just creating art; you’re building a visual legacy that captures your growth, challenges, and triumphs as an artist. So grab that sketchbook, start recording your journey, and watch as your artistry unfolds page by page.
Q: Why is it important to document my artistic journey?
A: Documenting your journey helps you track your progress, recognize your growth, and stay motivated as you see how far you’ve come.
Q: What should I include in my sketchbook?
A: You can include sketches, notes, reflections, inspirations, and even photographs that resonate with your artistic journey.
Q: How often should I sketch in my sketchbook?
A: Try to sketch regularly—whether daily, weekly, or whenever inspiration strikes. Consistency helps you improve and develop your style.

Sketchbook Challenges and Prompts
Engaging in sketchbook challenges can be a fantastic way to ignite your creativity and push the boundaries of your artistic skills. These challenges often provide a structured framework that can help you break out of your comfort zone and explore new techniques and themes. Imagine diving into a world where each page of your sketchbook becomes a playground for your imagination! Whether you’re a seasoned artist or just starting, challenges can offer a refreshing perspective and keep your artistic journey exciting.
So, what exactly are sketchbook challenges? They can vary from daily prompts to themed months where you focus on a specific subject. For instance, you might encounter a challenge that asks you to draw something that represents your favorite season. This not only encourages you to think creatively but also helps you develop a personal style as you interpret the prompt in your unique way. The beauty of these challenges is that they can be tailored to suit your interests and skill level, making them accessible and enjoyable for everyone.
Here are some popular types of sketchbook challenges you might consider:
- 30-Day Drawing Challenge: Commit to drawing something every day for a month. Each day presents a new prompt, which can range from simple objects to more complex scenes.
- Inktober: A challenge held every October where artists create ink drawings based on daily prompts. It's a great way to explore line work and shading.
- Character Design Challenge: Focus on creating unique characters based on specific themes or traits. This can help you develop your character-building skills.
To make the most of these challenges, consider setting specific goals. For example, you might aim to try a new medium, like watercolors or colored pencils, each week. This not only enhances your technical skills but also keeps the process fun and engaging. Remember, the goal is not perfection but rather exploration and growth. Allow yourself to make mistakes; they often lead to the most surprising and delightful discoveries!
Additionally, don’t hesitate to share your work with others. Joining online communities or local art groups can provide valuable feedback and encouragement. Social media platforms like Instagram or dedicated art forums can serve as excellent outlets for showcasing your progress and connecting with fellow artists. You might even find a sketch buddy to join you in your challenges, making the experience even more enjoyable.
Incorporating sketchbook challenges into your routine can also serve as a form of artistic therapy. It allows you to express your thoughts and feelings visually, providing a creative outlet that can be both relaxing and fulfilling. As you fill your sketchbook with diverse prompts and ideas, you’ll not only witness your artistic evolution but also gain a deeper understanding of your own creative process.
In conclusion, sketchbook challenges and prompts are invaluable tools for any artist looking to enhance their skills and keep their creativity flowing. Dive in, have fun, and let your sketchbook become a testament to your artistic journey!
1. What are some easy sketchbook prompts for beginners?
Some easy prompts include drawing your favorite food, sketching a pet, or illustrating a scene from a book you love. The key is to choose subjects that inspire you!
2. How do I stay motivated during a sketchbook challenge?
Setting small, achievable goals can help maintain motivation. Celebrate your progress, and remember that it’s okay to take breaks if needed. Joining a community can also provide support and encouragement.
3. Can I mix different mediums in my sketchbook?
Absolutely! Mixing mediums can lead to exciting results and help you discover new techniques. Just ensure that the paper you choose can handle the mediums you plan to use.
4. What if I don’t like my sketches?
It’s perfectly normal to feel that way sometimes. Remember, every artist has sketches they’re not fond of. Use them as learning experiences and don’t be afraid to experiment!
Maintaining Your Sketchbook Habit
Establishing a regular sketching routine is essential for growth as an artist. Just like any other skill, consistency is key to improvement. Think of your sketchbook as a gym for your creativity; the more you work out your artistic muscles, the stronger and more versatile they become. But how do you maintain that motivation to keep sketching day after day? Here are some practical tips to help you stick to your sketchbook habit.
First, set a realistic goal for yourself. Whether it's sketching for just 10 minutes a day or completing one page of sketches each week, having a target can provide a sense of direction. Remember, the goal isn't perfection; it's progress. You might find it helpful to create a sketching schedule that fits into your daily routine. This could be as simple as drawing during your morning coffee or dedicating some time in the evenings after work.
Another effective method is to create a sketchbook challenge. Challenges can be incredibly motivating, pushing you to explore new themes and techniques. You can either join existing challenges online or create your own. For instance, you might decide to draw a specific subject for each day of the week, such as:
- Monday: Portraits
- Tuesday: Landscapes
- Wednesday: Still Life
- Thursday: Animals
- Friday: Abstract
- Saturday: Fantasy
- Sunday: Free Choice
Moreover, don't forget to celebrate your achievements, no matter how small. Once you complete a challenge or reach a milestone, reward yourself! This could be a simple treat, a new art supply, or even just taking a moment to reflect on your progress. Acknowledging your efforts can significantly boost your motivation.
Lastly, consider involving others in your sketching journey. Share your work on social media or join a local art group. Engaging with a community can provide you with invaluable feedback, encouragement, and inspiration. Plus, seeing others' artwork can ignite your creativity and push you to try new things. Remember, art is not just about individual expression; it's also about connection.
In conclusion, maintaining a sketchbook habit is about finding a rhythm that works for you, setting achievable goals, and embracing the journey of growth. So grab that sketchbook, let your creativity flow, and watch as your skills blossom over time!
Q: How often should I sketch in my sketchbook?
A: Aim for a consistent schedule that works for you. Even sketching for just 10 minutes a day can lead to significant improvement over time.
Q: What if I feel uninspired?
A: It's completely normal to experience creative blocks. Try engaging in sketchbook challenges, exploring new subjects, or even taking a break to recharge your creativity.
Q: Can I use my sketchbook for mixed media?
A: Absolutely! Your sketchbook is a personal space for experimentation. Feel free to use colored pencils, watercolors, or even collage elements to enhance your sketches.
Q: Should I keep my sketches private?
A: It's up to you! Some artists prefer to keep their sketchbooks private for personal reflection, while others enjoy sharing their work for feedback and community engagement.
Frequently Asked Questions
- What type of sketchbook should I choose for drawing and painting?
Choosing the right sketchbook is essential for your artistic journey. Consider factors like paper type, size, and binding. For instance, if you love watercolors, opt for a sketchbook with thick, textured paper to handle wet media. If you prefer pencils, a smoother paper may be more suitable. Ultimately, it’s about finding what feels right for you!
- How can I improve my sketching techniques?
Improving your sketching techniques involves practice and experimentation. Start by focusing on line quality and control. Experiment with different pressures and speeds to see how they affect your lines. Also, don’t forget to explore shading techniques like hatching and blending to add depth to your sketches!
- Can I use color in my sketchbook?
Absolutely! Incorporating color can elevate your sketches to new heights. You can use colored pencils, watercolors, or markers to bring your drawings to life. Each medium offers unique effects, so it’s worth experimenting to find what works best for your style!
- How can sketchbooks help with concept development?
Sketchbooks are fantastic for brainstorming and refining ideas. Use them to jot down concepts for larger projects or to explore different approaches to a single idea. The freedom of a sketchbook allows you to think outside the box and develop your creative vision without pressure.
- Why is it important to document my artistic journey?
Documenting your artistic journey is crucial for growth. By keeping a sketchbook, you can track your progress, reflect on your evolution, and learn from past sketches. It’s like having a visual diary that showcases not only your skills but also your unique artistic voice!
- What are some good sketchbook challenges or prompts?
Engaging in sketchbook challenges can ignite your creativity! Try prompts like “draw your favorite object,” “sketch a scene from your day,” or “create a character based on a random word.” These challenges can push your boundaries and inspire new ideas.
- How can I maintain a regular sketchbook habit?
Establishing a sketching routine is all about consistency. Set aside a specific time each day, even if it’s just 10-15 minutes, to sketch. Create a comfortable space where you feel inspired, and don’t be afraid to make it fun! Remember, the more you sketch, the more you’ll grow as an artist!


