5 DIY Decor Ideas for Kitchen Counters
This article explores five creative DIY decor ideas to enhance your kitchen counters, adding style and functionality to your cooking space while reflecting your personal taste. The kitchen is often considered the heart of the home, where meals are prepared, and memories are made. By incorporating some DIY decor ideas, you can create a welcoming atmosphere that not only looks great but also serves practical purposes. Whether you're a seasoned chef or someone who simply enjoys the occasional cooking adventure, these decor ideas will inspire you to transform your kitchen counters into a reflection of your personality.
Creating a small herb garden in jars is an excellent way to bring greenery into your kitchen. Imagine having fresh basil, rosemary, or thyme right at your fingertips while you cook! Not only does this idea provide easy access to fresh herbs, but it also adds a charming aesthetic to your counters. You can use mason jars, terracotta pots, or even recycled glass containers. Just fill them with soil, plant your herbs, and place them in a sunny spot on your counter. The vibrant green of the herbs against the earthy tones of the jars creates a delightful contrast that brightens up your kitchen.
Personalized cutting boards not only serve a functional purpose but also act as decorative elements. They can be a canvas for your creativity! Learn how to customize your boards to match your kitchen's theme and showcase your culinary passion. You can choose to engrave your family name, a favorite quote, or even fun designs that reflect your cooking style. The beauty of a customized cutting board is that it becomes a conversation starter when you have guests over, adding a personal touch to your kitchen decor.
Woodburning techniques can transform a simple cutting board into a work of art. Imagine carving intricate designs or meaningful words into the surface of your board. Discover tips and tricks for using this method to create personalized designs that elevate your kitchen decor. The process involves using a woodburning tool that heats up and allows you to draw on the wood surface. It’s a fun and engaging way to express your creativity. Just think of it as painting, but instead of colors, you’re using heat to create stunning visuals!
Selecting the right type of wood is crucial for woodburning projects. Some woods take to burning better than others, allowing for clearer and more defined designs. Explore the best wood options that offer durability and visual appeal for your customized cutting boards. Popular choices include bamboo, maple, and cherry. Each type of wood has its unique grain and color, which can enhance the overall look of your board. When picking your wood, consider how well it holds up to daily use and cleaning, as well.
Safety is paramount when using woodburning tools. Learn essential safety tips to ensure a smooth and enjoyable crafting experience while creating your personalized kitchen decor. Always work in a well-ventilated area and wear protective eyewear to shield your eyes from smoke and debris. Additionally, keep a fire extinguisher nearby, just in case. Remember, woodburning can produce some intense heat, so always handle tools with care and allow your projects to cool down before touching them.
Painting techniques can also enhance cutting boards. You don’t have to limit yourself to just woodburning; get creative with paints! Discover various painting methods that allow you to express your creativity and add color to your kitchen counters. From vibrant acrylics to rustic chalk paints, the possibilities are endless. You can even use stencils to create beautiful patterns or quotes. Just imagine how a splash of color can brighten up your kitchen and make meal prep feel even more enjoyable!
A stylish fruit basket can serve as both a practical storage solution and a decorative centerpiece. Explore different designs and materials to find the perfect fruit basket for your kitchen. A well-placed fruit basket not only keeps your produce organized but also adds a pop of color to your counter. You can choose from woven baskets, metal bowls, or even ceramic containers. The key is to select a design that complements your kitchen decor while being functional.
Crafting your own woven baskets can add a personal touch to your kitchen decor. Learn the basics of basket weaving and how to incorporate different materials for a unique look. You can use natural fibers, such as jute or seagrass, to create a rustic feel, or opt for colorful yarns for a more vibrant touch. The process can be therapeutic and rewarding, and you’ll end up with a one-of-a-kind piece that showcases your creativity!
Using upcycled containers for fruit storage is an eco-friendly approach to kitchen decor. Discover creative ways to repurpose jars, bowls, and cans into stylish fruit baskets that enhance your counter space. For instance, old wooden crates can be transformed into charming fruit displays, or you can paint glass jars to create a cohesive look. Not only does this method reduce waste, but it also allows you to showcase your personal style while being kind to the planet.
1. How can I maintain my herb garden in jars?
To maintain your herb garden, ensure that your jars have proper drainage and receive adequate sunlight. Water them regularly, but avoid overwatering, as this can lead to root rot.
2. What type of paint is safe for cutting boards?
Use food-safe paints or finishes when painting cutting boards to ensure they are safe for food contact. Acrylic paints are generally a good choice, but always check labels for safety.
3. Can I use any type of wood for woodburning?
While you can use various types of wood for woodburning, softer woods like pine and basswood are easier to work with and result in better designs.
4. How do I clean my customized cutting board?
To clean your customized cutting board, use warm soapy water and a soft sponge. Avoid soaking it in water, and never put it in the dishwasher, as this can damage the wood.
5. What are some eco-friendly materials for DIY baskets?
Natural fibers like jute, cotton, and seagrass are excellent eco-friendly materials for DIY baskets. You can also use recycled fabrics or paper to create unique designs.
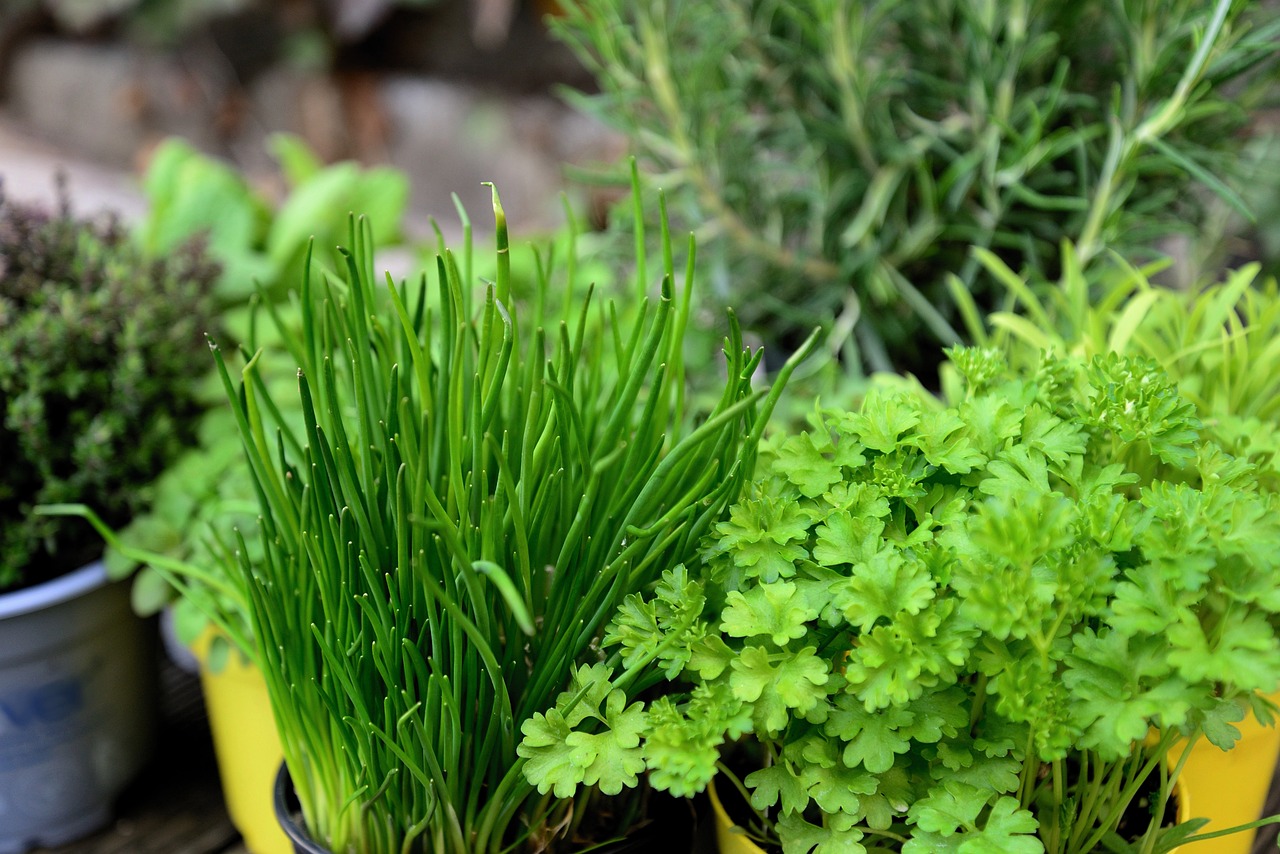
1. Herb Garden in Jars
This article explores five creative DIY decor ideas to enhance your kitchen counters, adding style and functionality to your cooking space while reflecting your personal taste.
Creating a small herb garden in jars is an excellent way to bring greenery into your kitchen. Imagine having fresh basil, thyme, or mint right at your fingertips while you whip up your favorite dishes! Not only does this idea add a pop of color and life to your counters, but it also provides you with fresh herbs that can elevate your culinary creations. Plus, the charming aesthetic of jars filled with lush greenery can make your kitchen feel more inviting and homely.
To get started, all you need are a few jars (glass or ceramic work wonderfully) and some potting soil. You can even repurpose old mason jars or any decorative containers you have lying around. The key is to ensure they have good drainage. If your jars don’t have holes at the bottom, simply add some small stones or gravel to the base before adding soil. This will help prevent water from accumulating and keep your herbs healthy.
Next, choose the herbs you’d like to grow. Some popular options include:
- Basil - Perfect for Italian dishes.
- Parsley - A versatile herb that can enhance many recipes.
- Mint - Great for drinks and desserts.
- Thyme - Adds depth to savory dishes.
Once you've selected your herbs, plant them in your jars, making sure to leave enough space for growth. Place your herb garden in a spot that gets plenty of natural light, such as a sunny windowsill. Remember to water them regularly, but be cautious not to overwater. A little care goes a long way in keeping your herbs thriving!
Not only does this DIY project beautify your kitchen, but it also encourages you to cook more with fresh ingredients. Imagine the satisfaction of snipping off a few leaves of basil to add to your pasta sauce, knowing that you grew it yourself! Plus, it’s a fantastic conversation starter when guests come over. You can share your culinary adventures and perhaps even inspire them to start their own herb gardens.
In summary, a herb garden in jars is a simple yet impactful way to enhance your kitchen decor while providing you with fresh ingredients. It’s a delightful blend of practicality and aesthetics that can transform your cooking space into a vibrant oasis. So, grab some jars, pick your favorite herbs, and let your kitchen bloom!
Q: What herbs are easiest to grow in jars?
A: Some of the easiest herbs to grow in jars include basil, parsley, and mint. They thrive well in smaller spaces and require minimal care.
Q: How much sunlight do the herbs need?
A: Most herbs prefer 6-8 hours of sunlight daily. A sunny windowsill is an ideal location.
Q: Can I grow herbs indoors year-round?
A: Yes, many herbs can be grown indoors year-round as long as they receive adequate light and care.
2. Customized Cutting Boards
When it comes to kitchen decor, personalization is key, and what better way to showcase your style than with customized cutting boards? These boards are not just practical tools for chopping and slicing; they can also serve as stunning decorative pieces that reflect your culinary passion and personality. Imagine a beautifully crafted cutting board that not only makes meal prep a breeze but also adds a unique touch to your kitchen counters. Whether you’re hosting a dinner party or preparing a family meal, a customized cutting board can be a conversation starter and a functional work of art.
One of the best parts about customizing your cutting boards is the variety of techniques you can use to make them truly yours. From woodburning to painting, the possibilities are endless. You can choose a design that resonates with you, whether it’s a favorite quote, a family recipe, or even a whimsical illustration. The process of creating these boards can be incredibly satisfying, allowing you to unleash your creativity and make something that’s not only useful but also visually appealing.
To help you get started on your journey to crafting customized cutting boards, here are some popular methods:
- Woodburning Techniques: This method allows you to etch intricate designs into the surface of the wood, creating a rustic and personalized look.
- Painting Techniques: Use food-safe paints to add vibrant colors or patterns that can brighten up your kitchen.
- Engraving: For a more sophisticated touch, consider engraving your cutting board with names, dates, or meaningful symbols.
As you embark on this creative project, remember that the choice of wood is crucial. Different types of wood not only affect the appearance of your cutting board but also its durability and functionality. Hardwoods like maple, walnut, and cherry are popular choices due to their strength and resistance to knife marks. On the other hand, softer woods may be easier to work with but can wear out more quickly. Take the time to select the right wood that suits both your aesthetic preferences and practical needs.
Before diving into your crafting adventure, it's essential to prioritize safety. Woodburning tools can reach high temperatures, so always use protective gear such as gloves and goggles. Make sure to work in a well-ventilated area to avoid inhaling any fumes. Following these safety tips will ensure that your creative process remains enjoyable and hazard-free, allowing you to focus on bringing your artistic vision to life.
In summary, customized cutting boards are a fantastic way to enhance your kitchen decor while showcasing your individuality. With various techniques at your disposal, you can create a piece that is not only functional but also a reflection of your personal style. So grab your tools, unleash your creativity, and let your cutting board tell your culinary story!
Q: What type of wood is best for cutting boards?
A: Hardwoods like maple, walnut, and cherry are ideal due to their durability and resistance to knife marks.
Q: Can I use regular paint on my cutting board?
A: It's best to use food-safe paints specifically designed for kitchenware to ensure safety.
Q: How do I maintain my customized cutting board?
A: Regularly oil your cutting board with food-grade mineral oil to keep it moisturized and prevent cracking.
2.1. Woodburning Techniques
This article explores five creative DIY decor ideas to enhance your kitchen counters, adding style and functionality to your cooking space while reflecting your personal taste.
Creating a small herb garden in jars is an excellent way to bring greenery into your kitchen. It offers fresh herbs at your fingertips while adding a charming aesthetic to your counters.
Personalized cutting boards not only serve a functional purpose but also act as decorative elements. Learn how to customize your boards to match your kitchen's theme and showcase your culinary passion.
Woodburning, or pyrography, is an exciting way to transform ordinary cutting boards into stunning pieces of art. It’s like giving your kitchen a unique fingerprint, one that reflects your personality and creativity. Imagine a simple wooden board, and then think about how a few strokes of a heated tool can turn it into a masterpiece! The beauty of woodburning lies in its versatility; you can create intricate designs, quotes, or even your family name. The process is not just about creating something beautiful; it's also a therapeutic experience that allows you to focus and unwind.
When it comes to woodburning, there are several techniques you can explore:
- Basic Stippling: This involves creating a series of dots to form images or patterns. It’s perfect for beginners!
- Shading: By varying the pressure and speed of the tool, you can create depth and texture in your designs.
- Line Work: Simple lines can be used to create elegant designs, making it suitable for those who prefer minimalism.
Each technique offers a different style, so you can choose one that resonates with your artistic vision. But before you dive into this creative endeavor, it's essential to consider the type of wood you'll be using. Not all woods are created equal when it comes to woodburning. Some types, like maple and birch, are excellent for detailed work due to their smooth grains, while others, like oak, can produce a rougher finish.
Selecting the right type of wood is crucial for woodburning projects. You want a wood that not only looks good but also reacts well to the heat of your tool. Here’s a quick comparison of popular woods for woodburning:
| Wood Type | Grain Texture | Burning Quality |
|---|---|---|
| Maple | Smooth | Excellent |
| Birch | Fine | Very Good |
| Oak | Coarse | Good |
| Pine | Variable | Fair |
As you can see, maple and birch are top choices for achieving detailed designs. They allow for smooth burning and create clean lines, making your artwork pop!
Safety is paramount when using woodburning tools. Here are a few essential tips to ensure a smooth and enjoyable crafting experience:
- Work in a well-ventilated area: This minimizes the inhalation of smoke and fumes.
- Use a heat-resistant surface: Always place your cutting board on a surface that can withstand heat.
- Keep water nearby: In case of any accidents, having water on hand can be a lifesaver.
- Wear protective gear: Consider wearing goggles and gloves to protect yourself from burns and splinters.
By following these tips, you’ll ensure a safe and enjoyable woodburning experience, allowing you to focus on unleashing your creativity!
A stylish fruit basket can serve as both a practical storage solution and a decorative centerpiece. Explore different designs and materials to find the perfect fruit basket for your kitchen.
Crafting your own woven baskets can add a personal touch to your kitchen decor. Learn the basics of basket weaving and how to incorporate different materials for a unique look.
Using upcycled containers for fruit storage is an eco-friendly approach to kitchen decor. Discover creative ways to repurpose jars, bowls, and cans into stylish fruit baskets that enhance your counter space.
Q: What tools do I need for woodburning?
A: You will need a woodburning tool, various tips for different effects, and a smooth piece of wood to start with.
Q: Can I use any type of wood for burning?
A: It's best to use woods like maple or birch for detailed work, as they burn well and provide a clean finish.
Q: Is woodburning safe for food preparation surfaces?
A: Yes, as long as you use food-safe finishes after burning to protect the surface.
2.1.1. Choosing the Right Wood
When it comes to woodburning your cutting boards, selecting the right type of wood is absolutely crucial. Not only does the wood you choose affect the aesthetic appeal of your finished product, but it also influences the durability and functionality of the cutting board itself. So, what should you look for? Here’s a quick rundown of the best wood options:
- Maple: This is a popular choice among chefs and home cooks alike. Its hardness makes it resistant to knife marks, and its fine grain gives a beautiful finish that enhances any design.
- Walnut: Known for its rich, dark color and stunning grain patterns, walnut cutting boards are not only functional but also add a touch of elegance to your kitchen.
- Cherry: Cherry wood is another fantastic option, known for its smooth surface and warm tones. Over time, cherry wood develops a lovely patina that can make your cutting board even more beautiful.
While these woods are excellent choices, it’s essential to consider the grain pattern and how it will interact with your woodburning designs. A tighter grain can provide a smoother surface for detailed work, while a more pronounced grain can add a rustic charm to your art. Additionally, you should always opt for food-safe finishes if you plan to use the board for food preparation. This ensures that your culinary creations remain safe and healthy.
Finally, don’t forget about the environmental impact of your wood choices. Seek out sustainably sourced wood whenever possible. This not only helps protect our forests but also gives you a sense of pride in your DIY project. The right wood can truly transform your cutting board into a stunning piece of art that reflects your personal style and commitment to quality.
2.1.2. Safety Tips for Woodburning
This article explores five creative DIY decor ideas to enhance your kitchen counters, adding style and functionality to your cooking space while reflecting your personal taste.
Creating a small herb garden in jars is an excellent way to bring greenery into your kitchen. It offers fresh herbs at your fingertips while adding a charming aesthetic to your counters.
Personalized cutting boards not only serve a functional purpose but also act as decorative elements. Learn how to customize your boards to match your kitchen's theme and showcase your culinary passion.
Woodburning techniques can transform a simple cutting board into a work of art. Discover tips and tricks for using this method to create personalized designs that elevate your kitchen decor.
Selecting the right type of wood is crucial for woodburning projects. Explore the best wood options that offer durability and visual appeal for your customized cutting boards.
When it comes to woodburning, safety should always be your top priority. The tools you’ll be using can reach high temperatures, and a moment of inattention can lead to accidents. Here are some essential safety tips to keep in mind:
- Work in a well-ventilated area: Ensure that your workspace is well-ventilated to avoid inhaling fumes produced during the burning process.
- Use a heat-resistant surface: Always work on a heat-resistant surface to prevent any fire hazards. A sturdy, non-flammable table is ideal.
- Wear protective gear: Consider wearing safety glasses to protect your eyes from any flying wood particles, and use gloves to shield your hands from heat.
- Keep a fire extinguisher nearby: It’s always better to be safe than sorry. Having a fire extinguisher within reach can provide peace of mind.
Additionally, always remember to unplug your woodburning tool when it's not in use. This simple step can prevent accidental burns or fires. By following these safety tips, you can enjoy your woodburning projects with confidence, turning plain cutting boards into stunning pieces of art without a hitch!
Painting techniques can also enhance cutting boards. Discover various painting methods that allow you to express your creativity and add color to your kitchen counters.
A stylish fruit basket can serve as both a practical storage solution and a decorative centerpiece. Explore different designs and materials to find the perfect fruit basket for your kitchen.
Crafting your own woven baskets can add a personal touch to your kitchen decor. Learn the basics of basket weaving and how to incorporate different materials for a unique look.
Using upcycled containers for fruit storage is an eco-friendly approach to kitchen decor. Discover creative ways to repurpose jars, bowls, and cans into stylish fruit baskets that enhance your counter space.
Q: What materials do I need for woodburning?
A: For woodburning, you’ll need a woodburning tool, a suitable piece of wood, and optionally, stencils or patterns for guidance.
Q: Can I use any type of wood for woodburning?
A: While you can use many types of wood, softer woods like pine or basswood are recommended for beginners due to their ease of burning.
Q: How do I clean my cutting boards after customizing them?
A: Hand wash your cutting boards with warm, soapy water and avoid soaking them. For maintenance, regularly oil them with food-safe mineral oil.
Q: Are there any non-toxic finishes for my wood projects?
A: Yes! Look for non-toxic finishes specifically labeled as food-safe, such as mineral oil or beeswax, to protect your wood projects.
2.2. Painting Techniques
When it comes to adding a splash of color and personality to your kitchen counters, painting techniques can be a game changer. Imagine transforming a plain cutting board into a vibrant piece of art that not only serves its purpose but also catches the eye of anyone who enters your kitchen. The beauty of painting is that it allows for endless creativity; you can use various colors, patterns, and even stencils to create something truly unique. So, let's dive into some exciting painting techniques that can elevate your kitchen decor!
One of the most popular methods is using acrylic paints. They are easy to work with, dry quickly, and come in a myriad of colors. Before you start painting, make sure to prepare your cutting board by sanding it lightly to create a smooth surface. This step is crucial as it helps the paint adhere better. Once you've prepped your board, you can start sketching out your design with a pencil. Don't worry about being perfect; the charm often lies in the imperfections!
If you're feeling adventurous, consider using stencils for a more polished look. Stencils can help you achieve intricate designs without the stress of freehand painting. Just place the stencil on your board, secure it with some tape, and paint over it with your chosen color. After removing the stencil, you'll be left with a beautiful pattern that looks professionally done. To add an extra layer of depth, consider using a layering technique. Start with a base color and let it dry completely before adding additional colors on top. This method can create stunning effects that will make your cutting board stand out.
For those who want to embrace a more rustic style, you might want to try a distressed painting technique. This involves applying a base coat, letting it dry, and then lightly sanding the edges to give it that worn, vintage look. It’s like giving your board a story without saying a word! To finish off, seal your masterpiece with a food-safe sealant to ensure it lasts and remains safe for food preparation.
In addition to these techniques, you can also explore chalkboard paint. This fun option allows you to turn your cutting board into a writable surface. Perfect for jotting down recipes or reminders, chalkboard paint adds both functionality and flair. Just remember to follow up with a sealant to keep the chalkboard finish intact.
In summary, painting your cutting boards is not just about aesthetics; it’s about expressing your creativity and making your kitchen a reflection of you. Whether you choose acrylics, stencils, or chalkboard paint, the possibilities are endless. So gather your supplies, unleash your inner artist, and watch as your kitchen transforms into a vibrant culinary space!
Q: What type of paint is safe for cutting boards?
A: It is essential to use food-safe acrylic paints or sealants specifically labeled as safe for food contact. Always check the product labels to ensure safety.
Q: How do I seal my painted cutting board?
A: After the paint has dried completely, apply a thin layer of food-safe sealant or mineral oil. Allow it to cure according to the manufacturer's instructions before using it for food preparation.
Q: Can I use regular paint for my cutting boards?
A: Regular paint may contain harmful chemicals that can leach into food. Always opt for paints specifically designed for food surfaces to ensure safety.
Q: How long will the paint last on my cutting board?
A: With proper care and sealing, painted designs can last for several months. Avoid soaking the board in water and wash it gently to prolong the life of the paint.

3. Stylish Fruit Baskets
When it comes to kitchen decor, fruit baskets can be a game changer. They not only serve a practical purpose—keeping your fruits organized and accessible—but they also add a touch of style and personality to your counters. Imagine walking into your kitchen and being greeted by a vibrant display of fruits, all nestled in a beautifully crafted basket. It’s like a little piece of art that also happens to be functional!
Choosing the right fruit basket can be a delightful adventure. You might want to consider the design, material, and even the size of the basket to ensure it complements your kitchen's overall aesthetic. From rustic woven baskets to sleek modern designs, the options are endless. Think about how you can incorporate your personal style into your fruit basket selection. For instance, if your kitchen has a farmhouse vibe, a charming wicker basket could be the perfect fit. On the other hand, a minimalist metal basket might be more suitable for a contemporary space.
Here are some popular materials for stylish fruit baskets:
- Wicker: Offers a rustic charm and is lightweight, making it easy to move around.
- Wood: Provides durability and a natural aesthetic, perfect for a cozy kitchen.
- Metal: Adds a modern touch and is often easy to clean, making it a practical choice.
- Ceramic: Can be colorful and decorative, ideal for a pop of personality.
But why stop at just buying a fruit basket? You can also get creative and make your own. Crafting your own woven basket can be a fun weekend project, allowing you to choose the colors and materials that resonate with your style. Plus, there’s something incredibly satisfying about using a basket that you made yourself to display your fresh produce. If you're not into weaving, consider upcycling containers you already have at home. Old jars, bowls, or even tin cans can be transformed into chic fruit holders with just a bit of paint or decorative paper.
In addition to aesthetics, think about the practicality of your fruit basket. Ensure it's large enough to hold your favorite fruits without overcrowding. You want to create a display that is not only beautiful but also functional. A well-organized fruit basket can encourage healthy eating habits, making it easy to grab a snack on the go. Plus, it can serve as a conversation starter when you have guests over. Just imagine someone admiring your unique basket and asking where you got it—this opens the door for you to share your DIY journey!
Ultimately, stylish fruit baskets are more than just a storage solution; they are an opportunity to showcase your creativity and enhance your kitchen's ambiance. So, why not take a moment to explore different styles and materials? Your kitchen counters will thank you for it!
Q: What materials are best for fruit baskets?
A: The best materials for fruit baskets include wicker, wood, metal, and ceramic. Each offers unique benefits in terms of style and functionality.
Q: How can I make my own fruit basket?
A: You can make your own fruit basket by weaving materials like wicker or using upcycled containers. Get creative with paint or decorative paper to personalize your design!
Q: How do I keep my fruits fresh in a basket?
A: To keep fruits fresh, ensure the basket has good airflow. Avoid overcrowding the basket and store it in a cool, dry place away from direct sunlight.
3.1. DIY Woven Baskets
Creating your own woven baskets can be a delightful and fulfilling project that adds a personal touch to your kitchen decor. Not only do these baskets serve a practical purpose, but they also allow you to express your creativity and style. Imagine walking into your kitchen and seeing beautiful, handcrafted baskets that you made yourself! It’s not just about storage; it’s about showcasing your personality in a functional way.
To get started with your DIY woven baskets, you’ll need a few basic materials. The beauty of this project is that you can use various materials, such as natural fibers, recycled paper, or even fabric scraps. Each option offers a different texture and aesthetic, allowing you to choose what best fits your kitchen theme. For instance, if your kitchen has a rustic vibe, consider using jute or seagrass. On the other hand, if you prefer a modern look, fabric baskets in vibrant colors can add a fun pop.
Here’s a simple guide to get you started:
- Gather Your Materials: You will need your chosen weaving material, scissors, and optionally, a hot glue gun for added stability.
- Choose a Base: Decide on the size and shape of your basket. You can use a cardboard base or start weaving around a bowl for a rounded shape.
- Start Weaving: Begin weaving your material around the base. Keep your tension even for a neat finish. If you're using fabric, you can cut it into strips for easier handling.
- Finishing Touches: Once you reach your desired height, secure the ends with glue or tuck them into the weave. You can also add decorative elements like beads or ribbons for a personalized flair.
As you weave, think about how these baskets will fit into your kitchen. They can be perfect for holding fruits, vegetables, or even kitchen utensils. Plus, they make great gifts! Imagine gifting a beautifully woven basket filled with homemade goodies or fresh produce. It’s not just a basket; it’s a heartfelt gesture.
Moreover, if you're feeling adventurous, you can experiment with different weaving styles. For example, try a twisted technique for a more intricate design or a simple coil for a classic look. The options are endless, and the best part is that each basket will be unique to you. So, roll up your sleeves and let your creativity flow!
In conclusion, DIY woven baskets are more than just a crafting project; they are a way to enhance your kitchen's aesthetic while providing functional storage. So why not give it a try? You might just find that weaving becomes one of your favorite hobbies!
Q1: What materials are best for making woven baskets?
A1: Natural fibers like jute or seagrass are great for a rustic look, while fabric scraps or recycled paper can add a modern twist.
Q2: How long does it take to make a woven basket?
A2: The time varies depending on the size and complexity of the basket, but a simple one can take anywhere from 1 to 3 hours.
Q3: Can I wash my woven baskets?
A3: It’s best to avoid soaking them in water. Instead, wipe them down with a damp cloth to keep them clean.
Q4: Are there any tips for beginners?
A4: Start with simple designs and practice your tension. Don’t be afraid to experiment with different materials and techniques!
3.2. Upcycled Containers
Upcycling is not just a trend; it’s a way of life that promotes sustainability and creativity. When it comes to kitchen decor, using upcycled containers for fruit storage can transform your space into a beautiful and eco-friendly haven. Imagine turning a simple glass jar or an old tin can into a stylish fruit basket that not only looks great but also reduces waste. The best part? You can customize these containers to fit your personal style and the overall aesthetic of your kitchen.
To get started with upcycling, you’ll want to gather a few materials you likely already have at home. Here’s a quick list of potential containers you can repurpose:
- Glass jars (like mason jars or old pickle jars)
- Tin cans (soup cans, coffee cans, etc.)
- Wooden crates or boxes
- Old bowls or platters
Once you have your containers, the real fun begins! You can paint, decorate, or even add embellishments to give each piece a unique flair. For instance, a glass jar can be painted with chalkboard paint, allowing you to write the names of the fruits inside or even a fun quote. Alternatively, you could wrap a tin can with twine or burlap for a rustic look that complements farmhouse-style kitchens.
Another exciting idea is to create a tiered fruit stand using multiple upcycled containers. By stacking smaller containers on top of larger ones, you can create an eye-catching centerpiece that not only saves space but also showcases your fruits beautifully. You can use a wooden board as a base and secure the containers with glue or screws for stability, making it both functional and decorative.
Don’t forget to consider the practicality of your upcycled containers. Ensure that they are clean and safe for food storage. If you’re using paint, make sure it’s non-toxic and food-safe. With a little creativity and effort, your upcycled containers can become the highlight of your kitchen counters, proving that style and sustainability can go hand in hand.
Q: What types of containers are best for upcycling?
A: Glass jars, tin cans, wooden crates, and old bowls are all excellent choices for upcycling in the kitchen.
Q: How do I ensure my upcycled containers are safe for food?
A: Always clean your containers thoroughly and use non-toxic, food-safe paints or finishes when decorating.
Q: Can I use any type of paint on my containers?
A: It’s best to use acrylic or chalkboard paint that is labeled as non-toxic and food-safe for any containers that will hold food.
Q: How can I decorate my upcycled containers?
A: You can paint them, wrap them in twine or fabric, or add embellishments like stickers or stencils to personalize them.
Frequently Asked Questions
- What materials do I need to create a herb garden in jars?
To create your own herb garden in jars, you'll need a few simple materials: glass jars (any size will do), potting soil, herb seeds or small herb plants, and optional decorative elements like twine or labels. It's a fun and easy project that adds a fresh touch to your kitchen!
- How can I customize my cutting boards?
You can customize your cutting boards using various techniques, such as woodburning or painting. For woodburning, you'll need a woodburning tool and some creativity to create designs. If you prefer painting, choose food-safe paints to ensure safety. Both methods allow you to express your personal style while making your kitchen more inviting!
- What type of wood is best for woodburning cutting boards?
When selecting wood for woodburning projects, opt for hardwoods like maple, cherry, or walnut. These woods not only provide durability but also showcase beautiful grain patterns that enhance your design. Make sure to choose untreated wood to avoid any chemicals that could interfere with your art!
- Are there any safety tips for using woodburning tools?
Absolutely! Always work in a well-ventilated area, and wear protective gear like gloves and goggles. Keep a fire extinguisher nearby, and never leave the tool unattended while it’s hot. Following these safety precautions will help ensure a smooth crafting experience!
- What are some creative ways to make stylish fruit baskets?
You can make stylish fruit baskets by crafting your own woven baskets or repurposing upcycled containers. For woven baskets, gather materials like natural fibers or even fabric strips. If you choose to upcycle, look for jars, bowls, or cans that can be painted or decorated to fit your kitchen's aesthetic. The possibilities are endless!
- Can I use any container for my DIY fruit baskets?
Yes, you can use almost any container for your DIY fruit baskets! Just make sure the container is clean and safe for food storage. Think outside the box—old jars, wooden crates, or even tin cans can be transformed into stylish fruit holders with a little creativity!


