Creating DIY Artificial Topiaries for Your Home
Have you ever walked into a home and been captivated by the lush greenery of topiaries, only to realize they were artificial? It's true! Creating your own DIY artificial topiaries is not only a fun and creative project but also a fantastic way to enhance your home decor. Imagine the charm and elegance these delightful green accents can add to your living space, whether you place them indoors or outdoors. In this article, we will explore the art of crafting beautiful artificial topiaries, providing you with creative ideas, essential materials, and step-by-step guidance that will empower you to transform your home into a vibrant oasis. So, roll up your sleeves and let's dive into the world of topiary crafting!
Selecting suitable materials is crucial for creating realistic artificial topiaries. The right choice can make all the difference between a project that looks cheap and one that exudes elegance. You’ll want to consider various options, including types of foliage, frames, and decorative elements that can help you achieve the desired look. For instance, high-quality silk leaves can mimic the appearance of real greenery, while sturdy foam or wire frames will provide the necessary support for your design. Don’t forget about embellishments like decorative stones or ribbons that can add that extra flair to your topiary!
The shape of your topiary defines its character, and this is where your creativity truly shines! From classic spheres to whimsical animals, the design possibilities are endless. Before you start crafting, it’s wise to sketch your vision. This simple act can save you time and help you visualize the end product. Think about what shapes resonate with your personal style or the vibe of your home. Are you leaning towards something traditional, or do you want to showcase your quirky side? Whatever you choose, make sure it reflects your personality!
Classic round topiaries are timeless and versatile, making them a popular choice for many home decorators. They can seamlessly fit into any space, whether it's a formal living room or a cozy patio. To create the perfect sphere, you'll need to consider dimensions and techniques that ensure a balanced and aesthetically pleasing appearance. A well-crafted round topiary can serve as a stunning focal point in your decor.
When crafting round topiaries, the choice of materials plays a significant role. Opt for foliage types that mimic natural plants, such as eucalyptus or boxwood, to achieve that authentic look. Additionally, sturdy frames made from wire or foam are essential to support the structure and maintain its shape. Remember, the sturdiness of your frame will determine the longevity of your topiary, so choose wisely!
Ready to get started? Follow our detailed step-by-step instructions to create your classic round topiary. First, gather all your materials, including the frame, foliage, and adhesive. Begin by attaching the foliage to the frame, layering it carefully to ensure a professional finish. Take your time with each layer, allowing the glue to set before adding more. This meticulous approach will pay off in the end, resulting in a topiary that looks like it belongs in a high-end garden!
If you're looking for a fun twist, whimsical topiary shapes can add a splash of personality to your decor. Think about crafting unique designs that reflect your interests—perhaps a topiary shaped like a favorite animal or a playful character. The key is to let your imagination run wild! Gather inspiration from nature or even your childhood memories, and don’t shy away from experimenting with different materials and colors.
Color and texture can significantly impact the overall look of your topiary. Choosing the right shades and materials is essential in creating a piece that complements your home’s interior and outdoor spaces. Consider the existing color palette of your home. Do you want your topiary to blend in or stand out? A vibrant splash of color can become a conversation starter, while subtle hues can provide a calming effect. Additionally, mixing textures—like combining glossy leaves with matte accents—can add depth and interest to your design.
Adding flowers and decorative accents can elevate your topiary’s appeal. Think about incorporating small artificial flowers or decorative stones that enhance the visual interest and provide a pop of color. You can even use seasonal accents to keep your decor fresh and exciting. For instance, adding tiny pumpkins in the fall or bright blooms in the spring can create a delightful seasonal display.
Even artificial topiaries require some care to keep them looking their best. Regular cleaning is essential to remove dust and maintain their vibrant appearance. A simple wipe with a damp cloth can do wonders. Additionally, keep your topiaries out of direct sunlight to prevent fading. With a little bit of attention, your creations will remain vibrant and beautiful for years to come!
- How long do artificial topiaries last? With proper care, artificial topiaries can last for many years, maintaining their vibrant colors and shapes.
- Can I use outdoor materials for indoor topiaries? While it's possible, outdoor materials may not have the same aesthetic appeal indoors. Choose materials that suit your interior decor.
- What are the best places to display my topiaries? Topiaries look great in entryways, living rooms, patios, or even as centerpieces on dining tables!
Choosing the Right Materials
When it comes to crafting stunning artificial topiaries, the choice of materials can make or break your project. Imagine trying to build a house with flimsy bricks; it just wouldn’t hold up, right? Similarly, selecting the right materials is crucial for achieving a realistic and durable topiary. You want your creation to look so lifelike that your friends might mistake it for the real deal! So, let’s dive into the essential materials you’ll need to create your masterpiece.
First off, you’ll want to consider the type of foliage you’re going to use. There are various options available, from faux silk leaves to high-quality plastic foliage. Each has its own benefits. For instance, silk leaves tend to have a more realistic texture and sheen, while plastic foliage is often more durable and easier to clean. Here’s a quick breakdown of some popular foliage types:
| Foliage Type | Pros | Cons |
|---|---|---|
| Silk Leaves | Realistic appearance, soft texture | Can fade in sunlight, more expensive |
| Plastic Foliage | Durable, easy to clean | Less realistic look, can be stiff |
| Foam Leaves | Lightweight, versatile | Can be less durable, may not hold shape |
Next, let’s talk about the frame that will support your topiary. A sturdy frame is essential for maintaining the shape of your design. You can choose from various materials such as wire frames, styrofoam shapes, or even wooden structures. Wire frames are particularly popular because they are lightweight and can be easily manipulated into various shapes. However, if you’re looking for something more robust, wooden structures can provide excellent support, especially for larger designs.
Don’t forget about decorative elements! Adding ribbons, lights, or even small ornaments can elevate your topiary to the next level. Think of these accents as the jewelry to your outfit; they can add that extra flair that makes your topiary stand out. Consider the overall theme of your decor when selecting these elements to ensure a cohesive look throughout your space.
In summary, the right materials can significantly impact the final appearance and durability of your artificial topiary. By selecting high-quality foliage, a sturdy frame, and thoughtful decorative accents, you can create a stunning piece that enhances your home decor. So, are you ready to gather your materials and start crafting? Your beautiful topiary awaits!
Designing Your Topiary Shape
When it comes to creating artificial topiaries, the shape is everything. It’s like the frame of a painting; without it, you’re left with a blank canvas. The right design can transform a simple arrangement of foliage into a stunning centerpiece that catches the eye and sparks conversation. So, what shapes should you consider? The options are as varied as your imagination! From classic spheres that evoke a sense of timeless elegance to whimsical animals that add a playful touch, the possibilities are endless.
Before you dive into crafting your topiary, take some time to sketch your vision. Grab a piece of paper and let your creativity flow. This doesn’t have to be a work of art; it just needs to capture the essence of what you want to create. Think about how the shape will fit into your space. Will it stand proudly on a mantel, or will it grace an entryway? Understanding the context will help you make decisions about size and complexity.
Classic round topiaries are the bread and butter of the topiary world. They are incredibly versatile and can fit into nearly any decor style, from modern to traditional. To create the perfect sphere, you’ll want to consider dimensions that are proportionate to where the topiary will be displayed. A topiary that is too large might overwhelm a small space, while one that is too small might get lost in a grand room.
When crafting your round topiary, the materials you choose are vital. You want foliage that mimics the look of natural plants, such as faux boxwood or silk ivy. These materials not only provide a realistic appearance but also offer durability. For the frame, consider using sturdy wire or foam bases that can support the weight of your foliage without collapsing. Your choice of materials will play a significant role in how realistic and long-lasting your topiary will be.
Now, let’s get into the nitty-gritty of creating your classic round topiary. Here’s a simple step-by-step guide to help you achieve that professional finish:
- Prepare Your Frame: Start by assembling your frame. If you're using a wire frame, ensure it’s sturdy enough to hold the foliage.
- Attach the Foliage: Begin at the bottom and work your way up, attaching the foliage with glue or pins. Make sure to overlap the leaves slightly to create a full appearance.
- Check for Gaps: As you go, constantly check for gaps. Fill them in as needed to maintain a uniform look.
- Finishing Touches: Once you’ve covered the entire frame, take a step back and admire your work! Add any additional accents, like flowers or decorative stones, to enhance the overall look.
If you’re feeling adventurous, why not explore whimsical shapes? Think of topiaries shaped like animals or even abstract forms that reflect your personality. These designs can be a fun way to express yourself and can serve as fantastic conversation starters. When designing these unique shapes, consider using a combination of materials to create texture and depth, making your topiary truly stand out.
In conclusion, designing your topiary shape is an exciting step in the crafting process. Whether you choose a classic round design or a whimsical creation, remember that the shape is the foundation of your project. So grab your sketchbook, gather your materials, and let your imagination run wild!
Q: How do I choose the best materials for my topiary?
A: Look for high-quality faux foliage that mimics natural plants. Materials like silk or plastic are great options. For the frame, sturdy wire or foam bases work well.
Q: Can I create a topiary in any shape?
A: Absolutely! While classic shapes like spheres are popular, feel free to experiment with whimsical designs that reflect your style and interests.
Q: How do I maintain my artificial topiary?
A: Regular dusting and occasional cleaning with a damp cloth will keep your topiary looking fresh. Avoid placing it in direct sunlight to prevent fading.

Classic Round Topiaries
Classic round topiaries are not just a trend; they are a timeless element of decor that can bring a touch of elegance to any space. Imagine stepping into a room filled with these lush, green spheres, each one meticulously crafted to perfection. The beauty of round topiaries lies in their simplicity and versatility, making them suitable for both indoor and outdoor settings. Whether you want to create a formal garden look or add a splash of greenery to your living room, round topiaries can effortlessly elevate your decor.
When embarking on your journey to create the perfect round topiary, consider the dimensions and balance of your design. A well-proportioned topiary not only looks aesthetically pleasing but also draws the eye in a way that feels harmonious. Typically, a classic round topiary can range from small sizes of about 12 inches in diameter to larger versions that can reach up to 36 inches or more. The key is to maintain a consistent shape as you layer your foliage, ensuring that each section is evenly distributed around the frame.
To achieve that flawless round shape, you might want to sketch your design first. Think of it as drawing the outline of a beautiful sphere before you start filling it in. This can help you visualize how much foliage you’ll need and where to place it for the best effect. You can even use a measuring tape to ensure that your topiary maintains its proportions as you build it up. Remember, practice makes perfect! Don’t be discouraged if your first attempt doesn’t turn out exactly as you envisioned; crafting topiaries can be a learning experience.
Choosing the right materials is crucial when crafting your round topiary. You’ll want to start with a sturdy frame that can support the weight of the foliage. Common materials for frames include wire, foam, or even wooden dowels. Each has its advantages, but wire frames are particularly popular due to their flexibility and strength. Next, you’ll need to select your foliage. Opt for high-quality artificial leaves that closely mimic the look of natural plants. Some popular choices include:
- Boxwood leaves for a classic look
- Faux ivy for a lush, green appearance
- Magnolia leaves for a touch of Southern charm
Additionally, don't forget about the finishing touches! You can enhance your round topiary with decorative elements such as ribbons, small ornaments, or even seasonal accents like faux flowers. These additions can make your topiary uniquely yours and can easily be changed out to reflect different seasons or holidays.
Now that you have a vision and the right materials, let’s dive into the step-by-step process of creating your classic round topiary. Follow these simple instructions to achieve a professional finish:
- Prepare Your Frame: Start by assembling your frame according to your design. Make sure it is stable and secure.
- Layer Your Foliage: Begin attaching your chosen foliage to the frame, starting from the bottom and working your way up. Use hot glue or floral wire to secure each piece in place.
- Check for Gaps: As you layer, step back periodically to check for gaps or unevenness. Adjust as necessary to maintain that perfect round shape.
- Add Finishing Touches: Once you’re satisfied with the foliage, it’s time to add any decorative elements. This could be a colorful ribbon tied around the base or small ornaments nestled within the leaves.
- Display Your Creation: Finally, find the perfect spot for your topiary! Whether it’s on a mantel, in a garden, or as a centerpiece on a dining table, your creation is sure to impress.
In conclusion, classic round topiaries are a fantastic way to bring a bit of nature indoors or to enhance your outdoor spaces. With the right materials, a clear vision, and a bit of creativity, you can create stunning topiaries that reflect your personal style and taste. So, what are you waiting for? Grab your supplies and start crafting your own beautiful round topiary today!
Q: How long do artificial topiaries last?
A: With proper care, artificial topiaries can last for many years, maintaining their vibrant appearance.
Q: Can I use real plants instead of artificial foliage?
A: Yes, you can use real plants, but they require more maintenance and care compared to artificial options.
Q: Where can I display my topiaries?
A: Topiaries can be displayed indoors on tables or shelves, or outdoors in gardens, patios, or entryways.
Q: How do I clean my artificial topiary?
A: Simply dust them with a soft cloth or use a damp cloth for more stubborn dirt. Avoid using harsh chemicals.
Materials for Round Designs
When it comes to creating stunning round topiaries, the choice of materials plays a pivotal role in achieving that realistic, lush appearance that makes these decorative pieces so enchanting. First and foremost, you'll need to select the right type of foliage. There are several options available, ranging from high-quality silk leaves to more durable plastic varieties. Silk leaves offer a soft, natural look, while plastic options are often more resilient to wear and tear, making them ideal for outdoor settings.
Next, consider the frame that will support your topiary. A sturdy base is essential for maintaining the shape of your round design. You can opt for wire frames, which are lightweight and easy to manipulate, or choose foam bases that provide a solid structure. The choice between these materials often depends on the size of the topiary you wish to create. For larger designs, a more robust frame is necessary to ensure stability.
In addition to foliage and frames, don’t overlook decorative elements that can enhance your topiary’s appeal. Items such as moss, decorative stones, or even LED lights can add an extra layer of charm. For instance, covering the base of your topiary with moss not only provides a natural look but also hides any unsightly mechanics of your frame. Additionally, incorporating LED lights can give your topiary a magical glow during evening hours, making it a stunning focal point in your garden or home.
To summarize, here are the essential materials you’ll need for crafting beautiful round topiaries:
- Foliage: Choose between silk or plastic leaves.
- Frame: Use wire or foam bases depending on size.
- Decorative Elements: Consider adding moss, stones, or lights.
By carefully selecting these materials, you’ll be well on your way to creating a round topiary that not only looks fantastic but also stands the test of time. Remember, the beauty of DIY projects lies in the details, so take your time to choose materials that resonate with your personal style and the overall aesthetic of your space.
Q1: Can I use real plants for my topiary?
A1: While real plants can be used, they require more maintenance and care. Artificial topiaries are a great alternative for those who want a low-maintenance option.
Q2: How do I clean my artificial topiary?
A2: Cleaning artificial topiaries is simple! Use a soft cloth or a feather duster to remove dust. For deeper cleaning, a damp cloth with mild soap can be used, but ensure it’s fully dried afterward.
Q3: Can I customize the colors of my topiary?
A3: Absolutely! You can paint the foliage or add colored flowers and accents to match your decor. Just make sure to use non-toxic materials if you're using paint.
Q4: How long will my artificial topiary last?
A4: With proper care, artificial topiaries can last for many years. Avoid direct sunlight exposure for extended periods to prevent fading.
Step-by-Step Instructions
Creating a classic round topiary is an exciting project that can transform your home decor with a touch of elegance. To get started, gather your materials, which typically include a sturdy frame, artificial foliage, floral wire, and a hot glue gun. The first step is to prepare your frame. If you're using a wire frame, ensure it's robust enough to support the weight of the foliage. You can either purchase a pre-made frame or create one using sturdy wire or foam. Remember, the sturdiness of your frame is crucial, as it will determine how well your topiary holds its shape over time.
Next, it's time to cut your foliage. Depending on the size of your topiary, you may need to cut the artificial leaves into smaller pieces. Aim for a mix of sizes to create a more natural look. Once you have your foliage ready, start attaching it to the frame. Begin at the base and work your way up, using floral wire or hot glue to secure each piece. It's best to overlap the foliage slightly, ensuring that no gaps are visible. This layering technique will give your topiary a lush, full appearance that mimics the look of real plants.
As you progress, step back occasionally to assess your work. This will help you maintain a balanced shape and ensure that your topiary looks uniform from all angles. If you notice any sparse areas, simply fill them in with additional foliage. Once you’re satisfied with the shape, let your creation dry completely if you used glue. This can take a few hours, but it’s worth the wait to ensure everything is secure.
To add a personal touch, consider incorporating decorative elements such as ribbons, small ornaments, or even seasonal decorations. These accents can elevate your topiary from a simple craft to a statement piece in your home. After all, a little creativity goes a long way! Once your topiary is complete, find a suitable spot for it in your home or garden. Whether you choose to display it indoors on a shelf or outdoors on your porch, this charming piece will surely enhance your space.
Finally, remember that maintaining your topiary is essential to keep it looking fresh and vibrant. You can gently dust it with a soft cloth or use a can of compressed air to remove any dust that may accumulate over time. With these simple steps, you'll have a stunning round topiary that showcases your crafting skills and adds a touch of greenery to your decor!
Q: How long does it take to create a topiary?
A: The time it takes can vary, but generally, you can complete a round topiary in about 2-4 hours, depending on your skill level and the complexity of your design.
Q: Can I use real plants instead of artificial foliage?
A: While you can use real plants, they require more maintenance and care. Artificial foliage is a great option for a low-maintenance, long-lasting topiary.
Q: Where can I display my topiary?
A: Topiaries can be displayed indoors or outdoors. They look great on shelves, tabletops, or as part of your garden decor.
Q: How do I clean my artificial topiary?
A: Simply use a soft cloth or a can of compressed air to remove dust. Avoid using harsh chemicals that could damage the materials.

Whimsical Shapes and Designs
When it comes to adding a touch of personality to your home decor, whimsical topiary shapes are the perfect way to go! Imagine transforming your living room or garden into a playful paradise with delightful figures that spark joy and conversation. From adorable animals to fantastical creatures, the possibilities are as vast as your imagination. Crafting these unique designs allows you to express your personal style while bringing a bit of whimsy into your space.
To get started, consider the shapes that resonate with you. Do you have a favorite animal, or perhaps a beloved character from a story? You could create a charming bunny, a cheeky monkey, or even a mystical unicorn! The key is to sketch out your ideas before diving into the crafting process. Grab a piece of paper and let your creativity flow. Don't worry about perfection; the beauty of whimsical designs lies in their playful nature!
Once you have a design in mind, it’s time to gather your materials. You'll want to choose foliage that is vibrant and full of life. Look for synthetic leaves that mimic the texture and appearance of real plants. Additionally, sturdy frames are essential to support your whimsical creations. Consider using wire or foam shapes that can be easily manipulated to achieve the desired look. For instance, if you're making a topiary in the shape of a cat, a wireframe can help you create those adorable ears and tail.
As you assemble your topiary, remember that layering is crucial. Start with a solid base and gradually build up the foliage to create depth and dimension. This technique not only enhances the visual appeal but also ensures that your whimsical design holds its shape over time. Feel free to mix and match different types of leaves and colors to add even more character. Perhaps a splash of bright yellow for a sun or deep green for a dragon? The choice is yours!
Finally, don’t forget to incorporate fun accents. Adding embellishments like colorful flowers, ribbons, or even small ornaments can elevate your whimsical topiary to the next level. These little touches can bring your creation to life, making it a true statement piece in your home. Imagine a topiary cat with a tiny bowtie or a bunny with a floral crown! These details not only enhance the overall aesthetic but also reflect your unique personality.
In summary, crafting whimsical topiary shapes is not just about creating decor; it’s about infusing your space with joy and creativity. So, gather your materials, unleash your imagination, and let your whimsical designs bring smiles to everyone who encounters them!
Q: What materials do I need for creating whimsical topiaries?
A: You'll need synthetic foliage, sturdy frames (like wire or foam), crafting glue, and decorative accents such as flowers or ribbons to enhance your design.
Q: How do I choose the right shape for my topiary?
A: Consider your interests and favorite themes. You can draw inspiration from animals, characters, or even abstract shapes. Sketching your ideas can help solidify your vision.
Q: Can I use real plants for whimsical topiaries?
A: While you can use real plants, they require more maintenance. Artificial materials are recommended for ease of care and longevity.
Q: How do I maintain my artificial topiaries?
A: Regularly dust your topiaries and clean them with a damp cloth to keep them looking fresh. Avoid direct sunlight to prevent fading.
Color and Texture Choices
When it comes to creating stunning artificial topiaries, color and texture are your secret weapons. These elements can transform a simple green ball of foliage into a breathtaking centerpiece that draws the eye and enhances your home decor. Think of color as the mood setter; it can evoke feelings of tranquility, excitement, or even nostalgia. For instance, vibrant greens can bring a sense of life and energy, while softer, muted shades can create a calming atmosphere. But how do you choose the right colors for your topiary? Well, it largely depends on where you plan to display your creation. If it’s going indoors, consider the existing color palette of your room. On the other hand, if your topiary is destined for the outdoors, you might want to opt for colors that stand out against the natural backdrop.
Texture is equally important. It adds depth and interest to your topiary, making it appear more lifelike. Imagine a topiary that combines smooth, glossy leaves with rougher, matte textures. This contrast can create a dynamic visual experience. When selecting foliage, look for materials that mimic the textures found in nature. For example, silk leaves often have a soft sheen that can replicate the look of real leaves, while felt or wool can add a cozy, rustic touch. Combining different textures can also enhance the overall aesthetic. You might choose to mix shiny leaves with more textured flowers or accents, creating a delightful interplay that captivates the viewer.
Here’s a quick guide to help you with your color and texture choices:
| Color | Best Use | Texture |
|---|---|---|
| Bright Green | Indoor spaces for energy | Smooth, glossy |
| Deep Green | Outdoor settings for realism | Textured, matte |
| Pastel Shades | Soft, calming environments | Soft, felt-like |
| Bold Colors (e.g., Red, Yellow) | Accent pieces for a pop of color | Mixed textures for interest |
As you select your colors and textures, don’t forget to consider the season and occasion. For example, bright colors and floral accents might be perfect for spring and summer, while deeper hues and richer textures can beautifully complement the fall and winter months. You can even change out elements in your topiary seasonally—adding small pumpkins for autumn or shimmering ornaments for the holidays can keep your decor fresh and exciting. So, get creative! Your topiary is a reflection of your personal style, so let your imagination run wild.
Q: How do I choose the right colors for my topiary?
A: Consider the existing color scheme of the space where the topiary will be displayed. For indoor use, harmonize with your room’s palette. For outdoor settings, choose colors that stand out against the natural environment.
Q: Can I mix different textures in my topiary?
A: Absolutely! Mixing different textures can enhance the visual appeal of your topiary. Combining shiny leaves with textured flowers creates a dynamic look that mimics nature.
Q: How often should I update my topiary’s decorations?
A: It depends on your preference! Seasonal updates can keep your decor fresh and exciting. Consider changing decorations for different holidays or seasons.
Incorporating Flowers and Accents
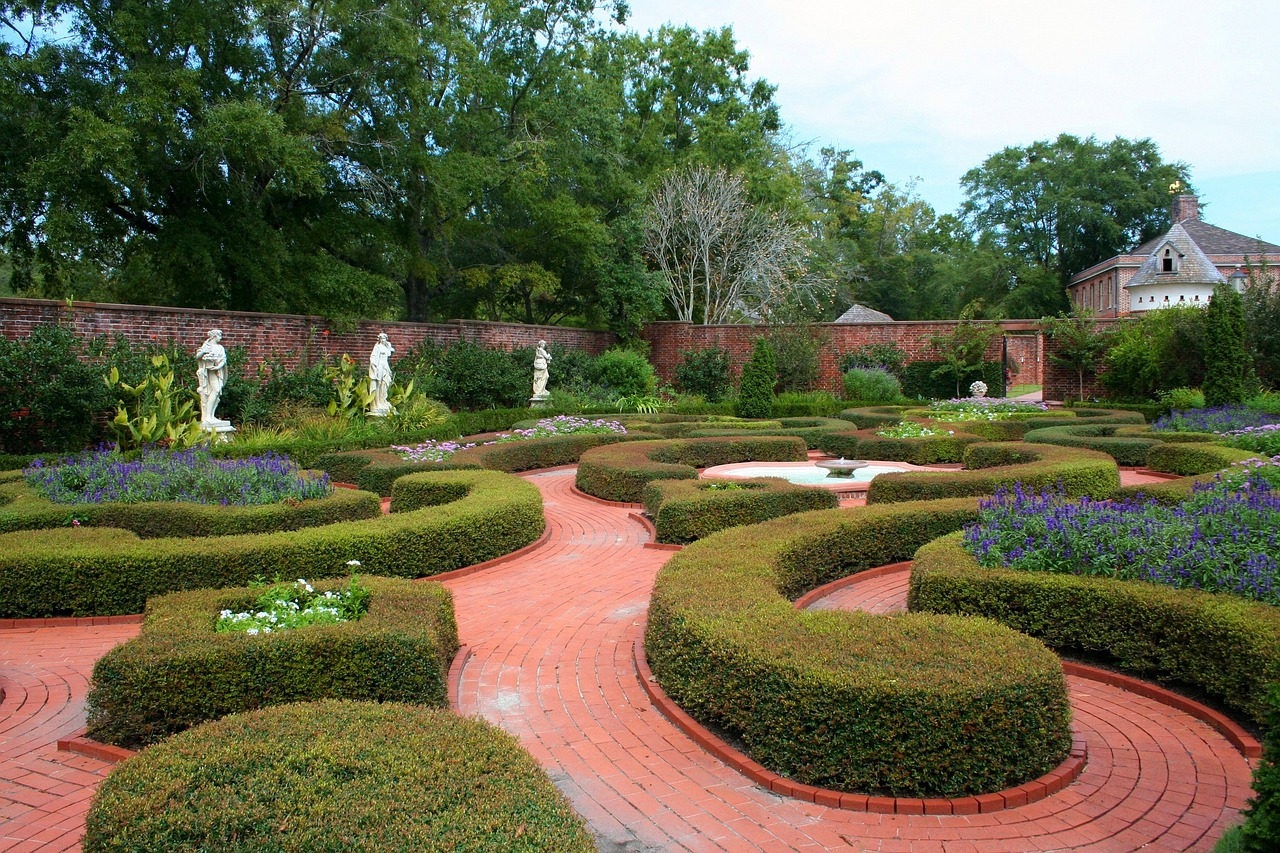
When it comes to creating stunning artificial topiaries, the right embellishments can make all the difference. Just like a chef adds spices to enhance flavors, incorporating flowers and accents can elevate your topiary from ordinary to extraordinary. Imagine your classic round topiary adorned with vibrant blooms or a whimsical animal shape featuring playful decorations. The possibilities are endless!
To start, consider the type of flowers you want to use. Silk flowers are a popular choice because they mimic the look of real blooms without the fuss of maintenance. You can find them in various colors and styles, allowing you to customize your topiary to fit your home’s aesthetic. For instance, pastel flowers can create a soft, romantic feel, while bright, bold colors can add a fun and energetic vibe.
When selecting accents, think about how you can create a cohesive look. For example, if your topiary features lavender blooms, consider adding small lavender sprigs or even decorative butterflies to enhance the theme. You can also use decorative ribbons, small ornaments, or seasonal decorations to keep your topiary fresh and exciting throughout the year.
Here are some ideas for incorporating flowers and accents into your topiary design:
- Seasonal Themes: Change your topiary decorations with the seasons. Use autumn leaves and small pumpkins for fall, or snowflakes and pinecones for winter.
- Color Coordination: Match the colors of your flowers and accents to your existing decor. This creates a harmonious look that ties everything together.
- Layering: Layer different types of flowers and accents to create depth. For instance, placing larger blooms at the base and smaller ones at the top can add visual interest.
Additionally, don’t forget about the texture of your chosen accents. Mixing materials like shiny ribbons with matte flowers can create a dynamic look. You might also consider adding natural elements such as twigs or moss to give your topiary a more organic feel. This blend of textures can make your artificial topiary appear even more lifelike and inviting.
Finally, remember that the placement of your topiary can also influence how the flowers and accents are perceived. Positioning your topiary in a well-lit area can highlight its features, making the colors pop and drawing attention to the beautiful details you’ve incorporated. Whether you choose to display it indoors or outdoors, the right lighting can enhance the overall effect, making your creation a true centerpiece.
In summary, incorporating flowers and accents into your artificial topiary is not just about decoration; it’s about expressing your personal style and creativity. By choosing the right elements and paying attention to detail, you can create a stunning piece that will be admired by all who see it.
Q: What types of flowers work best for artificial topiaries?
A: Silk flowers are the most popular choice due to their realistic appearance and variety of styles. Consider using flowers that complement your decor and fit the season.
Q: How can I change the decorations on my topiary?
A: You can easily switch out flowers and accents to reflect different seasons or occasions. Use hot glue or floral wire to attach new decorations, making it easy to refresh your design.
Q: What materials should I avoid when decorating my topiary?
A: Avoid using materials that may degrade over time, such as paper or cardboard, especially for outdoor topiaries. Stick to durable materials that can withstand the elements.
Maintenance and Care Tips
Even though artificial topiaries are designed to be low-maintenance, giving them a little love and care will ensure they look stunning for years to come. First and foremost, it's essential to keep your topiary out of direct sunlight, as prolonged exposure can lead to fading and discoloration of the foliage. Instead, position them in a spot that receives indirect light or partial shade, allowing them to retain their lush appearance.
Cleaning is another vital aspect of maintenance. Dust and dirt can accumulate on the surface, making your topiary look dull and lifeless. To refresh your creation, simply use a soft cloth or a feather duster to gently wipe away any debris. For more stubborn dirt, a damp cloth with a mild soap solution can work wonders. Just be sure to dry it thoroughly afterward to prevent any moisture damage.
For those who have placed their topiaries outdoors, it’s crucial to consider the weather conditions. Rain and wind can cause wear and tear, so consider bringing them indoors during harsh weather. If your topiary has decorative elements like flowers or ribbons, check them regularly to ensure they remain secure and vibrant. You might want to give them a little touch-up with fabric glue or a hot glue gun if they start to come loose.
In addition to these general care tips, here are some specific maintenance suggestions that can help keep your artificial topiaries looking fabulous:
- Inspect Regularly: Check for any signs of fading or damage, especially after seasonal changes.
- Store Properly: If you need to store your topiary, wrap it in a soft cloth and keep it in a cool, dry place.
- Refresh the Look: Occasionally, consider rearranging the foliage or adding new decorative elements to keep the design fresh and exciting.
By following these simple maintenance tips, you can ensure that your artificial topiaries remain a vibrant and charming addition to your home decor, bringing joy and elegance without the hassle of traditional plant care.
Have questions about caring for your artificial topiaries? You're not alone! Here are some common queries answered:
| Question | Answer |
|---|---|
| Can I use artificial topiaries outdoors? | Yes, but ensure they are made from UV-resistant materials to prevent fading. |
| How often should I clean my topiary? | It’s best to dust them every few weeks and give them a thorough cleaning every few months. |
| What’s the best way to store my topiary? | Wrap it in a soft cloth and keep it in a cool, dry place away from direct sunlight. |
| Can I customize my artificial topiary? | Absolutely! You can add flowers, ribbons, or even paint the base to match your decor. |
Frequently Asked Questions
- What materials do I need to create artificial topiaries?
To craft beautiful artificial topiaries, you'll need a variety of materials. Start with a sturdy frame, which can be made from wire or foam. For the foliage, consider using high-quality silk or plastic leaves that mimic real plants. You may also want decorative elements like flowers, ribbons, or even small ornaments to add a personal touch.
- How can I choose the right shape for my topiary?
The shape of your topiary plays a significant role in its overall appeal. Classic round shapes are timeless, but you can also explore whimsical designs like animals or geometric forms. Sketching your ideas beforehand can help you visualize the final product and ensure that it fits your decor style.
- What techniques should I use to create a perfect round topiary?
To achieve a balanced and aesthetically pleasing round topiary, start by determining the dimensions you want. Use a sturdy frame as your base, and layer the foliage evenly around it. Make sure to secure each layer well and step back frequently to check for symmetry. Patience is key—take your time to ensure every leaf is placed just right!
- Can I add flowers or other accents to my topiary?
Absolutely! Incorporating flowers and decorative accents can elevate the look of your topiary. Choose colors and styles that complement your existing decor. You can use small artificial flowers, ribbons, or even seasonal decorations to give your topiary a unique flair and a pop of color.
- How do I maintain my artificial topiary?
Even though artificial topiaries don’t require watering, they do need some maintenance to keep them looking fresh. Regularly dust them with a soft cloth or use a gentle vacuum attachment to remove dirt. If they get stained, a damp cloth with mild soap can help. Store them away from direct sunlight to prevent fading and ensure they last for years.


