An Introduction to Woodturning Lathes and Tools
Welcome to the fascinating world of woodturning! If you've ever marveled at beautifully crafted wooden bowls, intricate spindles, or stunning furniture pieces, you might have wondered about the magic behind these creations. Well, it all begins with woodturning lathes and the right set of tools. In this article, we’re diving deep into the essentials of woodturning, exploring the various types of lathes, the indispensable tools needed, and some handy tips for beginners.
So, what exactly is a woodturning lathe? Think of it as the heart of the woodturning process. This machine spins a piece of wood while you shape it with specialized tools, allowing you to create everything from simple projects to complex designs. The beauty of woodturning lies in its ability to transform a raw block of wood into a stunning piece of art, all thanks to the precision and control provided by a lathe.
Now, let’s break down the different types of woodturning lathes available. You might come across benchtop lathes which are compact and perfect for beginners or hobbyists working on smaller projects. Then there are floor model lathes, designed for more extensive work and capable of handling larger pieces of wood. Each type has its unique features and specifications, making them suitable for various applications. Understanding these differences can help you choose the right lathe for your woodturning journey.
Moving on, let’s talk about the tools that will accompany you on this creative adventure. Woodturning requires a set of specialized tools, including gouges, chisels, and scrapers. Each tool serves a distinct purpose, allowing you to achieve different shapes and finishes. For instance, gouges are perfect for hollowing out and shaping wood, while scrapers are essential for smoothing surfaces and providing that polished look to your finished pieces.
As you embark on your woodturning journey, it’s crucial to understand the significance of safety measures. Woodturning can be a rewarding experience, but it also comes with its risks. Wearing appropriate protective gear, such as goggles and face shields, is a must to safeguard yourself from flying debris and wood shavings. Additionally, mastering safe operation techniques will help you minimize accidents and ensure a secure working environment.
Lastly, proper maintenance of your woodturning tools is key to ensuring their longevity and performance. Regularly sharpening your tools will keep them effective and efficient, while proper storage will prevent damage and make it easier to access them when needed. In the world of woodturning, a well-maintained tool is a happy tool!
In conclusion, woodturning is an art that combines creativity with technical skill. Whether you’re a seasoned woodworker or a complete novice, understanding the fundamentals of woodturning lathes and tools can significantly enhance your crafting experience. So grab your gear, fire up that lathe, and let your imagination run wild!
- What is the best lathe for beginners? - A benchtop lathe is often recommended for beginners due to its compact size and ease of use.
- How do I choose the right gouge for my project? - Consider the type of shape you want to achieve; different gouges are designed for specific tasks.
- What safety gear do I need for woodturning? - Essential safety gear includes goggles, face shields, and dust masks to protect against shavings and dust.
- How often should I sharpen my tools? - It depends on usage, but a good rule of thumb is to sharpen them after every few projects or when you notice they are not cutting efficiently.

Understanding Woodturning Lathes
Woodturning lathes are the heart and soul of the woodturning process. These remarkable machines allow craftsmen to transform a simple block of wood into intricate designs and functional pieces. Imagine taking a rough piece of timber and, with the right tools and techniques, turning it into a beautifully shaped bowl or a delicate spindle. That's the magic of woodturning lathes!
There are several types of woodturning lathes, each designed for specific applications. The most common types include:
- Mini Lathes: Perfect for beginners and small projects, mini lathes are compact and easy to use. They are ideal for turning small items such as pens, knobs, and small bowls.
- Full-Size Lathes: These are larger and more robust, suitable for a wider range of projects. They can handle larger pieces of wood and are often used by experienced turners for furniture parts and larger bowls.
- Variable Speed Lathes: These lathes allow the user to adjust the speed, which is crucial for different types of turning. Slower speeds are great for roughing out shapes, while higher speeds are perfect for finishing and detail work.
When selecting a woodturning lathe, consider your skill level, the types of projects you want to create, and the space you have available. A mini lathe might be perfect for a beginner, while a full-size lathe could be the right choice for someone looking to take on larger, more complex projects.
Additionally, the construction and features of the lathe play a significant role in its performance. Look for a lathe with a sturdy base to minimize vibrations, as this will lead to smoother cuts and better results. Features like a digital speed display and easy-to-use controls can also enhance your woodturning experience, making it more enjoyable and efficient.
In summary, understanding the different types of woodturning lathes and their specific applications is crucial for anyone looking to dive into the world of woodturning. Whether you're a hobbyist or an aspiring professional, choosing the right lathe will set the foundation for your projects and help you achieve stunning results.
Q: What is the best woodturning lathe for beginners?
A: For beginners, a mini lathe is often recommended due to its compact size and ease of use. It allows new turners to practice basic techniques without feeling overwhelmed.
Q: Can I use any type of wood on a lathe?
A: While most hardwoods and softwoods can be used, it’s best to start with softer woods like pine or poplar. They are easier to turn and will help you develop your skills.
Q: How do I maintain my woodturning lathe?
A: Regular maintenance includes cleaning the lathe after use, checking for loose parts, and lubricating moving components. This will ensure a long lifespan and optimal performance.
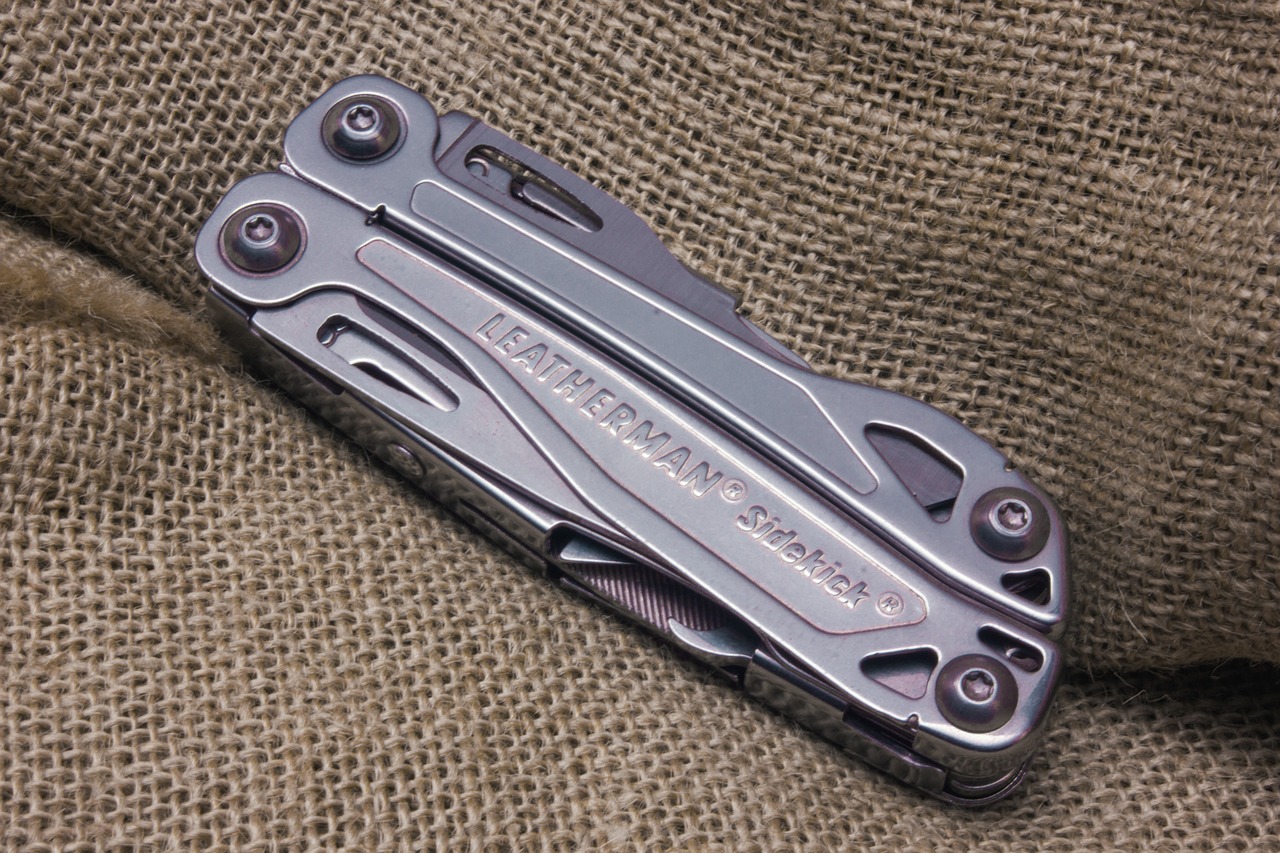
Essential Woodturning Tools
Woodturning is an art that requires not just creativity, but also the right set of tools to bring your visions to life. Whether you are crafting a simple bowl or an intricate spindle, having the essential woodturning tools at your disposal can make all the difference. Each tool serves a unique purpose, and understanding their functions is crucial for achieving the desired results in your projects. In this section, we will explore the fundamental tools every woodturner should have, including gouges, chisels, and scrapers, as well as their roles in shaping and finishing your wooden creations.
At the heart of woodturning is the lathe, but it’s the tools that do the real work. Among the most important tools are gouges, which are designed for cutting and shaping the wood. These tools come in various shapes and sizes, each tailored for specific tasks. For instance, a roughing gouge is perfect for quickly removing material and achieving a cylindrical shape, while a spindle gouge is ideal for creating fine details and intricate designs.
Next up are chisels, which are essential for refining shapes and adding intricate details to your projects. Chisels provide a flat cutting edge that allows for precision work. They are perfect for creating flat surfaces or for making fine cuts where accuracy is paramount. A well-rounded set of chisels can help you tackle a variety of projects, from basic to advanced.
Now, let’s not forget about scrapers. These tools are vital for finishing work, smoothing out surfaces, and removing any imperfections left behind by gouges and chisels. Scrapers can be used to create a glass-like finish on your turned pieces, making them look polished and professional. They work by scraping away thin layers of wood, allowing you to achieve that perfect surface finish.
To help you better understand the variety of tools available, here’s a quick overview in the table below:
| Tool Type | Primary Use |
|---|---|
| Gouges | Shaping and cutting wood |
| Chisels | Refining shapes and precision cuts |
| Scrapers | Smoothing surfaces and finishing work |
When selecting your tools, it’s essential to consider your specific needs and the types of projects you plan to undertake. If you are just starting, investing in a basic set of gouges, chisels, and scrapers can set you on the right path. Over time, as your skills develop, you can expand your toolkit to include specialized tools that cater to more advanced techniques.
In conclusion, having the right woodturning tools is crucial for any woodturner, whether you are a novice or an experienced craftsman. By understanding the roles of gouges, chisels, and scrapers, you can enhance your woodturning experience, allowing your creativity to flourish. Remember, the right tools not only make your work easier but also improve the quality of your finished pieces.
- What are the most essential tools for a beginner in woodturning? A basic set of gouges, chisels, and scrapers will suffice to get you started.
- How often should I sharpen my woodturning tools? Regular sharpening is vital; it’s best to sharpen them after every few projects or whenever you notice a decline in performance.
- Can I use regular woodworking tools for woodturning? While some woodworking tools can be used, it’s recommended to use tools specifically designed for turning to achieve the best results.
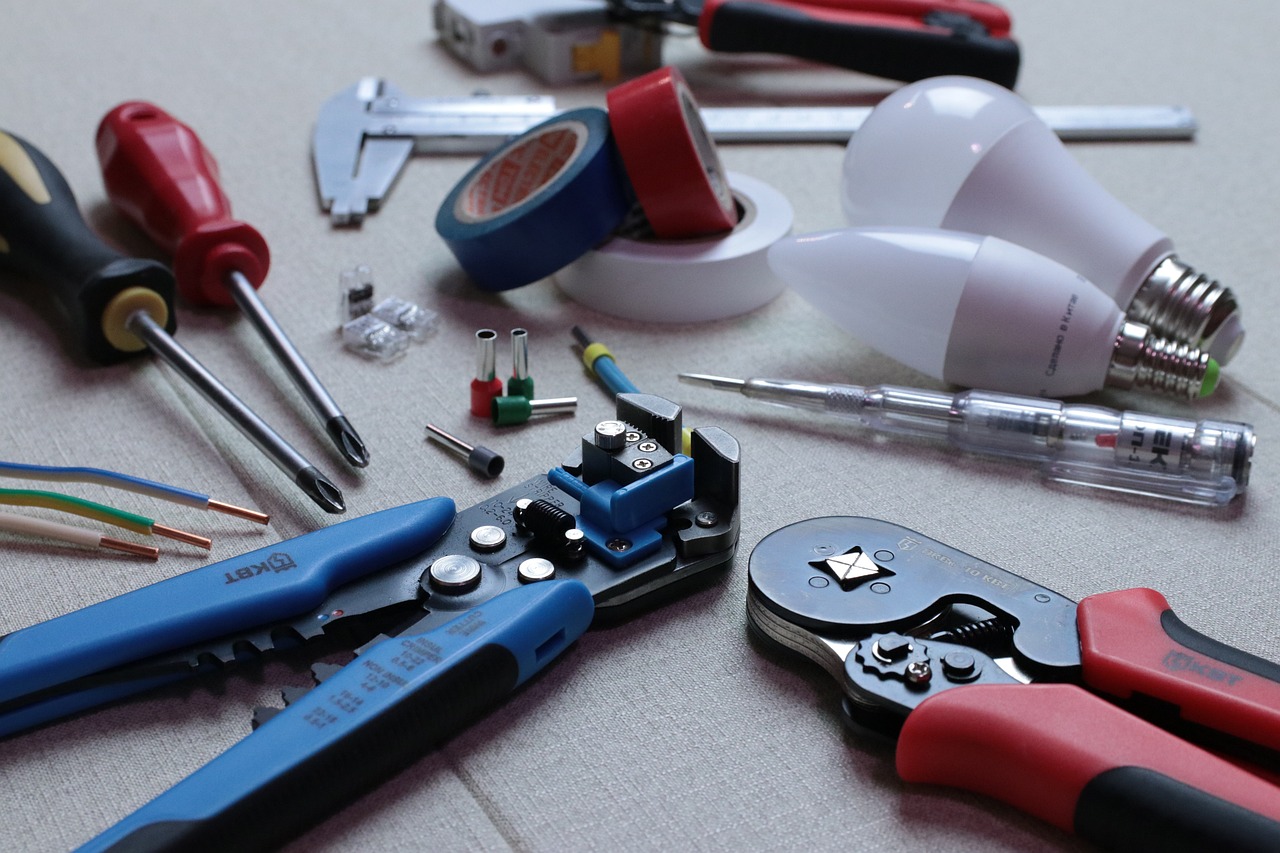
Types of Chisels
When it comes to woodturning, having the right tools is just as important as the technique itself. Among these tools, chisels play a pivotal role in shaping and detailing your wood projects. Each type of chisel has its unique purpose, and understanding these differences can significantly enhance your woodturning experience. So, let’s dive into the various types of chisels you’re likely to encounter in your woodturning journey.
First up, we have the roughing gouge. This tool is typically the first one you’ll reach for when starting a new project. Its wide blade is perfect for removing large amounts of material quickly, allowing you to transform a square blank into a round cylinder in no time. Think of it as the bulldozer of your toolkit—efficient but not always precise.
Next on the list is the spindle gouge. With a more tapered blade, this chisel is ideal for detailed work on spindles and smaller projects. It allows for intricate cuts and is great for creating coves and beads. If the roughing gouge is the bulldozer, the spindle gouge is more like a sculptor's chisel, carving out fine details.
Then we have the bowl gouge. This tool is specifically designed for hollowing out bowls and other curved forms. It features a deep fluted design, which allows for smooth cuts on the interior of your turned pieces. If you’re planning to create a beautiful wooden bowl, the bowl gouge will be your best friend, helping you achieve those elegant curves.
Don’t forget about the parting tool, which is essential for making clean cuts and separating pieces of wood. It’s a narrow, straight chisel that can also be used to create grooves. Think of it as the precision knife in your toolbox, perfect for those moments when you need to make a clean break or a fine detail.
Another important type is the scraper. While we’ll delve deeper into scrapers later, it’s worth mentioning that they are vital for refining surfaces and achieving a smooth finish. Scrapers work by removing small amounts of wood, making them perfect for finishing touches.
Finally, we have the chisel set. Investing in a good set will provide you with a variety of chisels suited for different tasks. A typical set may include roughing gouges, spindle gouges, bowl gouges, and parting tools, offering versatility for any project you undertake.
When selecting chisels, consider your specific projects and skill level. It’s often beneficial to start with a few essential chisels and gradually expand your collection as your skills grow. Remember, the right tools can make all the difference in your woodturning journey!
In summary, understanding the types of chisels available and their specific applications can help you choose the right tools for your woodturning projects. Whether you're shaping a simple spindle or crafting an intricate bowl, having the appropriate chisels will empower you to bring your creative visions to life.
- What is the best chisel for beginners? The roughing gouge is often recommended for beginners due to its versatility and ease of use.
- How do I maintain my chisels? Regularly sharpen and clean your chisels to ensure they perform well. Proper storage is also essential to prevent damage.
- Can I use regular chisels for woodturning? While you can use regular chisels, woodturning chisels are specifically designed for turning and will yield better results.
Gouges Explained
Gouges are one of the most fundamental tools in the woodturner's arsenal, serving as the sculptors of wood, shaping it into magnificent forms and intricate details. These tools come with a variety of shapes and sizes, each designed for specific tasks in the woodturning process. Understanding the different types of gouges and their applications can significantly enhance your woodturning experience. Whether you’re creating a delicate bowl or a robust table leg, the right gouge can make all the difference.
At their core, gouges are characterized by their curved cutting edges, which allow for a smooth and controlled removal of wood. This curvature enables woodturners to create both concave and convex surfaces, making them indispensable for achieving various profiles. The most common types of gouges include:
- Spindle Gouges: These are typically used for turning spindles and are ideal for detailed work. Their narrow, pointed tips allow for precision when shaping intricate designs.
- Bowl Gouges: Featuring a wider and more pronounced curve, bowl gouges are perfect for hollowing out bowls and creating larger, rounded shapes. They excel in removing material quickly while leaving a smooth finish.
- Flat Gouges: Also known as parting tools, these gouges are used to make clean cuts and separate pieces of wood. They are essential for creating precise edges and grooves.
When choosing a gouge, consider the type of project you are undertaking. For instance, if you’re working on a bowl, a bowl gouge with a swept-back profile will allow you to reach into the hollowed area more effectively. Conversely, for spindle work, a spindle gouge will provide the necessary control and finesse.
Additionally, the grind of the gouge plays a crucial role in its performance. A shallow grind will give you a more aggressive cut, while a deeper grind is better suited for finer details. Experimenting with different grinds can help you find what works best for your style and projects.
Lastly, it’s essential to maintain your gouges properly. Regular sharpening is key to keeping the cutting edge effective and prolonging the life of your tools. A well-maintained gouge not only performs better but also enhances your safety while turning, as a sharp tool requires less force and is less likely to slip.
In summary, understanding gouges and their specific applications is vital for any woodturner, whether you’re a novice or a seasoned professional. By selecting the right gouges for your projects and maintaining them properly, you can unleash your creativity and produce stunning woodturning pieces.
Q: What is the difference between a bowl gouge and a spindle gouge?
A: Bowl gouges are designed for hollowing out bowls and creating rounded shapes, while spindle gouges are used for turning spindles and detailed work. The shape of their cutting edges reflects their specific applications.
Q: How often should I sharpen my gouges?
A: It depends on how frequently you use them. Regular use may require sharpening after every few projects, while less frequent use might allow for longer intervals. Always ensure your gouges are sharp before starting a new project.
Q: Can I use a gouge for all types of wood?
A: Yes, gouges can be used on various types of wood. However, the hardness and grain of the wood may affect how well the gouge performs. Softer woods are generally easier to work with, while harder woods may require more frequent sharpening.
Scrapers and Their Uses
When it comes to achieving that smooth, polished finish on your woodturning projects, scrapers are your best friends. These tools are designed to refine the surface of your turned pieces, allowing you to eliminate any rough spots and achieve a professional-grade appearance. Unlike chisels and gouges, which are primarily used for shaping the wood, scrapers excel in the finishing process, making them essential for any woodturner's toolkit.
Scrapers come in various shapes and sizes, each tailored for specific applications. The most common types include flat scrapers, round scrapers, and square scrapers. Each type has its unique advantages, allowing woodturners to select the right tool based on the curvature and details of their projects. For instance, a flat scraper is perfect for large, flat surfaces, while a round scraper is ideal for concave areas where you want to achieve a smooth curve.
One of the key benefits of using scrapers is their ability to create a fine finish without the need for extensive sanding. When used correctly, scrapers can leave a surface so smooth that it often requires minimal sanding afterward, saving you time and effort. However, to get the most out of your scrapers, it's essential to use them with the right technique:
- Angle of Attack: Hold the scraper at a slight angle to the wood surface to avoid digging in.
- Light Pressure: Apply gentle pressure; too much force can cause the scraper to catch and create unwanted marks.
- Consistent Motion: Use a smooth, continuous motion to ensure an even finish across the surface.
Moreover, maintaining your scrapers is crucial. A well-sharpened scraper will perform better and provide a cleaner cut. Regularly honing the edge will help maintain its effectiveness, and it's advisable to check the sharpness frequently, especially when working on intricate details. This maintenance not only prolongs the life of your tools but also enhances your overall woodturning experience.
In summary, scrapers are indispensable tools in the woodturning process, allowing you to achieve that flawless finish that turns heads. By understanding their uses and mastering the techniques involved, you can elevate your woodturning projects to new heights. So, whether you're refining a bowl, smoothing out a spindle, or finishing a decorative piece, don't underestimate the power of a good scraper!
Q: What is the main purpose of a scraper in woodturning?
A: The primary purpose of a scraper is to refine and smooth the surface of turned wood pieces, creating a polished finish with minimal sanding required.
Q: How do I sharpen a scraper?
A: Scrapers can be sharpened using a honing jig or a flat sharpening stone. It's essential to maintain a consistent angle while sharpening to ensure an effective edge.
Q: Can I use scrapers on all types of wood?
A: Yes, scrapers can be used on most types of wood. However, softer woods may require more care to avoid tearing the fibers, while harder woods may benefit from the precision of a scraper.
Q: How do I know when to use a scraper instead of a chisel or gouge?
A: Use a scraper when you want to achieve a smooth finish on a surface that has already been shaped. Chisels and gouges are better suited for the initial shaping of the wood.
Choosing the Right Tools
When it comes to woodturning, selecting the right tools is like choosing the perfect paintbrush for an artist. Each tool serves its own purpose and can significantly impact the outcome of your project. As a beginner, it’s essential to assess your needs and understand the different tools available. This way, you can make informed decisions that align with your skill level and the type of projects you wish to tackle.
Start by considering the types of projects you want to create. Are you interested in making simple bowls or intricate spindles? Your choice of tools will vary based on the complexity of your designs. For instance, if your goal is to create decorative items, you might need a broader range of tools compared to someone focusing on functional pieces.
Another important factor is your budget. Quality woodturning tools can be an investment, but they are crucial for achieving the best results. It’s advisable to start with a few essential tools and gradually expand your collection as you gain experience. Here’s a quick overview of some must-have tools:
- Gouges: These are versatile tools that come in various shapes and sizes, perfect for hollowing and shaping wood.
- Chisels: Ideal for detailing and finishing work, chisels help refine the surface of your projects.
- Scrapers: Essential for smoothing surfaces, scrapers are vital for achieving a polished finish.
As you explore your options, consider the ergonomics of the tools. Comfort is key, especially during long woodturning sessions. Tools that feel good in your hands will not only enhance your performance but also reduce the risk of fatigue and injury. Don’t hesitate to visit a local woodworking store where you can physically handle the tools before making a purchase.
Lastly, don’t forget to seek advice from experienced woodturners or join a local woodturning club. Engaging with a community can provide you with invaluable insights and recommendations tailored to your specific needs. Remember, the right tools can make all the difference in your woodturning journey, allowing you to express your creativity while enjoying the process.
1. What are the essential tools for a beginner woodturner?
For beginners, essential tools include a set of gouges, a few chisels, and scrapers. These will allow you to tackle a variety of projects while developing your skills.
2. How do I know which gouge to choose?
The choice of gouge depends on the type of work you’re doing. For example, a roughing gouge is great for quickly shaping wood, while a bowl gouge is ideal for creating the contours of bowls.
3. Can I use cheaper tools when starting?
While it’s tempting to buy cheaper tools, investing in quality tools can save you frustration and improve your results. However, starting with a few basic, affordable tools is acceptable as long as you plan to upgrade later.
4. How often should I sharpen my tools?
Regular sharpening is crucial for maintaining tool performance. It’s best to sharpen your tools before each session or whenever you notice them losing their edge.
5. Where can I find resources to learn more about woodturning?
You can find resources in books, online tutorials, and local workshops. Joining a woodturning club can also provide mentorship and hands-on learning opportunities.
Safety Measures in Woodturning
When diving into the world of woodturning, safety should be your number one priority. Imagine yourself at the lathe, the wood spinning with precision, and the tools glinting in the light. It’s an exhilarating experience, but without proper safety measures, it can quickly turn dangerous. First and foremost, it's essential to wear appropriate protective gear. This gear includes goggles to shield your eyes from flying debris, face shields to protect your face from shavings, and ear protection to guard against the loud noise of the lathe. You wouldn’t jump into a pool without checking for water first, right? The same principle applies here; always be prepared.
In addition to wearing protective gear, understanding safe operation techniques is crucial. Before you even turn on that lathe, familiarize yourself with the controls and how to operate the machine safely. Always keep your hands at a safe distance from the cutting tools and the rotating wood. A good rule of thumb is to maintain a minimum of 6 inches away from the tool rest while the lathe is in motion. It's like driving; you have to keep your hands on the wheel and your eyes on the road. Similarly, avoid distractions while working and always focus on the task at hand.
To further enhance safety, ensure your workspace is organized and free of clutter. A tidy workspace reduces the chances of accidents. Make sure all tools are in their designated places, and there are no obstacles that could cause you to trip or stumble. Think of your workspace as a stage; everything should be in its right place to ensure a smooth performance. Additionally, check your lathe and tools regularly for any signs of wear and tear. A faulty tool is like a ticking time bomb; it can lead to accidents if not addressed promptly.
Moreover, it’s beneficial to have a first aid kit readily available. Accidents can happen, even to the most cautious woodturners. Having a first aid kit stocked with essentials can make all the difference in a minor mishap. Remember, safety is not just about wearing gear; it’s about being prepared for anything. Consider participating in safety workshops or training sessions. These can provide invaluable insights and hands-on experience, helping you to cultivate a safer turning environment.
In summary, the world of woodturning is filled with creativity and craftsmanship, but it’s vital to approach it with respect and caution. By wearing the right protective gear, mastering safe operation techniques, maintaining an organized workspace, and being prepared for emergencies, you can enjoy this rewarding hobby while minimizing risks. So, as you embark on your woodturning journey, keep these safety measures in mind, and you’ll be set for a fantastic experience!
- What type of protective gear should I wear while woodturning? It's essential to wear goggles, face shields, and ear protection to safeguard against debris and noise.
- How far should I keep my hands from the lathe? Always maintain a minimum of 6 inches away from the tool rest while the lathe is in motion.
- What should I do if I experience an accident? Having a first aid kit nearby is crucial. Address minor injuries immediately and seek professional help for more severe injuries.
- Can I learn safe woodturning practices online? Yes, many resources and workshops are available online that can help you understand safety measures in woodturning.
Protective Gear
When it comes to woodturning, safety should never be an afterthought. The process can be exhilarating, but it also poses risks, making the right absolutely essential. Imagine yourself in a whirlwind of wood shavings, the lathe spinning, and tools whirring; without proper protection, you could find yourself in a precarious situation. So, what should you wear to keep yourself safe while you unleash your creativity?
First and foremost, goggles are a must. These protect your eyes from flying debris and wood shavings, which can be surprisingly sharp and hazardous. You might think that a casual pair of glasses will do the trick, but they won't provide the same level of protection. Opt for impact-resistant goggles that fit snugly around your face. Additionally, consider a face shield. While goggles protect your eyes, a face shield offers a broader range of coverage, safeguarding your face from larger pieces that might fly off during the turning process.
Next on the list is a good pair of ear protection. Lathes can be quite noisy, and prolonged exposure to high decibel levels can lead to hearing loss. Investing in a pair of quality earmuffs or earplugs will help you maintain your hearing while you focus on your craft. It's a small price to pay for long-term health.
Don't forget about respiratory protection. Wood dust can be harmful when inhaled, especially when working with certain types of wood that may release toxic particles. A well-fitted dust mask or respirator can be your best friend in this scenario. Look for masks that are rated for wood dust to ensure they filter out harmful particles effectively.
Lastly, consider wearing protective clothing. Loose clothing can get caught in machinery, leading to serious injuries. Opt for snug-fitting clothes made of durable materials. Additionally, wearing gloves might seem like a good idea, but they can be risky around rotating machinery. Instead, use them only when handling rough wood pieces or while sanding, and always remove them before operating the lathe.
In summary, your protective gear should include:
- Goggles for eye protection
- Face shield for additional facial coverage
- Earmuffs or earplugs for hearing protection
- Dust mask or respirator for respiratory safety
- Snug-fitting clothing to prevent entanglement
By equipping yourself with the right protective gear, you not only ensure your safety but also create a more enjoyable and focused woodturning experience. Remember, it's always better to be safe than sorry, so gear up and get turning!
1. What type of goggles should I use for woodturning?
Look for impact-resistant goggles that fit snugly around your eyes. They should provide a clear view while protecting against flying debris.
2. Are earplugs sufficient for hearing protection?
While earplugs can be effective, earmuffs are generally recommended for better sound insulation, especially during long sessions of woodturning.
3. Can I wear gloves while using the lathe?
It's best to avoid wearing gloves while operating the lathe, as they can get caught in moving parts. Use them only when handling rough wood or during sanding, and remove them before using the lathe.
4. How often should I replace my protective gear?
Inspect your gear regularly for signs of wear and tear. Replace any damaged or worn-out items immediately to ensure your safety.
Safe Operation Techniques
When it comes to woodturning, understanding and implementing safe operation techniques can mean the difference between a successful project and a trip to the emergency room. Woodturning lathes, while incredibly useful, can also be dangerous if not handled properly. It's essential to approach your work with a mindset geared towards safety, ensuring that you protect yourself and those around you. One of the most important rules is to always keep your hands clear of the cutting area. This may seem obvious, but in the heat of creation, it’s easy to forget. Additionally, always ensure that the workpiece is securely mounted before starting the lathe to prevent it from flying off during operation.
Another critical aspect of safe operation is maintaining a clean workspace. Wood shavings and debris can create slip hazards and can interfere with the operation of your tools. Regularly cleaning your work area not only promotes safety but also improves efficiency. You should also familiarize yourself with the controls of your lathe. Knowing how to quickly stop the machine in case of an emergency can save you from potential injury. Moreover, understanding the speed settings and how they affect your workpiece is crucial. High speeds can lead to dangerous situations, especially with larger pieces of wood.
Furthermore, it’s vital to adopt the right body posture while operating the lathe. Stand with your feet shoulder-width apart for stability, and keep your body behind the lathe’s safety shield whenever possible. This positioning helps protect you from any unexpected incidents. Another technique to consider is to use push sticks or similar tools when handling smaller pieces of wood, allowing you to maintain a safe distance from the cutting edge. Remember, safety gear is your best friend; always wear goggles or a face shield to protect your eyes from flying debris, and consider using ear protection to guard against the noise of the lathe.
In summary, safe operation techniques are not just guidelines; they are essential practices that every woodturner should adopt. By following these safety measures, you can create a secure environment that allows your creativity to flourish without unnecessary risks. So, the next time you step up to your lathe, take a moment to ensure that you’re operating safely, and you’ll find that your woodturning experience is not only productive but also enjoyable.
- What should I wear while woodturning? Always wear safety goggles or a face shield, ear protection, and a dust mask to protect against wood shavings and noise.
- How do I know if my tool is sharp enough? A sharp tool should easily slice through wood without excessive force. If you feel resistance, it’s time to sharpen your tools.
- What is the safest way to stop the lathe? Always use the designated stop button or switch, and never try to stop the lathe manually with your hands.
- Can I turn wood that is not perfectly round? Yes, but it’s best to start with a piece that is as round as possible to minimize vibrations and potential hazards.
Maintenance of Woodturning Tools
Maintaining your woodturning tools is not just a chore; it's an essential part of ensuring that your projects turn out beautifully and that your tools last for years to come. Think of it like caring for a fine instrument; just as a musician wouldn't neglect their guitar or piano, a woodturner must also treat their tools with respect. Regular maintenance helps keep tools sharp, functional, and ready for any project you take on. Let’s dive into some key practices that will help you maintain your tools effectively.
One of the most critical aspects of tool maintenance is sharpening. A sharp tool cuts cleaner and requires less force, making your woodturning experience smoother and more enjoyable. You can use various sharpening methods, including bench grinders, sharpening stones, and specialized sharpening jigs. Each method has its pros and cons, but the goal remains the same: to maintain a keen edge. Here's a quick overview of some common sharpening methods:
| Sharpening Method | Pros | Cons |
|---|---|---|
| Bench Grinder | Fast and effective | Can overheat tools if not careful |
| Sharpening Stones | Precise control | Time-consuming |
| Sharpening Jigs | Consistent angles | Can be expensive |
Another essential practice is proper storage. Storing your tools correctly not only prevents physical damage but also keeps them organized and easy to access. Consider investing in a dedicated tool rack or drawer where your tools can be safely housed. Avoid leaving tools exposed to the elements, as moisture can lead to rust and deterioration. A simple way to store your tools is to use a pegboard system, allowing you to hang them up and keep them visible for quick access.
Additionally, don’t forget to clean your tools after each use. Wood shavings and dust can accumulate, affecting the performance and longevity of your tools. A soft cloth or brush can effectively remove debris, while a more thorough cleaning might involve using solvents or oils to keep metal parts rust-free. Regular cleaning should be part of your routine, just like sharpening.
In conclusion, maintaining your woodturning tools is a combination of sharpening, proper storage, and regular cleaning. By investing a little time and effort into these practices, you'll not only enhance the performance of your tools but also prolong their lifespan. Remember, a well-maintained tool is a happy tool, and a happy tool makes for a happy woodturner!
- How often should I sharpen my woodturning tools? - It depends on how often you use them, but a good rule of thumb is to sharpen them after every few hours of use.
- What is the best way to store my tools? - Store them in a dry place, preferably in a tool rack or drawer to keep them organized and protected.
- Can I use any type of oil for my tools? - It’s best to use a light machine oil or specific tool oil designed to prevent rust.
Sharpening Techniques
When it comes to woodturning, keeping your tools sharp is not just a matter of preference; it's a necessity. A well-sharpened tool not only makes your work easier but also enhances the quality of your finished product. Imagine trying to carve a delicate design with a dull chisel—frustrating, right? That's why mastering is essential for any woodturner, whether you are a beginner or an experienced craftsman.
There are several methods you can use to sharpen your woodturning tools, and each has its own advantages. One popular technique is using a bench grinder, which can quickly remove material and create a sharp edge. However, it’s crucial to maintain a consistent angle while sharpening to avoid overheating the metal, which can lead to losing temper and hardness. If you’re new to this, consider practicing on an old tool first before moving on to your prized chisels.
Another effective method is the use of a wet stone grinder. This technique is slower but offers the advantage of keeping the tool cool, thus preserving its hardness. Wet stone grinders typically come with jigs that help maintain the correct angle, making them user-friendly for beginners. Here’s a quick comparison of the two methods:
| Method | Pros | Cons |
|---|---|---|
| Bench Grinder | Fast material removal | Risk of overheating |
| Wet Stone Grinder | Preserves tool hardness | Slower sharpening process |
Aside from these methods, using a diamond sharpening stone or a waterstone can also be effective. These tools allow you to sharpen your chisels and gouges with precision, giving you the control needed to achieve the desired sharpness. For those who prefer a more traditional approach, honing with a leather strop can give your tools a razor-sharp edge, perfect for finishing touches.
It's important to regularly check the sharpness of your tools during your woodturning projects. A simple test is to see if the tool can easily slice through a piece of paper. If it struggles, it’s time to sharpen. Remember, taking the time to sharpen your tools will save you much more time in the long run, allowing for smoother cuts and better finishes.
In conclusion, sharpening techniques may vary, but the goal remains the same: to keep your tools in top condition for optimal performance. Whether you choose a bench grinder, wet stone grinder, or honing techniques, regular maintenance is key. So, the next time you sit down to turn some wood, take a moment to ensure your tools are sharp and ready to go—your future self will thank you!
- How often should I sharpen my woodturning tools? It's best to sharpen your tools regularly, ideally before starting a new project or whenever you notice a decline in performance.
- Can I use the same sharpening technique for all my tools? While many techniques can work for various tools, some may require specific methods. For example, gouges often benefit from different angles than chisels.
- What is the best angle for sharpening chisels? A common angle for chisels is between 25 to 30 degrees, but this can vary based on the type of chisel and its intended use.
- Is it necessary to use a honing guide? While not strictly necessary, a honing guide can help maintain consistent angles, especially for beginners.
Storing Your Tools
Proper storage of your woodturning tools is not just a matter of keeping things tidy; it’s essential for maintaining their performance and longevity. Imagine trying to carve a masterpiece with a dull chisel or a gouge that’s been left out in the elements—frustrating, right? To avoid this, consider creating a dedicated workspace that allows for organized storage. This could be as simple as a toolbox or as elaborate as a custom-built storage cabinet. The key is to ensure that your tools are easily accessible and well-protected from damage.
One effective method for storing tools is to use a pegboard. By hanging your tools on a pegboard, you not only keep them visible but also prevent them from clashing with each other, which can lead to nicks and scratches. Additionally, you can categorize your tools based on their type or size, making it easier to find what you need when inspiration strikes. For instance, you might group your chisels, gouges, and scrapers separately, ensuring that each tool has its own designated space.
Another important aspect of tool storage is humidity control. Woodturning tools, especially those made of high-carbon steel, can rust if exposed to moisture. To combat this, consider using desiccant packs in your storage area or keeping your tools in a climate-controlled environment. Regularly checking for signs of rust and applying a light coat of oil to your tools can also help protect them from the elements.
When organizing your tools, think about investing in some tool rolls or cases. These are particularly handy for transporting tools to workshops or classes. A good tool roll can keep your chisels and gouges secure, preventing them from moving around and sustaining damage during transit. Plus, you’ll look pretty professional pulling out your neatly organized tools in front of your fellow woodturning enthusiasts!
In summary, effective storage of your woodturning tools involves:
- Creating a dedicated workspace for organization.
- Using pegboards to keep tools visible and accessible.
- Controlling humidity to prevent rust.
- Investing in tool rolls for transport and organization.
By following these practices, you’ll not only prolong the life of your tools but also enhance your overall woodturning experience. A well-organized workspace can be a source of inspiration, allowing you to focus on your craft without the distraction of misplaced or damaged tools.
Q: How often should I clean my woodturning tools?
A: It's a good practice to clean your tools after each use to remove any wood shavings and debris. This prevents buildup that can affect performance.
Q: What is the best way to prevent rust on my tools?
A: To prevent rust, store your tools in a dry environment and apply a thin coat of oil regularly. Using desiccant packs can also help control humidity.
Q: Can I store my tools in a damp garage?
A: It’s not recommended. A damp environment can lead to rust and corrosion. If you must store them in a garage, consider using a dehumidifier or storing tools in a sealed container with desiccants.
Q: How can I organize my tools efficiently?
A: Use pegboards, toolboxes, or storage cabinets to categorize and organize your tools. Keeping similar tools together can save time and effort when you need to find them.
Tips for Beginners
Starting your journey in woodturning can feel a bit like stepping into a new world filled with possibilities. The **excitement** of creating something beautiful from a simple block of wood is truly unmatched. However, every new venture comes with its own set of challenges, and woodturning is no exception. To help you navigate this craft with confidence, here are some practical tips that can set you on the right path.
First and foremost, starting with simple projects is crucial. As a beginner, you might be tempted to dive into complex designs, but this can lead to frustration. Instead, consider tackling projects like simple bowls or pens. These projects not only help you get accustomed to the lathe and tools but also allow you to see quick results, which is incredibly motivating. Each small success will build your confidence and skill level.
Another essential tip is to learn from experienced turners. There’s a wealth of knowledge to be gained from those who have been in the craft for years. Seek out local workshops or online tutorials where you can watch seasoned woodturners in action. This not only enhances your understanding of techniques but also provides insights into the nuances of the craft that books might not cover. Plus, engaging with a community can make your learning journey much more enjoyable.
Don’t forget about the importance of practicing safety measures. Before you even start your first project, familiarize yourself with the safety protocols associated with woodturning. Wear protective gear such as goggles and face shields to safeguard against flying debris. Understanding the safe operation techniques will help you minimize risks and enjoy the process without fear.
Moreover, consider setting up a dedicated workspace that is organized and free from distractions. A clutter-free area not only boosts your productivity but also helps you focus on your craft. Keep your tools within reach and make sure your lathe is positioned in a way that allows you to work comfortably. This will make your woodturning experience more enjoyable and efficient.
Finally, embrace the learning process. Woodturning is an art that requires patience and practice. Don’t be discouraged by mistakes; instead, view them as opportunities to learn and improve. Each time you step up to the lathe, you’re honing your skills and developing your unique style. Remember, even the most skilled woodturners started as beginners!
As you embark on your woodturning journey, you may have some questions. Here are a few frequently asked ones:
- What is the best wood for beginners? Softwoods like pine or cedar are great for beginners as they are easier to work with.
- How often should I sharpen my tools? It's advisable to sharpen your tools after every few hours of use to maintain a sharp edge.
- Can I use power tools for woodturning? Yes, many woodturners use power tools, but it's important to learn the basics of hand tools first.
- What should I do if I make a mistake on a project? Don't worry! Mistakes are part of the learning process. Evaluate what went wrong and try to fix it or learn from it for next time.
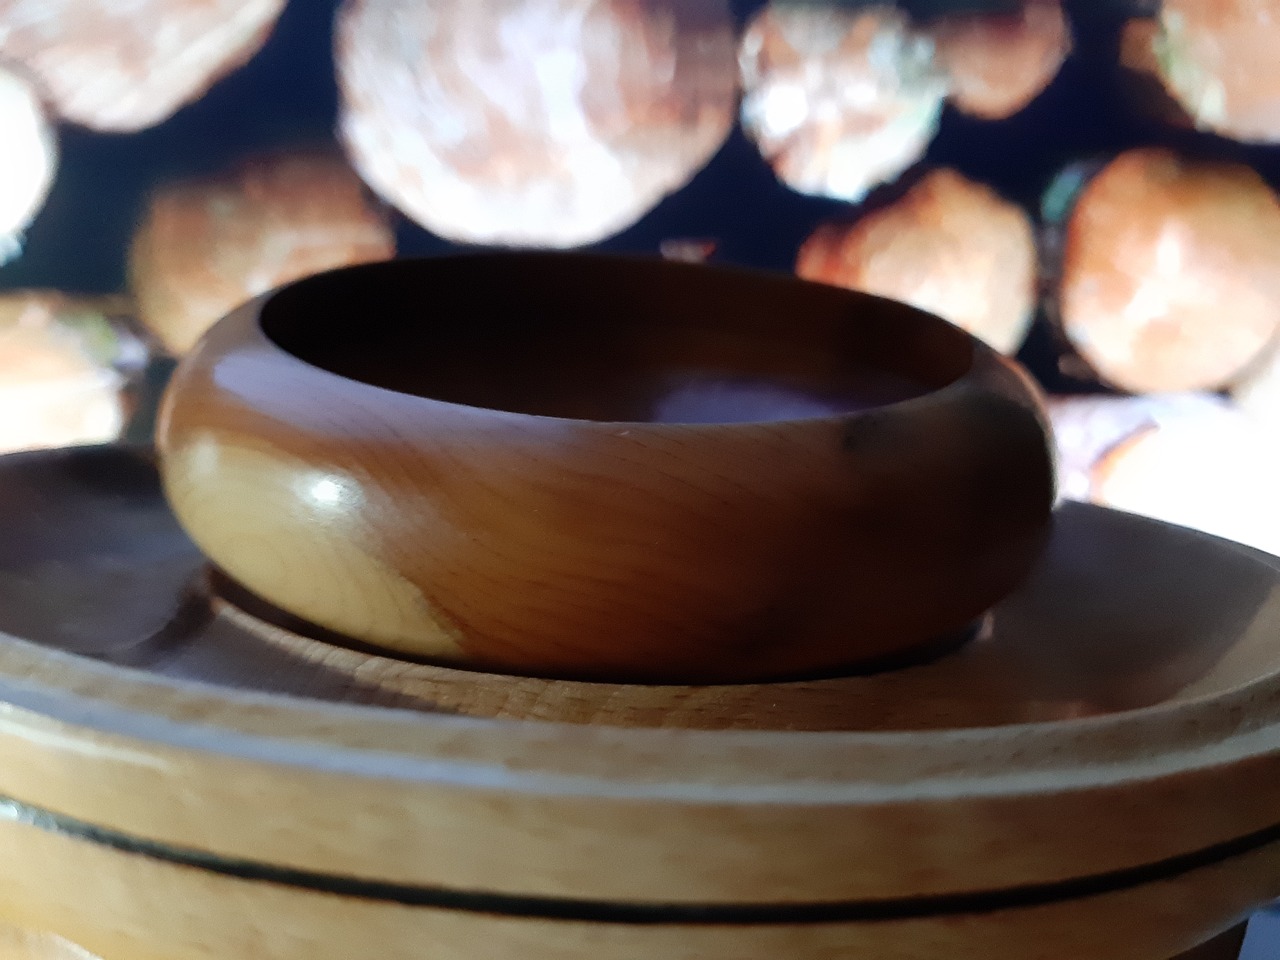
Starting with Simple Projects
When you're just stepping into the world of woodturning, it can feel a bit overwhelming. There are so many tools, techniques, and projects to choose from that it's easy to get lost in the details. However, starting with simple projects is a fantastic way to build your confidence and skills. Think of it like learning to ride a bike; you wouldn't start with a mountain trail, right? Instead, you’d begin on a flat surface, getting comfortable with the balance and motion before tackling the challenges ahead.
One of the best ways to ease into woodturning is by selecting projects that are not only manageable but also rewarding. Here are a few beginner-friendly projects that can help you get started:
- Spindle Turning: Creating a simple spindle can introduce you to the basic techniques of woodturning. It's a straightforward project that helps you understand how to control the lathe and manipulate the wood.
- Wooden Bowls: Turning a small bowl is another excellent project for beginners. Not only will you learn to shape the wood, but you’ll also get a chance to practice your finishing techniques.
- Pens: Crafting a wooden pen is a quick and satisfying project. It allows you to experiment with different types of wood and finishes while producing a functional item.
Each of these projects serves as a stepping stone, allowing you to progressively tackle more complex designs as your skills improve. As you work on these simple items, take the time to appreciate the process. Woodturning is not just about the end product; it’s about the journey of creation. Embrace the learning curve, and don’t be afraid to make mistakes. They are often the best teachers!
Furthermore, engaging with the woodturning community can enhance your learning experience. Online forums, local clubs, and workshops provide a wealth of knowledge and support. You can share your projects, seek advice, and even find inspiration for your next creation. Remember, every expert was once a beginner, and the more you immerse yourself in the craft, the more proficient you will become.
In conclusion, starting with simple projects in woodturning not only builds your foundational skills but also ignites your passion for the craft. So, grab your tools, choose a project, and let the wood chips fly!
Q: What is the best wood for beginners to start with?
A: Softwoods like pine or cedar are great for beginners. They are easier to work with and forgiving if you make mistakes.
Q: How do I know which tools I need to start woodturning?
A: Start with the essentials: a lathe, a set of gouges, a parting tool, and a scraper. As you progress, you can add more specialized tools to your collection.
Q: How can I improve my woodturning skills?
A: Practice is key! Try different projects, watch tutorials, and don't hesitate to ask for feedback from more experienced turners.
Q: What safety gear should I wear while woodturning?
A: Always wear safety goggles, a face shield, and a dust mask to protect yourself from wood shavings and dust.
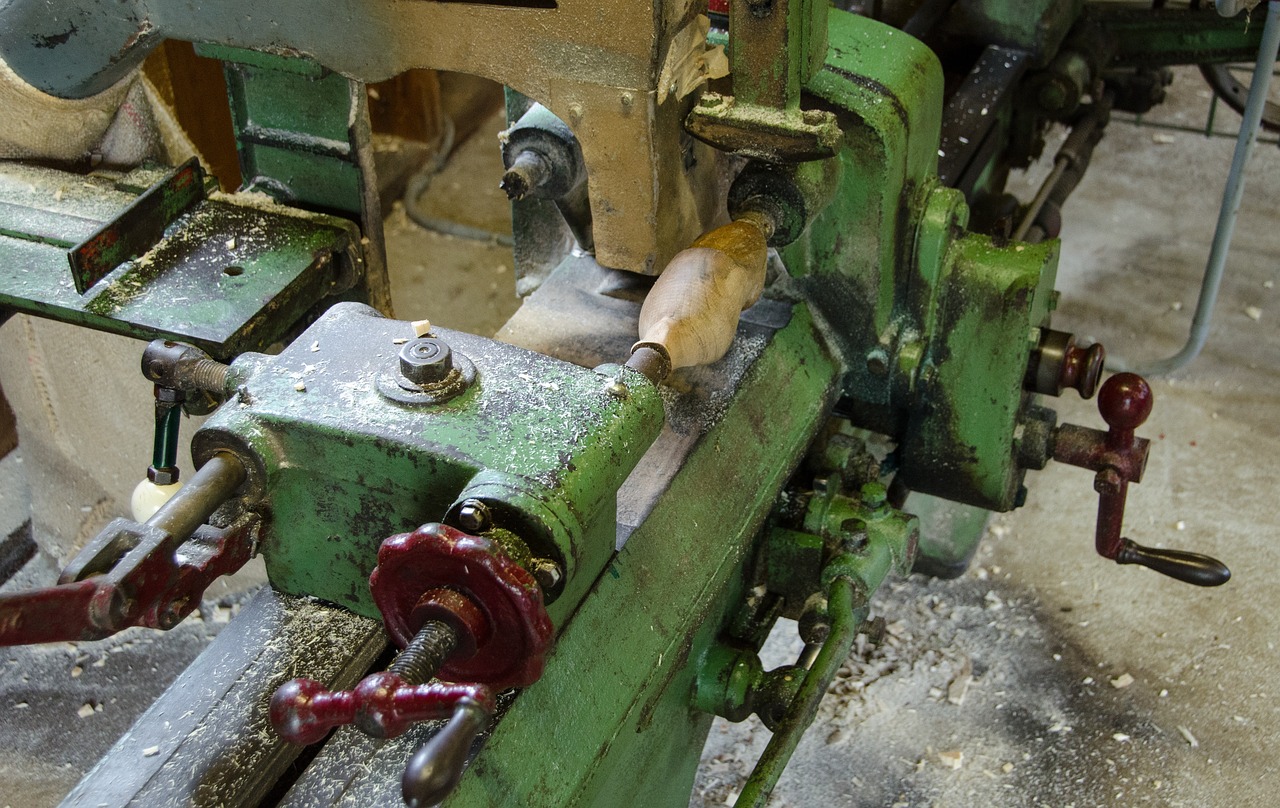
Learning from Experienced Turners
When it comes to mastering the art of woodturning, there’s no substitute for learning from those who have walked the path before you. Experienced turners can offer invaluable insights that you simply won’t find in books or online tutorials. Imagine trying to navigate a maze without a map; that’s what it can feel like when you’re starting out in woodturning without guidance. By tapping into the knowledge of seasoned craftsmen, you can avoid common pitfalls and accelerate your learning curve.
One of the best ways to learn is through mentorship. Finding a mentor who is willing to share their expertise can be a game changer. Not only can they provide hands-on demonstrations, but they can also offer personalized feedback on your technique. This immediate response is crucial, as it allows you to correct mistakes in real-time, which is often much more effective than trying to fix them later on your own.
Participating in workshops or classes can also be incredibly beneficial. These environments foster a sense of community and collaboration, allowing you to learn not just from the instructor, but from your peers as well. Imagine the excitement of sharing ideas, techniques, and even challenges with others who are just as passionate about woodturning as you are! Workshops often cover various topics, such as:
- Tool selection and usage
- Wood types and characteristics
- Finishing techniques
- Safety practices
Additionally, many experienced turners are active in online forums and social media groups. Engaging in these communities can provide you with a wealth of resources, including video tutorials, project ideas, and troubleshooting tips. It’s like having a global network of woodturning experts at your fingertips! Don’t hesitate to ask questions or share your projects; the woodturning community is typically very supportive and eager to help newcomers.
Lastly, never underestimate the power of observation. Watching experienced turners at work can reveal techniques and tricks that you might not have considered. Whether it’s the way they hold their tools, their body positioning, or their approach to problem-solving, observing these nuances can greatly enhance your own skills. You might find that a simple adjustment in your technique can lead to significant improvements in your work.
In conclusion, learning from experienced turners is not just about acquiring skills; it’s about building connections, gaining confidence, and cultivating a deeper appreciation for the craft. So, seek out mentors, participate in workshops, engage with online communities, and keep your eyes open. The journey of woodturning is as rewarding as the finished pieces you create!
Q: How can I find a mentor in woodturning?
A: You can find a mentor by joining local woodturning clubs, attending workshops, or connecting with experienced turners through online forums and social media groups.
Q: What are the benefits of attending woodturning workshops?
A: Workshops provide hands-on experience, personalized feedback, and opportunities to learn from both instructors and peers, fostering a collaborative learning environment.
Q: Are there online resources for learning woodturning?
A: Yes, there are numerous online resources, including video tutorials, forums, and social media groups where you can learn and interact with experienced turners.
Q: How important is safety in woodturning?
A: Safety is paramount in woodturning. Always wear appropriate protective gear and follow safe operation techniques to minimize risks.
Q: Can I learn woodturning without prior experience?
A: Absolutely! Many beginners start with little to no experience. Seeking guidance from experienced turners and starting with simple projects can help you build your skills.
Frequently Asked Questions
- What is a woodturning lathe?
A woodturning lathe is a machine used to shape wood by rotating it against various cutting tools. It allows woodturners to create a variety of objects, from bowls to intricate spindles, by removing material as the wood spins.
- What types of woodturning lathes are available?
There are several types of woodturning lathes, including mini lathes for smaller projects, midi lathes for medium-sized work, and full-size lathes for larger items. Each type serves different needs depending on the scale and complexity of the projects.
- What essential tools do I need for woodturning?
Some essential woodturning tools include gouges, chisels, and scrapers. Each tool has a specific function; for example, gouges are great for shaping, while scrapers are perfect for finishing touches.
- How do I choose the right chisel for my project?
Choosing the right chisel depends on the specific cuts you need to make. Consider the shape and size of the chisel, as well as the type of wood you’re working with. Beginners might start with a basic set and expand as they gain experience.
- What safety measures should I take while woodturning?
Safety is crucial in woodturning! Always wear protective gear such as goggles and face shields to protect against flying debris. Additionally, ensure your workspace is clear and that you understand safe operation techniques for your tools.
- How do I maintain my woodturning tools?
To maintain your tools, regularly sharpen them to keep the cutting edges effective. Also, store your tools properly in a dry place to prevent rust and damage. Cleaning them after each use can also prolong their lifespan.
- What are some beginner-friendly woodturning projects?
For beginners, starting with simple projects like wooden pens, small bowls, or candle holders can be a great way to build confidence. These projects help you practice basic techniques without being overwhelming.
- How can I learn more about woodturning?
Learning from experienced woodturners can significantly improve your skills. Consider attending workshops, joining local clubs, or watching online tutorials to gain insights and tips from seasoned professionals.


