Crafting Distinct Wooden Buttons: A Step-by-Step Guide
Welcome to the wonderful world of crafting unique wooden buttons! If you're looking to add a personal touch to your sewing projects or simply want to explore a new hobby, you've come to the right place. This article provides a comprehensive guide on creating beautiful and functional wooden buttons. We’ll cover everything from selecting the right wood to mastering finishing techniques, ensuring that your buttons are not just practical but also a reflection of your creativity. So, grab your tools, and let's dive into the art of button making!
When it comes to making wooden buttons, the choice of wood is crucial. Not only does it affect the durability of your buttons, but it also influences their overall aesthetic. Different types of wood come with unique characteristics that can enhance your designs. For instance, bamboo is lightweight and eco-friendly, making it an excellent choice for everyday use, while maple offers a beautiful grain that adds character to your buttons. Here’s a quick overview of popular wood types for button making:
| Wood Type | Characteristics | Best For |
|---|---|---|
| Bamboo | Lightweight, eco-friendly | Casual wear |
| Maple | Beautiful grain, sturdy | Dressy items |
| Walnut | Rich color, durable | Statement pieces |
| Pine | Soft, easy to work with | Beginner projects |
Choosing the right wood not only enhances the look of your buttons but also ensures they will stand the test of time. So, consider what you want your buttons to convey and pick a wood that aligns with your vision!
Before you start crafting, you need to gather the right tools and materials. Having the essentials at your disposal will make the button-making process smoother and more enjoyable. Here’s a list of basic tools you’ll need:
- Saws: For cutting wood into desired shapes.
- Files: To smooth out edges and refine shapes.
- Sanders: For achieving a polished finish.
While basic hand tools are essential, incorporating power tools can elevate your crafting game. Tools like drills and lathes can save you time and provide precision that hand tools may lack. Imagine the satisfaction of creating intricate designs with ease!
Before you dive into your crafting adventure, it’s vital to prioritize safety. Working with tools can be hazardous, so always wear protective gear like goggles and gloves. Make sure your workspace is organized and free from clutter to prevent accidents. Remember, safety first!
Now that you have your materials and tools ready, it’s time to unleash your creativity! Designing your buttons can be one of the most fun parts of the process. Think about the shapes and sizes you want to experiment with. Whether you prefer classic round buttons or more whimsical shapes, the possibilities are endless. Don’t be afraid to mix and match different designs to create a unique collection!
Adding patterns and textures can take your buttons to the next level. You can carve designs into the wood or use paint to create eye-catching patterns. Imagine a button with a floral design or a geometric pattern that catches the eye—these details can make your buttons truly stand out.
Want to make your buttons even more special? Consider personalizing them! Techniques like engraving or painting can help you add a unique touch that reflects your style. Think of your buttons as tiny canvases waiting for your artistic flair!
Once you’ve crafted your buttons, mastering finishing techniques is crucial for achieving a polished look. Sanding is essential to smooth out rough edges, while staining can enhance the wood's natural beauty. Sealing your buttons will protect them from wear and tear, ensuring they last for years to come. It’s like giving your buttons a protective armor!
Polishing your buttons elevates their appearance, making them look professionally crafted. A good polish can enhance the wood’s natural shine, giving your buttons that extra oomph!
Before you showcase or sell your buttons, it’s essential to inspect them for quality assurance. Check for any imperfections, rough edges, or inconsistencies. This step ensures that your final product meets high standards and reflects your hard work and creativity.
Q: What type of wood is best for beginners?
A: Pine is a great choice for beginners due to its softness and ease of workability.
Q: Can I use paint on my wooden buttons?
A: Absolutely! Paint can add a vibrant touch and allow for personalization.
Q: How do I ensure my buttons are durable?
A: Using proper finishes and sealants can greatly enhance the durability of your wooden buttons.
Choosing the Right Wood
When it comes to crafting unique wooden buttons, selecting the right type of wood is not just a matter of preference; it’s a crucial step that can significantly impact both the durability and aesthetics of your creations. Think of wood as the canvas for your artistic expression—each type offers its own characteristics and charm, influencing the final look and feel of your buttons. So, how do you choose the perfect wood? Let’s delve into some popular options and their unique traits.
First, consider maple, known for its fine grain and light color. Maple buttons can provide a clean, modern look that works beautifully for minimalist designs. On the other hand, if you’re aiming for something with a bit more character, walnut offers a rich, dark hue with striking grain patterns. This wood is perfect for creating buttons that stand out and make a statement.
Another excellent option is birch, which is not only affordable but also boasts a smooth surface that’s easy to work with. Birch buttons can be stained or painted to match any project, making them incredibly versatile. For those who appreciate a bit of texture, oak is a fantastic choice. Its pronounced grain adds depth to your designs, and its durability ensures that your buttons will last.
| Type of Wood | Characteristics | Best For |
|---|---|---|
| Maple | Fine grain, light color | Minimalist designs |
| Walnut | Rich color, striking grain | Statement pieces |
| Birch | Smooth surface, versatile | Staining and painting |
| Oak | Pronounced grain, durable | Textured designs |
While these woods are popular choices, it’s essential to consider the intended use of your buttons. If they’re meant for clothing, you might want to opt for lighter woods that won’t weigh down the fabric. Alternatively, if you're designing buttons for bags or accessories, heavier woods like oak or walnut can add a touch of elegance and sturdiness.
Additionally, think about the environmental impact of your wood selection. Sourcing wood from sustainable forests not only helps protect our planet but also ensures that your crafting practice is eco-friendly. Look for certifications like FSC (Forest Stewardship Council) to ensure your wood comes from responsibly managed sources.
In conclusion, choosing the right wood for your buttons is a blend of personal style, functionality, and environmental responsibility. By understanding the characteristics of different wood types, you’ll be well on your way to crafting beautiful and unique buttons that reflect your creativity and values.

Essential Tools and Materials
When it comes to crafting unique wooden buttons, having the right tools and materials at your disposal is absolutely vital. Imagine trying to bake a cake without the necessary ingredients or tools; it just wouldn’t work out, right? The same concept applies to button making. To embark on this creative journey, you’ll need a blend of basic hand tools and possibly some power tools, depending on how intricate you want your designs to be.
First and foremost, let’s talk about the essential hand tools. You’ll often rely on tools like saws, files, and sanders. A hand saw is crucial for cutting your wood into the desired shapes. If you want to get fancy, a scroll saw can create intricate designs that a standard saw might struggle with. After cutting, you’ll want to smooth out those edges, and that’s where a file comes in handy. This tool will help you refine the shape and eliminate any rough spots, making your buttons feel polished and professional.
Next up, the sander is your best friend. This tool not only speeds up the smoothing process but also ensures that your buttons have a consistent finish. For those who prefer a bit more power, you might consider investing in an orbital sander, which can save you a lot of elbow grease and time.
Here’s a quick rundown of some basic hand tools you should consider:
- Hand Saw: For cutting wood into rough shapes.
- Files: For refining edges and smoothing surfaces.
- Sander: For achieving that smooth finish.
Now, let’s not forget about the power tools. While you can certainly create beautiful buttons using only hand tools, power tools can make your life significantly easier and your work more efficient. A drill is essential for creating buttonholes, while a lathe allows you to shape your wood into stunning round buttons with precision. The beauty of using a lathe is that it can produce uniform shapes and sizes, making your buttons look professionally crafted.
Power tools not only save time but also enhance precision in your work. Imagine trying to create a perfectly round button with just a hand saw and sandpaper—it's a daunting task! With a lathe, you can achieve that perfect circle with ease. Plus, the drill makes quick work of buttonholes, allowing for quick assembly and use.
Once you’ve crafted your buttons, it’s time to think about how to protect and enhance them. This is where finishes and sealants come into play. A good finish not only adds beauty but also protects your buttons from wear and tear. Options like varnish, oil, or wax can give your buttons a stunning sheen while also providing a layer of protection against moisture and dirt. Remember, the finish you choose can drastically change the look of your buttons, so don’t rush this step!
Before diving into your crafting, it’s crucial to prioritize safety. Working with tools can be risky, so wearing protective gear such as goggles and gloves is a must. Always ensure your workspace is clean and organized, minimizing the risk of accidents. If you’re using power tools, familiarize yourself with their operation to prevent mishaps. Safety should always come first, allowing you to enjoy the crafting process without worry.
In conclusion, gathering the right tools and materials is the foundation of successful button making. Whether you opt for hand tools or power tools, each has its unique benefits that can help you create beautiful and functional wooden buttons. So, gear up and get ready to unleash your creativity!
Q: What type of wood is best for making buttons?
A: Hardwoods like maple, cherry, or walnut are excellent choices due to their durability and beautiful grain patterns.
Q: Can I use recycled wood for making buttons?
A: Absolutely! Recycled wood can add character and uniqueness to your buttons, making each piece one-of-a-kind.
Q: What is the best finish for wooden buttons?
A: It depends on your preference, but oil finishes are popular for their natural look, while varnishes provide a more durable surface.
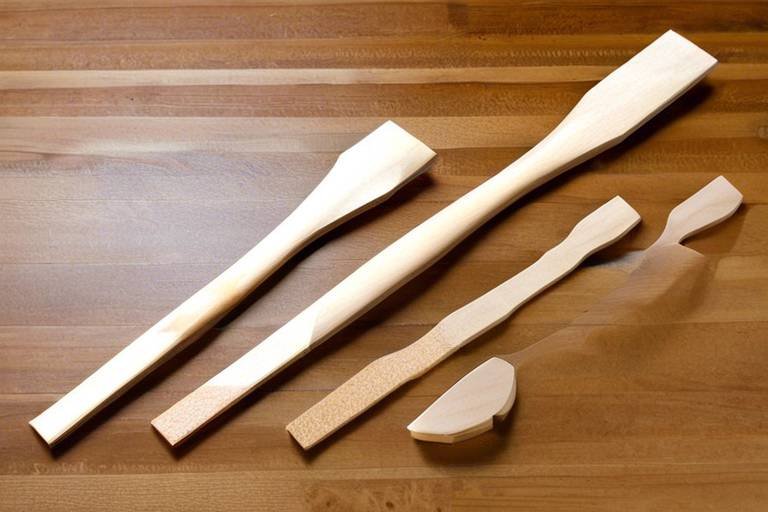
Basic Hand Tools
When embarking on the journey of crafting wooden buttons, having the right tools at your disposal is paramount. Think of your tools as the paintbrushes of a painter; they can make or break your artistic vision. In this section, we’ll delve into the essential hand tools that will not only facilitate your button-making process but also enhance the quality of your finished products.
First and foremost, a handsaw is indispensable. It allows you to cut your wood into the desired shapes and sizes. Whether you opt for a fine-toothed saw for intricate designs or a more robust one for larger pieces, the choice of saw can significantly impact the precision of your cuts. Remember, a clean cut is the foundation of a beautiful button!
Next up is the file. After cutting, the edges of your buttons may be rough or uneven. A good file helps smooth these edges, transforming sharp, jagged cuts into soft, inviting curves. This not only improves the aesthetic appeal but also ensures safety, as sharp edges can be hazardous. Additionally, consider investing in a variety of files, such as flat, round, and half-round, to cater to different contours and details.
Another crucial tool is the sander. While filing can help with initial smoothing, a sander takes it a step further by providing a finer finish. You can choose between manual sanders or powered ones, depending on your comfort level and the intricacy of your designs. Remember, the smoother the surface, the better the finish will be when you apply stains or sealants later on.
Lastly, don’t overlook the importance of a drill. If you’re planning to create buttons with holes for sewing or attachment, a drill is essential. It allows for precision in hole placement, ensuring that your buttons not only look great but are also functional. Using a drill with different bit sizes can give you versatility in your button designs, allowing for creativity to flourish.
In summary, the basic hand tools you need for crafting wooden buttons include:
- Handsaw - for cutting wood accurately.
- File - for smoothing edges and achieving a refined shape.
- Sander - for a polished finish.
- Drill - for creating holes in your buttons.
Equipped with these basic hand tools, you’ll be well on your way to creating stunning wooden buttons that showcase your craftsmanship. Remember, each tool has its unique role, and mastering their use will elevate your crafting experience. So, grab your tools, and let your creativity flow!
Q1: What is the best type of wood for making buttons?
A1: The best type of wood for making buttons depends on your design preferences. Hardwoods like maple and cherry are durable and have beautiful grain patterns, while softer woods like pine are easier to work with for beginners.
Q2: Do I need power tools to make wooden buttons?
A2: While power tools can make the process quicker and more precise, they are not strictly necessary. Basic hand tools can be sufficient, especially for beginners.
Q3: How can I ensure my buttons are safe to use?
A3: To ensure safety, always smooth out sharp edges and apply a non-toxic finish or sealant that is safe for skin contact.
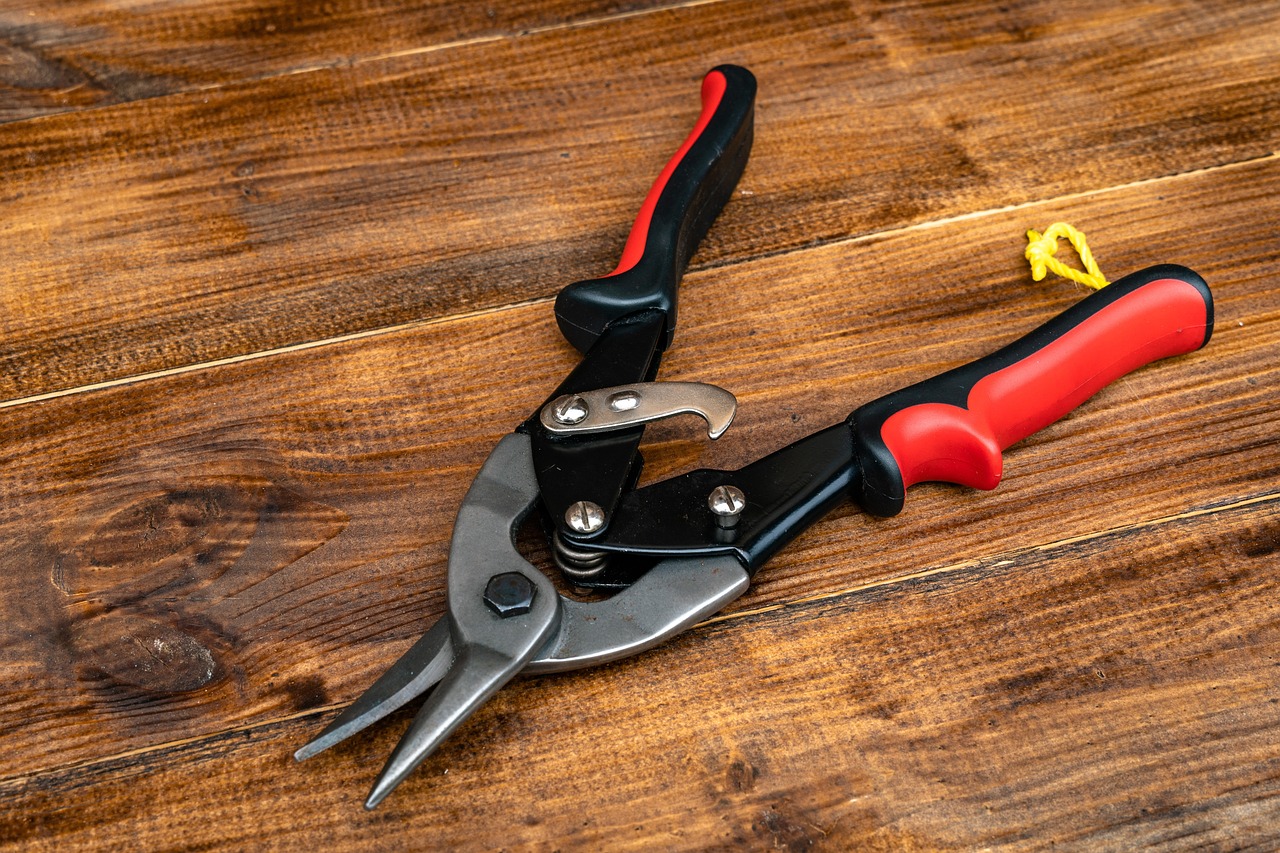
Power Tools for Efficiency
When it comes to crafting wooden buttons, power tools can be your best friends, transforming a tedious process into a swift and enjoyable experience. Imagine trying to carve intricate designs into wood with just a hand saw—exhausting, right? That's where power tools come into play, offering precision and speed that hand tools simply cannot match. They allow you to achieve intricate details and uniform shapes in a fraction of the time, making your crafting journey not only easier but also more fun.
One of the most essential power tools in your button-making arsenal is the drill. With the right drill bits, you can create perfectly sized holes in your wooden buttons, ensuring they function beautifully when stitched onto garments or accessories. Not only does a drill save you time, but it also helps maintain the integrity of the wood, reducing the risk of splitting that can occur with hand drilling. Pairing your drill with a drill press can further enhance your accuracy, allowing for consistent depth and placement every time.
Another powerful ally in your button-making endeavors is the lathe. This tool is particularly useful for shaping your buttons into smooth, rounded forms. By securing your wood piece on the lathe, you can create beautiful, uniform buttons with ease. The speed and precision of a lathe allow you to explore various shapes—from classic round buttons to unique geometric designs—without the hassle of manual shaping. Plus, the satisfaction of watching your raw wood transform into a polished button is nothing short of exhilarating!
However, it's essential to note that while power tools can greatly enhance efficiency, they also require a certain level of skill and safety awareness. Always remember to wear appropriate protective gear, such as safety goggles and ear protection, to shield yourself from potential hazards. Understanding how to operate each tool correctly will not only keep you safe but also ensure that your projects turn out exactly as you envision them.
In summary, incorporating power tools into your button-making process can significantly boost your efficiency and creativity. They allow you to focus on the artistic side of crafting while handling the more labor-intensive tasks with ease. So, whether you're drilling holes, shaping wood on a lathe, or sanding down edges, these tools will help you create stunning wooden buttons that are not only functional but also a joy to behold.
- What types of wood are best for making buttons? Softwoods like pine and hardwoods like maple or cherry are popular choices due to their durability and ease of carving.
- Can I use power tools if I'm a beginner? Absolutely! Just make sure to read the manuals, watch tutorials, and practice safety precautions.
- How do I choose the right finish for my buttons? Consider the intended use and aesthetic; oils, lacquers, and paints can all provide different looks and levels of protection.
Choosing Finishes and Sealants
When it comes to crafting wooden buttons, one of the most exciting yet often overlooked aspects is the choice of finishes and sealants. These elements not only enhance the beauty of your buttons but also provide essential protection against wear and tear. Imagine your beautiful wooden buttons glistening under the light, their colors vibrant and their surfaces smooth—this is the magic that the right finish can bring to your creations.
There are several types of finishes and sealants available, each offering unique benefits. For instance, if you're looking for a natural look, you might consider using oils such as linseed oil or tung oil. These oils penetrate the wood, bringing out its natural grain while providing a degree of moisture resistance. On the other hand, if you want a more durable finish, polyurethane or epoxy resins can create a hard, protective layer that stands up to the rigors of everyday use.
Here’s a quick overview of some popular finishes:
| Finish Type | Characteristics | Best For |
|---|---|---|
| Linseed Oil | Natural, enhances grain | Indoor projects |
| Tung Oil | Water-resistant, durable | Outdoor projects |
| Polyurethane | Hard, protective layer | Heavy-use items |
| Epoxy Resin | Very durable, glossy finish | Functional and decorative buttons |
In addition to choosing the right finish, applying it correctly is crucial. Always start with a clean surface; sand your buttons thoroughly to remove any rough spots or imperfections. Apply the finish in thin layers, allowing each coat to dry completely before adding the next. This method not only ensures a smooth application but also helps to build up a robust protective layer over time.
Don't forget to consider the environmental impact of your chosen products. Many crafters are now turning to eco-friendly finishes that are less harmful to both the environment and their health. Water-based finishes are a great option, as they typically emit fewer volatile organic compounds (VOCs) compared to their oil-based counterparts. This choice is not only better for you but also for the planet!
Ultimately, the choice of finish and sealant will depend on your personal style, the intended use of the buttons, and the overall aesthetic you wish to achieve. Experimenting with different products can lead to delightful surprises, so don’t hesitate to try a few options until you find the perfect match for your unique creations.
- What is the best finish for wooden buttons? It depends on your needs; for a natural look, consider oils, while for durability, polyurethane is a great choice.
- How do I apply a finish to my buttons? Sand them first, then apply in thin layers, allowing each to dry completely before adding more.
- Are there eco-friendly finishes available? Yes, water-based finishes are a great eco-friendly option with lower VOC emissions.
Safety Precautions
When it comes to crafting wooden buttons, safety should always be at the forefront of your mind. Working with tools, whether they are hand tools or power tools, can pose various risks if proper precautions are not taken. First and foremost, it’s essential to wear appropriate protective gear. This includes safety goggles to shield your eyes from wood shavings and dust, a dust mask to prevent inhalation of fine particles, and ear protection if you’re using loud power tools. Think of these items as your armor; they may seem cumbersome, but they are crucial for your safety.
Moreover, maintaining a clean and organized workspace can significantly reduce the risk of accidents. Ensure that your tools are stored properly and that the area is free from clutter. Just like a chef wouldn’t cook in a messy kitchen, you shouldn’t craft in a disorganized space. A clean environment not only enhances your focus but also minimizes the chances of tripping or knocking over tools.
Additionally, it’s vital to familiarize yourself with each tool you plan to use. Read the manuals and understand how they operate. For instance, using a drill may seem straightforward, but improper handling can lead to injuries. If you’re unsure about a tool, don’t hesitate to seek advice from experienced crafters or watch instructional videos. Knowledge is power, and in this case, it can also be a lifesaver.
Another important aspect of safety is to always use tools for their intended purpose. Using a tool in a way it wasn’t designed for can lead to malfunctions and accidents. For example, never use a chisel as a screwdriver. It might seem like a quick fix, but it can result in injury or damage to your tools. Always respect the tools and their capabilities.
Lastly, if you’re working with children or inexperienced crafters, supervision is key. Make sure they understand the importance of safety and know how to use tools properly. It’s like teaching someone to ride a bike; they need guidance and support to navigate safely.
In summary, prioritize safety by wearing protective gear, maintaining a clean workspace, understanding your tools, using them correctly, and supervising novice crafters. By following these precautions, you’ll not only protect yourself but also create a more enjoyable crafting experience.
- What protective gear should I wear while crafting?
Always wear safety goggles, a dust mask, and ear protection when necessary. - How can I maintain a safe workspace?
Keep your area organized and free from clutter to reduce the risk of accidents. - What should I do if I'm unsure how to use a tool?
Consult manuals, seek advice from experienced crafters, or watch instructional videos. - Can I use tools for purposes they weren't designed for?
No, always use tools as intended to avoid accidents and malfunctions. - How can I ensure the safety of children while crafting?
Supervise them closely and teach them about safety and proper tool usage.
Designing Your Buttons
Unleashing your creativity in the world of wooden button design can be an exhilarating experience! When it comes to crafting unique buttons, the possibilities are virtually endless. From shapes and sizes to artistic elements, every choice you make can transform a simple piece of wood into a stunning accessory that tells a story. Have you ever thought about how a button can be more than just a fastening? It can be a statement piece, a work of art, or even a reflection of your personality!
When designing your buttons, consider the shape first. Traditional buttons often come in round or square shapes, but why not think outside the box? Triangles, hexagons, or even abstract shapes can add a unique flair to your creations. Imagine the delight of someone discovering a beautifully crafted star-shaped button on a handmade garment! The shape sets the tone for the button's overall aesthetic, so let your imagination run wild.
Next up is the size. Larger buttons can serve as eye-catching focal points, while smaller buttons can add subtle elegance to your projects. Think about the context in which your buttons will be used. Are they for a cozy cardigan or a chic handbag? The size can dramatically affect the functionality and style of the finished product. As a rule of thumb, consider the scale of the item you are embellishing; a large button on a delicate fabric might overpower the design, while tiny buttons may get lost on a chunky knit.
Now, let’s talk about artistic elements. This is where your personality can truly shine! Incorporating patterns and textures into your button designs can elevate them from ordinary to extraordinary. You might want to experiment with engraving intricate designs, painting vibrant colors, or even applying natural dyes. For instance, a floral pattern engraved on a wooden button can add a rustic charm, while a splash of bright paint can infuse a modern twist. The choice of artistic elements can also reflect current trends or personal styles, making your buttons not only functional but also fashionable.
To help you visualize some design ideas, here’s a quick table summarizing various design aspects:
| Aspect | Considerations | Examples |
|---|---|---|
| Shape | Round, square, abstract | Star, heart, custom shapes |
| Size | Small, medium, large | Buttons for clothing, bags, crafts |
| Artistic Elements | Patterns, textures, colors | Engraving, painting, dyeing |
Finally, don’t forget to personalize your creations. Adding a personal touch can make your buttons even more special. Whether it's a monogram, a meaningful symbol, or a favorite quote, these small details can turn a simple button into a cherished keepsake. Think about the stories behind your designs; every button can carry a memory or a message, making it a perfect gift for a loved one or a delightful addition to your own collection.
In conclusion, designing wooden buttons is not just about functionality; it’s about expressing yourself and unleashing your creativity. So grab some wood, let your imagination soar, and start crafting buttons that are not only unique but also a true reflection of your artistic spirit!
- What type of wood is best for making buttons? - Hardwoods like maple, cherry, and walnut are excellent choices due to their durability and aesthetic appeal.
- Can I use power tools for button making? - Absolutely! Power tools can enhance precision and efficiency, especially for intricate designs.
- How do I ensure my buttons are safe to use? - Always sand your buttons thoroughly to remove sharp edges and consider applying a non-toxic finish.
Incorporating Patterns and Textures
When it comes to crafting unique wooden buttons, the incorporation of patterns and textures can truly elevate your creations from ordinary to extraordinary. Imagine your buttons as blank canvases, waiting for your artistic touch to transform them into stunning focal points on garments or accessories. The beauty of wood lies in its natural grain, and by enhancing this with various designs, you can create pieces that not only serve a functional purpose but also tell a story.
There are several methods to incorporate patterns and textures into your wooden buttons. One popular technique is woodburning, also known as pyrography. This method allows you to draw intricate designs directly onto the surface of the wood using a heated tool. Whether you prefer simple geometric shapes or elaborate floral motifs, woodburning gives you the flexibility to customize each button uniquely. You can also experiment with different heat settings to achieve varying depths and shades, adding dimension to your designs.
Another exciting way to add texture is through the use of carving. Hand-carving can produce stunning results, giving your buttons a tactile quality that’s pleasing to the touch. You can carve out patterns or even create three-dimensional shapes that stand out. For those who might feel intimidated by hand-carving, consider using stamps or molds that can imprint designs onto the wood. This technique allows for consistent patterns across multiple buttons, making it an efficient choice for larger projects.
Don't forget about the power of painting and staining your buttons. A splash of color can bring your designs to life and make them pop. For instance, using acrylic paints can allow you to create vibrant patterns, while stains can enhance the natural beauty of the wood grain, giving it a rich, warm tone. You can layer colors or even use techniques like sponging or dry brushing to achieve unique effects. The key is to experiment and find what resonates with your personal style.
Lastly, consider combining these techniques for truly one-of-a-kind buttons. For example, you might carve a design into the wood and then apply a colored stain to highlight the carved areas. Alternatively, you could woodburn a pattern and then paint the background, creating a striking contrast. The possibilities are endless when you let your creativity flow!
Incorporating patterns and textures not only enhances the visual appeal of your buttons but also adds a personal touch that can make them truly special. Whether you’re crafting for personal use or to sell, these unique designs can set your creations apart in a crowded market. So grab your tools, unleash your imagination, and start creating buttons that are not just functional but also works of art!
- What types of wood are best for button making? Hardwoods like maple, cherry, and walnut are ideal due to their durability and fine grain.
- Can I use power tools for intricate designs? Yes, tools like lathes and drills can help achieve precision, but hand tools offer more control for detailed work.
- How can I ensure my buttons are safe for clothing? Always use non-toxic finishes and sealants to protect your buttons and make them safe for wear.

Personalizing Your Creations
When it comes to crafting wooden buttons, personalization is where your creativity truly shines. Think of your buttons as little canvases waiting for your artistic touch. There are countless ways to make your buttons stand out, reflecting not only your style but also the personality of the projects they will adorn. Have you ever thought about how a simple engraving can transform a basic button into a cherished keepsake? Or how a splash of color can breathe life into a dull design? Let’s dive into some exciting techniques that can help you personalize your wooden creations.
One of the most popular methods for adding a personal touch is through engraving. This technique allows you to carve intricate designs, names, or even special dates into the surface of your buttons. You can use a rotary tool or a wood burning pen to achieve different effects. Engraving not only enhances the aesthetic appeal but also adds a sentimental value, making your buttons perfect for gifts or special occasions. Imagine giving a handmade sweater with buttons engraved with the recipient's initials—how special would that be?
Another fantastic way to personalize your buttons is through painting. You can use acrylic paints to add vibrant colors or even create detailed illustrations. The beauty of painting is that it allows for limitless creativity; you can opt for a simple solid color, a fun pattern, or even a detailed scene. Just remember to use a sealant afterward to protect your artwork from wear and tear. If you’re feeling adventurous, try experimenting with mixed media, combining paint with other materials like fabric or beads to create a truly unique piece.
Don’t overlook the power of natural finishes as a form of personalization. By using different oils or waxes, you can enhance the natural grain of the wood, allowing the beauty of the material to shine through. This method not only protects your buttons but also gives them a rich, warm appearance that is hard to replicate with paint. Choose from options like linseed oil, tung oil, or beeswax to find the finish that best suits your style.
For those who love a little sparkle, consider adding embellishments. Small beads, sequins, or even tiny charms can be glued onto your buttons to create a playful and eye-catching look. This is especially fun for buttons that will be used on children’s clothing or accessories. Just imagine a button adorned with colorful beads—it’s sure to catch the eye and become a conversation starter!
Finally, don’t forget the importance of shapes and sizes in personalizing your buttons. While traditional round buttons are classic, experimenting with different shapes like hearts, stars, or even custom designs can make a significant impact. Consider the size of your buttons in relation to the project they’ll be used for; larger buttons can serve as statement pieces, while smaller ones can add subtle charm. The right shape and size can elevate your design and make it uniquely yours.
In conclusion, personalizing your wooden buttons is all about expressing yourself and letting your creativity flow. Whether you choose to engrave, paint, or embellish, each technique offers a unique way to make your buttons special. So, gather your materials, unleash your imagination, and let your buttons tell your story!
- What types of wood are best for making buttons? Hardwoods like maple, cherry, and walnut are excellent choices due to their durability and beautiful grain patterns.
- Can I use regular paint on wooden buttons? Yes, acrylic paints work well on wood. Just ensure to seal them afterward for longevity.
- How can I ensure my buttons are safe to use on clothing? Always use non-toxic finishes and sealants, especially for items that will be worn close to the skin.
- Is engraving difficult for beginners? With practice, engraving can be mastered. Start with simple designs and gradually take on more complex patterns.
Finishing Techniques
Mastering the art of is crucial for achieving a polished look in your wooden buttons. Finishing not only enhances the aesthetic appeal but also adds a layer of protection against the elements. Imagine putting in all that effort to create a beautiful button, only to have it marred by scratches or moisture! To avoid this, let's dive into some essential finishing methods that will elevate your creations to the next level.
Firstly, sanding is the foundation of any good finish. It’s like the makeup prep before the big night out; you want your surface to be smooth and flawless. Start with a coarser grit sandpaper to remove any rough spots, and gradually work your way up to a finer grit. This process helps to create a surface that not only feels good to the touch but also allows any finishes to adhere better. Remember, patience is key here. Rushing through sanding might leave your buttons feeling rough and uneven.
Next comes staining. This is where you can really let your personality shine through! Stains come in various colors, and they can dramatically change the appearance of your wooden buttons. Whether you prefer a natural look that showcases the wood grain or a bold hue that makes a statement, the choice is yours. Apply the stain with a soft cloth or brush, and wipe away any excess to achieve your desired shade. Just like choosing the right outfit, picking the right stain can make all the difference in your final product.
After staining, it’s time to seal the deal with a sealant. Sealants are essential for protecting your buttons from moisture, dirt, and wear and tear. There are several types of sealants available, including polyurethane, lacquer, and shellac. Each has its own unique properties and finish quality. For instance, polyurethane provides a durable, water-resistant finish, making it ideal for buttons that will see a lot of use. On the other hand, shellac offers a warm, natural look but may not be as durable. Take a moment to consider the intended use of your buttons when selecting a sealant.
Finally, let's not forget about polishing. This step is like giving your buttons a final shine before they hit the runway! Polishing not only enhances the visual appeal but also provides a smooth finish that feels luxurious. You can use a soft cloth or a polishing compound to gently buff your buttons. The result? A professional-looking finish that will have everyone wondering where you got those stunning buttons!
To sum it up, finishing techniques are essential for creating beautiful and durable wooden buttons. By paying attention to sanding, staining, sealing, and polishing, you can ensure that your buttons not only look fantastic but also stand the test of time. Remember, each step is an opportunity to express your creativity and craftsmanship, so take your time and enjoy the process!
- What is the best wood for making buttons? - Hardwoods like maple, cherry, and walnut are excellent choices due to their durability and attractive grain patterns.
- Can I use acrylic paint instead of wood stain? - Yes, acrylic paint can be used for a more vibrant and opaque finish, but ensure to seal it properly to protect it.
- How do I know when my buttons are fully cured after sealing? - Follow the manufacturer's instructions, but generally, a few days should suffice for most sealants to cure completely.
Polishing for a Professional Look
Polishing your wooden buttons is like giving them a final coat of armor; it enhances their natural beauty while providing a smooth, professional finish that can transform even the simplest designs into stunning pieces of art. The process of polishing is not just about aesthetics; it also helps to protect the wood from moisture and wear, ensuring your buttons remain beautiful and functional for years to come. So, how do you achieve that perfect polish?
First, you need to start with a well-sanded surface. Use fine-grit sandpaper, around 220-grit, to smooth out any rough edges or imperfections. Sanding is crucial because it prepares the wood for polishing, allowing the finish to adhere better and providing a more even surface. Make sure to sand in the direction of the wood grain to avoid scratches that could mar the final look.
Once you’ve achieved a smooth surface, it’s time to choose your polishing method. There are several options available, each providing different results:
- Hand Polishing: This method involves using a soft cloth and a polishing compound. Apply a small amount of compound to the cloth and rub it onto the button in circular motions. This technique gives you control over the polishing process and allows you to focus on areas that need extra attention.
- Buffing Wheel: If you’re looking for efficiency and a high-gloss finish, a buffing wheel attached to a power drill can work wonders. Just be cautious; too much pressure can remove too much material or create heat that could damage the wood.
- Microfiber Cloths: These are excellent for achieving a shiny finish without leaving lint or scratches. They’re perfect for a final buff after applying your chosen finish.
After polishing, consider applying a wax finish. Wax not only adds an extra layer of protection but also enhances the sheen of your buttons. Simply rub a small amount of wax onto the surface using a clean cloth, let it dry for a few minutes, and then buff it out to achieve that coveted shine. This step is especially beneficial for buttons that will see frequent use, as it helps resist moisture and dirt.
Finally, never underestimate the importance of quality control. After polishing, inspect each button closely. Look for any imperfections or areas that may need additional attention. A well-polished button not only looks great but also feels great in your hands, making it more appealing to users.
In summary, polishing your wooden buttons is an essential step in the crafting process that can elevate your work from amateur to professional. By taking the time to properly sand, polish, and finish your buttons, you ensure that each piece is not only beautiful but also durable. So, roll up your sleeves and get ready to make those buttons shine!
Q: What type of wood is best for button making?
A: Hardwoods like maple, oak, and walnut are excellent choices due to their durability and beautiful grain patterns.
Q: Can I use regular paint on wooden buttons?
A: Yes, you can use acrylic or water-based paints, but make sure to seal the paint with a finish to protect it.
Q: How do I ensure my buttons are safe for clothing?
A: Use non-toxic finishes and sealants, and ensure there are no sharp edges.
Q: How often should I polish my buttons?
A: It depends on usage, but a good rule of thumb is to polish them every few months or whenever they start to look dull.
Quality Control and Inspection
When it comes to crafting wooden buttons, the journey doesn't end once you've finished shaping and finishing them; in fact, it’s just the beginning of a critical phase known as . This step is essential to ensure that each button not only meets your aesthetic standards but also performs well in practical applications. Imagine crafting a beautiful button only to find it cracks or breaks during use—what a disappointment that would be! Thus, taking the time to thoroughly inspect your creations can save you from future headaches and enhance your reputation as a skilled artisan.
Start by examining the overall appearance of your buttons. Look for any irregularities such as uneven surfaces, splinters, or unsightly blemishes. A well-crafted button should have a smooth finish and consistent color throughout. If you notice any issues, don’t hesitate to go back and make the necessary adjustments. This might involve additional sanding or refinishing to achieve that flawless look.
Next, it's crucial to check the functionality of your buttons. This includes ensuring that the holes are drilled correctly and are the right size for the intended use. If the holes are too small, threading the button onto fabric will be a challenge, while holes that are too large may result in a loose fit. To avoid these pitfalls, consider creating a size chart for your button holes, which can help you maintain consistency across different designs. Below is a simple example:
| Button Size | Recommended Hole Diameter |
|---|---|
| Small (15mm) | 2mm |
| Medium (25mm) | 3mm |
| Large (35mm) | 4mm |
Furthermore, consider conducting a stress test on your buttons. This can be as simple as applying pressure to see how well they hold up under strain. Are they sturdy enough to withstand everyday use? If you’re planning to sell your buttons, this step is even more vital. Customers expect quality, and providing them with durable products will lead to positive reviews and repeat business.
Lastly, don’t forget about the packaging. Properly packaged buttons not only look more professional but also protect your work from damage during transport. Use materials that cushion the buttons and prevent them from moving around. After all, your beautiful creations deserve to be presented in the best possible light!
In summary, quality control and inspection are critical components of the button-making process. By dedicating time to this phase, you can ensure that your buttons are not only visually appealing but also functional and durable. So, the next time you finish a batch of wooden buttons, remember to take a step back and assess your work—you’ll be glad you did!
- What tools do I need for quality control? While a simple visual inspection is often sufficient, having a caliper for measuring hole sizes and a stress-testing setup can be incredibly helpful.
- How can I ensure consistency in my button sizes? Using templates or molds can greatly enhance the uniformity of your buttons, making quality control easier.
- Is it necessary to perform stress tests on all buttons? While it may not be feasible for every piece, especially in large batches, prioritizing stress tests for your most intricate designs is a wise choice.
Frequently Asked Questions
- What type of wood is best for making buttons?
Choosing the right wood is essential for durability and aesthetics. Hardwoods like maple, oak, and cherry are excellent options due to their strength and beautiful grain patterns. If you're looking for something softer and easier to work with, consider pine or basswood. Each wood type has its unique characteristics that can significantly influence the final look of your buttons.
- What tools do I need to start making wooden buttons?
To get started, you'll need some basic hand tools like a saw, files, and sanders. These tools help shape and smooth your buttons. If you want to speed up the process and achieve precision, consider investing in power tools such as a drill and a lathe. They can make your crafting experience more efficient and enjoyable!
- How can I personalize my wooden buttons?
Personalizing your buttons can be a fun and creative process! You can use techniques like engraving or painting to add your unique touch. Think of it like adding a signature to your artwork; it makes your buttons truly one-of-a-kind and reflective of your personal style.
- What finishing techniques should I use for my buttons?
Finishing techniques are crucial for achieving a polished look. Start with sanding to smooth out any rough edges, then apply a stain if you want to enhance the wood's natural color. Finally, seal your buttons with a finish to protect them from wear and tear. Polishing your buttons can also give them that professional touch!
- Are there any safety precautions I should take?
Absolutely! Safety is key when working with tools and materials. Always wear protective gear such as goggles and gloves. Make sure to work in a well-ventilated area and keep your workspace organized to prevent accidents. Remember, a little caution can go a long way in ensuring a safe crafting experience.
- How do I ensure the quality of my finished buttons?
Quality control is essential! After finishing your buttons, inspect them thoroughly for any imperfections. Look for rough edges, uneven surfaces, or any flaws in the finish. This step is crucial to ensure that your buttons meet your standards before you use or sell them. Think of it as the final check before sending your masterpiece out into the world!