Upcycle Kitchen Utensils Into Functional Wall Hooks
Have you ever looked at your old kitchen utensils and thought, "What can I do with these besides toss them in the trash?" If so, you’re in for a treat! Upcycling is not just a trend; it’s a way to breathe new life into items that might otherwise end up in a landfill. By transforming your old forks, spoons, and ladles into stylish wall hooks, you can create a unique and functional piece of art for your home. Not only does this project allow you to showcase your creativity, but it also promotes sustainability by reducing waste. Imagine walking into your kitchen and being greeted by a beautiful, handmade display that tells a story—your story! So, let’s dive into the world of upcycling and discover how you can turn those forgotten utensils into eye-catching wall hooks.
Upcycling is a fantastic way to reduce waste while adding a personal touch to your home decor. It’s like giving your old items a second chance at life! When you upcycle, you’re not just eliminating clutter; you’re also making a statement about sustainability. This practice encourages creativity and innovation, allowing you to express your style in a way that’s both unique and environmentally friendly. Think of upcycling as a form of art—where every piece has its own history and charm. Plus, it’s incredibly satisfying to see your vision come to life right before your eyes. So why not embrace the benefits of upcycling? Not only will your home look fabulous, but you’ll also feel great knowing you’re contributing to a more sustainable world.
Now that you’re excited about the idea of upcycling, it’s time to choose the right utensils for your project. Not all kitchen tools are created equal when it comes to transforming them into wall hooks. You’ll want to select utensils that are sturdy enough to hold items like keys or kitchen towels but also have a design that appeals to your aesthetic. Look for items that have interesting shapes or textures, as these will add character to your wall display. For example, a vintage fork with ornate tines can make a stunning hook, while a simple spoon can offer a sleek, modern look. When assessing the suitability of your utensils, consider the following factors:
- Material: Stainless steel, wood, and even ceramic can work well.
- Shape: Curved or twisted utensils can create unique hooks.
- Size: Ensure they are large enough to serve their intended purpose.
When it comes to kitchen utensils, the possibilities are endless! Here are some common items you can consider:
- Forks: Their prongs can be bent to create unique hooks.
- Spoons: The curves of spoons lend themselves beautifully to hook designs.
- Ladles: Perfect for larger items or as statement pieces.
Let’s start with forks! These versatile utensils can be easily bent and shaped into stylish hooks. To achieve the perfect look, you can use a pair of pliers to gently manipulate the prongs into a hook shape. This process allows you to create a rustic or modern aesthetic depending on your style. For example, if you prefer a farmhouse look, consider leaving the fork in its original state with a bit of patina. On the other hand, if you’re going for a sleek, contemporary vibe, you might want to polish the fork to a shine. The beauty of upcycling is that you can customize each piece to fit your decor perfectly!
Spoons are another fantastic option for creating wall hooks. Their handles can be bent to form elegant hooks that not only serve a purpose but also add a decorative touch to your wall. You can attach spoons directly to the wall using screws or adhesive, depending on your preference. Highlighting the curves of the spoon can create a stunning visual effect, making them a focal point in your kitchen or entryway. Whether you choose to use a single spoon or multiple spoons in a creative arrangement, these hooks will surely catch the eye of anyone who enters your space.
Before diving into the transformation process, it’s essential to properly clean and prepare your utensils. Start by washing them in hot, soapy water to remove any grease or residue. If your utensils are particularly tarnished, consider using a metal polish to restore their shine. Once clean, you may want to give them a light sanding to ensure they’re smooth and free of any sharp edges. Proper preparation not only enhances the appearance of your hooks but also ensures they are safe to use.
Now that your utensils are clean and ready to go, it’s time to install them! Proper installation is key to ensuring your upcycled hooks are both functional and stylish. You can use a variety of methods to attach your hooks to the wall, including screws, nails, or adhesive strips. Make sure to choose a method that suits the weight of the items you plan to hang. For heavier items, screws are recommended, while lighter items may do just fine with adhesive. Remember, the goal is to create a display that not only looks good but is also practical.
Gathering the right tools is vital for a successful installation. Here’s a quick checklist of what you might need:
- Drill or screwdriver
- Nails or screws
- Adhesive strips (optional)
- Level (to ensure your hooks are straight)
Finally, let’s talk about arrangement! How you position your hooks can significantly impact the overall look of your display. Consider creating a pattern or grouping similar utensils together for a cohesive look. You might also want to mix and match different types of utensils for an eclectic feel. The key is to have fun and experiment until you find an arrangement that speaks to you. Remember, this is your creation, so let your personality shine through!
Q: Can I use plastic utensils for this project?
A: While plastic utensils are lightweight, they may not be as durable as metal ones. If you choose to use plastic, keep in mind that they may not hold heavier items.
Q: How do I ensure my hooks are secure?
A: Always use appropriate screws or nails for the weight of the items you intend to hang. If in doubt, opt for a more secure method like screws.
Q: Can I paint my utensils before using them?
A: Absolutely! Painting your utensils can add a pop of color and personalize your hooks even further. Just make sure to use a paint that adheres well to metal or whatever material you are using.
Benefits of Upcycling
Upcycling is more than just a trendy buzzword; it's a powerful movement that encourages creativity while promoting sustainability. When you upcycle, you’re taking something that might have been tossed aside and giving it a new life, which not only reduces waste but also adds a unique touch to your home. Imagine transforming an old fork into a chic wall hook that not only serves a purpose but also tells a story. This process allows individuals to express their personal style and creativity through home decor, making each piece truly one-of-a-kind.
Moreover, upcycling can significantly impact the environment. By reusing materials, you help decrease the demand for new products, which in turn reduces the consumption of resources and energy. Think about it: every time you choose to upcycle, you’re saying no to waste and yes to sustainability. Here are some of the key benefits of upcycling:
- Reduces Landfill Waste: By repurposing items, you help minimize the amount of waste that ends up in landfills.
- Encourages Creativity: Upcycling allows you to think outside the box, inspiring innovative ideas and designs.
- Cost-Effective: Instead of purchasing new decor, upcycling utilizes materials you already own, saving you money.
- Personal Expression: Each upcycled piece reflects your personality and style, making your home feel more like you.
- Supports Sustainable Living: Embracing upcycling contributes to a greener planet, promoting a lifestyle that values sustainability.
In addition, upcycling fosters a sense of community. Many people share their upcycling projects on social media, sparking conversations and inspiring others to get involved. Whether it’s a DIY workshop in your neighborhood or an online forum, the upcycling community is vibrant and supportive. By participating, you not only enhance your own home but also encourage others to think creatively about their waste.
Ultimately, the benefits of upcycling extend far beyond the physical items you create. It’s about embracing a mindset that values resourcefulness and creativity while making a positive impact on the environment. So, the next time you think about throwing something away, consider how you might upcycle it instead. Your home—and the planet—will thank you!
Choosing the Right Utensils
When it comes to upcycling kitchen utensils into stunning wall hooks, the first step is . Not all utensils are created equal, and some will lend themselves better to this creative transformation than others. You want to look for items that have a certain sturdiness, a unique shape, or an interesting design that can add character to your walls. For instance, consider utensils that are made from durable materials like stainless steel or heavy-duty plastic, as they will provide the strength needed to hold items like keys or kitchen towels.
Additionally, think about the style you want to achieve in your home. Are you going for a rustic farmhouse vibe, or do you prefer a sleek, modern aesthetic? This will guide your selection process. For a rustic look, vintage forks and spoons with patina can create a charming, lived-in feel. On the other hand, sleek, polished utensils can add a contemporary touch to your decor.
Here are some common utensils that work exceptionally well for upcycling:
- Forks: Their prongs can be bent to create unique hooks that are both functional and stylish.
- Spoons: With their curved shapes, they can be transformed into elegant hooks that highlight their natural form.
- Ladles: These can serve as larger hooks, perfect for hanging heavier items like bags or jackets.
Before you start gathering utensils, it’s also essential to assess their condition. Look for items that are intact and free from major damage. While minor scratches can add character, broken utensils might not hold up well as hooks. Keep in mind that the more creatively you can think about the utensils you have, the more unique your wall hooks will be. Sometimes, even the most mundane items can be transformed into eye-catching decor with a little imagination.
In summary, the key to successful upcycling lies in selecting the right utensils that not only serve a practical purpose but also enhance your home’s aesthetic. So, before you raid your kitchen drawers or hit up the thrift store, take a moment to visualize how each piece will fit into your overall decor scheme. The right choice can turn your old kitchen tools into conversation starters that bring a smile to your face every time you walk by.
Common Utensils to Upcycle
When it comes to upcycling kitchen utensils into functional wall hooks, the possibilities are endless! You might be surprised to learn that many everyday items in your kitchen can be transformed into beautiful and practical decor pieces. Think about it: every time you cook, you use utensils that can easily be repurposed once they’ve served their time. By giving these items a new lease on life, you not only save them from the landfill but also add a touch of personal flair to your home.
Some of the most common kitchen utensils that are perfect for this upcycling project include:
- Forks: These versatile tools can be bent and shaped to create unique hooks that are both rustic and stylish. Their prongs can be used to hold items like keys or lightweight bags, adding a quirky touch to your entryway.
- Spoons: With their elegant curves, spoons can be transformed in numerous ways. You can bend their handles to create hooks or attach them directly to the wall for a more streamlined look. They can serve as decorative pieces as well as functional hooks.
- Ladles: These large utensils can make for bold hooks. Imagine using a vintage ladle to hang your favorite kitchen towels or aprons. Their size and design can become a focal point in your kitchen or dining area.
- Whisks: A whisk can be an unexpected but delightful choice for a wall hook. The wires can be used to hold lightweight items, and their unique shape adds an artistic element to your decor.
Each of these utensils brings its own unique aesthetic to the table, allowing you to showcase your creativity and style. The key is to choose items that resonate with you and fit the overall vibe of your home. Whether you prefer a rustic farmhouse look or a sleek modern style, the right utensils can help you achieve your desired aesthetic.
As you embark on your upcycling journey, remember that the beauty of this project lies in its personal touch. The more you engage with the materials and the transformation process, the more meaningful your final product will be. So, gather those old utensils and let your imagination run wild!
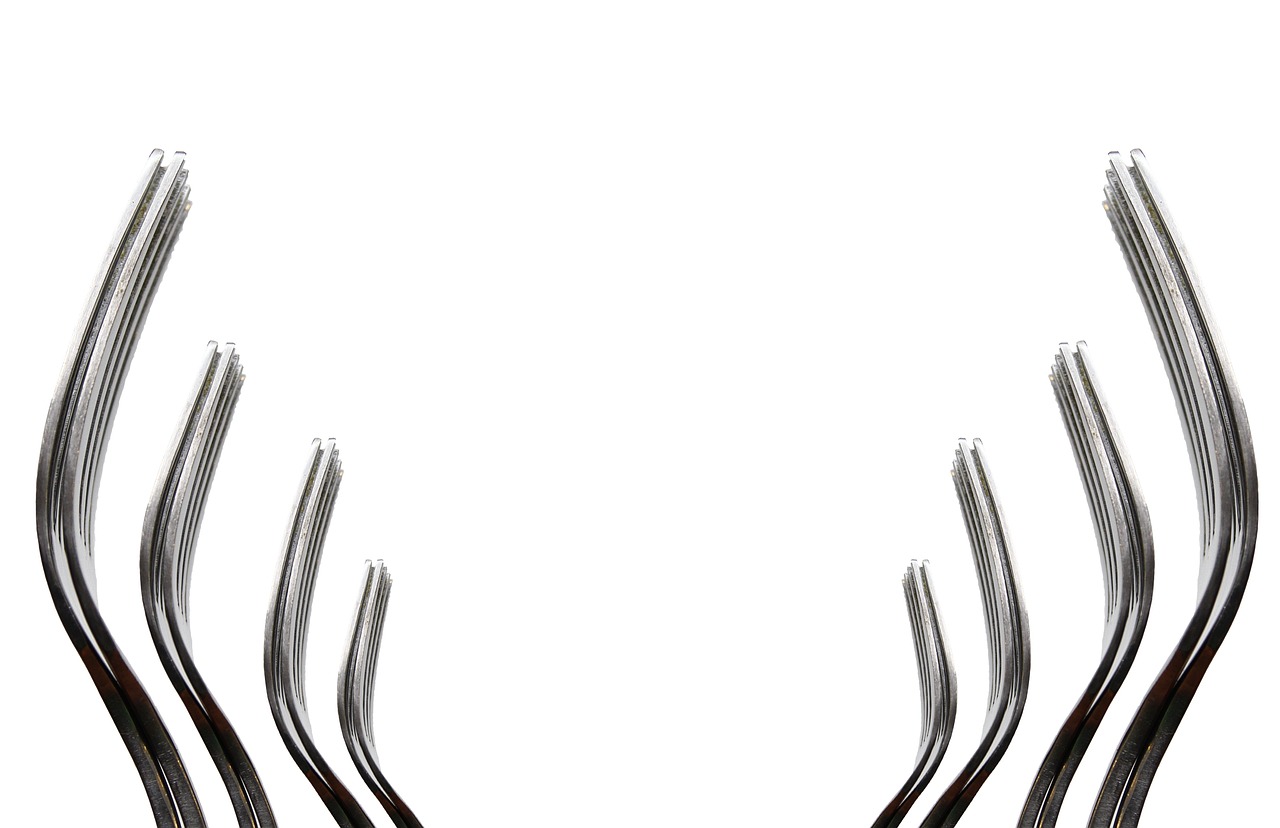
Forks as Hooks
When it comes to upcycling kitchen utensils, forks are among the most versatile tools you can transform into functional wall hooks. With their unique pronged design, forks can be bent and shaped to create hooks that are not only practical but also add a touch of whimsy to your home decor. Imagine walking into your kitchen and seeing a beautifully crafted fork hook holding your favorite apron or a set of keys. It’s a conversation starter and a clever way to repurpose something that would otherwise end up in the landfill!
To get started, you’ll need a few basic tools: a pair of pliers, a heat source (like a lighter or a small torch), and some sandpaper. The first step is to choose forks that you love—perhaps those old silver-plated ones that have lost their shine or even some colorful plastic ones that you no longer use. The beauty of upcycling is that you can select utensils that resonate with your personal style.
Once you have your forks, it’s time to get creative. Here are some techniques you can use to transform them:
- Bending the Tines: Use pliers to carefully bend the tines of the fork into a hook shape. A gentle curve can create a rustic look, while a sharper bend can give a modern flair.
- Adding a Base: For added stability, consider attaching your fork to a small wooden block or a piece of reclaimed wood. This not only enhances the aesthetic but also provides a solid base for your hook.
- Painting or Finishing: After shaping your fork, you might want to paint it or apply a clear coat to protect it. This step can help to enhance its visual appeal and match your home’s color scheme.
Before installing your fork hooks, ensure they are properly cleaned and prepped. A good wash with soap and water followed by a thorough drying will ensure that they are free from any grease or residue. If you’re using older forks, a little polishing can go a long way in making them shine again!
Installation is straightforward. You can use strong adhesive or screws to attach your forks to the wall. If you choose screws, make sure to drill pilot holes to avoid splitting the wood. Position your hooks at varying heights to create an eye-catching display that draws the eye and adds dimension to your space.
In conclusion, forks are not just for eating; they can be transformed into stunning wall hooks that serve both form and function. With a little creativity and effort, you can turn these everyday utensils into unique pieces of art that showcase your personality and commitment to sustainability. So, why not give it a try? You might just discover a new favorite DIY project!
Spoons for Stylish Hooks
Transforming spoons into stylish wall hooks is not just a fun project; it's a fantastic way to add a touch of personality and creativity to your home decor. The beauty of using spoons lies in their unique curves and shapes, which can be highlighted in various ways to create eye-catching hooks. Imagine walking into your kitchen and seeing a row of elegantly bent spoons, each one telling a story of its past life. It's like giving your old utensils a second chance to shine!
To start your upcycling journey, you'll need to select the right spoons. Look for those that have a sturdy handle and a design that appeals to you. Stainless steel spoons are a popular choice because they are durable and easy to clean. Once you've gathered your spoons, the next step is to decide how you want to transform them. Here are a couple of creative ideas to consider:
- Bending the Handles: Gently heat the handle of the spoon with a heat gun or a lighter (be careful not to burn yourself!) and then bend it into a hook shape. This method allows you to create a hook that can hold lightweight items like keys or kitchen towels.
- Attaching Directly to the Wall: For a more rustic look, you can attach the spoon directly to the wall by securing it with screws. This method works well for decorative purposes, such as hanging lightweight art or even as a unique coat hook.
Once you've chosen your design, the next step is to prepare your spoons. Make sure to thoroughly clean them to remove any grime or residue. A simple wash with soap and water followed by a good rinse will work wonders. If you want to take it a step further, consider polishing them to bring out their shine. A little elbow grease can go a long way in making your upcycled hooks look fabulous!
After your spoons are prepped and ready, you can start the installation process. Whether you decide to bend the handles or attach them directly to the wall, ensuring that they are securely mounted is crucial. You don't want your stylish hooks to come crashing down when you hang something on them! Use appropriate screws and anchors, especially if you're mounting them on drywall.
In terms of aesthetics, consider the arrangement of your spoon hooks. You can create a whimsical display by mixing different styles of spoons or even pairing them with other upcycled utensils. This not only adds visual interest but also allows you to showcase your creativity. Remember, the goal is to create a functional piece of art that enhances your space.
So, whether you’re a DIY enthusiast or just looking to declutter your kitchen, turning spoons into stylish hooks is a delightful project. It's a simple yet effective way to embrace sustainability while adding a personalized touch to your home. Plus, every time you see those hooks, you'll be reminded of the creativity and effort that went into making them. So grab those old spoons and let your imagination run wild!
Preparing Your Utensils
Before diving into the exciting world of upcycling kitchen utensils into wall hooks, it’s crucial to properly prepare your chosen items. Think of this step as laying the foundation for a beautiful home project; without it, the end result may not shine as brightly as you envision. Start by giving your utensils a thorough cleaning. Old utensils can harbor grease, food residues, or even just dust from sitting in a drawer. A simple wash with warm soapy water usually does the trick. For those stubborn spots, a gentle scrub with a sponge or a brush can help restore the utensils to their former glory.
Once clean, it’s time to dry them completely. Water can lead to rust, especially with metal utensils, which could compromise both their appearance and functionality as hooks. After drying, inspect each utensil closely. Look for any signs of damage, such as bends or cracks, that could affect their strength when mounted on the wall. If you find any, consider whether you can repair them or if they should be replaced with a sturdier option.
Next, think about the aesthetic you want to achieve. Some utensils might be perfect as they are, while others may require a little extra flair. For instance, if you’re working with forks, you might want to bend the prongs to create a more dynamic look. On the other hand, spoons can be polished to enhance their shine, making them a standout feature in your home decor. A quick polish can be done using a metal polish or even a homemade solution of vinegar and baking soda. This not only helps to clean but also adds a protective layer to keep them looking fresh.
Finally, consider any additional embellishments you might want to add. This could be as simple as a splash of paint or a decorative finish. If you’re going for a rustic vibe, perhaps a distressed look with some sandpaper will do the trick. For a more modern touch, a coat of spray paint in a bold color can turn a simple fork into a statement piece. Just ensure that any paint or finish you choose is suitable for the material of your utensils and is safe for indoor use.
In summary, preparing your utensils is an essential step that involves cleaning, drying, inspecting, and potentially enhancing their appearance. By taking the time to prepare them properly, you set the stage for a successful upcycling project that not only looks great but also stands the test of time. So, roll up your sleeves, gather your supplies, and get ready to transform those old kitchen tools into functional art for your walls!
- What types of kitchen utensils can I use for upcycling? You can use forks, spoons, ladles, and even whisks! Just ensure they are sturdy enough to hold items.
- Do I need special tools for installation? Basic tools like screws, wall anchors, and a drill or screwdriver will typically be sufficient.
- Can I paint my utensils? Yes, you can paint them! Just make sure to use paint that is safe for metal and suitable for indoor use.
- How do I ensure my hooks are secure? Use appropriate wall anchors and screws for the type of wall you are mounting on. Follow installation instructions carefully.
DIY Installation Techniques
Once you've transformed your old kitchen utensils into stunning wall hooks, the next step is all about installation. Proper installation is crucial not only for functionality but also for ensuring that your creative work stands out as a feature in your home. You want to make sure that your hooks are securely mounted and can hold whatever you plan to hang on them. So, let’s dive into some effective DIY installation techniques that will have your upcycled hooks looking fabulous and ready for use!
First and foremost, you need to choose the right location for your hooks. Consider areas where they will be most useful, like near the entrance for coats and bags, or in the kitchen for towels and utensils. Once you've identified the perfect spot, it's time to gather your tools. Here’s a quick list of essentials you’ll need:
- Drill - For making holes in the wall.
- Screws - To secure the hooks in place.
- Wall anchors - Especially important for drywall to prevent the screws from pulling out.
- Screwdriver - To tighten the screws.
- Level - To ensure your hooks are straight.
- Measuring tape - For precise placement.
After gathering your tools, the next step is to prepare the wall. If you're working with drywall, it’s best to use wall anchors to add extra support. Start by marking the spots where your hooks will go. Use a measuring tape to ensure that your hooks are evenly spaced and level. If you’re using multiple utensils, consider arranging them in a visually appealing pattern. For instance, you could alternate between forks and spoons to create an interesting design.
Now, let’s talk about the actual installation. Here’s a simplified step-by-step guide:
- Drill Holes: Use your drill to make holes at the marked spots. If you're using wall anchors, make sure to drill the appropriate size hole for them.
- Insert Wall Anchors: If needed, gently tap the wall anchors into the holes until they are flush with the wall.
- Attach Hooks: Position your upcycled utensils over the holes and use screws to secure them in place. Make sure they are tight enough to hold weight but be careful not to overtighten, as this could damage the utensil.
- Level Check: After attaching each hook, use a level to ensure they are straight before moving on to the next one.
Once installed, step back and admire your handiwork! Not only do you have functional wall hooks, but you’ve also added a splash of personality to your space. Whether you choose a rustic or modern look, the beauty of upcycled kitchen utensils lies in their unique charm and character.
Remember, installation doesn’t have to be a daunting task. With a little patience and the right tools, you can create a stunning display that not only serves a purpose but also tells a story. So, roll up your sleeves and get ready to transform your walls into a canvas of creativity!
Here are some common questions that you might have regarding the installation of your upcycled kitchen utensil hooks:
- Can I use these hooks outdoors? - While some utensils may withstand outdoor conditions, it's best to keep them indoors to avoid rusting.
- What weight can these hooks hold? - This largely depends on the type of utensil and how securely they are mounted. Generally, lightweight items like towels or small bags are ideal.
- How can I ensure my hooks are straight? - Using a level during installation is key. If you don’t have one, you can use the edge of a book as a makeshift level!
Tools Needed for Installation
When you're diving into the exciting world of upcycling kitchen utensils into wall hooks, having the right tools can make all the difference. Imagine setting out on a treasure hunt, but instead of gold coins, you're looking for tools that will help you turn your creative vision into reality. Here’s what you’ll need:
First and foremost, a drill is essential. This tool will help you create holes in the wall for screws or anchors, ensuring that your new hooks are securely fastened. If you don't have a drill, a screwdriver can work, but it might take a bit more elbow grease to get the job done. Alongside this, a level is crucial for ensuring that your hooks are perfectly aligned; nobody wants a crooked display that looks like it’s been through a funhouse mirror!
Next, consider grabbing some anchors or screws. These little guys are what will hold your hooks in place, especially if they’re carrying anything heavy like pots or pans. For lighter items, you might get away with just using screws. If you’re unsure which to use, always read the packaging or consult a hardware store expert. It's better to ask than to risk your beautiful upcycled hooks crashing down!
Additionally, having a measuring tape handy is a smart move. This will help you space your hooks evenly and ensure that they’re positioned exactly where you want them. Picture this: you’ve just bent a fork into a stunning hook, and you want it to be at the perfect height. A measuring tape will save you from awkwardly adjusting it later.
Lastly, don’t forget about a pair of pliers. If you’re bending forks or spoons, pliers will give you the grip and leverage you need to shape them without breaking a sweat—or the utensil! With these tools in hand, you’ll be well-equipped to transform your kitchen utensils into fabulous wall hooks that are both functional and stylish.
To summarize, here’s a quick table of the essential tools:
| Tool | Purpose |
|---|---|
| Drill | Create holes for screws or anchors |
| Screwdriver | Alternative to a drill for securing hooks |
| Level | Ensure hooks are straight and aligned |
| Anchors/Screws | Secure hooks to the wall |
| Measuring Tape | Space hooks evenly and position them correctly |
| Pliers | Bend and shape utensils into hooks |
With these tools at your disposal, you’re not just ready to install your upcycled wall hooks; you’re ready to unleash your creativity and make your home a more personalized space. So, roll up those sleeves and get ready to transform your kitchen utensils into something truly special!
Q1: Can I use any type of kitchen utensil for upcycling?
A1: While many utensils can be used, it's best to choose those that are sturdy and can be easily manipulated, like forks and spoons. Avoid flimsy items that might not hold up as hooks.
Q2: How do I clean the utensils before upcycling?
A2: Wash them thoroughly with soap and water, and consider using a mild disinfectant to ensure they are hygienic, especially if they were previously used for food.
Q3: Are there any weight limits for what I can hang on my upcycled hooks?
A3: Yes, it’s important to consider the strength of the utensil and the wall anchors you’re using. Lighter items like keys and small kitchen tools are ideal, while heavier items should be approached with caution.
Q4: Can I paint or decorate the utensils after upcycling?
A4: Absolutely! You can personalize your hooks with paint, varnish, or even decorative paper. Just ensure that any materials used are suitable for the utensils and won’t peel or chip easily.
Creative Arrangement Ideas
Once you've transformed your old kitchen utensils into functional wall hooks, the next step is to consider how to arrange them in a way that not only serves a purpose but also adds a touch of creativity to your space. Imagine walking into your kitchen or hallway and being greeted by a stunning display of colorful forks and spoons, each one telling its own story. The arrangement can significantly impact the overall aesthetic of your home, making it feel more personalized and inviting.
When it comes to arranging your upcycled hooks, think about the theme you want to create. For a rustic farmhouse vibe, consider grouping your utensils in a way that mimics the natural, imperfect beauty of a country kitchen. You might hang them in a staggered formation, with forks and spoons at varying heights, creating a sense of movement and flow. This not only makes the hooks functional but also serves as an eye-catching piece of art.
Alternatively, if your style leans more towards modern minimalism, you can opt for a clean, linear arrangement. Picture a sleek row of spoons, all facing the same direction, mounted at equal intervals on the wall. This method provides a contemporary look while still showcasing the unique shapes of the utensils. You can even paint the wall behind them a bold color to make the hooks pop, drawing attention to your creative handiwork.
Don't forget to consider the functionality of your arrangement. Think about what you’ll be hanging on these hooks. If they are intended for everyday use, such as holding keys or kitchen towels, make sure they are easily accessible and grouped accordingly. For a more decorative approach, you might want to position some hooks higher on the wall, allowing for the display of lighter items like decorative bags or small plants.
Additionally, you can create a themed display by grouping utensils that have a similar color scheme or design. For instance, if you have a collection of vintage silverware, arrange them together to create a cohesive look. You could even mix and match various utensils but keep them within a specific color palette to maintain harmony. The key is to ensure that your arrangement feels intentional and curated.
Lastly, don’t shy away from incorporating other decorative elements into your arrangement. Consider adding small shelves or picture frames that complement your hooks. This not only enhances the visual appeal but also provides additional functionality. You could place a small plant or a decorative bowl on the shelf above your hooks, creating a layered effect that draws the eye in and adds depth to your wall decor.
In summary, the way you arrange your upcycled kitchen utensil hooks can dramatically influence the atmosphere of your space. Whether you choose a rustic, modern, or eclectic approach, remember that the goal is to express your unique style while maintaining functionality. So, get creative, have fun with it, and let your personality shine through your wall decor!
- What types of kitchen utensils work best for upcycling into hooks? Utensils like forks, spoons, and ladles are ideal for this project due to their sturdy construction and unique shapes.
- How do I ensure my hooks are securely mounted? Make sure to use appropriate wall anchors and screws based on the weight of the items you plan to hang.
- Can I paint or decorate my upcycled hooks? Absolutely! Personalize them with paint, or consider adding embellishments like beads or ribbons for a unique touch.
- Where can I display my upcycled hooks? They can be used in various spaces such as kitchens, entryways, or even bathrooms for towels and accessories.
Frequently Asked Questions
- What types of kitchen utensils can I upcycle into wall hooks?
You can use a variety of kitchen utensils for upcycling! Common options include forks, spoons, ladles, and even whisks. Each of these items offers unique shapes and styles that can add a personal touch to your home decor.
- How do I prepare my kitchen utensils for upcycling?
Before starting your project, it's essential to clean your utensils thoroughly. Wash them with soap and water to remove any food residue, and then dry them completely. You might also want to polish them if you're aiming for a shiny finish!
- Can I use plastic utensils for upcycling?
While metal utensils tend to be more durable and stylish, you can certainly experiment with plastic utensils. Just keep in mind that they may not hold as much weight as metal ones, so consider what you'll hang on them.
- What tools will I need for installation?
To install your upcycled hooks, you'll typically need a drill, screws, wall anchors, and a screwdriver. If you're bending utensils like forks or spoons, pliers will also come in handy!
- How can I arrange multiple hooks for a visually appealing display?
When arranging your wall hooks, think about creating a cohesive look by varying the heights and spacing between them. You can also consider grouping them by color or style to create a more dynamic visual impact!
- Are there any safety concerns with using upcycled utensils?
Yes, it's important to ensure that your upcycled hooks are securely attached to the wall to prevent any accidents. Make sure to use the appropriate hardware for the weight of the items you'll be hanging, and check the stability regularly.
- Can I paint or decorate my upcycled utensils?
Absolutely! Personalizing your utensils with paint or decorative finishes can make them even more unique. Just ensure any paint used is suitable for metal or plastic and safe for your intended use.
- How do I ensure my upcycled wall hooks are functional?
To maintain functionality, choose sturdy utensils and ensure they're installed securely. Test them by hanging lightweight items first before adding heavier objects to make sure they hold up well.