
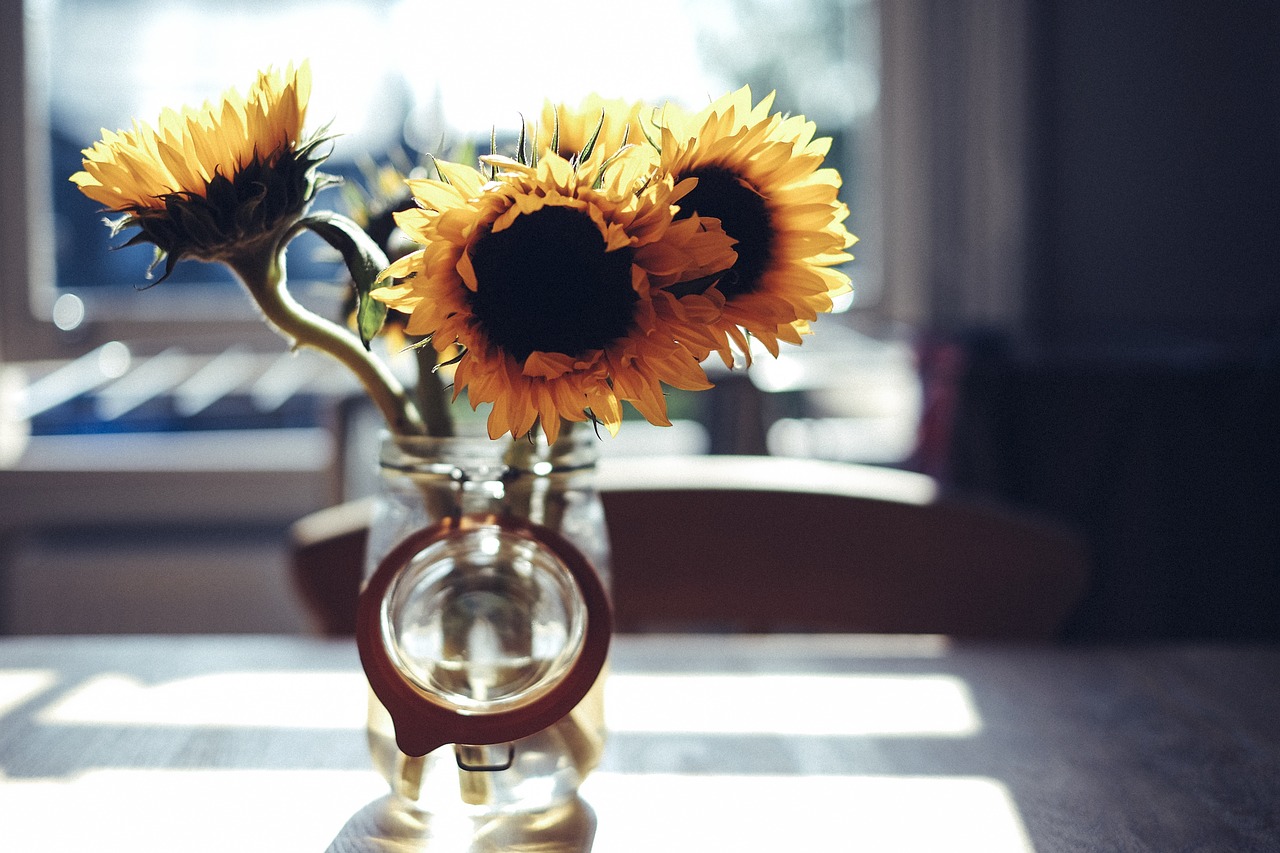
Upcycled Lanterns: Reusing Old Jars
Have you ever looked at an old jar and thought, "What a waste!"? Well, it's time to flip that thought on its head! Upcycling is not just a trend; it's a movement that invites creativity and sustainability into our lives. By transforming those forgotten jars into stunning lanterns, you not only breathe new life into these items but also contribute to a healthier planet. Think of each jar as a blank canvas, waiting for your unique touch. In this article, we'll explore the art of upcycling old jars into beautiful lanterns, highlighting the benefits of this practice, the materials you'll need, and step-by-step instructions to inspire your next DIY project.
Upcycling is like giving a second chance to items that would otherwise end up in a landfill. When you choose to upcycle, you're making a conscious decision to reduce waste and promote sustainability. Imagine the impact of your actions: by reusing materials like old jars, you create unique, one-of-a-kind items while minimizing your environmental footprint. Not only does this practice help the planet, but it also saves you money on new products. It's a win-win situation! Plus, there's something incredibly satisfying about crafting something beautiful from what might have been considered trash. So, why not roll up your sleeves and dive into the world of upcycled lanterns?
Before you embark on your lantern-making adventure, gathering the right materials is crucial. Here’s a quick rundown of what you'll need:
- Old jars (glass or plastic)
- Paints (acrylic or spray paint)
- Lighting options (candles, LED lights, or fairy lights)
- Decorative elements (ribbons, twine, beads)
- Adhesives (glue or decoupage medium)
Having these materials on hand will ensure that your project is not only successful but also enjoyable. The beauty of upcycling is that you can get creative with what you already have, so feel free to explore your craft supplies for additional embellishments!
The type of jar you select can significantly influence the final look of your lantern. From mason jars to old candle holders, the options are endless. Consider the size and shape of the jars; larger jars can create a more dramatic effect, while smaller ones can add a touch of whimsy. Don't be afraid to mix and match different types to create a stunning display. Remember, the goal is to let your personality shine through!
When it comes to choosing between glass and plastic jars, each has its own set of advantages. Glass jars are often more durable and provide a classic aesthetic that many people love. They can withstand heat from candles and offer a beautiful glow when lit. However, plastic jars are lighter and less prone to breakage, making them a safer option for outdoor use. Ultimately, the choice depends on your design vision and where you plan to display your lanterns.
Looking for unique jar shapes can be an exciting treasure hunt! Thrift stores, flea markets, and even your own kitchen are great places to find interesting jars. Consider visiting recycling centers or asking friends and family if they have any jars they no longer need. Each unique jar you find can inspire a different design, so keep an open mind and let your creativity flow!
Now that you have your jars, it's time to personalize them! Adding decorative elements can truly elevate your upcycled lanterns. You might want to try:
- Painting: Use acrylic paints to add color and patterns.
- Decoupage: Apply decorative paper or fabric using decoupage medium.
- Embellishments: Attach ribbons, twine, or beads for a charming finish.
These techniques will allow you to create lanterns that reflect your style and creativity. Remember, there are no rules in art, so feel free to experiment!
Ready to get started? Follow these simple steps to create your very own upcycled lanterns:
Preparation is key! Start by cleaning your jars thoroughly to remove any residue or labels. Soaking them in warm, soapy water can help loosen stubborn labels. Once clean, dry them completely. If necessary, you can also paint the inside of the jar for a different effect, but make sure it’s safe for the type of lighting you choose.
Now comes the fun part: assembling your lanterns! Decide on your lighting options—whether it's a flickering candle or twinkling LED lights—and carefully place them inside the jar. If you're using candles, ensure the jar is heat-resistant and stable. For added safety, consider using battery-operated lights. Once your lighting is in place, add any decorative elements you’ve chosen, and voilà! You have a stunning upcycled lantern ready to illuminate your space.
Q: Can I use any type of jar?
A: Yes, you can use various types of jars! Just ensure they are clean and suitable for the lighting you plan to use.
Q: How do I ensure my lantern is safe?
A: If using candles, always choose heat-resistant jars and never leave them unattended. Battery-operated lights are a safer option for outdoor use.
Q: What if I don’t have any jars at home?
A: Check out thrift stores, flea markets, or ask friends and family for jars they no longer need. You’ll be surprised at what you can find!
Benefits of Upcycling
Upcycling is more than just a trendy buzzword; it’s a lifestyle choice that can transform our relationship with waste. When we upcycle items like old jars, we embrace creativity while making a positive impact on our environment. Imagine turning something that would typically end up in a landfill into a stunning piece of décor! Not only does this practice help reduce waste, but it also promotes sustainability in our daily lives.
One of the most significant benefits of upcycling is its ability to minimize our environmental footprint. By choosing to reuse materials, we are actively participating in the fight against pollution and resource depletion. For instance, consider the energy and resources required to produce new glass jars. By upcycling, we save energy and reduce the demand for new products. It’s like giving a second chance to items that still have potential, rather than letting them gather dust or, worse, contributing to landfill overflow.
Moreover, upcycling allows for a unique expression of personal style. Each upcycled lantern created from an old jar is one-of-a-kind, reflecting the creator’s personality and artistic flair. You can experiment with colors, textures, and lighting options to create something truly special. This personal touch not only enhances your living space but also sparks conversations among friends and family. Just think about how much more interesting your home will be with custom-made lanterns that tell a story!
In addition to environmental and aesthetic benefits, upcycling can also lead to significant cost savings. Instead of splurging on expensive decorative items, you can create beautiful pieces from materials you already have at home. This is especially beneficial for those on a budget or looking to decorate without breaking the bank. By investing a little time and creativity, you can achieve stunning results without the hefty price tag.
To summarize, here are some key benefits of upcycling:
- Reduces waste: Keeps items out of landfills.
- Promotes sustainability: Conserves resources and energy.
- Encourages creativity: Allows for personal expression and unique designs.
- Saves money: Provides a cost-effective alternative to buying new products.
In a world where consumerism often leads to wastefulness, upcycling stands out as a refreshing alternative that encourages us to think differently about the things we own. So, the next time you find an old jar, don’t toss it aside; consider how it can be transformed into something beautiful and functional. The benefits of upcycling are numerous, and the possibilities are limited only by your imagination!

Materials Needed
When diving into the world of upcycled lanterns, gathering the right materials is absolutely essential. Not only does it set the stage for your creativity, but it also ensures that your project runs smoothly from start to finish. So, what do you need to get started? First and foremost, you'll need a selection of old jars. These can be anything from mason jars to old candle holders—just make sure they’re clean and free of any residue. The beauty of using jars is that they come in various shapes and sizes, each adding a unique flair to your final lantern design.
Next up, you'll want some paints and finishes to bring your jars to life. Acrylic paints are a popular choice because they adhere well to glass and come in a multitude of colors. You might also consider using spray paint for a more uniform finish or even chalk paint for a rustic look. Additionally, don't forget about decorative elements like ribbons, twine, or lace to add that personal touch. These embellishments can really make your lanterns pop and showcase your unique style.
Now, let’s talk about the lighting options. You have a few choices here depending on the ambiance you want to create. Traditional candles can provide a warm, flickering glow, but they do come with safety concerns. On the other hand, LED tealights are a fantastic alternative. They mimic the look of real candles without the risk of fire, making them perfect for indoor and outdoor use. If you’re feeling adventurous, you could even explore string lights or fairy lights, which can give your lanterns a magical touch.
To summarize, here’s a quick list of materials you’ll need to gather:
- Old jars (mason jars, glass containers, etc.)
- Acrylic paints or spray paints
- Decorative elements (ribbons, twine, lace)
- Lighting options (candles, LED lights, string lights)
Having these materials on hand will not only streamline your project but also inspire you to think creatively. Remember, the goal is to transform these everyday items into stunning decorative pieces that reflect your personality. So, gather your supplies, and let your imagination run wild!
Choosing the Right Jars
When it comes to creating stunning upcycled lanterns, the choice of jars is crucial. Think of jars as the canvas for your artistic expression; the right one can elevate your design from ordinary to extraordinary! So, how do you choose the perfect jar? First, consider the size and shape. Larger jars can create a bold statement, while smaller ones are perfect for delicate touches. For instance, a wide-mouth mason jar can be an excellent base for a rustic lantern, while a slender wine bottle can add an elegant flair.
Next, let’s talk about the material. You might be wondering, “Should I go for glass or plastic?” Well, glass jars often have a more sophisticated look and can withstand higher temperatures if you plan to use candles. On the other hand, plastic jars are lightweight and less prone to breaking, making them a safer choice for outdoor settings or where kids might be playing.
Now, don’t overlook the uniqueness of the jar's shape! A jar with an interesting silhouette can serve as a focal point in your decor. Look for jars that have curves, angles, or even embossed designs. You can find these gems at thrift stores, yard sales, or even your kitchen cupboard. Just imagine transforming a quirky pickle jar or an elegant old wine bottle into a stunning lantern!
To help you visualize your options, here’s a quick comparison table:
| Jar Type | Material | Best Use |
|---|---|---|
| Mason Jars | Glass | Rustic and farmhouse styles |
| Wine Bottles | Glass | Elegant and sophisticated designs |
| Plastic Containers | Plastic | Outdoor settings and safety |
| Unique Shaped Jars | Glass or Plastic | Creative and artistic lanterns |
In summary, choosing the right jar is all about blending functionality with creativity. Keep your vision in mind, and don’t hesitate to experiment with different styles and materials. The perfect jar is out there waiting for you to give it a new life as a beautiful lantern!
Here are some common questions that might help you in your upcycling journey:
- Can I use any jar for my lanterns? Yes, but make sure it can withstand heat if you're using candles.
- How do I clean the jars properly? Soak them in warm soapy water to remove labels, then rinse thoroughly.
- What lighting options work best for upcycled lanterns? LED lights are safe and come in various styles, but candles can create a cozy atmosphere.
Glass vs. Plastic Jars
When it comes to creating stunning upcycled lanterns, one of the first decisions you'll face is whether to use glass or plastic jars. Both options have their unique benefits and drawbacks, and understanding these can help you choose the right materials for your project. Let's delve into the details!
Glass jars are often the preferred choice for many DIY enthusiasts, and for good reason. They offer a classic aesthetic that enhances the beauty of any lantern design. The transparency of glass allows for the light to shine through brilliantly, creating a warm and inviting glow. Additionally, glass is generally more durable when it comes to heat resistance, making it suitable for use with candles. However, they can be heavier and more fragile, so handling them with care is essential.
On the other hand, plastic jars present their own set of advantages. They are typically lighter and less prone to breaking, which can be a significant benefit if you're planning to hang your lanterns or use them in outdoor settings. Moreover, plastic jars often come in a variety of shapes and colors, allowing for a more playful and creative approach to your designs. However, they may not withstand heat as well as glass, especially if you're using traditional candles, so opting for LED lights is a safer choice when working with plastic.
To help you visualize the differences, consider the following table that compares the two types of jars:
| Feature | Glass Jars | Plastic Jars |
|---|---|---|
| Aesthetic Appeal | Elegant and classic, allows light to shine beautifully | Colorful and playful, offers creative shapes |
| Durability | More fragile, can break easily | Lightweight and less prone to breaking |
| Heat Resistance | Good heat resistance, suitable for candles | Limited heat resistance, better for LED lights |
| Weight | Heavier, may require more support if hanging | Lighter, easier to handle and transport |
Ultimately, the choice between glass and plastic jars comes down to your specific needs and preferences. If you're aiming for a traditional look and don't mind the extra weight, glass is the way to go. However, if you're looking for something more versatile and lightweight, plastic jars may be your best bet. Whichever you choose, both materials can lead to stunning upcycled lanterns that will light up your space with personality and charm!
- Can I use any type of jar for my lanterns? Yes, you can use various types of jars, but consider their size, shape, and material for the best results.
- Are glass jars safe for outdoor use? Glass jars can be used outdoors, but make sure they are placed in secure locations to avoid breaking.
- What type of lighting is best for plastic jars? LED lights are recommended for plastic jars to prevent melting or damage.
Finding Unique Shapes
When it comes to creating stunning upcycled lanterns, the shape of your jars can make all the difference. Imagine transforming a simple, everyday jar into a captivating piece of art that draws the eye and sparks conversation. To achieve this, you’ll want to seek out jars that break the mold—literally! Unique shapes can add character and charm to your lanterns, making them truly one-of-a-kind.
So, where can you find these interesting jars? Thrift stores are a treasure trove of possibilities. You might stumble upon vintage jars with intricate designs or quirky shapes that you wouldn’t find in regular retail stores. Additionally, garage sales and flea markets often have hidden gems waiting to be discovered. Don't shy away from asking friends or family if they have any old jars lying around; you’d be surprised at what people are willing to part with!
Another fantastic source for unique jars is recycling centers. Many communities have facilities where you can browse through discarded items. This not only helps you find unique shapes but also supports environmental sustainability by giving new life to what might otherwise be thrown away. When you find a jar that speaks to you, consider how its shape can influence the overall design of your lantern. Will it be tall and slender, perfect for a flickering candle? Or perhaps a wide, round jar that casts a warm glow? The possibilities are endless!
Moreover, think outside the box when it comes to shapes. You can experiment with:
- Old glass bottles, which can be transformed into stunning lanterns with a bit of creativity.
- Vintage teacups or bowls, which can add a whimsical touch to your decor.
- Even larger jars like those used for pickling can create dramatic statement pieces.
In conclusion, the journey to finding unique jar shapes is as much about exploration as it is about creativity. Embrace the adventure of hunting for these items, and let your imagination run wild as you envision the beautiful lanterns you can create. Remember, it’s not just about the jar itself; it’s about the story it tells and the warmth it brings to your space.
Q1: What types of jars are best for upcycling into lanterns?
A1: The best jars for upcycling into lanterns are those with interesting shapes and sizes. Glass jars are typically preferred for their aesthetic appeal, but you can also use sturdy plastic jars. Look for unique designs that can enhance your lantern's visual impact.
Q2: How do I clean and prepare jars for upcycling?
A2: Start by removing any labels and residue from the jars. Soak them in warm, soapy water to loosen stubborn labels, then scrub with a sponge. Rinse thoroughly and let them dry completely before decorating.
Q3: Can I use LED lights instead of candles in my upcycled lanterns?
A3: Absolutely! LED lights are a safe and energy-efficient option for lanterns. They come in various styles, including fairy lights and tea lights, allowing you to create a magical atmosphere without the risk of fire.
Q4: Where can I find inspiration for my upcycled lantern projects?
A4: Inspiration can be found everywhere! Check out DIY blogs, Pinterest boards, and social media platforms like Instagram for creative ideas. Additionally, consider joining local crafting groups for tips and shared projects.

Decorative Techniques
When it comes to transforming your old jars into stunning upcycled lanterns, the magic truly lies in the you choose. These techniques not only enhance the visual appeal of your lanterns but also allow you to express your personal style. One popular method is painting. You can use glass paint or spray paint to create vibrant colors that reflect your personality. Imagine a soft pastel hue for a cozy evening or a bold, bright shade for a lively party atmosphere. The options are limitless!
Another fantastic technique is decoupage. This involves applying decorative paper, fabric, or even photos to your jars using a special glue. It’s a great way to add intricate designs or patterns that can tell a story or evoke a memory. You can choose floral prints for a romantic feel or geometric patterns for a modern twist. The beauty of decoupage is that it allows you to layer and combine different materials, creating a unique masterpiece that stands out.
Adding embellishments is another way to elevate your lanterns. You can use ribbons, twine, or even beads to wrap around the neck of the jar or hang from the top. This not only adds texture but also a touch of elegance. For instance, a rustic twine wrap paired with a vintage jar can create a charming farmhouse vibe, while shiny beads can give a more glamorous look. You might even consider using glitter or sequins to catch the light beautifully, making your lantern sparkle as the sun sets.
Don’t forget about the lighting itself! The type of light source you use can dramatically change the ambiance. For instance, placing a flickering candle inside a painted jar creates a warm, inviting glow, while LED fairy lights can add a whimsical touch. You can even combine these elements; imagine a jar adorned with decoupage and filled with twinkling fairy lights—absolutely enchanting!
Lastly, consider the theme of your lanterns. Are you going for a beachy vibe? Use seashells and sand-colored paints. Want something more festive? Incorporate holiday-themed decorations. The key is to let your imagination run wild and have fun with the process. Remember, each jar tells a story, and with the right decorative techniques, you can craft a narrative that is uniquely yours!

Step-by-Step Instructions
Creating your very own upcycled lanterns is not just a fun project; it’s a chance to let your creativity shine while giving new life to old jars. The process is straightforward, and with a little guidance, you'll be able to transform those dusty jars into stunning decorative pieces. Let’s dive into the step-by-step instructions that will help you along the way!
Step 1: Preparing the Jars - Before you can get your hands dirty with paint and embellishments, you need to prepare your jars. Start by cleaning them thoroughly to remove any residue. A simple wash with warm, soapy water usually does the trick. Don’t forget to remove the labels! You can soak the jars in warm water for a few minutes to help peel them off easily. If any sticky residue remains, a bit of rubbing alcohol or vinegar can work wonders. Once clean, let them dry completely. This preparation is crucial because any leftover moisture can interfere with paint adhesion.
Step 2: Choosing Your Lighting - Now that your jars are prepped and ready, it’s time to think about how you want to light them up. You have a few options here: traditional candles, LED tealights, or even fairy lights. Each option brings its own charm. For instance, using candles creates a warm, flickering glow, while LED lights are safer and last longer. If you opt for candles, make sure the jar is large enough to accommodate the flame safely. On the other hand, fairy lights can be a magical addition, especially if you’re going for a whimsical vibe.
Step 3: Decorating Your Jars - Here comes the fun part! Grab your paints, brushes, and any decorative items you've gathered. You can use acrylic paint for a pop of color or go for a more rustic look with natural twine and burlap. If you’re feeling adventurous, try decoupage with beautiful paper designs. To apply paint, simply use a brush or sponge to cover the jar's surface evenly. Remember, you can layer colors for a more complex look. For added flair, consider embellishing with beads, ribbons, or even dried flowers. The sky's the limit!
Step 4: Assembling the Lanterns - Once your jars are decorated and dry, it’s time to assemble your lanterns. If you’re using candles, place them at the bottom of the jar. For LED lights, you can either drop them in or wrap them around the inside of the jar for a twinkling effect. If you’re using fairy lights, simply stuff them into the jar, letting the lights cascade down. Ensure that whatever lighting you choose is secure and won’t tip over. If you’re using candles, always keep safety in mind and never leave them unattended.
Step 5: Adding Finishing Touches - To truly make your lanterns stand out, consider adding some final touches. You can tie a piece of twine around the neck of the jar or attach a small tag with a sweet message. If you’re creating a set, think about coordinating colors or themes to make them visually appealing together. Place your lanterns in a spot where they can be admired, whether it’s on your porch, in your garden, or as a centerpiece on your dining table.
By following these steps, you’ll not only create beautiful lanterns but also enjoy the process of upcycling and expressing your unique style. So, gather your materials, unleash your creativity, and let those old jars shine anew!
Q: What types of jars work best for upcycling into lanterns?
A: Glass jars are often preferred due to their durability and aesthetic appeal, but plastic jars can work as well, especially for outdoor use.
Q: Can I use any type of paint on the jars?
A: Acrylic paint is a great choice as it adheres well and comes in various colors. Just make sure it’s suitable for the surface of your jar.
Q: How can I ensure my candles are safe in the jars?
A: Always use jars that are heat-resistant and ensure the candle fits securely at the bottom. Never leave burning candles unattended.
Q: Where can I find unique jars for my projects?
A: Thrift stores, garage sales, and recycling centers are excellent places to find interesting jars. Don’t forget to check your own kitchen too!
Preparing the Jars
Getting your jars ready for the transformation into stunning lanterns is an exciting part of the upcycling process. First and foremost, you'll want to clean your jars thoroughly to ensure they are free from any dust, grime, or residue. This not only helps the decorative materials adhere better but also guarantees a polished finish for your lanterns. You can use warm soapy water and a sponge to scrub the insides and outsides of the jars. After washing, rinse them well and allow them to air dry completely to prevent any moisture from interfering with your decor.
Next, it's essential to remove any labels that might be stuck to the jars. Labels can be a nuisance, especially if they leave behind sticky residue. To tackle this, soak the jars in warm soapy water for a few minutes, which should loosen the adhesive. If any stubborn bits remain, a bit of rubbing alcohol or adhesive remover can work wonders. Just be sure to rinse the jars again after using any chemicals to ensure they are safe for use.
Once your jars are clean and label-free, you might want to consider making modifications to enhance their appearance. For instance, if you have jars with wide mouths, they can easily accommodate larger candles or flowers, while narrow jars might be perfect for string lights. Additionally, you might want to experiment with different shapes and sizes; a mix of tall and short jars can create a stunning visual effect when grouped together. Remember, the goal is to let your creativity flow!
Lastly, think about the lighting elements you plan to use. If you're going for a candle, make sure the jar is heat-resistant and stable enough to hold the flame safely. For LED lights, consider drilling a small hole in the lid of the jar to allow the wire to pass through without compromising the jar's aesthetic. This little detail can add a magical glow to your upcycled lanterns, making them perfect for any occasion, from cozy evenings at home to festive gatherings with friends.
Assembling the Lanterns
Assembling your upcycled lanterns is where the magic truly happens! It's the moment when your creative vision starts to take shape, transforming those old jars into stunning decorative pieces. First things first, you’ll want to choose the right lighting option for your lantern. Whether you prefer the warm glow of traditional candles or the safety and versatility of LED lights, each choice brings its own unique charm to your lantern.
When using candles, consider the size of your jar. A larger jar can accommodate a bigger candle, while smaller jars are perfect for tealights. However, if you opt for candles, remember to place them on a heat-resistant surface and never leave them unattended. Safety always comes first, right? If you’re leaning towards LED lights, the options are endless! You can use fairy lights, which can be wrapped around the inside of the jar, or battery-operated candles that mimic the flickering effect of real flames.
Now, let’s talk about the assembly process. Start by preparing your jar. Ensure it’s clean and dry, as any residue can affect the adhesion of decorative elements. If you’re using a candle, place a small amount of sand or pebbles at the bottom of the jar to help stabilize the candle and prevent it from tipping over. For LED lights, simply place them inside the jar and arrange them as you like.
Next comes the fun part: decorating the outside of your jar! You can use a variety of materials to personalize your lantern. Here are some popular techniques:
- Painting: Use glass paint or spray paint to add a splash of color. You can also use stencils for intricate designs.
- Decoupage: Apply decorative paper or fabric with Mod Podge for a unique texture. This technique allows you to layer different patterns for a more eclectic look.
- Embellishments: Add ribbons, twine, or beads for an extra touch of charm. You can even attach small charms or seasonal decorations to match your decor.
Once your jar is decorated, it’s time to secure the lighting. If you’re using a candle, make sure it’s centered and stable. For LED lights, you can use a bit of tape or adhesive to keep them in place if needed. Finally, consider adding a handle to your lantern for easy carrying. You can create a simple handle using wire or twine, attaching it to the neck of the jar for a rustic look.
And there you have it! Your upcycled lantern is ready to shine. Place it on your patio, hang it from a tree, or use it as a centerpiece for your dining table. The possibilities are endless! Remember, the beauty of upcycling lies not just in the end product, but in the joy of creating something new from what was once considered waste.
Q: Can I use any type of jar for my lanterns?
A: Absolutely! You can use glass jars, mason jars, or even unique shapes like old teacups. Just make sure they are clean and safe for your chosen lighting method.
Q: Are LED lights safe to use in upcycled lanterns?
A: Yes! LED lights are a great option as they don’t produce heat and are safe to use in enclosed spaces. They come in various styles, including fairy lights and battery-operated candles.
Q: How can I make my lanterns weather-resistant?
A: If you plan to use your lanterns outdoors, consider sealing them with a weatherproof spray or using outdoor-rated materials. This will help protect your beautiful creations from the elements.
Frequently Asked Questions
- What types of jars are best for making lanterns?
When it comes to creating stunning upcycled lanterns, glass jars are often the top choice due to their durability and aesthetic appeal. However, plastic jars can also be used, especially if you're looking for lighter options or if you plan to use them outdoors. Ultimately, the best jar depends on your design vision and the type of lighting you plan to use.
- How can I ensure my upcycled lanterns are safe to use?
Safety is paramount when crafting lanterns. If you're using candles, make sure the jars are heat-resistant and never leave them unattended. For LED lights, ensure they are properly secured and that wiring is safe. Always double-check that any decorative materials you use are non-flammable to prevent any accidents.
- Can I use any type of paint on my jars?
Not all paints are created equal! For best results, opt for paint specifically designed for glass or non-toxic acrylic paint. This will help ensure that your designs adhere well and withstand the test of time. Always remember to let the paint cure fully before adding any lighting elements.
- Where can I find unique jars for my projects?
Searching for unique jars can be a fun adventure! Thrift stores, garage sales, and recycling centers are treasure troves for interesting shapes and sizes. You can also ask friends or family if they have any old jars they’re willing to part with. The more unique the jar, the more character your lantern will have!
- How do I remove labels from old jars?
Removing labels can be a bit tricky, but it’s definitely doable! Soak the jars in warm soapy water for a few hours, which usually helps the labels peel off easily. For stubborn residue, try using a mixture of baking soda and oil or some rubbing alcohol to get the job done. Just make sure to rinse and dry the jars thoroughly before decorating!
- Can I use my upcycled lanterns outdoors?
Absolutely! Upcycled lanterns can add a charming touch to your outdoor space. Just ensure that the materials you use can withstand the elements. If you're using candles, consider placing them inside a glass jar to protect them from wind. For LED options, they are generally safe for outdoor use as long as they are rated for it.


