
Old to Gold: Upcycling Ideas for Your Home Decor
Are you tired of looking at the same old decor in your home? Do you want to add a touch of personality and creativity to your space without breaking the bank? Upcycling might just be the answer you’re looking for! This exciting trend involves taking items that have outlived their original purpose and transforming them into beautiful, functional decor pieces that tell a story. It's not just about saving money; it’s about embracing sustainability and creativity in your interior design. Imagine turning a worn-out chair into a stunning centerpiece or repurposing old jars into stylish candle holders. The possibilities are endless!
In this article, we will explore various upcycling ideas that can breathe new life into your home. From furniture makeovers to textile transformations, you’ll find inspiring tips and techniques that will help you create a space that reflects your unique style. Not only will you be reducing waste, but you'll also be making your home feel more personal and inviting. So, roll up your sleeves and get ready to dive into the world of upcycling!
Upcycling is not just a trend; it's a lifestyle choice that promotes sustainability. By choosing to upcycle, you're not only saving money but also contributing to a healthier planet. Instead of tossing out items that no longer serve their original purpose, you can give them a new lease on life. This creative process enhances your home decor while reducing waste, making it a win-win situation. So, let's embark on this exciting journey of transforming the old into gold!
Upcycling is the process of creatively reusing old materials to create something new and valuable. This concept is gaining momentum as people become more aware of the environmental impact of waste. Upcycling not only reduces the amount of waste sent to landfills but also encourages a more sustainable approach to home decor. Imagine turning an old wooden pallet into a chic coffee table or using vintage fabrics to create unique throw pillows. The beauty of upcycling lies in its ability to spark creativity and innovation.
There are numerous benefits to upcycling, including:
- Environmental Impact: Reduces waste and promotes sustainability.
- Cost-Effective: Saves money by repurposing items instead of buying new.
- Personalization: Allows for unique, one-of-a-kind decor that reflects your style.
- Creativity Boost: Encourages innovative thinking and problem-solving.
As we delve deeper into the world of upcycling, you’ll discover that it’s not just about giving your home a facelift; it’s about embracing a lifestyle that values creativity, sustainability, and individuality. So, let’s dive into some fantastic ideas on how to upcycle furniture and household items!
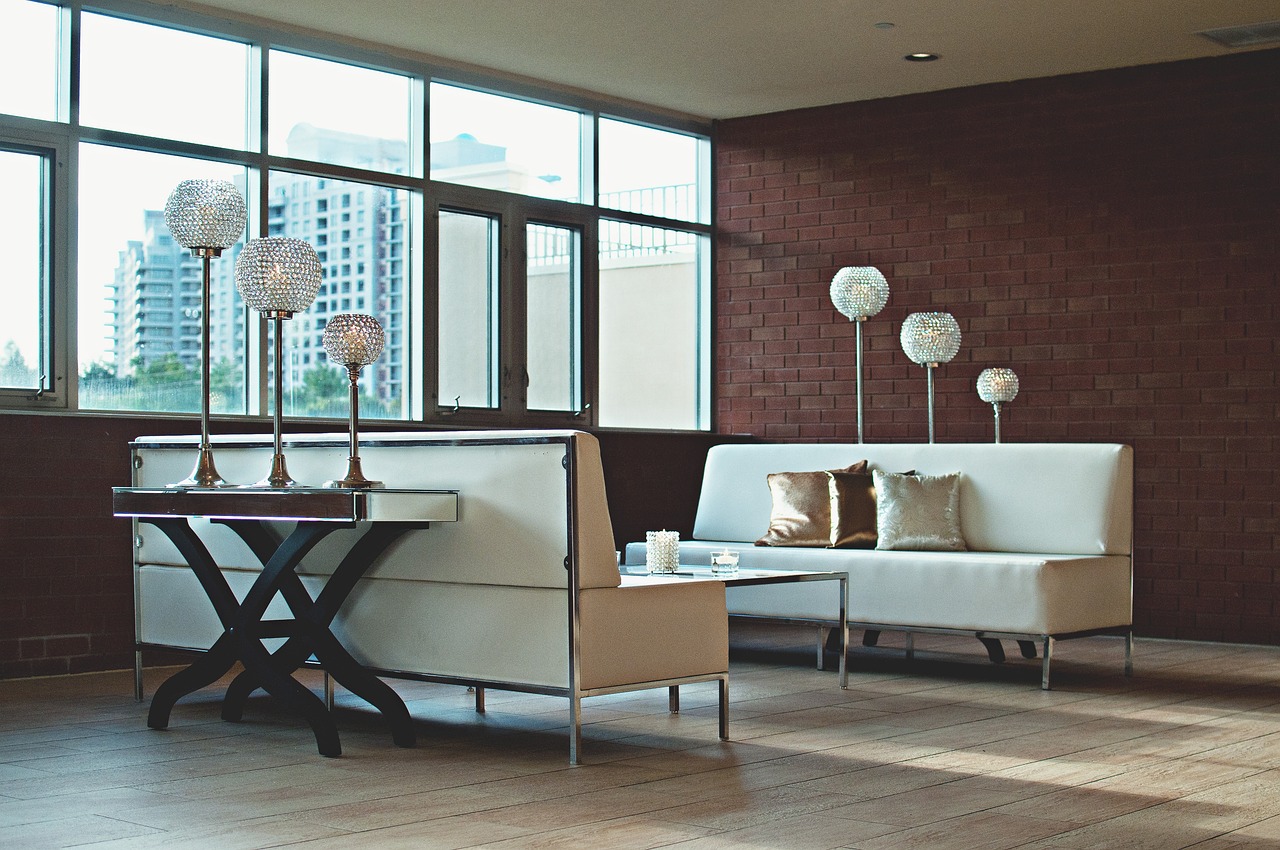
Transforming outdated furniture is a fantastic way to upcycle and breathe new life into your home. Whether it’s an old chair, a tired table, or a forgotten cabinet, with a little creativity and effort, you can turn these pieces into stylish focal points. The first step is to assess what you have and envision how you can make it better. Think about the colors, textures, and styles that resonate with you and your space.
Here are some tips and techniques for refurbishing furniture:
- Painting: A fresh coat of paint can work wonders. Consider using chalk paint for a matte finish or spray paint for a sleek look.
- Distressing: Achieve a vintage charm by distressing your furniture. This involves sanding down edges and applying a wax finish for a worn-in look.
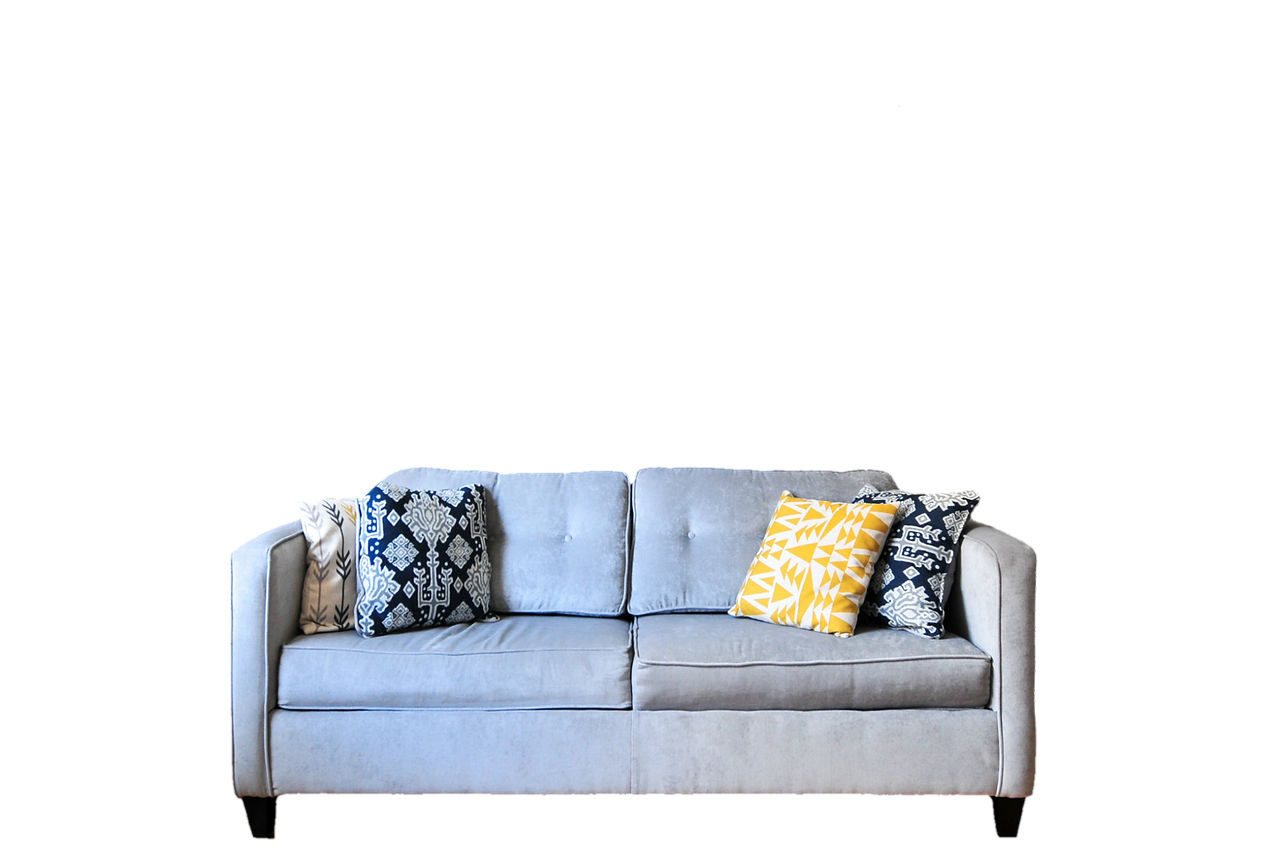
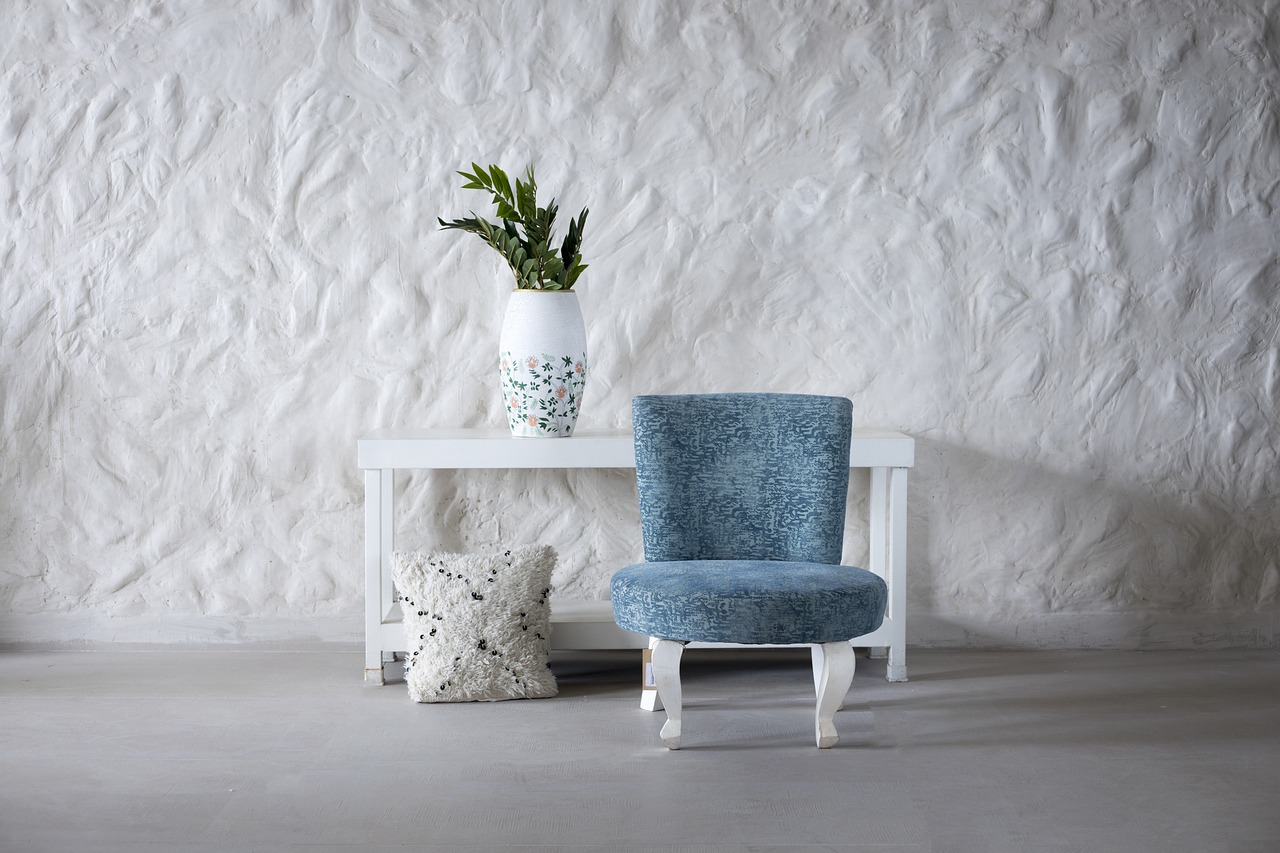
- Reupholstering: Give old chairs or sofas a makeover with new fabric. Choose something bold and colorful to make a statement!
With these techniques, you can create stunning pieces that not only serve a purpose but also enhance the aesthetic of your home. So, gather your tools and get ready to transform your furniture from drab to fab!
Q: What is the difference between upcycling and recycling?
A: Upcycling involves creatively repurposing items into something of higher value, while recycling breaks down materials to create new products.
Q: Can I upcycle anything?
A: Almost anything can be upcycled! From furniture to textiles, the key is to think creatively and envision new uses for old items.
Q: Do I need special skills to upcycle?
A: Not at all! While some projects may require basic DIY skills, many upcycling ideas are simple and can be done by anyone.
Q: Where can I find items to upcycle?
A: You can find potential upcycling items at thrift stores, garage sales, or even in your own home. Look for things that you no longer need or use!

Understanding Upcycling
Upcycling is more than just a trendy buzzword; it’s a revolutionary approach to sustainability that invites us to look at our old belongings with fresh eyes. Imagine taking something that would typically end up in a landfill and transforming it into a stunning piece of home decor. This process not only reduces waste but also allows for a unique expression of creativity and personal style. By reusing and repurposing materials, we can create **one-of-a-kind** items that reflect our individuality and values.
The benefits of upcycling extend far beyond just aesthetics. To start, it significantly contributes to environmental sustainability by minimizing waste. Did you know that landfills are overflowing with perfectly usable items? By upcycling, we can divert these items from the trash and give them a new lease on life. Additionally, upcycling encourages us to think creatively and resourcefully. It challenges us to see the potential in what we already possess, rather than rushing out to buy new things. This shift in mindset not only saves money but also fosters a deeper appreciation for our belongings.
Moreover, upcycling can enhance the character of our homes. Each piece tells a story, carrying with it a history that new items simply cannot replicate. Whether it's a vintage chair that once belonged to a grandparent or a wooden pallet turned into a rustic coffee table, these upcycled treasures become conversation starters. They invite guests to ask about their origins, creating connections and memories that new, mass-produced items often lack.
In the world of upcycling, the possibilities are endless. From furniture makeovers to transforming everyday household items, there’s no limit to what you can create. Here are some of the key benefits of upcycling:
- Environmental Impact: Reduces waste and conserves resources.
- Cost-Effective: Saves money by reusing materials instead of buying new.
- Creativity Boost: Encourages innovative thinking and problem-solving.
- Personalization: Allows for unique, customized decor that reflects your style.
As you embark on your upcycling journey, remember that it’s not just about creating beautiful decor; it’s about making a positive impact on the world around you. So, grab those old items collecting dust and let your imagination run wild. Who knows? You might just discover a hidden gem that adds charm and character to your home!
Furniture Makeovers
Transforming outdated furniture is not just a fantastic way to upcycle; it’s an opportunity to inject your personality into your living space. Imagine walking into your home and being greeted by a stunning coffee table that was once a drab, old piece of furniture. With a little creativity and elbow grease, you can turn those forgotten items into stylish focal points that tell your unique story. Whether it's a vintage chair, a tired dresser, or an old dining table, each piece has the potential to become a work of art. So, let’s dive into some tips and techniques that will help you breathe new life into your furniture!
First off, let’s talk about painting techniques. The right color can dramatically change the look and feel of your furniture. For instance, chalk paint is a popular choice because it adheres to surfaces easily and gives a lovely matte finish. It’s perfect for achieving that rustic, farmhouse vibe that many people adore. On the other hand, spray paint offers a quick and smooth application for those who want to revamp their furniture in record time. Just imagine a bright teal dresser that pops against a neutral wall! The possibilities are endless.
When it comes to painting your furniture, consider the following techniques:
- Chalk Paint: Ideal for a matte finish and great for distressing.
- Spray Paint: Perfect for a smooth, even coat and quick application.
- Milk Paint: A natural option that creates a beautiful, vintage look.
Next, let’s discuss distressing furniture. This technique gives your pieces a vintage charm that many people crave in their decor. By intentionally creating wear and tear, you can achieve that beautifully aged look. Techniques such as sanding the edges, using a wet cloth to remove paint in certain areas, or even applying a glaze can help you achieve this effect. It’s like giving your furniture a story, a history that adds character to your home.
Here are some methods to achieve that worn-in look:
- Sanding: Lightly sand the edges and surfaces to reveal the wood beneath.
- Waxing: Apply a layer of wax to create a soft sheen and protect the finish.
- Glazing: Use a glaze over the paint to add depth and texture.
Finally, let’s not forget about reupholstering. Old chairs or sofas can often look tired and out of place, but with a little fabric and some basic upholstery techniques, you can give them a fresh new look. Choosing the right fabric is crucial; think about the colors and patterns that will complement your overall decor. A bold floral print can make a statement, while a neutral fabric can blend seamlessly into your space. Don’t be afraid to experiment!
Here are a few tips to get you started:
- Selecting Fabric: Look for durable fabrics that can withstand wear and tear.
- Basic Upholstery Techniques: Familiarize yourself with tools like a staple gun, scissors, and a sewing machine.
- Finishing Touches: Add decorative elements like buttons or trim for a professional finish.
In conclusion, furniture makeovers are an exciting way to express your creativity and give your home a personal touch. Whether you decide to paint, distress, or reupholster, the end result will be a unique piece that reflects your style. So, gather those old items, roll up your sleeves, and let your imagination run wild. Your home is a canvas, and you are the artist!
Q: What type of paint is best for upcycling furniture?
A: Chalk paint is a popular choice due to its ease of use and beautiful matte finish. However, spray paint is also a great option for a smooth and quick application.
Q: Can I distress furniture without sanding?
A: Yes! You can use methods like applying a wet cloth to remove some paint or using a glaze to create depth without sanding.
Q: How do I choose the right fabric for reupholstering?
A: Consider durability, color, and pattern. Fabrics like canvas or upholstery-grade materials are ideal for furniture.

Painting Techniques
When it comes to giving your old furniture a fresh look, are your best friends. They can completely transform the aesthetic of your pieces, making them feel brand new and tailored to your style. So, what are some of the most effective techniques you can use? Let's dive in!
One of the most popular methods is using chalk paint. This type of paint is known for its matte finish and ease of use, making it perfect for beginners. It adheres well to various surfaces without the need for extensive prep work, which means you can skip the sanding and priming steps that often deter DIY enthusiasts. Just grab a brush, and you’re ready to create a stunning piece that looks like it came straight from a boutique!
If you're looking for something a bit more versatile, spray paint might be the way to go. It allows for an even coat and can cover intricate details that a brush might miss. However, it’s essential to use it in a well-ventilated area and wear a mask for safety. The beauty of spray paint is that it comes in countless colors and finishes, from glossy to matte, allowing you to get as creative as you like. Just remember to use a primer beforehand for the best results!
For those who enjoy a more rustic or vintage look, distressing techniques can add a charming touch to your furniture. This method involves intentionally creating a worn appearance, which can be achieved through several techniques. You might try sanding edges to reveal the wood underneath or using a wet cloth to wipe away some of the paint before it dries. The goal is to make your piece look like it has a story to tell, which adds character and warmth to your space.
Lastly, if you're feeling adventurous, consider a two-tone or ombre effect. This technique involves blending two or more colors together, creating a stunning gradient that can elevate your furniture to a whole new level. Imagine a side table that transitions from a deep navy blue at the bottom to a soft sky blue at the top. It’s eye-catching and can become a fantastic conversation starter!
In summary, painting techniques are not just about applying color; they’re about expressing your personality and creativity. Whether you opt for chalk paint, spray paint, distressing, or a two-tone effect, the possibilities are endless. So, grab your brushes and get ready to transform your old furniture into stunning pieces that reflect your unique style!
Q: Do I need to sand my furniture before painting?
A: Not necessarily, especially if you're using chalk paint, which adheres well without sanding. However, a light sanding can help with adhesion for other types of paint.
Q: Can I use regular paint on furniture?
A: Yes, you can! Just make sure to use a primer and a topcoat for durability.
Q: How do I achieve a distressed look?
A: You can distress furniture by sanding edges or using a wet cloth to remove some paint. Experiment to find the right look for your piece!

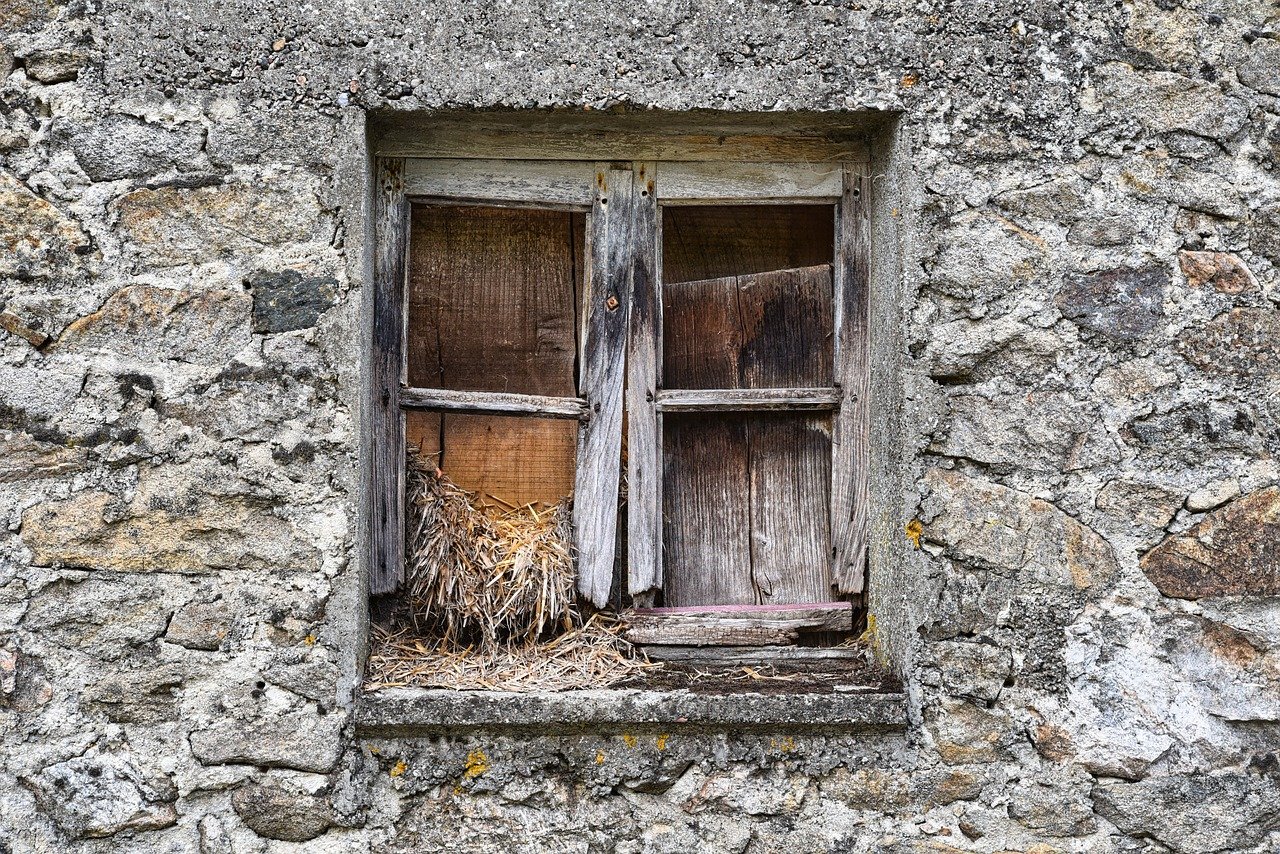
Distressing Furniture
Distressing furniture is not just a technique; it's an art form that brings character and a sense of history to your home decor. Imagine walking into a room where every piece of furniture tells a story, whispering tales of time gone by. By embracing the beauty of imperfection, you can transform a mundane piece into a stunning focal point that captures attention. So, how do you achieve this vintage charm? Let's dive into some techniques that will help you distress your furniture like a pro!
One popular method for distressing is using sandpaper to gently wear down edges and surfaces. This technique mimics the natural wear and tear that occurs over time, giving your furniture an authentic aged look. Start with a coarse grit sandpaper to remove the finish in certain areas, then switch to a finer grit to smooth everything out. Focus on corners, edges, and any areas that would naturally see more use. This simple step can make a world of difference in how your piece is perceived.
Another effective method is to use a technique known as "dry brushing." This involves applying a small amount of paint on a brush and wiping most of it off before lightly brushing over the surface of the furniture. This creates a subtle texture that highlights the details of the piece without overwhelming it with color. You can use contrasting colors for a more dramatic effect or stick to shades within the same color family for a softer look.
For those looking to add a bit of flair, consider using a wax or glaze over your painted furniture. This not only helps to protect your finish but also enhances the distressed look. Applying a dark wax can deepen the crevices and add depth, while a lighter glaze can soften the overall appearance. The choice of finish can dramatically change the vibe of your furniture, so don't hesitate to experiment!
Finally, if you're feeling adventurous, you can try the "vinegar and steel wool" method. Soak steel wool in vinegar for a few hours, then apply it to your wood surface. The reaction creates a natural stain that gives the wood a weathered look. This method is particularly effective for achieving that rustic farmhouse aesthetic that’s so popular right now.
Incorporating these distressing techniques can breathe new life into old furniture, making it a unique addition to your home. Remember, the key is to embrace the imperfections and let your creativity shine through. So grab your tools, get a bit messy, and enjoy the transformative journey of distressing your furniture!
- What type of paint is best for distressing furniture? Chalk paint is highly recommended because it adheres well and gives a matte finish, making distressing easier.
- Can I distress furniture without sanding? Yes! You can use techniques like dry brushing or applying a vinegar solution to achieve a distressed look without traditional sanding.
- How do I protect my distressed furniture? Applying a clear wax or polyurethane finish can help protect your furniture from scratches and stains while preserving the distressed look.
Reupholstering Tips
Reupholstering old chairs or sofas is not just a way to refresh tired furniture; it's like giving them a brand new lease on life! Imagine transforming a worn-out seat into a stunning focal point that draws compliments from every guest. But before you dive into this creative endeavor, there are a few essential tips to keep in mind to ensure your project is a success.
First things first, choose the right fabric. The fabric you select will dictate not only the aesthetic appeal but also the durability of your piece. Consider factors such as the room's purpose, the amount of wear and tear the furniture will face, and the overall style you want to achieve. For high-traffic areas, opt for durable materials like canvas or denim, while luxurious options like velvet or silk can elevate the elegance of a less-used piece.
Next, don't forget about measuring your furniture accurately. Grab a tape measure and jot down the dimensions of the areas you plan to cover. This step is crucial because it helps you calculate how much fabric you'll need. A good rule of thumb is to add about 10% extra fabric to account for mistakes or pattern matching. You wouldn't want to run out of fabric halfway through your project!
When it comes to the actual reupholstering process, remove the old upholstery carefully. This step is like peeling back the layers of an onion. You'll want to take your time to ensure you preserve the structure of your furniture. Use a staple remover or pliers to carefully take off the old fabric, and keep the pieces intact as they can serve as a pattern for cutting your new fabric. It's like having a cheat sheet for your new design!
Once you have the old fabric off, inspect the foam and padding. If it's in good shape, you can reuse it, but if it’s flattened or damaged, consider replacing it. New foam can work wonders, giving your furniture that plush feel we all crave. Don't forget to use a batting layer over the foam for added softness and a professional finish. It's like putting icing on a cake!
Before you start stapling your new fabric onto the frame, lay it out on a flat surface and cut it according to your measurements. Make sure to leave some extra fabric around the edges to ensure you have enough to work with when wrapping it around the furniture. Once you’re ready, start from the center and work your way out, pulling the fabric tight to avoid any wrinkles. It's a bit like wrapping a present — the tighter and neater, the better!
Finally, once everything is stapled down and looking fabulous, take a moment to check for any rough edges or exposed staples. You can cover these with a trim or piping to give your piece that polished look. Remember, the goal is not just to make it look good but also to ensure it feels good. After all, a beautifully reupholstered chair should invite you to sit down and relax!
In conclusion, reupholstering is a rewarding project that can breathe new life into your furniture. With the right fabric, careful measurements, and a bit of creativity, you'll turn your old, tired pieces into stunning works of art that reflect your personal style. So, roll up those sleeves and get ready to transform your space!
- How much fabric do I need for reupholstering? It generally depends on the size of the furniture. For a standard chair, you'll need about 2-3 yards of fabric, while a sofa may require 5-10 yards. Always measure and add a little extra just in case!
- Can I reupholster furniture by myself? Absolutely! With the right tools and a bit of patience, DIY reupholstering can be a fun and satisfying project. Just follow the steps carefully, and don't hesitate to seek help if needed.
- What tools do I need for reupholstering? Basic tools include a staple gun, staples, a staple remover, scissors, a tape measure, and possibly a sewing machine if you're making custom cushions or covers.
Repurposing Household Items
When it comes to decorating your home, why settle for the ordinary when you can unleash your creativity by repurposing everyday household items? This practice not only breathes new life into objects that might otherwise end up in the landfill, but it also adds a unique touch to your decor that reflects your personality. Imagine transforming an old ladder into a stylish bookshelf or turning glass jars into charming candle holders. The possibilities are endless!
Repurposing is all about seeing potential where others see waste. For instance, an old wooden crate can serve as a rustic coffee table or a storage solution for your favorite magazines. Similarly, vintage suitcases can be stacked to create a quirky nightstand or even a unique storage bench. By embracing this creative approach, you not only enhance your living space but also contribute to a more sustainable lifestyle. So, let’s dive into some inspiring ideas that can help you turn your clutter into captivating decor!
One of the simplest yet most effective ways to repurpose items is by using glass jars. These versatile containers can be transformed into beautiful vases, storage solutions, or even DIY lanterns. Just imagine a row of colorful jars filled with fresh flowers or fairy lights adorning your dining table. Additionally, old t-shirts can be cut and braided into trendy rugs, adding a splash of color and comfort to your floors. The best part? You’re not only saving money but also creating something truly one-of-a-kind!
To get started, consider these repurposing ideas:
- Old Furniture: Transform a worn-out chair into a chic planter stand or a side table.
- Kitchen Items: Use old colanders as hanging planters for your herbs.
- Books: Stack old books to create a unique side table or use them as decorative elements on shelves.
- Picture Frames: Turn them into trays or use them to display fabric swatches for a colorful wall art piece.
By looking at items around your home with a fresh perspective, you can discover countless opportunities for upcycling. Remember, the key is to let your imagination run wild! Don't be afraid to experiment and combine different materials and styles. You might just stumble upon a new favorite piece that becomes the talking point of your home.
Q: What items can I repurpose for home decor?
A: Almost any household item can be repurposed! Common examples include glass jars, old furniture, wooden crates, and even fabric scraps. The key is to think creatively about how these items can serve a new purpose.
Q: Do I need special tools to repurpose items?
A: While some projects may require basic tools like a hammer or screwdriver, many repurposing ideas can be accomplished with minimal supplies. Just gather your creativity and start experimenting!
Q: How do I ensure my repurposed items are safe and functional?
A: Always assess the condition of the items you plan to repurpose. Make sure they are clean, sturdy, and free from harmful substances. If you're unsure about the safety of an item, consider consulting online resources or DIY communities for guidance.
Q: Can I sell my repurposed items?
A: Absolutely! Many people have turned their passion for repurposing into a small business. You can sell your creations at local markets, online platforms, or through social media. Just ensure that your items are well-made and appealing to potential buyers.

Garden Upcycling Ideas
When it comes to enhancing your outdoor space, upcycling offers a treasure trove of possibilities that not only beautify your garden but also promote sustainability. Imagine transforming that old wooden ladder into a charming vertical garden or repurposing tires into vibrant planters. The beauty of upcycling lies in its creativity and resourcefulness, allowing you to breathe new life into items that might otherwise end up in a landfill.
One of the most exciting aspects of garden upcycling is the ability to personalize your space with unique features that reflect your style. For instance, consider using old tools like shovels and rakes as decorative wall art or turning a discarded wheelbarrow into a whimsical flower bed. These projects not only serve a functional purpose but also tell a story, adding character to your garden.
Furthermore, the possibilities are endless when it comes to materials. Think about how you can utilize everyday items:
- Old Furniture: Dressers can be transformed into potting benches, while chairs can become quirky plant stands.
- Glass Jars: These can be turned into lanterns or mini terrariums, bringing a touch of enchantment to your garden.
- Wooden Pallets: Use them to create vertical gardens or rustic compost bins, combining functionality with aesthetic appeal.
Not only does this approach help you save money, but it also encourages a sense of community and craftsmanship. You might even find joy in hosting a garden upcycling workshop with friends, where everyone can bring their own items to transform. It's a great way to share ideas, inspire one another, and create lasting memories while contributing positively to the environment.
As you embark on your garden upcycling journey, remember that the key is to embrace creativity and think outside the box. Whether you’re crafting a cozy nook with repurposed furniture or designing a stunning centerpiece with upcycled materials, the process is all about making your garden a reflection of who you are. So, roll up your sleeves, gather those forgotten items, and let your imagination run wild!
Q1: What types of items can be upcycled for garden decor?
A1: Almost anything can be upcycled! Common items include old furniture, tires, glass jars, pallets, and garden tools. The key is to use your creativity to see the potential in these materials.
Q2: How can I ensure my upcycled garden decor is weather-resistant?
A2: To protect your upcycled items from the elements, consider using weatherproof paints or sealants. Additionally, choose materials that are naturally resistant to moisture, such as treated wood or metal.
Q3: Can I upcycle items that are not originally meant for gardening?
A3: Absolutely! Many non-gardening items can serve a purpose in the garden. For example, an old bicycle can become a whimsical plant holder, and kitchen utensils can be turned into garden markers.Q4: Is upcycling expensive?
A4: Not at all! Upcycling is often a cost-effective way to decorate your garden, as it involves using items you already have or can find cheaply. The focus is on creativity rather than spending money.
Planters and Pots
Transforming old containers into planters can add a whimsical touch to your garden, making it not only a space for plants but also a canvas for your creativity. Imagine taking a rusty old wheelbarrow or a stack of mismatched teacups and giving them a new lease on life as vibrant, eye-catching planters. Not only does this process breathe new life into forgotten items, but it also promotes sustainability by reducing waste. The beauty of upcycling planters is that it allows you to express your personal style while contributing to environmental conservation.
When selecting items to upcycle into planters, consider materials that can hold soil and retain moisture. Some fantastic options include:
- Old Buckets: These can be painted or left as-is for a rustic look.
- Wooden Crates: Perfect for a farmhouse aesthetic, these can be stacked or used individually.
- Glass Jars: Great for smaller plants or herbs, adding a touch of elegance to your kitchen window.
- Tires: Brightly painted tires can create fun, colorful displays in your garden.
Before you start planting, it’s essential to prepare your containers properly. For instance, if you’re using metal buckets or old tin cans, ensure you drill holes in the bottom for drainage. This will prevent water from pooling and potentially damaging your plants. If you're using wooden crates, consider lining the inside with landscaping fabric to keep the soil from falling out while still allowing for drainage.
Once your planters are ready, think about the types of plants you want to use. You can mix and match different species for a vibrant display or opt for a single type for a more cohesive look. Consider using herbs like basil and mint in your kitchen planters for a functional yet decorative touch. For more ornamental options, succulents and flowering plants can add bursts of color and texture to your outdoor space.
Additionally, don’t be afraid to get creative with your arrangements. Grouping different planters together can create a stunning focal point in your garden. You can elevate some planters on stands or hang others from hooks to add dimension to your space. The key is to let your imagination run wild and have fun with the process. After all, upcycling is not just about creating something new; it’s about telling a story through your decor.
In conclusion, upcycling planters and pots is a fantastic way to personalize your garden while being kind to the planet. It allows you to take items that might otherwise be discarded and turn them into beautiful, functional pieces that showcase your unique style. So, gather your old containers, unleash your creativity, and watch your garden transform into a vibrant oasis!
Q: Can I use any type of container for planting?
A: While you can use many types of containers, ensure they are safe for plants and have proper drainage. Avoid using anything that could leach harmful chemicals into the soil.
Q: How do I ensure my upcycled planters are safe for my plants?
A: Always clean your containers thoroughly and check for any sharp edges or harmful residues. For wooden containers, make sure they're untreated or use a food-safe sealant.
Q: What types of plants work best in upcycled containers?
A: It depends on the size and type of container. Herbs, succulents, and small flowering plants are great choices for smaller containers, while larger items can accommodate bigger plants or even small shrubs.

Garden Art
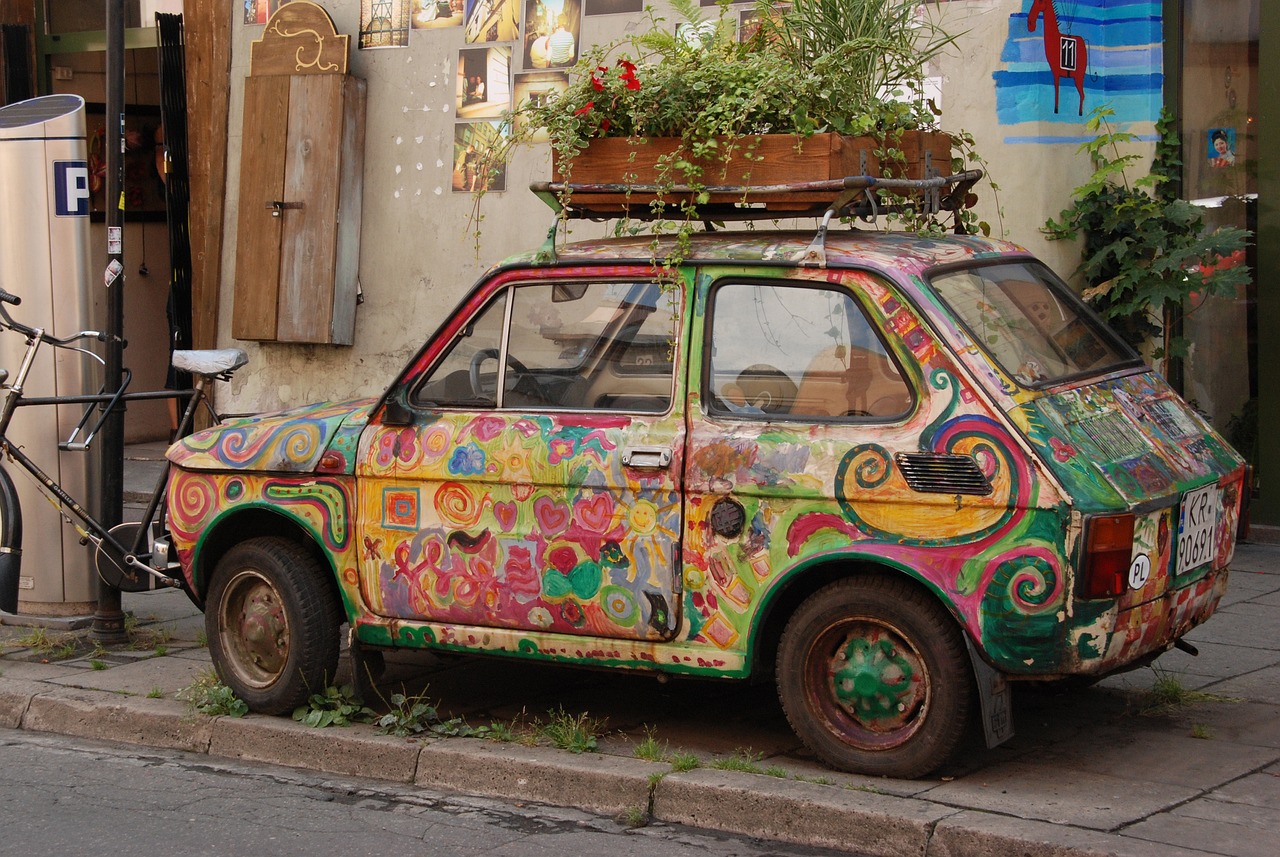
Creating art from discarded items is not just a fun project; it can also transform your garden into a vibrant oasis filled with personality and charm. Imagine walking through your outdoor space and being greeted by whimsical sculptures, colorful wind chimes, and unique decorations that tell a story. By using materials that might otherwise end up in a landfill, you can express your creativity while promoting sustainability. It’s like giving a second life to items that have lost their original purpose, turning them into something extraordinary.
One of the most exciting aspects of making garden art is the freedom to experiment. You can use a variety of materials, from old tools and broken pottery to discarded furniture and even plastic bottles. Each piece you create can reflect your personality and style, whether you prefer a rustic look or something more modern. For example, an old bicycle can be transformed into a stunning planter, while glass bottles can be turned into colorful garden stakes. The possibilities are endless!
Here are some creative ideas to inspire your garden art projects:
- Wind Chimes: Use old keys, spoons, and beads to create beautiful wind chimes that not only sound lovely but also catch the light beautifully.
- Garden Sculptures: Combine various materials like scrap metal, wood, and stones to create eye-catching sculptures that can serve as focal points in your garden.
- Stepping Stones: Use concrete and decorate with colorful tiles, glass pieces, or even handprints to make unique stepping stones that add a personal touch to your pathways.
To get started, gather your materials and think about the overall theme or vibe you want for your garden. You might want to create a serene space with soft colors and gentle shapes or a lively area filled with bright colors and playful designs. Don’t forget to consider the placement of your art pieces; they should complement the natural beauty of your garden while drawing the eye.
As you embark on your garden art journey, remember that the process is just as important as the end result. Enjoy the hands-on experience of creating something unique, and don’t be afraid to get a little messy! After all, art is about expression, and your garden is a canvas waiting for your creative touch.
Q: What materials can I use for garden art?
A: You can use a wide range of materials, including old tools, broken pottery, wood scraps, glass bottles, and even plastic items. The key is to think creatively and repurpose items that might otherwise be discarded.
Q: How do I ensure my garden art withstands the weather?
A: To protect your garden art from the elements, consider using weather-resistant materials or applying a sealant to your creations. Additionally, placing your art in sheltered areas can help prolong its life.
Q: Can I involve my kids in creating garden art?
A: Absolutely! Involving children in art projects is a great way to foster creativity and teamwork. Just ensure that any materials used are safe and age-appropriate.
Q: Where can I find inspiration for garden art?
A: Inspiration can come from various sources, including gardening magazines, online platforms like Pinterest, or even nature itself. Visiting local gardens or art shows can also spark your creativity.
Textile Upcycling
Textile upcycling is a creative and sustainable way to breathe new life into old fabrics, turning what might have been discarded into stunning home accents. Imagine transforming a pile of old clothes or worn-out linens into beautiful, functional pieces that not only enhance your decor but also tell a story. This practice not only reduces waste but also allows you to express your personal style in a unique way. Think of your old textiles as a treasure trove of possibilities, just waiting to be discovered!
One of the most exciting aspects of textile upcycling is the sheer variety of projects you can undertake. From making cozy pillows that add a splash of color to your living room to crafting intricate quilts that can keep you warm during chilly nights, the options are nearly limitless. You can even create wall art that adds texture and warmth to your space, making your home feel more inviting. With just a little creativity and some basic sewing skills, you can turn fabric scraps into show-stopping decor pieces.
For those who love sewing, patchwork projects are a fantastic way to utilize fabric remnants. You can mix and match different patterns and colors to create quilts, throws, or even wall hangings that are not only functional but also serve as beautiful art pieces. Each patch can represent a memory or a moment, adding a personal touch to your home. The beauty of patchwork lies in its imperfections; it’s all about embracing the uniqueness of each piece of fabric and letting it shine.
Another innovative idea is to create fabric wall art. This can be achieved by framing fabric swatches or creating fabric collages that showcase your favorite prints. Imagine a gallery wall adorned with vibrant textiles that not only catch the eye but also spark conversations. The process is simple: just choose fabrics that resonate with you, cut them into shapes or patterns, and arrange them in a way that feels right. This method allows you to infuse your personality into your decor while also recycling materials that would otherwise go to waste.
To inspire you further, here’s a quick overview of some potential textile upcycling projects:
| Project | Description |
|---|---|
| Pillows | Use old shirts or fabric scraps to create unique pillow covers. |
| Quilts | Combine various fabric pieces into a cozy quilt that tells a story. |
| Wall Art | Frame colorful fabrics or create collages for a stunning visual impact. |
| Rugs | Weave together old clothes or fabric scraps to create a one-of-a-kind rug. |
In conclusion, textile upcycling not only allows you to be environmentally conscious but also gives you the chance to unleash your creativity. Whether you’re a seasoned crafter or just starting, there’s something incredibly rewarding about transforming old textiles into beautiful, functional pieces for your home. So, gather those old clothes and linens, roll up your sleeves, and let your imagination run wild!
- What is textile upcycling? Textile upcycling is the process of repurposing old fabrics into new and functional items, reducing waste while adding creativity to home decor.
- What types of fabrics can I use for upcycling? You can use a wide range of fabrics, including old clothes, linens, curtains, and even fabric scraps from previous projects.
- Do I need special skills to start upcycling textiles? While basic sewing skills can be helpful, many projects can be completed with simple techniques, making it accessible for beginners.
- How can I ensure my upcycled items are durable? Choose sturdy fabrics and use quality stitching techniques to ensure your upcycled items withstand daily use.

Patchwork Projects
When it comes to breathing new life into old textiles, are like a treasure chest waiting to be opened. Imagine all those fabric scraps you’ve been hoarding over the years; they can be transformed into something beautiful and functional! Patchwork isn’t just about sewing pieces together; it’s about weaving a story, creating a tapestry of memories, and letting your creativity shine. Whether you’re a seasoned crafter or just starting out, the world of patchwork offers endless possibilities.
First off, let’s talk about the sheer joy of using fabric scraps. You might have pieces from old clothes, leftover fabric from previous projects, or even remnants from your grandmother’s sewing box. Each piece holds a story, and when stitched together, they create a unique narrative that adds character to your home. You can create stunning quilts, cozy throws, or even decorative wall hangings that serve as conversation starters. The beauty of patchwork is that it allows you to play with colors, patterns, and textures, giving you the freedom to express your personal style.
Here are a few inspiring ideas to kickstart your patchwork journey:
- Quilts: Combine different fabric pieces to make a quilt that not only keeps you warm but also tells a story of your crafting adventures.
- Throws: Create a patchwork throw that adds a pop of color to your living room or bedroom, making it the perfect cozy companion for chilly evenings.
- Wall Hangings: Use fabric scraps to craft wall art that can bring warmth and texture to your walls, turning them into a gallery of your creativity.
But wait! It doesn’t stop there. You can also explore patchwork in various forms, such as clothing alterations. Why not take that old denim jacket and add a patchwork design to the back? It’ll not only be a unique piece but also a sustainable fashion statement. Additionally, patchwork can be a fantastic way to upcycle old linens into stunning table runners or placemats, perfect for your next dinner party.
As you dive into your patchwork projects, remember that the process is just as important as the final product. Don’t be afraid to experiment! Mix and match different styles, and let your imagination run wild. You might even find that some of your best ideas come from happy accidents along the way. So grab your sewing machine, or even just a needle and thread, and start stitching your way to a more personalized and eco-friendly home decor.
Q: What types of fabrics are best for patchwork projects?
A: The best fabrics for patchwork are cotton, linen, and denim. These materials are easy to sew and hold up well over time. However, feel free to experiment with other fabrics like silk or wool for added texture!
Q: Do I need a sewing machine for patchwork?
A: While a sewing machine can speed up the process, you can definitely hand-sew your patchwork projects. It’s a great way to connect with the craft and adds a personal touch.
Q: How do I choose a color palette for my patchwork project?
A: Start with a few colors that you love or that match your home decor. You can use a color wheel to help you find complementary colors. Remember, there are no strict rules—trust your instincts!
Q: Can I use old clothes for patchwork?
A: Absolutely! Old clothes are perfect for patchwork. Just make sure to wash and iron them before cutting them into pieces to ensure they’re clean and ready for your project.
Fabric Wall Art
When it comes to home decor, is like the cherry on top of a sundae. It adds warmth, texture, and a splash of personality to any room. Imagine walking into a space where the walls are adorned with vibrant fabrics, each piece telling its own unique story. Whether you're a seasoned crafter or just looking for a fun weekend project, creating fabric wall art can be a rewarding endeavor that transforms your living space.
One of the best things about fabric wall art is its versatility. You can use almost any type of fabric, from old clothes to leftover upholstery scraps. The key is to choose fabrics that resonate with your personal style. For example, if you love bohemian vibes, consider using colorful prints and patterns. On the other hand, if you're drawn to a more minimalist aesthetic, neutral tones and simple textures might be the way to go. The options are endless!
To get started, you’ll need a few basic supplies: a canvas or wooden frame, fabric, scissors, and a staple gun or glue. First, select your fabric pieces—these could be remnants from previous projects, thrifted finds, or even family heirlooms. Cut the fabric to fit your canvas or frame, leaving a little extra for folding over the edges. Once you’ve got your fabric cut, it’s time to attach it. If you’re using a staple gun, simply pull the fabric tight and staple it to the back of the canvas. If you prefer glue, apply a thin layer to the surface and press the fabric down, ensuring there are no wrinkles.
Another captivating technique is to create a fabric collage. You can mix and match textures, colors, and patterns to craft a stunning visual display. Think of it as a puzzle where each piece contributes to a larger picture. You might even want to incorporate other elements like lace, buttons, or old jewelry to add depth and interest. This method not only showcases your creativity but also allows you to recycle materials that might otherwise go to waste.
For those who love a bit of structure, consider framing smaller pieces of fabric in shadow boxes. This not only elevates the fabric art but also protects it from dust and damage. You can create a gallery wall with a mix of framed fabric pieces, photographs, and other art forms to curate a space that reflects your journey and interests.
Ultimately, fabric wall art is more than just decoration; it’s a way to express yourself and bring a piece of your personality into your home. So, gather those fabric scraps, unleash your creativity, and watch as your walls transform into a vibrant tapestry of your life!
- What types of fabric can I use for wall art? You can use any fabric, including cotton, linen, burlap, and even old clothing. Just ensure the fabric is clean and in good condition.
- How do I hang my fabric wall art? Depending on the weight and size, you can use adhesive strips, nails, or picture hooks. Make sure to choose a method that suits your wall type.
- Can I wash my fabric wall art? If you used washable fabric and non-permanent adhesives, you can gently hand wash it. However, it's best to avoid submerging any glued pieces.
Frequently Asked Questions
- What is upcycling, and how is it different from recycling?
Upcycling is the creative process of transforming old or discarded items into something new and valuable, often enhancing their aesthetic or functional appeal. Unlike recycling, which breaks down materials to create new products, upcycling preserves the original form and gives it a fresh purpose, making it a more sustainable option for home decor.
- Can I upcycle any type of furniture?
Absolutely! Almost any piece of furniture can be upcycled, from chairs and tables to cabinets and dressers. The key is to look for items that have good bones or structure. With a little creativity and some DIY skills, you can give new life to even the most outdated pieces.
- What are some easy painting techniques for upcycling furniture?
There are several painting techniques you can use, including chalk paint for a matte finish, spray paint for a smooth application, and distressing techniques for a vintage look. Each method can dramatically change the appearance of your furniture, allowing you to customize it to fit your decor style.
- How can I repurpose household items creatively?
Look around your home for everyday items that can be transformed. For example, glass jars can become candle holders or storage containers, while old pallets can be turned into rustic shelves or garden beds. The possibilities are endless when you let your imagination run wild!
- What are some fun garden upcycling ideas?
There are many ways to upcycle in your garden! You can turn old tires into colorful planters, use wooden crates for vertical gardens, or even transform broken tools into unique garden art. These projects not only beautify your space but also promote sustainability.
- How can I use old textiles for upcycling?
Old textiles can be repurposed into a variety of home accents. You can create patchwork quilts, throw pillows, or even wall art using fabric scraps. This not only helps reduce waste but also adds a personal touch to your home decor.
- Are there any specific tools needed for upcycling projects?
While the tools needed can vary depending on the project, some basics include a paintbrush, sandpaper, a staple gun for reupholstering, and a sewing machine for textile projects. Having a good set of tools can make your upcycling experience smoother and more enjoyable!


