Cardboard Box Upcycling Ideas You Can Try at Home
Have you ever looked at a cardboard box and thought, "What on earth am I going to do with this?" Well, you’re not alone! Every year, millions of cardboard boxes end up in landfills, but with a little creativity and some elbow grease, you can turn these seemingly useless items into something truly special. Upcycling cardboard boxes not only helps reduce waste but also allows you to create unique, personalized items for your home. In this article, we’ll explore a variety of creative and practical ways to repurpose cardboard boxes into useful items that can enhance your living space.
From storage solutions that help keep your home organized to stunning DIY home decor projects, the possibilities are endless. Imagine transforming a simple cardboard box into a chic storage bin or a piece of eye-catching wall art. Not only will you save money by using materials you already have, but you’ll also contribute to a more sustainable lifestyle. So, grab those empty boxes, roll up your sleeves, and let’s dive into the world of cardboard box upcycling!
Are you tired of clutter taking over your living space? One of the best ways to tackle this issue is by creating stylish storage solutions from cardboard boxes. With a little bit of customization and decoration, you can transform plain boxes into beautiful organizers that blend seamlessly with your home decor. For instance, you can cover boxes with fabric or decorative paper, add labels for easy identification, and even paint them in colors that match your interior design. The result? A chic storage solution that not only keeps your items organized but also adds a touch of personality to your home.
Moreover, you can create a variety of storage options, such as:
- Stackable Boxes: Create a set of stackable boxes for a space-saving solution.
- Drawer Dividers: Cut and customize boxes to fit inside your drawers, keeping everything neatly separated.
- Decorative Bins: Use larger boxes to create decorative bins for toys, magazines, or blankets.
Next up, let’s talk about turning those cardboard boxes into stunning home decor items. Whether you’re looking to spruce up your walls or create unique centerpieces, there’s so much you can do with cardboard. One popular project is making cardboard wall art. This can be as simple or as intricate as you like. You can cut out shapes, paint them, and arrange them on your wall to create a visually appealing display. The best part? You can easily change it up whenever you feel like a new look!
Creating stunning wall art from cardboard boxes is a fun and rewarding project. Start by gathering your materials, which only require some cardboard, scissors, paint, and glue. You can explore various techniques, such as layering different shapes or using stencils, to achieve a unique design. The key is to let your imagination run wild! Once finished, your cardboard wall art will not only elevate your home’s aesthetic but also serve as a conversation starter when guests come over.
To take your wall art to the next level, consider adding texture. You can achieve this by layering pieces of cardboard, using fabric scraps, or even incorporating natural elements like twigs and leaves. This technique gives your creations depth and interest, making them truly one-of-a-kind. The beauty of textured art is that it invites touch and interaction, creating a more engaging experience for anyone who sees it.
If you want to create something that stands out, try turning your cardboard creations into framed art pieces. Simply cut your cardboard into your desired shapes, paint them, and then frame them using simple wooden frames. This not only adds a professional touch to your artwork but also allows you to create focal points in any room. Imagine a beautifully framed piece of cardboard art hanging in your living room, showcasing your creativity and commitment to sustainability!
Now, let’s get a bit more ambitious! How about transforming cardboard boxes into functional furniture? Yes, you read that right! With some clever crafting, you can create practical items like coffee tables or stools that are both eco-friendly and stylish. For instance, by stacking and reinforcing several boxes, you can create a sturdy coffee table that serves as a great conversation piece. Just make sure to cover it with a nice tablecloth or paint it for a polished look.
Engaging your kids in fun and educational cardboard box crafts can be a fantastic way to promote creativity and recycling. Not only do these projects keep little hands busy, but they also provide an opportunity for family bonding. For example, you can work together to build imaginative cardboard playhouses that can provide hours of entertainment. Customize the playhouse with paint, markers, or even fabric to create a cozy space for your children to play.
Building a cardboard playhouse is like creating a mini-world for your kids. With just a few boxes, some scissors, and a bit of creativity, you can craft a playhouse that sparks their imagination. Whether they want a castle, a spaceship, or a cozy cottage, the possibilities are endless! This project not only encourages creativity but also teaches kids about recycling and the importance of reusing materials.
Last but not least, you can create educational games using cardboard boxes. This is a fantastic way to help children learn while having fun. You can design board games, puzzles, or even flashcards tailored to various age groups and subjects. The best part is that these DIY games can be customized to fit your child’s interests, making learning feel like an exciting adventure!
Q: What types of cardboard boxes are best for upcycling?
A: Any cardboard box can work, but sturdier boxes like those from appliances or moving boxes are ideal for larger projects. For crafts, smaller boxes like cereal boxes or shoe boxes are perfect.
Q: How can I make my cardboard projects more durable?
A: To enhance durability, consider reinforcing your cardboard with additional layers, using glue or tape, and sealing with a protective coating like Mod Podge or clear spray paint.
Q: Are there any safety tips for using cardboard in crafts?
A: Always use safety scissors, and supervise children when using sharp tools. Additionally, ensure that any paint or glue used is non-toxic and safe for indoor use.
Creative Storage Solutions
Are you tired of clutter taking over your living space? Well, cardboard boxes may just be the answer you’ve been searching for! Not only are they a budget-friendly option, but they also offer a plethora of creative storage solutions that can transform your home into a more organized haven. Imagine turning those mundane boxes into stylish, customized storage that complements your decor while keeping your belongings neatly tucked away. Sounds intriguing, right?
Let’s dive into the world of cardboard upcycling! First off, consider the size and shape of the boxes you have. Large boxes can be perfect for storing blankets or seasonal clothing, while smaller boxes are excellent for organizing office supplies or crafting materials. With a little imagination, you can create a variety of storage options that are both functional and visually appealing.
One great way to enhance your cardboard storage is by customizing and decorating them. You can use paint, fabric, or even decorative paper to cover the boxes, giving them a fresh look that fits seamlessly into your home. For example, if you have a box that you want to use for storing toys in the living room, consider wrapping it in a vibrant fabric that matches your color scheme. Not only does this hide the box’s original appearance, but it also adds a pop of color to your space.
To make your storage solutions even more practical, think about adding labels. You can easily create your own labels using cardboard scraps or printable templates. This simple touch not only helps you find what you need at a glance but also adds a personal touch to your organization system. Here’s a quick idea: use a chalkboard paint on the front of your boxes, allowing you to write and erase labels as needed!
For those who enjoy a bit of DIY, consider creating a multi-tiered storage unit using cardboard boxes. Stack boxes of varying sizes to create a unique shelving system. This not only maximizes vertical space but also gives you the flexibility to rearrange your storage as needed. Just be sure to secure the boxes together with glue or tape to ensure stability. You can even paint them in a cohesive color to give the illusion of a more expensive furniture piece!
In addition to these ideas, here’s a quick overview of some other creative storage solutions you can try:
- Drawer Dividers: Cut boxes into smaller sections to create dividers for drawers, keeping everything organized.
- Under-Bed Storage: Use flatter boxes to store items under your bed, maximizing otherwise wasted space.
- Wall-Mounted Storage: Attach boxes to walls using brackets for a unique shelving solution that saves floor space.
By incorporating these creative storage solutions into your home, you not only gain functional space but also contribute to a more sustainable lifestyle. It’s a win-win! So, gather those cardboard boxes, unleash your creativity, and start transforming your home into an organized, stylish sanctuary.
Q: Can I use any type of cardboard box for storage?
A: Yes! Most cardboard boxes can be used for storage. Just make sure they are clean and in good condition. Sturdier boxes are better for heavier items.
Q: How can I ensure my cardboard storage lasts?
A: To prolong the life of your cardboard storage, avoid exposing them to moisture. You can also reinforce them with tape at the seams for added durability.
Q: What are some easy ways to decorate my cardboard boxes?
A: You can use paint, fabric, wallpaper, or even scrapbook paper to decorate your boxes. Get creative with patterns and colors that match your home decor!
DIY Home Decor
When it comes to giving your home a personal touch, projects made from cardboard boxes can be a game changer. Not only are these projects a fantastic way to repurpose materials that would otherwise end up in the landfill, but they also allow you to express your creativity and style without breaking the bank. Imagine transforming a simple cardboard box into a stunning centerpiece or a unique piece of wall art that reflects your personality. Sounds fun, right?
One of the most exciting aspects of using cardboard for decor is the endless possibilities. You can create everything from decorative storage boxes to intricate wall hangings. Let’s dive into some ideas that will inspire you to grab those boxes and start crafting!
Creating wall art from cardboard is not just about cutting and pasting; it's about telling a story through your designs. You can start by cutting out shapes or patterns from the cardboard and then painting them in vibrant colors. The best part? You can customize these pieces to match your existing decor. Whether you prefer a minimalist look or something more eclectic, cardboard wall art can fit right in.
If you want to take your cardboard art to the next level, consider adding texture! Layering different pieces of cardboard can create depth, making your artwork pop. You can also incorporate other materials, like fabric or paint, to enhance the visual appeal. This approach not only adds interest but also transforms a simple craft into a stunning focal point for your room.
Another fantastic idea is to create framed cardboard art. By cutting cardboard into various shapes and sizes, you can assemble them into a collage that tells a story or represents a theme. Once you have your pieces arranged, simply frame them in a simple or ornate frame, depending on your style. This project is a great way to showcase your creativity while adding a unique touch to your home.
Now, let’s not forget about the importance of sustainability. By choosing to create your decor from cardboard, you're not only saving money but also making an eco-friendly choice. It’s a win-win! Plus, these projects can be a wonderful way to spend time with family or friends, sharing ideas and techniques as you craft together.
As you embark on your DIY decor journey, remember that the only limit is your imagination. With a little creativity and some basic supplies, you can turn ordinary cardboard boxes into extraordinary pieces of art that will impress your guests and add warmth to your home.
Q: What tools do I need to start making cardboard decor?
A: You’ll need some basic tools like scissors, a utility knife, glue, and paint. Optional tools include a cutting mat and a ruler for precision.
Q: Can I use any type of cardboard?
A: Yes, but thicker cardboard, like that from shipping boxes, works best for structural projects. Thinner cardboard is great for detailed art pieces.
Q: How can I ensure my cardboard decor lasts?
A: Sealing your cardboard with a clear varnish or paint can help protect it from moisture and wear. Additionally, keep it in a dry place to prevent damage.
Cardboard Wall Art
Cardboard wall art is not just a creative outlet; it's a fantastic way to breathe new life into what would otherwise be discarded materials. Have you ever looked at a plain wall and thought it could use a splash of personality? Well, cardboard provides the perfect canvas for your artistic endeavors! Whether you're a seasoned artist or a beginner looking to explore your creative side, making wall art from cardboard is an enjoyable and fulfilling project.
To get started, gather your cardboard boxes, scissors, and some basic art supplies. You might want to keep some paint, glue, and decorative materials like fabric scraps or old magazines handy. The beauty of cardboard wall art lies in its versatility. You can create everything from abstract shapes to intricate designs. Imagine transforming a simple box into a stunning centerpiece that draws the eye and sparks conversation!
Here are a few techniques you can use to create your cardboard masterpieces:
- Layering: By cutting out various shapes and layering them, you can create a 3D effect that adds depth to your art. Think of it as building a miniature landscape where each layer tells a different part of the story.
- Painting: Once you have your shapes cut out, grab some paint and let your imagination run wild! Bright colors can energize a room, while muted tones can create a calm atmosphere. Don't be afraid to mix colors or experiment with textures.
- Assembling: After you've painted and decorated your pieces, it's time to assemble them. Use glue or even tape to secure your layers together. You can mount them on a larger piece of cardboard or directly onto the wall for a stunning visual impact.
One of the most exciting aspects of cardboard wall art is the opportunity to personalize your creations. Consider using materials that reflect your interests or your family's personality. For example, if you love nature, you could create a piece that showcases trees, flowers, or animals. If you're into modern art, geometric shapes in bold colors might be more your style. The possibilities are as endless as your imagination!
Once your artwork is complete, think about how to display it. Framing your cardboard art can elevate its appearance and make it look more polished. You can easily create a frame using more cardboard or purchase an inexpensive one from a craft store. Hang your framed pieces in a gallery-style arrangement for a stunning focal point in your living room or hallway.
In conclusion, cardboard wall art is a delightful way to express your creativity while also being eco-friendly. Not only do you reduce waste, but you also create beautiful, unique pieces that enhance your home. So, why not dive into this fun project today? You might just find that cardboard is the perfect medium for your next artistic adventure!
Q1: What type of cardboard is best for wall art?
A1: Any type of cardboard can work, but thicker cardboard, like that from shipping boxes, is ideal for creating sturdy pieces. It holds its shape better and can support more weight when layered.
Q2: Can I use other materials with cardboard?
A2: Absolutely! Feel free to incorporate materials like fabric, paper, or even found objects. This can enhance the texture and visual appeal of your artwork.
Q3: How do I hang my cardboard wall art?
A3: You can use adhesive hooks, nails, or even string to hang your art. Just make sure to choose a method that can support the weight of your piece.
Q4: Is cardboard wall art suitable for outdoor use?
A4: Cardboard is not weather-resistant, so it's best suited for indoor use. If you want to create outdoor art, consider sealing it with a weatherproof spray to protect it from the elements.
Textured Art Pieces
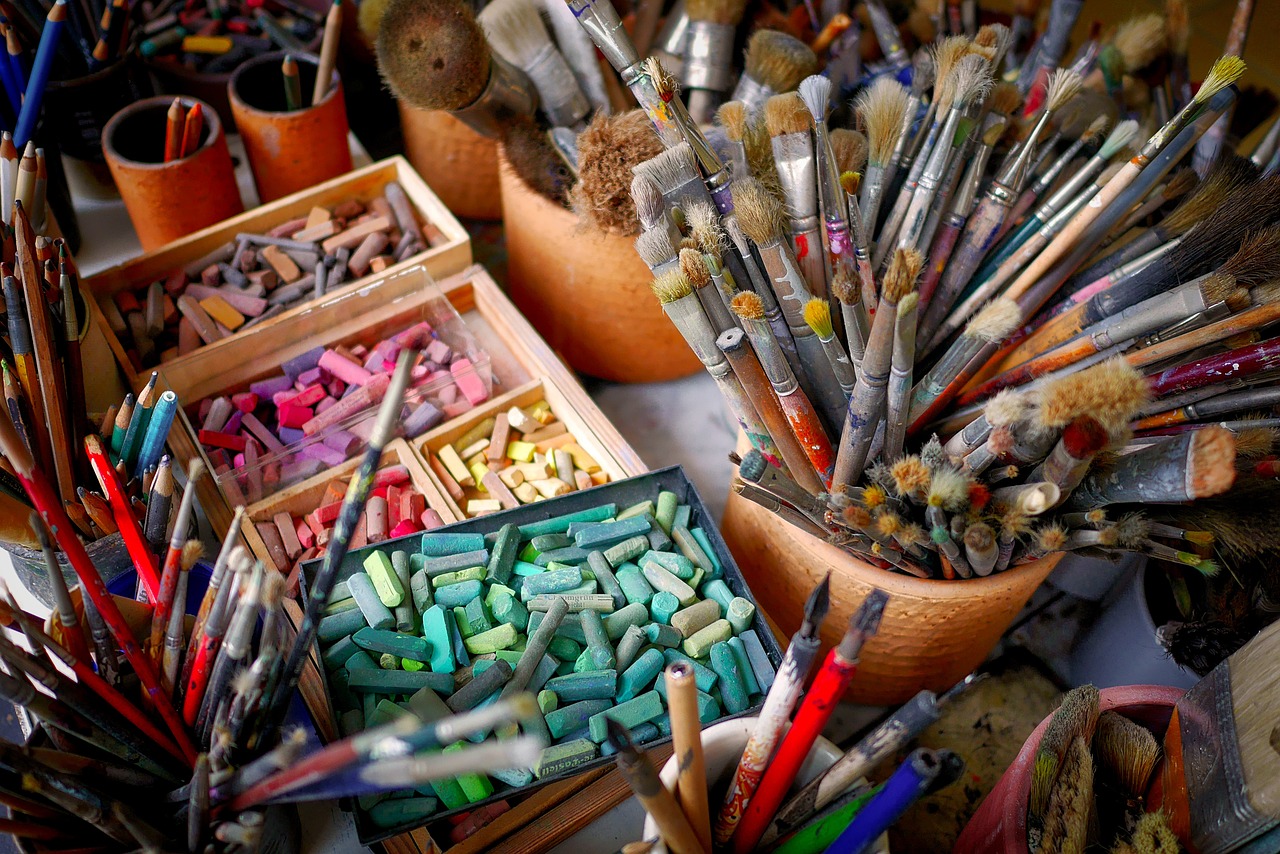
Creating from cardboard boxes is an exciting way to add depth and interest to your home decor. The beauty of using cardboard lies in its versatility; it can be cut, layered, painted, and transformed into stunning visuals that captivate the eye. Imagine walking into a room and being greeted by a breathtaking piece of art that not only looks good but also tells a story of creativity and sustainability. By layering different pieces of cardboard, you can create a three-dimensional effect that draws viewers in, making them want to explore every detail.
To begin your journey into textured art, gather some basic materials: cardboard boxes, scissors, a hot glue gun, and paints. The first step is to cut the cardboard into various shapes and sizes. Think about how you want to arrange these pieces on your canvas. You can create abstract designs or even representational art—it's all about what resonates with you. Once you've cut your pieces, start layering them. Apply glue generously to ensure they stick well, and don’t be afraid to overlap pieces to create a more dynamic composition.
After your layers are secure, it’s time to unleash your inner artist with paint. Choose colors that complement your home’s aesthetic, or go bold with contrasting hues to make a statement. You can use brushes or sponges to apply the paint, experimenting with different techniques to achieve various textures. For instance, a sponge can create a soft, mottled effect, while a brush can produce sharp, defined lines. The key is to have fun and let your creativity flow!
Additionally, consider incorporating other materials to enhance your textured art pieces. Items such as fabric scraps, beads, or even natural elements like twigs and leaves can add a unique touch. These elements not only provide visual interest but also create a tactile experience, inviting viewers to touch and feel your creation. The combination of cardboard and these materials can result in a stunning focal point that sparks conversation and admiration.
Once your artwork is complete, think about how you want to display it. You could frame your textured art to give it a polished look, or you could mount it directly on the wall for a more casual feel. Whichever way you choose to showcase your masterpiece, the important thing is to enjoy the process and celebrate the creativity that cardboard can inspire.
- What types of cardboard are best for textured art? Generally, any cardboard will work, but thicker cardboard like that from shipping boxes is ideal for creating sturdy layers.
- Can I use other materials besides paint? Absolutely! You can use markers, paper, fabric, or even natural elements like leaves and flowers to add color and texture.
- How do I hang my textured art pieces? You can use adhesive strips for a damage-free option or traditional picture hangers if you prefer a more permanent solution.

Framed Cardboard Art
Have you ever looked at a plain cardboard box and thought it had more potential than just being a container? Well, you're absolutely right! is a fantastic way to transform those humble boxes into stunning pieces of decor that can become conversation starters in your home. Imagine walking into a room and being greeted by a vibrant, eye-catching piece of art that not only looks good but also tells a story of creativity and sustainability. Sounds intriguing, right?
Creating framed cardboard art is not just about aesthetics; it’s also about expressing your individuality. You can customize these pieces to reflect your personality or fit the theme of your home. The process is simple, fun, and can be a great activity for family bonding. To get started, gather your materials: old cardboard boxes, scissors, a frame (which can also be made from cardboard), paint, and any other decorative items you might want to use, like fabric, glitter, or even natural elements like leaves.
Here’s a basic step-by-step guide to creating your very own framed cardboard art:
- Step 1: Cut your cardboard into the desired shape and size. Think about what design you want to create—abstract, geometric, or maybe even a landscape.
- Step 2: Paint your cardboard pieces. This is where you can really let your creativity shine! Use bright colors or muted tones to match your decor.
- Step 3: Once the paint is dry, consider adding texture. You can layer additional pieces of cardboard, or incorporate other materials like fabric or paper to create depth.
- Step 4: Assemble your art piece within the frame. If you’re using a cardboard frame, make sure it’s sturdy enough to hold your art securely.
- Step 5: Finally, hang your masterpiece on the wall or place it on a shelf to showcase your creativity!
This project not only allows you to recycle materials but also provides a unique way to decorate your home. Plus, it’s a great conversation starter. When guests admire your framed cardboard art, you can share the story of how you created it, turning a simple decor item into a meaningful piece of your home's narrative.
In addition to being a fun project, framed cardboard art can also be a great gift. Imagine giving someone a personalized piece of art that you created yourself! It shows thoughtfulness and effort, making it far more special than a store-bought item. So, why not gather your friends or family for a fun art night? You can all create your own pieces and enjoy a night filled with laughter and creativity.
As you dive into the world of cardboard art, remember that the only limit is your imagination. Whether you decide to go for a minimalist look or an extravagant design, your framed cardboard art will surely bring a unique charm to your living space. So, grab those boxes and let your creativity flow!
Q1: Can I use any type of cardboard for this project?
A: Yes, you can use any type of cardboard, but thicker cardboard will provide more stability for your art piece.
Q2: What kind of paint should I use?
A: Acrylic paint works well on cardboard, but you can also use spray paint for a smoother finish.
Q3: How do I hang my framed cardboard art?
A: You can use adhesive strips, picture hooks, or even nails, depending on the weight of your art piece.
Q4: Can children participate in this project?
A: Absolutely! This is a great project for kids to explore their creativity, just be sure to supervise them with scissors and paint.
Functional Furniture
Have you ever thought about how many cardboard boxes you toss away each year? Instead of letting them pile up in the recycling bin, why not transform them into ? This creative approach not only saves you money but also allows you to showcase your unique style while being eco-friendly. Imagine crafting a chic coffee table or a stylish stool that not only serves a purpose but also sparks conversations among your guests. Sounds intriguing, right?
Creating furniture from cardboard might sound a bit unconventional, but with a little imagination and some basic crafting skills, you can create pieces that are both practical and visually appealing. For instance, a simple cardboard coffee table can be made by stacking and securing boxes together, then covering them with decorative paper or paint to match your decor. The result? A stunning centerpiece that’s lightweight and easy to move around.
Here are a few ideas to get you started on your cardboard furniture journey:
- Cardboard Coffee Table: Stack several boxes, secure them with glue or tape, and cover them with a fun fabric or paint for a personalized touch.
- Stools: Create sturdy stools by reinforcing boxes with additional cardboard layers. Add cushions on top for comfort and style.
- Bookshelves: Use larger boxes to create a unique bookshelf that can hold your favorite reads while adding character to your space.
Now, you might be wondering about the durability of cardboard furniture. While it may not replace your solid wood pieces, it can certainly hold its own for light use. The key is to ensure your creations are well-constructed and properly supported. Adding layers and using strong adhesives can enhance their stability. Plus, the beauty of cardboard furniture is that it can be easily replaced or updated as your style changes.
In addition to being functional, these projects are also a fantastic way to get the whole family involved. Whether it’s designing a new piece or painting it together, the process fosters creativity and teamwork. Plus, it teaches valuable lessons about recycling and sustainability. So, gather your supplies, roll up your sleeves, and let your imagination run wild!
| Question | Answer |
|---|---|
| Is cardboard furniture durable? | While it's not as sturdy as traditional furniture, with proper construction and reinforcement, cardboard furniture can hold up well for light use. |
| How can I make my cardboard furniture more stable? | Adding extra layers of cardboard and using strong adhesives will significantly improve the stability of your furniture. |
| Can I paint or decorate my cardboard furniture? | Absolutely! You can use paint, fabric, or decorative paper to personalize your cardboard creations and match your home decor. |
Children's Crafts
Engaging your kids in cardboard box crafts is not just a way to keep them entertained; it's also a fantastic opportunity to promote creativity and environmental awareness. Imagine transforming those old boxes that would otherwise end up in the landfill into delightful projects that can spark joy and imagination. Whether it’s a rainy day or a sunny afternoon, these crafts can be a fun family activity that brings everyone together.
One of the most exciting projects is creating cardboard playhouses. Building a playhouse from cardboard is like crafting a miniature kingdom where your children can unleash their creativity. You can start with a basic structure by cutting out windows and doors, then let your kids decorate it with paints, markers, or even leftover wrapping paper. The best part? They can customize it to fit any theme, whether it’s a castle, a spaceship, or a cozy cottage. This project not only provides hours of imaginative play but also helps develop their motor skills as they cut, glue, and paint.
But the fun doesn’t stop there! You can also create educational games using cardboard boxes. Think about how much more engaging learning can be when it’s hands-on. For instance, you can make a simple board game by cutting a large piece of cardboard into a game board and using smaller boxes as game pieces. Tailor the game to fit different subjects like math, spelling, or geography, making it suitable for various age groups. This way, your children can learn while they play, making education feel less like a chore and more like an adventure.
To give you more ideas, here are a few additional projects you can try with your kids:
- Cardboard Puppets: Create fun puppets from cardboard cutouts. Your kids can put on a puppet show, enhancing their storytelling skills.
- Cardboard Instruments: Make musical instruments like guitars or drums. This project can introduce your children to the world of music.
- Cardboard Cars: Design and build toy cars that your kids can race. This can lead to exciting playtime with friends and family.
By engaging in these creative cardboard box crafts, you’re not just keeping your children busy; you’re also teaching them valuable lessons about recycling and resourcefulness. Each project serves as a reminder that with a little imagination, you can turn something ordinary into something extraordinary. Plus, the joy and pride they feel when they complete their crafts are priceless. So gather those cardboard boxes, roll up your sleeves, and dive into a world of creativity with your kids!
Q: What materials do I need for cardboard crafts?
A: Basic materials include cardboard boxes, scissors, glue, paint, markers, and any decorative items like stickers or fabric scraps you may have at home.
Q: Are cardboard crafts safe for young children?
A: Yes, cardboard crafts can be safe for young children, but adult supervision is recommended, especially when using scissors or other sharp tools.
Q: How can I encourage my children to be creative with cardboard?
A: Encourage them to think outside the box! Ask open-ended questions about what they would like to create and allow them to lead the project. Providing them with various materials can also inspire creativity.
Q: What should I do with the completed crafts?
A: You can display their creations around the house, use them as toys, or even take photos and recycle the cardboard afterward, teaching kids about sustainability.
Cardboard Playhouses
Imagine transforming a simple cardboard box into a magical playhouse that sparks your child's imagination! are not just a fun craft project; they provide endless opportunities for creativity and play. With just a few boxes, some scissors, and a bit of paint, you can create a cozy hideaway where your children can embark on adventures without ever leaving home. The beauty of cardboard playhouses is that they can be customized to fit any theme—whether it’s a castle, a spaceship, or a cozy cottage, the possibilities are limitless!
To get started, gather materials you already have at home. Look for large cardboard boxes, such as those from appliances or furniture. These boxes provide ample space for building and decorating. You will also need some basic crafting supplies, including scissors, tape, glue, and paint. Once you have everything ready, it's time to unleash your inner architect!
Begin by cutting out windows and doors to make the playhouse more inviting. You can even create a little porch or a garden area around the playhouse. This is where your creativity can truly shine. Encourage your kids to help with the decorating process—let them paint the walls in their favorite colors, draw flowers and trees, or even add their names to the front door. This not only makes the playhouse feel personal but also gives them a sense of ownership over their creation.
One of the most exciting aspects of building a cardboard playhouse is that it can be a learning experience for your children. As they engage in this project, they can learn about recycling and the importance of using materials wisely. You can even incorporate educational elements by discussing shapes, measurements, and even basic engineering principles as you work together to create a stable structure. For instance, you might explain how to reinforce the walls with additional cardboard to make sure the playhouse stands strong during playtime.
Once the playhouse is complete, the fun doesn’t have to stop there! You can organize themed play sessions where your kids can dress up and act out their favorite stories inside their new cardboard castle or spaceship. Invite their friends over for a playdate, and watch the magic unfold as they create their own adventures in the world you helped them build.
In addition to being a source of fun, cardboard playhouses are also environmentally friendly. When your children are done playing, the playhouse can be easily dismantled and recycled. This teaches kids about sustainability and the importance of caring for our planet. So not only are you providing them with hours of entertainment, but you’re also instilling valuable lessons about resourcefulness and responsibility.
In conclusion, cardboard playhouses are a fantastic way to foster creativity, learning, and fun in your home. They offer a unique opportunity for parents and children to bond while engaging in a project that is both entertaining and educational. So, gather those cardboard boxes, roll up your sleeves, and let the adventures begin!
- How long does it take to build a cardboard playhouse? The time it takes to build a cardboard playhouse can vary based on its size and complexity, but most simple designs can be completed in a few hours.
- What materials do I need to decorate the playhouse? You can use paint, markers, stickers, and even fabric scraps to decorate your cardboard playhouse. Be creative!
- Can I use smaller boxes to create a playhouse? Absolutely! Smaller boxes can be used to create a more compact playhouse or even a series of smaller structures.
- Is it safe for children to play in cardboard playhouses? Yes, cardboard playhouses are generally safe. Just ensure that there are no sharp edges and supervise young children during playtime.
Educational Games
Creating from cardboard boxes is not only a fun activity for kids but also an excellent way to enhance their learning experience. Imagine transforming a simple cardboard box into a vibrant game that teaches math, spelling, or even science! The beauty of these projects lies in their versatility and the opportunity they provide for parents and children to bond while learning. You can customize these games to cater to your child's interests and educational needs.
One popular idea is to make a cardboard memory game. All you need are some cardboard squares cut from your boxes. Decorate each square with different images or words that your child is currently learning. Once the squares are ready, shuffle them and lay them face down. The objective is simple: flip two squares at a time to find matching pairs. Not only does this game improve memory skills, but it also reinforces vocabulary and recognition.
Another engaging project is creating a cardboard board game. You can design your own game board using a large piece of cardboard. Draw a path with various educational challenges along the way, such as answering trivia questions, solving math problems, or completing fun tasks. Children can roll dice to move along the path, making learning a thrilling adventure. This interactive approach keeps kids motivated and eager to learn.
For younger children, consider crafting a counting game using small cardboard boxes as "stores." Each box can represent a different item, such as fruits or toys. Kids can use play money to "buy" items from the boxes, practicing their counting and basic math skills as they calculate their total purchases. This hands-on experience not only reinforces mathematical concepts but also introduces them to the basics of commerce in a playful way.
To take it a step further, you can create a storytelling game using a cardboard dice. Each side of the dice can feature different characters, settings, or actions. Kids can roll the dice and then create a story based on the elements they roll. This activity not only sparks their imagination but also enhances their language skills and creativity.
Ultimately, the possibilities for using cardboard are endless. The key is to encourage creativity and make learning enjoyable. These DIY projects not only foster a love for learning but also promote recycling and sustainability, showing kids the importance of reusing materials in fun and inventive ways. So gather your cardboard boxes and let the educational adventures begin!
- What age group are these educational games suitable for?
These games can be tailored for various age groups, from toddlers to older children, depending on the complexity of the game and the learning objectives. - Do I need special materials to create these games?
No, most of the materials needed can be found at home, such as cardboard boxes, markers, scissors, and glue. - Can these games be used in a classroom setting?
Absolutely! These DIY games are perfect for engaging students in a classroom and can be adapted to fit various subjects.
Frequently Asked Questions
- What are some easy cardboard box upcycling projects I can start with?
There are plenty of fun projects to dive into! You can start by transforming cardboard boxes into stylish storage solutions, such as decorative bins for your living room or closet. If you're feeling crafty, consider making some unique wall art or even functional furniture like stools or tables. The possibilities are endless!
- Can I use any type of cardboard box for upcycling?
Absolutely! Most cardboard boxes are suitable for upcycling, but the sturdier, thicker ones (like those used for shipping) are often the best choice. They hold up better for projects like furniture or storage. Just make sure to clean them out and remove any tape or labels before you start crafting.
- How can I decorate my upcycled cardboard projects?
Decorating your projects can be as simple or as elaborate as you like! You can use paint, fabric, or even wrapping paper to add color and personality. For a more textured look, try layering different materials or using stencils for patterns. Get creative—this is your chance to express yourself!
- Are cardboard box crafts safe for children?
Yes! Cardboard crafts can be a safe and fun activity for kids, especially with adult supervision. Just make sure to use child-safe scissors and non-toxic materials. Engaging in these crafts not only sparks creativity but also teaches kids about recycling and sustainability.
- What tools do I need for cardboard box upcycling?
You'll need some basic tools like scissors or a craft knife, glue, and possibly a ruler for precise measurements. If you're working on more complex projects, a cutting mat can help protect your surfaces. Don't forget to have some paintbrushes and paints ready for decorating!
- How can upcycling cardboard boxes benefit the environment?
Upcycling cardboard boxes helps reduce waste by giving them a new life instead of sending them to the landfill. It promotes sustainability by encouraging creative reuse of materials, which can lessen the demand for new products and resources. Plus, it’s a fun way to contribute to a greener planet!


