Cool Upcycling Ideas for Broken Tiles
Have you ever looked at a pile of broken tiles and thought, "What a waste!"? Well, it’s time to change that mindset! Broken tiles can be transformed into stunning creations that not only add charm to your home but also promote sustainability. Upcycling is all about creativity, and with a little imagination, those discarded pieces can become functional and decorative items. From vibrant mosaic art to unique coasters, the possibilities are endless! Let’s dive into some innovative ways to repurpose those broken tiles and give them a new life.
Mosaic art is one of the most exciting ways to use broken tiles. Imagine turning those jagged pieces into a breathtaking piece of art that catches the eye of anyone who enters your space. You can create stunning designs for walls, tables, or even outdoor spaces. The beauty of mosaic art lies in its versatility; you can choose any color scheme or pattern that fits your style. Whether you want a classic look or something more contemporary, broken tiles can help you achieve that vision. Plus, it’s a fantastic conversation starter!
Another fantastic way to repurpose broken tiles is by crafting unique coasters. Not only do they serve a practical purpose by protecting your surfaces from moisture and heat, but they also add a personal touch to your home decor. Imagine sipping your morning coffee while resting it on a beautifully designed coaster that you made yourself. It’s a small yet impactful way to showcase your creativity. Plus, making coasters is a relatively simple project that can be completed in a weekend!
Ready to get started? Here’s a simple guide to transform those broken tiles into stylish coasters:
- Gather Your Materials: You’ll need broken tiles, cork or felt for the base, adhesive, and a sealant.
- Prepare the Tiles: Clean the tiles thoroughly and, if necessary, sand down any sharp edges.
- Arrange Your Design: Play around with the layout of the tiles before gluing them down.
- Adhere the Tiles: Use a strong adhesive to secure the tiles onto the cork or felt base.
- Seal Your Coasters: Once the adhesive is dry, apply a sealant to protect your coasters from moisture.
When it comes to choosing an adhesive for your tile projects, it’s essential to select one that provides a strong bond. Consider using epoxy or construction adhesive for durability. These adhesives are designed to withstand daily use, ensuring your coasters remain intact for years to come.
To enhance the durability of your coasters, explore various sealing options. A clear acrylic spray or polyurethane can provide a protective layer, making your coasters resistant to stains and moisture. Not only does this increase their longevity, but it also gives them a polished and professional look!
Now that you have the basics down, let’s talk about design! Here are some ideas to spark your creativity:
- Geometric Patterns: Use tiles of different colors and shapes to create modern geometric designs.
- Nature-Inspired Themes: Incorporate earthy tones and shapes reminiscent of leaves or flowers.
- Personalized Touches: Add initials or meaningful symbols to make your coasters truly unique.
Transforming your outdoor space can be just as rewarding as beautifying your indoor areas. Consider creating a decorative pathway using broken tiles! It’s a great way to add color and texture to your garden while utilizing materials that would otherwise go to waste. Imagine walking through a vibrant, tiled pathway that leads you to your favorite garden spot. Not only does it enhance your outdoor aesthetics, but it also contributes to an eco-friendly lifestyle.
Before you start laying down tiles, it’s crucial to plan your layout. Think about the design patterns and spacing that will create an eye-catching result. You can opt for a random arrangement for a more organic feel or create a structured pattern for a polished look. Take your time to visualize how you want the pathway to flow through your garden.
When installing your tile pathway, ensure stability and longevity by following these essential tips:
- Prepare the Ground: Level the ground and add a layer of sand or gravel for drainage.
- Use Spacers: To maintain uniform gaps between tiles, consider using spacers.
- Secure with Adhesive: Use a strong adhesive to bond the tiles to the ground, ensuring they stay in place.
Wall art is another fantastic way to showcase your creativity with broken tiles. By turning discarded pieces into striking focal points, you can breathe new life into any room. Whether you create a large statement piece or a series of smaller artworks, your tile creations are sure to impress guests and family alike.
To enhance the visual appeal of your tile art, consider various framing techniques. You can use simple wooden frames or go for a more elaborate design with reclaimed materials. The frame not only adds structure but also draws attention to your artwork, making it a standout piece in your decor.
When creating tile wall art, pay attention to color coordination. Choose colors that harmonize with your existing decor, adding a unique touch without clashing with your overall theme. This thoughtful approach ensures that your tile art complements your space beautifully.
Q: Can I use any type of tile for upcycling projects?
A: Yes! You can use ceramic, porcelain, or glass tiles. Just ensure they are clean and free of sharp edges.
Q: What tools do I need for these projects?
A: Basic tools include adhesive, sealant, a cutting tool (if necessary), and protective gear like gloves.
Q: How can I ensure my projects are durable?
A: Use strong adhesives and sealants designed for tile projects to enhance durability and longevity.
Creative Mosaic Art
Creating mosaic art from broken tiles is not just a fun project; it's a transformative experience that allows you to breathe new life into discarded materials. Imagine the thrill of turning those once unusable fragments into stunning pieces of art that can adorn your walls, tables, or even your garden! The beauty of mosaic art lies in its ability to tell a story through color, texture, and design, making it a perfect way to express your creativity while promoting sustainability.
To get started, gather your broken tiles and a few essential materials. You’ll need a sturdy base, such as a piece of plywood or an old table, tile adhesive, and grout. When choosing your tiles, consider a mix of colors and textures. This variety will add depth and interest to your mosaic. You might even want to include some glass or ceramic pieces for added flair. The process of assembling your mosaic can be likened to putting together a puzzle, where every piece has its place, and the end result is a beautiful masterpiece.
Once you have your materials ready, it’s time to unleash your imagination! Start by sketching a rough design of what you want to create. This could be anything from a geometric pattern to a more organic shape inspired by nature. Don’t be afraid to experiment; after all, the beauty of mosaic art is in its imperfections. As you begin placing your tiles, remember to leave some space between them for the grout. This space not only enhances the visual appeal but also helps secure each piece in place.
After you’ve laid out your design and adhered the tiles to your base, allow everything to dry completely. Then comes the fun part—grouting! Mix your grout according to the package instructions, and carefully spread it over the tiles, ensuring that it fills all the gaps. Once the grout has set for a few minutes, use a damp sponge to wipe away any excess from the tile surfaces. This will reveal the vibrant colors of your mosaic and give it a polished look.
Finally, consider how you want to display your masterpiece. Whether it’s hanging on a wall or placed on a table, your mosaic art will surely be a conversation starter. Plus, it’s a fantastic way to showcase your artistic skills while contributing to a more sustainable lifestyle by reusing materials that would otherwise end up in a landfill.
In summary, creating mosaic art from broken tiles is a rewarding project that combines creativity with sustainability. So, gather your materials, let your imagination run wild, and transform those broken pieces into a stunning work of art that you can proudly display in your home!
- What types of tiles can I use for mosaic art? You can use ceramic, glass, porcelain, or even natural stone tiles. The key is to choose materials that can withstand the adhesive and grout.
- How do I clean my mosaic art? Use a damp cloth to wipe away dust and dirt. Avoid harsh chemicals that could damage the tiles or grout.
- Can I use mosaic art outdoors? Yes, but make sure to use outdoor-rated adhesive and grout to ensure durability against the elements.
- How long does it take for the grout to dry? Typically, grout takes about 24 hours to fully cure, but always check the manufacturer's instructions for specific drying times.
Unique Coasters
Have you ever thought about how those broken tiles lying around could be transformed into something not just functional, but also uniquely beautiful? Coasters are the perfect solution! Not only do they protect your surfaces from unsightly water rings and heat marks, but they can also serve as stunning pieces of art that reflect your personal style. With a little creativity and some simple tools, you can turn those fragments into coasters that will surely impress your guests and spark conversations.
Creating coasters from broken tiles is a fantastic way to add a personal touch to your home decor. Imagine sipping your favorite beverage while resting it on a coaster that showcases vibrant colors and intricate patterns. The beauty of using broken tiles is that no two coasters will ever be the same! Each piece tells a story, and you can mix and match different colors and textures to create a set that truly represents your taste.
Before diving into the crafting process, it’s essential to gather your materials. You'll need:
- Broken tiles (ceramic or glass work best)
- Strong adhesive (more on this later!)
- Felt or cork backing (to protect your surfaces)
- Grout (optional, for a more finished look)
- Sealant (to protect your coasters from moisture)
Once you have everything ready, you can unleash your creativity! The process is straightforward and can be a fun activity to do alone or with friends. You can create coasters in various shapes and sizes, making them perfect for different occasions. Whether it's a casual get-together or a formal dinner, your unique coasters will add a special touch to your table setting.
In the next sections, we’ll dive into a step-by-step guide on how to craft these coasters, ensuring you have all the tips and tricks you need to make your project a success. You’ll learn about choosing the right adhesive, applying finishing touches, and even explore some design ideas that will inspire you to think outside the box.
Ready to get started? Let’s break it down into simple steps so you can create your own stunning coasters!
One of the most critical aspects of making durable coasters is selecting the right adhesive. You want something that will hold your tiles firmly together while also being resistant to moisture. Here’s a quick comparison of some popular adhesives:
| Adhesive Type | Pros | Cons |
|---|---|---|
| White Glue | Easy to use, non-toxic | Not water-resistant |
| Epoxy | Very strong bond, water-resistant | Can be messy, requires mixing |
| Hot Glue | Quick drying, easy to apply | May not hold heavy tiles well |
Choosing the right adhesive will ensure that your coasters last through many gatherings and coffee breaks!
After assembling your coasters, it's time for the finishing touches! Applying a sealant is crucial to protect your coasters from moisture and stains. You can use a clear acrylic spray or a brush-on sealant. This step not only enhances durability but also adds a polished look to your creations, making them even more appealing.
In conclusion, creating unique coasters from broken tiles is a delightful way to express your creativity while promoting sustainability. So, gather your materials, unleash your imagination, and start crafting coasters that are not just practical, but also a true reflection of your style!
Here are some common questions you might have about creating coasters from broken tiles:
- Can I use any type of tile? - While ceramic and glass tiles are ideal, you can experiment with other materials as long as they are durable.
- How do I clean my tile coasters? - Simply wipe them down with a damp cloth. Avoid soaking them in water.
- Will my coasters absorb moisture? - If sealed properly, your coasters should resist moisture and stains effectively.
Step-by-Step Guide
Creating stylish coasters from broken tiles is not just a fun DIY project, but it's also a fantastic way to add a personal touch to your home decor. The process is straightforward, and you'll be amazed at how something that was once deemed useless can transform into a functional piece of art. So, let’s dive into the step-by-step guide that will help you turn those broken tiles into beautiful coasters that will impress your guests!
First things first, gather your materials. You'll need:
- Broken tiles (ceramic or glass work best)
- Adhesive (such as tile adhesive or strong craft glue)
- Felt pads (to protect your surfaces)
- Grout (optional, for a more finished look)
- Sealant (to waterproof your coasters)
- Tools: A sponge, a small bucket for mixing grout, and a cutting tool if you want to shape your tiles further.
Once you have everything ready, it’s time to start crafting! Begin by selecting the tiles you want to use. You can choose a mix of colors and patterns for a more eclectic look, or go for a uniform style if you prefer something more cohesive. After selecting your tiles, clean them thoroughly to remove any dust or debris, as this will help the adhesive bond better.
Next, it’s time to arrange your tiles on a flat surface. Play around with different layouts until you find one that you love. This is where your creativity shines! Once you're satisfied with the arrangement, it’s time to glue them down. Apply a generous amount of adhesive to the back of each tile, pressing them firmly onto a sturdy base, such as a piece of cork or wood.
If you're using grout, allow the adhesive to dry as per the manufacturer's instructions before applying it. Once the tiles are secure, spread grout over the gaps between the tiles using a sponge or your fingers. Make sure to wipe away any excess grout from the surface of the tiles to keep them looking sharp.
After the grout has set, the final step is to seal your coasters. This will protect them from moisture and stains, ensuring they last a long time. Apply a sealant according to the instructions on the product, and let it dry completely. Once finished, attach felt pads to the bottom of each coaster to prevent scratching your surfaces.
And just like that, you have created beautiful, unique coasters that not only serve a purpose but also showcase your artistic flair! These coasters make for great conversation starters and can even be gifted to friends and family. So, gather those broken tiles and get crafting!
Q: What type of tiles work best for coasters?
A: Ceramic and glass tiles are ideal for coasters due to their durability and ease of cleaning. Avoid using porous tiles, as they may absorb moisture.
Q: Can I use these coasters for hot drinks?
A: Yes, as long as you use a heat-resistant adhesive and sealant, your coasters can handle hot drinks. However, it’s always a good idea to place a hot pad underneath very hot items just to be safe.
Q: How do I clean my tile coasters?
A: Simply wipe them down with a damp cloth. For tougher stains, a mild detergent can be used. Avoid abrasive cleaners that could scratch the surface.
Q: Can I customize the size of my coasters?
A: Absolutely! You can cut the tiles to your desired size before starting your project. Just ensure you use appropriate tools and safety measures.
Choosing the Right Adhesive
When it comes to crafting coasters from broken tiles, selecting the right adhesive is crucial for ensuring that your creations are not only beautiful but also durable. Imagine your coasters as the unsung heroes of your coffee table, tirelessly protecting it from spills and heat. To achieve this, you need an adhesive that can withstand the daily wear and tear of life. There are several types of adhesives you can choose from, each with its own unique properties and benefits.
First on the list is thin-set mortar, often used in tile installations. This adhesive is incredibly strong and ideal for heavier tiles. However, it requires some skill to apply correctly. If you’re feeling adventurous and want your coasters to last through countless coffee spills, this might be the way to go!
Another popular choice is epoxy resin. This adhesive is known for its superior bonding strength and resistance to moisture, making it perfect for coasters that will frequently come into contact with liquids. Plus, it dries clear, so it won’t detract from the beauty of your tile designs. Just be sure to follow the mixing instructions carefully to get the best results.
If you prefer a more straightforward approach, craft glue is a user-friendly option. While it may not be as durable as the previous two choices, it’s perfect for light-duty coasters and quick projects. Just keep in mind that these coasters may not hold up as well against heat or moisture over time.
To help you make an informed decision, here’s a quick comparison of the three types of adhesives:
| Type of Adhesive | Strength | Moisture Resistance | Best For |
|---|---|---|---|
| Thin-set Mortar | High | Moderate | Heavy tiles, long-lasting projects |
| Epoxy Resin | Very High | Excellent | Durable, moisture-prone projects |
| Craft Glue | Low | Poor | Light-duty, quick projects |
In summary, the adhesive you choose will depend largely on the intended use of your coasters and the materials you’re working with. For a project that combines aesthetics with functionality, epoxy resin is often the best choice due to its strength and moisture resistance. However, if you're looking for a simpler, more casual project, craft glue can still yield charming results. Ultimately, the right adhesive will help you create coasters that not only look great but also stand the test of time.
Finishing Touches
Once you've crafted your stylish coasters from broken tiles, it’s time to focus on the that will elevate your creations from simple DIY projects to stunning, functional art pieces. These final steps not only enhance the aesthetic appeal of your coasters but also ensure their longevity and usability in your home. First, let’s talk about sealing. Applying a sealant is crucial as it protects the surface from moisture and stains, which is particularly important if you plan to use your coasters for beverages. You have a variety of sealing options to consider, including spray sealants, brush-on sealants, and even epoxy resin for a more glossy finish.
When selecting a sealant, think about the look you want to achieve. For a natural, matte finish, a water-based sealant works wonders, while a glossy finish can be achieved with a polyurethane sealant. If you’re feeling adventurous, epoxy resin can give your coasters a high-gloss, durable surface that’s not only beautiful but also incredibly resilient. Just remember to follow the manufacturer's instructions for the best results, as each type of sealant may have different application and curing times.
In addition to sealing, consider adding felt pads to the bottom of each coaster. These pads serve two purposes: they protect your furniture from scratches and provide a non-slip surface, ensuring that your coasters stay in place even when glasses are placed on them. You can find adhesive felt pads at any craft store, and they come in various sizes to fit your coasters perfectly. Simply peel off the backing and stick them onto the underside of each tile.
Lastly, don’t underestimate the power of personalization. You can add a personal touch by painting or stenciling designs onto the tiles before sealing them. This is a fantastic way to incorporate your unique style and make your coasters truly one-of-a-kind. Whether it’s a simple monogram, a favorite quote, or a vibrant pattern, these personal touches can transform your coasters into cherished keepsakes.
In summary, the finishing touches are what truly bring your broken tile coasters to life. By sealing them properly, adding felt pads, and personalizing your designs, you’ll not only enhance their functionality but also create beautiful pieces that reflect your creativity and style.
Here are some common questions that DIY enthusiasts often ask about finishing touches for tile coasters:
- What type of sealant is best for tile coasters? - Water-based sealants are great for a matte finish, while polyurethane provides a glossy look. For a durable option, consider using epoxy resin.
- Can I use the coasters immediately after sealing? - It's best to wait for the sealant to cure completely, which can take anywhere from a few hours to a couple of days, depending on the product used.
- Do I need to add felt pads to my coasters? - While not mandatory, felt pads help protect surfaces and prevent slipping, making them a wise addition.
- How can I personalize my tile coasters? - You can paint or stencil designs on your coasters before sealing them. This adds a unique touch that reflects your style.

Design Ideas
When it comes to transforming broken tiles into stunning coasters, the possibilities are as endless as your imagination. Let's dive into some creative design ideas that will not only showcase your artistic flair but also add a personal touch to your home decor. Think of each broken tile as a blank canvas, waiting for your unique vision to bring it to life. Whether you prefer bold geometric patterns or gentle nature-inspired themes, there’s something for everyone. Here are a few ideas to spark your creativity:
- Geometric Patterns: Create a modern look by arranging tiles in sharp, angular designs. Use contrasting colors to make the patterns pop. This style can convey a sense of order and sophistication.
- Nature-Inspired Themes: Embrace the beauty of the outdoors by incorporating colors and shapes found in nature. Think leaf patterns, floral designs, or even ocean waves. Using earthy tones can evoke a sense of tranquility.
- Color Blocks: For a vibrant and playful feel, consider a color-blocking approach. Mix and match tiles of different colors to create a fun mosaic effect that will brighten up any space.
- Personalized Messages: Why not add a personal touch? Use tiles to spell out meaningful words or phrases. This could be anything from a family name to an inspirational quote that resonates with you.
- Seasonal Designs: Change things up with the seasons! Create coasters that reflect the time of year – think autumn leaves, winter snowflakes, spring flowers, or summer sun motifs.
Each of these design ideas not only enhances the aesthetic appeal of your coasters but also tells a story. Just like a good book, your coasters can express your personality and interests. Imagine serving drinks to guests on coasters that reflect your love for nature or your passion for modern art. It’s not just about functionality; it’s about creating a conversation starter!
Additionally, consider the size and shape of your tiles. Rectangular, square, or even circular tiles can create different visual effects. Mixing shapes can add an unexpected twist to your design, making your coasters even more unique. Don’t shy away from experimenting! Sometimes, the most beautiful creations come from a bit of trial and error.
Lastly, remember that the finish of your tiles can also play a significant role in the overall look. A glossy finish can give a modern and sleek vibe, while a matte finish might evoke a rustic charm. Choose what resonates with your style and complements the rest of your decor.
Q: Can I use any type of broken tile for my projects?
A: Yes! Most ceramic, porcelain, or glass tiles work well for upcycling projects. Just make sure to handle them carefully to avoid sharp edges.
Q: How do I ensure my coasters are waterproof?
A: Seal your coasters with a waterproof sealant after they are fully assembled. This will protect them from moisture and heat.
Q: What tools do I need for cutting tiles?
A: A tile cutter or a glass cutter is ideal for cutting tiles. Always wear safety gear, such as gloves and goggles, when working with sharp materials.
Q: How can I clean my tile projects?
A: Simply wipe them down with a damp cloth. Avoid harsh chemicals that could damage the surface finish.
With these design ideas and tips, you're ready to embark on your upcycling journey. Let your creativity flow and enjoy the process of turning broken tiles into beautiful, functional art!
Garden Pathway Decor
Transforming your outdoor space with decorative pathways made from broken tiles is not just an eco-friendly choice; it’s a creative way to add personality and charm to your garden. Imagine stepping into your backyard and being greeted by a vibrant mosaic of colors and textures, all crafted from pieces that would otherwise end up in the landfill. It’s a win-win situation for both your home and the environment!
Creating a tile pathway allows you to express your personal style while utilizing materials that are often overlooked. You can mix and match different colors, shapes, and sizes of tiles to create a unique design that reflects your taste. Whether you prefer a rustic look with earthy tones or a modern vibe with bright, bold colors, the possibilities are endless. Plus, broken tiles are durable and can withstand the elements, making them a practical choice for outdoor decor.
When planning your garden pathway, consider how it will fit into the overall landscape. Will it lead to a cozy seating area, meander through flower beds, or connect different sections of your garden? Layout planning is crucial for achieving an eye-catching result. You might want to sketch out your design on paper before you begin, taking into account the natural flow of the space. Think of your pathway as a roadmap for your garden—where do you want it to lead, and what do you want to highlight along the way?
Once you have your design in mind, it’s time to focus on the installation. Here are some essential tips to ensure your tile pathway is not only beautiful but also stable and long-lasting:
- Prepare the Ground: Clear the area of grass, weeds, and debris. Level the ground to create a solid base for your tiles.
- Use Sand or Gravel: Lay down a layer of sand or gravel to provide drainage and prevent shifting. This will help your pathway stay intact over time.
- Secure the Tiles: Arrange the tiles according to your design, pressing them firmly into the sand or gravel. Make sure to leave small gaps between the tiles for a more natural look.
- Fill the Gaps: Once the tiles are set, fill the gaps with sand or small pebbles to keep them in place and enhance the aesthetic.
As you install your pathway, don’t forget to take breaks and step back to admire your progress. It’s easy to get caught up in the details, but the overall effect is what truly matters. Just like creating a beautiful piece of art, building a tile pathway is about finding balance and harmony in your design.
Once your pathway is complete, you might want to enhance it further with surrounding plants, decorative stones, or even solar lights to illuminate the path at night. This will not only make your garden more inviting but will also highlight the beauty of your new tile pathway.
Q: Can I use any type of broken tile for my pathway?
A: Yes! You can use ceramic, porcelain, or glass tiles. Just ensure they are durable enough for outdoor use.
Q: How do I maintain my tile pathway?
A: Regularly sweep away debris and wash the tiles with water and mild soap to keep them looking fresh.
Q: Will the tiles crack in extreme weather?
A: While most tiles are durable, extreme temperature changes can cause some materials to crack. Opt for frost-resistant tiles if you live in a colder climate.
Layout Planning
Planning the layout of your broken tile pathway is a crucial step that can make or break the overall aesthetic of your garden. Just like a painter carefully considers the canvas before splashing colors, you need to visualize how the tiles will come together. Start by sketching a rough outline of your garden area where the pathway will be installed. This will help you determine the best placement for your tiles, ensuring that they complement your existing landscape rather than clash with it.
Consider the design patterns you want to create. Do you prefer a random scatter of colors that evoke a playful vibe, or a more structured geometric pattern that speaks to modern elegance? A few popular design ideas include:
- Herringbone: A classic pattern that adds sophistication.
- Spiral: A whimsical approach that draws the eye.
- Checkerboard: Timeless and versatile, perfect for any garden style.
Once you’ve decided on a pattern, it’s time to think about the spacing between the tiles. Proper spacing not only enhances the visual appeal but also allows for drainage and prevents water pooling, which can lead to slippery surfaces or even damage over time. A good rule of thumb is to leave about a quarter to half an inch between tiles, depending on their size.
Next, walk through your garden and envision how the pathway will guide visitors. Will it lead them to a cozy seating area, or perhaps to a vibrant flower bed? The pathway should create a natural flow, inviting people to explore every nook and cranny of your garden. You might even want to use a garden hose or rope to outline the pathway temporarily, allowing you to adjust the layout until it feels just right.
Finally, don’t forget to consider the environmental factors. Think about how sunlight and shade will affect the pathway throughout the day. If certain areas receive more sunlight, you may want to choose lighter tiles to avoid them getting too hot. Conversely, shaded areas might benefit from darker tiles that absorb heat.
By taking the time to plan your layout carefully, you’ll ensure that your broken tile pathway not only looks stunning but also serves its purpose effectively. Happy tiling!
Q: How do I choose the right tiles for my pathway?
A: Look for tiles that are durable and can withstand outdoor conditions. Porcelain or ceramic tiles are excellent choices due to their resilience.
Q: Can I use any type of adhesive for outdoor tiles?
A: It's best to use a waterproof adhesive specifically designed for outdoor use to ensure your tiles stay secure over time.
Q: How can I maintain my tile pathway?
A: Regular cleaning with mild soap and water will keep your pathway looking fresh. Additionally, sealing the tiles can help protect them from stains and weather damage.
Installation Tips
When it comes to installing your beautiful broken tile pathway, there are several essential tips that can make the difference between a stunning outdoor feature and a frustrating project. First and foremost, planning your pathway layout is crucial. Take some time to sketch out your design on paper or even in the dirt to visualize how the tiles will fit together. Be sure to consider the shape and size of your tiles, as well as the overall flow of your garden. You might want to create a winding path that invites exploration or a straight path that leads directly to a focal point, like a garden bench or a flower bed.
Next, before you start laying down your tiles, prepare the ground properly. This means clearing away any grass, weeds, or debris and leveling the area where your pathway will go. A solid foundation will not only make your tiles look better but will also prevent them from shifting over time. If your ground is particularly uneven, you might consider adding a layer of sand or gravel to create a more stable base. Remember, a little extra effort in preparation can save you a lot of headaches later!
Once your area is ready, it’s time to get down to the nitty-gritty of installation. When you start laying your tiles, leave small gaps between them to allow for expansion and contraction due to temperature changes. This is especially important if you live in an area with extreme weather conditions. You can use spacers or simply eyeball it, but consistency is key for a professional-looking finish. As you lay each tile, gently press down to ensure a good bond with the base material.
After the tiles are laid, it’s time to fill in those gaps. You can use a mixture of sand and cement or simply sand, depending on the look you want to achieve. Ensure that the mixture is packed tightly into the gaps to provide stability and prevent weeds from growing through. Finally, once everything is set, give your pathway a good rinse to clear away any excess sand or debris, and voilà! You have a beautiful, unique pathway that not only enhances your garden but also showcases your creativity.
With these tips in mind, you’re well on your way to creating a stunning tile pathway that will be the envy of your neighborhood. Just remember, like any DIY project, patience and attention to detail are your best friends!
- Can I use any type of tile for my pathway? Yes, you can use various types of tiles, but ensure they are durable and suitable for outdoor use.
- How do I clean my tile pathway? Regular sweeping and occasional washing with water and mild soap will keep your pathway looking great.
- Will my tile pathway crack in winter? If properly installed with the right materials, your pathway should withstand winter conditions, but it's good to check for any cracks after heavy frost.
- How long will my tile pathway last? With proper care and installation, a tile pathway can last for many years, providing both beauty and functionality.

Wall Art Displays
Are you tired of the same old wall decor that everyone else seems to have? It’s time to think outside the box and unleash your inner artist with broken tiles. These discarded pieces can be transformed into stunning wall art displays that not only beautify your space but also tell a story of creativity and sustainability. Imagine walking into a room and being greeted by a vibrant mosaic that reflects your personality—now that’s a conversation starter!
Creating wall art from broken tiles is like piecing together a puzzle, where each fragment adds character and charm to the overall design. You can play with different shapes, sizes, and colors to craft a piece that resonates with your style. Whether you prefer a bold abstract design or a more delicate floral pattern, the possibilities are endless. Plus, using broken tiles means you’re not only repurposing materials but also contributing to a more sustainable way of decorating your home.
When it comes to framing your tile art, you have a few options to consider. You can opt for a traditional frame that complements the colors in your mosaic, or you might choose to leave the edges raw for a more rustic look. Either way, framing enhances the visual appeal of your creation and makes it stand out as a focal point in your decor. Here are some popular framing techniques to consider:
- Shadow Box Frames: Perfect for adding depth to your tile art.
- Floating Frames: Creates the illusion that your art is suspended in mid-air.
- Simple Wooden Frames: Offers a classic touch that works well with any style.
Color coordination is another essential aspect of creating stunning tile wall art. You want your piece to harmonize with your existing decor while also standing out in its own right. A good rule of thumb is to choose a color palette that resonates with your room's overall theme. For instance, if your space is filled with earthy tones, incorporating tiles in shades of green, brown, and cream can create a seamless flow. On the other hand, if you want to make a bold statement, consider using vibrant colors that contrast with your walls.
To help you get started, here’s a simple table outlining some popular color combinations you might want to explore:
| Color Palette | Best For |
|---|---|
| Warm Tones (Red, Orange, Yellow) | Creating a cozy, inviting atmosphere |
| Cool Tones (Blue, Green, Purple) | Promoting a calm, relaxing environment |
| Neutral Tones (White, Gray, Beige) | Achieving a modern, minimalist look |
| Bold Contrasts (Black, White, Bright Colors) | Making a striking statement piece |
In conclusion, transforming broken tiles into wall art displays is not just about beautifying your space; it’s about expressing yourself and making a sustainable choice. So gather those fragments, unleash your creativity, and let your walls tell a story that’s uniquely yours!
Q: What types of tiles can I use for wall art?
A: You can use any type of broken tiles, including ceramic, porcelain, and glass. Each type offers different textures and colors that can enhance your design.
Q: Do I need special tools to create tile wall art?
A: Basic tools like tile cutters, adhesive, and grout are helpful, but you can also create beautiful designs with just a strong adhesive and a good eye for layout.
Q: How do I hang my tile wall art?
A: Depending on the weight of your piece, you can use picture hooks, nails, or even adhesive strips. Make sure to choose a method that securely supports your artwork.
Q: Can I change the design later?
A: Yes! If you ever want to refresh your decor, many tile art pieces can be removed and replaced with new designs without damaging your walls.
Framing Techniques
Explore innovative ways to repurpose broken tiles creatively, transforming them into functional and decorative items for your home while promoting sustainability and reducing waste.
Discover how to create stunning mosaic art pieces using broken tiles, turning fragments into beautiful designs for walls, tables, and outdoor spaces.
Learn how to craft stylish coasters from broken tiles, adding a personal touch to your home decor while protecting surfaces from moisture and heat.
Follow this simple guide to transform broken tiles into coasters, including materials needed and easy instructions for a successful project.
Understand the different types of adhesives suitable for tile projects, ensuring a strong bond for your coasters that withstand daily use.
Explore various sealing options to protect your tile coasters, enhancing their durability while adding a polished look to your creations.
Get inspired by various design ideas for tile coasters, from geometric patterns to nature-inspired themes, allowing you to express your creativity.
Transform your outdoor space with decorative pathways made from broken tiles, adding color and texture to your garden while utilizing materials that would otherwise go to waste.
Learn how to plan the layout of your tile pathway, considering design patterns and spacing for an eye-catching result that enhances your garden.
Discover essential tips for installing your tile pathway, ensuring stability and longevity while creating a stunning outdoor feature.
Explore how to create eye-catching wall art using broken tiles, turning discarded pieces into striking focal points for any room in your home.
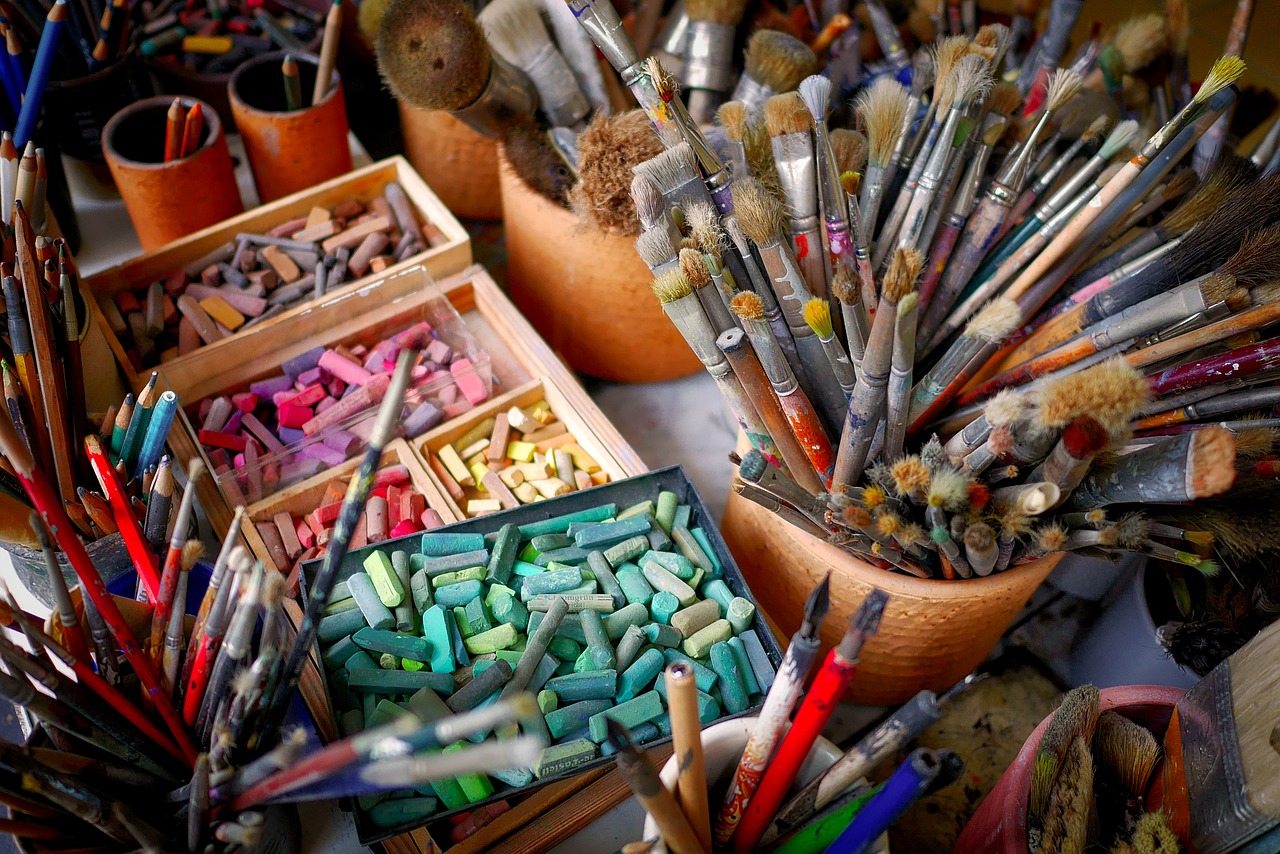
When it comes to showcasing your tile art, the right framing techniques can elevate your creation to new heights. Imagine your broken tile masterpiece as a diamond in the rough; framing is the setting that makes it shine. There are several approaches you can take, depending on the style you wish to achieve and the space you have available. One popular method is using a simple wooden frame. This can be stained or painted to match your decor, providing a rustic or modern look. You can also consider using shadow boxes, which add depth and dimension to your art, allowing for a more three-dimensional display.
If you're feeling particularly adventurous, think about creating a DIY frame from reclaimed materials. Old windows, doors, or even pallet wood can be transformed into unique frames that tell a story. The juxtaposition of the rough frame with the polished tiles can create a stunning visual contrast. Don't forget to take into account the color palette of your tiles. Coordinating your frame color with the hues in your tiles can create a cohesive and harmonious look, drawing the eye to your artwork.
Additionally, you might want to consider the placement of your framed tile art. Hanging it at eye level or grouping multiple pieces can create a gallery wall effect, making a bold statement in your home. Remember, the frame should complement your tile art, not overshadow it. So, choose wisely and let your creativity flow!
Understand how to coordinate colors when creating tile wall art, ensuring harmony with your existing decor while adding a unique touch.
Q: Can I use any type of tile for these projects?
A: While most ceramic and porcelain tiles work well, avoid using glass tiles for certain projects due to their fragility.
Q: How do I clean my upcycled tile projects?
A: Use a damp cloth for general cleaning. For tougher stains, a mild detergent can be applied.
Q: Are these projects suitable for beginners?
A: Absolutely! Many of these projects are beginner-friendly and require minimal tools and materials.
Q: How can I ensure my tile art lasts?
A: Using the right adhesives and sealants will help protect your projects from wear and tear.
Color Coordination
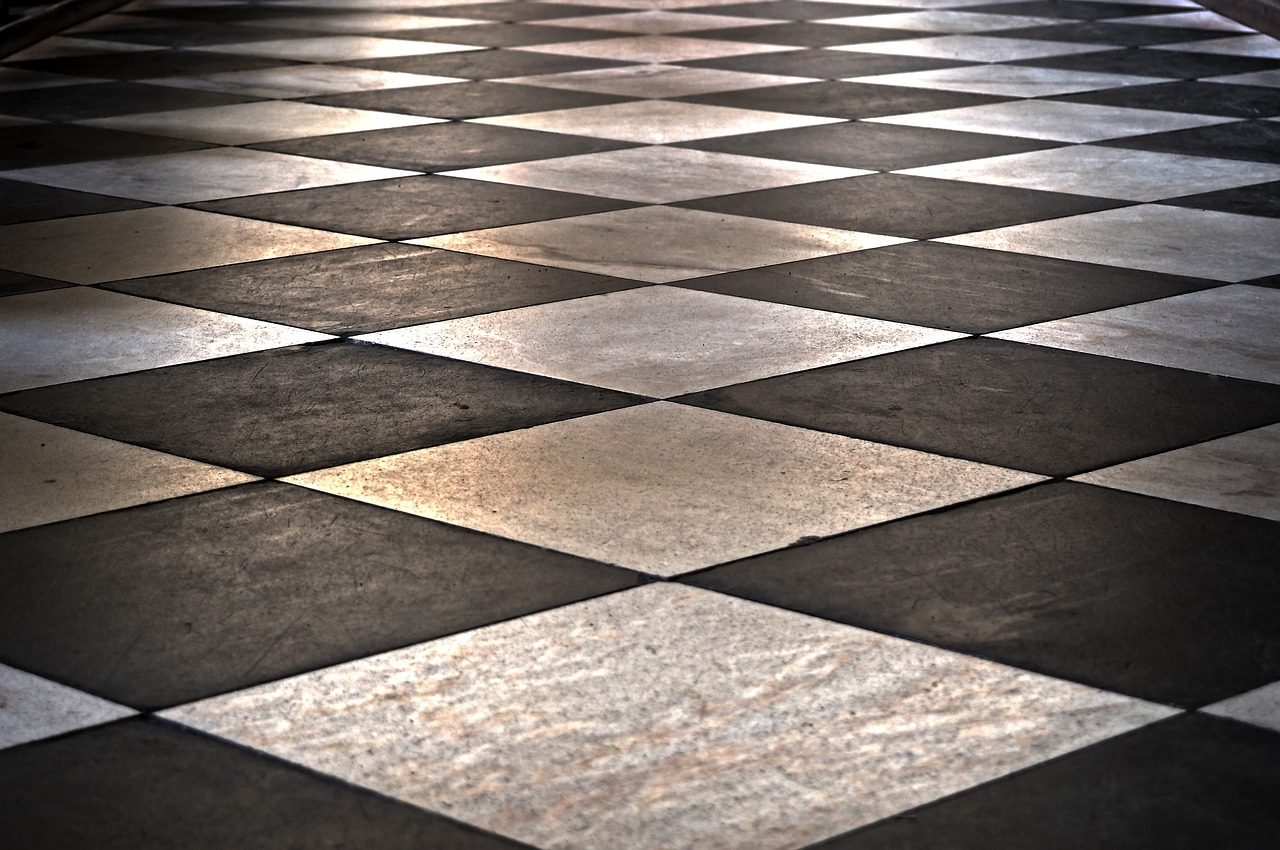
When it comes to creating stunning wall art with broken tiles, is crucial. The right colors can transform your art from a mere collection of fragments into a cohesive masterpiece that draws the eye and enhances your space. Think of your tile art as a puzzle; each piece must fit together not just physically, but visually as well. It's all about creating a balance that resonates with the overall aesthetic of your home.
First, consider the color wheel. This handy tool can guide you in selecting complementary colors that make your artwork pop. For instance, if your room features warm hues like reds and oranges, incorporating tiles in shades of blue or green can create a striking contrast that invigorates the space. Alternatively, if you prefer a more harmonious look, choose tiles that are analogous—colors that sit next to each other on the color wheel, like yellows, greens, and blues. This will create a soothing effect, perfect for tranquil spaces like bedrooms or reading nooks.
Another factor to consider is the texture of the tiles. Glossy tiles can reflect light and add a modern touch, while matte tiles offer a more rustic feel. Mixing these textures can also add depth to your art piece. Imagine a mosaic where glossy, vibrant tiles meet earthy, textured ones; the interplay can create a dynamic visual experience that keeps the viewer engaged.
As you plan your color scheme, think about the existing decor in your home. Pulling colors from your furniture, curtains, or even artwork can create a sense of unity throughout your space. For example, if your living room features a deep navy sofa, incorporating tiles in similar shades can tie the whole room together. You might even want to create a mood board to visualize how different colors will work together before you start your project. This can be as simple as cutting out swatches from magazines or using digital tools to experiment with color combinations.
To help you get started, here’s a quick overview of popular color combinations that work well in tile art:
| Color Combination | Effect |
|---|---|
| Blue & Orange | Vibrant contrast that energizes a space. |
| Green & Yellow | Fresh and cheerful, perfect for kitchens or gardens. |
| Purple & Gold | Luxurious and elegant, ideal for formal areas. |
| Black & White | Timeless and classic, adds sophistication. |
Ultimately, the key to successful color coordination in your tile art lies in experimentation and personal expression. Don’t be afraid to play with different combinations until you find the one that feels right for you. After all, this is your art, and it should reflect your unique style and personality. So gather those broken tiles, unleash your creativity, and watch as your vision comes to life!
- What types of tiles are best for upcycling projects?
Any type of tile can work, but ceramic and glass tiles are particularly popular due to their durability and variety of colors.
- How do I clean broken tiles before using them?
Make sure to wash the tiles with soap and water to remove any dirt or residue. Allow them to dry completely before starting your project.
- Can I use broken tiles outdoors?
Yes! Just ensure that the tiles you choose are suitable for outdoor use and can withstand various weather conditions.
Frequently Asked Questions
- What can I do with broken tiles?
Broken tiles can be transformed into a variety of creative and functional items! You can create stunning mosaic art, stylish coasters, decorative garden pathways, and even eye-catching wall art displays. The possibilities are endless, and it’s a fantastic way to repurpose materials that would otherwise go to waste.
- How do I start a mosaic art project with broken tiles?
To start a mosaic art project, gather your broken tiles, a sturdy base (like wood or a canvas), and some adhesive. Sketch out your design on the base, then begin placing the tile pieces according to your plan. Once you’re satisfied with the layout, glue the tiles down and let them dry. Finish with grout to fill in the gaps for a polished look!
- What materials do I need to make tile coasters?
For making tile coasters, you will need broken tiles, a strong adhesive like epoxy or tile glue, cork or felt pads for the bottom, and a sealant to protect your coasters. Optionally, you can add decorative elements like paint or decoupage to personalize your coasters further.
- How do I ensure my tile pathway is stable?
To ensure your tile pathway is stable, start by preparing a solid base with compacted soil or gravel. Lay out your tiles in the desired pattern, leaving small gaps for drainage. Use a strong adhesive or mortar to secure the tiles in place. Finally, fill the gaps with sand or gravel to provide extra stability and prevent shifting over time.
- Can I use any kind of adhesive for tile projects?
Not all adhesives are created equal! For tile projects, it’s best to use adhesives specifically designed for ceramics or tiles, such as thin-set mortar or tile adhesive. These options provide a strong bond and are resistant to moisture, ensuring your creations last.
- How should I finish my tile art for durability?
To finish your tile art for durability, consider applying a sealant once your project is complete. This will protect it from moisture and wear while enhancing the colors. Make sure to choose a sealant that is appropriate for the materials you used and follow the manufacturer's instructions for the best results.
- What design ideas can I use for my tile coasters?
When it comes to designing your tile coasters, the sky's the limit! You can explore geometric patterns, floral designs, or even abstract art. Nature-inspired themes like leaves or waves can add a fresh touch. Don’t be afraid to mix and match colors and shapes to reflect your personal style!


