Decor Ideas: DIY Headboards for Your Bedroom
Transforming your bedroom can be as simple as adding a unique headboard. The right headboard not only serves as a functional piece but also acts as a focal point that can elevate the overall aesthetic of your space. Imagine walking into your room and being greeted by a stunning, personalized headboard that reflects your style and personality. Whether you’re a seasoned DIY enthusiast or just starting out, creating a custom headboard can be a fun and rewarding project. In this article, we'll explore various DIY headboard ideas, focusing on materials, styles, and techniques that can help you craft a beautiful centerpiece for your bedroom.
Headboards come in various forms—from sleek and modern to rustic and vintage. They can be made from materials like wood, fabric, or even repurposed items, allowing you to express your creativity and make a statement in your bedroom. The beauty of DIY projects is that you have complete control over the design, color, and texture, enabling you to create something truly one-of-a-kind. So, if you're ready to roll up your sleeves and add a personal touch to your bedroom, let’s dive into the exciting world of DIY headboards!
Selecting the appropriate material for your DIY headboard is crucial in achieving the desired look and feel for your bedroom. Different materials can dramatically change the vibe of your space. For instance, wood evokes a warm and rustic charm, while fabric can add softness and elegance. On the other hand, metal introduces a modern and industrial flair. Here’s a quick overview of the materials you might consider:
| Material | Style | Durability |
|---|---|---|
| Wood | Rustic, Traditional | High |
| Fabric | Soft, Elegant | Medium |
| Metal | Modern, Industrial | High |
| Repurposed Items | Unique, Vintage | Varies |
By choosing the right material, you can set the tone for your entire bedroom. So, think about the overall aesthetic you wish to achieve and let that guide your selection process!
If you're new to DIY projects, creating a simple upholstered headboard is an excellent starting point. It’s straightforward, requires minimal tools, and the results can be incredibly stylish. Imagine sinking into your bed, leaning against a plush, upholstered headboard that adds both comfort and elegance to your space. To get started, you’ll need some basic materials like plywood, foam padding, batting, and the fabric of your choice. The beauty of this project is that you can customize it to match your bedroom decor perfectly!
Before you embark on your upholstered headboard journey, it's essential to gather the necessary tools. Here’s what you’ll need:
- Staple gun
- Scissors
- Measuring tape
- Electric saw (if cutting plywood)
- Drill
Having these tools at hand will ensure a smooth and successful DIY experience. Now, let’s dive into the steps to create your upholstered headboard!
Selecting the right fabric is key to achieving the desired look for your upholstered headboard. Consider factors such as color, texture, and durability. Fabrics like linen, cotton, or even velvet can add a touch of luxury to your bedroom. When picking a color, think about what complements your existing decor. A bold pattern can serve as a statement piece, while a neutral tone can create a calming effect.
Accurate measurements and cutting are vital for a well-fitted headboard. Measure the width of your bed and decide on the height you want for your headboard. Once you have your measurements, cut the plywood and foam to size. This step is crucial, as a well-fitted headboard will look much more professional and polished.
Adding finishing touches can elevate your upholstered headboard from simple to stunning. Consider incorporating embellishments like buttons, nailhead trim, or even a decorative border. These little details can make a big difference and personalize your headboard, making it uniquely yours.
For those who appreciate a rustic vibe, a wooden pallet headboard is a trendy and eco-friendly option. Sourcing pallets can be an adventure in itself! Many businesses give away or sell used pallets, so keep an eye out for these treasures. Once you have your pallets, the fun begins!
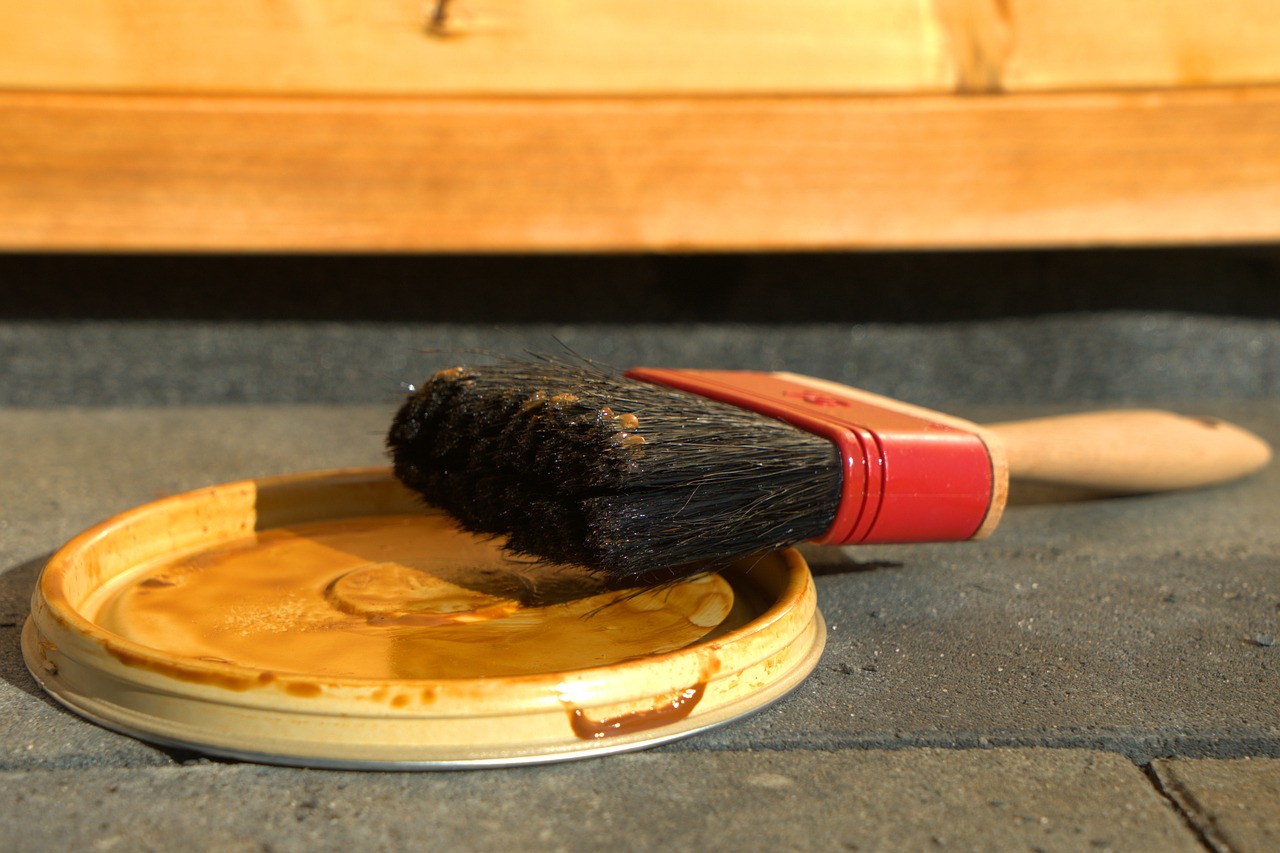
Before constructing your headboard, proper preparation of the pallets is essential. Start by cleaning them thoroughly to remove any dirt or debris. Sanding the wood will ensure a smooth finish and prevent splinters. If you want to enhance the wood's appearance, consider applying a wood stain or sealant for added protection and a polished look.
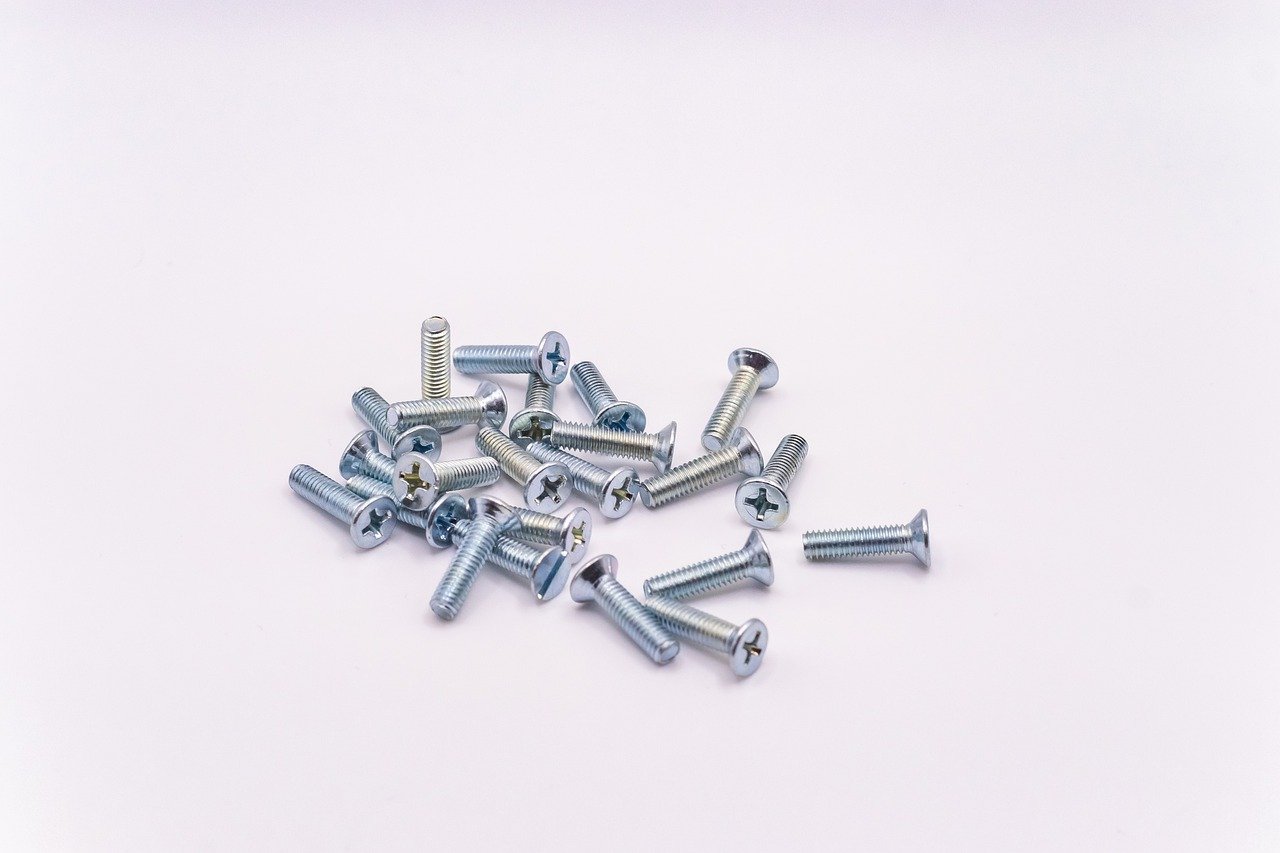
Understanding assembly techniques is crucial for a sturdy headboard. You can either stack the pallets vertically or lay them horizontally, depending on your preferred style. Securely attach the pallets using screws or brackets to ensure that your headboard stands the test of time. This simple yet effective method can create a striking focal point in your bedroom.
Repurposing old furniture or materials can create unique headboards that tell a story. Have an old door or vintage window frame lying around? These items can be transformed into stunning headboard designs that add character to your space. The beauty of upcycling is that you can breathe new life into forgotten items, making them functional and beautiful once again.
Finding inspiration for your upcycled headboard can spark creativity. Browse through home decor magazines, Pinterest, or even local thrift stores for ideas. You never know what treasures you might find that could be transformed into a beautiful headboard!
Successful upcycling requires some DIY know-how. Ensure that the items you choose are sturdy and safe to use. A little paint or refinishing can go a long way in making your upcycled headboard look polished and intentional. Remember, the goal is to create a piece that not only looks great but is also functional and durable.
Q: How much does it cost to make a DIY headboard?
A: The cost can vary widely depending on the materials you choose. On average, you can expect to spend anywhere from $50 to $200.
Q: Can I use old furniture to create a headboard?
A: Absolutely! Repurposing old furniture is a fantastic way to create a unique headboard while saving money and being eco-friendly.
Q: How long does it take to make a DIY headboard?
A: Depending on the complexity of your design, it can take anywhere from a few hours to a couple of days to complete your headboard.
Q: Do I need any special skills to create a DIY headboard?
A: Most DIY headboard projects are beginner-friendly. Basic tools and a little patience are all you need to get started!
So, are you ready to embark on your DIY headboard journey? With a little creativity and effort, you can create a stunning centerpiece that transforms your bedroom into a personal sanctuary!

Choosing the Right Material
When it comes to creating a DIY headboard, is one of the most critical steps in the process. The material you select not only affects the overall look and feel of your bedroom but also impacts the durability and functionality of your headboard. With so many options available, it can be overwhelming to decide which one will best suit your style and needs. Let's explore some popular materials and how they can enhance your space.
First up, we have wood. Wooden headboards can bring a warm, rustic charm to your bedroom, making them a favorite among DIY enthusiasts. You can choose from a variety of wood types, each offering its unique grain and color. For instance, reclaimed wood can add a touch of history and character, while new wood can be painted or stained to match your existing decor. The versatility of wood allows you to create everything from a sleek, modern design to a more traditional look.
Next, consider fabric. Upholstered headboards are not just stylish; they also provide a layer of comfort, perfect for those who enjoy sitting up in bed to read or watch TV. The fabric you choose can dramatically change the vibe of your room. Soft, plush materials like velvet or linen can create a cozy atmosphere, while bold patterns or colors can serve as a striking focal point. When selecting fabric, think about how it will coordinate with your bedding and other decor elements.
Another option is metal. Metal headboards can add an industrial or contemporary feel to your space. They are often lightweight and easy to install, making them a practical choice for DIY projects. Metal can also be painted in various colors, allowing you to customize the look to fit your style. Whether you prefer a sleek, minimalist design or something more ornate, there's a metal headboard out there for you.
To help you visualize the differences between these materials, here's a quick comparison table:
| Material | Pros | Cons |
|---|---|---|
| Wood | Durable, Warm aesthetic, Versatile | Can be heavy, Requires maintenance |
| Fabric | Comfortable, Variety of colors/patterns, Softens the look | Can stain easily, Requires regular cleaning |
| Metal | Lightweight, Easy to install, Modern look | Can be cold in feel, Limited color options |
Ultimately, the right material for your DIY headboard will depend on your personal style, budget, and how much time you're willing to invest in the project. Don’t be afraid to mix and match materials for a truly unique look! For example, combining a wooden frame with a fabric insert can create a stunning centerpiece for your bedroom. Remember, this headboard will be a part of your sanctuary, so choose materials that resonate with you and your vision.
Simple Upholstered Headboard
Creating a is not just a fun DIY project; it's a fantastic way to add a touch of personality and comfort to your bedroom. Imagine sinking into your pillows at the end of a long day, supported by a headboard that reflects your style and taste. Whether you're a beginner or someone with a bit of experience, this project is perfect for anyone looking to enhance their space without breaking the bank.
To start, you'll need to gather some materials. The beauty of this project is that you can customize it to fit your aesthetic preferences. You can choose from a variety of fabrics, colors, and patterns that can complement your existing decor. Think about what vibe you want to create—do you want something cozy and inviting, or sleek and modern? The options are endless!
Here’s a quick rundown of the basic materials you'll need:
- Wood board: This will serve as the base for your headboard.
- Foam padding: To give it that plush, comfortable feel.
- Fabric: Choose a fabric that suits your style, whether it's velvet, cotton, or linen.
- Staple gun: Essential for securing the fabric to the foam and wood.
- Scissors: For cutting the fabric and foam to size.
- Measuring tape: To ensure everything fits perfectly.
Now, let’s dive into the step-by-step process of creating your headboard. First, you’ll want to take accurate measurements of your bed. This is crucial because a well-fitted headboard can make all the difference in the overall look of your bedroom. Once you have your measurements, cut the foam padding and fabric accordingly, ensuring you leave extra material for wrapping around the edges.
Next, it's time to attach the foam to the wood board. Use your staple gun to secure the foam, making sure it’s evenly distributed. After that, lay your fabric over the foam, pulling it tight to avoid any wrinkles. Again, use the staple gun to secure the fabric to the back of the wood board. This part can be a bit tricky, so take your time to ensure everything looks neat and tidy.
Finally, once everything is securely attached, you can add your own personal touch. Consider embellishments like decorative nails, piping, or even a contrasting fabric at the edges. These finishing touches can elevate your headboard from simple to stunning.
Adding those finishing touches can truly make your upholstered headboard stand out. Think of it as the cherry on top of your DIY project. You might want to consider:
- Decorative trim: Adding a trim can give your headboard a more polished look.
- Accent colors: Use a contrasting fabric for a pop of color.
- Artwork: Hang some artwork above your headboard to create a focal point.
In conclusion, a simple upholstered headboard is not only a delightful DIY project but also a way to express your creativity and style. With just a few materials and some time, you can transform your bedroom into a cozy retreat that feels uniquely yours.
Q: How long does it take to make a DIY upholstered headboard?
A: Depending on your experience level and the complexity of your design, it can take anywhere from a few hours to a full day.
Q: Can I use any type of fabric for my headboard?
A: Yes, but it’s best to choose durable fabrics that can withstand wear and tear, especially if you plan to lean against it often.
Q: Do I need any special tools for this project?
A: A staple gun, measuring tape, and scissors are the primary tools you'll need. If you want a more polished finish, you might also consider a sewing machine for certain embellishments.
Q: How can I ensure my headboard is securely attached to the wall?
A: Make sure to use wall anchors and screws that are appropriate for your wall type to secure the headboard safely.
Tools Required for Upholstering
When it comes to creating a stunning upholstered headboard, having the right tools is essential for achieving that professional finish. Imagine embarking on a journey without a map; you might get lost along the way! Similarly, without the proper tools, your DIY project could turn into a frustrating experience. So, let’s dive into the must-have tools that will make your upholstery project a breeze.
First and foremost, you will need a staple gun. This tool is your best friend when it comes to securing the fabric to the headboard frame. A good quality staple gun ensures that your fabric stays in place and gives your headboard that polished look. You should also consider having extra staples on hand, as you don't want to run out mid-project.
Next up is a utility knife or a pair of sharp scissors. These will be crucial for cutting the fabric and foam to the right size. Precision is key here; you want clean edges to avoid any frayed looks. Additionally, a measuring tape is indispensable for ensuring that everything is cut to the correct dimensions. Remember, measure twice, cut once!
Now, let's talk about a hot glue gun. While it might not be the first tool that comes to mind, a hot glue gun can be incredibly useful for securing any embellishments or decorative elements you may want to add to your headboard. Whether it’s fabric flowers or decorative trim, a hot glue gun can make the process quick and easy.
For a more professional touch, consider investing in a sewing machine. If you’re planning on adding piping or if your fabric requires sewing, this tool will save you a lot of time and effort. However, if you don’t have access to a sewing machine, hand stitching can also do the trick, albeit with a bit more time and patience.
Lastly, don’t forget about a level and a drill for the assembly process. These tools will ensure that your headboard is securely attached to the wall and perfectly aligned with your bed. After all, no one wants a headboard that’s slightly askew!
Here’s a quick summary of the essential tools you’ll need:
| Tool | Purpose |
|---|---|
| Staple Gun | Secures fabric to the headboard frame. |
| Utility Knife/Scissors | Cuts fabric and foam to size. |
| Measuring Tape | Ensures accurate measurements. |
| Hot Glue Gun | Secures embellishments and decorative elements. |
| Sewing Machine | For adding piping or sewing fabric. |
| Level | Ensures headboard is straight. |
| Drill | Attaches headboard to the wall securely. |
With these tools in hand, you’ll be well on your way to creating a beautiful upholstered headboard that will elevate your bedroom decor. So, gather your supplies, roll up your sleeves, and let your creativity flow!
Q: How long does it take to make a DIY upholstered headboard?
A: The time it takes can vary depending on your experience level and the complexity of the design, but generally, it can take anywhere from a few hours to a full day.
Q: Can I use any fabric for my headboard?
A: While you can technically use any fabric, it’s best to choose upholstery-grade fabric for durability and ease of cleaning.
Q: Do I need to be an expert to create a DIY headboard?
A: Not at all! Most DIY headboard projects are beginner-friendly and can be completed with basic tools and supplies.
Q: What if I don’t have a sewing machine?
A: You can still create a beautiful headboard by hand-stitching or using fabric glue for any seams or embellishments.
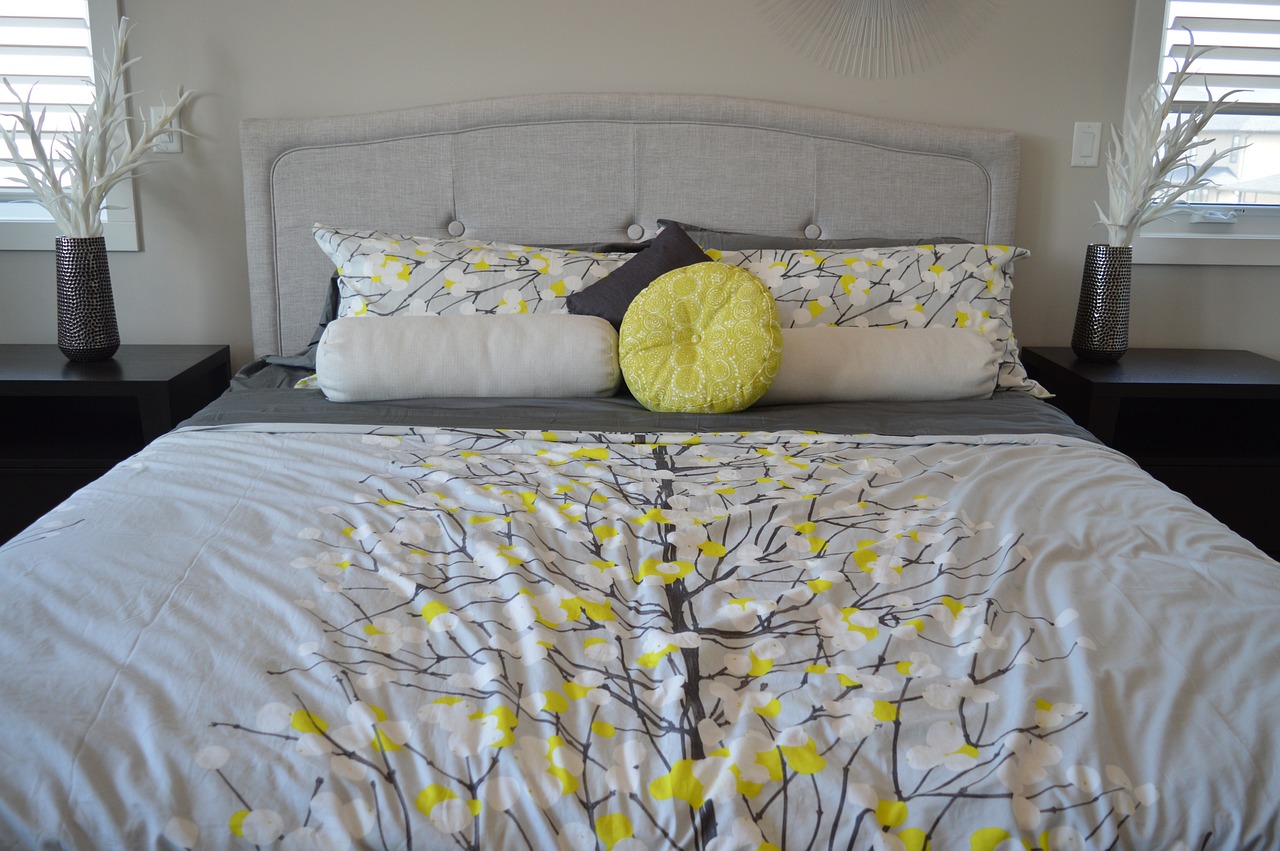
Choosing the Right Fabric
When it comes to creating a stunning DIY headboard, is paramount. The fabric not only impacts the aesthetic appeal of your headboard but also its durability and comfort. Imagine sinking into your bed each night, surrounded by a beautifully upholstered headboard that reflects your personal style. So, how do you select the perfect fabric for your project? Let's dive in!
First, consider the style of your bedroom. Are you going for a modern, sleek look, or does your space lean more towards a cozy, rustic vibe? The fabric you choose should harmonize with your overall decor. For instance, if your bedroom features soft, neutral colors, a textured fabric like linen or cotton can add depth without overwhelming the space. On the other hand, bold patterns or vibrant colors can serve as a statement piece in a more minimalist room.
Next, think about functionality. If you have pets or children, you might want to opt for fabrics that are more resistant to stains and wear. Synthetic materials like polyester or blends are often easier to clean and maintain compared to natural fibers. Additionally, consider the texture of the fabric. A soft velvet can add a touch of luxury, while a rugged canvas might be better suited for a more casual look.
Here are a few fabric types to consider for your headboard:
- Cotton: Breathable and easy to clean, making it a popular choice.
- Velvet: Adds a touch of elegance and is soft to the touch.
- Linen: Offers a natural look and feel, perfect for a relaxed vibe.
- Leather or Faux Leather: Durable and easy to wipe clean, great for a modern aesthetic.
- Canvas: Sturdy and can withstand wear, ideal for a casual or rustic theme.
Finally, don't forget about color and pattern. A solid color can provide a timeless look, while a pattern can inject personality into the room. If you're feeling adventurous, why not mix and match different fabrics or patterns? Just ensure that they complement each other to maintain a cohesive look. Remember, your headboard is a reflection of your style, so choose fabrics that resonate with you.
In summary, selecting the right fabric for your DIY headboard involves balancing style, functionality, and personal preference. With the right choice, your headboard can become a stunning focal point in your bedroom, inviting you to relax and unwind in style.
Q: What is the best fabric for a headboard?
A: The best fabric depends on your personal style and needs. Cotton and linen are great for a soft, breathable option, while leather offers durability and a modern look.
Q: How do I clean my upholstered headboard?
A: Cleaning methods vary by fabric. For most fabrics, a vacuum with an upholstery attachment works well. For stains, check the manufacturer's recommendations for spot cleaning.
Q: Can I use multiple fabrics on my headboard?
A: Absolutely! Mixing fabrics can create a unique look, but ensure they complement each other to maintain a cohesive design.
Measuring and Cutting
When it comes to creating a stunning upholstered headboard, measuring and cutting accurately is absolutely crucial. Think of it as laying the foundation for a beautiful house; if the foundation is shaky, everything built on top will be too! Start by measuring the width of your bed frame. Typically, the headboard should be a little wider than the bed, allowing for a more polished look. To achieve this, grab a tape measure and jot down the dimensions. For a standard queen bed, a width of around 60 to 64 inches is ideal, while a king bed might need about 76 to 80 inches.
Next, you’ll want to determine the height of your headboard. A common height is between 24 to 48 inches, depending on your style preference. Imagine how the headboard will look against your wall and consider how it will complement your bedding. Once you have your measurements, it’s time to cut your foam and fabric. Use a sharp utility knife for the foam, ensuring clean edges that will fit snugly against the board. When cutting fabric, make sure to leave an extra inch or two around the edges for wrapping around the board; this will allow you to secure it neatly.
Here’s a quick reference table to keep your measurements organized:
| Bed Size | Recommended Headboard Width | Recommended Headboard Height |
|---|---|---|
| Twin | 38-40 inches | 24-36 inches |
| Full | 54-58 inches | 24-36 inches |
| Queen | 60-64 inches | 24-48 inches |
| King | 76-80 inches | 24-48 inches |
As you cut the fabric, remember to keep the pattern aligned if you’re using a printed material. It’s like aligning the stars for a perfect night; everything should flow beautifully. Once you’ve finished cutting, lay your fabric flat and place the foam on top of the board. This way, you can visualize how everything will come together before you start attaching it. By taking your time during this measuring and cutting phase, you’re setting yourself up for a headboard that not only looks fantastic but also fits perfectly in your space.

Finishing Touches
When it comes to DIY projects, the can make all the difference! Think of your headboard as a blank canvas waiting for your personal flair. Adding those final details can transform a simple piece into a stunning focal point in your bedroom. So, what can you do to elevate your upholstered headboard from ordinary to extraordinary? Let's dive into some creative ideas!
First off, consider adding decorative trim. Whether it’s a chic nailhead trim or a soft fringe, the right trim can enhance the overall aesthetic. Nailhead trim, for instance, offers a touch of elegance and sophistication, while fringe can bring a bohemian vibe. You can easily attach these with a staple gun or adhesive, giving your headboard a polished look.
Another fantastic option is to incorporate pillow accents. Throw pillows not only provide comfort but also add color and texture. Choose pillows that complement the fabric of your headboard. For instance, if you opted for a bold pattern, consider solid-colored pillows that echo one of the hues in the fabric. This creates a cohesive look that ties the whole room together.
Don't forget about lighting! Wall sconces or bedside lamps can dramatically change the ambiance of your space. Position them strategically on either side of the headboard to create a warm, inviting glow. This not only enhances the functionality of your bedroom but also adds a layer of sophistication to your headboard design.
Lastly, think about personalized artwork. Hanging a piece of art or a decorative mirror above your headboard can draw the eye upward, making your room feel more spacious. Choose artwork that resonates with you—perhaps a favorite quote, a serene landscape, or even a family photo. This personal touch makes your headboard not just a piece of furniture, but a reflection of your style and personality.
In summary, the finishing touches you add to your DIY headboard can truly elevate its appearance and functionality. From decorative trims and pillows to lighting and personalized artwork, each element plays a vital role in creating a space that feels uniquely yours. So, get creative and let your personality shine through!
- What materials do I need for finishing touches on my headboard? You might need decorative trim, pillows, lighting fixtures, and artwork.
- How can I ensure the trim stays in place? Use a staple gun or strong adhesive to secure your trim effectively.
- Can I change the finishing touches later? Absolutely! You can update your headboard's look anytime by swapping out pillows or artwork.
- Is it possible to mix different styles? Yes! Mixing styles can create an eclectic vibe, just make sure to maintain a cohesive color palette.

Wooden Pallet Headboard
When it comes to DIY headboards, a wooden pallet headboard stands out as a trendy and eco-friendly choice that can add a touch of rustic charm to your bedroom. Not only are wooden pallets often readily available and affordable, but they also allow you to express your creativity while being kind to the environment. Imagine transforming something as simple as a pallet into a stunning focal point above your bed! This project is perfect for those who want a unique look without breaking the bank.
To get started, the first step is sourcing your pallets. You can often find them at local hardware stores, garden centers, or even behind retail shops. Just make sure you choose pallets that are in good condition—free from large cracks, splinters, or chemical treatments. Once you have your pallets, the real fun begins! Preparing the wood is essential to ensure a safe and attractive finish. This involves cleaning, sanding, and treating the wood to protect it from moisture and pests. After all, you want your headboard to last, right?
As you prepare to assemble your headboard, it’s important to think about the layout. You can opt for a simple stacked design or get creative with different orientations. For instance, arranging the pallets vertically can create a modern look, while a horizontal layout offers a more traditional feel. Here’s a quick breakdown of some popular assembly techniques:
| Technique | Description |
|---|---|
| Stacking | Pallets are stacked on top of each other for a layered look. |
| Horizontal Layout | Pallets are placed side by side to form a long, continuous headboard. |
| Vertical Slats | Pallets are cut and arranged vertically for a unique design. |
Once you’ve decided on your layout, it’s time to secure the pallets together. Using wood screws or brackets will ensure that your headboard is sturdy and can withstand the test of time. You can also attach the headboard directly to the wall for added stability. Just remember to check your wall type and use appropriate anchors if needed.
Finally, don’t forget to customize your wooden pallet headboard! You can stain it to match your bedroom decor, paint it a bold color, or even add decorative touches like fairy lights or fabric accents. The possibilities are endless, and this is where you can truly make the headboard your own. A little creativity goes a long way in turning a simple wooden pallet into a stunning piece of art that reflects your style.
Q: Where can I find wooden pallets?
A: You can find wooden pallets at local hardware stores, garden centers, or even behind retail shops. Just ensure they are in good condition and free from chemicals.
Q: How do I prepare the pallets for my headboard?
A: Clean the pallets thoroughly, sand down any rough areas, and treat the wood to protect it from moisture and pests.
Q: What tools do I need for assembling the headboard?
A: Basic tools include a drill, screws, a saw (if you need to cut the pallets), and sandpaper for finishing touches.
Q: Can I paint or stain my wooden pallet headboard?
A: Absolutely! You can customize your headboard with paint or stain to match your bedroom decor and personal style.
Preparing the Pallets
When it comes to creating a stunning wooden pallet headboard, the preparation of the pallets is a crucial step that should not be overlooked. Imagine transforming a rough, discarded piece of wood into a beautiful focal point for your bedroom. The first step in this journey is to source the right pallets. Look for pallets that are in good condition, free from major damages, and preferably made of hardwood for durability. Once you've gathered your pallets, it’s time to roll up your sleeves and get to work!
Start by cleaning the pallets thoroughly. Use a stiff brush to remove any dirt, dust, or debris that may have accumulated. If the pallets have been exposed to the elements, a gentle wash with soap and water can do wonders. After cleaning, allow the pallets to dry completely. This step is essential because moisture can lead to mold or warping later on.
Next, you'll want to sand the pallets to ensure a smooth surface. This is where the magic happens! Sanding not only removes splinters and rough edges but also prepares the wood for any finishes you may want to apply. Use a medium-grit sandpaper followed by a finer grit for the best results. Pay particular attention to the edges and corners, as these are areas that could be sharp and uncomfortable against your pillows.
Once sanded, it’s time to treat the wood. Applying a wood treatment or sealant will protect your headboard from moisture and enhance its longevity. You can choose from a variety of finishes, including stains, paints, or clear sealants. Each option will give your headboard a unique look, so consider your bedroom's color scheme and overall aesthetic when making your choice.
Lastly, if you want to add a bit of flair, consider using a wood conditioner before staining. This will help the stain absorb evenly, resulting in a more polished appearance. Remember, preparation is key! Taking the time to properly prepare your pallets will not only ensure a beautiful final product but also a sturdy and functional headboard that will last for years to come.
In summary, the preparation of your pallets involves a few simple yet important steps:
- Source quality pallets in good condition.
- Clean thoroughly to remove dirt and debris.
- Sand the surface for smoothness and safety.
- Treat the wood with a sealant or stain for durability.
- Optionally, use a wood conditioner for an even finish.
By following these steps, you're not just building a headboard; you're creating a piece of art that reflects your personal style and brings warmth to your bedroom. So, grab those pallets and let your creativity soar!

Assembly Techniques
When it comes to creating a sturdy and visually appealing wooden pallet headboard, understanding the right is crucial. You don’t want your masterpiece to wobble or fall apart, right? So let’s dive into some effective methods to ensure your headboard stands the test of time and looks fabulous!
First, you’ll want to start by laying out your pallets. This means arranging them in the order you want them to appear on your headboard. Consider the overall design and how the wood grain and color variations can create a stunning visual effect. Once you have a layout you love, it’s time to secure those pallets together.
One popular method is to use screws. Make sure to choose screws that are long enough to penetrate through one pallet and into the next without coming out the other side. Pre-drilling holes can help prevent the wood from splitting. As you screw the pallets together, check for alignment to ensure everything is straight and even.
Another technique you might consider is using wood glue in conjunction with screws. Applying glue to the edges before screwing them together adds an extra layer of stability. Just remember to clamp the pieces together while the glue dries to create a strong bond. This technique can be particularly effective if you’re working with thinner pallets that might not hold screws as well.
If you’re looking for a more rustic approach, you might opt for brackets. Metal L-brackets can be attached to the back of the headboard to provide additional support. This method not only adds strength but can also contribute to a unique industrial look if you leave the brackets visible. Just be sure to choose brackets that match the style of your room.
Once your pallets are securely assembled, it’s time to think about how you’ll attach the headboard to your bed frame or wall. If you’re going for a wall-mounted design, make sure to use sturdy wall anchors and screws that can hold the weight of the headboard. For a bed frame attachment, you can use wood screws or even a sliding bracket system that allows for easy removal if needed.
In summary, the key to a successful pallet headboard lies in the you choose. Whether you prefer screws, glue, or brackets, taking the time to ensure everything is securely attached will pay off in the long run. So grab your tools and get ready to transform your bedroom with a stunning DIY headboard!
Q: What type of pallets should I use for my headboard?
A: Look for heat-treated pallets that are in good condition. Avoid those that have been chemically treated, as they may contain harmful substances.
Q: How do I make sure my headboard is safe and sturdy?
A: Ensure that you use proper assembly techniques, such as pre-drilling holes and using appropriate screws or brackets. Additionally, always check for stability after assembly.
Q: Can I paint or stain my pallet headboard?
A: Absolutely! Painting or staining can add a personal touch and help the headboard fit in with your bedroom decor. Just make sure to use non-toxic products if you’re concerned about safety.
Q: Do I need a lot of tools for this project?
A: While some basic tools are necessary, such as a drill and screws, many people find that they can complete the project with just a few essentials. Check your tool collection before heading to the store!

Repurposed and Upcycled Headboards
Repurposing and upcycling old furniture into stunning headboards is not only a fantastic way to save money, but it also adds a unique charm to your bedroom. Imagine sleeping against a headboard that tells a story, perhaps crafted from an antique door or a vintage window frame. The beauty of this approach lies in the creativity it allows; you can breathe new life into items that might otherwise end up in a landfill. Not only are you making a bold design statement, but you’re also embracing sustainability, which feels good for your conscience!
When it comes to finding materials for your upcycled headboard, the possibilities are endless. Consider scouring local thrift stores, garage sales, or even your own attic for pieces that could be transformed. Here are some popular items that can be repurposed:
- Old Doors: A solid door can make a sturdy and stylish headboard. You can leave it as-is for a rustic look or paint it for a pop of color.
- Windows: Vintage windows can create a charming, cottage-style headboard. You can even add a shelf for displaying decor.
- Old Furniture: Dressers or cabinets can be disassembled and transformed into a unique headboard that complements your bedroom decor.
Once you've gathered your materials, it’s time to get creative! You might want to paint, stain, or even decoupage your chosen items to match your bedroom's color scheme. The key to a successful upcycled headboard is to ensure it’s both functional and stylish. For instance, if you’re using an old door, make sure it’s not too heavy for your wall, or if you’re using windows, ensure they’re securely fastened to avoid any accidents.
Finding inspiration is crucial in the upcycling process. Websites like Pinterest and Instagram are treasure troves of ideas where DIY enthusiasts share their projects. You can also visit local craft fairs or flea markets to see how others have creatively transformed their spaces. Remember, the goal is to create something that reflects your personal style while being practical for everyday use.
As you embark on your upcycling journey, keep in mind a few practical tips to ensure your project is a success:
- Measure Twice, Cut Once: Before making any cuts, ensure you have accurate measurements to avoid mistakes.
- Use Quality Materials: If you’re combining different pieces, make sure they are sturdy and in good condition.
- Finish with Care: Sand down any rough edges and apply a protective finish to ensure durability.
In conclusion, repurposing and upcycling headboards is an exciting way to showcase your creativity while enhancing your bedroom decor. Not only do you get to create something unique, but you also contribute to a more sustainable lifestyle. So, roll up your sleeves, grab those old treasures, and let your imagination run wild!
Q: What materials are best for upcycling into a headboard?
A: Great options include old doors, windows, vintage furniture, and even pallets. The key is to choose sturdy items that can support the design you envision.
Q: How do I ensure my upcycled headboard is safe?
A: Always check the integrity of the materials you’re using. Make sure everything is securely fastened and that there are no sharp edges.
Q: Can I paint or stain my upcycled headboard?
A: Absolutely! Painting or staining can help match your headboard to your bedroom decor and can also protect the wood.
Q: Where can I find inspiration for my upcycled headboard?
A: Websites like Pinterest and Instagram are fantastic resources. You can also look at DIY blogs and visit local craft fairs for ideas.

Finding Inspiration
When it comes to creating a unique DIY headboard, inspiration is everywhere! You just need to know where to look. Imagine walking through your neighborhood, and suddenly you spot an old door propped against a fence. That door could be the perfect starting point for your next headboard project. can be as simple as taking a stroll, visiting local thrift stores, or even browsing online platforms like Pinterest and Instagram. These platforms are brimming with creative ideas that can ignite your imagination and help you visualize how everyday items can transform into stunning focal points in your bedroom.
One of the most exciting aspects of DIY projects is the opportunity to personalize your space. Think about the items you already have at home. Perhaps an old window frame or a set of wooden crates could be repurposed into a headboard that tells a story. You can even combine multiple elements to create a headboard that reflects your personality and style. For example, mixing reclaimed wood with fabric can add texture and warmth to your bedroom, making it feel more inviting.
To help you get started, here are a few inspiration sources to consider:
- Thrift Stores: You never know what treasures you might find, from vintage doors to unique pieces of furniture.
- Online Marketplaces: Websites like Etsy or eBay often have unique items that can be transformed into headboards.
- Home Decor Magazines: Flip through the pages of your favorite magazines for stylish ideas and trends.
- Nature: Sometimes, the best inspiration comes from the outdoors. Look at natural elements that could influence your design, such as driftwood or branches.
Don’t forget to take photos of your favorite ideas or create a mood board. This can help you visualize how different elements will work together in your space. Remember, the goal is to create something that resonates with you and makes your bedroom feel like a sanctuary. So, let your imagination run wild, and don’t hesitate to experiment with different styles, colors, and materials!
Q: What materials can I use for a DIY headboard?
A: You can use a variety of materials including wood, fabric, metal, and even repurposed items like doors or windows. The choice depends on your style and the look you want to achieve.
Q: How do I ensure my headboard is sturdy?
A: To ensure sturdiness, use proper assembly techniques. Make sure to securely attach all components and consider using brackets or reinforcements if necessary.
Q: Can I paint or stain my headboard?
A: Absolutely! Painting or staining your headboard can add a personal touch and allow you to match it with your bedroom decor.
DIY Tips for Upcycling
Upcycling is not just a trend; it’s a creative way to breathe new life into old items while being environmentally friendly. When it comes to creating a stunning headboard from repurposed materials, there are several DIY tips that can help you achieve a beautiful and functional piece without breaking the bank. First and foremost, always keep an open mind. The beauty of upcycling lies in the unexpected. An old door, a vintage window frame, or even a collection of wooden crates can all be transformed into unique headboards. The key is to visualize the potential in what others might consider trash.
Before you dive into your project, it’s essential to gather the right tools and materials. A good quality paint or wood stain can dramatically alter the look of your upcycled headboard. Consider the color palette of your bedroom when choosing these finishes. For example, if your room has a calming blue theme, a distressed white or soft gray finish could complement it beautifully. Additionally, having a set of basic tools—like a saw, drill, and sandpaper—will make the process smoother and more enjoyable.
Next, measure twice, cut once. This old adage is especially true in upcycling. Accurate measurements ensure that your headboard fits perfectly against your bed and wall. If you’re using multiple pieces to create your headboard, lay them out before making any cuts. This way, you can experiment with the arrangement and find the most visually appealing configuration. Don’t hesitate to mix and match materials—wood, metal, and fabric can all coexist beautifully in a single headboard design.
Another important tip is to incorporate personal touches. Upcycling is about making something that reflects your personality. Perhaps you have a collection of vintage postcards or photographs that could be incorporated into the design. You could decoupage them onto a wooden panel for a unique touch. Alternatively, consider adding hooks or shelves to your headboard for functionality. These little details not only enhance the aesthetics but also make your headboard more practical.
Finally, don’t rush the finishing touches. Once your headboard is assembled, take the time to sand down rough edges and apply a protective finish. This not only enhances the beauty of the wood but also prolongs the life of your creation. If you’re using paint, consider a matte finish for a more modern look or a glossy finish for a traditional vibe. The final step is to style your headboard with decorative elements like fairy lights, plants, or artwork that resonates with you.
In conclusion, upcycling can be a fun and rewarding DIY project, especially when it comes to creating a headboard that is uniquely yours. With some creativity, patience, and the right techniques, you can turn ordinary items into extraordinary pieces that not only enhance your bedroom decor but also tell a story. So, gather those old items, unleash your creativity, and start transforming your space today!
- What materials can I use for upcycling a headboard?
Almost anything! Old doors, windows, pallets, and even fabric can be used creatively. - Do I need special tools for upcycling?
Basic tools like saws, drills, and sandpaper are usually sufficient for most projects. - How can I ensure my upcycled headboard is safe?
Make sure to sand down any rough edges and use non-toxic finishes to ensure safety. - Can I mix different materials in my headboard design?
Absolutely! Mixing materials can create a unique and personalized look.
Frequently Asked Questions
- What materials can I use for my DIY headboard?
You can use a variety of materials for your DIY headboard, including wood, fabric, metal, or even repurposed items like doors and windows. Each material has its unique charm and can greatly enhance the aesthetic of your bedroom.
- How do I choose the right fabric for an upholstered headboard?
Choosing the right fabric is essential for both style and durability. Look for fabrics that complement your bedroom decor, such as cotton, linen, or velvet. Consider colors and patterns that resonate with your personal taste and the overall theme of your room.
- What tools do I need to create an upholstered headboard?
For an upholstered headboard, you'll need a staple gun, scissors, a measuring tape, a foam pad, and fabric. These tools will help you achieve a professional finish and make the process smoother.
- Can I make a headboard from old furniture?
Absolutely! Repurposing old furniture is a fantastic way to create a unique headboard. Items like vintage doors, windows, or even old bed frames can be transformed into stunning headboards with a bit of creativity and effort.
- How do I ensure my wooden pallet headboard is safe and durable?
To ensure safety and durability, properly prepare the pallets by cleaning, sanding, and treating the wood. This process not only enhances the appearance but also makes it safe for use in your bedroom.
- What finishing touches can I add to my headboard?
Finishing touches can include decorative elements like trim, paint, or even stenciling. You can also add personal touches like photos or artwork to make your headboard truly unique and reflective of your style.
- How can I find inspiration for my DIY headboard project?
Finding inspiration can be as simple as browsing online platforms like Pinterest, visiting home decor blogs, or even exploring local thrift stores. The possibilities are endless, and you might discover ideas that spark your creativity!
- What are some tips for successful upcycling?
When upcycling, consider the functionality of the item you’re transforming. Measure accurately, use appropriate tools, and don’t hesitate to get creative with paint or fabric. The goal is to enhance the piece while ensuring it serves its purpose in your bedroom.


