
DIY Paint Makeovers to Revamp Your Interior Decor
Are you tired of your living space feeling dull and uninspired? Well, it's time to unleash your inner artist and transform your home with some exciting DIY paint makeovers! Painting is one of the most effective and budget-friendly ways to breathe new life into your interiors. Whether you're looking to create a cozy atmosphere or a vibrant space that sparks joy, the right paint techniques can work wonders. And the best part? You don't need to be a professional to achieve stunning results! In this article, we'll explore creative paint makeover ideas, share tips and tricks, and inspire you to take your decor to the next level.
When it comes to painting, selecting the perfect paint color is crucial for setting the mood in a room. Think of paint as the emotional backdrop of your space. It can make a small room feel expansive or a large room feel cozy. So, how do you choose the right shade? Start by considering the existing decor and furniture in your space. Are there colors that dominate your current palette? If so, you might want to choose shades that complement or contrast with those hues. For example, if you have a lot of warm wood tones, a cool blue or green can create a beautiful balance. And don't forget to think about the amount of natural light your room receives; a color can look completely different in bright sunlight compared to dim lighting!
Before you grab that paintbrush, it's essential to prepare your space properly. Think of this step as laying the foundation for a masterpiece. Proper preparation ensures a smooth painting process and a professional-looking finish. Start by removing any furniture or covering it with drop cloths to protect it from paint splatters. Next, take the time to clean your walls—dust, dirt, and grease can all affect how paint adheres. Once your surfaces are clean, inspect them for any imperfections that need repairing. This is where the real magic happens!
Cleaning and repairing surfaces is a crucial step in the painting process. Imagine trying to paint on a dirty canvas—it's just not going to work! Start by wiping down your walls with a damp cloth to remove any dust or grime. If you notice any holes or cracks, don’t fret! You'll want to fill these with spackle or a similar product. Once you've patched up the imperfections, sand the area smooth for an even finish. This attention to detail will ensure that your new paint job looks flawless.
Sometimes, the best way to start fresh is to remove old paint entirely. This can be a daunting task, but with the right methods, you can create a clean slate for your new design. You can use a paint stripper or a heat gun to remove old paint, but be sure to follow safety guidelines. Always wear gloves and a mask to protect yourself from fumes. Once the old paint is removed, give your surfaces a good cleaning to ensure no residue is left behind.
Patching holes and priming surfaces is essential for achieving a long-lasting and beautiful paint job. Think of primer as the secret weapon in your painting arsenal. It helps paint adhere better and can even enhance the color of your topcoat. After patching any holes, apply a coat of primer and let it dry completely. This step may seem tedious, but trust me, your future self will thank you when your paint job looks vibrant and flawless!
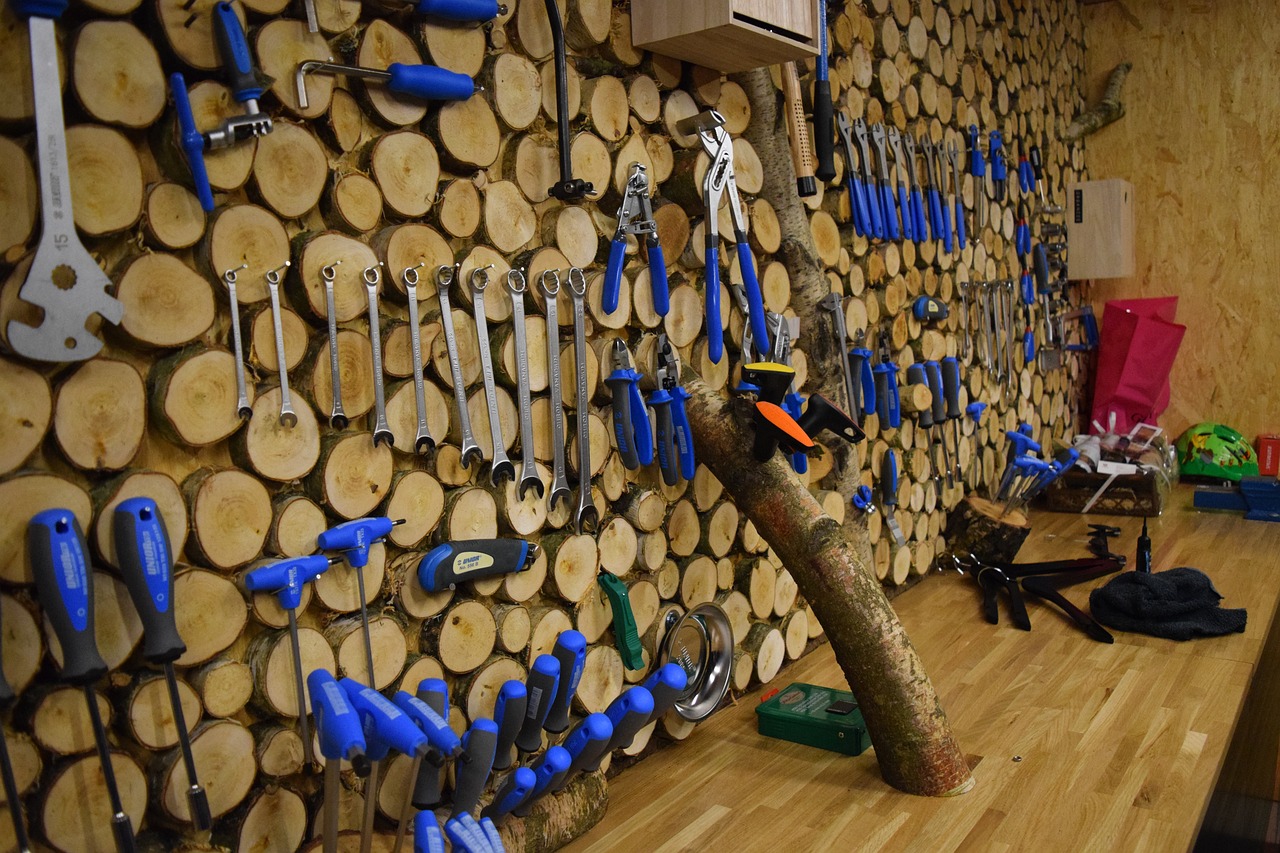
Using the right tools can make all the difference in your painting project. Imagine trying to bake a cake without the proper utensils—it's bound to be a disaster! Here are some essential tools you'll need for your DIY paint makeover:
- High-quality paintbrushes and rollers
- Drop cloths to protect your floors
- Painter's tape for clean edges
- A paint tray for easy application
- Sandpaper for surface prep
Investing in good tools will not only make your job easier, but it will also enhance the overall quality of your work.
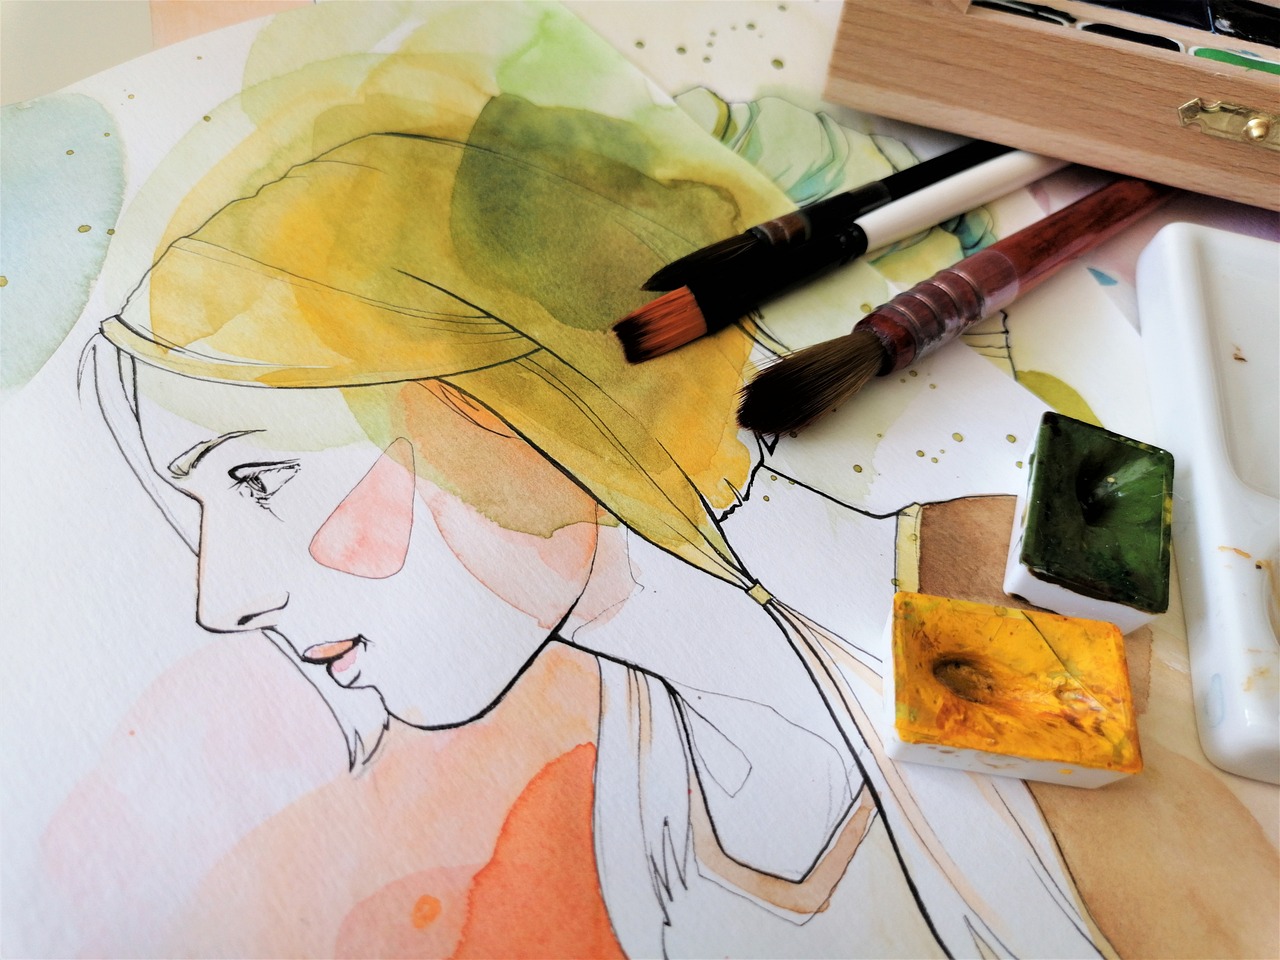
Now that your space is prepped and your tools are ready, let's talk about different painting techniques that can dramatically alter the look of your walls. From sponging to stenciling and even ombre effects, the possibilities are endless! Each technique offers a unique way to express your personality and style. For instance, sponging can create a soft, textured look, while stenciling allows for intricate designs that can serve as a focal point in your room. Don't be afraid to experiment!
Understanding when to use brushes or rollers can impact your painting results significantly. Brushes are great for detailed work and edges, while rollers cover large areas quickly. Think of brushes as your precision instruments and rollers as your heavy lifters. By using both appropriately, you can achieve a balanced and professional look in your painting project.
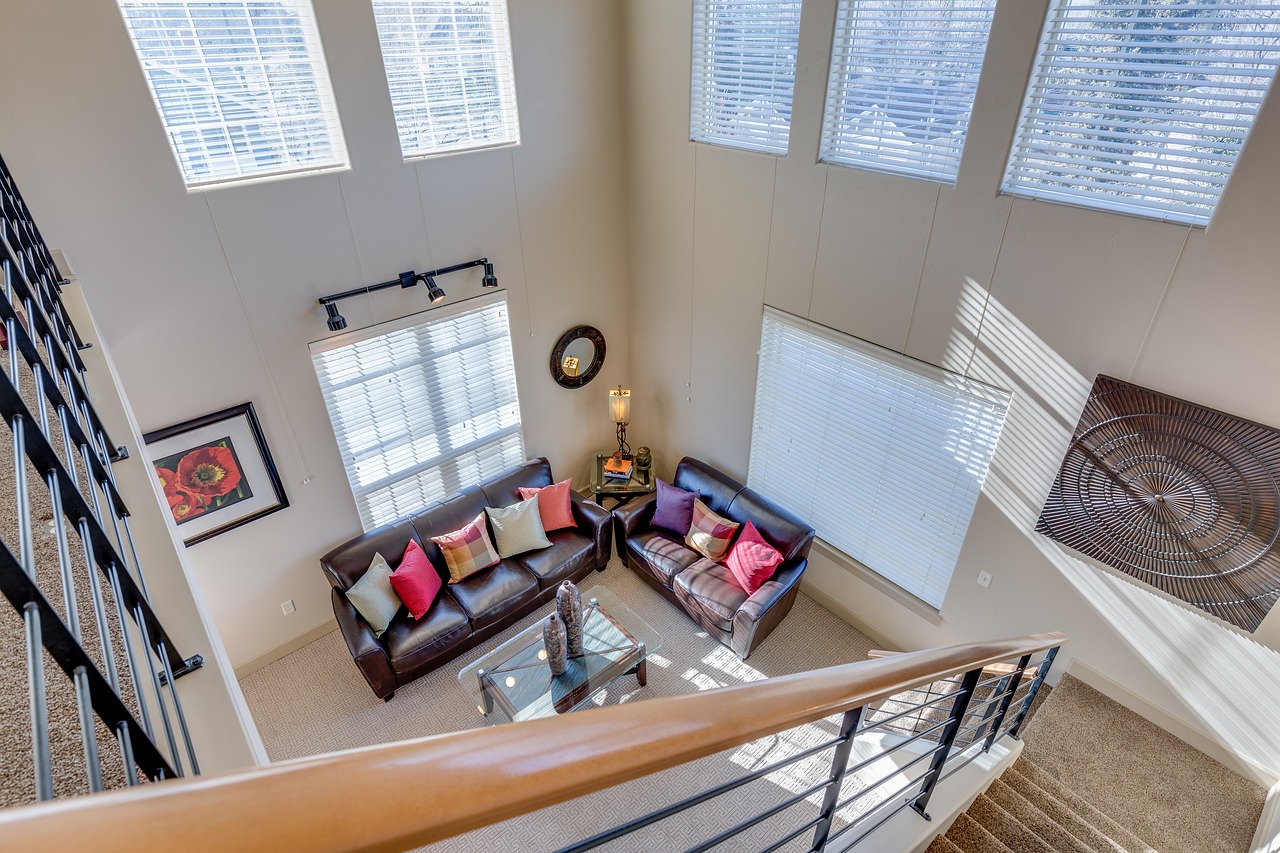
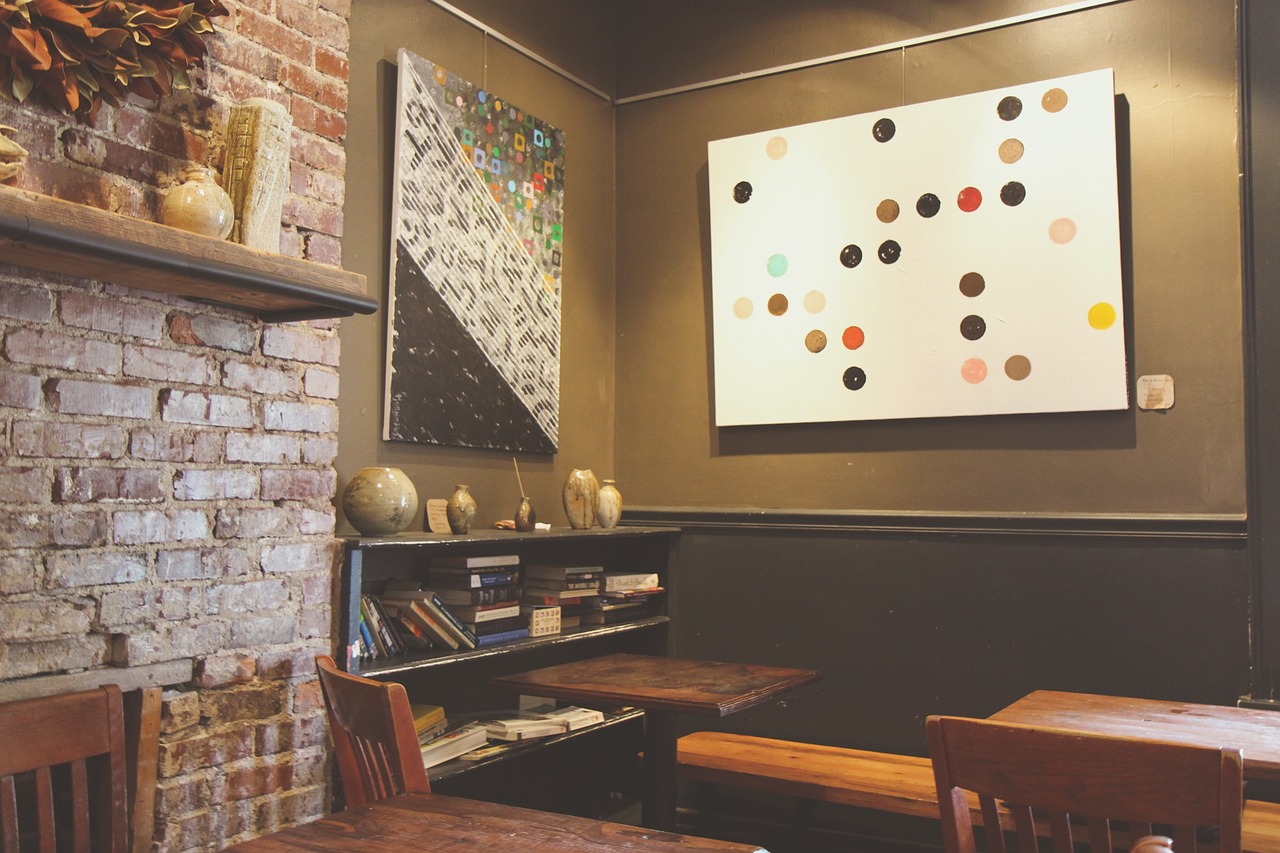
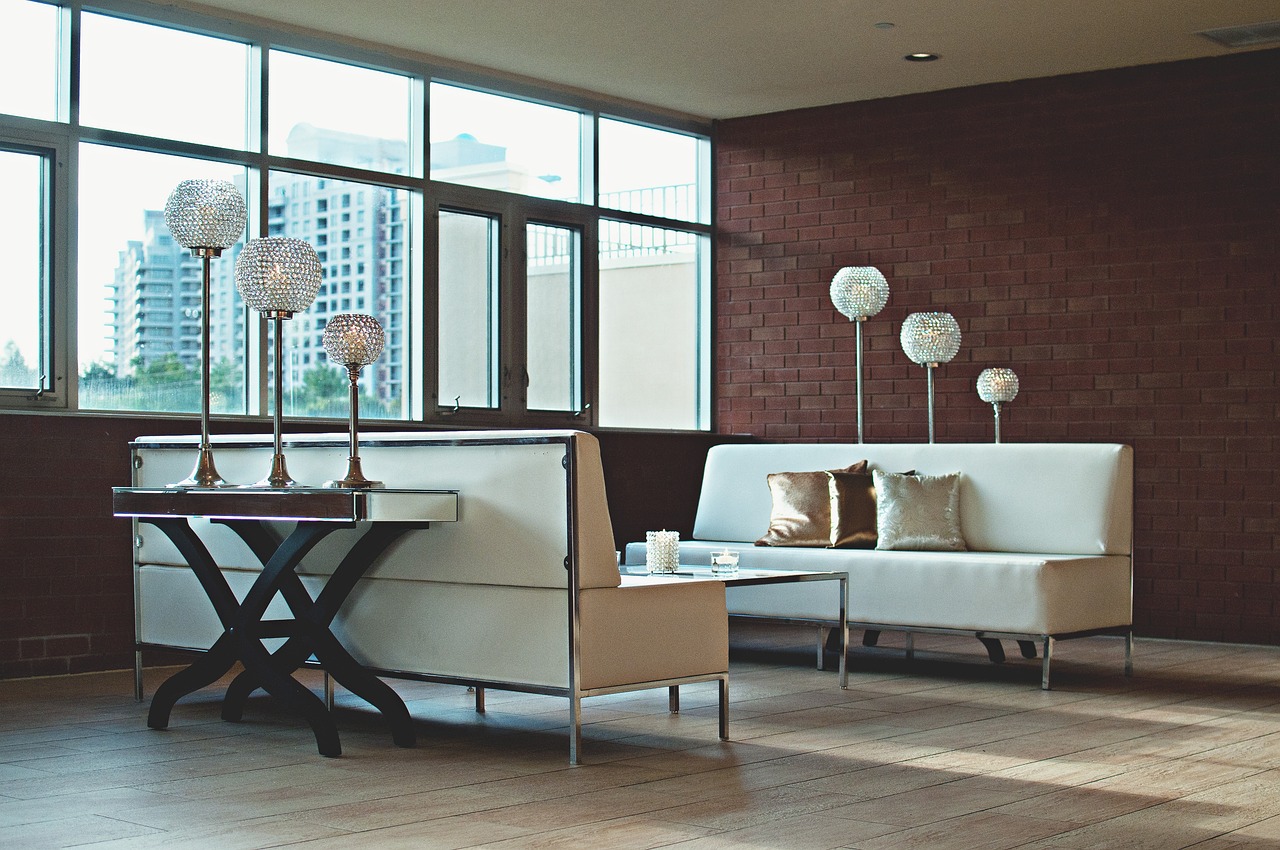
Accent walls can add depth and interest to a room, and they’re a fantastic way to make a statement without overwhelming the space. Consider using bold colors or unique patterns to draw the eye. You can even use wallpaper or decals for an added touch of creativity. The key is to choose a wall that naturally attracts attention, such as one behind a piece of artwork or furniture, to make it truly pop!
After all that hard work, don’t forget about the finishing touches! These details can elevate your paint job from good to absolutely stunning. Consider adding new hardware, like light switch covers or curtain rods, that coordinate with your new color scheme. Additionally, make sure to clean your brushes and rollers properly to prolong their lifespan for future projects. And remember, regular maintenance is key to keeping your newly painted surfaces looking fresh—just a quick wipe-down now and then can do wonders!
Q: How do I choose the right paint finish?
A: The finish you choose can affect the overall look of your paint job. Matte finishes are great for hiding imperfections, while satin and semi-gloss finishes are more durable and easier to clean.
Q: Can I paint over wallpaper?
A: It's generally not recommended to paint over wallpaper, as it can lead to peeling and bubbling. It's best to remove the wallpaper first for a smooth finish.
Q: How long does it take for paint to dry?
A: Drying times can vary based on the type of paint and the environment, but generally, latex paints dry to the touch within an hour and can be recoated in 4-6 hours.
Q: How can I make my paint color look different?
A: Lighting plays a significant role in how paint colors appear. Test your paint in different lighting conditions and at various times of the day to see how it changes.
Choosing the Right Paint Color
When it comes to transforming your living spaces, is like picking the perfect outfit for a special occasion. It sets the mood, reflects your personality, and can even influence the way you feel in a room. Imagine walking into a space painted in soothing blues or vibrant yellows; each color tells a story and evokes emotions. But how do you go about selecting the perfect shade? Here are some tips to guide you through this colorful journey.
First and foremost, consider the existing decor in your home. The colors of your furniture, flooring, and accessories play a significant role in determining which paint colors will harmonize with your space. For example, if you have warm-toned wooden furniture, opting for cool blues or greens might create an unbalanced look. Instead, you might want to choose shades that complement or contrast beautifully with these elements. A great way to visualize this is by creating a mood board with paint swatches, fabric samples, and pictures of your current decor.
Next, think about the functionality of the room. Different spaces serve different purposes, and the color you choose can enhance or detract from that purpose. For instance, calming colors like soft greens or light blues are perfect for a bedroom, promoting relaxation and tranquility. On the other hand, vibrant colors like reds or oranges can energize a kitchen or dining area, stimulating conversation and appetite. It’s all about creating the right atmosphere that aligns with how you want to feel in that space.
Another important factor to consider is the lighting in the room. Natural light can drastically change how a paint color looks at different times of the day. A color that appears warm and inviting in the morning sun may look cold and unwelcoming by evening. To avoid any surprises, test your chosen paint colors on the walls and observe them at various times throughout the day. This will help you see how the color interacts with the light and how it changes throughout the day.
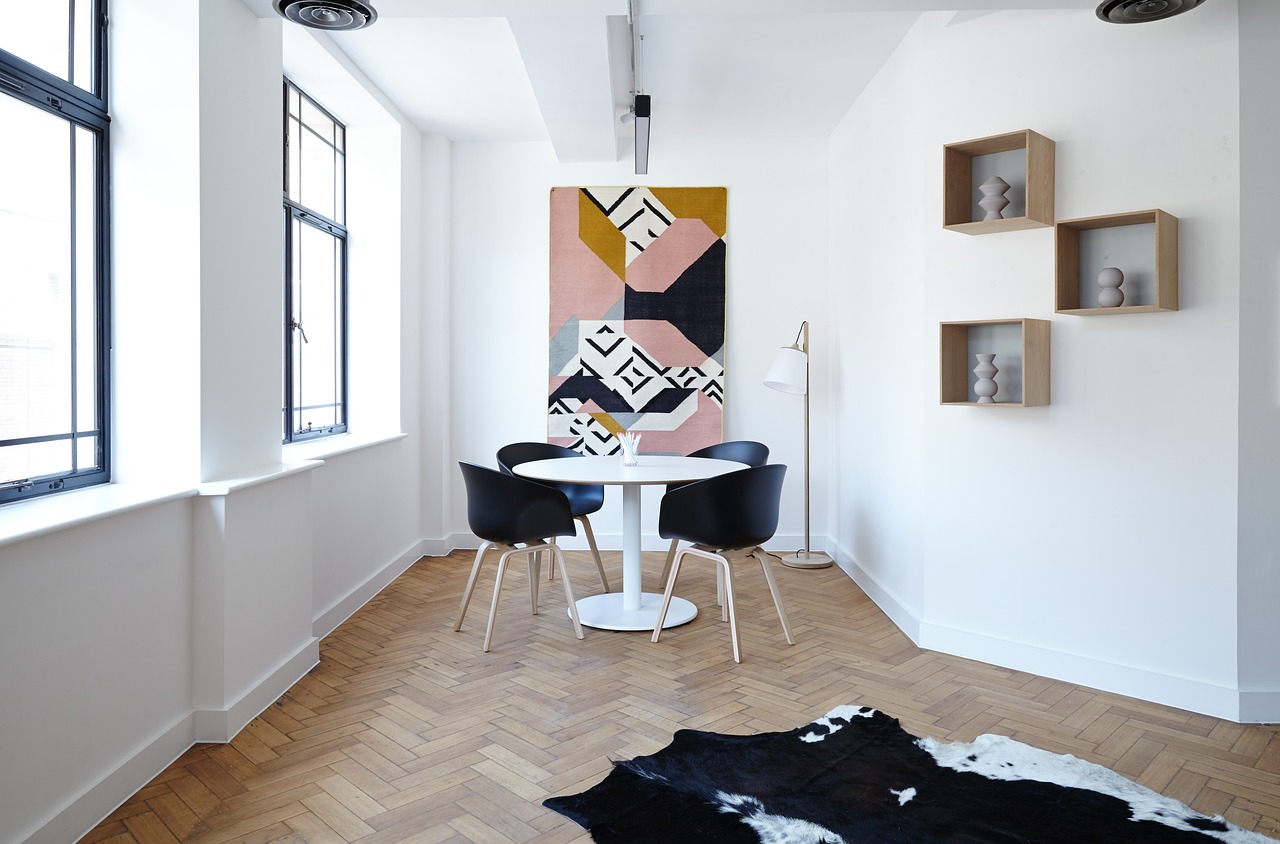
For those who might feel overwhelmed by the vast array of choices, remember that you can always start with a neutral base. Shades of white, gray, or beige can serve as a fantastic backdrop for more colorful accents. You can then introduce bolder colors through accessories like throw pillows, artwork, or an accent wall. This approach allows for flexibility and makes it easier to change the look of your space without committing to a full paint job every time you want a change.
Lastly, don’t be afraid to experiment! Sometimes, the most stunning results come from unexpected color combinations. Use a color wheel to find complementary colors or even analogous colors that sit next to each other on the wheel for a more harmonious look. Remember, your home should be a reflection of you, so trust your instincts and have fun with the process!
In summary, choosing the right paint color is a blend of art and science. By considering your existing decor, the functionality of the room, the lighting, and your personal style, you can create a space that feels uniquely yours. So grab those paint swatches, unleash your creativity, and let your walls tell your story!
Preparing Your Space for Painting
When it comes to giving your home a fresh coat of paint, preparation is key. Think of it as laying the groundwork for a masterpiece; without a solid foundation, the end result may not live up to your expectations. So, roll up those sleeves and let's dive into the essential steps you need to take to prepare your space for painting.
First things first, you want to clear the area. Remove any furniture, decorations, and personal items from the room. This not only protects your belongings from paint splatters but also gives you ample space to work. If moving larger items is a hassle, consider covering them with drop cloths or plastic sheeting to shield them from dust and paint. Trust me, you don’t want to be scrubbing paint off your favorite armchair later!
Next, it’s time to address your walls. Before you even think about opening that can of paint, you need to inspect your walls for any imperfections. Look for cracks, holes, or peeling paint. These issues can seriously affect how the new paint adheres and looks once dry. A little bit of time spent on repairs can save you a lot of headaches down the road. If you find any holes, grab some spackle and a putty knife to fill them in. Once dry, sand them smooth to ensure a seamless finish.
Now that your walls are clear and ready, it's time to give them a good cleaning. Dust and grime can build up over time, and if you paint over them, you're just asking for trouble. Use a damp cloth or sponge to wipe down the walls, and for tougher stains, a mixture of warm water and mild detergent can work wonders. Rinse the walls with clean water and let them dry completely before moving on.
If your walls have multiple layers of old paint, it might be time to strip them down. Removing old paint can be a daunting task, but it’s essential for achieving a smooth and flawless finish. You can use a chemical paint stripper or a heat gun to remove the old layers. Just remember to wear protective gear, like gloves and a mask, to keep yourself safe from harmful fumes. Don't rush this step; a clean slate will give your new paint a better chance to shine.
After cleaning and repairing, the next step is patching and priming. Patching is important because it helps to fill in any imperfections that could show through your new paint. Once patched, applying a primer is a game-changer. Primer creates a uniform surface for the paint to adhere to and can also enhance the vibrancy of your chosen color. It’s like giving your walls a fresh canvas to work with. Make sure to choose a primer that’s suitable for the type of paint you’ll be using.
Now that your space is prepped, it’s time to gather your tools. Here’s a quick list of essentials you’ll need for your painting project:
- Paintbrushes and rollers
- Paint tray
- Drop cloths
- Painter's tape
- Sandpaper
- Spackle and putty knife
- Primer
Having the right tools on hand can make your painting experience much smoother and more enjoyable. Plus, you’ll feel like a pro as you tackle your DIY project!
In conclusion, preparing your space for painting may take a bit of time and effort, but the results will be well worth it. By ensuring your walls are clean, repaired, and ready for a fresh coat, you set yourself up for a successful painting project that you can be proud of. So, are you ready to transform your space? Let’s get started!
Q: How long should I let my walls dry after cleaning?
A: It's best to let your walls dry for at least a few hours, or until they are completely dry to the touch, before starting to paint.
Q: Is primer really necessary?
A: Yes! Primer helps the paint adhere better and provides a more even finish, especially when painting over darker colors or patched areas.
Q: Can I paint over old paint?
A: You can, but it’s important to ensure the old paint is in good condition. If it’s peeling or cracking, it’s best to remove it first.
Q: What type of paint should I use for high-traffic areas?
A: For high-traffic areas, consider using a durable, washable paint, such as semi-gloss or satin finishes, which are easier to clean and maintain.
Cleaning and Repairing Surfaces
Before diving into your exciting paint makeover, it's essential to start with a clean slate—literally! Cleaning and repairing surfaces is a crucial step that many DIY enthusiasts overlook, but it can make all the difference in how your paint job turns out. Think of it as preparing a canvas before painting a masterpiece. If the surface is dirty, damaged, or uneven, your fresh coat of paint won't adhere properly, leading to peeling and unsightly finishes down the road.
First things first, grab your cleaning supplies! You’ll want to use a mixture of warm water and mild detergent to wipe down the walls. A sponge or a soft cloth works wonders here. This process not only removes dust and grime but also helps eliminate any grease stains that could interfere with paint adhesion. Don’t forget to pay special attention to areas around light switches and door frames where dirt tends to accumulate.
Once your walls are sparkling clean, it’s time to inspect for any imperfections. Look for cracks, holes, or peeling paint that need attention. This is where the real magic happens! Patching these areas is essential for achieving that professional finish you’re after. Use a spackling compound or a wall filler to fill in any holes or gouges. After applying, let it dry completely, and then sand it smooth to create an even surface. It’s like giving your walls a little facelift!
Now, if you’re dealing with particularly stubborn areas, like old paint or wallpaper remnants, you might need to resort to some more intensive cleaning methods. A paint scraper can help you remove old, flaky paint, while a wallpaper remover solution can assist in tackling any leftover wallpaper. Just remember, patience is key! Rushing through this process can lead to an uneven finish.
After cleaning and repairing, it’s important to prime your walls. Priming is like laying down a solid foundation for your paint. It not only helps the paint adhere better but also ensures that the true color shines through, especially if you’re making a dramatic change from dark to light shades. Choose a primer that suits your surface type—whether it's drywall, wood, or metal. This step may seem tedious, but trust me, it pays off in the long run!
In conclusion, taking the time to clean and repair your surfaces before painting can significantly enhance the quality and longevity of your paint job. Think of it as setting the stage for a fabulous performance. When everything is clean and repaired, your paint will glide on smoothly, resulting in a stunning finish that you can be proud of. So roll up those sleeves, put on some music, and let’s get to work!
- How long should I wait after cleaning before I start painting? It's best to wait at least a few hours to ensure the walls are completely dry.
- Can I paint over old paint? Yes, but make sure to clean and repair the surface first. Priming is also recommended for the best results.
- What tools do I need for cleaning and repairing walls? You’ll need a sponge or cloth, a bucket, a putty knife for patching, sandpaper, and a primer.

Removing Old Paint
Removing old paint can feel like a daunting task, but it’s a crucial step in your DIY paint makeover journey. Think of it as giving your walls a fresh start, much like a clean canvas for an artist. The right approach not only ensures a smooth finish but also enhances the longevity of your new paint. So, let’s dive into the methods that can help you strip away the layers of the past and prepare your walls for a stunning transformation.
There are several effective techniques you can use to remove old paint, and the best method often depends on the type of surface you're working with and the amount of paint that needs to be removed. Here’s a quick rundown of some popular methods:
- Scraping: This is the most straightforward method. Use a putty knife or paint scraper to gently lift off the old paint. Be careful not to damage the surface underneath.
- Heat Gun: A heat gun can soften the paint, making it easier to scrape off. However, be cautious with this method, as overheating can damage the surface or even cause a fire hazard.
- Chemical Strippers: These products can effectively dissolve paint, but they require careful handling. Always wear protective gear and ensure proper ventilation when using chemical strippers.
- Sanding: For surfaces that need a little extra love, sanding can be an excellent option. It not only removes paint but also smooths out imperfections. Just remember to wear a mask to avoid inhaling dust!
Before you start, it’s essential to assess the condition of your walls. Are there multiple layers of paint? Is the paint lead-based, especially in older homes? If you suspect lead paint, it’s best to consult a professional to ensure safety. Once you’ve determined the best method for your project, gather your tools and materials. You might need:
| Tool/Material | Purpose |
|---|---|
| Putty Knife | For scraping off paint |
| Heat Gun | To soften paint for easier removal |
| Chemical Stripper | Dissolves old paint layers |
| Sanding Block | Smooths surfaces and removes paint |
| Protective Gear | Safety first! Always wear gloves and a mask |
Once you’ve removed the old paint, take a moment to inspect the surface. Any imperfections or holes should be filled in before you proceed. This is where patching and priming come into play, ensuring that your new paint has a solid foundation to adhere to. Remember, the effort you put into this step will pay off with a beautiful, long-lasting finish.
In conclusion, removing old paint is an essential part of your DIY journey. It may take some time and effort, but the results will be worth it. So, roll up your sleeves, gather your tools, and get ready to unveil a fresh and vibrant look for your living space!
Q: How do I know if I have lead paint?
A: If your home was built before 1978, it’s wise to have it tested for lead paint. You can purchase a lead test kit or hire a professional to do it for you.
Q: Can I use a pressure washer to remove paint?
A: While a pressure washer can remove some paint, it may not be effective on all surfaces and can cause damage. It’s best to stick with scraping or chemical methods for most projects.
Q: What safety precautions should I take when removing paint?
A: Always wear protective gear, including gloves, goggles, and a mask, especially when using chemical strippers. Ensure proper ventilation if you’re working indoors.
Patch and Prime
When it comes to achieving a flawless paint job, patching and priming are two essential steps that should never be overlooked. Think of your walls as a blank canvas; if the surface is not prepared properly, even the most expensive paint can look subpar. So, how do you ensure that your walls are ready for that fresh coat of color? Let’s dive into the nitty-gritty of patching and priming.
First off, patching is all about fixing imperfections. Whether it’s nail holes, cracks, or dents, these blemishes can distract from the overall beauty of your freshly painted walls. To patch these areas, you’ll need a few supplies: spackle or joint compound, a putty knife, and sandpaper. Start by applying a small amount of spackle to the damaged area using the putty knife. Smooth it out as much as possible, and allow it to dry completely. Once dry, lightly sand the area until it’s flush with the surrounding wall. This step is crucial because any unevenness will be amplified once the paint is applied.
Now, let’s talk about priming. Priming is like giving your walls a protective layer that enhances paint adhesion and provides a uniform base for your topcoat. If you’re painting over a dark color, or if your walls have never been painted before, priming is even more important. It helps to block stains and prevent any previous colors from bleeding through. Choose a primer that suits your project; for example, a stain-blocking primer is ideal for walls with water damage or smoke stains. After applying the primer, give it sufficient time to dry before moving on to the painting phase.
Here’s a quick overview of the benefits of patching and priming:
| Benefits | Description |
|---|---|
| Improved Adhesion | Priming creates a better surface for paint to adhere to, ensuring a longer-lasting finish. |
| Enhanced Color | Using a primer can enhance the true color of your paint, making it more vibrant. |
| Stain Blocking | Primers can prevent stains from bleeding through your new paint job. |
| Smoother Finish | Patching imperfections leads to a smoother, more polished final look. |
In conclusion, never underestimate the power of a good patch and prime. These steps not only prepare your walls for paint but also ensure that your efforts result in a beautiful and long-lasting finish. Just like a chef wouldn’t start cooking without prepping their ingredients, you shouldn’t dive into painting without taking the time to patch and prime. Your walls will thank you!
- How long should I wait after patching before priming? It's best to wait until the patch is completely dry, which usually takes about 24 hours.
- Can I skip priming if I'm using high-quality paint? While high-quality paint can provide good coverage, skipping primer can lead to uneven texture and color.
- What type of primer should I use? Use a water-based primer for most applications, but oil-based primers are excellent for covering stains.
Gathering the Right Tools
When it comes to DIY paint makeovers, having the right tools in your arsenal can make all the difference between a project that looks professional and one that screams "amateur hour." Picture this: you're halfway through painting your living room, and suddenly, your brush frays, or you realize you forgot to buy painter's tape. Frustrating, right? To avoid such hiccups, let’s dive into the essential tools and materials you need for a successful paint makeover.
First and foremost, you’ll need quality paint. Don't skimp on this; the type of paint you choose can significantly affect the final outcome. Opt for a paint that suits your project—whether it's a matte finish for a cozy feel or a glossy finish for a more modern look. Along with paint, consider getting a primer. Priming is crucial, especially if you’re painting over a dark color or a surface that hasn’t been painted before. It creates a uniform base that enhances the color of your topcoat.
Next up, let's talk about brushes and rollers. The choice between these two can be a game-changer. For corners and edges, a high-quality brush is essential. A 2- to 3-inch angled brush is perfect for cutting in around trim and ceilings. On the other hand, rollers are fantastic for covering large areas quickly. Make sure to select the right nap length for your roller based on the texture of your walls. A smooth wall needs a short nap, while a textured wall requires a longer nap to reach all the nooks and crannies.
Don't forget about painter's tape. This handy tool is your best friend when it comes to achieving clean lines. Applying tape along trim, windows, and doors will help you avoid those pesky paint splatters and ensure a crisp finish. And while you're at it, grab a drop cloth to protect your floors and furniture. You’d be surprised how a little paint splatter can turn into a big headache if you don’t take precautions.
Lastly, gather some cleaning supplies for after the job is done. A good brush cleaner, rags, and a bucket of water will help you clean your tools and keep your workspace tidy. Trust me; a clean workspace not only looks better but also helps you stay organized and focused.
Here’s a quick rundown of the essential tools you’ll need for your paint makeover:
| Tool | Purpose |
|---|---|
| Paint | Base material for your project |
| Primer | Prepares the surface for better paint adhesion |
| Brushes | For edges and detailed work |
| Rollers | For covering large areas quickly |
| Painter's Tape | To achieve clean lines |
| Drop Cloth | Protects floors and furniture |
| Cleaning Supplies | To clean tools and workspace |
With these tools in hand, you're not just prepared; you’re ready to unleash your creativity and transform your space. Remember, the right tools can turn a daunting task into an enjoyable experience. So, gather your supplies, roll up your sleeves, and get ready to make your home shine!
- What type of paint is best for interior walls? - Generally, latex paint is the best choice for interior walls due to its durability and easy cleanup.
- How long should I wait before applying a second coat? - It’s usually recommended to wait at least 2-4 hours, but always check the paint can for specific drying times.
- Can I use a roller for corners? - While rollers are great for large areas, a brush is better for corners and edges to ensure precision.
- How do I clean my brushes after painting? - Rinse them in warm, soapy water if you used latex paint, or use paint thinner for oil-based paints.
Techniques for Painting Walls
When it comes to painting walls, the technique you choose can make all the difference between a dull finish and a stunning masterpiece. Think of your walls as a blank canvas waiting for your creative touch. There are several techniques you can employ to transform your space dramatically. Whether you're looking to create a cozy atmosphere or a vibrant statement, mastering these techniques will help you achieve your desired look.
One popular method is sponging, which adds texture and depth to your walls. By using a natural sea sponge dipped in a contrasting color, you can create a soft, mottled effect that brings warmth to any room. Imagine walking into a space where the walls seem to breathe with life, each sponge mark telling a story of creativity. To get started, simply apply a base coat and then use the sponge to dab on your second color, blending as you go.
Another exciting technique is stenciling. This method allows you to add intricate patterns or designs to your walls without the need for advanced artistic skills. You can purchase stencils or even make your own, and with a little patience, you can create a stunning focal point in your room. Imagine a wall adorned with delicate floral patterns or geometric shapes, instantly elevating the space. Just remember to use painter's tape to secure the stencil and prevent any paint bleed.
If you're feeling adventurous, consider the ombre technique. This gradient effect transitions from one color to another, creating a beautiful blend that can make a room feel larger or more intimate. To achieve this, start with your base color at the bottom and gradually mix in a lighter shade as you move upwards. The result? A dreamy, ethereal look that can transform any wall into a work of art. It's like watching the sunset captured within your home!
For those who prefer a more traditional approach, using brushes and rollers can yield fantastic results as well. Brushes are great for edges and corners, while rollers cover large areas quickly. Each tool has its advantages, and knowing when to use each can save you time and effort. For example, you might want to use a brush for detailed work around windows and doors, while a roller can efficiently cover the main wall surfaces.
As you explore these techniques, consider creating an accent wall to really make a statement. An accent wall is a single wall painted a different color or pattern from the others, drawing the eye and adding interest to the room. You could use any of the techniques mentioned above on your accent wall, making it a unique feature in your decor. Imagine stepping into a room where one wall bursts with color and creativity, instantly capturing your attention!
In summary, painting walls is not just about slapping on a coat of paint; it's about expressing your personality and style. With techniques like sponging, stenciling, and ombre, you can create a space that feels uniquely yours. So grab your brushes, rollers, and sponges, and let your creativity flow!
Here are some common questions regarding wall painting techniques:
- What is the best paint for sponging? Look for a semi-gloss or satin finish, as these types adhere well and provide a nice sheen.
- Can I stencil over textured walls? Yes, but you may need to use a thicker paint and be patient to ensure the stencil adheres properly.
- How do I clean my brushes and rollers after painting? Use warm, soapy water for latex paints, and mineral spirits for oil-based paints.
- How long should I wait between coats? Typically, 2-4 hours is sufficient, but always check the paint can for specific instructions.
Using Brushes vs. Rollers
When it comes to painting your walls, one of the most significant decisions you'll face is whether to use a brush or a roller. Each tool has its unique strengths and weaknesses, and understanding these can help you achieve the best possible finish for your DIY project. Brushes are fantastic for detailed work, such as cutting in around edges, corners, and intricate designs. They allow for precision and control, making them ideal for painting trim, moldings, and tight spots where a roller simply can't reach.
On the other hand, rollers are your best friends when it comes to covering large areas quickly and efficiently. They can hold a significant amount of paint, allowing you to spread it evenly across the surface with fewer strokes. This means less time spent painting and more time enjoying your refreshed space! However, it's essential to choose the right roller nap thickness based on your wall texture. For smooth surfaces, a short nap (1/4 to 3/8 inch) works well, while textured surfaces may require a thicker nap (1/2 inch or more).
To help you decide which tool to use, consider the following table that outlines the advantages of both brushes and rollers:
| Tool | Advantages |
|---|---|
| Brush |
|
| Roller |
|
Ultimately, the choice between brushes and rollers depends on the specific requirements of your project. For the best results, many DIYers opt to use both tools in tandem. Start with a roller to cover the broad surfaces and switch to a brush for the detailed work. This combination not only saves time but also ensures a professional-looking finish that you can be proud of!
Q: Can I use a roller for corners and edges?
A: While rollers are great for large areas, they can struggle with corners and edges. It's best to use a brush for those detailed spots.
Q: How do I clean my brushes and rollers after painting?
A: Clean brushes and rollers with warm, soapy water if you used latex paint. For oil-based paints, you'll need mineral spirits or paint thinner.
Q: What's the best way to store leftover paint?
A: Store leftover paint in a cool, dry place, tightly sealed in its original container to prolong its shelf life.
Creating Accent Walls
Creating an accent wall is like giving your room a stunning piece of jewelry; it draws the eye and adds a unique flair to your space. Imagine walking into a room where one wall bursts with color or texture, instantly transforming the atmosphere. It's not just about slapping a different color on one wall; it's about making a statement that reflects your personality and style. So, how do you go about creating this focal point? Let’s dive into some creative ideas!
First off, consider the color scheme of your room. The accent wall should complement the overall palette while standing out enough to catch attention. For instance, if your room is adorned in soft neutrals, a bold navy blue or a vibrant coral can create a stunning contrast. Or, if you prefer a more subtle approach, consider using a deep shade of the same color family as your other walls. This technique can add depth without overwhelming the space.
Next, think about the texture you want to incorporate. Paint isn’t your only option! You can explore various materials such as wallpaper, wood panels, or even fabric. A wood panel accent wall can bring warmth and a rustic feel to your decor, while textured wallpaper can add sophistication and intrigue. If you’re feeling adventurous, why not try a DIY project like a geometric wood accent wall? The possibilities are endless!
Another technique to consider is the use of stencils or patterns. If you have a steady hand or are willing to use a stencil, you can create intricate designs that can elevate your accent wall from ordinary to extraordinary. For example, a simple herringbone pattern can add a modern touch, while floral stencils can bring a bit of nature indoors. Just remember to keep it balanced; you want the accent wall to complement your existing decor, not compete with it.
Lastly, don’t forget about the lighting. Proper lighting can enhance the beauty of your accent wall and draw attention to it. Consider using wall sconces or spotlights to highlight the texture or color. If your wall features artwork or a special design, good lighting can make all the difference, turning your accent wall into a true focal point.
In summary, creating an accent wall is an exciting way to revamp your interior decor. Whether you choose a bold color, a unique texture, or an intricate pattern, the key is to ensure it reflects your personal style while complementing the rest of your space. So grab that paintbrush, or those stencils, and let your creativity shine!
- What is an accent wall? An accent wall is a wall that is painted or treated differently from the others in a room, designed to draw attention and create a focal point.
- Can I use wallpaper for an accent wall? Absolutely! Wallpaper can add texture and pattern, making it a great choice for an accent wall.
- How do I choose the right color for my accent wall? Consider the existing color scheme of your room and choose a color that complements it while still standing out.
- What are some popular materials for accent walls? Paint, wallpaper, wood panels, and fabric are all popular materials for creating accent walls.
Finishing Touches and Maintenance
Once you've put in the hard work of painting your space, it's time to focus on the finishing touches that will elevate your newly painted walls to the next level. These little details can make a big difference in how your room feels and looks. First things first, consider adding some decorative elements that complement your new color scheme. This could be anything from artwork that resonates with the hues on your walls to carefully chosen furniture that enhances the overall aesthetic.
Next, don't underestimate the power of cleaning your space after painting. It's crucial to remove any dust or debris that may have settled during the painting process. A simple wipe-down with a damp cloth can go a long way in ensuring your walls look their best. Additionally, if you used painter's tape, carefully peel it off at a 45-degree angle to avoid any paint chips. This step is essential for achieving those crisp, clean lines that make your paint job pop.
Now, let’s talk about maintenance. Keeping your walls looking fresh requires a bit of ongoing care. Consider the following tips:
- Regular Cleaning: Use a soft cloth or sponge with mild soap and water to clean your walls. Avoid harsh chemicals that can strip the paint.
- Touch-Up Paint: Keep a small container of leftover paint for quick touch-ups. This is especially useful for covering scuffs or scratches that can occur over time.
- Avoid Excessive Moisture: In areas prone to moisture, like kitchens and bathrooms, ensure good ventilation to prevent paint peeling or mold growth.
Furthermore, if you've opted for a textured finish or an intricate design, be mindful of how you clean these surfaces. Use a gentle approach to avoid damaging the texture. A soft brush can help you reach into crevices without harming the paint.
Lastly, don't forget to reassess your decor periodically. As seasons change, so can your style preferences. Updating your decor to match your paint can keep your space feeling fresh and inviting. Whether it’s swapping out throw pillows or adding seasonal artwork, these adjustments can breathe new life into your painted walls.
Q: How long should I wait before cleaning my newly painted walls?
A: It's best to wait at least two weeks before cleaning your newly painted walls to allow the paint to cure fully.
Q: Can I use regular soap to clean my painted walls?
A: Yes, using mild soap and water is safe for most painted surfaces. Just ensure you don’t scrub too hard to avoid removing the paint.
Q: How often should I touch up my paint?
A: This can vary based on the room's usage, but a good rule of thumb is to check for scuffs or scratches every few months and touch up as needed.
Q: What if I want to change the color of my walls?
A: If you're looking to change your wall color, make sure to properly prep the surface by cleaning and possibly priming it, especially if you're going from a dark to a light color.
Frequently Asked Questions
- What is the best way to choose a paint color for my room?
Choosing a paint color can feel overwhelming, but it doesn't have to be! Start by considering the mood you want to create. Do you want a calm, serene space? Soft blues and greens can work wonders. For a vibrant and energetic vibe, think about bold yellows or reds. It's also helpful to look at your existing decor and choose shades that complement your furniture and accessories.
- How do I prepare my walls for painting?
Preparation is key to achieving a professional-looking finish! Start by cleaning your walls to remove dust and grime. Next, inspect for any holes or cracks and patch them up with spackle. Once patched, sand the area smooth and apply a primer if necessary. This ensures that the paint adheres well and the final result looks flawless!
- What tools do I need for a DIY paint project?
Gathering the right tools can make your painting experience so much smoother! You'll need paintbrushes and rollers, a paint tray, painter's tape, drop cloths to protect your floors, and a ladder for those hard-to-reach spots. Don't forget a good quality primer and paint, as these are crucial for the best results!
- Are there different techniques for painting walls?
Absolutely! There are several fun techniques you can try. Sponging creates a textured look, while stenciling allows for intricate designs. Ombre is perfect for a gradient effect. Each technique can dramatically change the feel of a room, so don’t hesitate to experiment and find what suits your style!
- How can I create an accent wall?
Creating an accent wall is a fantastic way to add depth to your space! Choose a wall that you want to highlight, then select a bold color or pattern. You can use wallpaper, a different paint color, or even a mural. The key is to make it stand out without overwhelming the rest of the room!
- What are the finishing touches after painting?
Finishing touches can elevate your paint job! After the paint dries, remove any painter's tape carefully to avoid peeling. Touch up any areas that need extra attention, and consider adding trim or baseboards for a polished look. Finally, keep your surfaces clean and consider using a protective topcoat if necessary to maintain that fresh appearance!


