Simple DIY Crafts for Your Christmas Decor
This article explores various easy and creative DIY craft ideas to enhance your Christmas decorations, making your holiday season more festive and personalized. The holiday season is a time for joy, warmth, and creativity, and what better way to embrace the spirit of Christmas than by crafting your own decorations? Whether you're looking to add a personal touch to your home or simply want to enjoy a fun activity with family and friends, these DIY crafts will spark your imagination and bring a sense of accomplishment as you see your creations come to life.
Imagine walking into your living room, greeted by the sight of a beautifully decorated Christmas tree, adorned with ornaments that you've crafted yourself. It's not just about the decorations; it's about the memories you create while making them. Plus, DIY crafts allow you to express your unique style, making your holiday decor truly one-of-a-kind. So, gather your supplies, roll up your sleeves, and let’s dive into some simple yet stunning DIY craft ideas that will transform your home into a winter wonderland!
Learn how to create beautiful and unique ornaments using everyday materials, perfect for adding a personal touch to your Christmas tree this year. Ornaments can be made from a variety of items, such as old CDs, felt, or even salt dough. Each ornament tells a story, whether it’s a hand-painted masterpiece or a simple yet charming creation. Imagine hanging a glittery star made from recycled materials or a cute snowman crafted from felt—each piece will remind you of the fun you had making it.
To get started, consider these materials:
- Old Christmas cards
- Yarn or twine
- Buttons and beads
- Glitter and glue
With just a few basic supplies, you can create ornaments that reflect your personality and style. Plus, these handmade decorations make great gifts for friends and family!
Discover simple techniques for crafting stunning wreaths that can adorn your front door, welcoming guests with a touch of holiday cheer. A handmade wreath sets the tone for your holiday decor and serves as a beautiful invitation to all who visit. With a little creativity, you can design a wreath that captures the essence of the season. From traditional evergreen wreaths to colorful, whimsical designs, the options are endless!
Incorporate natural elements like pinecones and dried fruits into your wreath designs for a rustic and charming aesthetic that celebrates the season. These elements not only add texture and color but also bring the beauty of nature indoors. Imagine a wreath adorned with shiny red apples, fragrant cinnamon sticks, and clusters of pinecones. It’s like bringing a piece of the outdoors into your home, creating a warm and inviting atmosphere.
Explore how to use seasonal flowers to add color and fragrance to your wreaths, making them more vibrant and inviting. Fresh flowers like holly, poinsettias, and even eucalyptus can elevate your wreath from ordinary to extraordinary. You can either use faux flowers for longevity or fresh ones for a delightful scent that fills your home with holiday cheer.
Learn the art of creating beautiful bows and incorporating ribbons to enhance the visual appeal of your handmade wreaths. A well-placed bow can transform a simple wreath into a stunning focal point. Experiment with different colors and textures of ribbon to find the perfect match for your wreath design. The right bow can add that extra touch of elegance, making your creation truly stand out.
Transform old items into festive decorations, showcasing your creativity while promoting sustainability during the holiday season. Upcycling is not only environmentally friendly but also a fantastic way to create unique decor. Think about using old glass jars as candle holders or turning worn-out sweaters into cozy ornaments. This approach not only saves money but also allows you to craft with a clear conscience, knowing you’re reducing waste.
Create eye-catching centerpieces for your holiday gatherings using simple materials, ensuring your dining table looks festive and inviting. A well-decorated table can enhance the overall atmosphere of your holiday meals, making every gathering feel special. Centerpieces can range from simple arrangements of candles to elaborate displays featuring seasonal decor.
Discover how to craft stunning candle displays that not only illuminate your table but also add warmth and ambiance to your holiday festivities. Use an assortment of candles in varying heights and colors to create depth and interest. Surround them with greenery, ornaments, or even seasonal fruits to enhance the festive feel. The soft glow of candlelight will create a cozy atmosphere, perfect for family gatherings and celebrations.
Explore various themes for your centerpieces, from winter wonderland to traditional holiday motifs, allowing you to express your style and creativity. You can choose a color palette that resonates with your home's decor or go all out with a whimsical theme. The key is to let your personality shine through in your designs, making your holiday table a true reflection of you.
Q: What materials do I need to start my DIY crafts?
A: Basic materials include scissors, glue, ribbons, and any decorative items you want to use like beads, fabric, or natural elements.
Q: Can I involve my kids in these DIY projects?
A: Absolutely! Many of these crafts are kid-friendly and can be a fun way to bond during the holiday season.
Q: How can I store my handmade decorations for next year?
A: Use sturdy boxes or bins to store your decorations, and wrap fragile items in bubble wrap or tissue paper to prevent damage.
Festive Ornaments
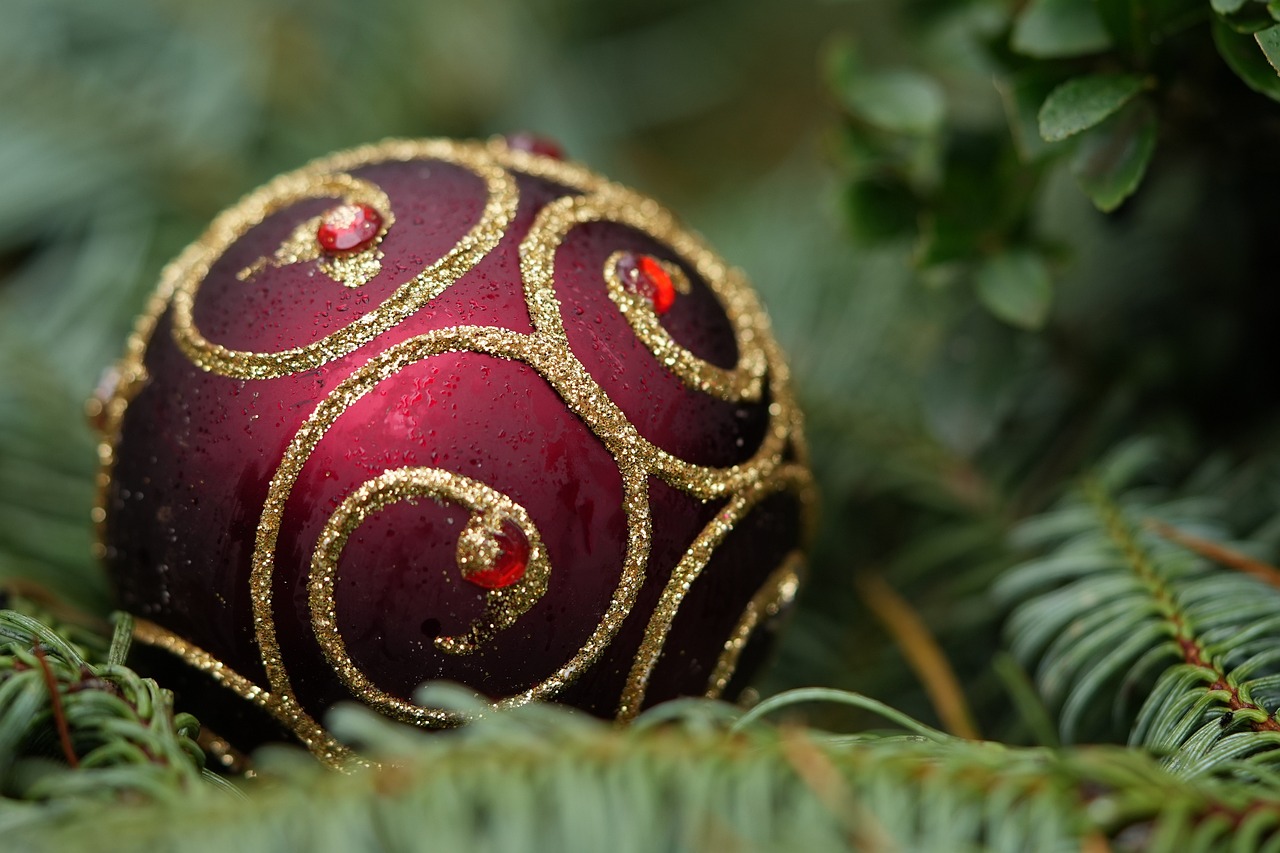
When it comes to decorating your Christmas tree, play a crucial role in setting the mood and bringing the holiday spirit to life. Instead of relying solely on store-bought decorations, why not unleash your creativity and make your own unique ornaments? The beauty of DIY ornaments lies not only in their personalization but also in the joy of crafting them with your loved ones. Imagine the laughter and bonding moments as you gather around the table, surrounded by glitter, glue, and a myriad of colorful materials!
To get started, you don't need to break the bank or spend hours searching for rare supplies. You can create stunning ornaments using everyday items you probably already have at home. For instance, consider using:
- Old Christmas cards for creating charming 3D shapes.
- Clear plastic or glass baubles that you can fill with anything from glitter to dried flowers.
- Felt or fabric scraps to sew small, whimsical figures.
One particularly fun idea is to make photo ornaments. Simply print out your favorite family photos, cut them into fun shapes, and attach them to a sturdy backing. You can even laminate them for durability! This not only adds a personal touch to your tree but also creates a beautiful way to reminisce about cherished memories each holiday season.
Another popular method is to create nature-inspired ornaments. Collect pinecones, acorns, and twigs from your backyard or a nearby park. With a little paint and some glitter, you can transform these natural elements into stunning decorations that bring a rustic charm to your home. Imagine hanging a glittery pinecone on your tree—it's a conversation starter and a beautiful reminder of the great outdoors!
For those who enjoy a bit of sparkle, consider crafting ornaments using beads and sequins. Stringing beads together to form festive shapes like stars, candy canes, or snowflakes can be a delightful activity for both kids and adults. You can even make it a friendly competition to see who can create the most unique design!
Don't forget the finishing touches! Adding ribbons, twine, or even a sprig of holly can elevate your DIY ornaments from simple crafts to stunning decorations. Plus, the process of decorating your creations can be just as enjoyable as making them. Gather your family, put on some holiday music, and get creative!
In summary, making your own festive ornaments is not just about the final product; it's about the experience of creating something special together. So grab your supplies, let your imagination run wild, and fill your tree with ornaments that tell your family's unique story. Trust me, when you look at those ornaments hanging on your tree, you'll feel a sense of pride knowing you made them with love.
Handmade Wreaths
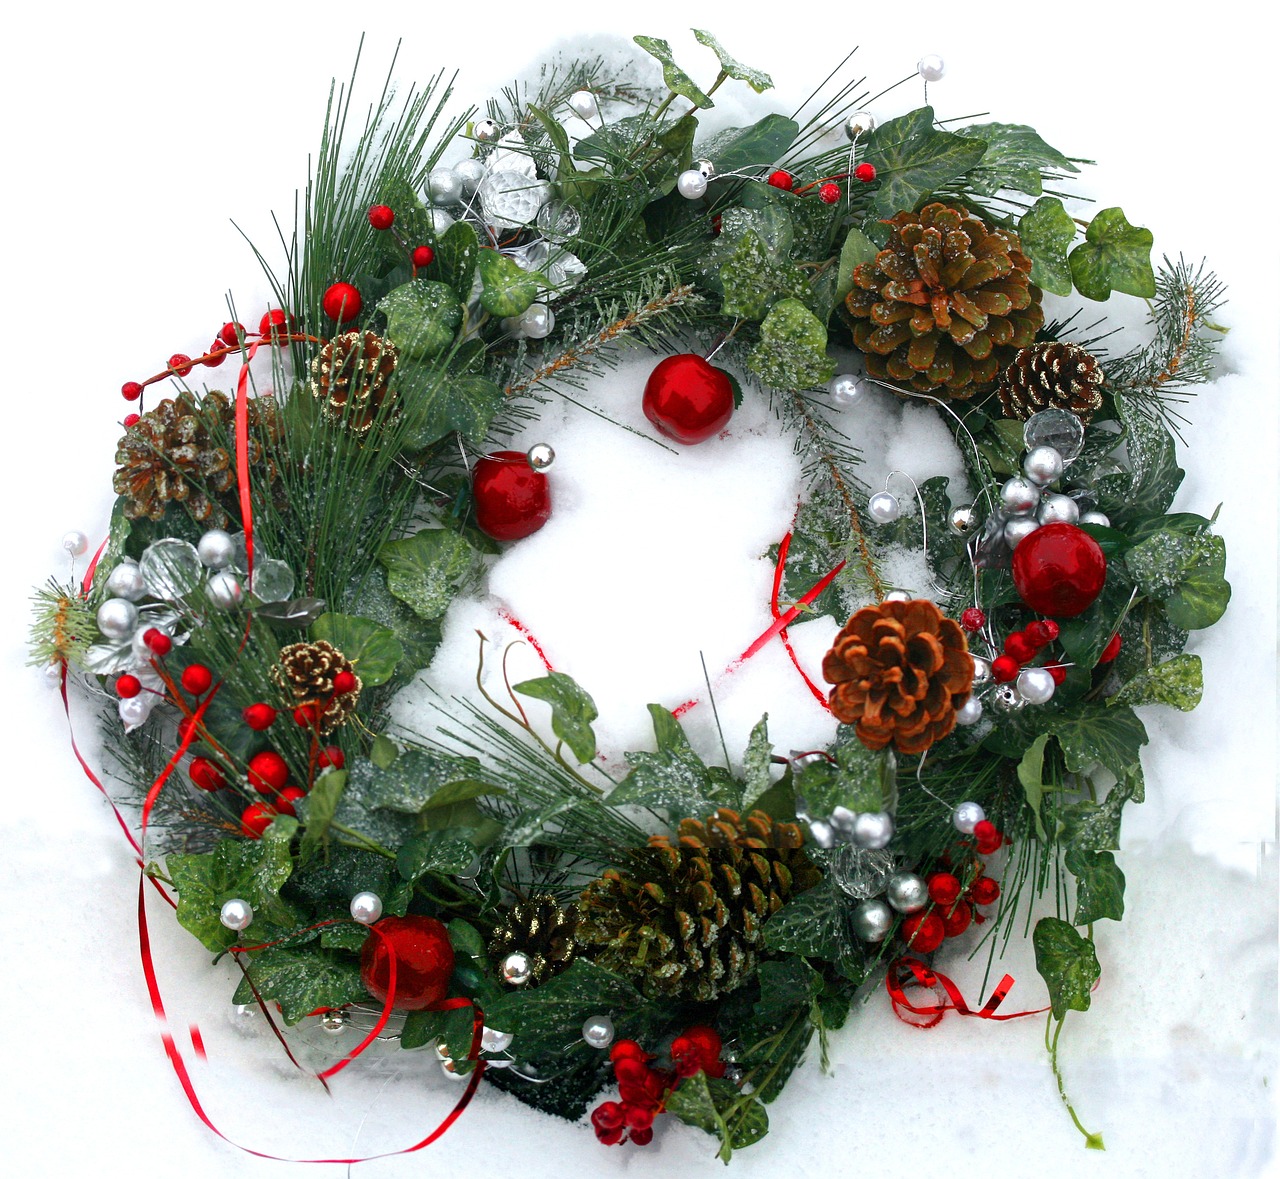
Creating your own is not only a fun and engaging activity, but it also allows you to showcase your personal style and creativity during the festive season. Imagine walking up to your front door and being greeted by a stunning wreath that you made yourself! The best part? You don’t need to be a crafting expert to pull it off. With just a few materials and some inspiration, you can craft beautiful wreaths that will become a focal point of your holiday decor.
To get started, you’ll need a base for your wreath. This can be a simple wire frame, a foam ring, or even a sturdy twig circle. The choice is yours! Once you have your base, the fun begins as you can choose from a variety of embellishments to bring your wreath to life. Think about incorporating natural elements like pinecones, dried fruits, or even seasonal flowers to create a rustic, charming aesthetic. These elements not only add texture and interest but also celebrate the beauty of the season.
Using natural elements in your wreath designs can evoke a sense of warmth and nostalgia. For example, pinecones can be painted in festive colors or left in their natural state for a more organic look. Dried oranges or apple slices can be strung onto the wreath for a pop of color and a delightful scent. Imagine the aroma of dried fruits wafting through your home, creating an inviting atmosphere for your guests!
Another way to enhance your wreath is by adding seasonal flowers. Think about using evergreens for a classic touch, or vibrant red berries to bring in that holiday spirit. Not only do flowers add color, but they also infuse your wreath with a lovely fragrance. You can choose to use fresh flowers for a lively look or opt for artificial ones that can last for years to come. The beauty of crafting your wreath is that you can mix and match until you find the perfect combination that reflects your style.
No wreath is complete without a stunning bow! Ribbons can elevate your design, adding elegance and a splash of color. You can experiment with different types of ribbons—velvet, burlap, or even metallic finishes—to find what suits your wreath best. Learning how to tie a beautiful bow is an art in itself, and once you master it, you can use it to embellish not just wreaths but also gifts and other decorations around your home.
Creating handmade wreaths is a delightful way to get into the holiday spirit. Not only does it allow you to express your creativity, but it also results in a beautiful decoration that can be cherished for years. So gather your materials, put on some festive music, and let your imagination run wild as you craft your unique wreath that will welcome guests with a touch of holiday cheer.
Q: What materials do I need to make a wreath?
A: To make a basic wreath, you'll need a wreath base (like a wire frame or foam ring), natural elements (pinecones, dried fruits), seasonal flowers, ribbons, and floral wire or glue to secure everything.
Q: How long will my handmade wreath last?
A: If you use fresh materials, your wreath will last a couple of weeks. However, if you opt for dried or artificial elements, your wreath can last for many seasons!
Q: Can I use any type of ribbon for my wreath?
A: Absolutely! You can use any type of ribbon that matches your theme and style. Just ensure it's durable enough to withstand the elements if your wreath will be hung outdoors.

Natural Elements
When it comes to crafting your own Christmas wreaths, incorporating is a fantastic way to bring the beauty of the outdoors into your holiday decor. Imagine stepping outside, gathering some pinecones, twigs, and dried fruits, and transforming them into a stunning wreath that not only looks beautiful but also tells a story of nature's charm. The best part? These elements are often free or very inexpensive, making your wreath both budget-friendly and eco-conscious.
Using natural materials allows you to create a rustic and charming aesthetic that celebrates the season. Pinecones, for example, add a touch of texture and can be painted or left in their natural state for a more organic look. Dried fruits, like oranges and apples, can infuse your wreath with a delightful aroma, reminding you of cozy winter days spent baking and crafting with loved ones. The vibrant colors of these fruits can also add a pop of brightness to your wreath, making it truly eye-catching.
To get started, consider these essential natural elements that can elevate your wreath-making game:
- Pinecones: Perfect for adding texture; you can leave them natural or spray paint them for a festive touch.
- Dried Fruits: Slices of oranges, lemons, or even pomegranates bring color and a lovely scent.
- Evergreen Sprigs: Use branches from pine, fir, or cedar to form the base of your wreath, giving it a fresh and vibrant look.
- Twigs and Branches: These can be woven into your wreath for added structure and a rustic feel.
- Berries: Red or white berries can add a festive pop of color, making your wreath stand out even more.
As you gather these materials, think about how you can arrange them to create a harmonious design. For instance, you might start with a base of evergreen sprigs, then layer in pinecones and dried fruits, finishing off with a few bright berries for contrast. The process can be incredibly therapeutic, allowing you to connect with nature while expressing your creativity.
Moreover, the beauty of using natural elements is that each wreath can be unique. Just like snowflakes, no two wreaths will ever be the same, reflecting your personal style and the beauty of the materials you’ve chosen. Plus, these wreaths can be a great conversation starter when guests arrive, allowing you to share the story behind your creation.
So, as you embark on your DIY wreath-making journey, remember to embrace the beauty of nature. Not only will your wreath be a stunning addition to your decor, but it will also serve as a reminder of the simple joys found in the world around us. Happy crafting!
Q1: What kind of glue should I use for natural elements in wreaths?
A1: A hot glue gun works best for attaching heavier items like pinecones, while craft glue or floral adhesive can be used for lighter materials like dried fruits.
Q2: How long will my natural wreath last?
A2: If properly cared for, a natural wreath can last several weeks to a few months. Keep it in a cool, dry place away from direct sunlight to prolong its life.
Q3: Can I use fresh elements instead of dried ones?
A3: Yes! Fresh elements can be used, but they will not last as long as dried ones. Consider using them for a short-term display, such as a holiday party.

Floral Arrangements
When it comes to Christmas decorations, floral arrangements can truly bring a festive spirit into your home. Imagine walking through your front door and being greeted by a stunning wreath adorned with vibrant seasonal flowers. Not only do these arrangements add a splash of color, but they also infuse your space with delightful fragrances that evoke the warmth of the holiday season. Using flowers like poinsettias, evergreens, and holly can create a beautiful and inviting atmosphere.
To get started, consider the following tips for creating your own floral arrangements:
- Choose Seasonal Flowers: Select flowers that are readily available during the Christmas season. Poinsettias are a classic choice, but you can also incorporate seasonal blooms like amaryllis and narcissus.
- Experiment with Colors: Embrace the traditional colors of Christmas—red, green, and white. However, don’t hesitate to mix in some gold or silver for a touch of elegance!
- Incorporate Greenery: Adding evergreens not only enhances the visual appeal but also provides a lovely scent. Consider using fir, pine, or cedar to create a rich backdrop for your floral arrangements.
Once you've gathered your materials, the fun part begins! You can create a stunning centerpiece for your dining table or a lovely arrangement for your mantelpiece. Start by arranging your greenery as the base, then add your flowers, ensuring to balance colors and heights for a visually appealing look. A little tip: odd numbers of flowers tend to look more natural and pleasing to the eye!
For those who want to elevate their floral arrangements even further, consider adding some festive accents. Think about incorporating elements like pinecones, berries, or even small ornaments. These little touches can make your arrangements pop and add an extra layer of charm. And don’t forget about the vase or container—using something unique, like a rustic wooden box or a glass jar wrapped in twine, can tie the whole look together beautifully.
Creating floral arrangements for Christmas is not just about aesthetics; it’s also about expressing your creativity and personality. Whether you prefer a traditional look or something more modern and playful, the possibilities are endless. So gather your supplies, put on some festive music, and let your imagination run wild!
1. What flowers are best for Christmas arrangements?
The best flowers for Christmas arrangements include poinsettias, amaryllis, and evergreens. These not only provide vibrant colors but also enhance the festive feel.
2. How can I make my floral arrangements last longer?
To prolong the life of your arrangements, make sure to change the water regularly, trim the stems at an angle, and keep them away from direct sunlight and heat sources.
3. Can I use artificial flowers for my Christmas arrangements?
Absolutely! Artificial flowers are a great option for those who want a long-lasting decoration. Just ensure they look realistic and are of good quality.

Ribbon and Bows
When it comes to enhancing your handmade wreaths, the magic often lies in the details, and nothing adds more charm than ribbons and bows. Imagine walking up to a beautifully adorned front door, where a stunning wreath greets you, complete with vibrant ribbons cascading gracefully. It’s like the cherry on top of a sundae, isn’t it? Ribbons can transform an ordinary wreath into a stunning masterpiece that reflects your personal style and the festive spirit of the season.
To start, you’ll want to choose ribbons that complement the colors and materials of your wreath. Think about the overall theme you’re going for. Are you leaning towards a traditional look with reds and greens, or perhaps something more modern with metallics and neutrals? The right ribbon can set the tone. For example, a classic red velvet ribbon evokes warmth and nostalgia, while a sleek silver satin ribbon might bring a touch of elegance and sophistication.
Creating bows is where the fun really begins! You don’t need to be a professional florist to make a stunning bow. Here’s a quick guide to get you started:
- Measure Your Ribbon: Cut a length of ribbon that’s about 24 inches long for a standard bow. Adjust the length based on how large you want your bow to be.
- Make a Loop: Fold the ribbon in half to create a loop at the center. This will be the base of your bow.
- Create Additional Loops: Depending on how full you want your bow, create additional loops by folding the ribbon back and forth, securing each loop with a twist tie or piece of wire.
- Secure the Bow: Once you have your desired number of loops, pinch the center together and secure it tightly with your wire.
- Fluff It Up: Finally, fluff out the loops to give your bow a full and lively appearance. Adjust the tails of the ribbon to hang as you like.
Once your bow is complete, you can attach it to your wreath using floral wire or hot glue. Position it at the top or side of the wreath for a balanced look. If you want to take it a step further, consider layering different types of ribbons for added texture and dimension. Combining a sheer ribbon with a thicker, patterned one can create a stunning visual effect that draws the eye.
Don’t forget about the finishing touches! Adding small embellishments like pinecones, ornaments, or even dried flowers can create a cohesive look. You can intertwine these elements with your ribbons to create a seamless design that showcases your creativity.
So, the next time you’re crafting your holiday wreath, remember that ribbons and bows are not just decorative elements; they are the finishing touches that can elevate your creation from simple to spectacular. Embrace the opportunity to express your style and let your wreath be a reflection of your holiday spirit!
Q: What types of ribbons are best for wreaths?
A: The best types of ribbons for wreaths are those that are durable and can withstand various weather conditions. Consider using wired ribbons for easy shaping, and opt for materials like burlap, velvet, or satin for a festive touch.
Q: How can I ensure my bow stays in place?
A: To ensure your bow stays in place, use floral wire to secure it tightly to the wreath. You can also add a dab of hot glue to keep it firmly attached.
Q: Can I use multiple colors of ribbon in one bow?
A: Absolutely! Mixing different colors and patterns can add depth and interest to your bow. Just make sure the colors complement each other for a cohesive look.
Upcycled Decorations
Upcycling is not just a trend; it's a wonderful way to breathe new life into old items, making your Christmas decorations not only unique but also eco-friendly. Imagine transforming a worn-out sweater into a cozy Christmas stocking or repurposing glass jars into beautiful candle holders. The beauty of upcycling lies in its creativity—it's like giving your old belongings a second chance to shine during the festive season!
One of the simplest ways to start your upcycling journey is by looking around your home for items that might otherwise be tossed aside. For instance, old picture frames can be painted and adorned with holiday-themed decorations, turning them into charming wall art or festive displays. You can even use them to showcase your favorite holiday cards, creating a lovely gallery that tells a story of your Christmas cheer.
Another fantastic idea is to repurpose tin cans. After a good wash, these cans can be painted in vibrant colors or wrapped in decorative paper to create delightful planters for seasonal greenery. Imagine a row of these colorful cans filled with holly or mistletoe, adding a rustic charm to your holiday decor. Not only does this project reduce waste, but it also brings a touch of nature indoors, reminding us of the beauty of the season.
Moreover, consider using old Christmas lights that may have seen better days. Instead of tossing them, you can cut the wires and use the bulbs to create a stunning centerpiece. Fill a glass bowl with the bulbs and place a few sprigs of evergreen or artificial snow around them for a sparkling display that captures the essence of Christmas. This simple yet effective decoration can be a conversation starter at your holiday gatherings!
When it comes to upcycled decorations, the possibilities are endless. You can even host a craft night with friends and family, where everyone brings items to upcycle. This not only fosters creativity but also builds memories that will last a lifetime. Just imagine the laughter and joy of transforming something old into something beautiful together. It’s a win-win situation: you get to create stunning decorations while also promoting sustainability!
To inspire your upcycling efforts, here’s a quick table summarizing some common household items you can transform into festive decorations:
| Item | Upcycled Decoration Idea |
|---|---|
| Old Sweaters | Christmas stockings or decorative pillows |
| Tin Cans | Painted planters or candle holders |
| Glass Jars | Votive candle holders or snow globes |
| Picture Frames | Holiday card displays or wall art |
| Christmas Lights | Centerpieces or decorative garlands |
In summary, upcycling is a fantastic way to express your creativity and make your Christmas decor truly one-of-a-kind. By using items you already have, you not only save money but also contribute to a more sustainable holiday season. So, roll up your sleeves, gather your materials, and let your imagination run wild. Who knows? You might just create the most memorable decorations your friends and family will talk about for years to come!
Q: What is upcycling?
A: Upcycling is the process of transforming old or discarded items into new products of better quality or for better environmental value. It’s a creative way to reduce waste and make something beautiful.
Q: Can I use any household item for upcycling?
A: Yes! Almost any household item can be upcycled. Just think creatively about how you can repurpose it. Items like old clothes, jars, cans, and even furniture can be transformed into festive decorations.
Q: Do I need special skills to upcycle?
A: Not at all! Upcycling is all about creativity and imagination. Basic crafting skills can help, but the most important thing is to have fun and experiment with different ideas!
Q: Where can I find inspiration for upcycling projects?
A: You can find inspiration in many places, including DIY blogs, Pinterest, and social media. Additionally, local craft stores often have workshops that can spark your creativity!
DIY Table Centerpieces
Creating stunning is a fantastic way to elevate your holiday gatherings! Imagine your dining table adorned with beautiful decorations that not only enhance the festive spirit but also reflect your personal style. Whether you’re hosting a cozy family dinner or a large holiday party, a well-crafted centerpiece can be the cherry on top of your holiday decor. So, let’s dive into some creative ideas that will make your table the talk of the season!
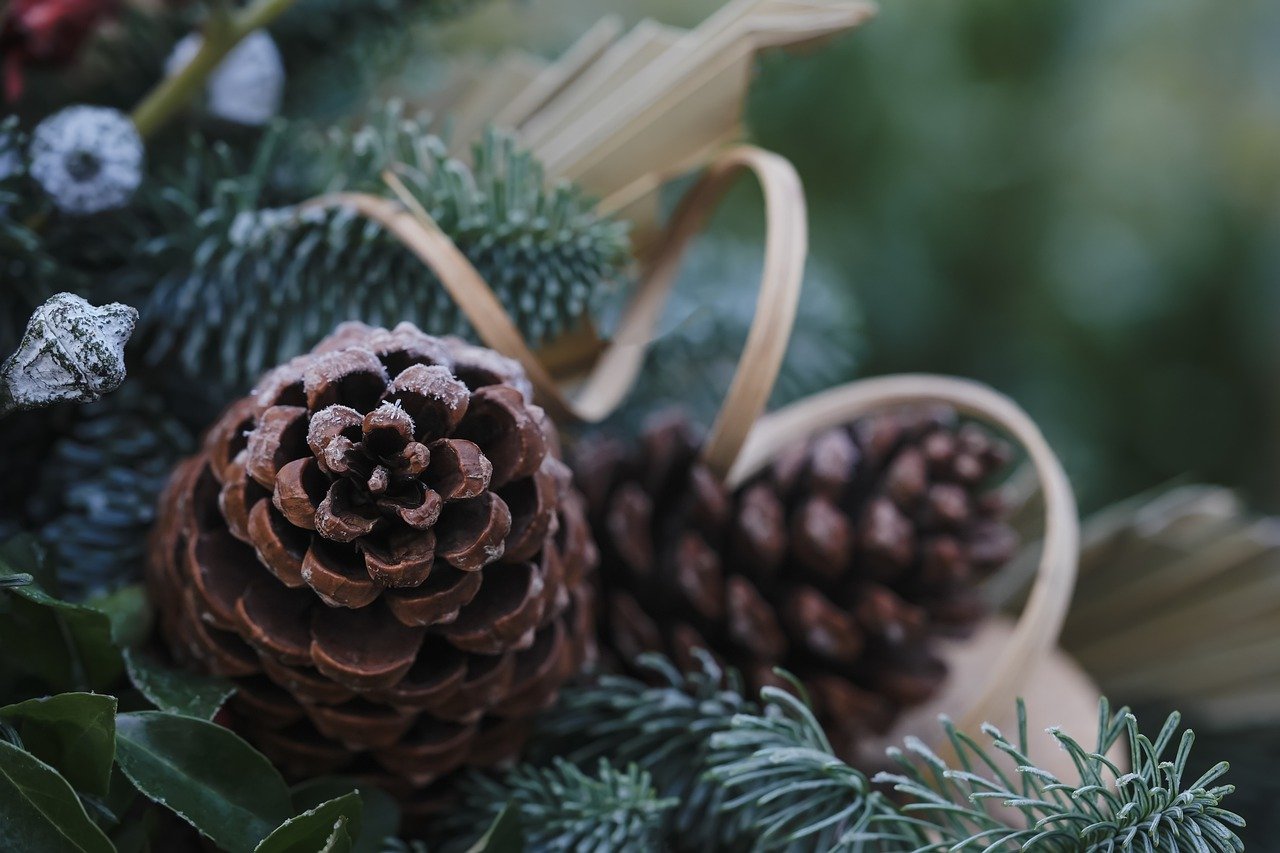
One of the simplest yet most effective ways to create a centerpiece is by using natural elements. Think about incorporating items like pinecones, twigs, and seasonal fruits. These elements not only bring a touch of nature indoors but also add a rustic charm that resonates with the essence of Christmas. You can easily gather these materials from your backyard or local park, making this a budget-friendly option. For instance, placing a cluster of pinecones in a decorative bowl can create an effortless centerpiece that exudes warmth and coziness.
Another delightful option is to create candle displays. Candles are synonymous with the holiday season, as they provide a warm glow that instantly makes any space feel inviting. You can use various types of candles—pillar, votive, or even tealights—arranged in a way that complements your table's aesthetic. For a more dramatic effect, consider using a mirrored tray to reflect the flickering light, or surround your candles with greenery, such as eucalyptus or holly, to add an extra layer of festivity. Remember, the key is to play with different heights and textures to create visual interest.
If you're feeling particularly creative, why not explore seasonal themes for your centerpieces? From a winter wonderland filled with white and silver accents to a more traditional red and green palette, the possibilities are endless! You could even create a themed centerpiece based on your favorite holiday movie or story. For example, if you love "A Christmas Carol," you could incorporate elements like tiny top hats or miniature Christmas trees to tell a story through your centerpiece. This not only showcases your creativity but also sparks conversation among your guests.
To help you visualize your centerpiece ideas, here’s a simple table outlining some popular centerpiece themes and their key elements:
| Theme | Key Elements |
|---|---|
| Winter Wonderland | White candles, silver accents, faux snow, and pine branches |
| Traditional Christmas | Red and green colors, holly, ornaments, and rustic wood |
| Glamorous Gold | Gold candles, sequined tablecloths, and glittery accents |
| Rustic Charm | Pinecones, burlap, mason jars, and wildflowers |
Don't forget about the finishing touches! Adding small details like personalized place cards or festive napkin rings can make your table feel extra special. Think of it as dressing up your centerpiece, giving it that final touch of elegance and thoughtfulness. Your guests will surely appreciate the effort you put into making them feel welcome and cherished during the holiday season.
So, roll up your sleeves and let your creativity shine! With these DIY table centerpiece ideas, you can transform your dining area into a festive haven that captures the joy and spirit of Christmas. Remember, the most important part is to enjoy the process and make memories with your loved ones as you craft your holiday decor!
Q: What materials do I need for a simple DIY centerpiece?
A: You can start with a base like a table runner or a tray, then add candles, flowers, seasonal elements, and personal touches like ornaments or photographs.
Q: How can I ensure my centerpiece is safe with candles?
A: Always use candle holders, keep flammable materials at a safe distance, and never leave candles unattended.
Q: Can I create a centerpiece on a budget?
A: Absolutely! Use items you already have at home, gather natural elements from outside, and get creative with DIY projects to keep costs low.

Candle Displays
Creating stunning for your holiday table can transform your dining area into a warm and inviting space. Imagine the soft glow of flickering candles illuminating your festive meal, casting a magical ambiance that makes every gathering feel special. But how do you achieve that perfect balance of beauty and safety? Let’s dive into some creative ideas that will not only enhance your decor but also keep your space cozy and festive.
First off, consider the type of candles you want to use. Whether you prefer classic tapered candles, elegant pillar candles, or charming votives, each type can bring its own unique flair to your display. For a more contemporary look, you might opt for LED candles, which provide the same warm glow without the worry of open flames. These are especially great if you have little ones or pets around!
Next, think about the arrangement. You can create a visually appealing centerpiece by clustering candles of varying heights. This adds depth and interest to your table. For example, place taller candles in the center and surround them with shorter ones. You can even utilize decorative trays or mirrored surfaces to reflect the light and create an illusion of more space. Here’s a quick idea to get you started:
| Height | Candle Type | Suggested Arrangement |
|---|---|---|
| Tall | Pillar Candle | Centerpiece |
| Medium | Taper Candle | Flanking sides |
| Short | Votive Candle | Scattered around |
Adding natural elements can also elevate your candle display. Think about incorporating pinecones, holly, or even sprigs of evergreen. These not only add a touch of nature but also enhance the festive spirit. You can create small arrangements of these elements around your candles or even place them inside glass containers as a base.
Don’t forget about the color scheme! The colors you choose can set the tone for your entire holiday gathering. Traditional reds, greens, and golds evoke a classic Christmas feel, while blues and silvers can give a more contemporary winter wonderland vibe. You can even paint or decorate your candle holders to match your chosen theme. The possibilities are endless, and this is where your creativity can truly shine.
Finally, consider the fragrance of your candles. Scented candles can create a delightful olfactory experience that complements your holiday feast. Scents like cinnamon, pine, or vanilla can evoke feelings of warmth and nostalgia, making your guests feel right at home. Just be cautious with the intensity of the fragrance; you want it to enhance the ambiance, not overpower it.
In conclusion, crafting beautiful candle displays for your holiday table is all about combining creativity with practicality. By selecting the right candles, arranging them thoughtfully, incorporating natural elements, and considering color and scent, you can create a stunning centerpiece that will leave your guests in awe. So, gather your materials, unleash your imagination, and let your candle displays light up your holiday celebrations!
- What types of candles are best for holiday displays? Consider using a mix of pillar, taper, and votive candles for varied heights and styles.
- How can I make my candle display safe? Always keep candles away from flammable materials and consider using LED candles for added safety.
- Can I use scented candles? Yes! Scented candles can enhance the holiday atmosphere, just be mindful of strong fragrances that might clash with food aromas.
Seasonal Themes
When it comes to creating stunning DIY table centerpieces, embracing can take your decorations to the next level. Think of your table as a blank canvas, waiting for the vibrant colors and textures of the season to come alive. Each theme tells a story and sets the mood for your holiday gatherings, making your dining experience not just a meal but a celebration of the season.
For instance, a winter wonderland theme can transform your table into a serene escape, reminiscent of a snowy landscape. Imagine white tablecloths adorned with shimmering silver accents, sparkling fairy lights, and frosted pinecones. You can use clear glass vases filled with faux snow or cotton balls to mimic the look of snowdrifts. Adding white candles in varying heights will create a cozy ambiance, illuminating the winter theme beautifully.
If you prefer a more traditional holiday motif, consider rich reds and greens as your primary colors. A deep red table runner paired with green napkins can evoke the spirit of Christmas. Enhance this theme with elements like miniature Christmas trees, holly berries, and even small ornaments scattered around the centerpiece. This not only creates a festive atmosphere but also sparks conversations about cherished holiday traditions.
Moreover, don't shy away from incorporating nature-inspired themes. Using elements like pine branches, dried oranges, and cinnamon sticks can bring a rustic charm to your table. These natural components can be arranged in a simple wooden tray, creating an earthy yet elegant centerpiece. The warm scents of cinnamon and pine will not only please the eyes but also delight the senses, making your holiday meals even more memorable.
For those who love a bit of whimsy, a playful and colorful theme can be a delightful choice. Think of bright colors like turquoise, pink, and gold. Use quirky tableware and fun decorations, such as candy canes, colorful ornaments, and even playful holiday figurines. This theme is perfect for family gatherings, especially with kids, as it creates a joyful and light-hearted atmosphere.
In addition to these ideas, you can mix and match elements from different themes to create something uniquely yours. The key is to let your creativity flow and choose what resonates with you and your loved ones. Remember, the goal is to create a space that feels inviting and warm, where everyone can gather, share stories, and enjoy each other's company.
To help you visualize these ideas, here’s a quick comparison of some popular seasonal themes for your DIY centerpieces:
| Theme | Color Palette | Key Elements |
|---|---|---|
| Winter Wonderland | White, Silver | Faux snow, Glass vases, White candles |
| Traditional Holiday | Red, Green | Mini Christmas trees, Holly berries, Ornaments |
| Nature-Inspired | Earth tones | Pine branches, Dried oranges, Cinnamon sticks |
| Playful & Colorful | Bright colors | Candy canes, Colorful ornaments, Holiday figurines |
Ultimately, the seasonal theme you choose should reflect your personal style and the spirit of the holidays. So gather your materials, unleash your creativity, and let your table centerpiece be a true reflection of the joy and warmth of the season!
- What materials do I need for DIY centerpieces? You can use a variety of materials, including candles, flowers, natural elements, and decorative items that fit your chosen theme.
- How can I make my centerpiece last longer? Use fresh flowers and change the water regularly, or opt for artificial flowers and elements that can be reused each year.
- Can I mix different themes in one centerpiece? Absolutely! Mixing themes can create a unique and personalized look that reflects your style.
- What are some quick tips for setting up a centerpiece? Keep it simple, ensure it's not too tall (so guests can see each other), and coordinate colors with your table setting.
Frequently Asked Questions
- What materials do I need for DIY Christmas ornaments?
You can use a variety of everyday materials such as cardboard, paper, felt, or even old Christmas cards. Don't forget items like glitter, paint, and glue to add some sparkle and creativity to your ornaments!
- How can I make a wreath using natural elements?
Start by gathering natural items like pinecones, dried fruits, and evergreen branches. Use a wire frame as your base, and attach the elements using floral wire or hot glue. This will give your wreath a rustic and charming look that’s perfect for the holiday season!
- Can I use artificial flowers in my wreath?
Absolutely! Artificial flowers can add a pop of color and last for years. Just make sure to choose seasonal colors that complement your overall decor theme for a cohesive look.
- What are some ideas for DIY table centerpieces?
You can create centerpieces using candles, seasonal flowers, or even festive fruits. Consider using a theme, like a winter wonderland or traditional holiday motifs, to tie everything together and impress your guests!
- How do I create a candle display for my table?
To craft a stunning candle display, start with a decorative tray or a mirror as your base. Arrange candles of varying heights, and surround them with seasonal decorations like pinecones, ornaments, or greenery for added flair!
- What are some sustainable options for Christmas decorations?
Upcycling old items is a fantastic way to create unique decorations while being environmentally friendly. Think of transforming glass jars into candle holders or using old sweaters to make festive garlands!
- How can I add personal touches to my Christmas decor?
Personal touches can be added through handmade ornaments, family photos in decorative frames, or even custom wreaths that reflect your family's style. The goal is to make your space feel warm and inviting!


