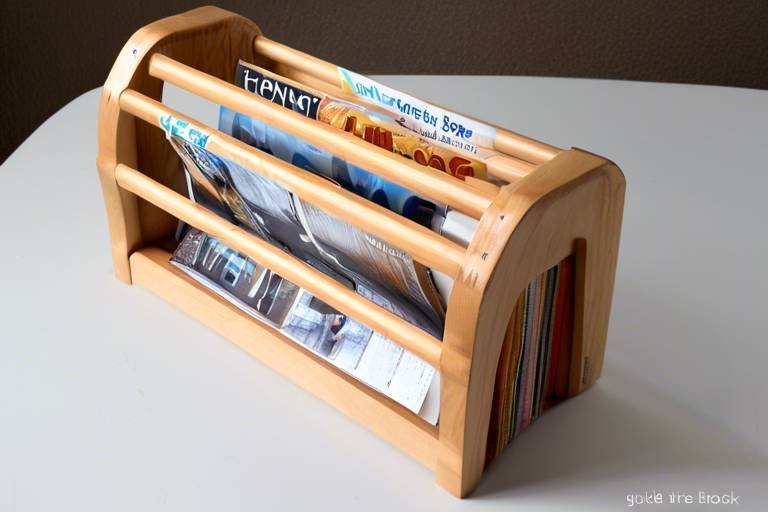
Turning Wooden Bowls: A Comprehensive Guide
Welcome to the enchanting world of woodturning, where raw pieces of wood transform into stunning, functional art. If you've ever admired a beautifully crafted wooden bowl, you might have wondered about the intricate process that brings it to life. This guide is designed to take you through the art of turning wooden bowls, whether you're a curious beginner or a seasoned woodturner looking to refine your skills. The journey of turning wooden bowls is not just about the final product; it's about the experience, the techniques, and the tools that make it all possible.
Imagine standing in your workshop, the scent of fresh wood filling the air, as you prepare to create something unique with your own hands. The process of turning wooden bowls is as much about self-expression as it is about craftsmanship. From selecting the right wood to applying the final finish, every step is an opportunity to showcase your creativity. In this comprehensive guide, we will explore essential techniques, tools, and tips that will help you navigate this rewarding craft.
As we dive deeper into the world of bowl turning, you'll discover the importance of wood selection, the essential tools needed to get started, and the techniques that will help you create beautiful pieces. We'll also address safety practices, common mistakes, and finishing techniques that will elevate your work. So, grab your tools and let’s embark on this exciting journey together!
Choosing the right type of wood is crucial for bowl turning. The wood you select not only influences the bowl's appearance but also its durability and functionality. Different species of wood have unique characteristics, such as grain patterns, color, and hardness. For instance, hardwoods like maple and walnut are popular choices due to their durability and beautiful grain. In contrast, softer woods like pine may be easier to work with but may not hold up as well over time.
When selecting wood, consider the following factors:
- Grain Pattern: A wood with a pronounced grain can add visual interest to your bowl.
- Color: Different woods offer a range of colors, from rich browns to lighter hues, which can affect the overall aesthetic.
- Workability: Some woods are easier to turn than others, making them ideal for beginners.
Ultimately, your choice of wood will play a significant role in the final product, so take the time to explore different options and find what resonates with your style.
A well-equipped workshop is vital for successful bowl turning. The right tools can make the process smoother and more enjoyable. Here’s a quick rundown of the essential tools you’ll need:
| Tool | Description |
|---|---|
| Lathe | The heart of your woodturning setup, allowing you to shape the wood. |
| Chisels | Various chisels are used for different cuts and shaping tasks. |
| Safety Gear | Includes goggles, dust masks, and ear protection to keep you safe while working. |
Investing in quality tools can significantly affect your experience and results. As you become more comfortable with the craft, you can explore additional tools that enhance your capabilities and allow for more intricate designs.
Now that you have your wood and tools ready, it’s time to dive into some fundamental turning techniques. For beginners, mastering the basics is essential to building confidence and skill. Start by focusing on your grip, stance, and the basic cuts necessary for shaping your bowl.
Understanding basic cuts is vital for creating beautiful bowls. The two primary cuts you’ll use are:
- Roughing Cut: This cut is used to remove large amounts of wood quickly, shaping the bowl into its general form.
- Finishing Cut: This cut refines the shape and smooths the surface for a polished final product.
As you practice these cuts, you'll find that consistency and control are key. It's normal to make mistakes along the way, but learning to recognize and correct them can save you time and frustration.
Once your bowl is turned, it’s time to focus on finishing. This step is essential as it enhances the beauty of the wood and protects it from damage. Popular finishing techniques include sanding, staining, and applying protective coatings. Each method has its own set of pros and cons, so it’s important to choose the right finish for your project.
To maintain the beauty and longevity of your wooden bowls, proper maintenance is crucial. Regular cleaning, oiling, and appropriate storage will ensure your creations remain stunning for years to come.
As you embark on your woodturning journey, you might have some questions. Here are a few common inquiries along with their answers:
- What wood is best for beginners? Softwoods like pine are great for beginners due to their workability.
- How do I prevent my bowl from cracking? Proper drying and sealing techniques can minimize cracking.
- What is the best finish for food-safe bowls? Mineral oil or beeswax are popular choices for food-safe finishes.
With this guide in hand, you’re well on your way to creating beautiful wooden bowls that reflect your creativity and skill. Remember, practice makes perfect, and the more you turn, the better you’ll become. Happy turning!

Understanding Wood Selection
When it comes to turning wooden bowls, the selection of wood is not just a matter of picking something that looks nice; it’s a crucial step that can make or break your project. Different wood species possess unique characteristics that affect not only the appearance of your finished bowl but also its durability and workability. So, how do you choose the right wood for your bowl? Let’s dive into the fascinating world of wood selection!
First off, you’ll want to consider the density of the wood. Denser woods tend to be more durable and can yield a smoother finish, making them ideal for bowls that will see frequent use. Woods like maple and cherry are excellent choices due to their fine grain and resilience. On the other hand, softer woods like pine can be easier to work with, especially for beginners, but they may not hold up as well over time.
Next, think about the color and grain pattern you desire in your finished bowl. Some woods, such as walnut and mahogany, offer rich colors and striking grain patterns that can enhance the visual appeal of your piece. If you’re looking for something unique, consider using exotic woods like zebrawood or padauk, which can add a touch of flair to your work. However, keep in mind that exotic woods can be more challenging to turn and may require special tools or techniques.
Another vital factor to consider is the wood’s moisture content. Freshly cut wood, or green wood, can be easier to turn but may warp or crack as it dries. On the contrary, seasoned wood has already gone through the drying process, making it less prone to these issues, but it can be more challenging to work with initially. If you’re new to woodturning, it might be beneficial to start with seasoned wood to avoid the frustrations that come with working with green wood.
For your reference, here’s a quick comparison of some popular wood species for bowl turning:
| Wood Species | Density (lbs/ft³) | Workability | Appearance |
|---|---|---|---|
| Maple | 38-45 | Easy | Light color, fine grain |
| Cherry | 35-45 | Moderate | Warm reddish-brown |
| Walnut | 38-58 | Moderate | Rich dark brown |
| Pine | 25-35 | Easy | Light yellowish-white |
| Zebrawood | 40-50 | Challenging | Striped pattern, exotic |
In conclusion, selecting the right wood for your bowl turning project is an art in itself. It’s about finding the perfect balance between appearance, durability, and workability. As you gain experience, you’ll develop a keen sense for what works best for your style and needs. So, don’t rush this step; take your time to explore different types of wood and discover what resonates with you!
- What is the best wood for beginners? - Maple and pine are great choices due to their workability and availability.
- How do I know if the wood is seasoned? - Seasoned wood typically has a lower moisture content and is less prone to warping.
- Can I use reclaimed wood for bowl turning? - Yes! Reclaimed wood can add character and uniqueness to your bowls, but ensure it’s free of contaminants.

Essential Tools for Bowl Turning
When it comes to turning wooden bowls, having the right tools is absolutely essential. Imagine trying to bake a cake without the proper utensils; it would be a messy disaster! Similarly, a well-equipped workshop can make or break your woodturning experience. So, let's dive into the must-have tools that will help you create stunning, functional pieces while ensuring a smooth and enjoyable turning process.
The heart of any woodturning project is the lathe. This powerful machine spins the wood, allowing you to shape it with precision. There are several types of lathes available, each catering to different skill levels and project requirements. For beginners, a basic benchtop lathe can be a great starting point, while experienced woodturners may prefer larger, more advanced models that offer additional features. The key is to find a lathe that fits your needs and budget.
Alongside the lathe, you’ll need a set of chisels. These are your primary tools for shaping the wood, and selecting the right ones can significantly impact the quality of your work. Common chisel types include:
- Roughing Gouge: Perfect for removing large amounts of material quickly.
- Spindle Gouge: Ideal for creating finer details and shapes.
- Skew Chisel: Excellent for achieving smooth finishes and precise cuts.
- Parting Tool: Useful for defining the edges and separating the bowl from the blank.
Each chisel has its own unique purpose, so it's beneficial to familiarize yourself with their uses to maximize your efficiency and creativity.
Don’t forget about safety equipment! Woodturning can be risky, with flying shavings and sharp tools posing potential hazards. Always wear safety goggles to protect your eyes from debris, and consider using a dust mask to avoid inhaling wood dust. A sturdy pair of gloves can also provide added protection, but make sure they are snug-fitting to prevent them from getting caught in the lathe.
In addition to these primary tools, having a few accessories can enhance your woodturning experience. For instance, a good set of calipers can help you measure the thickness of your bowl accurately, ensuring consistent results. A faceplate is also crucial for securely mounting your wood blank onto the lathe, allowing you to turn it safely and efficiently.
To summarize, the essential tools for bowl turning include:
| Tool | Purpose |
|---|---|
| Lathe | Spins the wood for shaping |
| Chisels | Shapes the wood |
| Safety Equipment | Protects against hazards |
| Calipers | Measures thickness |
| Faceplate | Mounts wood blank securely |
By ensuring you have these essential tools in your workshop, you’ll be well on your way to mastering the art of bowl turning. Remember, the right tools not only make the process easier but also enhance the quality of your finished products. So gear up, and let your creativity flow!
Q: What type of wood is best for beginners?
A: Softwoods like pine or poplar are great for beginners because they are easier to work with and more forgiving than hardwoods.
Q: How do I maintain my chisels?
A: Regularly sharpen your chisels using a sharpening stone or honing guide. Keep them clean and dry after use to prevent rust.
Q: Can I use a regular drill instead of a lathe?
A: While you can create some shapes with a drill, a lathe provides the controlled spinning motion necessary for proper bowl turning.
Q: What safety gear do I need?
A: At a minimum, you should wear safety goggles and a dust mask. Gloves and an apron can provide additional protection.
Q: How long does it take to turn a wooden bowl?
A: The time varies based on the complexity of the design and your skill level, but a simple bowl can typically be completed in a few hours.

Lathe Types and Features
When it comes to turning wooden bowls, the lathe is the heart of your workshop. Understanding the different types of lathes available can significantly impact your woodturning experience. There are primarily three types of lathes that woodturners utilize: benchtop lathes, floor-standing lathes, and mini lathes. Each type has its unique features and benefits, catering to various skill levels and project sizes.
Benchtop lathes are compact and perfect for hobbyists or those with limited space. They typically have a smaller footprint and are lightweight, making them easy to move around. However, they may limit the size of the projects you can undertake. These lathes usually come equipped with variable speed controls, allowing you to adjust the speed according to your needs, which is essential for achieving different finishes and cuts.
On the other hand, floor-standing lathes are designed for serious woodturners who require more power and stability. These lathes have a larger capacity, enabling you to turn bigger pieces of wood. They often feature a robust motor, which provides consistent torque even at higher speeds. Additionally, floor-standing lathes usually include more advanced features, such as electronic speed control, which allows for precise adjustments.
For those who are just starting out or have limited space, mini lathes can be a fantastic choice. These lathes are lightweight and portable, making them ideal for beginners. While they may not handle larger projects as effectively as benchtop or floor-standing lathes, they are perfect for smaller bowls and delicate items. Mini lathes often come with essential features that allow new woodturners to learn the craft without overwhelming them with complexity.
When choosing a lathe, consider the following features:
- Motor Power: A more powerful motor allows for smoother operation and can handle tougher woods.
- Speed Range: Different projects require different speeds; having a lathe with variable speed options can be very beneficial.
- Bed Length: A longer bed allows for larger projects, while a shorter bed is more suited for smaller items.
- Accessories: Look for lathes that come with or have compatible accessories, such as tool rests and faceplates.
Ultimately, the best lathe for you will depend on your specific needs, skill level, and the types of projects you plan to undertake. As you gain experience, you might find yourself upgrading to a more advanced model, but starting with the right lathe will set you on the path to success in woodturning.
1. What is the best lathe for beginners?
For beginners, a mini lathe or a benchtop lathe is often recommended due to their ease of use and compact size. They provide a great introduction to the craft without being overwhelming.
2. How much should I expect to spend on a lathe?
Prices can vary widely based on the type and features of the lathe. Mini lathes can start around $200, while more advanced floor-standing models can range from $600 to over $2000.
3. Can I use a lathe for other woodworking projects?
Yes! While lathes are primarily used for turning, they can also be utilized for other woodworking projects such as making furniture legs, spindles, and decorative items.

Choosing the Right Chisels
When it comes to turning wooden bowls, selecting the right chisels is not just a matter of preference; it’s a fundamental step that can significantly affect the quality of your work. The right tools can make your journey into woodturning smoother and more enjoyable, while the wrong ones can lead to frustration and subpar results. So, how do you choose the best chisels for your bowl turning projects? Let’s dive into the essential aspects you need to consider.
First and foremost, it's important to understand the different types of chisels available. Each chisel serves a unique purpose and is designed to perform specific cuts. Here are some commonly used chisels in bowl turning:
- Gouges: These are perhaps the most versatile tools in your arsenal. They come in various shapes, such as bowl gouges and spindle gouges, and are perfect for hollowing out the inside of a bowl or shaping the outer surface.
- Skew Chisels: Known for their sharp edge, skew chisels are ideal for making fine cuts and achieving a smooth finish. They can be a bit tricky to master, but their precision is worth the effort.
- Parting Tools: These are used to cut through the wood and create a separation between different sections of the bowl. They’re essential for creating clean lines and defined edges.
- Scrapers: While they may not be the first choice for many woodturners, scrapers can be incredibly useful for smoothing out surfaces and removing any imperfections.
Now, when selecting chisels, consider the material they are made from. High-speed steel (HSS) chisels are a popular choice among woodturners due to their durability and ability to hold an edge longer than carbon steel. This means less time spent sharpening and more time creating! Additionally, you should look for chisels that feel comfortable in your hand. A good grip can make all the difference, especially during long turning sessions.
Another factor to consider is the size of the chisels. Depending on the size of the bowls you plan to turn, you may need a variety of chisel sizes. For larger bowls, a wider gouge will be more effective, while smaller bowls can be tackled with narrower chisels. It’s often beneficial to have a range of sizes at your disposal so you can tackle any project with confidence.
Lastly, don't forget about maintenance. Keeping your chisels sharp is crucial for achieving clean cuts and reducing the risk of accidents. Investing in a good sharpening system will pay off in the long run, ensuring that your tools remain in top condition for years to come.
In summary, choosing the right chisels involves understanding the different types available, considering the materials and sizes, and maintaining them properly. By putting thought into your chisel selection, you’ll enhance your woodturning experience and create stunning bowls that showcase your craftsmanship.
Q: What is the best type of chisel for beginners?
A: For beginners, a bowl gouge and a parting tool are excellent starting points. They offer versatility and are essential for most bowl turning projects.
Q: How often should I sharpen my chisels?
A: The frequency of sharpening depends on how often you use them. A good rule of thumb is to sharpen them whenever you notice a dull edge or after a few hours of turning.
Q: Can I use any chisel for bowl turning?
A: While you can technically use any chisel, using tools specifically designed for woodturning will yield better results and enhance your overall experience.

Safety Equipment and Practices
When it comes to turning wooden bowls, safety should always be your top priority. Imagine you're embarking on a thrilling adventure—would you set out without the right gear? Just like a knight wouldn’t charge into battle without armor, you shouldn’t step up to the lathe without proper safety equipment. The tools you use can be sharp and dangerous, and the wood can fly off unexpectedly, so being prepared is essential.
First and foremost, wearing a quality face shield is crucial. This shield protects your face and eyes from flying debris, which can be as hazardous as a rogue arrow in battle. Additionally, a pair of ear protection is advisable since lathes can produce loud noises that may damage your hearing over time. You wouldn’t want to miss out on the sounds of nature because you couldn’t hear them!
Next, consider donning a dust mask or respirator. Wood dust can be harmful to your lungs, much like a thick fog that hides dangers in the night. Keeping your airways clear while working is vital for your long-term health. Moreover, wearing protective gloves is a good idea, but make sure they are snug and do not have loose ends that could get caught in the lathe. Think of it as the difference between a knight’s chainmail and a flowing cape—one keeps you safe, while the other can lead to trouble!
It's also important to maintain a clean workspace. A cluttered area can lead to accidents. Just as a warrior keeps their battlefield tidy to avoid tripping over their own feet, you should keep your lathe area organized. Make it a habit to clean up wood shavings and debris regularly. Additionally, ensure that your tools are in good condition and stored properly. Dull tools can be just as dangerous as sharp ones, as they require more force to use and can slip unexpectedly.
Finally, always follow best practices when operating your lathe. Before you start, double-check that all safety features are functional and that your wood is securely mounted. It’s like checking your armor before a joust—every piece needs to be in place to ensure your safety. Take your time to familiarize yourself with the equipment and don’t hesitate to seek advice from experienced woodturners. Remember, even the greatest knights had mentors!
In conclusion, equipping yourself with the right safety gear and adopting best practices will not only protect you but also enhance your woodturning experience. So gear up, stay safe, and let your creativity flow as you turn those beautiful wooden bowls!
- What type of face shield is best for woodturning? A full-face shield that meets safety standards is ideal for protecting against flying debris.
- Do I really need to wear a dust mask? Yes, especially if you are working with woods that produce fine dust, which can be harmful to your lungs.
- Are there any specific gloves recommended for woodturning? Look for gloves that are snug-fitting and made of durable material, but ensure they do not have loose ends.
- How often should I clean my workspace? It's best to clean your workspace after every turning session to prevent accidents.

Preparing the Wood Blank
Before diving into the exciting world of turning wooden bowls, one crucial step you can't afford to overlook is preparing the wood blank. Think of the wood blank as the canvas for your masterpiece; if it's not properly prepared, even the most skilled artist will struggle to create a beautiful painting. The process of preparing your wood blank involves several steps that set the stage for a successful turning experience.
First, you'll want to select the right piece of wood. Look for a blank that is free of cracks, knots, and other imperfections. Hardwoods like maple, cherry, and walnut are popular choices due to their durability and aesthetic appeal. However, softer woods like pine can also be used for practice pieces. Once you've selected your wood, it's time to cut it down to a manageable size. A general rule of thumb is to choose a blank that is at least twice as wide as the intended diameter of your bowl. For example, if you aim to turn a bowl with a diameter of 10 inches, your wood blank should be at least 20 inches wide.
Next, you’ll need to cut the wood blank into a rough shape. This can be done using a bandsaw or a chainsaw. The goal is to remove excess material and create a more rounded shape that will fit onto your lathe. Remember, a well-shaped blank will result in a smoother turning process. Once you have your rough shape, it's important to securely mount the blank onto your lathe. This typically involves using a faceplate or a scroll chuck, depending on the shape and size of your blank. Make sure it is tightly secured to avoid any accidents while turning.
Another crucial aspect to consider is the orientation of the wood grain. When preparing your blank, pay attention to the grain direction. Positioning the grain correctly can enhance the visual appeal of your finished bowl. For instance, if you want to showcase the grain patterns, orient the blank in a way that allows the grain to flow outward from the center of the bowl. This can significantly impact the aesthetics of your final product.
Finally, before you start turning, take a moment to inspect your setup. Ensure that your lathe is properly calibrated, the tools are sharp, and all safety equipment is in place. A well-prepared wood blank, combined with a properly set up workspace, will not only boost your confidence but also lead to a more enjoyable turning experience. Remember, preparation is key, and taking these extra steps will pay off in the long run!
- What type of wood is best for beginners? Softwoods like pine are great for practice, while hardwoods like maple and cherry are excellent for finished pieces.
- How do I know if my wood blank is suitable for turning? Look for a blank that is free of cracks and knots, and has a good grain pattern.
- Can I use green wood for turning? Yes, green wood can be used, but it may warp as it dries, so be prepared for some changes in shape.
- What tools do I need to prepare my wood blank? A bandsaw or chainsaw for cutting, and a lathe for mounting are essential tools.

Turning Techniques for Beginners
Embarking on the journey of woodturning can feel like stepping into a new world filled with endless possibilities. For beginners, mastering the basic turning techniques is akin to learning the alphabet before you can write a novel. It’s essential to grasp the fundamental skills that will serve as the foundation for your future projects. So, let’s dive into the basics of turning techniques that every novice woodturner should know!
First and foremost, your grip on the chisel is crucial. A firm yet comfortable grip allows for better control and precision. Imagine holding a pencil while trying to write your name; if your grip is too tight or too loose, the letters will be shaky. Similarly, with woodturning, you want to find that sweet spot where you can maneuver your chisel smoothly without straining your hand. A good rule of thumb is to keep your hands relaxed and maintain a consistent pressure throughout the turning process.
Your stance also plays a pivotal role in your turning success. Stand with your feet shoulder-width apart for stability, and position your body in a way that allows you to lean into the work without overreaching. This posture not only enhances your control but also minimizes fatigue, allowing you to work longer without discomfort. Think of it as being a quarterback ready to throw a perfect pass; your body position can make all the difference!
Now, let’s talk about the basic cuts. Understanding these cuts is like knowing the different strokes in swimming; each has its purpose and technique. The two fundamental cuts you’ll encounter are the roughing cut and the finishing cut. The roughing cut is used to shape the wood quickly, removing large amounts of material to create a basic form. It’s all about getting rid of the excess and transforming that raw wood into something recognizable. On the other hand, the finishing cut is where the magic happens. This cut refines the surface, smoothing it out and preparing it for the final touches. Each cut has its rhythm and flow, and mastering them will elevate your woodturning game.
As you begin to practice these techniques, it’s important to be aware of some common mistakes that beginners often make. For instance, many new woodturners apply too much pressure when cutting, which can lead to catches and tear-outs. Instead, focus on a gentle touch and let the tool do the work. Additionally, neglecting to check your tool sharpness can result in poor cuts and frustration. Always keep your chisels sharp, as a dull tool is not only ineffective but can also be dangerous. Remember, patience is key; every expert was once a beginner!
Finally, practice is your best friend. The more you turn, the more comfortable you will become with your tools and techniques. Don’t be afraid to experiment and make mistakes along the way. Each piece you create is a stepping stone towards mastering the art of woodturning. Think of it as learning to ride a bike; you might wobble and fall a few times, but eventually, you’ll find your balance and ride smoothly.
- What is the best wood for beginners to start turning? Softwoods like pine or poplar are great for beginners as they are easier to work with.
- How often should I sharpen my chisels? It’s best to sharpen your chisels every few hours of use or whenever you notice a dull edge.
- Can I turn green wood? Yes, turning green wood can be easier as it’s softer, but it requires different techniques due to the moisture content.
- What safety gear should I wear while turning? Always wear safety goggles, a dust mask, and ear protection to safeguard against debris and noise.

Basic Cuts Explained
When it comes to turning wooden bowls, understanding the basic cuts is crucial for achieving beautiful and functional results. These cuts are not just random movements; they are the foundation upon which your skills will grow. Think of them as the building blocks of your woodturning journey. Mastering these techniques will not only enhance your craftsmanship but also boost your confidence as a woodturner.
The most fundamental cuts you will encounter are the roughing cut and the finishing cut. Each serves a specific purpose in the turning process, and knowing when and how to use them is key to creating stunning bowls.
The roughing cut is your starting point. This is where you remove the bulk of the wood, transforming a square or irregularly shaped blank into a smooth, round cylinder. Imagine sculpting clay; you need to remove excess material before you can refine your masterpiece. To perform a roughing cut, you typically use a bowl gouge or a roughing gouge. These tools allow you to take off large shavings and quickly shape your piece. Maintaining a steady hand and a consistent angle will help you achieve a smooth surface.
Once the roughing cut is complete, it’s time to move on to the finishing cut. This cut is all about finesse. It refines the shape and smooths out any imperfections left from the roughing phase. For this, a scraper or a finishing gouge is ideal. The goal here is to create a surface that feels as good as it looks. You want to eliminate tool marks and achieve a glass-like finish. As you make this cut, remember to adjust your speed and pressure; too much of either can lead to tear-out, ruining the smoothness you’re aiming for.
In addition to these primary cuts, there are a few other techniques worth mentioning:
- Parting Cut: This cut is used to separate the bowl from the wood blank. It’s essential for finishing your piece and can also be used to create decorative grooves.
- Bevel Rubbing: This technique involves using the bevel of your tool to create smooth transitions and curves. It’s particularly useful for hollowing out the interior of your bowl.
Understanding these cuts is just the beginning. As you practice, you’ll develop a feel for the tools and the wood, allowing you to experiment with advanced techniques and styles. Remember, woodturning is as much about the journey as it is about the destination. So, take your time, enjoy the process, and don’t be afraid to make mistakes; they’re often the best teachers.
Q: What is the best tool for beginners to start with?
A: A good starter tool is a roughing gouge. It’s versatile and allows you to make the initial rough cuts effectively.
Q: How do I know when to switch from roughing to finishing cuts?
A: You should switch once the shape is generally round and free of major bumps or irregularities. The surface should feel relatively smooth to the touch.
Q: Can I use any type of wood for bowl turning?
A: While you can use various types of wood, it's best to start with softer woods like pine or poplar. They are easier to work with and can help you hone your skills.
As you continue to explore the world of woodturning, remember that practice makes perfect. Embrace each new project as an opportunity to learn and grow.

Common Mistakes to Avoid
When diving into the world of woodturning, particularly when it comes to creating beautiful wooden bowls, it’s easy to make some common blunders that can lead to frustration and unsatisfactory results. Understanding these pitfalls can save you time, resources, and a lot of headaches. One of the most frequent mistakes is neglecting wood selection. Not all wood is created equal, and using a species that is too hard or too soft can impact your ability to turn effectively. For instance, hardwoods like maple and walnut provide durability and a stunning finish, while softwoods can be easier to work with but may not yield the same aesthetic appeal. Always consider the characteristics of the wood before starting your project.
Another common issue arises during the preparation of the wood blank. Many beginners are eager to jump straight to turning without properly securing their wood. Failing to mount your blank securely can lead to dangerous situations and poor-quality work. Always ensure that your blank is clamped tightly to the lathe, using appropriate methods such as faceplates or centers, to prevent it from shifting during the turning process.
Moreover, many new woodturners underestimate the importance of tool maintenance. Dull tools can lead to jagged cuts and a frustrating experience. Regularly sharpening your chisels and gouges not only enhances safety but also improves the quality of your work. A sharp tool glides through the wood, allowing for smoother cuts and cleaner finishes. If you're unsure how to sharpen your tools, consider investing some time in watching tutorials or taking a class to learn the best techniques.
Additionally, improper stance and grip can significantly impact your control over the lathe. Many beginners tend to grip their tools too tightly, which can lead to fatigue and a lack of precision. Instead, aim for a relaxed grip, allowing your body to absorb vibrations while maintaining control. Your stance should be stable and balanced, with your feet shoulder-width apart to provide a solid foundation as you work.
Lastly, rushing the finishing process is a mistake that can drastically affect the final look of your bowl. Many turners are eager to see their creations completed and may skip essential steps such as sanding or applying multiple layers of finish. Taking the time to sand your bowl thoroughly and applying a high-quality finish will not only enhance its beauty but also prolong its lifespan. Remember, good things come to those who wait!
In summary, avoiding these common mistakes can significantly improve your woodturning experience. By focusing on wood selection, securing your blank properly, maintaining your tools, adopting the right stance and grip, and being patient with the finishing process, you’ll be well on your way to creating stunning wooden bowls that you can be proud of.
Here are some common questions that many aspiring woodturners have:
- What type of wood is best for beginners? Softwoods like pine and poplar are great for beginners due to their workability, but hardwoods like maple and cherry are excellent for finished products.
- How often should I sharpen my tools? It depends on usage, but a good rule of thumb is to sharpen your tools whenever you notice a decrease in performance or after a few hours of turning.
- Can I use a regular lathe for bowl turning? While you can use a regular lathe, a dedicated wood lathe is designed for bowl turning and will provide better results.
- What safety gear do I need? Essential safety gear includes safety glasses, a face shield, and a dust mask to protect against wood particles.

Finishing Techniques for Wooden Bowls
Finishing your wooden bowl is not just about aesthetics; it plays a crucial role in enhancing durability and functionality. When you put in all that hard work turning and shaping the wood, you want to ensure that the final product looks stunning and lasts for years to come. So, what are the best techniques for finishing wooden bowls? Let’s dive into the world of sanding, staining, and protective coatings!
First off, sanding is a vital step in the finishing process. It smooths out any rough spots and prepares the surface for further treatment. Start with a coarse grit sandpaper, like 80 or 120, to remove any tool marks, and gradually move to finer grits, such as 220 or 320, for a silky finish. Remember, the smoother the surface, the better the finish will adhere. A common mistake is rushing through this process, but patience pays off here!
Once sanding is complete, you might want to consider staining your bowl. Stains can bring out the natural beauty of the wood grain and add depth to the color. There are various types of stains available, including oil-based, water-based, and gel stains. Each type has its unique properties and application methods. For instance, oil-based stains penetrate deeper into the wood, while water-based stains dry faster and are easier to clean up. Choose a stain that complements the wood species you’re using and apply it with a clean cloth or brush, ensuring you wipe off any excess.
After staining, it’s time to protect your masterpiece! Applying a protective coating is essential, especially if the bowl will be used for food. Here are some popular options:
- Food-safe finishes: These include mineral oil, beeswax, or a combination of both. They are easy to apply and safe for food contact.
- Polyurethane: This offers a durable, waterproof finish but is not recommended for food use. It’s perfect for decorative bowls.
- Lacquer: Fast-drying and provides a hard finish, lacquer is another option for non-food bowls.
When applying any finish, always follow the manufacturer’s instructions for the best results. Typically, you’ll want to apply multiple thin coats, allowing each coat to dry completely before adding the next. This builds up a protective layer that enhances both the beauty and durability of your bowl.
Finally, maintaining your wooden bowl is key to preserving its beauty. Regular cleaning with mild soap and water, followed by thorough drying, will prevent moisture damage. Additionally, applying mineral oil periodically can help keep the wood hydrated and prevent cracking. Store your bowls in a cool, dry place, away from direct sunlight, to avoid warping and fading.
| Question | Answer |
|---|---|
| Can I use my wooden bowl for hot foods? | No, it’s best to avoid using wooden bowls for hot foods as heat can damage the finish and the wood itself. |
| How often should I reapply finish to my bowl? | It depends on usage, but generally, reapplying mineral oil every few months is a good practice for maintaining the wood’s condition. |
| What is the best way to clean my wooden bowl? | Use mild soap and warm water, then dry immediately with a towel to prevent moisture absorption. |

Choosing the Right Finish
When it comes to finishing your wooden bowls, the choice of finish can make a world of difference, not just in aesthetics but also in durability. The right finish can enhance the natural beauty of the wood, bringing out its unique grain patterns and colors, while also providing essential protection against moisture and wear. With so many options available, how do you decide which finish is best for your project? Let's dive into some popular finishes and their characteristics to help you make an informed choice.
First off, we have oil finishes, which are a favorite among woodturners for their ease of application and the warm, natural look they provide. Common oils include mineral oil, tung oil, and linseed oil. These finishes penetrate the wood, providing a protective barrier while enhancing the grain. However, they often require reapplication over time, especially for items that see regular use, like bowls.
Next up are varnishes. Unlike oils, varnishes form a hard protective layer on the surface of the wood. They can be glossy or matte, depending on your preference. While varnishes offer excellent protection against scratches and moisture, they can sometimes obscure the wood's natural beauty if not applied carefully. It's essential to sand between coats to achieve a smooth finish.
Another option is wax finishes. Wax can be used alone or over other finishes to provide an additional layer of protection and a lovely sheen. It’s easy to apply and can be buffed to a high shine, but it doesn’t offer as much durability as oils or varnishes. For items that won’t see heavy use, wax can be a great choice.
For those who want a more robust finish, polyurethane is a popular option. This synthetic finish is incredibly durable and water-resistant, making it ideal for bowls that may come into contact with liquids. Polyurethane is available in both oil-based and water-based formulations, each with its own set of advantages. Oil-based polyurethane tends to offer a richer color, while water-based options dry faster and have less odor.
To help you compare these finishes, here’s a quick overview in the table below:
| Finish Type | Durability | Ease of Application | Appearance | Maintenance |
|---|---|---|---|---|
| Oil | Moderate | Easy | Warm, natural | Reapply regularly |
| Varnish | High | Moderate | Glossy or matte | Sand and recoat as needed |
| Wax | Low | Very easy | Soft sheen | Reapply occasionally |
| Polyurethane | Very high | Moderate | Rich color | Minimal, but may need to be stripped and reapplied |
Ultimately, the choice of finish depends on the intended use of your wooden bowl and your personal aesthetic preferences. If you’re looking for a finish that highlights the wood's natural beauty while providing some protection, an oil finish might be your best bet. On the other hand, if you want something that can withstand the rigors of daily use, a polyurethane or varnish may be the way to go.
Remember, finishing is not just about protection; it’s also about expressing your creativity and enhancing the beauty of your work. So take your time, experiment with different finishes, and have fun bringing your wooden bowls to life!
- What is the best finish for wooden bowls? The best finish depends on your needs; oils are great for a natural look, while polyurethane offers excellent durability.
- How often should I reapply the finish? It varies by finish; oils may need reapplication every few months, while varnish can last longer.
- Can I use food-safe finishes? Yes, many finishes are food-safe, but always check the label to ensure they are suitable for kitchenware.

Maintaining Your Wooden Bowls
Maintaining your wooden bowls is essential to ensure they remain beautiful and functional for years to come. Just like a cherished piece of art, these bowls deserve some love and care. **Proper maintenance** not only preserves their appearance but also extends their lifespan, allowing you to enjoy them for generations. So, how can you keep your wooden bowls looking their best? Let’s dive into some effective maintenance practices!
First and foremost, **cleaning** is a crucial step in your maintenance routine. After using your wooden bowl, it's important to wash it gently with warm, soapy water. Avoid soaking your bowl, as prolonged exposure to water can cause the wood to warp or crack. Instead, use a soft sponge or cloth to wipe down the surface. After cleaning, rinse it thoroughly and dry it immediately with a towel to prevent moisture retention.
Another vital aspect of maintenance is **oiling** your wooden bowls. Regularly applying a food-safe mineral oil or a specialized wood conditioner helps to nourish the wood, preventing it from drying out and cracking. Ideally, you should oil your bowls every few months, or whenever they start to look dull. Simply pour a small amount of oil onto a clean cloth and rub it into the wood in the direction of the grain. Allow the oil to soak in for a few hours or overnight, then wipe off any excess oil. This simple act can make a world of difference in how your bowls look and feel.
When it comes to storing your wooden bowls, it's essential to keep them in a **dry and cool place**. Avoid exposing them to direct sunlight or heat sources, as this can lead to fading and warping. Instead, consider using a dedicated shelf or cabinet where they can be displayed safely. If stacking your bowls, place a soft cloth or paper towel between them to prevent scratches and damage.
Lastly, if you notice any signs of wear, such as scratches or stains, don’t fret! You can easily restore your wooden bowls with some light sanding. Use fine-grit sandpaper to gently smooth out any rough areas, always sanding in the direction of the grain. After sanding, remember to reapply oil to restore the finish. This quick touch-up can bring your bowls back to life and keep them looking as good as new.
In summary, maintaining your wooden bowls is a straightforward process that involves regular cleaning, oiling, and proper storage. By following these simple steps, you can ensure your bowls remain stunning and functional for years to come. Treat them with care, and they'll reward you with their beauty and utility!
- How often should I oil my wooden bowls? It's recommended to oil your bowls every few months, or whenever they look dull.
- Can I put my wooden bowls in the dishwasher? No, it's best to wash them by hand with warm, soapy water to avoid damage.
- What type of oil should I use for maintenance? Use a food-safe mineral oil or a specialized wood conditioner for best results.
- How can I remove stains from my wooden bowls? Light sanding with fine-grit sandpaper followed by re-oiling can help remove stains.
Frequently Asked Questions
- What type of wood is best for turning bowls?
When it comes to turning bowls, hardwoods like maple, cherry, and walnut are often preferred due to their durability and beautiful grain patterns. However, softer woods like pine can also work well for beginners. The choice of wood can significantly impact the final look and feel of your bowl.
- Do I need a specific lathe for bowl turning?
While you can use various types of lathes for bowl turning, a wood lathe designed for larger projects is ideal. Look for features like a wide swing and variable speed settings, which allow for better control and versatility in your turning projects.
- What are the essential chisels I should have?
For bowl turning, you'll want to have a few key chisels in your toolkit. A bowl gouge is essential for shaping the interior, while a scraper is great for smoothing out surfaces. Additionally, a spindle gouge can be useful for detailing work.
- How can I ensure safety while woodturning?
Safety is paramount in woodturning. Always wear eye protection and a dust mask to protect against wood shavings and dust. It's also crucial to keep your workspace organized and to use sharp tools, as dull tools can lead to accidents.
- What are some common mistakes beginners make?
Beginners often rush the preparation of their wood blank or neglect to secure it properly, which can lead to dangerous situations. Additionally, not practicing basic cuts can result in uneven surfaces. Take your time to learn and practice to avoid these pitfalls.
- How do I finish my wooden bowl?
Finishing your bowl can enhance its natural beauty and protect it from wear. Start by sanding the surface smoothly, then consider applying a finish such as mineral oil or a food-safe varnish. Each finish has its own benefits, so choose one that suits your bowl's intended use.
- What maintenance do wooden bowls require?
To keep your wooden bowls looking their best, it's important to clean them gently with warm, soapy water and avoid soaking them. Regularly applying a food-safe oil can help maintain the wood's integrity and luster, extending the life of your bowls.