Creating Precision in Woodwork: Using a Joiner
Welcome to the fascinating world of woodworking! Whether you're just starting out or you've been crafting beautiful pieces for years, understanding the role of a joiner is crucial for achieving that perfect finish. A joiner is not just a tool; it's an essential part of your woodworking arsenal that can make or break your project. Imagine standing back to admire a piece of furniture that not only looks stunning but is also built to last. That's the magic of precision joinery!
In woodworking, joinery refers to the techniques used to connect pieces of wood together. It’s the backbone of any solid structure, providing both strength and aesthetic appeal. Think of it as the glue that holds your masterpiece together—without it, even the most beautiful wood can fall apart. By mastering various joinery techniques, you can create pieces that not only look good but also stand the test of time.
But why is precision so important? Well, picture this: you’ve spent hours selecting the finest wood, carefully measuring and cutting each piece, only to find that your joints don’t fit together perfectly. Frustrating, right? That’s why learning about joinery techniques and the tools that go along with them can be a game-changer. In this article, we’ll dive deep into the art of joinery, exploring different techniques, essential tools, and tips that can elevate your woodworking skills to new heights.
So, whether you’re crafting a simple shelf or a complex piece of furniture, understanding how to use a joiner effectively will help you achieve that professional touch. Let’s get started on this journey of precision in woodworking, and who knows? You might just discover a new passion along the way!
Joinery is the backbone of woodworking, providing strength and durability to structures. Understanding different joinery techniques helps woodworkers create pieces that not only look good but also stand the test of time. Each joint serves a purpose, whether it’s to support weight, allow for movement, or simply to look beautiful. Without strong joinery, even the most exquisite designs can become weak and unstable.
From dovetail to mortise and tenon, various joinery techniques exist to suit different projects. Each method has its unique advantages, making it crucial to choose the right one for your woodworking needs. For instance, dovetail joints are often used in drawer construction due to their strength and aesthetic appeal, while mortise and tenon joints are a classic choice for furniture construction. Knowing when and how to use these techniques can significantly impact the quality of your work.
Dovetail joints are renowned for their strength and aesthetic appeal. This technique is commonly used in drawer construction, providing a reliable method to connect pieces of wood at right angles. The interlocking design of dovetails not only adds visual interest but also creates a mechanical bond that’s incredibly strong.
Learning to cut dovetails by hand can enhance your woodworking skills. This section covers essential tips and tools needed to achieve clean, precise dovetail joints that elevate your projects. Start with a sharp chisel and a good quality saw, and remember to take your time. Accuracy is key! As you practice, you'll find that your skills improve, and soon enough, you'll be cutting dovetails like a pro.
Dovetail jigs simplify the dovetail joint process, making it accessible for all skill levels. This part discusses how to select and effectively use a dovetail jig for consistent results. A good jig can save you time and ensure that your joints fit perfectly every time. Just remember to follow the manufacturer’s instructions closely for the best results!
Mortise and tenon joints are a classic choice for furniture construction. Understanding how to create and use these joints can significantly improve the stability and longevity of your wooden pieces. The mortise is a hole cut into one piece of wood, while the tenon is a protruding piece on another that fits snugly into the mortise. This joint is not only strong but also allows for some movement, which is essential in woodworking.
Having the right tools is essential for effective joinery. This section highlights the must-have tools for every woodworker, ensuring you have the best equipment to achieve precise joints. Investing in quality tools can make all the difference in your projects, allowing you to work more efficiently and achieve better results.
Hand tools remain a favorite among traditional woodworkers. This part explores essential hand tools for joinery, including chisels, mallets, and hand saws, and their proper use for precision work. While power tools have their place, there’s something satisfying about using hand tools to create beautiful joints. They give you greater control and allow for a more personal touch in your work.
Power tools can speed up the joinery process and improve accuracy. This section discusses popular power tools used in joinery, such as routers and drills, and tips for their effective use. While power tools can be intimidating at first, with practice, they can become invaluable in your woodworking journey.
- What is the best joinery technique for beginners?
For beginners, simple techniques like butt joints or lap joints are great starting points. - Do I need expensive tools to achieve good joinery?
No, while quality tools help, you can achieve good results with basic, well-maintained tools. - Can I use power tools for all joinery techniques?
While many techniques can be adapted for power tools, some, like dovetails, are often best done by hand for precision.
The Importance of Joinery
Joinery is the backbone of woodworking, providing not just aesthetic appeal but also crucial strength and durability to various structures. Think of it as the glue that holds your woodworking projects together—without it, even the most beautiful pieces can fall apart with time. Understanding the different joinery techniques is essential for any woodworker, whether you're just starting or have years of experience under your belt. It's like knowing the right spices to use in a recipe; the right joinery can elevate your project from mediocre to magnificent.
At its core, joinery is about creating connections. A well-executed joint can withstand pressure, resist wear, and endure the test of time. It’s fascinating to realize that the strength of a piece of furniture often lies in the joints rather than the wood itself. For instance, a beautifully crafted table may be made from the finest oak, but if the joints are weak, it could wobble and eventually collapse. This is why mastering joinery is not just a skill; it’s an art form.
Moreover, different projects require different types of joints. For example, when crafting a drawer, dovetail joints are often preferred for their ability to resist pulling apart. On the other hand, mortise and tenon joints are commonly used in frame construction because they offer exceptional strength and stability. Understanding these nuances allows woodworkers to choose the right technique for their specific needs, ensuring that each piece not only looks good but also functions well.
In addition to functionality, joinery also plays a significant role in the visual appeal of a project. The way joints are executed can add character and charm to a piece. A well-made joint can be a statement in itself. For instance, exposed joinery can showcase craftsmanship, while hidden joints can create a clean, modern look. This balance between functionality and aesthetics is what makes woodworking so rewarding.
When you delve into the world of joinery, you’ll quickly discover that it’s not just about connecting wood; it’s about creating a lasting relationship between materials. Just like in any relationship, the strength, compatibility, and care you put into the joinery will determine the longevity and success of your project. So, whether you’re building a simple shelf or a complex piece of furniture, remember that good joinery is essential for creating something that will stand the test of time.
Ultimately, investing time in learning about joinery techniques will pay off in dividends. It not only enhances the quality of your work but also elevates your skills as a craftsman. The satisfaction of seeing your projects come together with precision is unparalleled. So, grab your tools, and let’s dive into the fascinating world of joinery!

Types of Joinery Techniques
When diving into the world of woodworking, one of the most exciting aspects is exploring the various joinery techniques available. Each method brings its own flavor, much like spices in a recipe, enhancing the overall quality and durability of your projects. Understanding these techniques is akin to having a toolbox filled with different tools; each one serves a specific purpose and can dramatically affect the outcome of your work. Whether you are crafting a simple shelf or an intricate piece of furniture, selecting the right joinery technique can make all the difference.
Among the myriad of techniques out there, some stand out due to their strength, ease of use, or aesthetic appeal. For instance, the dovetail joint is a classic choice for drawers and cabinets, known for its interlocking design that provides exceptional strength. It's like a puzzle piece that fits perfectly, ensuring that your furniture can withstand daily use without falling apart. On the other hand, the mortise and tenon joint is another favorite, especially in traditional furniture making. This technique involves a rectangular hole (the mortise) and a corresponding projection (the tenon) that fits snugly into it, creating a strong bond that can last for generations.
But wait, there's more! In addition to these two popular methods, there are several other joinery techniques worth exploring:
- Lap Joints: These are simple and effective, often used in frames and structures where two pieces of wood overlap.
- Box Joints: Similar to dovetails, these joints provide a strong connection and are often used in box construction.
- Bridle Joints: These are perfect for creating strong frames, allowing pieces of wood to fit together at right angles.
Each of these techniques has its unique advantages and applications, so understanding their characteristics can help you choose the right one for your specific project. It's essential to consider the type of wood you are working with, the intended use of the piece, and your own skill level. For example, while dovetail joints may offer stunning visual appeal, they can be challenging for beginners. Conversely, simpler techniques like lap joints might be more accessible while still providing adequate strength.
Moreover, mastering these joinery techniques can not only enhance your woodworking skills but also elevate your projects to a professional level. Imagine the satisfaction of crafting a piece of furniture that not only looks great but is also built to last. With practice, you can develop a keen eye for which technique to use in various situations, allowing you to tackle more complex projects with confidence.
In conclusion, the world of joinery is vast and full of possibilities. By familiarizing yourself with these various techniques, you can expand your woodworking repertoire and create stunning pieces that stand the test of time. So, whether you’re a seasoned woodworker or just starting, don’t hesitate to experiment with different joinery methods. Who knows? You might just discover a new favorite technique that transforms your projects!
Dovetail Joints
Dovetail joints are often hailed as the **jewel of woodworking**. Their unique interlocking design not only provides exceptional strength but also adds an aesthetic appeal that can elevate any project. Imagine a beautifully crafted drawer, where the corners are seamlessly joined together, showcasing the craftsmanship that went into its creation. That’s the magic of dovetail joints! They are particularly popular in furniture making, cabinetry, and any application where durability is paramount.
What makes dovetail joints so special? First, they resist tensile forces, meaning they can withstand pulling apart better than many other joint types. This characteristic is crucial when constructing pieces that will endure daily use. Moreover, the visual appeal of dovetails is undeniable; they serve as a testament to the skill of the craftsman. When done right, a dovetail joint can be a stunning feature, drawing the eye and sparking conversation.
To create a dovetail joint, you’ll need to understand the basic anatomy of the joint itself. A typical dovetail joint consists of two main components: the **tail** and the **pin**. The tails are cut into one piece of wood, while the pins are cut into the adjoining piece. The interlocking nature of these components is what gives the dovetail its strength. But, it’s not just about cutting; it’s about precision. Accurate measurements and cuts are essential to ensure that the joint fits together snugly without gaps.
When it comes to cutting dovetails, there are a couple of methods you can choose from. You can opt for the traditional hand-cut method, which, while time-consuming, allows for a level of craftsmanship that power tools sometimes cannot replicate. Alternatively, you can use a dovetail jig, which simplifies the process and can produce consistent results, making it a great option for beginners or those looking to save time.
Here’s a quick overview of the two methods:
| Method | Advantages | Disadvantages |
|---|---|---|
| Hand-Cutting |
|
|
| Dovetail Jigs |
|
|
Regardless of the method you choose, practice is key. Start with scrap wood to hone your skills before tackling your main project. As you gain confidence, you’ll find that cutting dovetails becomes not just a task, but a rewarding experience. So, whether you’re crafting a simple drawer or a complex piece of furniture, incorporating dovetail joints will undoubtedly enhance the quality and beauty of your work.
Q: What wood types are best for dovetail joints?
A: Hardwoods like oak, maple, and cherry are excellent choices due to their durability and ability to hold the joint well. However, softer woods can also work if you're looking for ease of cutting.
Q: Can I use dovetail joints in outdoor furniture?
A: Yes, but it's important to use weather-resistant wood and appropriate finishes to protect the joints from moisture and wear.
Q: How can I ensure my dovetail joints are precise?
A: Take your time with measurements and cuts. Using a marking gauge and a square can help achieve accurate lines, and practice will improve your skills.
Cutting Dovetails
Cutting dovetails by hand is often seen as a rite of passage for woodworkers, and it’s easy to understand why. This technique not only enhances your skills but also adds a personal touch to your projects. Imagine the satisfaction of crafting a joint that not only fits perfectly but also showcases your craftsmanship! To get started, you’ll need to gather some essential tools and materials.
First, let’s talk about the tools you’ll need. A good quality chisel is crucial for cleaning up the joints. A marking gauge will help you achieve precise measurements, while a back saw is perfect for making the initial cuts. Don’t forget a mallet to drive your chisels and a reliable square to ensure your angles are spot on. Here’s a quick rundown of the tools:
| Tool | Purpose |
|---|---|
| Chisel | For cleaning and shaping joints |
| Marking Gauge | For precise measurements |
| Back Saw | For making accurate cuts |
| Mallet | To drive chisels |
| Square | For ensuring right angles |
Once you have your tools ready, the next step is to mark your wood. Start by drawing the outline of your dovetail joint on the end of the board. It’s essential to be meticulous here, as the accuracy of your markings will determine the quality of your joint. Use your marking gauge to set the depth of your cuts, ensuring consistency across all joints.
Now, it’s time to make the cuts! Begin with the tails of the dovetail joint. Using your back saw, carefully cut along the lines you've marked. Take your time—precision is key! Once the tails are cut, you can move on to the pins. Mark the position of the pins on the adjoining piece of wood, and repeat the cutting process. After cutting the pins, use your chisel to remove any excess material and refine the fit.
Finally, it’s all about fitting the pieces together. Test the joint by gently pushing the tails into the pins. If they don’t fit perfectly, don’t fret! You can always make small adjustments with your chisel until you achieve that snug fit. Remember, the goal is to create a joint that is both strong and visually appealing.
As you practice cutting dovetails, you’ll find that your technique will improve, and you’ll develop a rhythm that makes the process more enjoyable. Each joint you create will not only enhance your woodworking skills but also give you a sense of pride in your craftsmanship. So grab your tools, and let’s get cutting!
- What is the best wood for practicing dovetail joints? Softwoods like pine are great for beginners due to their workability.
- Can I use power tools for dovetail joints? Yes, while hand-cut dovetails are traditional, there are power tools like routers that can help achieve dovetail joints.
- How long does it take to master dovetail joints? Mastery varies by individual, but with consistent practice, you can see improvement in just a few weeks!
Using Dovetail Jigs
When it comes to woodworking, the dovetail joint is a hallmark of craftsmanship and precision. However, achieving that level of finesse can be a daunting task for many. This is where dovetail jigs come into play, serving as invaluable tools that simplify the process while ensuring consistent, high-quality results. Imagine having a reliable assistant by your side, guiding you through the intricacies of cutting perfect dovetails, and that’s exactly what a dovetail jig does.
But how do you choose the right dovetail jig for your projects? There are a few factors to consider. First, think about the type of dovetail joints you want to create. Some jigs are designed specifically for through dovetails, while others excel at half-blind dovetails or box joints. Understanding your project requirements will help you narrow down the options. Additionally, consider the adjustability and ease of use of the jig. A good jig should allow you to make quick adjustments without much hassle, keeping your workflow smooth and efficient.
Once you have your dovetail jig, the next step is to familiarize yourself with its setup. Most jigs come with user manuals that provide detailed instructions, but here are some key tips to get you started:
- Secure the Workpiece: Ensure your wood is firmly clamped in place. A stable workpiece is crucial for achieving accurate cuts.
- Adjust the Router: Set up your router according to the jig's specifications. The depth of the cut is vital; too deep, and you risk compromising the joint's strength.
- Test Cuts: Before diving into your main project, practice on scrap wood. This allows you to fine-tune your settings and gain confidence.
Using a dovetail jig can dramatically reduce the learning curve for creating dovetail joints. It offers a level of precision that hand-cutting might take years to master. Plus, the speed at which you can produce high-quality joints means you can tackle more ambitious projects without the fear of time constraints. Whether you’re crafting a beautiful drawer or building a sturdy cabinet, the dovetail jig can be your best friend in the workshop.
In conclusion, embracing a dovetail jig not only enhances your woodworking capabilities but also opens up a world of creative possibilities. It combines the art of traditional joinery with modern efficiency, making it an essential tool for both novice and seasoned woodworkers alike. So, gear up, get your jig ready, and watch as your woodworking projects transform into stunning masterpieces!
Q: What is a dovetail joint?
A: A dovetail joint is a type of joint used in woodworking that interlocks two pieces of wood, typically at right angles, providing exceptional strength and stability.
Q: Do I need a special router for using a dovetail jig?
A: While many routers can work with dovetail jigs, it’s best to choose a router that can accommodate the depth and width adjustments required for dovetail cuts.
Q: Can I use a dovetail jig for different types of joints?
A: Yes! Many dovetail jigs are versatile and can be adjusted to create various types of joints, including box joints and half-blind dovetails.
Q: Is it worth investing in a dovetail jig?
A: Absolutely! A dovetail jig can save you time and improve the quality of your woodworking projects, making it a worthwhile investment for serious woodworkers.
Mortise and Tenon Joints
The mortise and tenon joint is often hailed as one of the most reliable and traditional methods in woodworking. This classic joint consists of two parts: the mortise, which is a cavity cut into one piece of wood, and the tenon, a protruding piece on the other wood that fits snugly into the mortise. Not only does this joint provide exceptional strength, but it also allows for a seamless connection that enhances the overall aesthetics of your project. Imagine it as the perfect handshake between two pieces of wood—firm, secure, and lasting.
One of the primary reasons woodworkers favor the mortise and tenon joint is its versatility. It can be used in various applications, from constructing tables and chairs to building frames and cabinets. The joint's design allows it to bear heavy loads, making it ideal for furniture that needs to withstand daily use. When executed correctly, this joint can also hide any visible fasteners, giving your projects a clean and polished look. It's like wearing a well-tailored suit—everything just fits together perfectly.
Creating a mortise and tenon joint may seem daunting at first, but with the right tools and techniques, you can master this skill. Here are some essential points to consider when working with mortise and tenon joints:
- Precision is Key: Accurate measurements and cuts are critical. A poorly cut tenon will not fit into the mortise, leading to a weak joint.
- Tools Required: Common tools for creating these joints include chisels, a mortising machine or a drill, and hand saws. Each tool plays a vital role in ensuring the joint fits snugly.
- Wood Selection: The type of wood can affect the strength of the joint. Hardwoods like oak and maple are often preferred for their durability.
To give you a clearer picture, here’s a simple table comparing different types of mortise and tenon joints:
| Joint Type | Description | Best Use |
|---|---|---|
| Through Mortise and Tenon | The tenon passes completely through the mortise. | Visible joints in furniture like tables. |
| Blind Mortise and Tenon | The tenon does not go all the way through the mortise. | Furniture where a clean look is desired. |
| Haunched Mortise and Tenon | A haunch is added to the tenon for extra strength. | High-stress applications like chair legs. |
In conclusion, mastering the mortise and tenon joint can elevate your woodworking projects significantly. It’s not just about joining two pieces of wood; it’s about creating a bond that stands the test of time. So, roll up your sleeves, grab your tools, and start practicing this timeless technique. With patience and precision, you’ll be crafting beautiful, sturdy pieces that will impress anyone who lays eyes on them.
Q1: What is the main advantage of using a mortise and tenon joint?
A1: The main advantage is its strength and durability, making it ideal for furniture that needs to endure stress.
Q2: Can I use power tools for creating mortise and tenon joints?
A2: Yes, power tools like mortising machines and routers can make the process quicker and more precise.
Q3: Is it difficult to master the mortise and tenon joint?
A3: While it requires practice, with the right tools and techniques, anyone can learn to create strong mortise and tenon joints.

Tools for Joinery
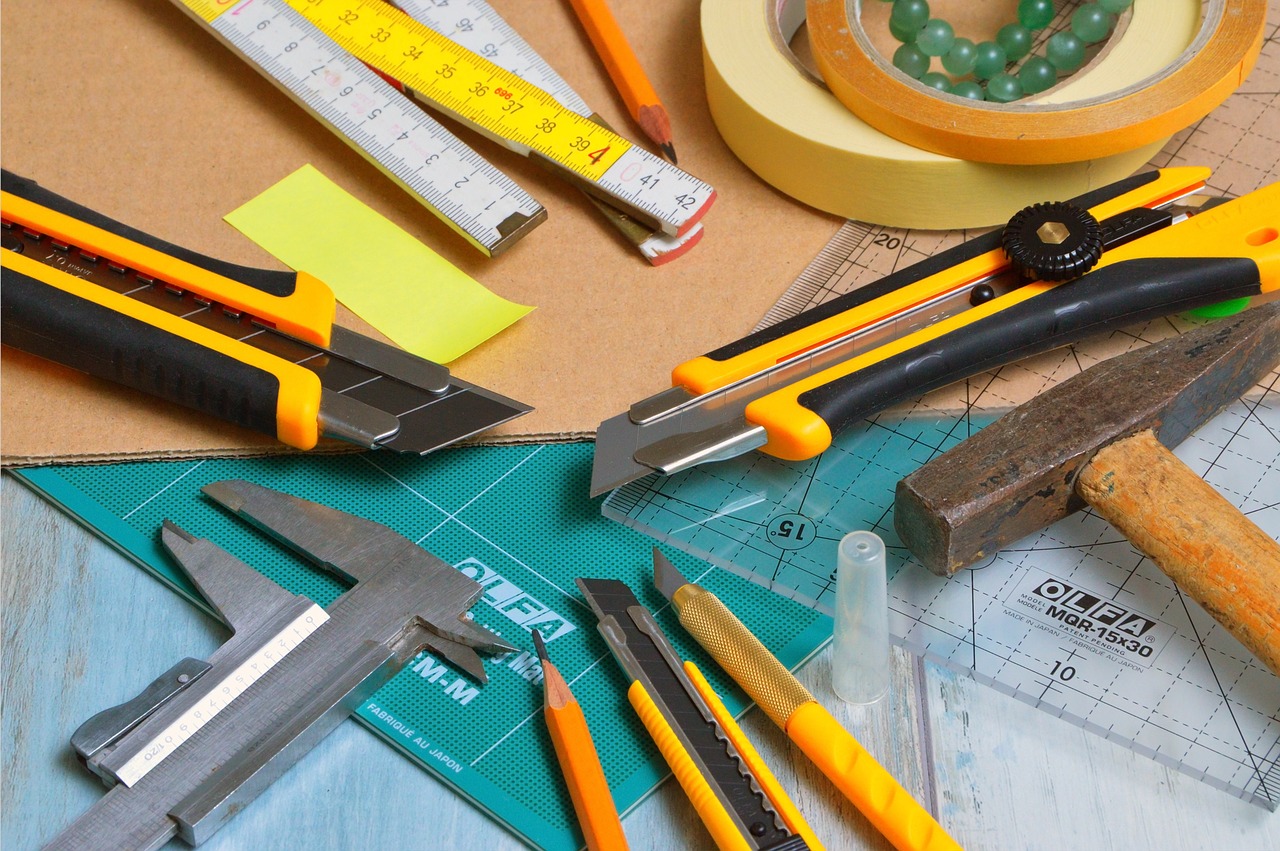
When it comes to achieving precision in woodworking, having the right tools for joinery is absolutely crucial. Whether you’re just starting out or you’re a seasoned pro, the tools you choose can make all the difference in the strength and aesthetic of your projects. The world of joinery is vast, and it encompasses both hand tools and power tools, each serving a unique purpose in the crafting process. Let's dive into the essentials that every woodworker should have in their toolbox.
First, let’s talk about hand tools. These tools are the backbone of traditional woodworking and are favored by many for their simplicity and effectiveness. Essential hand tools for joinery include:
- Chisels: Perfect for creating clean, precise cuts in wood, chisels are indispensable when it comes to forming joints like mortises.
- Mallets: A good mallet provides the necessary force to drive chisels without damaging the wood.
- Hand Saws: These are essential for making straight cuts and are particularly useful for joints like dovetails.
Next, we have power tools, which can significantly speed up the joinery process while enhancing accuracy. Some popular power tools that every woodworker should consider include:
- Routers: These are great for hollowing out areas in wood and can be used to create intricate designs on the edges of your joints.
- Drills: A versatile tool for making holes, drills are essential for creating dowel joints or pilot holes for screws.
- Jigsaws: Perfect for cutting curves and intricate shapes, jigsaws can help you create custom joints that fit your design.
In addition to these tools, having a well-organized workspace is vital. A sturdy workbench equipped with clamps can make all the difference when it comes to holding your materials steady while you work. Furthermore, investing in high-quality measuring tools like squares and calipers will ensure that your joints are not only precise but also consistent.
To summarize, whether you prefer the tactile feel of hand tools or the efficiency of power tools, the right equipment is essential for successful joinery. By selecting the proper tools and using them effectively, you can elevate your woodworking projects to a new level of craftsmanship. Remember, investing in quality tools is investing in your skills and the longevity of your work.
Q: What is the best type of joinery for beginners?
A: For beginners, simple joints like butt joints or lap joints are a great starting point. As you gain confidence, you can move on to more complex joints like dovetails.
Q: Do I need both hand tools and power tools for joinery?
A: While it's possible to do joinery with just hand tools, having power tools can significantly speed up the process and improve accuracy. A combination of both is often ideal.
Q: How can I improve my joinery skills?
A: Practice is key! Start with simple projects and gradually take on more complex joinery techniques. Additionally, watching tutorials and reading woodworking books can provide valuable insights.
Q: What maintenance do my tools need?
A: Regular cleaning, sharpening, and oiling of your tools will keep them in top condition. Proper storage is also essential to prevent rust and damage.
Hand Tools
When it comes to woodworking, are the unsung heroes that have stood the test of time. While power tools can certainly speed up the process, nothing quite compares to the control and finesse that hand tools provide. Imagine shaping a piece of wood with nothing but your hands and a few well-chosen tools; it’s like painting a masterpiece with a brush instead of a spray can. The tactile feedback you get from using hand tools allows for a deeper connection with your work, making each cut feel more intentional and precise.
Among the essential hand tools for joinery, you'll find chisels, mallets, and hand saws. Each of these tools serves a specific purpose and mastering them can significantly elevate your woodworking game. For instance, chisels are indispensable for creating clean, precise cuts in your wood. Whether you’re cleaning up a joint or carving intricate designs, a sharp chisel is your best friend. But remember, it’s not just about having the tool; knowing how to use it effectively is what truly makes the difference.
Next up is the mallet, which is often overlooked but plays a crucial role in joinery. It’s not just any hammer; it’s designed specifically for use with chisels. A well-balanced mallet allows you to strike with precision, giving you the power to drive your chisel deeper into the wood without causing damage. Think of it as the conductor of an orchestra, guiding each tool to create harmonious results.
And let's not forget about hand saws. They come in various sizes and styles, each tailored for different cuts and types of wood. A good hand saw allows for intricate cuts that power saws can’t replicate. It’s like a sculptor chiseling away at marble, revealing the beauty hidden within the material. Plus, using a hand saw can be incredibly satisfying; the rhythmic motion and the sound of the blade slicing through wood create a meditative experience.
To help you get started, here’s a quick overview of some must-have hand tools for joinery:
| Tool | Purpose |
|---|---|
| Chisels | For precise cuts and cleaning joints |
| Mallets | To strike chisels without damaging them |
| Hand Saws | For intricate cuts and shaping wood |
Incorporating these hand tools into your woodworking routine not only improves your craftsmanship but also enhances your overall experience. Each tool has its own personality and learning to work with them can be akin to forming a friendship; the more you understand them, the better your projects will turn out. So, whether you’re a seasoned woodworker or just starting, embracing the art of hand tools can lead to a rewarding journey filled with creativity and precision.
- What are the best hand tools for beginners? For beginners, a basic set including chisels, a mallet, and a hand saw is essential. These tools will cover most joinery needs.
- How do I maintain my hand tools? Regularly sharpen your chisels and saws, and keep them clean and dry to prevent rust. A little oil on metal parts can go a long way in preserving your tools.
- Can I achieve precision with hand tools? Absolutely! With practice, hand tools can provide precision that matches or even exceeds that of power tools.

Power Tools
When it comes to woodworking, power tools can be a game changer. They not only save time but also enhance precision, allowing you to achieve results that might take hours of manual labor. If you're looking to elevate your joinery game, investing in the right power tools is crucial. Think of power tools as your trusty sidekick in the workshop—always ready to lend a hand when the going gets tough!
One of the most popular power tools among woodworkers is the router. This versatile tool is perfect for hollowing out an area in the face of a piece of wood. With the right bit, routers can create decorative edges, grooves, and even complex joinery profiles. Imagine transforming a plain piece of wood into a stunning work of art with just a few passes of a router!
Another essential tool is the drill. While you might think of it as a simple tool for making holes, a drill can do so much more. With the right attachments, you can use it for driving screws, mixing paint, or even sanding surfaces. Just like a Swiss Army knife, a drill is a multi-functional powerhouse that no woodworker should be without.
Here’s a quick overview of some of the most common power tools used in joinery:
| Power Tool | Primary Use |
|---|---|
| Router | Creating edges, grooves, and joinery profiles |
| Drill | Drilling holes and driving screws |
| Saw (Circular, Jigsaw) | Cutting wood to size |
| Sander | Smoothing surfaces and edges |
While power tools are incredibly useful, it's essential to use them correctly to ensure safety and effectiveness. Always read the manual, wear appropriate safety gear, and practice on scrap wood before tackling your main project. Power tools can be intimidating at first, but with a little practice, you'll find they can make your woodworking experience not only easier but also more enjoyable!
As you dive deeper into the world of woodworking, remember that the right combination of hand tools and power tools can set you on the path to creating beautiful, precise pieces. So, whether you're building a simple shelf or a complex piece of furniture, having the right tools at your disposal will make all the difference.
- What is the most important power tool for joinery?
The router is often considered the most versatile tool for joinery, allowing for various cuts and profiles. - Can I achieve precision with hand tools alone?
Yes, many woodworkers prefer hand tools for their precision and craftsmanship, but power tools can significantly speed up the process. - How do I maintain my power tools?
Regular cleaning, lubrication, and checking for wear and tear are essential for maintaining power tools.
Frequently Asked Questions
- What is joinery and why is it important in woodworking?
Joinery refers to the techniques used to connect pieces of wood together. It's crucial because it provides the strength and durability needed for wooden structures. Without proper joinery, even the most beautifully crafted piece can fall apart over time.
- What are the different types of joinery techniques?
There are several joinery techniques, each with its own unique advantages. Some popular methods include dovetail joints, mortise and tenon joints, lap joints, and biscuit joints. Choosing the right technique depends on the project and the desired strength and appearance.
- What tools do I need for effective joinery?
To achieve precise joinery, you'll need a mix of hand tools and power tools. Essential hand tools include chisels, mallets, and hand saws, while power tools like routers and drills can speed up the process and improve accuracy. Having the right tools makes a world of difference in your woodworking projects!
- Can beginners learn to cut dovetail joints?
Absolutely! While dovetail joints may seem intimidating, beginners can learn to cut them with practice and the right guidance. There are many resources available, including tutorials and classes, to help you master this technique and enhance your woodworking skills.
- What is the advantage of using a dovetail jig?
A dovetail jig simplifies the process of creating dovetail joints, making it accessible for woodworkers of all skill levels. By using a jig, you can achieve consistent and precise results, which is especially helpful for larger projects or when making multiple joints.
- How do mortise and tenon joints contribute to furniture stability?
Mortise and tenon joints are known for their strength and reliability. They create a strong connection between two pieces of wood, which significantly improves the stability and longevity of furniture. This technique is a time-tested choice for high-quality woodworking projects.