Hacks for DIY Distressed Wood Decor
Have you ever walked into a home and felt instantly transported to a cozy cabin in the woods? That’s the magic of distressed wood decor. It carries a certain charm that can transform any space into a warm, inviting haven. In this article, we're diving into some innovative techniques and tips that will elevate your crafting skills and help you create stunning pieces that radiate rustic elegance. Whether you’re a seasoned DIY enthusiast or a curious beginner, these hacks will inspire you to pick up that saw and get crafting!
Imagine walking through a flea market, stumbling upon a beautifully aged wooden table that tells a story of its own. The scratches, the faded paint, and the rough edges all contribute to its unique character. Want to recreate that vibe in your home? Let’s explore the world of DIY distressed wood decor together. From choosing the right wood to sealing your masterpiece, we’ll cover everything you need to know to make your decor dreams come true!
So, grab your tools and let’s get started on this exciting journey of creating beautiful distressed wood pieces that not only enhance your space but also showcase your creativity. Ready to unleash your inner artisan? Let’s go!
Choosing the Right Wood
When it comes to creating beautiful distressed wood decor, the first step is selecting the right type of wood. This choice is crucial because different woods not only have varying textures and colors but also respond differently to distressing techniques. Imagine the difference between a rich, dark walnut and a light, airy pine; each brings its own unique character to your project. So, how do you choose?
Start by considering the style you want to achieve. If you're aiming for a rustic farmhouse vibe, woods like pine or cedar are fantastic options due to their natural knots and grains. On the other hand, if you prefer a more refined, elegant look, hardwoods like maple or cherry can be beautifully distressed to create a sophisticated finish. Each wood type offers a different palette of colors and textures to work with, making your choice pivotal.
Another factor to consider is the durability of the wood. Some woods are more resistant to wear and tear than others. For instance, oak is known for its strength and longevity, making it an excellent choice for items that will see a lot of use, like a dining table or a coffee table. Conversely, softer woods like pine can be easier to distress but may not hold up as well over time. Balancing aesthetics with practicality is key.
Lastly, think about the environmental impact of your wood choice. Opting for reclaimed wood not only gives your decor a unique story but also helps reduce waste and promotes sustainability. You might find old barn wood or pallets that can be transformed into stunning decor pieces. Not only does this choice add character, but it also aligns with eco-friendly practices, which is increasingly important in today’s crafting world.
In summary, when choosing the right wood for your distressed decor projects, consider the following:
- Style: What look are you going for?
- Durability: How much wear will the item endure?
- Environmental Impact: Are you using sustainable or reclaimed materials?
By taking these factors into account, you can confidently select the perfect wood that will not only meet your aesthetic desires but also stand the test of time, ensuring that your distressed wood decor remains a cherished part of your home for years to come.
Essential Tools and Materials
When it comes to creating stunning distressed wood decor, having the right tools and materials at your fingertips is absolutely essential. Imagine setting out on a journey without a map; that’s what crafting can feel like without the proper equipment. To make your DIY experience smooth and enjoyable, let’s explore the must-have items that will elevate your projects from ordinary to extraordinary.
First and foremost, sandpaper is your best friend in achieving that perfect distressed look. Different grits of sandpaper allow you to manipulate the wood’s surface, creating textures that can range from subtle to dramatic. For instance, using a coarse grit (around 60-80) can help you remove the top layer of paint or finish, revealing the beautiful grain underneath. On the flip side, a fine grit (220 and above) is perfect for smoothing out rough edges after distressing.
Next up is the saw. Whether you’re cutting planks for a new shelf or shaping a frame for a rustic mirror, having the right saw can make all the difference. A circular saw is ideal for straight cuts, while a jigsaw is perfect for more intricate shapes. Think of your saw as the brush to an artist; it’s essential for creating your masterpiece.
Now, let’s talk about paint and stain. These materials are what truly bring your wood to life. Choosing the right color can evoke different feelings and atmospheres in your space. For a classic rustic look, consider using a combination of stains and paints. For example, a rich walnut stain paired with a white paint can create a beautiful contrast that highlights the wood's natural beauty while giving it that coveted distressed appearance.
But don’t forget about sealants. Once you’ve perfected your piece, sealing it is crucial for durability. A good sealant protects your work from scratches and moisture while ensuring that the colors remain vibrant over time. Think of it as the protective layer that locks in all your hard work, allowing your decor to shine for years to come.
In summary, the essential tools and materials for your distressed wood projects include:
- Sandpaper (various grits)
- Saws (circular saw, jigsaw)
- Paint and stain (various colors)
- Sealants (polyurethane, wax)
Having these tools on hand will not only streamline your crafting process but also empower you to unleash your creativity. As you gather your supplies, remember that each piece of wood has its own story to tell. With the right tools, you can help it tell that story beautifully.

Sandpaper and Saws
When it comes to creating stunning distressed wood decor, the right tools can make all the difference. Sandpaper and saws are your best friends in this creative journey. Think of sandpaper as the magic wand that transforms rough, raw wood into a smooth canvas for your artistic expression. It’s not just about making things look pretty; it’s about achieving that perfect texture that gives your project character and depth.
Let’s dive into the specifics of sandpaper first. Sandpaper comes in various grits, and each grit serves a different purpose. For instance, if you’re starting with raw wood, you’ll want to begin with a coarser grit, such as 60 or 80, to remove any rough edges and imperfections. As you progress, you’ll move to finer grits like 120 or 220 to achieve a smooth finish. This gradual approach is like sculpting a masterpiece; you start with a block and, through careful sanding, reveal the beauty beneath.
Here’s a quick breakdown of sandpaper grits and their uses:
| Grit | Use |
|---|---|
| 60-80 | Removing rough edges and shaping wood |
| 120 | Smoothing surfaces and preparing for finish |
| 220+ | Final sanding before painting or staining |
Now, let’s talk about saws. Choosing the right saw is crucial for achieving clean cuts and precise shapes in your wood. Depending on your project, you might opt for a hand saw for simple cuts or a jigsaw for more intricate designs. A circular saw is also a fantastic option for larger pieces, allowing you to cut through wood like a hot knife through butter. Remember, a well-cut piece of wood is the foundation of a beautiful decor item. It’s akin to laying the groundwork for a house; if the foundation is strong, the structure will stand tall.
In summary, investing in good quality sandpaper and saws is essential for any DIY enthusiast looking to create distressed wood decor. The right tools not only make the process easier but also enhance the overall aesthetic of your projects. So, gear up, and let those tools work their magic!
- What grit sandpaper should I start with? It's best to start with a coarser grit like 60 or 80 for rough surfaces.
- Can I use a regular saw for detailed cuts? A jigsaw is recommended for intricate designs, while a hand saw can work for simpler cuts.
- How can I ensure a smooth finish? Gradually progress through finer grits of sandpaper, ending with at least 220 grit for the smoothest finish.
Different Grits of Sandpaper
When it comes to achieving that perfect distressed look on your wood projects, the choice of sandpaper grit can make a world of difference. Sandpaper is graded by the size of its abrasive particles, and this grading system ranges from coarse to fine. Understanding the different grits of sandpaper is essential for creating a texture that enhances the rustic charm of your decor. So, let’s break it down!
Starting with coarse grits, typically ranging from 40 to 60, these are your go-to for heavy sanding tasks. If you’re working with rough wood or trying to remove old paint, coarse grit is your best friend. It quickly removes material and prepares the surface for further refinement. However, be cautious; too much pressure can leave deep scratches.
Next up, we have medium grits, which fall between 80 and 120. This range is perfect for smoothing out surfaces after the initial coarse sanding. It helps to eliminate the scratches left by the coarse grit, making your wood feel smoother to the touch. Think of it as the middle ground that prepares your wood for the final touches.
Finally, we have the fine grits, which range from 150 to 220 and beyond. These grits are essential for the final sanding phase, giving your wood that silky smooth finish. Fine grit is particularly useful when you want to highlight the natural grain of the wood, especially when you plan to apply a stain or a clear coat afterward. It’s like putting the cherry on top of your woodworking sundae!
To give you a clearer picture, here’s a quick reference table:
| Grit Range | Purpose |
|---|---|
| 40 - 60 | Heavy material removal, rough surfaces |
| 80 - 120 | Smoothing surfaces, removing scratches from coarse sanding |
| 150 - 220+ | Final sanding for a smooth finish, preparing for stain or sealant |
In summary, understanding these different grits of sandpaper allows you to tailor your sanding process to achieve that desired distressed effect. Whether you're aiming for a rugged, weathered look or a sleek, refined finish, choosing the right grit can elevate your DIY projects to the next level. So, the next time you’re in your workshop, remember: the right grit is just as important as the wood itself!
- What grit sandpaper should I start with for distressed wood? It's best to start with a coarse grit (40-60) to remove any rough edges, then move to medium and fine grits for smoothing.
- Can I use the same sandpaper for all types of wood? While you can use the same grits for different woods, softer woods may require finer grits to avoid damage.
- How do I know when to switch grits? If you notice that the surface is becoming smoother and the scratches from the previous grit are gone, it’s time to switch to a finer grit.

Choosing the Right Saw
When it comes to creating stunning distressed wood decor, selecting the right saw can make all the difference. Think of your saw as the brush to a painter; it shapes the wood and defines the final piece. There are various types of saws available, each designed for specific tasks, and knowing which one to choose can save you time and effort while ensuring clean, precise cuts.
For most DIY projects, you might consider the following types of saws:
- Hand Saw: Ideal for small projects or when working with softer woods. A hand saw gives you full control over your cuts.
- Jigsaw: Perfect for intricate shapes and curves. This saw allows for flexibility and is great for detailed designs.
- Circular Saw: Excellent for making straight cuts in larger pieces of wood. It’s powerful and efficient, making it a favorite among DIY enthusiasts.
- Miter Saw: Best for angled cuts, especially when creating frames or decorative edges. This saw ensures accuracy, which is crucial for a polished look.
Before you head to the store, think about the specific needs of your project. Are you working with reclaimed wood that has a lot of knots? A hand saw might be your best bet for maneuverability. On the other hand, if you're cutting through thick boards for a large piece, a circular saw will save you time and provide a cleaner cut.
Furthermore, consider the blade type as well. Different blades can enhance your cutting experience:
| Blade Type | Best For |
|---|---|
| Crosscut Blade | Making clean cuts across the grain |
| Rip Blade | Cutting along the grain for straight cuts |
| Combination Blade | Versatile for both ripping and crosscutting |
In conclusion, choosing the right saw is not just about picking the most powerful tool; it’s about understanding your project’s requirements and how each type of saw can meet those needs. By taking the time to select the appropriate saw, you’ll not only improve the quality of your cuts but also enhance the overall look of your distressed wood decor, making it a true centerpiece in your home.

Paint and Stain Techniques
When it comes to transforming plain wood into stunning distressed decor pieces, play a pivotal role. These methods not only enhance the aesthetic appeal of your projects but also allow you to express your creativity. Imagine taking a piece of raw wood and turning it into a beautiful centerpiece that tells a story—this is the magic of paint and stain.
One of the most popular techniques is the two-tone staining method. This technique involves applying a darker stain to the grooves and edges of your wood while using a lighter stain on the flat surfaces. The contrast creates a visually appealing depth, making your decor stand out. To achieve this effect, you’ll want to follow these steps:
- Start by sanding your wood to ensure a smooth surface.
- Apply the darker stain first, focusing on the crevices and edges.
- Once dry, apply the lighter stain over the flat areas, allowing some of the darker stain to show through.
Another effective method is layering paint. This technique allows you to create a weathered look by applying multiple coats of paint in varying colors. For instance, you could start with a base coat of soft gray, followed by a layer of creamy white, and finally, a top coat of a muted blue. Once these layers are dry, you can distress the edges and surfaces using sandpaper to reveal the colors underneath. This technique not only adds depth but also gives your wood decor a unique, vintage charm.
For those who prefer a more subtle approach, glazing can be an excellent option. Glazing involves applying a thin, translucent layer of color over your base coat. This method enhances the wood grain while adding a hint of color. To create a glaze, mix paint with a glaze medium, then apply it with a brush, wiping away excess to achieve your desired effect. The result is a soft, sophisticated finish that elevates the overall look of your project.
Don't forget about whitewashing, a classic technique that gives wood a bright, airy feel. To whitewash, dilute white paint with water (usually a 1:1 ratio) and apply it generously with a brush or rag. This technique allows the wood grain to show through while providing a light, rustic finish. It's perfect for achieving that farmhouse chic style that is so popular today.
Lastly, consider the use of stencils for added detail. Stencils allow you to incorporate intricate designs or patterns onto your wood decor. After painting your base color, use a stencil to apply a contrasting color, enhancing the overall look of your piece. This technique can bring a personal touch to your decor, making it truly one-of-a-kind.
In summary, mastering paint and stain techniques is essential for creating beautiful distressed wood decor. Whether you choose to layer colors, glaze, whitewash, or stencil, the possibilities are endless. Remember, the key to a successful project is experimentation. So grab your brushes and stains, and let your creativity flow!
Q: What type of paint is best for distressed wood decor?
A: Acrylic paints are often recommended because they adhere well to wood and are easy to work with. However, chalk paint is also a popular choice for its matte finish and ease of distressing.
Q: How can I achieve a more pronounced distressed look?
A: To enhance the distressed effect, use a combination of sandpaper and techniques like dry brushing or whitewashing. The more layers and textures you add, the more character your piece will have.
Q: Is it necessary to seal my distressed wood decor?
A: Yes, sealing your project is crucial for protecting it from wear and tear. A good sealant will maintain the beauty of your work while ensuring its longevity.
Distressing Techniques
When it comes to creating that coveted rustic charm in your home decor, are your best friends! These methods not only add character but also tell a story, transforming ordinary wood into extraordinary pieces that catch the eye and spark conversation. Imagine walking into a room filled with handmade decor that looks like it has been cherished for generations. Sounds appealing, right? Let's dive into some popular distressing techniques that will elevate your DIY game!
One of the most accessible methods is dry brushing. This technique involves using a dry brush with a small amount of paint on it to lightly stroke the surface of your wood. The trick here is to use a color that contrasts with the base wood. For instance, if you're working with a dark wood, a light cream or white paint can create a stunning visual effect. The beauty of dry brushing lies in its simplicity; it highlights the grain and texture of the wood without overwhelming it. Plus, it’s a fantastic way to achieve depth and dimension without needing advanced skills!
Another popular technique is whitewashing. This method gives your wood a soft, weathered look that is perfect for achieving that beachy vibe or a cozy farmhouse feel. To whitewash, you simply dilute your paint with water—typically in a 1:1 ratio—but feel free to adjust based on the opacity you desire. Once mixed, apply it generously to the wood and wipe off the excess with a cloth. This allows the natural wood grain to show through, creating a beautiful, rustic finish. Whitewashing not only enhances the wood grain but also protects it, making it a win-win!
For those looking to add a bit of flair, consider distressing with tools. Techniques such as hammering, scraping, or even using chains can create unique textures on your wood surfaces. Each method leaves behind a distinct mark, giving your piece an authentic, worn look. Picture this: you take a hammer and lightly tap the edges of your wood to create small dents, or you drag a chain across its surface, leaving behind a pattern that resembles years of wear and tear. The result? A piece that feels like it has a history, making it all the more special.
To get the most out of these techniques, it’s essential to experiment! Don’t hesitate to mix and match methods; for instance, you might try whitewashing a piece and then follow up with dry brushing for added depth. The key is to have fun and let your creativity flow. Remember, every scratch and imperfection adds to the charm of your creation, making it uniquely yours!
- What type of wood is best for distressing? Softwoods like pine are popular because they are easy to work with and take paint and stain well.
- Can I distress pre-finished wood? Yes, but you may need to sand it lightly first to help the paint adhere better.
- How do I seal my distressed wood? Use a clear polyurethane or wax finish to protect your piece while maintaining its rustic charm.
Dry Brushing
Dry brushing is a fantastic technique that can breathe new life into your wood projects, giving them a unique and textured appearance. Imagine a painter gently caressing a canvas with just the right amount of paint, creating a masterpiece with every stroke. That’s the essence of dry brushing! This method involves using a dry brush to apply a light coat of paint, allowing the wood grain to show through while adding depth and character. It’s perfect for achieving that rustic charm that many of us crave in our home decor.
To start, you’ll need to gather a few supplies. Choose a paint color that complements your wood piece—whites, creams, or soft pastels work wonders for a distressed look. You’ll also need a brush with stiff bristles; a chip brush or a paintbrush with a flat edge is ideal. The key here is to ensure the brush is as dry as possible, so you might want to dab off excess paint on a paper towel before applying it to your wood.
Now, let’s talk technique! Begin by lightly dragging the brush across the surface of your wood in the direction of the grain. Don’t press too hard; the goal is to let the bristles catch on the high points of the wood, leaving the low points untouched. This creates a beautifully uneven finish that mimics the wear and tear of aged wood.
Here’s a quick step-by-step guide to mastering dry brushing:
- Prep Your Surface: Make sure your wood is clean and sanded. Any imperfections can enhance the final look, but a smooth base will ensure better paint application.
- Choose Your Paint: Select a color that contrasts well with the wood. White or light colors work well on darker woods, while darker shades can add drama to lighter pieces.
- Apply the Technique: Dip your brush lightly in paint, then remove most of it on a towel. Lightly brush the surface, following the wood grain.
- Build Up Layers: If you want a more pronounced effect, feel free to add additional layers of paint, allowing each layer to dry before applying the next.
One of the best aspects of dry brushing is its versatility. You can use it on furniture, picture frames, or even wooden signs. The beauty of this technique lies in its forgiving nature; if you apply too much paint, simply sand it down a bit to reveal more of the wood underneath. It’s a fun way to experiment and find your unique style!
In conclusion, dry brushing is not just a painting technique; it’s a way to tell a story through your decor. Each stroke adds character, making your wood pieces not just objects, but conversation starters. So grab your brush and let your creativity flow—your home will thank you for it!
Q: Can I use any kind of paint for dry brushing?
A: While acrylic or chalk paint is commonly used, you can experiment with other types as long as they adhere well to wood.
Q: How do I clean my brush after dry brushing?
A: Clean your brush with soap and water if you used water-based paint. For oil-based paints, use the appropriate solvent.
Q: Is dry brushing suitable for outdoor furniture?
A: Yes, but ensure you use outdoor paint and a suitable sealant to protect your work from the elements.
Whitewashing
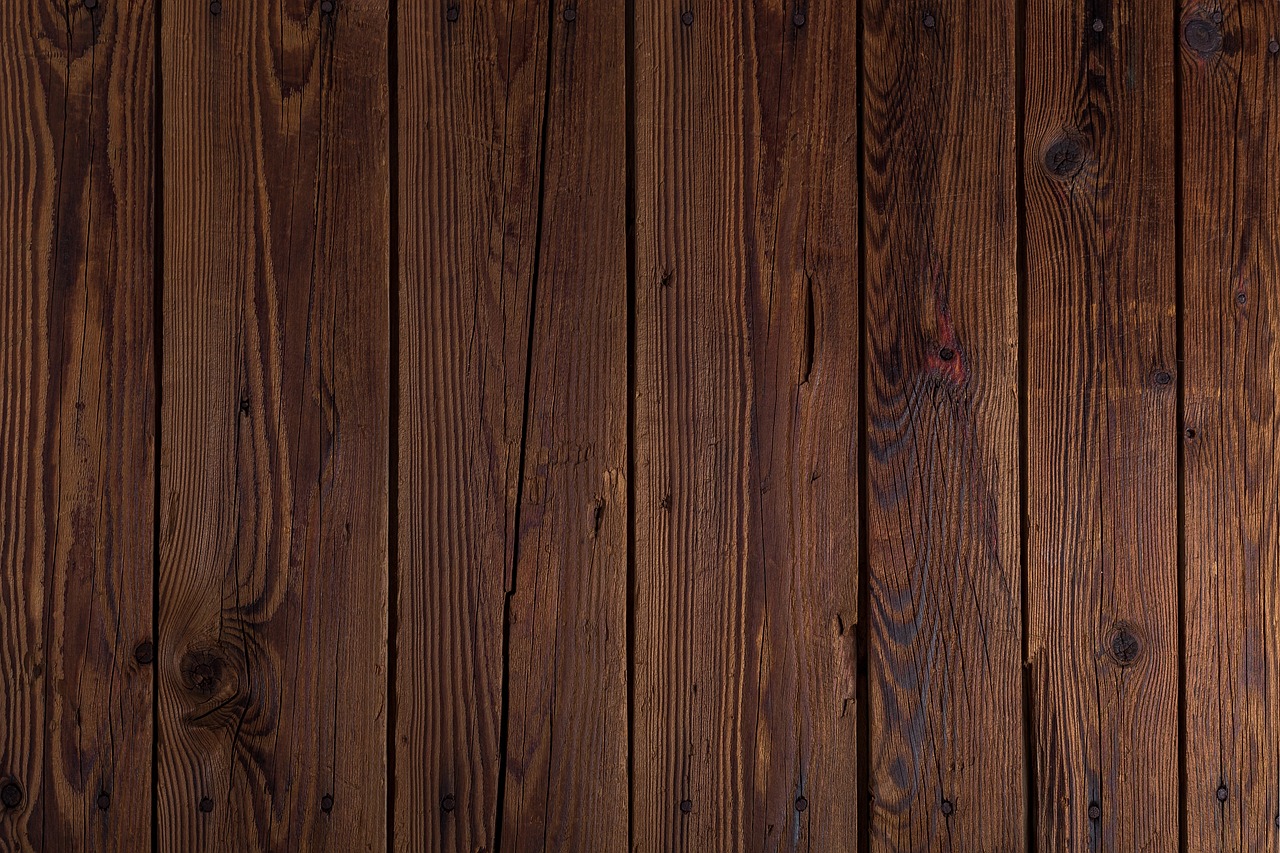
Whitewashing is a timeless technique that can breathe new life into your wood decor, giving it a beautifully weathered and rustic appearance. Imagine transforming a plain, dull piece of wood into something that tells a story, something that evokes the charm of a countryside cottage. This method not only enhances the natural grain of the wood but also adds a soft, ethereal quality that can complement any home decor style. The beauty of whitewashing lies in its simplicity and versatility, making it a favorite among DIY enthusiasts.
To achieve that perfect whitewashed look, you'll need to start with the right materials. Typically, a mix of water and white paint is used, but the ratio can vary depending on how opaque or translucent you want your finish to be. A common mix is 1 part paint to 2 parts water, but feel free to adjust this according to your preference. The more water you add, the more the wood grain will show through, giving it that sought-after rustic vibe.
Before you dive into the whitewashing process, preparation is key. Make sure your wood surface is clean and free of any dust or debris. If your wood is unfinished, a light sanding can help the whitewash adhere better. Once you're ready to go, apply the whitewash using a brush or a rag. The technique is straightforward: simply wipe the mixture onto the wood and then wipe off the excess with a clean cloth. This method allows you to control the intensity of the whitewash, letting you create a look that's uniquely yours.
After applying the whitewash, it’s essential to let it dry completely. Depending on the humidity and temperature of your workspace, this can take anywhere from 30 minutes to a few hours. Once dry, you can assess whether you want to add another coat for a more opaque look or leave it as is for a softer finish. The beauty of whitewashing is that you can always layer it until you find the perfect balance!
To further enhance your whitewashed decor, consider adding some distressing techniques afterward. Lightly sanding edges or using a dark stain in the crevices can create a stunning contrast that adds depth and character to your piece. This combination of whitewashing and distressing can truly elevate your DIY project, making it a standout piece in your home.
In summary, whitewashing is an incredibly effective way to achieve a beautiful, rustic finish on your wood decor. It’s easy to do, requires minimal materials, and the results can be breathtaking. So why not give it a try? Your home will thank you for it!
- What type of paint should I use for whitewashing? It's best to use latex or water-based paint as they mix well with water and are easy to clean up.
- Can I whitewash over stained wood? Yes, but make sure the stain is completely dry and consider testing a small area first to see how the colors interact.
- How do I clean up after whitewashing? Clean your brushes and tools with soap and water immediately after use to prevent the paint from drying on them.
- How can I make my whitewash last longer? Applying a clear sealant after the whitewash is dry can help protect the finish and extend its longevity.

Sealing Your Project
Once you've poured your heart and soul into creating your stunning distressed wood decor, sealing it is a crucial step you can't afford to skip. Think of sealants as the protective armor for your masterpiece. They not only enhance the beauty of your work but also ensure its durability against the elements, wear and tear, and the occasional curious hand that might want to touch it. So, how do you choose the right sealant for your project? Let's dive in!
First, you need to consider the environment where your piece will reside. Is it going to live indoors or outdoors? For indoor projects, a water-based sealant is often the best choice, as it dries quickly and has minimal odor. On the other hand, outdoor pieces require more robust protection against rain and UV rays, making oil-based sealants a better option. These sealants can withstand the elements but may take longer to dry.
Here’s a quick comparison of popular sealant types:
| Sealant Type | Best For | Drying Time | Durability |
|---|---|---|---|
| Water-Based Polyurethane | Indoor Projects | 1-2 Hours | Moderate |
| Oil-Based Polyurethane | Outdoor Projects | 4-6 Hours | High |
| Varnish | Indoor/Outdoor | 2-4 Hours | High |
| Wax | Indoor Projects | 24 Hours | Low |
Once you've selected the right sealant, the application process is just as important. You want to ensure an even finish that doesn’t obscure your beautiful distressed details. Start by preparing your workspace—make sure it’s well-ventilated, especially if you’re using oil-based products. Then, grab a clean brush or a foam applicator. Apply a thin coat, following the wood grain to avoid streaks.
After applying the first coat, allow it to dry completely. This is where patience comes into play! Once dry, you might want to lightly sand the surface with fine-grit sandpaper before applying a second coat. This step is vital for achieving that smooth, professional finish. Remember, multiple thin coats are better than one thick coat. They provide better protection and maintain the character of your wood.
Finally, after your last coat has dried, give your piece some time to cure. Depending on the sealant, this could take anywhere from a few days to a week. It’s worth the wait to ensure your creation withstands the test of time. So, take a step back, admire your handiwork, and get ready to show off your beautiful distressed wood decor!
- What is the best sealant for distressed wood decor? Water-based polyurethane is ideal for indoor projects, while oil-based options are better for outdoor use.
- How many coats of sealant should I apply? Typically, two to three thin coats are recommended for optimal protection.
- Can I use a spray sealant? Yes, spray sealants can work well for smaller projects, but ensure even coverage and follow the manufacturer's instructions.
Choosing the Right Sealant
When it comes to preserving your beautifully distressed wood decor, choosing the right sealant is absolutely crucial. You wouldn’t want all your hard work to go to waste, right? A good sealant not only enhances the aesthetic appeal of your piece but also provides protection against moisture, dirt, and wear. Think of it as the armor that shields your masterpiece from the elements!
There are various types of sealants available on the market, and each has its unique benefits. The most common types include polyurethane, varnish, and wax. Let’s break them down:
| Sealant Type | Best For | Finish | Durability |
|---|---|---|---|
| Polyurethane | High-traffic areas | Glossy or satin | Very durable |
| Varnish | Outdoor projects | Glossy | Durable |
| Wax | Indoor decor | Matte | Less durable |
As you can see, each sealant serves a purpose, and your choice should depend on where your decor piece will be displayed. For instance, if your project is going to be in a high-traffic area, like a dining table, polyurethane might be your best bet due to its toughness. On the other hand, if you’re working on a decorative piece that will stay indoors and won’t see much wear and tear, wax can provide a lovely matte finish that enhances the wood's natural beauty.
Another important factor to consider is the application method. Some sealants require brushes, while others can be applied with a cloth or spray. It’s essential to read the instructions carefully to ensure you achieve the best results. For example, polyurethane can be tricky; it’s best applied in thin coats to avoid drips and bubbles. On the contrary, wax can be easily buffed on, giving you a more forgiving application process.
Finally, don’t forget to test your sealant on a small, inconspicuous area before applying it to the entire piece. This way, you can see how it interacts with your wood and whether it alters the color or texture in an unexpected way. It’s like a dress rehearsal for your decor piece—better to find out before the big reveal!
In summary, selecting the right sealant is a vital step in your DIY distressed wood project. It’s about protecting your hard work while enhancing its beauty. So, take your time, choose wisely, and your decor will not only look stunning but also stand the test of time!
- What is the best sealant for outdoor wood decor? Polyurethane is often recommended due to its durability and resistance to weather elements.
- Can I use a sealant over chalk paint? Yes, but ensure the paint is completely dry before applying the sealant for the best results.
- How long does it take for sealant to dry? Drying times vary by product, but generally, allow 24 hours for a complete cure.

Application Techniques
When it comes to sealing your distressed wood decor, the you employ can make all the difference in achieving a professional finish. Whether you're using a brush, roller, or spray, each method has its own nuances that can impact the final look of your piece. For starters, it's essential to ensure that your surface is clean and free of dust or debris before you begin. This simple step can prevent imperfections from marring your beautifully distressed finish.
One effective technique is to use a high-quality brush for application. A brush allows for greater control, especially in those intricate areas where detail matters most. When applying the sealant, work in long, even strokes, following the grain of the wood. This not only enhances the natural beauty of the wood but also ensures that the sealant penetrates effectively. Remember, less is more—applying too much sealant at once can lead to drips and uneven coverage.
If you're looking for a faster method, a roller can be a great alternative, especially for larger pieces. Rollers cover a broader area quickly, but they can sometimes leave behind bubbles or uneven patches. To avoid this, apply the sealant in thin layers and follow up with a brush to smooth out any imperfections. A light sanding between coats can also help create a seamless finish, giving your decor that polished look.
Lastly, using a spray sealant can be a game changer for those hard-to-reach areas or intricate designs. However, it requires a bit more finesse. Always work in a well-ventilated area and wear a mask to protect yourself from fumes. Hold the spray can about 6-12 inches away from the surface and apply in light, sweeping motions. This technique ensures an even coat while minimizing the risk of drips.
Regardless of the method you choose, always allow adequate drying time between coats. This ensures that each layer adheres properly, enhancing the durability of your decor. Typically, waiting 24 hours before applying a second coat is a good rule of thumb. After the final coat has dried, inspect your piece for any areas that may need touch-ups. A little extra care can go a long way in making your distressed wood decor shine.
Q: What is the best sealant for distressed wood decor?
A: The best sealant depends on your project's specific needs, but polyurethane and water-based sealants are popular choices for their durability and ease of use.
Q: How many coats of sealant should I apply?
A: Generally, applying two to three coats of sealant will provide adequate protection, especially for items that will see regular use.
Q: Can I use a sealant on painted distressed wood?
A: Yes, you can use sealants on painted surfaces. Just ensure the paint is fully cured before applying the sealant for the best results.
Q: How do I clean my brushes after using sealant?
A: Clean your brushes with soap and water if you used a water-based sealant. For oil-based sealants, mineral spirits are recommended for cleaning.
Frequently Asked Questions
- What type of wood is best for distressed decor?
When it comes to achieving that perfect distressed look, softwoods like pine or cedar are often recommended. They’re easier to work with and take on paint and stain beautifully. However, hardwoods like oak or maple can also provide a stunning finish if you prefer a more durable option.
- Do I need special tools for distressing wood?
While you don’t need a fancy toolkit, having a few essential items can make a world of difference. Basic tools like sandpaper, a saw, and brushes will get you started. If you want to get adventurous, consider adding chisels or even a hammer for that authentic distressed effect!
- How do I choose the right paint for my project?
Choosing paint can be tricky! For a distressed look, you might want to use acrylic paints or chalk paints, as they adhere well and can be easily distressed. Just remember to pick colors that will complement your wood and overall decor style.
- What are some effective distressing techniques?
There are so many fun techniques to try! Dry brushing is a favorite, as it adds texture without overwhelming the wood grain. Whitewashing is another popular method, giving your pieces a soft, rustic vibe. Experimenting with these techniques can lead to some truly unique results!
- How can I seal my distressed wood decor?
Sealing your project is crucial for longevity. Look for polyurethane or polycrylic sealants, as they provide a durable finish without changing the color of your wood too much. Make sure to apply it evenly for the best results and protect that beautiful distressed look!
- Can I distress wood without sanding?
Absolutely! While sanding is a common method, you can also use tools like chains or nails to create dents and scratches. This can add a unique character to your pieces without the need for traditional sanding techniques.
- How long does the distressing process take?
The time it takes can vary based on your project size and the techniques you choose. On average, you might spend a few hours on the actual distressing, but don’t rush it! Enjoy the process and let your creativity flow.


