Create DIY Paper Mache Decor for Your Home
Are you looking to add a personal touch to your living space? If so, then DIY paper mache decor might just be the perfect solution for you! This creative craft not only allows you to express your artistic side but also helps you transform everyday materials into stunning home accents. Imagine walking into a room adorned with unique, handmade pieces that spark conversation and admiration. In this article, we’ll explore the fascinating world of paper mache, guiding you through its rich history, essential materials, and innovative techniques to create your very own decor. So, roll up your sleeves, gather your supplies, and let’s dive into the wonderful world of paper mache!
Before we get our hands messy, it’s important to understand what paper mache is all about. Originating from the French term meaning "chewed paper," this craft has been around for centuries, dating back to ancient civilizations. It involves using paper strips or pulp mixed with an adhesive to create sturdy structures. The beauty of paper mache lies in its versatility—you can mold it into virtually any shape or form, making it ideal for home decor.
Now that we have a grasp on the basics, let’s talk about the essential materials you’ll need for your paper mache projects. Here’s a quick rundown:
- Types of Paper: Newspaper, tissue paper, and craft paper.
- Adhesives: Flour paste, glue, or even wallpaper paste.
- Tools: Mixing bowls, brushes, and sculpting tools.
Having the right materials on hand will ensure a smooth crafting experience, so make sure to gather everything before you start.
The type of paper you choose can significantly affect the appearance and durability of your finished product. For instance, newspaper is an excellent choice for beginners due to its availability and ease of use. On the other hand, tissue paper adds a delicate touch and vibrant colors, perfect for decorative pieces. Lastly, craft paper offers sturdiness and can be painted over easily, giving you more creative freedom.
One of the best aspects of paper mache is its sustainability. You can incorporate recycled materials into your projects, such as old magazines, cardboard, or even fabric scraps. Not only does this promote eco-friendliness, but it also adds unique textures and colors to your decor, making each piece truly one-of-a-kind.
When it comes to adhesives, you have a few options. Flour paste is a classic choice, made from simple ingredients like flour and water. It’s easy to make and non-toxic, making it great for family projects. Alternatively, glue can provide a stronger bond, especially for larger pieces. Don’t forget to seal your projects with a clear sealant once they’re dry to protect them from moisture and wear!
Having the right tools can make a world of difference in your crafting experience. Essential tools include mixing bowls for your adhesive, brushes for applying glue, and sculpting tools to shape your creations. If you’re feeling adventurous, you might even want to invest in some molds to create specific shapes. Remember, the right tools can help bring your vision to life!
Ready to get started? Follow these step-by-step techniques to create your paper mache masterpieces. First, begin with the basic layering technique, where you apply strips of paper soaked in adhesive over a form. This builds structure and strength, allowing you to create intricate designs. Once you’ve achieved your desired shape, let it dry completely before moving on to the finishing touches.
Layering is key in paper mache. Start with a base layer, allowing it to dry before adding additional layers for depth. This technique not only enhances the durability of your decor but also gives it a more polished look. Think of it like building a cake—each layer adds flavor and structure!
Once your piece is dry, it’s time to unleash your creativity! You can paint, decorate, and seal your paper mache projects to make them truly shine. Consider using vibrant colors or metallic finishes to elevate your decor, and don’t shy away from adding embellishments like beads or fabric for a personal touch.
Now that you’re equipped with the knowledge and skills, let’s explore some creative project ideas. From stunning wall art to functional decor items, the possibilities are endless!
Consider creating 3D sculptures or textured pieces that can be hung on your walls. These unique creations can serve as focal points in any room, adding depth and interest to your decor. Imagine a vibrant, paper mache flower or an abstract shape that catches the eye of anyone who enters!
Don’t forget about functional pieces! You can craft beautiful bowls or stylish lampshades that blend artistry with practicality. Not only do these items serve a purpose, but they also showcase your creativity and make your home feel more personalized.
As you embark on your paper mache journey, keep these practical tips in mind for success:
Proper drying techniques are crucial to avoid issues like mold or structural weakness. Ensure your projects dry in a well-ventilated area, and consider using a fan to speed up the process. Patience is key here!
Finally, once your paper mache decor is complete, learn how to care for it. Avoid exposing it to excessive moisture and dust it regularly to maintain its beauty. With the right care, your creations can last for years to come!
Q: Can I use any type of paper for paper mache?
A: While you can use various types of paper, newspaper and craft paper are the most common choices due to their durability and ease of use.
Q: How long does it take for paper mache to dry?
A: Drying times vary depending on the thickness of your layers and the humidity in your environment, but it typically takes 24-48 hours for pieces to dry completely.
Q: Can I paint my paper mache projects?
A: Absolutely! Once your piece is dry, you can paint it with acrylic or spray paint to add color and personality.
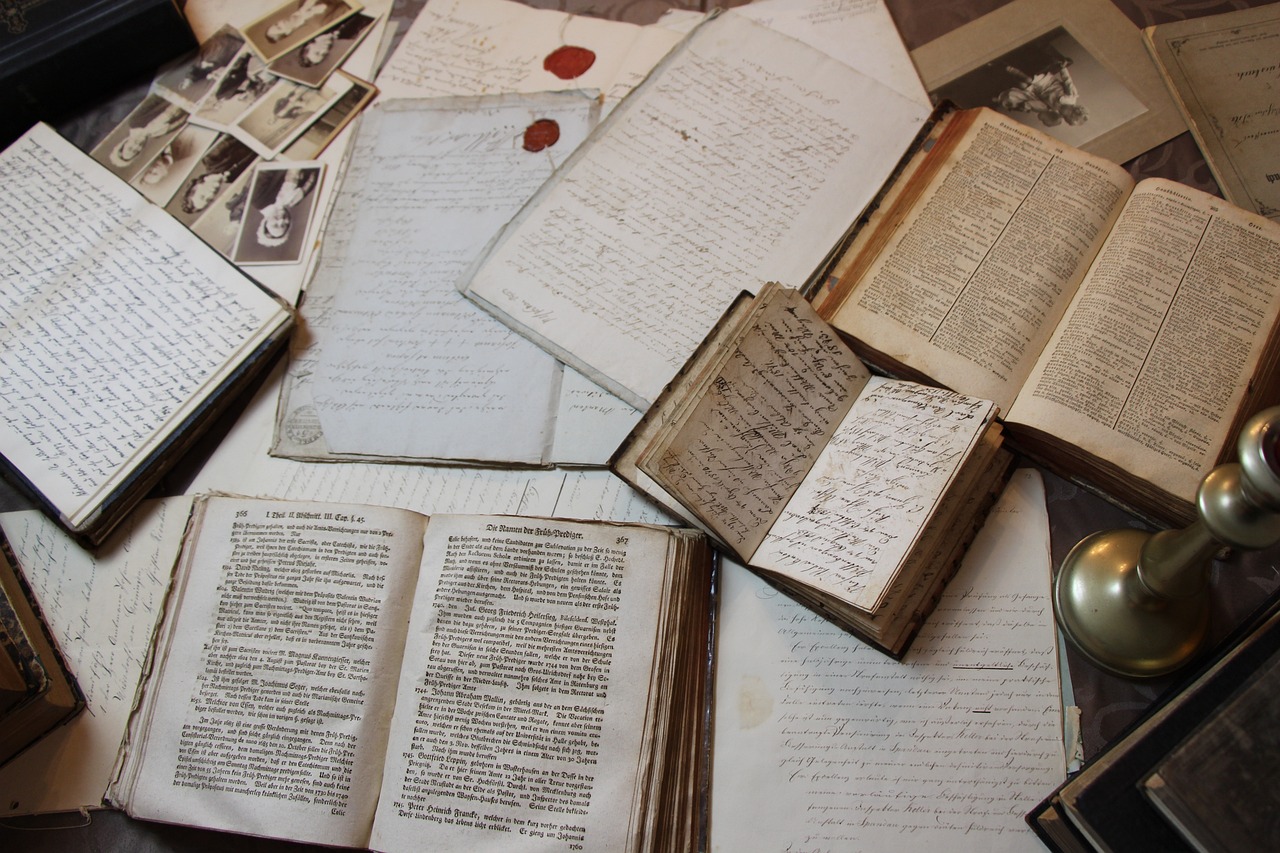
Understanding Paper Mache
Paper mache is more than just a fun craft; it’s a fascinating blend of art and history that has stood the test of time. Originating in ancient China, this technique has been used for centuries to create everything from decorative masks to sturdy furniture. The term “paper mache” comes from the French phrase meaning “chewed paper,” which perfectly describes the process of pulping paper and combining it with a binding agent. This method allows for incredible versatility, enabling artists and crafters to shape their imagination into tangible forms.
At its core, paper mache is composed of three primary elements: paper, adhesive, and water. The type of paper you choose can significantly influence the texture and durability of your finished piece. For instance, newspaper is often favored for its availability and ease of use, while tissue paper can add a delicate touch. The adhesive, whether it’s a simple flour and water paste or a stronger glue, plays a pivotal role in binding the layers together. Water is essential for creating a workable paste that can be easily manipulated.
As you delve deeper into the world of paper mache, you’ll discover various techniques that can enhance your crafting experience. From layering to sculpting, each method offers unique ways to express creativity. The layering technique, for example, involves applying multiple coats of paper to build strength and detail. This is where the magic happens, transforming a simple flat surface into a three-dimensional masterpiece. But it’s not just about the application; understanding the drying process is crucial too. Proper drying ensures that your creation is robust and prevents it from becoming a soggy mess.
Moreover, paper mache is an eco-friendly craft that encourages recycling and sustainability. By using materials that might otherwise end up in the trash, you can create beautiful decor while reducing waste. Imagine the satisfaction of turning old magazines or scrap paper into stunning art pieces that brighten up your living space! This not only adds a personal touch to your home but also contributes to a more sustainable lifestyle.
To sum it up, paper mache is a captivating craft that combines history, technique, and creativity. Whether you’re a seasoned artist or a curious beginner, understanding the fundamentals of paper mache will empower you to create unique decor that reflects your personal style. So grab some paper, mix up that paste, and let your imagination run wild!

Essential Materials Needed
When diving into the world of paper mache, having the right materials is crucial for creating stunning and durable pieces. The beauty of this craft lies in its simplicity; you don’t need to break the bank to gather supplies. In fact, many of the materials you need might already be lying around your home, just waiting to be transformed into something beautiful!
First and foremost, you'll need paper. The type of paper you choose can significantly affect the outcome of your project. Common choices include:
- Newspaper: This is a classic choice due to its availability and flexibility. It’s great for layering and adds a rustic feel to your creations.
- Tissue Paper: Perfect for adding color and delicate textures, tissue paper can elevate your decor with vibrant hues.
- Craft Paper: This thicker option provides durability and is excellent for creating more structured pieces.
Next up is your adhesive. The glue you choose will dictate the strength and finish of your paper mache projects. Two popular options are:
- Flour Paste: Made from a simple mixture of flour and water, this traditional adhesive is non-toxic and easy to make. However, it may not be as strong as commercial glues.
- PVA Glue: A more modern choice, this white glue dries clear and provides a strong bond, making it ideal for more intricate designs.
Don’t forget about sealants! Once your project is complete, applying a sealant can protect your work from moisture and wear. A clear acrylic spray or a mod podge finish can work wonders, giving your piece a polished look.
Now, let’s talk about the tools. You’ll need some basic crafting tools to help you along the way. Here’s what I recommend:
- Mixing Bowls: For your adhesive, you’ll want a couple of bowls to mix your paste or glue.
- Brushes: A few paintbrushes will come in handy for applying glue and sealants.
- Sculpting Tools: If you’re planning on creating detailed designs, tools like spatulas or carving tools can help you shape your project with precision.
Lastly, let’s not overlook the importance of workspace protection. Paper mache can get messy, so having an old tablecloth or newspaper to cover your work area is a smart move. This way, you can focus on your creativity without stressing over the cleanup!
In summary, gathering the essential materials for your paper mache projects is not just about having the right supplies; it's about setting the stage for your creativity to flourish. With the right paper, adhesive, tools, and a protected workspace, you’re well on your way to crafting beautiful home decor pieces that are not only unique but also a reflection of your personal style.
Choosing the Right Paper
When it comes to creating stunning paper mache decor, the choice of paper can dramatically influence the outcome of your project. Each type of paper brings its own unique qualities to the table, affecting not only the appearance but also the durability of your finished piece. So, how do you choose the right paper for your next crafting adventure? Let’s dive into the various options available and what makes each one special.
First up, we have newspaper. This is the classic choice for many paper mache enthusiasts. It’s readily available, inexpensive, and easy to work with. The fibers in newspaper create a strong bond when layered, which is essential for building the structure of your decor. However, it does have a tendency to yellow over time, so if you’re aiming for a long-lasting piece, you might want to consider a different option.
Next is tissue paper. This delicate paper adds a beautiful, soft texture to your creations. It comes in a variety of colors, allowing for vibrant designs that can brighten up any space. The downside? Tissue paper is more fragile than newspaper, so it’s best used for lighter projects or as a decorative layer on top of sturdier materials. Think of it as the icing on your crafting cake!
Then we have craft paper, which is thicker and more durable than both newspaper and tissue paper. This type of paper is perfect for projects that require a bit more strength, like bowls or lampshades. It holds its shape well and can withstand a fair amount of wear and tear. Plus, it comes in a plethora of colors and patterns, making it a versatile choice for any decor style.
Now, if you’re feeling adventurous and want to incorporate some sustainability into your crafting, consider using recycled materials. Old magazines, wrapping paper, or even brown paper bags can be transformed into gorgeous paper mache decor. Not only does this approach promote environmental consciousness, but it also adds unique textures and colors to your pieces that can’t be replicated with store-bought paper.
In summary, the right paper for your paper mache project largely depends on what you're trying to achieve. Whether you go for the classic strength of newspaper, the delicate beauty of tissue paper, or the durability of craft paper, each choice offers unique advantages. Don't be afraid to mix and match! Combining different types of paper can yield stunning results, allowing you to create truly one-of-a-kind pieces that reflect your personal style.
So, next time you embark on a DIY paper mache project, remember: the paper you choose is just as important as the design you envision. Happy crafting!
- What is the best type of paper for beginners? Newspaper is often recommended for beginners due to its availability and ease of use.
- Can I use colored paper for paper mache? Yes, colored paper can be used, but be cautious of the dye running when wet. It's best to test a small piece first.
- How do I prevent my paper mache from getting moldy? Ensure proper drying techniques and store your finished pieces in a dry environment.
Recycled Materials
In today's world, where sustainability is more important than ever, incorporating into your paper mache projects not only helps reduce waste but also adds a unique touch to your creations. Imagine transforming old newspapers, cardboard, and even fabric scraps into stunning decor pieces that tell a story and reflect your eco-conscious values. It's like giving a second life to materials that would otherwise end up in a landfill!
Using recycled materials can significantly enhance the texture and appearance of your paper mache projects. For instance, shredded cardboard can create a rough surface that adds character, while old magazines can provide vibrant colors and patterns. Here's a quick overview of some common recycled materials you might consider:
| Material | Benefits | How to Use |
|---|---|---|
| Newspaper | Easy to mold, widely available | Shred or tear into strips for layering |
| Cardboard | Sturdy base, adds dimension | Cut into shapes or strips for structure |
| Fabric Scraps | Adds texture and color | Mix with paper for unique patterns |
| Old Magazines | Bright colors, interesting images | Use for decoupage or layering |
When working with recycled materials, it's essential to prepare them properly. For example, if you're using cardboard, make sure to remove any plastic coatings or tape that might interfere with adhesion. Additionally, consider the environmental impact of your adhesives as well; opting for natural glues can further enhance your eco-friendly approach.
Moreover, embracing recycled materials can spark your creativity. You might find that the imperfections in these materials lead to unexpected and beautiful results. It's like finding treasure in the trash! So, the next time you're about to toss something out, pause and think: Can this be transformed into art? The answer is often a resounding yes!
In conclusion, utilizing recycled materials in your paper mache projects not only promotes sustainability but also encourages you to think outside the box. The beauty of paper mache lies in its versatility, and by incorporating unique textures and colors from recycled sources, you can create decor pieces that are not just beautiful but also meaningful.
Adhesives and Sealants
When it comes to crafting with paper mache, choosing the right adhesives and sealants is crucial for achieving durable and beautiful results. The adhesive you select will determine not only the strength of your creations but also how they stand up to wear and tear over time. Two of the most popular types of adhesives used in paper mache projects are flour paste and white glue.
Flour paste is a traditional choice that many crafters swear by. It’s made by mixing flour with water to create a thick paste. This method is not only cost-effective but also environmentally friendly. Flour paste dries clear and provides a strong bond, making it ideal for layering paper strips. However, it's essential to use it in a well-ventilated area and store any leftover paste in the refrigerator to prevent mold growth.
On the other hand, white glue, such as PVA (polyvinyl acetate), offers a different set of benefits. It is readily available, dries quickly, and provides a strong bond, especially for intricate designs. White glue can be diluted with water to create a more fluid consistency, which is great for soaking paper before applying it to your project. However, it can sometimes leave a glossy finish, which may not be desirable for all decor styles.
In addition to adhesives, using a good sealant is essential for protecting your finished projects. Sealants can enhance the durability of your paper mache decor, making it resistant to moisture and wear. Here are some common options:
- Acrylic Sealants: These provide a clear, protective coat that can be applied with a brush or spray. They are ideal for indoor and outdoor projects.
- Mod Podge: A popular choice among crafters, Mod Podge acts both as an adhesive and a sealant. It comes in various finishes, including matte and gloss, allowing you to choose the best look for your decor.
- Varnish: For a more professional finish, using a varnish can give your paper mache creations a beautiful sheen while adding a layer of protection.
Ultimately, the choice of adhesive and sealant will depend on your specific project and desired outcome. Experimenting with different materials can lead to exciting discoveries about what works best for your crafting style. Remember, the right combination can elevate your paper mache decor from simple to stunning!
Q: Can I use any type of glue for paper mache?
A: While you can use various types of glue, it's best to stick with PVA glue or flour paste for optimal results, as they provide strong bonds and are easy to work with.
Q: How do I prevent mold from forming in my paper mache?
A: To prevent mold, ensure that your flour paste is stored properly and used within a few days. Additionally, keep your projects in a well-ventilated area while drying.
Q: What sealant should I use for outdoor paper mache projects?
A: For outdoor projects, an acrylic sealant is recommended as it provides a durable, waterproof finish that can withstand the elements.
Tools for Crafting
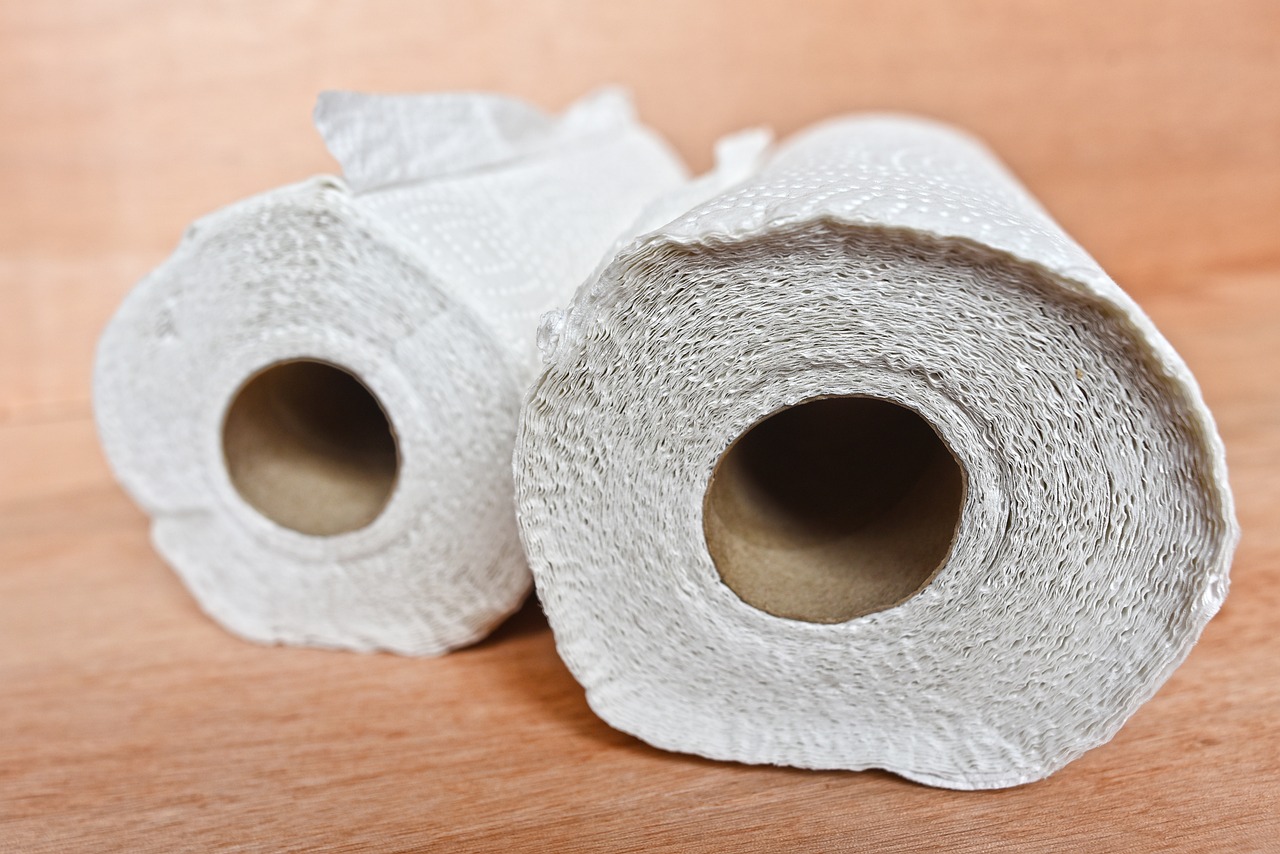
When it comes to paper mache crafting, having the right tools can make all the difference between a frustrating experience and a fun, creative one. Imagine trying to paint a masterpiece without the right brushes; it just wouldn’t work, right? Similarly, equipping yourself with essential tools not only enhances your crafting process but also allows you to bring your artistic vision to life with ease. Here’s a rundown of the must-have tools that every paper mache artist should have in their toolkit.
First and foremost, you’ll need mixing bowls. These are essential for preparing your adhesive mixtures, whether you’re using flour paste or glue. It’s best to have a couple of different sizes on hand, as you may need a larger bowl for mixing big batches. Alongside mixing bowls, a whisk or stirring stick will help you achieve a smooth, lump-free consistency in your paste.
Next up are scissors and a craft knife. Scissors are great for cutting paper into manageable strips or shapes, while a craft knife can be used for more intricate cuts, especially when you’re working on detailed designs. Just remember to handle the craft knife with care; it’s sharp and can lead to accidents if not used properly.
Another important tool is a brush. You’ll need it for applying your adhesive to the paper strips. A wide brush is excellent for covering large areas, while smaller brushes are perfect for getting into tight spots or applying decorative finishes later on. Additionally, consider investing in a sponge. Sponges can be used for applying paste or even for painting your finished pieces, providing a unique texture.
Don’t forget about gloves! While crafting can be a messy endeavor, wearing gloves will keep your hands clean and protect them from any harsh chemicals in your adhesives. Plus, it allows you to dive into your projects without worrying about the mess.
For shaping and sculpting your paper mache, molds or armatures can be incredibly useful. You can create your own armatures using materials like wire or cardboard to give your projects structure. This is especially helpful when crafting larger items, such as sculptures or decorative bowls. If you’re looking to create more defined shapes, consider using balloons as a base for your paper mache projects; they can easily be inflated to the desired size and shape.
Lastly, you’ll want to have a crafting mat or an old newspaper spread out on your workspace. This will protect your surfaces from glue spills and paper scraps, making cleanup a breeze. A clean workspace is not just about aesthetics; it keeps you organized and focused on your creative process.
In summary, having the right tools for paper mache crafting can significantly enhance your experience. Here’s a quick overview of the essential tools:
| Tool | Purpose |
|---|---|
| Mixing Bowls | For preparing adhesive mixtures. |
| Whisk/Stirring Stick | To achieve a smooth paste. |
| Scissors & Craft Knife | For cutting paper into strips and shapes. |
| Brushes | For applying adhesive and paint. |
| Gloves | To keep hands clean and protected. |
| Molds/Armatures | To shape and support your projects. |
| Crafting Mat/Newspaper | To protect your workspace. |
With these tools at your disposal, you’ll be well on your way to creating stunning paper mache decor that’s sure to impress. So, gather your supplies, unleash your creativity, and let the crafting begin!
- What type of paper is best for paper mache? Newspaper is commonly used due to its availability and flexibility, but you can also experiment with tissue paper for a lighter finish.
- Can I use regular glue instead of flour paste? Yes, regular white glue can work well, but it may be more expensive than making your own flour paste.
- How long does it take for paper mache to dry? Drying times can vary based on humidity and thickness, but generally, it takes 24 hours for each layer to dry completely.

Step-by-Step Paper Mache Techniques
Creating stunning paper mache decor is not just about having the right materials; it’s about mastering the techniques that will bring your artistic vision to life. Whether you are a beginner or an experienced crafter, understanding the nuances of paper mache can elevate your projects from ordinary to extraordinary. Let’s dive into the essential techniques that will help you craft beautiful pieces for your home.
The first step in your paper mache journey is learning the basic layering technique. This involves applying multiple layers of paper strips soaked in your adhesive mixture over a form or mold. Start with a single layer of paper, allowing it to dry completely before adding the next layer. This technique not only builds strength but also gives your decor a solid foundation. Aim for at least three to five layers, depending on the size and complexity of your project. The more layers you add, the more durable your piece will become, transforming it into a long-lasting decor item.
Next up is the advanced sculpting technique. This method allows you to create intricate designs and shapes that can truly showcase your creativity. To begin, you’ll need to work with a base structure, which can be made from materials like cardboard, balloons, or even wire frames. Once your base is ready, apply your paper mache layers as before, but take the time to mold and shape the paper into your desired form. This could mean creating curves, angles, or even adding details like facial features for a mask. Don’t be afraid to get your hands messy; sculpting is all about feeling the material and letting your artistic instincts guide you!
To further enhance your projects, consider incorporating mixed media into your paper mache. This technique allows you to combine various materials, such as fabric, beads, or even natural elements like twigs and leaves, into your designs. For instance, after your paper mache piece has dried, you can glue on fabric scraps for texture or embellish it with beads for a touch of glamour. This not only adds dimension to your decor but also makes each piece uniquely yours. Remember, the sky's the limit when it comes to creativity!
Once your paper mache creation is complete, it’s time for the finishing touches. This is where you can let your personality shine through. Painting your piece can dramatically change its appearance. Use acrylic paints for vibrant colors or try a more muted palette for a rustic look. Don’t forget to seal your work with a clear varnish or sealant to protect it from moisture and wear. This step is crucial, especially if your decor will be displayed in high-traffic areas or near windows where sunlight can fade colors.
Finally, let’s talk about drying techniques. Proper drying is essential in preventing issues like mold or structural weakness. After each layer, allow your project to dry thoroughly in a well-ventilated area. You can speed up the drying process by placing your piece in a warm, dry room or using a fan to circulate air. Just be careful not to expose it to direct sunlight, as this can cause warping or cracking.
Q: How long does it take for paper mache to dry?
A: The drying time can vary depending on the thickness of the layers and the humidity in your environment, but generally, it can take anywhere from 24 hours to several days for a project to dry completely.
Q: Can I use regular glue instead of flour paste?
A: Yes, you can use white glue or other adhesives, but flour paste is often preferred for its cost-effectiveness and ease of use. Just make sure to dilute it with water for the best results.
Q: What should I do if my paper mache cracks?
A: If you notice cracks, you can easily repair them by applying a mixture of glue and water to the cracked areas and then layering additional strips of paper over them.
Q: Can I paint my paper mache before it dries?
A: It’s best to wait until your paper mache is completely dry before painting. This ensures that the paint adheres properly and doesn’t cause any issues with the structure.
Q: How can I make my paper mache decor waterproof?
A: To make your paper mache decor waterproof, apply a waterproof sealant or varnish after painting. This will protect your piece from moisture and prolong its lifespan.
Layering Techniques
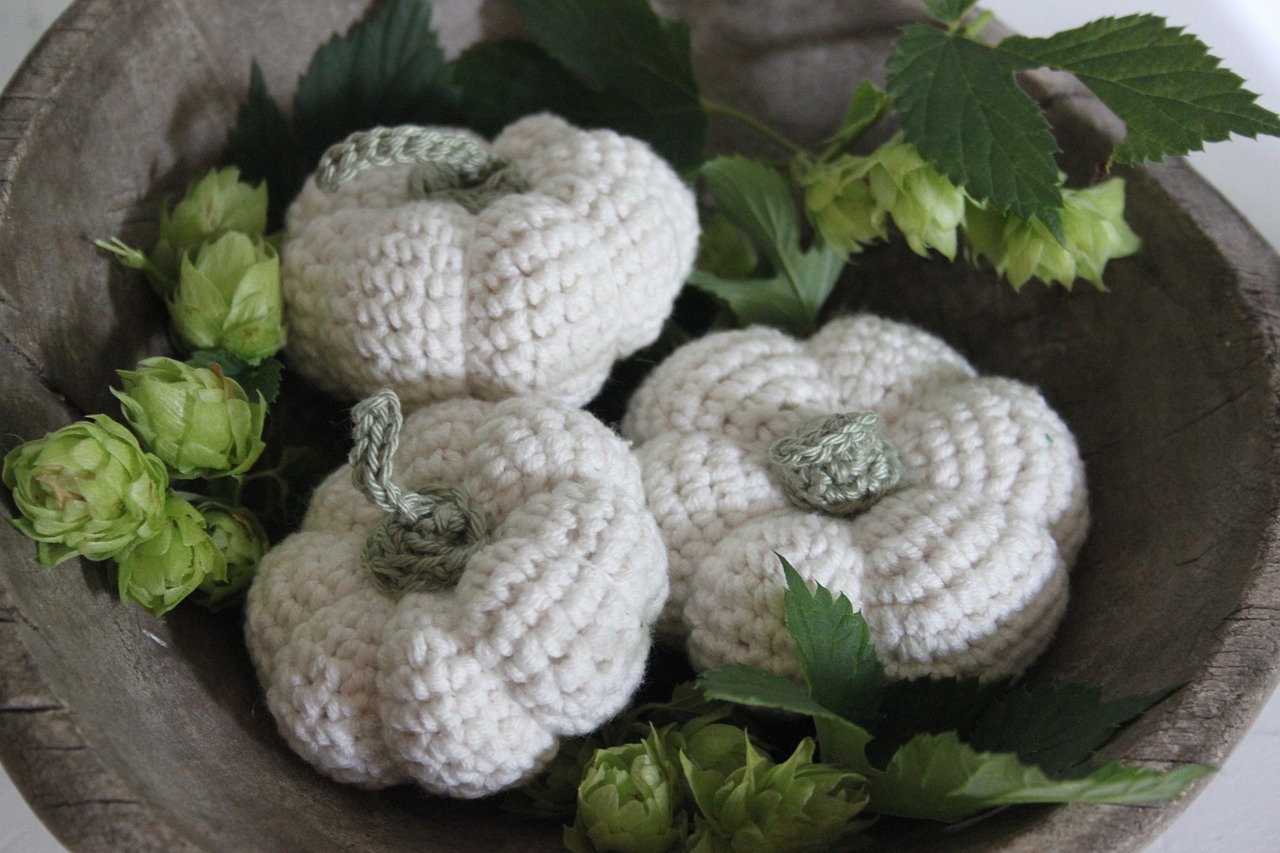
When it comes to crafting stunning paper mache decor, mastering is essential. Think of layering as building a cake; each layer adds depth, structure, and character to your final masterpiece. The beauty of paper mache lies in its versatility, allowing you to create anything from delicate sculptures to robust decor pieces. To start, you’ll want to apply a base layer of paper strips, ensuring they adhere well to your chosen form. This initial layer serves as the foundation of your project, providing the necessary support for subsequent layers.
As you progress, consider the thickness of your layers. Generally, three to five layers are recommended for most projects, but this can vary depending on the size and intended use of your piece. For example, if you’re crafting a decorative bowl, you might want to add more layers to ensure it holds its shape and withstands regular use. On the other hand, if you’re creating a lightweight wall hanging, fewer layers might suffice. The key is to strike a balance between durability and aesthetics.
Another important aspect of layering is the drying time. Each layer must be completely dry before adding the next one. This not only prevents the layers from becoming soggy but also enhances the overall strength of your creation. A good rule of thumb is to wait at least 24 hours after applying a layer before proceeding. If you're in a hurry, using a fan or placing your project in a warm, dry area can speed up the drying process. However, avoid direct sunlight as it can warp your piece.
To add even more character to your projects, consider varying the types of paper used in each layer. For example, you might start with newspaper for the base, then add a layer of colorful tissue paper for vibrancy, and finish off with a sturdy craft paper for durability. This technique not only creates visual interest but also allows you to experiment with textures and colors, making your decor truly unique.
Incorporating different layering techniques can elevate your paper mache projects. Here are a few methods to consider:
- Cross-Layering: This involves applying strips in alternating directions, which enhances strength and stability.
- Textured Layers: Use textured materials like fabric or lace between layers of paper to create a unique finish.
- Color Gradation: Gradually change the colors of your paper layers to create a stunning ombre effect.
Ultimately, the layering process is where your creativity can shine. Don’t be afraid to experiment and find what works best for you. The more you practice, the more skilled you’ll become at manipulating layers to achieve the desired effect. Remember, crafting is all about enjoying the journey, so let your imagination run wild and create decor that truly reflects your style!
Q: How do I know when each layer is dry?
A: You can tell a layer is dry when it feels firm to the touch and no longer feels cool or damp. It’s best to wait at least 24 hours between layers for optimal results.
Q: Can I use paint on paper mache layers?
A: Yes! Once your layers are dry, you can paint them using acrylic or spray paint. Just make sure to seal your project afterward to protect the finish.
Q: What happens if I add too many layers?
A: Adding too many layers can make your project heavy and may lead to cracking or warping. It’s important to find a balance based on the size and intended use of your piece.
Finishing Touches
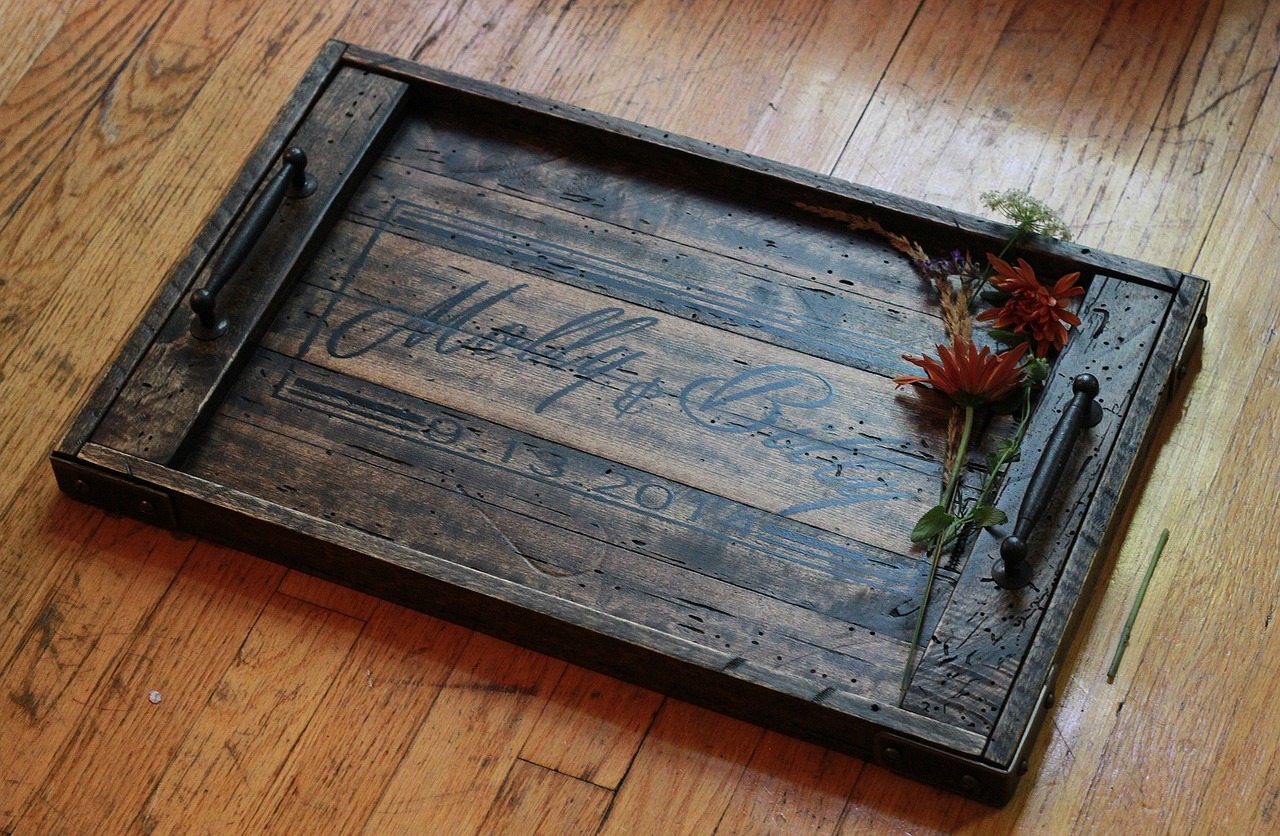
Once you’ve crafted your stunning paper mache piece, it’s time to elevate it to the next level with some . This stage is where your creativity truly shines! Painting, decorating, and sealing your projects are essential steps that not only enhance their beauty but also protect them for years to come. Think of this as the icing on the cake; it transforms a simple creation into a captivating masterpiece!
First, let’s talk about painting. Choosing the right colors can dramatically change the vibe of your decor. Acrylic paints are a popular choice due to their vibrant hues and quick-drying properties. You can opt for a single color for a minimalist look or mix multiple shades to create a unique design. Remember to apply a base coat first; this helps the colors pop and ensures even coverage. Once your base coat is dry, feel free to get creative! Use sponges, brushes, or even your fingers to add texture and depth.
After painting, consider adding decorative elements to your project. This could include anything from glitter and stencils to fabric scraps and beads. These additions can bring a personal touch to your piece, making it uniquely yours. For instance, if you’re working on a lamp shade, why not glue on some colorful fabric pieces for a boho-chic look? Or if you’re creating wall art, stenciling a pattern can add a sophisticated flair.
Finally, sealing your paper mache project is crucial for its longevity. A good sealant protects your creation from moisture and wear, making it suitable for various environments. You can use a spray sealant or a paint-on variety, depending on your preference. Make sure to choose a sealant that is compatible with the materials you used, especially if you've added any decorative elements. It’s like wrapping your artwork in a protective layer, allowing it to shine without fear of damage!
In summary, the finishing touches are what truly make your paper mache decor stand out. By carefully selecting your paints, adding unique decorations, and sealing your work, you can ensure that your creations not only look fabulous but also last for years to come. So, grab your brushes and unleash your inner artist!
- What type of paint is best for paper mache? Acrylic paint is highly recommended due to its vibrant colors and quick-drying properties.
- Can I use regular glue for paper mache? While you can use regular glue, it’s best to use a mixture of flour and water or a dedicated paper mache adhesive for better results.
- How do I prevent my paper mache from getting moldy? Ensure that your projects are thoroughly dried before sealing them, and store them in a dry environment.
- What can I use to seal my paper mache projects? Spray sealants or paint-on sealants are both effective. Just ensure they are compatible with your chosen materials.
Creative Project Ideas
Unleashing your creativity with paper mache can be an incredibly rewarding experience. The beauty of this versatile craft is that it allows you to transform simple materials into stunning decor pieces that can elevate any room in your home. Whether you’re looking to create something functional or purely decorative, the possibilities are endless! Imagine crafting a vibrant wall sculpture that captures the essence of your personality or a unique lamp shade that casts a warm glow in your living space. Let's dive into some exciting project ideas that will inspire you to get started on your next paper mache adventure.
One of the most popular applications of paper mache is creating wall art. You can design anything from intricate 3D shapes to bold, textured pieces that can serve as a focal point in your room. For instance, consider making a large, abstract piece that incorporates various colors and shapes. This can be achieved by layering different types of paper, such as newspaper for structure and tissue paper for vibrant color. The final product can be painted or left in its natural state, depending on your aesthetic preference. Not only does this project allow for creativity, but it also gives you a chance to express your individuality through art.
In addition to wall art, functional decor items are a fantastic way to blend artistry with practicality. Imagine crafting a beautiful bowl that can hold your keys or a stylish lampshade that adds character to your bedside table. To create a bowl, you can use a balloon as a mold, layering paper mache until it reaches the desired thickness. Once dry, pop the balloon and paint your new bowl in colors that match your decor. For a lampshade, simply shape the paper mache around a wire frame, allowing light to filter through and create a stunning visual effect when illuminated. These projects not only serve a purpose but also showcase your skills and creativity.
Another exciting idea is to create themed decor for special occasions or seasons. For example, you can make spooky decorations for Halloween, such as ghostly figures or pumpkins, or create festive ornaments for Christmas. These themed pieces can be as simple or as intricate as you like, allowing you to experiment with different techniques and styles. Plus, they can become cherished annual traditions that bring joy and creativity to your celebrations.
To help you get started, here are some additional ideas that you might find inspiring:
- Animal Sculptures: Create lifelike or whimsical animal figures that can be displayed on shelves or as part of a centerpiece.
- Planters: Design unique planters that add a touch of nature to your home while showcasing your paper mache skills.
- Seasonal Wreaths: Craft beautiful wreaths that can be adorned with flowers, leaves, or other embellishments for different seasons.
With each project, remember that the journey of creating is just as important as the final product. Take your time, enjoy the process, and don’t be afraid to experiment with different techniques and materials. The more you practice, the more skilled you will become, and soon you’ll have a collection of stunning paper mache decor pieces that truly reflect your style and creativity.
Q: What type of paper is best for paper mache projects?
A: Newspaper is commonly used due to its availability and strength, but you can also use tissue paper, craft paper, or even recycled materials for unique textures.
Q: How long does it take for paper mache to dry?
A: Drying times can vary depending on the thickness of your layers and the humidity in your environment. Generally, it can take anywhere from 24 hours to a few days for your projects to fully dry.
Q: Can I paint my paper mache projects?
A: Absolutely! Once your paper mache is completely dry, you can paint it with acrylic paints or decorate it with other materials to enhance its appearance.
Q: How do I seal my paper mache creations?
A: You can use a clear sealant or varnish to protect your finished projects from moisture and wear. Make sure to apply it after the paint has dried completely.

Wall Art Inspirations
When it comes to transforming your living space, wall art can make a significant impact. Paper mache offers a unique and versatile medium for creating stunning wall decor that can reflect your personality and style. Imagine stepping into a room adorned with vibrant, textured pieces that catch the eye and spark conversation. The beauty of paper mache is that it allows for endless creativity, enabling you to craft everything from abstract designs to intricate sculptures. So, where do you start?
One fantastic idea is to create 3D wall sculptures. These pieces can be designed to resemble anything from nature-inspired motifs like leaves and flowers to geometric shapes that add a modern touch. The layering technique in paper mache is perfect for building depth and dimension, making your wall art truly stand out. You can experiment with different colors and textures by using various papers, such as colorful tissue paper or even recycled cardboard, to give your sculptures a unique flair.
Another inspiring option is to create a textured mural that tells a story or depicts a scene. Imagine a tranquil forest, complete with layered trees and animals, or an abstract representation of the ocean waves. To achieve this, you can use a base of cardboard or canvas and build your design with multiple layers of paper mache. This not only adds depth but also allows you to play with shadows and highlights, enhancing the overall visual effect.
For those who love a more minimalist aesthetic, consider crafting geometric wall art. By cutting shapes from cardboard and covering them with paper mache, you can create a series of interconnected forms that can be painted in monochromatic colors or bold, contrasting hues. Hang these pieces in a grid pattern for a clean, modern look that still has the warmth and texture of handmade art.
Don't forget about the power of color! The final finish of your paper mache art can dramatically change its look and feel. After completing your piece, consider painting it with acrylics or applying a wash for a more subtle effect. You can even add embellishments like glitter or metallic paints to catch the light and draw attention.
Finally, think about how to incorporate functionality into your wall art. Why not create a decorative clock or a wall-mounted planter using paper mache? These functional pieces not only serve a purpose but also add artistic flair to your home. The possibilities are truly endless!
As you embark on your paper mache wall art journey, remember that the most important aspect is to have fun and let your creativity flow. Each piece you create will not only beautify your space but also tell a story about your artistic journey. So gather your materials, let your imagination run wild, and start crafting stunning wall art that will be the envy of all your friends!
- What type of paint is best for paper mache? Acrylic paint works well as it adheres nicely and comes in a wide range of colors.
- How long does it take for paper mache to dry? Drying time can vary, but typically it takes 24 to 48 hours depending on the thickness of the layers.
- Can I use paper mache outdoors? Yes, but it’s essential to seal your project with a waterproof sealant to protect it from the elements.
Functional Decor Items
When it comes to home decor, why not merge function with artistry? Paper mache offers a fantastic way to create unique and functional decor items that can enhance your living space while serving a practical purpose. Imagine crafting a stunning bowl that not only looks great on your coffee table but is also perfect for holding your keys or snacks. The beauty of paper mache is that it allows you to explore your creativity while making items that are genuinely useful.
One of the most popular functional decor items you can create is a paper mache lamp shade. This project is not only fun but also a fantastic way to add a personal touch to your lighting. By using various layering techniques, you can design a shade that casts beautiful patterns of light throughout your room. The process involves creating a sturdy base and then adding layers of paper mache to form the desired shape. Once dry, you can paint or decorate it to match your home’s color scheme, making it a perfect conversation starter.
Another exciting idea is to make decorative bowls. These can serve multiple purposes, from holding fruit to functioning as a catch-all for miscellaneous items. To create a bowl, start by inflating a balloon to your desired size and shape. Then, apply layers of paper mache around the balloon, allowing it to dry thoroughly. Once you pop the balloon and remove it, you’ll be left with a beautiful, lightweight bowl. You can even experiment with different colors and patterns to make it truly one-of-a-kind.
For those who love to entertain, consider crafting a paper mache serving tray. This project allows you to combine aesthetics with functionality, providing a stylish way to serve drinks or snacks at your next gathering. By using a flat base and building up the sides with paper mache, you can create a tray that not only looks stunning but is also durable enough for everyday use. You can finish it off with a coat of sealant to ensure it withstands any spills.
Here’s a quick look at some functional decor items you can create with paper mache:
- Lampshades - Illuminate your space with custom designs.
- Bowls - Perfect for storage or decoration.
- Serving trays - Stylishly serve your guests.
- Wall pockets - Functional storage for mail or small items.
In addition to these items, you can also explore creating wall pockets for storing mail or small items. These can be both decorative and functional, adding a touch of whimsy to your entryway or kitchen. The possibilities are endless, and the only limit is your imagination!
Overall, incorporating functional decor items into your home using paper mache not only enhances your living space but also allows you to showcase your creativity. Each piece you create tells a story and adds a unique flair to your home. So, gather your materials and let your imagination run wild—you’ll be amazed at what you can create!
Q: Can I use any type of paper for paper mache projects?
A: While you can use various types of paper, newspaper and craft paper are the most popular choices due to their availability and ease of use.
Q: How long does it take for paper mache to dry?
A: Drying times can vary depending on the thickness of the layers and humidity levels. Generally, it can take anywhere from 24 to 48 hours for your projects to dry completely.
Q: What kind of paint should I use on my paper mache items?
A: Acrylic paint works well for paper mache projects, as it adheres nicely and provides vibrant colors. Make sure to use a sealant afterward for durability.
Q: Are paper mache items waterproof?
A: Paper mache is not inherently waterproof, but you can apply a waterproof sealant to protect your items from moisture.
Tips for Successful Crafting
When it comes to paper mache crafting, a little preparation goes a long way. To ensure your projects turn out beautifully, there are several tips and techniques you should keep in mind. First and foremost, always make sure to choose the right workspace. A clean, well-ventilated area will help you avoid messes and allow your creations to dry properly. It’s also wise to cover surfaces with old newspapers or a plastic sheet to catch any drips or spills.
Next, understanding the drying process is crucial. Paper mache projects require time to dry completely, and rushing this process can lead to issues like mold growth or a weakened structure. Ideally, allow your pieces to dry in a warm, dry location, away from direct sunlight, which can cause cracking. For larger projects, consider using a fan to circulate air, speeding up the drying without compromising the integrity of your work.
Another important aspect is the application of layers. When layering paper mache, aim for at least three to four layers to create a robust structure. Each layer should be allowed to dry before adding the next. This technique not only enhances durability but also allows you to build intricate designs and textures. Remember, patience is key! Think of it like building a cake; each layer adds to the overall strength and appearance.
Once your project is dry, it’s time for the finishing touches. Painting and sealing your paper mache creations can transform them from simple crafts into stunning decor pieces. Use acrylic paints for vibrant colors, and don’t hesitate to experiment with different finishes, such as matte or glossy. For sealing, a clear acrylic spray or a diluted glue mixture can protect your work from moisture and wear, ensuring it lasts for years to come.
Lastly, maintenance and care are essential for keeping your paper mache decor looking fresh. Dust your pieces regularly with a soft cloth, and avoid exposing them to excessive moisture. If you notice any signs of wear, such as peeling paint or soft spots, address them promptly to prevent further damage. Think of your paper mache decor as a living piece of art; with a little love and care, it can continue to brighten your home for a long time.
- Can I use any type of paper for paper mache?
While you can use various types of paper, newspaper is often preferred due to its strength and availability. Tissue paper and craft paper can also be used for different effects. - How long does it take for paper mache to dry?
The drying time can vary based on the thickness of your layers and the humidity in your environment. Typically, it can take anywhere from 24 to 48 hours for a project to dry completely. - What should I do if my paper mache piece gets wet?
If your piece gets wet, gently blot it with a cloth and allow it to dry in a well-ventilated area. If it becomes deformed, you may need to reshape it while it's damp and let it dry again.

Drying Techniques
When it comes to crafting with paper mache, the drying process is just as crucial as the actual creation. It's like letting a cake cool before frosting it; if you rush it, you're going to end up with a mess! Proper drying techniques ensure your projects maintain their shape and strength, preventing issues like mold or structural weakness. So, how do you achieve the best results? Let's dive into some effective methods!
First off, it's essential to choose a suitable drying environment. Ideally, you want a space that is well-ventilated and away from direct sunlight. Too much heat can cause the paper to warp, while a damp environment can promote mold growth. Think of it like finding the perfect spot for a plant; it needs just the right conditions to thrive! A fan can be a great addition to speed up the drying process without overheating your creations.
Another technique to consider is the use of layering. When applying multiple layers of paper, allow each layer to dry completely before adding the next. This ensures that moisture doesn't get trapped between layers, which can lead to bubbling or uneven drying. A good rule of thumb is to wait at least 24 hours between layers, but if you're using thicker materials, you might want to extend that time. Think of it as building a sturdy house; every layer needs to be solid before moving on to the next!
For those with a bit of patience, using a drying rack can be incredibly beneficial. This allows air to circulate around your piece, promoting even drying. If you don't have a drying rack, you can create your own with some wire or even use a simple clothes drying line. Just hang your projects and let gravity do its work!
Lastly, keep an eye on the humidity levels in your workspace. If it's particularly humid, you might want to consider using a dehumidifier. This can help pull moisture from the air, allowing your paper mache to dry faster and more evenly. It’s like giving your craft a little extra boost to help it along its drying journey!
In summary, effective drying techniques are essential for successful paper mache crafting. By ensuring proper ventilation, allowing sufficient time between layers, using a drying rack, and monitoring humidity levels, you'll set yourself up for success. Remember, good things come to those who wait, and your beautiful creations will be worth every moment spent drying!
- How long does it take for paper mache to dry? Generally, it can take anywhere from 24 to 48 hours, depending on the thickness of your layers and environmental conditions.
- Can I speed up the drying process? Yes! Using a fan, ensuring good ventilation, and avoiding direct sunlight can help speed up drying without compromising the integrity of your project.
- What should I do if my paper mache is still damp after a few days? If your project is still damp, check for trapped moisture between layers. You may need to separate layers gently and allow it to dry more thoroughly.

Maintenance and Care
Taking care of your paper mache decor is essential to ensure its longevity and beauty. Just like any cherished item in your home, these creations require a bit of love and attention to keep them looking their best. First and foremost, it's crucial to understand that paper mache is made primarily from paper and glue, which means it can be susceptible to moisture. To prevent any damage, keep your decor in a dry environment away from direct sunlight, which can cause fading and deterioration over time.
When it comes to cleaning your paper mache pieces, a gentle approach is key. Use a soft, dry cloth to dust them regularly. If you encounter stubborn dirt or stains, you can lightly dampen the cloth with water, but be careful not to soak the paper mache, as excess moisture can weaken the structure. For those pieces you want to keep pristine, consider applying a clear sealant after your initial crafting process. This not only adds a protective layer but also enhances the colors, making your decor pop!
Storage is another vital aspect of maintenance. If you need to store your paper mache items, wrap them in acid-free tissue paper and place them in a sturdy box. Avoid stacking heavy items on top of them, as this can lead to dents or breaks. Remember, these creations are not just decor; they are a reflection of your creativity and effort. Treat them with care, and they will continue to bring joy to your space.
To help you maintain your paper mache decor effectively, here are some practical tips:
- Avoid moisture: Keep your pieces in a dry place to prevent mold and warping.
- Dust regularly: Use a soft cloth to keep your decor dust-free.
- Seal wisely: Consider using a clear acrylic sealant for added protection.
- Store carefully: Wrap items in tissue paper and avoid stacking heavy objects on them.
By following these simple maintenance and care tips, your paper mache decor will not only survive but thrive in your home, adding charm and character for years to come. Embrace the uniqueness of your creations, and don’t hesitate to showcase them proudly!
Here are some common questions about maintaining and caring for your paper mache decor:
| Question | Answer |
|---|---|
| Can I use water to clean my paper mache items? | Yes, but be sure to use a lightly dampened cloth and avoid soaking the pieces. |
| How often should I dust my paper mache decor? | Regular dusting, at least once a week, will help keep your items looking fresh. |
| Is it necessary to seal my paper mache projects? | While not mandatory, sealing can protect your decor and enhance its appearance. |
| What should I do if my paper mache item gets wet? | Gently dry it with a soft cloth and allow it to air dry completely in a dry area. |
Frequently Asked Questions
- What is paper mache?
Paper mache is a crafting technique that involves using paper pieces, often mixed with a binding agent like glue or flour paste, to create sturdy and lightweight objects. It's a fun and versatile way to make decor items for your home!
- What materials do I need for paper mache?
To get started with paper mache, you'll need some basic materials, including:
- Paper (newspaper, tissue paper, or craft paper)
- Adhesive (like glue or flour paste)
- Tools (mixing bowls, brushes, and sculpting tools)
- Can I use recycled materials in my paper mache projects?
Absolutely! Using recycled materials not only promotes sustainability but also adds unique textures and colors to your creations. Think about incorporating items like old magazines, cardboard, or even fabric scraps!
- How do I choose the right paper for my project?
The type of paper you choose can affect the final look and durability of your decor. For example, newspaper is great for strength, while tissue paper can add a delicate touch. Experiment with different types to see what works best for your style!
- What are some common techniques for paper mache crafting?
There are several techniques you can try, including:
- Layering: Building up layers for structure and depth.
- Sculpting: Shaping your paper mache into intricate designs.
- Finishing: Painting and sealing your projects for a polished look.
- How do I properly dry my paper mache projects?
Proper drying is crucial to avoid issues like mold or weak structures. Make sure to let your projects dry in a well-ventilated area, and consider using a fan to speed up the process if needed!
- What are some tips for maintaining my paper mache decor?
To keep your paper mache items looking great, avoid placing them in direct sunlight or damp areas. Regular dusting and occasional sealing with a clear coat can help maintain their beauty over time!


