Upcycling Ideas to Transform Old Light Bulb into Ornaments
Have you ever looked at an old light bulb and thought, "What on earth can I do with this?" Well, you’re in for a treat! Upcycling old light bulbs into stunning ornaments is not just a fun craft project; it’s a fantastic way to express your creativity while being eco-friendly. Imagine transforming those seemingly useless bulbs into charming decorations that add a personal touch to your home. Whether you're an experienced crafter or a complete novice, this guide will walk you through some innovative ideas that will leave your friends and family in awe.
First off, let’s talk about the beauty of upcycling. It’s like giving a second chance to items that would otherwise end up in the landfill. By turning old light bulbs into ornaments, you’re not only reducing waste but also creating unique pieces that tell a story. Each ornament can reflect your personality and style, making your home feel even more inviting. Plus, it’s a great way to engage with your kids or friends, sparking creativity and collaboration!
Now, you might be wondering where to start. The good news is that the options are endless! From painting and wrapping to embellishing and crafting, there are numerous techniques to explore. You can choose to go bold with bright colors or keep it subtle with natural tones. The only limit is your imagination! For instance, try painting the bulbs with vibrant hues to create eye-catching designs or wrapping them in twine for a rustic look. You could even add glitter or sequins for a touch of sparkle. The key is to have fun and experiment!
As you embark on this creative journey, think about the seasons and holidays that inspire you. Why not create seasonal decorations that can be showcased throughout the year? Picture hanging snowman ornaments during winter or vibrant floral designs in spring. Each season offers a unique palette and theme that can be beautifully captured using upcycled light bulbs. So gather your materials and let your creativity flow!
In the upcoming sections, we will delve deeper into specific crafting techniques, seasonal ideas, and even functional art pieces that you can create from light bulbs. So, stay tuned as we explore how to turn those forgotten bulbs into delightful ornaments that will brighten up your space and your spirit!
- What materials do I need to upcycle light bulbs?
You'll need old light bulbs, paint, glue, embellishments (like glitter or sequins), twine, and any other decorative items you wish to use. - Are there any safety precautions I should take?
Yes! Always handle light bulbs with care to avoid breakage. Wear gloves if necessary, and ensure you work in a well-ventilated area, especially when using paints or adhesives. - Can I use LED bulbs for upcycling?
While traditional incandescent bulbs are easier to work with, you can also upcycle LED bulbs. Just be mindful of their different structures. - How can I make my ornaments last longer?
To enhance longevity, consider sealing your painted bulbs with a clear coat spray. This will protect them from dust and wear.
Creative Crafting Techniques
When it comes to transforming old light bulbs into stunning ornaments, the possibilities are as vast as your imagination! With just a few basic crafting supplies and a sprinkle of creativity, you can breathe new life into those discarded bulbs. Let’s dive into some exciting techniques that will help you unleash your inner artist and create personalized decorations that will charm anyone who steps into your home.
First off, one of the most popular methods is painting. You can use acrylic paints to give your light bulbs a fresh coat of color. Imagine turning a plain bulb into a vibrant flower or a cute animal! Simply clean the bulb thoroughly, apply a base coat, and let your creativity flow. You can even create patterns or designs by using tape as a stencil. This technique not only adds color but also allows for endless customization.
Another fantastic technique is wrapping. This method involves using various materials like twine, ribbon, or even fabric to wrap around the bulb. Not only does this give the bulb a cozy, rustic feel, but it also allows you to incorporate different textures into your decor. For instance, wrapping a bulb in burlap can create a charming farmhouse look, while colorful yarn can add a pop of fun for a more playful vibe.
If you’re feeling particularly adventurous, consider embellishing your light bulbs with decorative elements. Think about adding beads, sequins, or even dried flowers to create a unique ornament. You can use a hot glue gun to attach these embellishments securely. The result? A stunning, one-of-a-kind piece that reflects your personal style. This technique is perfect for special occasions or holidays, as you can tailor your decorations to fit the theme.
For those who love a bit of sparkle, glitter can be your best friend. After painting or wrapping your bulb, apply a layer of glue and sprinkle glitter over it to achieve a dazzling finish. This technique is especially popular for festive decorations, as it adds a touch of magic to any ornament. Just remember to work in a well-ventilated area and cover your workspace to manage the glitter mess!
Finally, if you want to take your crafting to another level, consider using decoupage techniques. This involves applying decorative paper or fabric to the bulb using a special glue. You can use old book pages, wrapping paper, or even napkins to create a unique design. Once the paper is applied, seal it with a clear varnish for a polished finish. This technique allows you to create intricate designs that tell a story or convey a theme.
In summary, the world of upcycling old light bulbs is filled with exciting crafting techniques that can transform simple glass into remarkable ornaments. Whether you choose to paint, wrap, embellish, add glitter, or decoupage, each method offers a unique way to express your creativity. So gather your supplies, invite some friends over, and start crafting! You’ll not only create beautiful decorations but also enjoy a fun and fulfilling experience.

Seasonal Decorations
When it comes to decorating your home for different seasons, old light bulbs can be your best friend! These little glass wonders are not just for lighting; they can be transformed into stunning ornaments that reflect the spirit of each season. Think about it: why throw away those old bulbs when you can breathe new life into them? Let’s dive into some creative ways to make your home a seasonal showcase using light bulbs.
Each season offers a unique palette of colors and themes. For instance, during the winter months, you can create beautiful ornaments that evoke a winter wonderland. Imagine hanging frosted light bulbs that mimic icicles, or crafting adorable snowmen that bring a smile to anyone who sees them. In contrast, spring offers a burst of colors and life, perfect for creating floral-themed decorations that celebrate the blooming nature around us. And let’s not forget summer, where vibrant hues can turn your old bulbs into cheerful sunflowers or beach-themed ornaments!
Here are some ideas to inspire your seasonal crafting:
- Winter: Frosted light bulbs can create a magical snowy effect. You can also use white paint to create snowmen or even use glitter for a sparkling touch.
- Spring: Paint light bulbs in pastel colors and add faux flowers or ribbons to create beautiful floral ornaments that brighten up any space.
- Summer: Use bright colors and tropical designs. Think of painting bulbs to look like fruits or beach balls, adding a playful vibe to your decor.
- Autumn: Embrace the warm tones of fall by painting bulbs in shades of orange, yellow, and red. You can even wrap them in twine for a rustic touch.
As you can see, the possibilities are endless! Not only do these projects provide a fun way to spend your time, but they also allow you to express your creativity while being eco-friendly. Each season brings its own charm, and with a little imagination, your home can reflect that charm beautifully. So, gather those old light bulbs and get ready to craft your way through the seasons!
Q: Can I use any type of light bulb for these projects?
A: Generally, yes! However, it's best to use incandescent or LED bulbs. Avoid using fluorescent bulbs as they contain hazardous materials.
Q: How do I safely remove the base from the light bulb?
A: To safely remove the base, wear gloves and goggles for protection. Use pliers to gently twist and pull the base off. If you’re unsure, there are many tutorials available online that can guide you through the process step by step.
Q: What kind of paint should I use for decorating light bulbs?
A: Acrylic paint works well for most projects, as it adheres nicely to glass. For a frosted look, consider using spray paint designed for glass surfaces.
Q: Are there any safety tips I should keep in mind while crafting?
A: Absolutely! Always work in a well-ventilated area, wear protective gear, and be cautious when handling broken glass. Dispose of any broken bulbs properly.
Winter Wonderland Themes
When the chill of winter sets in and the world transforms into a breathtaking wonderland, it’s the perfect time to get creative with your old light bulbs. These once-forgotten items can be reimagined into stunning decorations that capture the magic of the season. Have you ever thought about how a simple light bulb could become a whimsical snowflake or a charming icicle? With just a bit of imagination and some crafting supplies, you can turn your old bulbs into delightful winter-themed ornaments that will impress your family and friends.
One of the most enchanting ideas is to create snowman ornaments. Picture this: a bulb painted white, adorned with a tiny hat and scarf, and maybe even some buttons to give it character. To make these adorable snowmen, you’ll need:
- Old light bulbs
- White paint
- Small accessories (like fabric scraps for scarves)
- Markers for facial features
Start by painting the bulb white and letting it dry completely. Once dry, use markers to draw a cheerful face, and then wrap a small piece of fabric around the neck for a scarf. Add a tiny hat made from felt or paper, and there you have it—a delightful snowman ornament that brings a smile to anyone who sees it!
Another captivating project is to create frosted bulbs. This technique beautifully mimics the look of freshly fallen snow, adding a magical touch to your decor. To frost your bulbs, you can use a mixture of white glue and Epsom salt. Simply mix equal parts of glue and salt, then apply it to the bulb’s surface with a brush. As the mixture dries, it will create a frosty effect that glistens in the light. Hang these frosted bulbs on your tree or place them around your home to enhance the winter ambiance.
As you embark on your winter crafting journey, consider how these ornaments can be used to create a cohesive theme throughout your home. You can mix and match your snowman ornaments with frosted bulbs, and even incorporate other winter-themed decorations, such as stars or snowflakes made from paper or cardboard. The key is to let your creativity flow and enjoy the process of upcycling.
In addition to these ideas, don’t shy away from experimenting with colors and textures. For instance, you could paint some bulbs in shades of blue and silver to evoke a frosty night sky or use glitter to add a touch of sparkle. By combining different crafting techniques, you can create a winter wonderland that reflects your unique style and personality.
Q: Can I use any type of light bulb for these projects?
A: Yes! While traditional incandescent bulbs work great, you can also use LED or CFL bulbs. Just be cautious with glass bulbs as they can break easily.
Q: How can I safely handle light bulbs during crafting?
A: Always wear gloves when handling light bulbs to prevent cuts from broken glass. If you’re using a heat source, ensure the bulb is completely cool before starting your project.
Q: What other materials do I need for these projects?
A: Basic crafting supplies like paint, brushes, glue, and embellishments are all you need. Feel free to get creative with whatever materials you have on hand!

Snowman Ornaments
Creating from old light bulbs is a delightful way to bring a touch of winter whimsy into your home. Imagine transforming those discarded bulbs into charming little snowmen that can adorn your holiday tree, hang from your mantel, or even serve as festive table decor. This project is not only an exciting craft but also a wonderful opportunity to engage your creativity and recycle materials that would otherwise contribute to waste.
To get started, you'll need a few basic supplies: old light bulbs, white paint (or spray paint), black and orange markers or paint for the face, and some fabric or ribbon for the scarf. You can also use additional embellishments like buttons, glitter, or tiny hats to give your snowmen personality. The beauty of this project lies in its versatility; you can make each snowman unique!
Here’s a simple step-by-step guide to crafting your snowman ornaments:
- Step 1: Clean the light bulbs thoroughly to remove any dust or residue.
- Step 2: Apply a coat of white paint to the bulb. If you're using spray paint, ensure you do this in a well-ventilated area and let it dry completely.
- Step 3: Once the paint is dry, use black paint or a marker to create the eyes and mouth. An orange marker or paint is perfect for the carrot nose!
- Step 4: Get creative with the scarf! Wrap a piece of fabric or ribbon around the neck of the bulb. You can even glue on buttons for added flair.
- Step 5: If you like, you can add a small hat made from felt or other materials to top off your snowman’s look.
Once your snowman ornaments are complete, you can hang them using twine or string. They make perfect gifts for friends and family, and they’re a great way to involve kids in holiday crafting. Just imagine the joy of seeing a little snowman hanging on the tree, each one a testament to creativity and sustainability!
In addition to being fun to make, these snowman ornaments can also spark conversations about the importance of recycling and upcycling in our daily lives. By turning something old into something new and beautiful, you not only beautify your home but also contribute to a more sustainable planet. So, gather your materials and let your imagination run wild—who knows how many unique snowmen you’ll create!
Q: Can I use different types of light bulbs for this project?
A: Absolutely! While traditional incandescent bulbs work well, you can also use LED bulbs or even compact fluorescent bulbs. Just ensure that the bulb is clean and dry before painting.
Q: How can I hang my snowman ornaments?
A: You can use twine, fishing line, or decorative ribbon. Simply tie a loop around the neck of the bulb or attach it to the top of the hat if you’ve made one.
Q: What if I don't have white paint?
A: If you don’t have white paint, consider using white fabric or even white paper to cover the bulb. You can also leave it clear for a more modern look!
Frosted Bulbs
Transforming old light bulbs into frosted ornaments is not only a delightful way to recycle but also a fantastic method to create a cozy, winter ambiance in your home. The process of frosting light bulbs is surprisingly simple, yet the results can be stunning. Imagine a beautiful array of frosted bulbs hanging from your ceiling or adorning your holiday tree, twinkling like icy gems. This project is perfect for those who enjoy crafting and want to add a touch of magic to their winter decor.
To achieve that frosted look, you’ll need a few basic materials. Here’s a quick rundown:
- Old light bulbs (preferably clear ones)
- Frosted glass spray paint or a DIY frosted effect using white glue and Epsom salt
- Protective gloves and a mask (for safety)
- String or wire for hanging
Once you have your materials ready, the fun begins! If you're using frosted glass spray paint, simply follow these steps:
- Ensure the light bulb is clean and dry. A quick wipe with rubbing alcohol will do the trick.
- In a well-ventilated area, hold the bulb securely and spray a light coat of the frosted glass spray paint. Remember, less is more!
- Allow the paint to dry completely, and if you desire a thicker frost effect, apply additional coats.
- Once dry, you can add embellishments like ribbons or faux snow to enhance the wintery feel.
If you prefer a more textured look, try the DIY method using white glue and Epsom salt. This technique gives your bulbs a unique, snowy finish that’s both charming and tactile. Here's how:
- Mix equal parts of white glue and water in a bowl.
- Dip the bulb in the glue mixture, making sure to cover it evenly.
- While the glue is still wet, roll the bulb in Epsom salt to create a snowy texture.
- Let it dry completely before hanging or displaying your frosted masterpiece.
These frosted bulbs can be hung from your ceiling, placed in a decorative bowl, or even strung together as a garland. The soft, diffused light they emit will create a warm and inviting atmosphere, perfect for those chilly winter nights. They also make excellent gifts or can be used as unique party favors during the holiday season.
In conclusion, frosted light bulbs are a brilliant way to blend creativity with sustainability. Not only do they breathe new life into old materials, but they also add a personal touch to your winter decorations. So, gather your supplies and let your imagination run wild—your frosted bulbs are waiting to dazzle!
Q: Can I use any type of light bulb for this project?
A: Yes, clear incandescent bulbs work best, but you can also use LED bulbs. Just ensure they are clean and dry before starting.
Q: How long does the frosted effect last?
A: The frosted effect can last for many seasons if properly cared for. Avoid exposing them to moisture or harsh conditions.
Q: Can I use colored bulbs instead of clear ones?
A: While clear bulbs give the best frosted effect, you can experiment with colored bulbs for a unique look. Just keep in mind that the color may affect the final appearance.
Spring and Summer Creations
As the days grow longer and the flowers begin to bloom, what better way to celebrate the vibrancy of spring and summer than by transforming old light bulbs into delightful ornaments? Imagine your garden or home adorned with colorful, handcrafted pieces that not only showcase your creativity but also reflect the beauty of the seasons. Upcycling light bulbs offers an eco-friendly way to add a personal touch to your decor while keeping the spirit of nature alive.
One fantastic idea is to create flower-themed ornaments. You can paint the bulbs in bright colors like yellows, pinks, and blues, and then embellish them with faux flowers or even real dried flowers. This can be achieved by using a hot glue gun to attach the flowers securely. Hang these beauties in your garden or indoors to bring a splash of color to your space. You can even place small LED lights inside to create a glowing effect during the evening, turning your bulbs into enchanting garden lights.
Another creative approach is to make bird feeders from your old light bulbs. By carefully cutting the bulb and attaching a small dish underneath, you can create a charming feeder that will attract local birds. Simply fill it with seeds, and you’ll have a delightful show of nature right in your backyard. Plus, it’s a wonderful way to teach children about wildlife and the importance of caring for the environment.
If you’re feeling particularly artistic, consider crafting hanging terrariums from light bulbs. After removing the filament and cleaning the inside, fill the bulb with soil and small succulents or air plants. These mini gardens are not only stunning but also require minimal maintenance. You can hang them from branches or create a unique display by placing them on shelves. They serve as a great conversation starter and a reminder of the beauty of nature indoors.
Incorporating light bulbs into your spring and summer decor can also mean creating themed centerpieces. For instance, you can fill a shallow bowl with sand, shells, and small painted bulbs to evoke a beach vibe. Alternatively, for a garden party, use bulbs painted in pastel colors arranged in a rustic wooden crate. This not only enhances your theme but also showcases your dedication to sustainable practices.
Ultimately, the possibilities are endless when it comes to upcycling light bulbs for spring and summer creations. Whether you opt for floral designs, functional bird feeders, or whimsical terrariums, each project allows you to express your personality while contributing to a greener planet. So, roll up your sleeves, gather your materials, and let your imagination run wild!
- Can I use any type of light bulb for these projects? Yes, you can use various types of light bulbs, including incandescent, LED, and CFLs. Just ensure they are clean and safe to handle.
- Are there any safety precautions I should take? Absolutely! Always wear gloves when handling light bulbs, especially when cutting them. Make sure to work in a well-ventilated area and dispose of any broken glass properly.
- How can I hang my light bulb ornaments? You can use fishing line, twine, or decorative ribbon to hang your ornaments. Ensure they are securely attached to avoid any accidents.
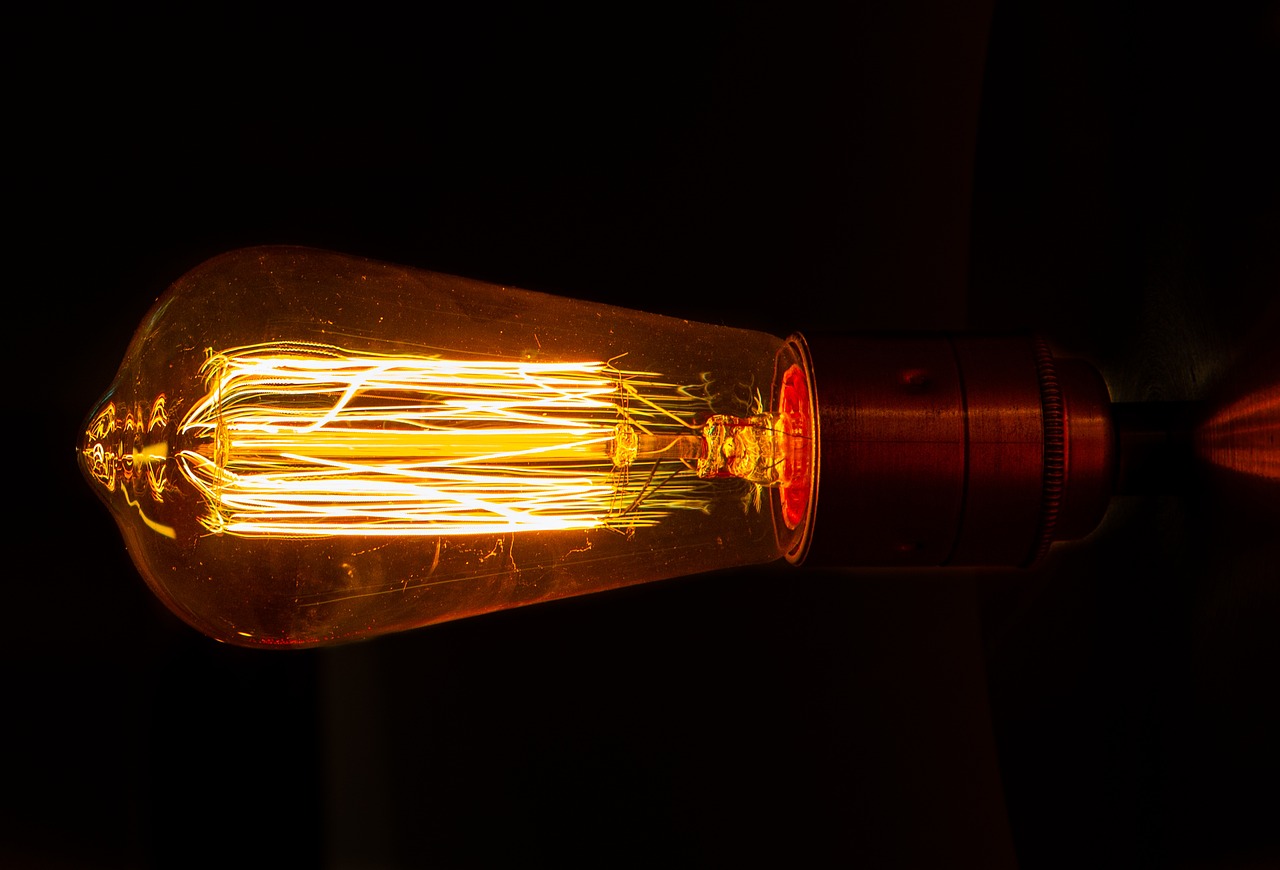
Functional Art Pieces
When it comes to upcycling, the beauty lies not just in aesthetics but also in functionality. Old light bulbs, often discarded as waste, can be transformed into that serve a purpose while adding a unique flair to your home. Imagine walking into your living room and spotting a charming little planter made from a repurposed light bulb, or a stylish candle holder that sparks conversation. These creations not only showcase your creativity but also promote sustainability by giving new life to items that would otherwise end up in a landfill.
One of the most delightful transformations you can achieve is turning light bulbs into planters. To create a light bulb planter, start by carefully removing the metal base and the inner components of the bulb. This might sound tricky, but with a little patience, you'll find it quite manageable. Once the bulb is empty, you can fill it with soil and small plants like succulents or air plants. These mini planters can be hung in clusters or displayed on a shelf, bringing a touch of nature indoors. The contrast of the glass bulb with the greenery creates a stunning visual appeal.
Another fantastic idea is to make candle holders from light bulbs. The process is similar: remove the base, and then you can either leave the bulb clear or paint it to match your decor. Fill the bulb with wax or place a small tealight inside. The warm glow of the candlelight through the glass creates an enchanting ambiance, perfect for cozy evenings. You can even experiment with different colors and shapes of bulbs to create a variety of candle holders that complement your style.
To help you visualize the potential of these functional art pieces, here’s a simple comparison table:
| Project | Materials Needed | Time Required | Skill Level |
|---|---|---|---|
| Light Bulb Planters | Old light bulbs, soil, small plants | 30 minutes | Beginner |
| Candle Holders | Old light bulbs, wax or tealights, paint (optional) | 45 minutes | Intermediate |
As you embark on these projects, remember that the possibilities are endless. You can customize your light bulb creations with paint, ribbons, or even beads to match your home decor or personal style. The act of transforming these bulbs into functional art pieces not only beautifies your space but also sends a powerful message about sustainability and creativity. So, gather those old bulbs, and let your imagination run wild!
Q1: Can I use any type of light bulb for these projects?
A1: Yes, most types of light bulbs can be used, but it's best to avoid compact fluorescent bulbs due to safety concerns. Stick to traditional incandescent or LED bulbs for easier crafting.
Q2: Is it safe to handle light bulbs when upcycling?
A2: Absolutely! Just be cautious when removing the base and inner components. Use gloves to protect your hands from sharp edges.
Q3: What plants are best for light bulb planters?
A3: Succulents, air plants, and small herbs work wonderfully in light bulb planters due to their minimal soil requirements and compact size.
Q4: How do I clean light bulbs before using them?
A4: Gently wash the outside with soap and water. For the inside, you can use a small brush to clean out any residue before planting or filling.
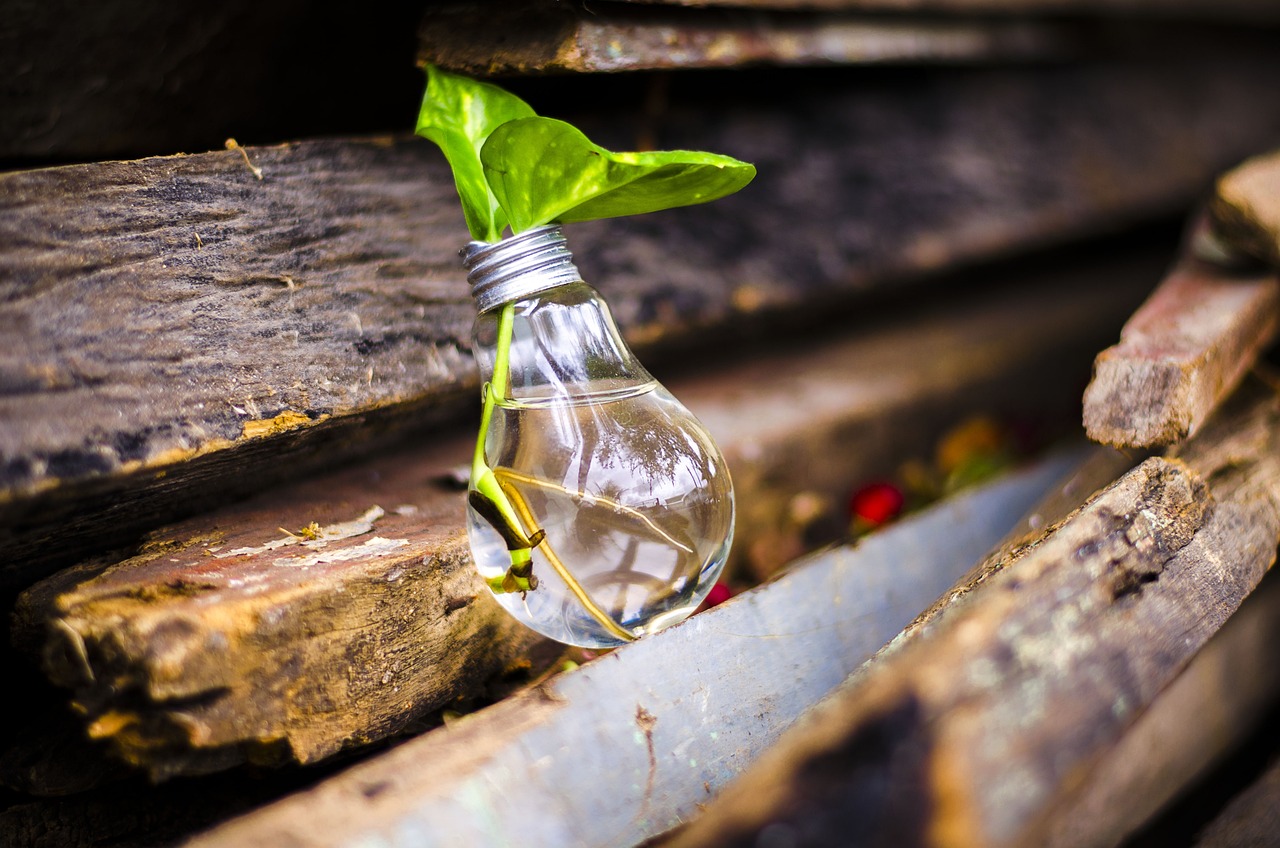
Light Bulb Planters
Imagine transforming those old, forgotten light bulbs into stunning little planters that can brighten up your home and bring a touch of nature indoors! are not only a creative way to recycle, but they also add a unique charm to your decor. The process is simple, and the results can be incredibly rewarding. Let's dive into how you can create your very own light bulb planters with just a few materials and a sprinkle of creativity.
First, you'll need to gather your supplies. You'll require:
- Old light bulbs (preferably incandescent)
- A pair of pliers
- Scissors or a sharp knife
- Potting soil
- Your choice of small plants or succulents
- Twine or decorative string (optional)
To start, carefully remove the metal base of the light bulb using the pliers. Be cautious during this step, as the glass can be sharp. Once the base is off, you can gently break the inner components of the bulb. This will leave you with a hollow shell that you can fill with soil. Rinse out any remaining glass fragments to ensure a clean workspace.
Next, fill the light bulb with potting soil, leaving enough room for your chosen plant. Succulents are a fantastic option due to their small size and low maintenance needs. After placing the plant in the soil, you can add a decorative touch by wrapping twine around the neck of the bulb or attaching it to a small stand. This not only enhances the aesthetic appeal but also makes it easier to display your new planter.
Now, you might be wondering, where can you display these delightful light bulb planters? The options are endless! You can hang them from the ceiling using twine, place them on a windowsill to catch the sunlight, or even create a mini indoor garden on your coffee table. The combination of glass and greenery creates a stunning visual effect that is sure to impress your guests.
Moreover, creating light bulb planters is an excellent way to engage in eco-friendly practices. By repurposing materials that would otherwise end up in a landfill, you're contributing to a more sustainable lifestyle. Plus, it’s a fun project that can be enjoyed alone or with friends and family, making it a perfect weekend crafting activity!
In summary, light bulb planters are a fantastic way to merge art with nature. They not only serve as beautiful decorations but also promote an eco-conscious mindset. So, gather your supplies, unleash your creativity, and enjoy the process of turning ordinary light bulbs into extraordinary green accents for your home!
Q: Can I use LED bulbs for this project?
A: While LED bulbs can technically be used, they are more challenging to dismantle due to their construction. It's best to stick with incandescent bulbs for easier handling.
Q: What types of plants work best in light bulb planters?
A: Succulents and small air plants are ideal choices as they require minimal soil and water. They also thrive in the limited space of a light bulb.
Q: How do I care for my light bulb planter?
A: Ensure your planter gets enough sunlight and water it sparingly, as the small space can retain moisture longer. Always check the soil's dryness before watering.

Candle Holders
Transforming old light bulbs into stylish candle holders is a delightful way to combine creativity with functionality. Imagine the warm glow of a candle flickering through the delicate glass of a repurposed light bulb. Not only do these unique candle holders add a touch of charm to your decor, but they also serve as a conversation starter when guests visit your home. The process is surprisingly simple and allows you to express your personal style.
To get started, gather your materials. You will need:
- Old light bulbs
- A pair of pliers
- A candle (tea light or small pillar)
- Paint (optional)
- Decorative elements (like twine, beads, or glitter)
Begin by carefully removing the metal base of the light bulb using the pliers. This can be a bit tricky, so take your time and ensure you’re wearing protective gloves to avoid any injuries. Once the base is removed, you’ll see the inner workings of the bulb. Make sure to clean out any remaining debris inside.
Next, you can choose to paint your light bulb to match your decor. A coat of matte white paint can give it a frosted look, while bright colors can add a pop of fun to your space. If you prefer a more natural aesthetic, wrapping the bulb with twine or jute can create a rustic vibe that pairs beautifully with the warm light of a candle.
Once your light bulb is ready, place a small candle inside. If you’re using a tea light, you can simply set it in the bottom of the bulb. For pillar candles, ensure the bulb is wide enough to accommodate the size of the candle. To add an extra layer of safety, consider placing a small dish or plate under the bulb to catch any wax drips.
Finally, think about how you want to display your new candle holders. You can hang them from a sturdy branch or a decorative hook to create an enchanting floating candle effect. Alternatively, group several candle holders together on a table for a cozy, inviting atmosphere. The flickering candlelight will create beautiful shadows and a warm ambiance, perfect for any occasion.
As you explore this creative endeavor, remember that the beauty of upcycling lies in the uniqueness of each piece. No two candle holders will be the same, and that’s what makes them special. So gather your supplies, unleash your creativity, and enjoy the process of turning something old into a stunning new centerpiece for your home!
Q: Can I use any type of light bulb for this project?
A: While most standard light bulbs work well, it's best to use bulbs that are made of glass rather than plastic for safety and aesthetic reasons.
Q: How do I ensure the candle is safe to use in the light bulb holder?
A: Always use candles that fit snugly in the bulb and ensure they are placed on a heat-resistant surface. Avoid using larger candles that could cause the bulb to overheat.
Q: What if I want to make my candle holders more decorative?
A: You can glue on decorative elements such as beads, ribbons, or even paint designs on the glass to personalize your candle holders further!

Eco-Friendly Benefits
Upcycling old light bulbs into beautiful ornaments not only sparks creativity but also carries significant . In a world where waste is a growing concern, finding ways to repurpose materials can make a substantial difference. When you choose to upcycle, you are actively participating in reducing the amount of waste that ends up in landfills. Light bulbs, for instance, can take years to decompose, contributing to environmental degradation. By transforming these items into decorative pieces, you are extending their lifespan and minimizing waste.
Moreover, the process of upcycling promotes a sustainable lifestyle. It encourages individuals to think outside the box, inspiring them to see potential in what might otherwise be discarded. This shift in perspective not only fosters creativity but also aligns with a growing movement towards conscious consumerism. Rather than purchasing new items that often come with a hefty environmental price tag, upcycling allows for the creation of unique, personalized decor without the associated costs to the planet.
Additionally, upcycling helps in conserving natural resources. Every new product requires raw materials, energy, and water for production. By reusing old items, we can significantly decrease the demand for new resources. Consider this: when you upcycle a light bulb, you are effectively reducing the carbon footprint associated with manufacturing new products. This is a small but impactful step toward a greener future.
Incorporating upcycled items into your home decor can also spark conversations and promote awareness about sustainability among friends and family. When visitors admire your creative light bulb ornaments, they may be inspired to explore their own upcycling projects, creating a ripple effect of eco-conscious behavior. In this way, your crafting not only beautifies your space but also serves as a catalyst for change.
To sum it up, the eco-friendly benefits of upcycling old light bulbs are manifold:
- Reduces landfill waste
- Promotes sustainable living
- Conserves natural resources
- Encourages creativity and innovation
- Sparks conversations about sustainability
By embracing the art of upcycling, you are not just crafting beautiful ornaments; you are making a conscious choice to protect our planet. So, the next time you find an old light bulb, remember that it holds the potential for a new life—one that can brighten your home and our world.
Q: What types of light bulbs can I upcycle?
A: Most standard incandescent and LED bulbs can be upcycled. However, avoid using broken or damaged bulbs for safety reasons.
Q: Are there any safety precautions I should take?
A: Yes! Always wear safety gloves when handling light bulbs, and ensure you work in a well-ventilated area. If you break a bulb, clean up carefully to avoid injury.
Q: Can I use paint on light bulbs?
A: Absolutely! Use non-toxic paints and ensure they are suitable for glass surfaces. This way, you can safely customize your ornaments.
Q: How can I display my upcycled light bulb ornaments?
A: You can hang them on a decorative tree, use them as table centerpieces, or even string them together as a unique garland!
Tips for Safe Upcycling
When diving into the world of upcycling old light bulbs, safety should always be your top priority. These little glass wonders can be quite fragile, and handling them improperly can lead to accidents. Here are some essential tips to ensure your crafting experience is both enjoyable and safe.
First and foremost, always wear protective gear. A good pair of safety goggles can shield your eyes from any unexpected glass shards, while gloves can protect your hands from cuts. It’s a simple precaution that makes a world of difference. Additionally, make sure you’re working in a well-lit area. This helps you see any potential hazards and ensures you can handle the light bulbs with precision.
Next, consider the condition of the light bulbs you’re using. If they are cracked or damaged, it’s best to dispose of them properly rather than attempting to upcycle. Broken bulbs can pose a risk, so always inspect them before starting your project. If you’re unsure how to dispose of them safely, check with your local waste management facility for guidelines.
When it comes to the actual crafting process, use appropriate tools. For instance, if you plan to cut the bulb, make sure you have a glass cutter and know how to use it safely. If you’re painting or decorating, opt for non-toxic materials that won't emit harmful fumes. It’s not just about creating art; it’s about creating a safe environment.
Lastly, always clean up your workspace after you’re done. Broken glass can be sneaky and may hide in corners or under tables. Use a broom and dustpan to collect any shards, and consider using a damp paper towel to pick up tiny pieces that might be left behind. This not only keeps your space tidy but also prevents any accidental injuries later on.
By following these simple yet effective tips, you can enjoy the creative process of upcycling light bulbs while keeping safety at the forefront. Remember, crafting should be a fun and fulfilling experience, so take these precautions seriously!
Here are some common questions people have about upcycling light bulbs safely:
- Can I use any type of light bulb for upcycling?
While most incandescent and LED bulbs can be used, avoid using fluorescent bulbs as they contain hazardous materials. - What should I do if a bulb breaks?
Carefully clean up the pieces using gloves and a broom, and dispose of them according to local regulations. - Are there any specific tools I need for crafting with light bulbs?
A glass cutter, glue, and non-toxic paints are great tools to have on hand. - How can I ensure my finished projects are safe for my home?
Use non-toxic materials and ensure that any electrical components are properly managed if you’re using light bulbs in a functional way.
Frequently Asked Questions
- What materials do I need to upcycle old light bulbs?
To get started with upcycling old light bulbs, you'll need a few basic materials. Common items include paint, twine, glitter, and various embellishments like beads or sequins. For functional projects, you might also need soil and small plants for planters, or candles for candle holders. The beauty of upcycling is that you can use whatever you have on hand, making it a fun and creative process!
- Are there specific safety tips I should follow when handling light bulbs?
Absolutely! Safety is key when working with light bulbs. Always ensure the bulb is unplugged and cool before handling. Use gloves to protect your hands from sharp edges, especially if you break a bulb. It’s also wise to work in a well-ventilated area, particularly when using paints or adhesives. And remember, if you're unsure about breaking a bulb, consider using a Dremel tool or similar to cut it safely.
- Can I use LED light bulbs for upcycling projects?
Yes, you can use LED light bulbs for upcycling! They are often made of plastic rather than glass, which makes them safer and lighter for crafting. However, keep in mind that the techniques might differ slightly since they don’t have the same structure as traditional glass bulbs. Get creative and explore how you can transform them into unique ornaments or functional art pieces!
- What are some seasonal decoration ideas using upcycled light bulbs?
There are endless possibilities! For winter, think snowman ornaments or frosted bulbs that mimic snow. In spring, you might create flower-shaped ornaments or colorful garden decor. Summer can inspire beach-themed designs, while autumn could lead to pumpkin or leaf motifs. The key is to let your imagination run wild and adapt your designs to fit each season!
- How can I ensure my upcycled light bulb creations are eco-friendly?
To make your projects eco-friendly, focus on using non-toxic paints and adhesives. Whenever possible, incorporate natural materials like twine or recycled items. By upcycling, you're already contributing to sustainability by reducing waste. Additionally, consider how your creations can be reused or repurposed in the future to extend their life cycle!
- What are some easy projects I can start with as a beginner?
If you're just starting out, try simple projects like painting light bulbs or wrapping them with twine. You can also create hanging ornaments by adding a loop of string. Another easy idea is to turn a bulb into a planter by cutting it open and filling it with soil and small plants. These projects are not only easy but also allow you to practice your crafting skills!


